#after i write my reply i switch to html and edit the link's text there!
Explore tagged Tumblr posts
Visit Tumblr Blog
Explore Tumblr blogs with no restrictions, modern design and the best experience.
Last Seen Tumblr Blogs


Fun Fact
Tumblr has a low social media market share in South America.
Text
webdev log 3
this log is longer since I'm writing it as I work, since I forget a lot once I've put down the keyboard for the night (day? I'm always up until morning)
okay, so...
I've implemented user (me)-only add story, edit story, and add chapter, and edit chapter functions

creating a story. I have some "preset" tags. clicking on them adds them to the input, and it'll get converted into arrays to be placed into the database. they're sort of placed there manually since I'm too lazy to make it so that it sifts through tags and posts them there but I'd rather not since some tags are only used once. for the series presets being manually placed there.. well, I have no excuse. I'm just lazy. I'll just kms when I have to add another, ig.
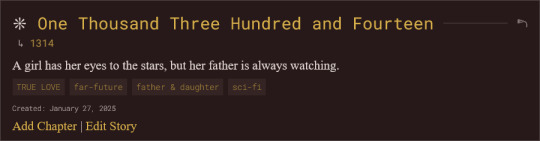
anyways once a new story is made, there's no chapter added so the link to it doesn't work. I have to go in and add a chapter. I will not update this because I don't care and it doesn't trouble me enough to make it a feature so you can upload it all in one go.
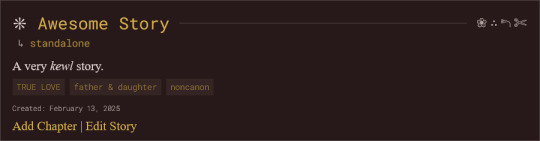
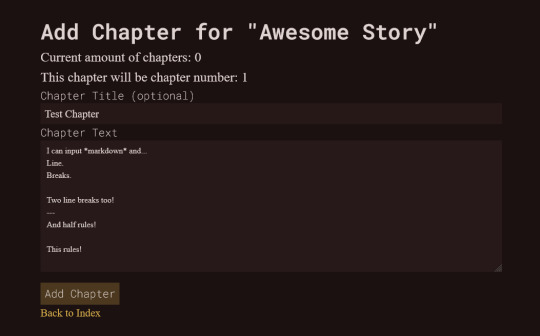
from there I get to see this shitty barebones chapter creator.
START TANGENT feel free to skip
laravel Eloquent stores the text as-is so I won't need to use my shitty markdown -> html converter that I have on my secret utilities site that I always had to use for when posting my stories onto my neocities.
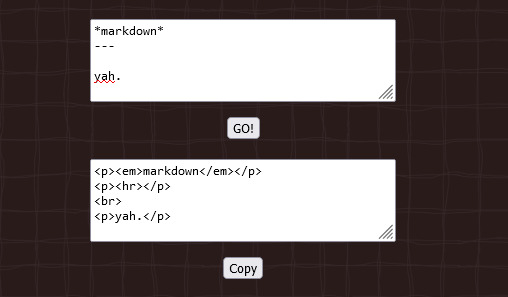
that's what it looked like, lol. I had to make this because of the way I write and I want it to display in a particular way which I'll get into in a sec. the reason why I didn't want to use some shitty markdown -> html converter on some other website is because a single linebreak gets converted to <br> while <p> only gets sandwiched between paragraphs with double line breaks.
I don't like that since I wanted text indents for every <p> but text-indent doesn't apply to the next line within a <p> if you use <br>... they only apply to the start of each <p>. a workaround for this is to use text-indent: {size} each-line; but each-line isn't supported in all browsers, including chrome of all things. So I had to write up a program for my own converter which wraps *every* line into a <p> and applies a <br> if there's another newline after that.
but for my new site, there's a function that detects what browser the user is using and will add the text-indent styling only if using supported browsers. so chrome users will just be indent-less! sorry! (you should switch to firefox anyways)
END TANGENT okay, enough about my neocities..
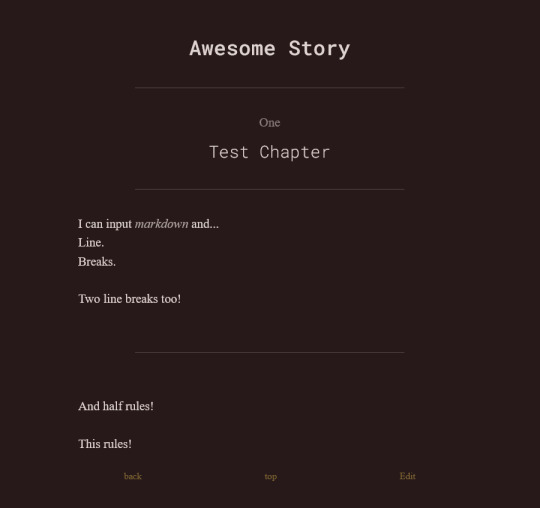
What it looks like for a user (me)... guests won't be able to see the edit link.
When editing, there's an option to delete the chapter. if it is the first chapter of a story, then it will delete the whole story. it's currently the only way to delete a story, mostly as a safeguard for myself since I don't trust myself. if I have to delete a story with a ton chapters in the future... well.. then fuck me.
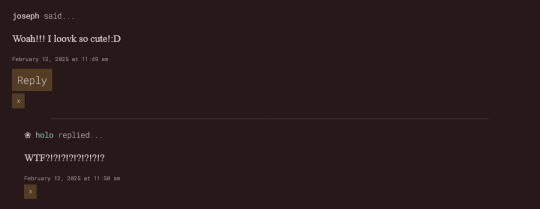
over on the side, I also went back and added a delete comment function too. accidentally had it earlier where if I tried to delete a reply it deleted the parent comment too. oops.
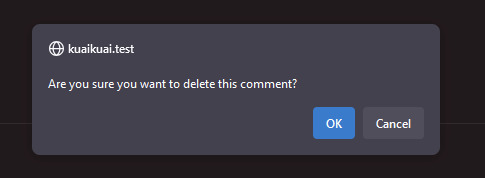
delete buttons (as well as the buttons that accept/reject comments on the user dashboard) had no confirmation so.. phew. now they do! I've accidentally deleted a whole years worth of art before on my computer, so I need this. very badly.
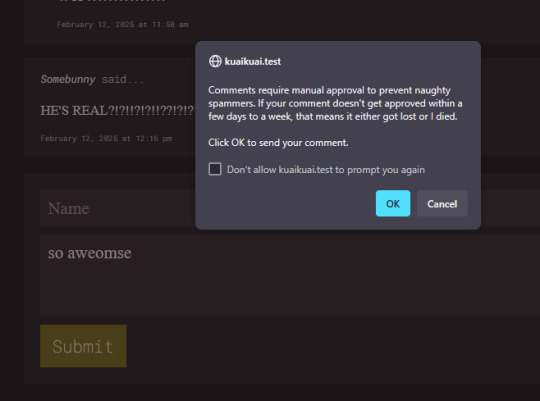
decided to move the warning into a confirmation alert once they hit submit. allows guests to see the warning in a less clunky manner, and also lets them know for sure that their comment is going to get sent! before the page would just refresh without any confirmation.. so this would be less confusing. two in one!
anyways, the next big feature I gotta implement is creating, editing, and deleting art. then I'll be done with all backend related things and I can finally start on the ~fun~ pages like my about. and other things.
unless I decide to make a guestbook. which I probably will end up doing..
I'll probably be keeping my neocities just for memory's sake and also to host my twine games and silly coding projects but I'll probably be removing my dreams page since I kind of don't want people seeing those anymore lest some tiktok-addicted teenager tries to kill me. better huff them all now if you want to peer into my sick twisted mind (jk I'm an angel)
2 notes
·
View notes
Text
how to use beta + trim reblogs
so! we all know about beta editor by now. for better or for worse, a lot of us are using tumblr's new beta editor, and it's likely that everyone will have no choice but to use it soon. this unfortunately means a lot of us can't use the new xkit to trim our roleplay posts. there have been a lot of posts explaining this and the benefits of xkit rewritten; this one, this one, and this one especially helped me understand what's going on. however, a lot of people still seem to be floundering around in the dark so i wanted to make a tutorial that sums up everything i've learned from other tutorials as well as my own trial and error.
if you want a step by step guide to trimming reblogs (with screenshots) as well as a brief overview of beta editor's pros and cons, keep reading.
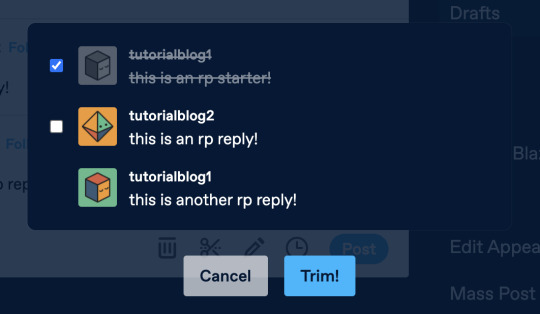
the first step, obviously, is to switch to beta editor and install xkit rewritten. the posts linked above explain how and why so i won't go into detail here. trim reblogs is the new version of edit reblogs, and it looks like this. one of the best features is that you can use it even after posting your reply, so if something glitches or you forget to trim, you still have a chance to fix it.

once you have them, there are two different ways i've seen people use xkit rewritten to trim their posts.
1. seperate reblogs
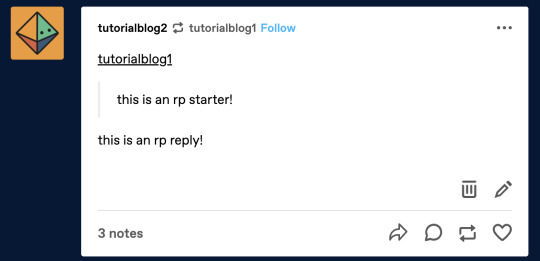
this is, in my opinion, the best and easiest way to go about this. mun 1 makes a post, mun 2 reblogs it, and then mun 1 uses xkit rewritten to trim their original post from the thread.

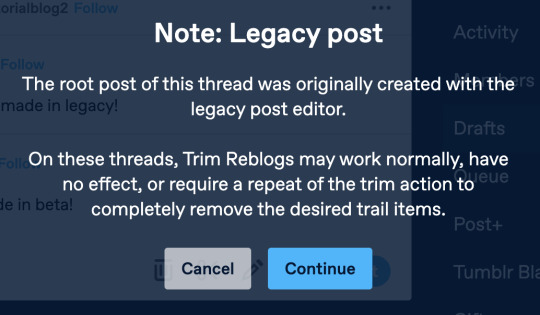
however, this only works if the original post was made in beta. if you try to trim a post that was made in legacy, you get get a warning, and if you go ahead with it, it's going to glitch somehow. in my testing, my reply duplicated! which is very annoying. and despite what the warning says, repeating the trim usually does not last—even if it seems like it does at first.


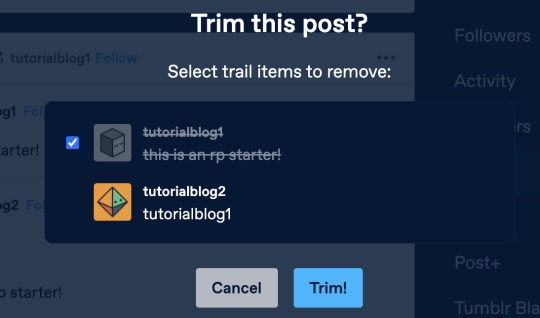
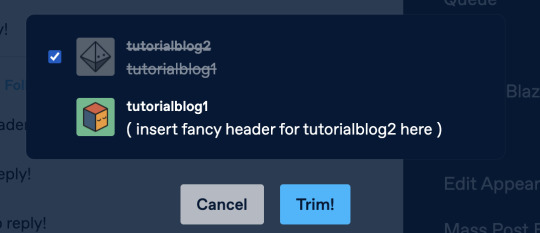
2. (probably) copy and paste
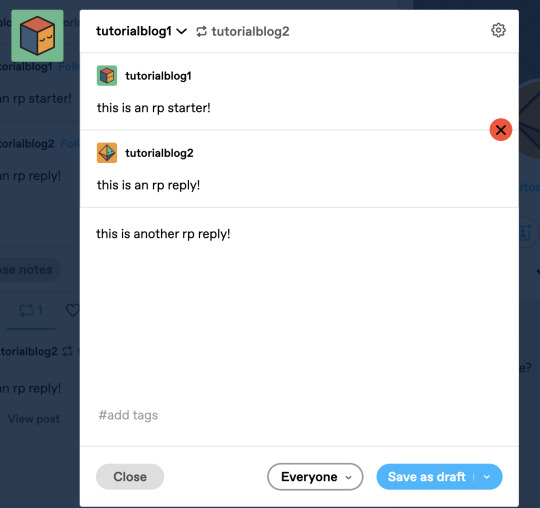
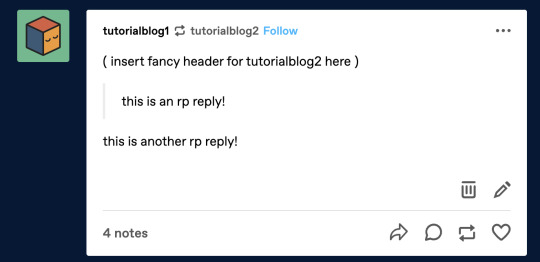
this is more visually reminsicent of editable reblogs from new xkit. there might be an easier way to do this that i don't know about—if so, please let me know. the name kind of explains it all; a mun will copy and paste their partner's reply, indent it, and write their own below. then, obviously, they'll have to trim all the past reblogs of the post. this is especially good for people who like doing pretty headers or editing their partner's url to look pretty, you know what i'm talking about.
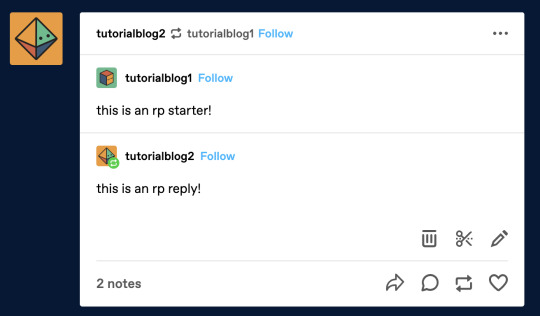
there is a glitch i have run into on my own blog a few times that i was unable to duplicate, so i've just taken a screenshot of my own blog with most of the information blanked out. if only one person if using beta, trim reblogs will still sometimes glitch and duplicate. i trimmed my reblog multiple times but every time i reloaded, my duplicated reply was back. please, please communicate with your partners. i know it's annoying and awkward but it will save everyone so much frustration. especially if you're clinging to legacy, please let your partners know so they can adjust accordingly—or consider switching to beta, even if just for that thread.

but beta is not all bad i promise
i know how frustrating this all is (i fully refused to do drafts for a few days once beta really started kicking in and new xkit stopped working for me), but i am slowly coming around to it.
tags are editable now! i cannot explain the joy i experienced when i first realized this. no more typing up a long, rambling tag only to notice a typo as soon as you've hit return. you can edit tags at any point—even when going back and editing an old post! does this mean that i have accidentally started editing a tag when i meant to move it? yes but it's worth it.
making the text small is so much easier now. no more going into html or command+option+shift! instead, it's available as an option right in between the italic and link buttons when you highlight text.
you can now edit the size and type of text very easily! this did confuse me at first when i couldn't find the indent button, but it's now in a toggle list; if you click on the regular tab when text is highlighted, there are a ton of options including indent, chat, lucille (whatever that means), bigger/biggest, and more.
however, it's not all great. but it's tumblr, what did we expect.
the most frustrating thing for me personally is that you can no longer copy and past an image link into your reply, or else the image url will be tagged on underneath it. it looks funky and isn't great if you don't want to download a million gifs. while i've just been downloading/dragging the gifs i want to use to desktop and uploading them to my reply, it's annoying to have to clean up my desktop and empty my computer's trash so i'm not wasting storage space. additionally, this does not work if the gifset is in a post rather than a page; the only option there is to copy and paste and simply put up with the image url. clicking "add image" and then pasting the image or dragging the gif from the page/post's tab into the tumblr tab and onto your reply still results in a url. if anyone has figured out a workaround for any of this please let me know; otherwise, i think we should all just agree to ignore the url if it shows up. update: thank you sm to anon for informing me of @rpclefairy's roleplay formatter! if you put the gif in their formatter, copy the source, and paste that into the post when it's in html mode, not rich text mode, the link is gone! and thanks to tumblr realizing this was annoying, if you click the little link icon that appears when you hover over an image, delete the url, and hit done so it saves, the url will be gone!
formatting is......weird now. if you make your paragraph text small and then decide to add another sentence, the new text won't be small. you'll have to edit it again. text that has been formatted (small, italic, bold, etc) will be highlighted in a very strange way when the cursor is in the formatted section. as far as i've been able to figure out, even after poking around a bit in the html, there's no way to change any of this. not to sound like a broken record here, but if you've found a way to change any of this, please let me know. otherwise i think we just have to put up with this bullshit.


there's always a chance that these things will be fixed; it is still just a beta system after all. for now, i think the best thing the community can do is communicate with partners, ask questions, and just accept that there's gonna be some weird shit going on and we're all doing our best.
if any of this changes i will update this post, but in the meantime, pls share if this helped or you want to share the word. and for the last time, if i've gotten anything wrong, just let me know and i'll update.
#rpc#rp community#rp help#rph#tumblr beta#tumblr beta tutorial#xkit rewritten#tumblr rp help#rpt#idk how to tag this lmao#also i truly have no idea if this will be helpful to anyone#or if i'm just outing myself as a dumbass#if so pls just ignore lmao#also!! this is in no way an attack on people still using legacy#i'm autistic i get it#m*
382 notes
·
View notes
Text
Making Formatted Mobile Replies!
Hello!! Okay so I know there's a lot of people who get stuck on mobile because their computer breaks (aka me) or are on vacation. SO I give you my tutorial on how to do formatted replies and thoroughly convince everyone you are a god. It's a little long, but very detailed and step by step.
First, you need a smartphone. No brainer but, I'm going super detailed. I have an iPhone 6s, but the basic perimeters are the same even if you have an android.
Alright! Let's just get started.
You want to use your browser. This is important. Yes, you can use the app, but I find the app acts weird when coming to reading what's html text and what's not even when it's switched to the html setting. So do yourself a favor and use your browser (safari, chrome, or whatever other internet thing you use).
Log in. Find the reply you want on your dash. My phone doesn't let me copy and paste on people's blogs so I have to copy from the dash, but you might find that different. basically you just need to highlight and copy the last persons reply as shown below.

I write my replies in my notes because I find it easier. You can write them directly into a post if you wish. Pressing the reblog button will bring you to a page like this. You want this page regardless of where you type. Press it. You will get this page.

Go to your notes and write your reply below the other person’s.

Now, once you've written your reply, it's time for all the fun formatting!!
First place <p> at the beginning of every paragraph (including your partner's reply! If you like small text, insert <small> after the <p> of every paragraph as well.

Basic codes for text formatting are <b>text</b> for bold, <i>text</i> for italic, and <strike>text</strike> for a strike through. You can look up other basic html formats here.
Now you have to insert the link that takes you back to the last persons reply. To get the url for the last reply, press and hold the link and press copy (or copy link or copy link location, whatever comes up).

The code looks like this and it goes at the very very top of all the text.
<p><a href="LINK TO LAST URL GOES HERE">Thing you want linked here</a>

Next, select all and copy all the text you’ve written from your notes into the body of the reply page.

Now you need to insert the icons/gif.
The code for images looks like this:
<p><img src="IMAGE LINK HERE">
If you put the code proceeding the other person’s text, the image will appear before their reply an vice versa. To get the link for the past person's icon, you just press and hold over the image and hit copy.

It's a similar process to insert the icon/gif for your reply. Open your gif hunt in a new tab. Press and copy the url for the icon/gif you want.

place the code <p><img src="URL HERE"> before or after you reply depending on where you want your icon/gif.

Last coding thing you have to do is insert the blockquote line.
Place <blockquote> DIRECTLY after the <p><a href="LINK">url</a> code.
You place </blockquote> after the last persons reply. Be sure to include the code for their icon/gif between <blockquote> and </blockquote>.

Congrats you're done with coding!
Press the red x to get rid of the past replies.

Now, scroll down and hit the little down arrow. Insert the tags you want, and switch the "publish now" to "save as draft."


You don't have to save as draft and publish your post now, but I like to see how the formatting come out and make sure I didn't make any stupid mistakes.
Once you've saved the post as a draft, go look at it in your drafts.


If it doesn't look right, press the edit button. Some common mistakes would be not placing the entire person's reply between the <blockquote></blockquote> code and forgetting a "<" or "/". Don't be discouraged!

Note that italics don't show up on browsers. They do show up in the app, so if you're really worried about your italics you can look at it on the tumblr app.
Once everything looks awesome and like you want, switch "save as draft" to "publish now." Press save and congrats!! You're all done.

I know this seems like a lot, but once you do it a couple times it gets much easier!! Yes, it will take more time than if you were on your computer (esp. if you have edible reblogs installed), but I promise it's not impossible!!
Now go wow your followers and rp partners, and if you thought this tutorial was good, give me a like/reblog c:.
48 notes
·
View notes