#and it is finished with a thick sugar glaze. cuisine
Photo
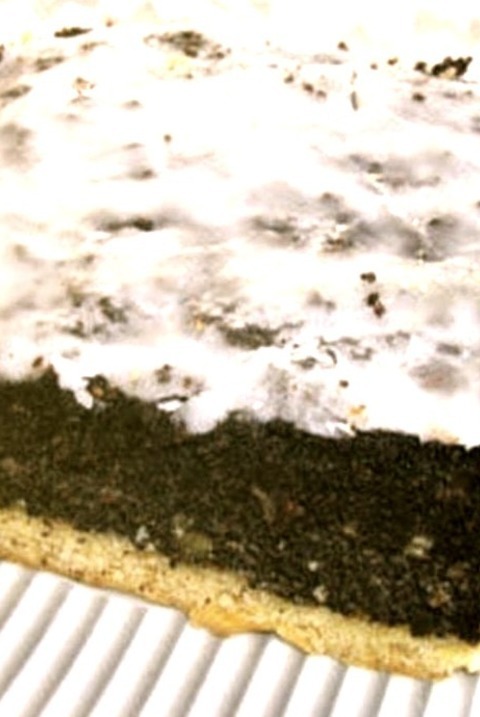
Polish Poppy Seed Cake - Eastern European
#The shortcrust base of this classic Polish poppy seed cake is filled with a creamy poppy seed filling#and it is finished with a thick sugar glaze. cuisine#base#occasions#christmas#poppy seeds#cake
1 note
·
View note
Text
How to Use Asian Sauces to Elevate Your Cooking
Asian sauces are a staple in many kitchens around the world, renowned for their ability to transform simple ingredients into vibrant, flavorful dishes. Whether you're a seasoned chef or a culinary novice, learning how to incorporate these sauces into your cooking can open up a world of flavor. Here's a guide to some of the most popular Asian sauces and tips on how to use them to elevate your dishes.
1. Soy Sauce
Overview: Soy sauce is a versatile condiment made from fermented soybeans, wheat, salt, and water. It’s used in numerous Asian cuisines, imparting a salty, umami flavor that enhances a variety of dishes.
How to Use:
Marinades: Mix soy sauce with ingredients like garlic, ginger, and sesame oil to create a savory marinade for meats.
Stir-Fries: Add a splash of soy sauce while stir-frying vegetables or noodles to add depth and color.
Dipping Sauces: Use soy sauce as the base for dipping sauces. Combine it with vinegar and a touch of chili for a simple and delicious dip.
2. Fish Sauce
Overview: Made from fermented fish and salt, fish sauce is a staple in Southeast Asian cooking, known for its strong aroma and salty, umami flavor.
How to Use:
Salad Dressings: Incorporate fish sauce into salad dressings to add a punch of flavor to fresh salads.
Soups and Stews: A few drops of fish sauce can greatly enhance the savory depth of soups and stews.
Dipping Sauces: Blend fish sauce with lime juice, garlic, sugar, and chili peppers for a traditional Southeast Asian dipping sauce.
3. Oyster Sauce
Overview: Oyster sauce is a thick, brown sauce made from oyster extracts, sugar, and salt. It has a sweet and salty flavor, making it perfect for glazing and enhancing stir-fried dishes.
How to Use:
Vegetable Dishes: Drizzle oyster sauce over steamed or stir-fried vegetables for added flavor.
Meat Glazes: Use oyster sauce to glaze meats before grilling or roasting to create a rich, caramelized surface.
Noodle Dishes: Add oyster sauce to noodles for extra shine and a burst of flavor.
4. Hoisin Sauce
Overview: Often referred to as Chinese barbecue sauce, hoisin sauce is a thick, fragrant sauce made from soybeans, garlic, chili, and various spices. It’s sweet and tangy with a hint of spice.
How to Use:
Marinades: Hoisin sauce is excellent for marinating pork or duck before roasting.
Dipping Sauces: Serve it as a dipping sauce for spring rolls or Peking duck.
Stir-Fries: Add hoisin sauce to stir-fries for a sweet and tangy flavor.
5. Sesame Oil
Overview: While not a sauce, sesame oil is an essential finishing oil in many Asian dishes. Made from raw or toasted sesame seeds, it offers a nutty, aromatic flavor.
How to Use:
Dressing and Sauces: Add a few drops of sesame oil to dressings or sauces to introduce a rich, nutty aroma.
Cooking: Use it sparingly to sauté or finish off a dish, as its strong flavor can dominate.
Marinades: Include sesame oil in marinades to add depth and richness.
Conclusion
Asian sauces provide a simple way to add complexity and authenticity to your dishes. Experimenting with these sauces can turn an ordinary meal into a gourmet experience. Start with small amounts to find the balance that works best for your palate. Remember, the key to successful cooking with Asian sauces is balance—allowing all the flavors to shine without overwhelming the dish. Explore, taste, and adjust, and soon you'll be cooking like a seasoned chef with the help of these flavorful sauces!
FAQ: Using Asian Sauces in Cooking
Q: What are Asian sauces?
A: Asian sauces are condiments derived from various ingredients such as soybeans, fish, oysters, and chilies. These sauces are staples in Asian cuisine and are used to enhance flavor, add moisture, and provide a base for dishes.
Q: Can I substitute one Asian sauce for another?
A: Substituting one Asian sauce for another can drastically alter the flavor profile of a dish because each sauce has unique ingredients and flavor intensities. For instance, substituting fish sauce for soy sauce could overpower a dish with its strong fishy flavor. It’s best to use the specific sauce called for in a recipe for optimal results.
Q: Are Asian sauces suitable for vegan and vegetarian diets?
A: Not all Asian sauces are suitable for vegan or vegetarian diets. For example, fish sauce, oyster sauce, and some brands of hoisin sauce contain animal products. However, there are vegan alternatives for many of these, such as vegetarian oyster sauce made from mushrooms and vegan fish sauce made from seaweed or soy protein.
Q: How should I store Asian sauces once opened?
A: Most Asian sauces should be stored in the refrigerator after opening to preserve their quality and extend their shelf life. Typically, they can last for several months to a year if stored properly. Always check the label for specific storage instructions.
Q: Can Asian sauces be used in non-Asian dishes?
A: Absolutely! Asian sauces are versatile and can be incorporated into various cuisines. For example, try adding soy sauce to a marinade for grilled meats, or drizzle sesame oil over roasted vegetables for added flavor.
Q: How do I know how much sauce to use in a dish?
A: Start with small amounts and taste as you go, since Asian sauces can be very potent and salty. It's easier to add more if needed than to correct a dish that's become too salty or overpowering.
Q: What is the difference between light and dark soy sauce?
A: Light soy sauce is thinner, lighter in color, and saltier, making it ideal for flavoring dishes without significantly changing their color. Dark soy sauce is thicker, darker, and slightly sweeter, used primarily for adding color and rich, caramelized flavors to dishes.
Q: Are there gluten-free Asian sauces available?
A: Yes, there are gluten-free options available for many Asian sauces. Tamari is a popular gluten-free alternative to traditional soy sauce. Always check the labels, as some brands may offer gluten-free versions of sauces like hoisin and oyster sauce.
Q: Can I make my Asian sauces at home?
A: Yes, many Asian sauces can be made at home with the right ingredients. Homemade sauces allow you to adjust flavors to your taste and avoid preservatives found in commercial products. Recipes for sauces like teriyaki, hoisin, and sweet chili are widely available and can be a fun addition to your cooking repertoire.
Q: Why do some recipes call for both soy sauce and fish sauce?A: Using both soy sauce and fish sauce in a recipe can provide a deeper umami flavor and a more complex saltiness than using either alone. Each brings different flavor notes that can complement each other well in dishes.
0 notes
Text
Fic: Love Language, ch. 5
Relationships: Marinette Dupain-Cheng | Ladybug/Kagami Tsurugi, Sabine Cheng/Tom Dupain, Adrien Agreste | Chat Noir/Wayhem
Characters: Marinette Dupain-Cheng | Ladybug, Kagami Tsurugi, Tikki, Tom Dupain, Tomoe Tsurugi, Sabine Cheng, Adrien Agreste | Chat Noir, Alya Césaire, Nino Lahiffe, Kitty Section, Jagged Stone, Penny Rolling, Clara Nightingale, Alec Cataldi, Nadja Chamack, Fang, XY, Lila Rossi, Chloé Bourgeois, Wayhem, Le Gorille | Adrien Agreste's Bodyguard
Tags: Fluff, Tooth-Rotting Fluff, Language of Flowers, Gifts, Traditions, Holidays, Cultural Differences, Kimono, Qipao, Family, Love, Romance, Celebrations, Symbolism, Aged-Up Character(s), Warm and Fuzzy Feelings, Christmas Fluff, Identity Reveal, LGBTQ Character, LGBTQ Themes, Established Relationship, Marriage Proposal, Family Dinners, Airports, feeding each other, sharing ceremony, Anxiety, Engagement, Kissing, It was supposed to be a one-shot, Admiration, Pet Names, Cuddling & Snuggling, yin and yang, Communication, Smut, Food Sex, Cunnilingus, Vaginal Fingering, Multiple Orgasms, Bathing/Washing, Kagami is a boob woman, Nudity, Instagram, Social Media, Sleeping Together, Wedding Planning, Wedding Rings, Lila salt, Alec Cataldi salt, Food Porn, Paparazzi, Panic Attacks, Chloé Bourgeois Redemption, Lila Rossi Lies, Date Night, Adrien Sugar, Relationship Goals, Protective Kagami Tsurugi
Summary: Kagami and Marinette have date night... which is abruptly interrupted by the paparazzi.
Notes: See end.
AO3 link (ch. 3 has smut)
FFN link (ch. 3 has implied sex)
Part 5 (currently) of the Catch a Falling Star series
Part 1 | Part 2 | Part 3 | Part 4 |
Love Language: Chapter 1 | Chapter 2 | Chapter 3 | Chapter 4
-----------
Kagami and Marinette decided on New Year’s Eve Eve as date night, since the Eve itself was spoken for. While they normally didn’t frequent many Chinese or Japanese restaurants given the quality of what they could have at home, this particular restaurant was a new Asian fusion place, one that mixed Vietnamese, Thai, Cambodian, Korean, Chinese, and Japanese cuisines. It had received glowing reviews.
The fusion theme also appealed to both of them, based on the symbolism of their recent engagement, and they had dressed appropriately. Kagami was wearing a kimono-style tunic Marinette had designed and made for her, red and black with a diagonal half-skirt, over leggings with some very stylish boots. A matching fabric headband finished the look. Marinette was wearing the full-length qipao she had sewn for last year’s Lunar New Year. It was black with pink embroidery, and she’d added an experimental French flair with peeping black lace down the false slit along the shoulder and all the way down the dress. Kagami had confessed it was one of her favorites, so she loved to spoil her by wearing it. She had put her hair in twin buns again, the same style she had worn when Kagami proposed.
Even in a crowded restaurant, Marinette was hyper-aware of Kagami, of the details of every moment. She loved the feeling that they were in their own world, a special intensity to everything. No moment spent with her was boring; she brought life to everything by virtue of her presence.
Some fusion restaurants simply had food from multiple cultures, but this one actually fused different dishes in fascinating ways. Even better: the servings were tapas-style, so smaller portions, enabling them to try an assortment of options. With each dish, they posted pictures to Instagram, tagging the restaurant and working to come up with descriptions of the flavors to describe to people who might want to try it.
They were both fascinated by the menu and its many options. For her drink, Marinette chose a Korean, Chinese, and Taiwanese inspired omija chrysanthemum milk tea with rose jelly, which was unique and delicious. The mix of flavors was heady, hitting the whole tongue at once. Kagami selected a Taiwanese and Vietnamese fusion, orange tamarind boba smoothie; also fantastic, both fruits a mix of sweet and tart that somehow leveled out both in a way that enhanced the drink.
Since soups traditionally started the meal, they decided on seafood chao ga with dashi flavoring and clams, whitefish, and sea urchin—lovely rice porridge for the cold. The texture was thick and the dashi lent a savory flavor that balanced the fish well. Kagami mentioned that one of the flavors was possibly the light earthy-sweet of miso paste, as well as ginger and a touch of rayu chili oil.
Then they decided on an assortment of bāozi stuffed with different things, including Korean bulgogi, Thai coconut curry chicken, Japanese unagi no kabayaki, Cambodian fish amok, and Vietnamese bun cha. Marinette was familiar with all but the last two. The fish amok turned out to be a unique yogurt-thick fish curry made with coconut milk and a mixture of spices that offered a savory quality rather than heat. Bun cha was amazing grilled pork belly that had been marinated in fish sauce and mixed with rice vermicelli and pickled vegetables, all stuffed in a perfectly-steamed bun.
They also tried a couple types of okonomiyaki, one with kimchi and japchae and the other with spicy Sichuan làzǐ jī. The japchae folded into the pancake was sweet potato glass noodles, strips of beef, and a variety of thin-sliced vegetables, and it matched well with the spicy tang of the kimchi spread atop. A sweet umami Korean junganjang cream sauce, a light spiral on the red kimchi, cut the heat a bit and added another layer of flavor. The làzǐ jī was the kind of spicy that would put off those not used to Sichuan peppercorns, a wonderful numbing sort of flavor that was tempered by the okonomiyaki batter, paired well with a Japanese-style sweet ginger mayonnaise drizzled over the top.
By that point, all they could handle was dessert.
Kagami ordered Chinese gāo diǎn stuffed with Thai pumpkin coconut pudding; they were glazed lightly with a spritz of honey-rosewater. Still warm, the pudding and pastry melted together in the mouth. Marinette opted for Cambodian mango sweet sticky rice with a scoop of black sesame ice cream that both of them knew had roots in both China and Japan. They tried each part separately, then mixed, enjoying the texture of the slightly-warm sticky rice against the icy cream of the ice cream, and the way the different varieties of sweet melded.
Marinette had just fed Kagami the last spoon of the ice cream when their table was abruptly surrounded by people with cameras and microphones, startling her into dropping the spoon. The clatter it made sounded louder than the cacophony of competing voices that assailed them.
She only made our pieces of them, words and phrases.
“... that you’re a gold-digger…?”
“...stalked Adrien Agreste…?”
“...settled for…?”
“...Chinese concubine…?”
Though Marinette felt frozen under the deluge of abusive questions, Kagami stood at that last one.
The reporters quieted somewhat, waiting for a response.
“You dare imply the love of my life is the equivalent of ianfu?!” She pinpointed the man who had asked the question and Marinette noted absently that he was, of course, an older white man. “Ah, you work for that rag. My lawyer will be in contact.”
Marinette stood, trying to find courage in the fire in Kagami’s eyes.
“We do not consent to be filmed or photographed. If any footage or photos appear in any of your media, you will hear from our lawyers,” Marinette added, reaching out and taking Kagami’s hand.
She received a reassuring squeeze. This had happened immediately following their announcement, and in preparation for that Tomoe had the Tsurugi family lawyer appraise them of their right to control being photographed and the use of those photographs—one of the lovelier facets of French law.
The cameras lowered, but the questions commenced, their personal space invaded as what she realized were tabloid reporters jockeyed for position.
Marinette felt hemmed in, trapped by the ugly questions.
In the distance someone yelled, “Is that Adrien Agreste?!”
The shift away from them allowed Kagami to pull her toward the kitchen, which they were thankfully seated near.
Marinette nearly jumped out of her skin when someone touched her shoulder, but standing behind her was Wayhem.
He pulled them into the kitchen, where a waiter handed them their coats and whisked them toward a back exit.
“Adrien?” Kagami asked Wayhem, slipping several large bills to the waiter, far more than enough to cover their meal.
The clipped nature of her tone hinted at her stress.
“In the car. One of my buddies in a wig is distracting the morons.”
Marinette let out a breath she hadn’t realized she was holding. Whatever had sparked this, it was big enough for Adrien and Wayhem to mount a rescue—and do it quickly.
The back door of the car opened as they rushed out, and Adrien scooted over to make room for them. Wayhem didn’t bother trying to squeeze in back, instead taking the front passenger seat beside the Gorilla.
Before she could entirely register what happened, the car was pulling out of the alley, the restaurant receding in the background.
Kagami squeezing her hand brought her back to the present.
“I don’t understand,” she murmured. “I thought it had died down.”
“You missed us talking about that, Mari.” Adrien offered her a smile that was tinged with sadness. “It had. Then there were rumors spread by someone to major and minor tabloids. They literally started breaking an hour ago.”
Marinette felt overwhelmed, almost like her skin was too heavy and smothering to bear. “The things they were saying…”
Kagami wrapped her in an embrace, and the feeling started to ease immediately—because they were together, in this. Together in everything.
“My father is coordinating with Tomoe on finding out what happened. But it sounds like different rumors were released to different places, all at once almost.”
“Throwing shit at the wall to see what sticks,” Wayhem added.
Adrien scowled then, a look she almost never saw on him, and she realized he was truly angry on their behalf.
“I would bet anything we know who it was, though these faux journalists might pull the ‘protect their sources’ routine.”
Marinette went cold, her eyes meeting Kagami’s. They were filled with a fire that consumed, rather than that which usually smoldered.
“Lila.” Kagami said the name like it was something disgusting she had to expel.
“H-how… You got here so fast,” Marinette murmured. “Thank you.”
“We were on our way out for date night when the news broke,” Wayhem explained. “We saw you were at that restaurant—sounds amazing, by the way—and had the Gorilla divert.”
“Wayhem called ahead to the restaurant. Then he had a friend who lives nearby and does cosplay at comic conventions play decoy. I called my father, and he’s gotten in touch with Tomoe. Nathalie’s texting me updates.” Adrien’s lips twisted further. “Some of those rumors involve me, which means he’ll actually do something. Because ‘it affects the brand.’ Otherwise he wouldn’t care.”
Oddly, his anger helped ease her distress. Marinette let herself melt into Kagami’s arms, using breathing exercises Fu had taught her so long ago to work on finding her calm. As awful as this was, she couldn’t afford to get Akumatized.
“We aren’t headed to my home,” Kagami noted. “Or to Marinette’s.”
“Paparazzi.” Wayhem turned in his seat. “They’re camped out. It’s a mess.”
“Chloé called. We’re going to the Grand Paris.”
Marinette looked at him incredulously.
“She’s changed.” Adrien shrugged. “She’s probably mad on my behalf, not yours. But she extended the offer. My house is mobbed, too.”
A buzzing sensation registered against Marinette’s leg, and she realized it was Tikki trying to get her attention. She reached her hand in her purse and Tikki pressed her phone into it. She had missed calls and texts from Alya.
Alya: I didn’t know he’d do that.
Alya: he took evrythng out of context
Alya: that bastard i;m sorry
Alya: Mari pick up plz
Another call came in from Alya and Marinette pressed accept.
“Oh thank god! Mari, you got away?” Alya sounded positively frantic. “The feeds cut when you told them off.”
“Yeah. Adrien and Wayhem helped us escape. Putting you on speaker.”
“Thank god for the gays.” Alya’s voice filled the car. “Fucking Alec Cataldi, he… Dammit, I had no idea. He asked about our friendship and I thought it was like for a fluff piece or something.”
Marinette’s heart sank into her gut as she catastrophized over what Alya could have said.
Adrien held out his phone, a video playing.
“Yeah, we’re all awesome friends. For a while Mari had trouble talking to Adrien, had a big crush, bu—”
The clip cut to Alec Cataldi. “And there you have it, folks. An inside source confirms: Marinette Dupain-Cheng, fiancée of Kagami Tsurugi, was involved in a love triangle. An anonymous source revealed a history of stalking and trying to use Adrien Agreste to jump-start her fashion career. So is she a gold-digger…?”
Adrien stopped the clip.
“I’m so sorry!” Alya’s voice was strangled with rage and guilt.
Kagami wiped at her face with the sleeve of her tunic; Marinette hadn’t realized she’d been crying.
“That… You didn’t know,” she managed. “I can’t talk right now, though. I… I just can’t.”
They had ignored Cataldi’s requests for an interview because he did this sort of thing, but Marinette had never expected this. She felt sick, wondering if Nadja had been involved at all. She doubted it, but...
“I understand, girl. I’m gonna do a livestream. Set the record straight. That asshole.”
The call ended. Marinette let Kagami take her phone and tuck it in her purse, likely handing it off to Tikki.
She let Kagami gather her close, pressing her face into her shoulder. Her friends stayed silent the rest of the drive, letting her work to clear her mind, to push through.
By the time she really was able to focus on the world, she and Kagami were ensconced in a plush room at the Grand Paris, and a cup of tea was being pressed in her hands.
“Oh, you’re back.” Chloé’s voice was oddly gentle, the arrogant tone missing. “It’s chamomile. Helps me when I’m stressed.”
It was strange, seeing Chloé almost as though for the first time. The fallout from Miracle Queen back in collège had left her friendless, Sabrina eschewing her, and she’d left to finish her studies through online courses, then attended a different lycée. Marinette hadn’t seen much of her since.
She’d toned down, it seemed. Maybe even gained a little humility. She was wearing much more muted tones of makeup that fit her skin tone and hair. The smirk that had often twisted her features was absent. Even her hair was styled differently, in a loose bun.
“Hi,” Marinette murmured. “Th-thank you.”
Chloé nodded, looking a bit uncomfortable as she backed away. Their previous relationship had been oppositional. This was different for both of them.
Kagami was pressed against her side, offering comfort in her presence. Marinette noted she had her own cup of chamomile, shaking slightly in her hands. She leaned her head against her fiancée’s shoulder.
“I’m okay, mon beignet,” she whispered, and was relieved when Kagami laughed at the endearment and her hand stopped shaking. “We’re in this together. We can do anything.”
A giggle caught her attention, and she was surprised to find it had come from Chloé. Her laugh had always had a haughty quality. It was absent now.
“Those rags are ridiculous, falling for those rumors. You two… just ridiculous how in love you are. Bakery endearments. Geez.”
It was almost strange to hear her say ridiculous as she always had, compared to the rest of her tone.
“It’s like they think collège wasn’t forever ago for us.” Chloé offered a soft smile. “Sorry, I know this is weird.”
Marinette nodded. “You’re… different.”
Chloé shrugged. “I was a complete bitch. But… Well, we’re not in collège anymore. And I didn’t want to be that person who peaked there as nothing but a mean girl.”
A look passed over her face, almost anguished, and she turned away slightly.
“I didn’t want to keep being the stupid entitled brat who willingly worked with a supervillain as part of a fucking temper tantrum.”
The silence that followed was uncomfortable. Chloé offered no attempt at justification, no request for forgiveness.
“I’m glad,” Marinette finally said, at least offering that much, if not absolution. “And I hope you’re happier.”
When Chloé turned back, there were tears on her face. “You know, when you said you thought I could be a hero… I was so awful to you, but still you…” She took a breath. “I just want to let you know it really meant a lot. It was important. So thank you.”
Marinette didn’t know what to say, and just offered a smile.
Chloé fidgeted a bit for a moment. “Um, anyway. This is Jagged and Penny’s suite. They’re getting here later tonight. Already told them what’s going on. Wayhem and Adrien are staying, too, in another suite—you’ll be sharing that one once it’s ready.” She flashed an awkward smile. “I’ll get you guys pajamas and such. We’ll figure this out.”
Then Chloé fled.
Marinette let her; no matter how much she had changed, she knew this was more than a little uncomfortable for both of them—more so for Chloé’s developed conscience.
And Chloé had given her something new to consider, something positive. Something else Marinette could cleave to as she worked through the shock of the awful things she was going to be reading about herself, and that she would have to refute.
She brought the fine china teacup to her lips, the delicate scent of chamomile wafting through her even before she took a sip. The warmth of the tea, of Kagami’s presence, the remnants of their date tattered but still existent, the knowledge that this couldn’t touch the world they had created… all came together to help calm her.
------------
Notes:
I’m big on verisimilitude, and I know if I read a fic that had the kind of restaurant described at the beginning, I’d want to know the fusion aspects. So I did a bunch of research on foods from each culture. All the foods do exist, but I’ve actually melded them in ways that I don’t believe do. With the exception of Thai curry chicken bao, which you can get at Wow Bao. Man do I wish a lot of them did, though!
I didn’t expect the chapter to go the way it did, in some respects. I actually thought I’d get further, to the New Year Tsurugi family event. But there was a lot happening in this chapter and I realized my initial estimation was way off.
I also wasn’t sure if there was going to be Chloé redemption, but then it just… happened.
Oh, and happy Adrien/Wayhem. In Catch a Falling Star-verse after “Never Let It Fade Away,” Adrien will have done some soul-searching and come to the realization he’s bisexual and was just so hung up on Ladybug he didn’t realize it (much like Mari being bi but hung up on Adrien). So when Alya jokingly calls them “the gays,” it’s more a general statement than bi erasure. Wayhem is totes gay though. Also, it’s casually brought in because they’ve been together a bit and is thus a normal thing to all the characters.
Enjoy the Alec Cataldi and Lila salt.
#miraculous ladybug#miraculous fanfiction#kagami tsurugi#marinette dupain cheng#marigami#kagaminette#kagami x marinette#wayhem#adrien agreste#ml gorilla#alya cesaire#alec cataldi#alec cataldi salt#lila 'the liar' rossi#lila salt#chloe bourgeois#chloe redemption#my fanfiction#adrien sugar
4 notes
·
View notes
Text
Eggnog Scones
Eggnog scones with dried cranberries and white chocolate are the perfect holiday treat and a welcome guest at any holiday tea, brunch or breakfast.
I first enjoyed an eggnog scone years ago at a local tea shop here in Portland. My girls and I joined a friend and her girls and enjoyed a perfectly lovely afternoon sipping tea and devouring the eggnog scones the tea house made. Sad for us that tea house closed down and the amazing eggnog scones with dried cranberries and white chocolate were gone.
Cranberry Eggnog Scones
I looked on this as a challenge. I now needed to create my own version of eggnog scones so I could continue to enjoy them! And who doesn’t love a good scones! I used my favorite scone recipe and came up with my own version. I served these just recently at a little holiday girlfriend tea I hosted and several people told me they may just be the best scones they have ever had. One of my friends who told me this has a mother who is an amazing baker and makes delicious scones so I took her statement as a high compliment!
Instead of milk or cream I used eggnog as the liquid in these scones, added in dried cranberries and white chocolate chips and finished them off with an eggnog drizzle.
Tips for making scones
Making scones is an easy process but there are a couple of tips that will make your scones even more amazing!
Use cold butter and cold eggnog.
As you cut your butter into your flour mixture it is o.k. to have little lumps of butter, in fact you want them!
Don’t overwork the dough. This makes the dough tough. You want your scones light and flaky.
Make them and enjoy them the same day. They are much better fresh.
I like to form my dough into a circle, about 1 inch thick and cut it into pie shapes. This recipe will make two rounds and 16 scones. If you prefer square scones just form your dough into a large square and cut! Either way they taste delicious.
After the scones have cooled, add an eggnog drizzle. The drizzle is easy to make. It is just a combination of powdered sugar and eggnog. Then heat up your water, pour yourself a couple of tea and enjoy a little break in your day!
Some of my other favorite tea time treats:
For all of my other favorite kitchen products and tools visit my Amazon Store.
Did you know I wrote a cookbook? Check out the Holiday Slow Cooker Cookbook for 100 delicious recipes
Eggnog Scone Recipe
Eggnog Scone Recipe
Tender and delicious eggnog scones with dried cranberries and white chocolate.
Course: Breakfast
Cuisine: American, English
Keyword: eggnog scones, scones
Servings: 16 scones
Calories: 316 kcal
Author: Leigh Anne
Ingredients
3 cups all purpose flour
1 Tbsp baking powder
1/2 tsp salt
1/3 cup sugar
1/2 cup butter
2 eggs
3/4 cup eggnog
1 tsp vanilla
1 cup white chocolate chips
1 cup dried cranberries
Glaze
2 cups powdered sugar
1/8 cup eggnog
Instructions
Preheat oven to 425 degrees F.
In a large bowl, combine flour, baking powder, salt and sugar
Cut butter into tablespoon sized pieces and using a pastry blender or a fork, cut butter into dry ingredients. You want little pieces of butter still visible.
Add in white chocolate chips and dried cranberries.
Add in wet ingredients and stir until just combined
Turn dough out onto a floured surface and knead just until dough comes together.
Do not overwork the dough. Divide dough into two pieces.
Shape each half of the dough into a circle, about 1 inch thick and cut in half and then each half into four wedges.
Place wedges on a parchment lined baking sheet, about 1/2 inch apart and bake for 12-15 minutes.
Cool and then glaze. Eat fresh!
Nutrition Facts
Eggnog Scone Recipe
Amount Per Serving
Calories 316 Calories from Fat 90
% Daily Value*
Total Fat 10g 15%
Saturated Fat 6g 30%
Cholesterol 46mg 15%
Sodium 150mg 6%
Potassium 166mg 5%
Total Carbohydrates 51g 17%
Dietary Fiber 1g 4%
Sugars 31g
Protein 4g 8%
Vitamin A 4.8%
Vitamin C 0.3%
Calcium 8.2%
Iron 7.4%
* Percent Daily Values are based on a 2000 calorie diet.
Need some help figuring out what’s for dinner tonight?
Come join our Facebook Group! Join hundreds of others who love sharing dinner time ideas. You don’t want to miss out on the fun!
You’ll find lots of ideas for dinner from all our awesome members and you can share your ideas too! Join the Family Dinner Table today.
Get my Weekly Menu Plan for FREE!
Receive my FREE "What's for Dinner?" Meal Planning Course, a copy of my FREE ebook that includes my most popular recipes and my FREE weekly Meal Plan.
<![CDATA[/* Layout */ .ck_form.ck_minimal /* divider image */ background: #f9f9f9; font-family: 'Helvetica Neue', Helvetica, Arial, Verdana, sans-serif; line-height: 1.5em; overflow: hidden; color: #818178; font-size: 16px; border: solid 1px #d1d1d1; -webkit-box-shadow: none; -moz-box-shadow: none; box-shadow: none; clear: both; margin: 20px 0px; text-align: center; .ck_form.ck_minimal h3.ck_form_title text-align: center; margin: 0px 0px 10px; font-size: 28px; .ck_form.ck_minimal h4 text-align: center; font-family: 'Open Sans', Helvetica, Arial, sans-serif; text-transform: uppercase; font-size: 18px; font-weight: normal; padding-top: 0px; margin-top: 0px; .ck_form.ck_minimal p padding: 0px; .ck_form, .ck_form * -webkit-box-sizing: border-box; -moz-box-sizing: border-box; box-sizing: border-box; .ck_form.ck_minimal .ck_form_fields width: 100%; float: left; padding: 5%; /* Form fields */ .ck_errorArea display: none; /* temporary */ #ck_success_msg padding: 10px 10px 0px; border: solid 1px #ddd; background: #eee; .ck_form.ck_minimal input[type="text"], .ck_form.ck_minimal input[type="email"] font-size: 18px; padding: 10px 8px; width: 68%; border: 1px solid #d6d6d6; /* stroke */ -moz-border-radius: 3px; -webkit-border-radius: 3px; border-radius: 3px; /* border radius */ background-color: #fff; /* layer fill content */ margin-bottom: 5px; height: auto; float: left; margin: 0px; margin-right: 2%; height: 42px; .ck_form input[type="text"]:focus, .ck_form input[type="email"]:focus outline: none; border-color: #aaa; .ck_form.ck_minimal .ck_subscribe_button width: 100%; color: #fff; margin: 0px; padding: 11px 0px; font-size: 18px; background: #7598b4; -moz-border-radius: 3px; -webkit-border-radius: 3px; border-radius: 3px; /* border radius */ cursor: pointer; border: none; text-shadow: none; width: 30%; float: left; height: 42px; .ck_form.ck_minimal .ck_guarantee color: #626262; font-size: 12px; text-align: center; padding: 15px 0px 0px; display: block; clear: both; .ck_form .ck_powered_by display: block; color: #aaa; font-size: 12px; .ck_form .ck_powered_by:hover display: block; color: #444; .ck_converted_content display: none; padding: 5%; background: #fff; .ck_form.ck_minimal.width400 .ck_subscribe_button, .ck_form.ck_minimal.width400 input[type="email"] width: 100%; float: none; margin-top: 5px; .ck_slide_up, .ck_modal, .ck_slide_up .ck_minimal, .ck_modal .ck_minimal min-width: 400px; .page .ck_form.ck_minimal margin: 50px auto; max-width: 600px; /* v6 */ .ck_slide_up.ck_form_v6, .ck_modal.ck_form_v6, .ck_slide_up.ck_form_v6 .ck_minimal, .ck_modal.ck_form_v6 .ck_minimal min-width: 0 !important; @media all and (min-width: 801px) .ck_modal.ck_form_v6 .ck_form.ck_minimal margin-left: -300px; width: 600px; .ck_modal.ck_form_v6 .ck_minimal .ck_subscribe_form padding-top: 20px; .ck_slide_up.ck_form_v6 .ck_minimal .ck_subscribe_form padding-top: 10px; .ck_form_v6 #ck_success_msg margin-top: 15px; padding: 0px 10px; .ck_slide_up.ck_form_v6 .ck_minimal + .ck_close_link top: 5px; .ck_slide_up.ck_form_v6 .ck_minimal h3.ck_form_title margin-top: 5px; /* This changes the background color and border of the entire form */ .ck_form background-color: #ffffff !important; border: 1px solid #45c3d2 !important; /* This hides the "powered by convertkit" text */ .ck_form .ck_powered_by display: none !important; ]]>
Hi – I’m Leigh Anne! Food, family and friends are three of my favorite things. I love sharing easy, delicious recipes and entertaining ideas that everyone will love. When she started her blog, Your Homebased Mom, over 9 years ago she had no idea that it would one day house over 2,400 recipes and ideas! .
Latest posts by Leigh Anne (see all)

Source: https://www.yourhomebasedmom.com/eggnog-scones/
0 notes
Text
Empire State of Mind
By Charlie McGill and Nathaniel Samuels
Empire Café is a Houston institution located in the heart of Montrose, famous for their cake and European-influenced food. Founded in 1994 and reimagined from an old gas station, both the food and the decor excite, and give an experience that is not one to miss.

Empire cafe from the outside
We walked into Empire Café and were immediately greeted by their red decor and daily specials, which looked appetizing and delicious, and enticed us to order more than we could really eat. The waitstaff, who we ordered from after passing the cakes and pastries, were attentive and efficient, and they made our drinks while simultaneously taking our order. This process proved to foreshadow the experience we had at Empire Cafe, pleasant, relaxing, and one of delicious food.

The line to order food inside
After ordering, we sat on their outside patio with our large group of ten, where we fit comfortably. The traffic from the nearby busy street is cut off by some plants and bushes, so that besides the noise, we didn’t even notice it’s there. The entirety of Empire Café is wheelchair accessible, and the patio is pet friendly so all the pet lovers can bring their dogs.

Our group having a wonderful time at Empire Café
For our drinks, we ordered the Justice Juice, which is a mango-peach juice mixed into a frozen drink, and an iced chai. This juice, which is very sweet, but not to a fault, had the right ratio of ice to liquid and is quite peachy, although the mango is definitely a side player in the drink as it’s more a peach drink with some mango than a peach-mango drink. The iced chai definitely isn’t on the menu to impress anyone. It tastes very much like syrup, which is understandable considering it’s made with chai syrup, but at the same time, many other coffee shops are able to use the syrup to make an iced chai that taste like the real deal. It’s by no means fantastic, but also not terrible.

Justice Juice with Toll House cake in the background
As for our food, we started with an appetizer, the Spinach Artichoke Dip, a cheesy, delicious mixture of two vegetables served with parmesan bread for dipping and some classic dip vegetables. This dip looked watery and different from most spinach and artichoke dips; we expected a solid mass of spinach and cheese, and were surprised by the thin nature of the dip. However, when we dipped into it with the parmesan bread, they blended perfectly like they were always meant to be together. The crunchiness of the bread accentuated the texture of the dip, and allowed the bread to stay in the background without being totally ignored.

The spinach-artichoke dip with parmesan bread surrounding it
Our entrees came out soon after: the Fiorenza, and the Buffalo Pizza. The Fiorenza, a pasta dish made up of a thin fettuccine, smoky grilled chicken, steamed broccoli, a thick, dense garlic alfredo sauce, and served with a side of garlic bread is fantastic. As soon as it was served, we knew we’re in for a treat.
The dish smells strongly of garlic, normally a bad thing, but in the case of this dish it’s perfect. The fettucine, glazed in the rich flavor of the sauce, blended perfectly with the smoky chicken. This flavor combination is easily the best part of the dish, and it’s the reason we recommend it. Both the flavor of the sauce and the flavor of the chicken come through, which leaves the customer craving more. However, the broccoli and the garlic bread seemed like outsiders, and were generally avoided during our meal.
Garlic bread is something that is included in many meals, but it isn’t amazing by any terms. When it’s first brought out and warm, it has a slight crunch around the outside, but it’s still chewy in the middle, and leaves something to be desired. After only a few minutes, it’s room temperature and has lost its crunch altogether, leaving a small piece of chewy, cool, and largely flavorless bread.
The steamed broccoli could simply be taken out of the dish due to its incredible lack of flavor and synergy with the other ingredients. However, both the garlic bread and the broccoli are far less important than the pasta and chicken, so it is still delectable.
The Buffalo Pizza, which admittedly doesn’t go with the European style of the restaurant, smells exactly like buffalo wings and tastes like what we expect; a greasy, delicious cheese covered pizza with both mozzarella and cheddar and coated in deconstructed buffalo wings, spicy buffalo sauce, crispy bacon scattered across the top of the pizza, and ranch drizzle that acts as a cream dulling down the spice when it’s eaten. However, the chicken that’s on the pizza doesn’t come through, and it wasn’t until after we revisited the menu that we remembered that it was supposed to be there, so it’s all together unmissed.
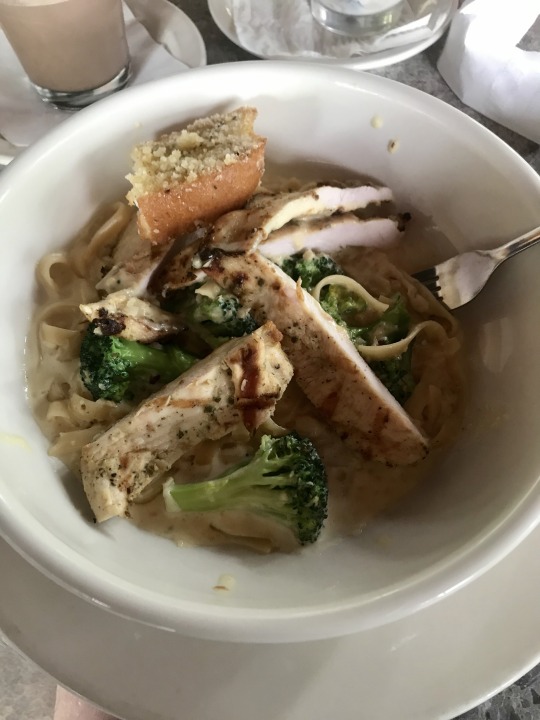
Fiorenza pasta with grilled chicken and steamed broccoli
After finishing our entrees, we finally get to dig into Empire's famous cakes. As we went on Monday, their half price cake day, we decided to try three of their cakes.
The first cake that we tried was the Chocolate Blackout cake. This cake is a rich and moist chocolate cake, a model for other cakes in Houston. It’s covered in a thick, rich, and very chocolatey icing and chocolate shredding on the outside, which displays an elegant exterior but doesn’t add much in terms of flavor.
Our second cake, and definitely the best one we tried, is Empire Café’s best-selling Toll House Crunch cake. This cake consists of a yellow cake, the same rich chocolate icing from the the Chocolate Blackout, semi-sweet chocolate chips, and grains of brown sugar on the icing. Each and every part of the cake adds something to it. The moist yellow cake is light, fluffy, and flavorful, one of the best bases to a cake I’ve had in awhile. The chocolate icing has a beautiful contrast with the yellow cake, making a sweet, robust combination of two iconic flavors. And the chocolate chips and brown sugar, although seemingly for aesthetic purposes only, add a fantastic crunch to the cake we would never expect, but definitely want more of.
The last cake we try is the Berry White Cake. This is the lightest cake, with an airy whipped cream icing and a light, delicious vanilla cake, that has strawberry and raspberry preserves mixed into it. The berries in the cake complete it, adding a fruit dimension and rounding out the cake’s flavor. However, the white chocolate shredding on outside has the same effect as the chocolate shredding on the first cake, and didn’t add anything to the cake flavor-wise.

The Chocolate Blackout Cake
Empire Café is a delectable, wonderful experience that we thoroughly enjoyed. Come here for a great Montrose atmosphere and a little escape from the real world, which is the vibe you’ll get while eating their delicious food. The Fiorenza and any flavor of cake get our recommendation. In general, anything on the menu that falls under their specialty of European cuisine is very likely to be amazing. Foods that fall out of their specialty and some of the drinks are a risk to get, but can still make for a great breakfast, lunch, or dinner. Overall, Empire Café is a restaurant worth going to and an experience worth having, and if you’re in the Montrose District we recommend you go.
Stars: 4/5
Price: $$
Wheelchair Accessible: Yes
Recommended dishes and drinks: Fiorenza, Buffalo Pizza, Toll House Cake, Hot Chocolate
Overall: The atmosphere is peaceful and relaxing, and the service and food makes for a good time.
Food: A great place for some casual breakfast, lunch, or dinner.
Service: The staff are friendly and good at their jobs.
Atmosphere: Very relaxed, feels like a tucked away secret.
0 notes
Text
Sticky Asian Glazed Chicken
New Post has been published on https://cookingawe.com/sticky-asian-glazed-chicken/
Sticky Asian Glazed Chicken
Sticky Asian Glazed Chicken is tender and juicy chicken coated in a sticky sweet Asian sauce. This meal is ready in just thirty minutes and the flavor is awesome!
The sticky glaze sauce on the chicken is a favorite of ours. While we love the Asian flavor, we also like to mix up the flavors of the glaze. Some of my other glazed chicken recipes like Honey Orange Glazed Chicken, Cider Glazed Chicken, Glazed Lemon Honey Garlic Chicken are also insanely delicious.
Sticky Asian Glazed Chicken
Isn’t life just so dang busy? And now that it is starting to warm up outside we soak up the sun any chance that we can get. But, if there is one thing that I always try to do, its have a meal ready for my family each night. We really do enjoy coming together at the dinner table and talking and joking around. So, I really love when I am able to create an easy and delicious meal!
You have probably noticed by now that I love Asian flavored meals on the blog. Some of my most popular recipes are Asian inspired dishes and they are to die for. My favorite food is Chinese and I have been able to create restaurant quality dishes in my kitchen.
This meal instantly became one of my top five Asian recipes with the first bite!
Asian Chicken Ingredients:
The sticky and sweet sauce on these bad boys is absolutely incredible. It is made with a delicious sauce of soy sauce, hoisin sauce, sweet chili sauce, brown sugar and a squeeze of a fresh lime. Don’t all of those flavors combined sound amazing? I love how thick and sticky the sauce is glazed over the chicken.
And the very best part… it is ready in just 30 minutes. So you are able to bring a delicious Asian inspired meal to your family in no time at all!
Chicken Breasts or boneless chicken thighs: Choose thighs for a juicer softer chicken and a chicken breast for a lower fat option.
Olive Oil: This oil is used to cook the chicken and keep it from sticking to the pan.
Brown Sugar: The molasses in this sugar adds to the rich sweetness of the glaze.
Soy Sauce: This salty sauce adds to the deep savory flavor of this chicken dish.
Hoisin sauce: Look for Hoisin Sauce in the international food isle. It is a much thicker, saltier version of Teriyaki sauce.
Sweet Chili Sauce: Stores in the pantry for 1 month. Refrigerate to keep this ingredient fresh for 6-9 months.
Ginger: Ginger is easy to peel and grate using the back of a spoon and fork.
Dried red pepper flakes: Add to taste
Minced garlic: Chop the garlic yourself or use a garlic press to release intense, immediate flavor.
Juice of one lime: This equates to about 2 tablespoons of lime juice.
How to Make Asian Glazed Chicken:
Our family absolutely loved this meal! Everything about this meal turned out perfect. From the tender and juicy chicken to the sticky and sweet Asian sauce. All you need to do is garnish with some sesame seeds and chopped green onions and you have an easy restaurant quality meal right at home!
Heat a large skillet: Place skillet over medium high heat and add 1 Tbs of olive oil. Add the chicken and salt and pepper.
Cook chicken: Let chicken cook about 3 minutes on each side or until thermometer reads 165 degrees and brown on each side.
Remove Chicken: Set chicken aside on plate.
Wisk together sauce: In the same skillet whisk together brown sugar, soy sauce, hoisin sauce, sweet chili sauce, ginger, red pepper flakes, garlic and lime juice.
Bring to a boil: Let sauce cook over medium heat for 1-2 minutes until sauce thickens.
Add chicken: Place chicken back into the sauce and coat each side with the sauce. Garnish with sesame seeds and chopped green onions.
Tips for Making Asian Glazed Chicken:
Soy Allergy: Use tamari or coconut aminos to replace the soy sauce if you have a soy allergy.
Chicken: My favorite way to cook this insanely delicious meal is to use chicken thighs instead of chicken breasts. Chicken thighs give you the crispy skin on the outside and juicy flavorful chicken on the inside.
Drumsticks: A great variation I loved with this recipe is drumsticks. The bone in chicken takes about twice as long to cook depending on the thickness but was an instant favorite!
What to Serve with Asian Chicken:
Be sure to try it with Easy Fried Rice, Egg Rolls, and an Asian Kale Salad for a complete Asian theme night.
How to Store Chicken:
When you are finished with this meal you will be lucky if you have any leftovers. If so, here are some things to remember when you are storing your chicken:
Let chicken cool completely before storing
Within two hours of cooking, wrap chicken tightly with aluminum foil or put in a shallow airtight container
Refrigerate on the top shelf (when correctly wrapped and stored it should last in the refrigerator for about 3 days)
To extend the length of time you can store your chicken you can freeze it for 2-6 months
More Traditional Asian Recipes:
Asian Turkey Lettuce Wraps
Asian Barbecue Burgers
Slow Cooker Sticky Asian Ribs
Grilled Asian Garlic Steak Skewers
Asian Pan Seared Salmon Salad
Print
Sticky Asian Glazed Chicken
.wprm-recipe-rating .wprm-rating-star.wprm-rating-star-full svg * fill: #343434;
Sticky Asian Glazed Chicken are tender and juicy chicken breasts that get coated in a sticky sweet asian sauce. This meal is ready in just thirty minutes and the flavor is awesome!
Course Main Course
Cuisine Asian American, Chinese
Keyword asian glazed chicken, sticky asian glazed chicken
Prep Time 5 minutes
Cook Time 15 minutes
Total Time 20 minutes
Servings 4 people
Calories 357kcal
Author Alyssa Rivers
Equipment
Large Skillet
Meat Thermometer
Serving Plate
Whisk
Ingredients
1 Pound thinly sliced Chicken Breasts or boneless chicken thighs*
1 Tablespoon Olive Oil
¾ cup brown sugar
⅓ cup soy sauce
2 Tablespoons hoisin sauce
1 Tablespoon Sweet Chili Sauce
1 Tablespoons ginger peeled and grated
Pinch of dried red pepper flakes to taste
½ teaspoon minced garlic
Juice of one lime
Instructions
Heat a large skillet over medium high heat and add 1 Tbs of olive oil. Add the chicken and salt and pepper. Cook chicken about 3 minutes on each side or until thermometer reads 165 degrees and brown on each side. Set chicken aside on plate.
In the skillet whisk together brown sugar, soy sauce, hoisin sauce, sweet chili sauce, ginger, red pepper flakes, garlic and lime juice. Bring to a boil over medium heat for 1-2 minutes until sauce thickens. **
Add chicken back to the sauce and coat each side with the sauce. Garnish with sesame seeds and chopped green onions.
Video
https://therecipecritic.com/wp-content/uploads/2016/03/STICKY20ASIAN20GLAZED20CHICKEN.mp4
Notes
Updated on May 6, 2020
Original Post on: March 13, 2016
Nutrition
Calories: 357kcal | Carbohydrates: 48g | Protein: 27g | Fat: 7g | Saturated Fat: 1g | Cholesterol: 73mg | Sodium: 1395mg | Potassium: 525mg | Fiber: 1g | Sugar: 45g | Vitamin A: 34IU | Vitamin C: 1mg | Calcium: 46mg | Iron: 1mg
0 notes
Text
Yasmin Khan’s palestinian recipes
Pomegranate passion cake
Pomegranates never fail to delight me; their crimson juices and sweet and tart arils provided such joy for me throughout my childhood that they are forever etched in my memory and on my heart.
Palestinians also hold this mighty fruit in high esteem, and here I’ve paired it with a dense and sticky almond cake, topped with a light and creamy mascarpone topping, which I love, and which I hope will enliven your passion for this magical fruit, too.
You will need a 20cm-deep cake tin.
Serves 8
For the cake
unsalted butter 200g, plus more for the tin
caster sugar 170g
eggs 4, lightly beaten
plain flour 100g
fine sea salt ¼ tsp
baking powder 1½ tsp
ground almonds 270g
unwaxed lemon finely grated zest of 1
lemon juice 3 tbsp
unsweetened pomegranate molasses 2 tbsp
vanilla extract 1 tsp
For the glaze
unsweetened pomegranate molasses 3 tbsp
sugar (any type) 2 tbsp
For the topping
pomegranate seeds 150g
caster sugar 2 tbsp
mascarpone 250g
Greek yogurt 3 tbsp
icing sugar 1 tbsp
Preheat the oven to 160C/gas mark 3. Butter a 20cm-deep cake tin and line it with baking parchment.
In a large bowl, cream the butter and sugar with electric beaters. When the mixture is combined, beat in the eggs gradually, beating well between each addition. Then fold in the flour, salt, baking powder and almonds with a large spoon.
Fold in the lemon zest and juice, pomegranate molasses and vanilla, then spoon into the tin.
Bake for 40–50 minutes, or until firm and a skewer inserted into the centre comes out clean.
When it is almost ready, make the glaze. Put the pomegranate molasses and sugar in a saucepan with 3 tablespoons water, place over a medium heat and stir to help dissolve the sugar. As soon as the cake comes out of the oven, use a fork to pierce holes in it, then brush the syrup over. Leave to cool in the tin, then turn it out, syrup-side up.
Place the pomegranate seeds in a small bowl with the sugar and leave to macerate for at least 30 minutes. Mix the mascarpone with the yogurt and icing sugar and spread it thickly over the cake. Finish with the pomegranate seeds and their juices.
Hummus
Let’s start with the most iconic of all Palestinian dishes: thick bowls of hummus, drenched in tahini and singing with citrussy flavour. Palestinians mainly eat hummus for breakfast, when it is commonly topped with tangy chilli-and-lemon-dressed chickpeas and served with thick slices of tomatoes and crunchy wedges of cucumber. A lot has been written about the perfect hummus... but I’m not a purist. Lemon and garlic levels are a matter of taste, so, while I suggest amounts you might start with, I encourage you to adapt them as you like. As brands of tahini can vary, feel free to play with the quantities of that, too. Here is a basic hummus and, on the following pages, two more elaborate versions that elevate the simple chickpea to a more sophisticated main meal. Just be sure to process the chickpeas while warm, to achieve the lightest, creamiest result.
Serves 4–6 as part of a spread
dried chickpeas 250g
bicarbonate of soda 1 tsp
garlic 3 cloves, crushed
lemon juice 90ml or to taste
tahini 180g
ground cumin ½ tsp
sea salt 1½ tsp
ice cubes 4
extra virgin olive oil to serve
Optional extras
za’atar, paprika or ground cumin a pinch
Soak the chickpeas overnight in a large bowl of cold water. The next day, drain them, tip them into a saucepan with the bicarbonate of soda, cover with water and bring to a simmer. After 5 minutes, stir the chickpeas and skim off the foam that rises. Cook until the chickpeas are soft but not completely mushy. Depending on their freshness, this could take 30–40 minutes.
When they are ready, drain them and place the hot chickpeas in a food processor with the garlic, lemon juice, tahini, cumin and 1½ teaspoons of salt. Process until the mixture is smooth, then add the ice cubes and process for another 2 full minutes, until the hummus looks light and creamy. Taste and adjust the seasoning, adding a touch more lemon juice or salt, according to taste, and splashing in a little cold water if it is looking a bit thick (it will thicken more upon cooling). Transfer to a serving bowl and leave to rest for 1 hour for the flavours to come together.
To serve, use the back of a spoon to make a well in the hummus and drizzle over some extra virgin olive oil. You could also finish with a pinch of za’atar, paprika or ground cumin, if you like.
Hummus with spiced lamb
Discovering this spectacular combination of juicy marinated lamb spooned over velvety smooth hummus was one of the culinary highlights of my first visit to the West Bank. Incredibly simple to make, this winning combination has fast become one of my kitchen staples whenever I need a quick, nourishing dinner.
I’ve written this recipe using a batch of homemade hummus but, to be quite honest, you could spruce up shop-bought hummus with this delicious topping, too. Serve it with a bright, fresh salad and a bowl of crunchy Middle Eastern pickles.
Use minced lamb instead of fillet if you like but, if you do, leave out the extra virgin olive oil from the marinade.
Serves 4 as a main, or 6 as part of a spread
lamb neck or loin fillet 300g
garlic 1 clove, crushed
lemon juice 2 tbsp
extra virgin olive oil 1 tbsp plus more to serve (optional)
sumac ½ tsp
dried oregano ½ tsp
ground turmeric ¼ tsp
Aleppo pepper (pul biber) or cayenne pepper a pinch
sea salt and freshly ground black pepper
light olive oil 2 tbsp, for frying
For the rest
pine nuts 30g
hummus
chopped parsley leaves a small handful
sumac
Chop the lamb fillet into 1cm-thick pieces. Mix in all the marinade ingredients, except the light olive oil, seasoning with ½ teaspoon of salt and ¼ teaspoon of pepper, and ensure that the lamb is fully coated. Cover and leave to marinate for at least 30 minutes or up to 1 hour.
Heat the light olive oil in a frying pan and fry the meat for 3-4 minutes over a medium heat until it is just cooked through.
Toast the pine nuts by placing them in a small dry pan over a medium heat and stirring them for a minute or so, until they turn golden brown. Set them aside in a small bowl.
When you are ready to eat, transfer the hummus to a couple of serving bowls and use the back of a spoon to make a shallow well in each. Spoon the lamb over, finishing with a sprinkling of parsley, the toasted pine nuts and a pinch of sumac.
Drizzle with a little extra virgin olive oil, if you like.
Chickpea and bulgur salad
Nutty and flavoursome, herby and zingy, this makes a great side dish for roasted meat and fish. Try it with lemon, cumin and green chilli sea bass, or slow-roast shoulder of lamb with Palestinian spices. It is also lovely on its own as a light vegetarian main dish.
Serves 2–3 as a main, 4–6 as part of a spread
coarse bulgur wheat 175g
sea salt and freshly ground black pepper
chickpeas 400g tin, drained and rinsed
parsley leaves 30g, finely chopped
mint leaves 30g, finely chopped
chives 15g, finely chopped
garlic 2 cloves, crushed
extra virgin olive oil 5 tbsp
lemons juice of 2
pomegranate seeds 60g
Cook the bulgur wheat with ½ teaspoon of salt in a large pan of boiling water for 10 minutes, until it is soft. Drain, rinse with cold water and place in a serving bowl.
Add the chickpeas to the bulgur wheat, then stir through the chopped herbs and garlic. Dress the salad with the olive oil, lemon juice, 1 teaspoon salt and ½ teaspoon pepper. Taste and adjust the seasoning as you prefer, bearing in mind that this dish benefits from generous salting.
Just before serving, sprinkle over the pomegranate seeds.
Aubergine and feta kefte
The Palestinian kitchen is filled with a variety of meat, fish and vegetable kefte, which are balls of seasonal ingredients that have been moulded, stuffed, baked or fried. This is my vegetarian version, using the region’s ubiquitous aubergines married with fresh herbs and tangy white cheese. These are perfect for picnics and keep well for a few days in the fridge.
Serves 4–6
aubergines 600g (about 2 large ones) chopped into 1cm squares
light olive oil 3 tbsp, plus more for the tray
sea salt and freshly ground black pepper
bulgur wheat 175g
cumin seeds ½ tsp
coriander seeds ½ tsp
garlic 1 clove, finely chopped
mint leaves 10g, finely chopped
parsley leaves 15g, finely chopped
feta cheese 175g, crumbled
sunflower and pumpkin seeds 50g
eggs 2, lightly beaten
unwaxed lemon finely grated zest of 1
Preheat the oven to 200C/gas mark 6. Place the aubergine pieces on a baking tray and drizzle with the 3 tablespoons of light olive oil and ½ teaspoon of salt. Use your hands to mix the pieces, then roast for 25 minutes, or until soft. Transfer to a large mixing bowl and leave to cool.
Bring a saucepan of water to the boil, add the bulgur wheat and cook for 15 minutes. Drain, rinse with cold water, drain well again, then add the bulgur to the aubergines.
Preheat the oven to 220C/gas mark 7, or just increase the temperature if you didn’t turn it off.
Toast the cumin and coriander seeds by stirring them in a dry pan for a few minutes until their aromas are released, then grind in a mortar and pestle or a spice grinder. Stir into the aubergines and bulgur wheat with all the remaining ingredients, seasoning with ½ teaspoon each of salt and pepper.
Oil a baking tray, then use your hands to mould 12 satsuma-sized kefte and place them on the tray. Roast for around 20 minutes, or until the kefte are golden all over.
Roast rainbow carrots with herbed yogurt
This recipe is inspired by a meal I enjoyed at Tawla, a Palestinian-owned restaurant in San Francisco that serves up innovative and tasty adaptations of eastern Mediterranean cuisine. Rainbow carrots are a particular addiction of mine and I adore how they brighten up my table with their purple and golden hues. If you can’t find any, fear not, regular carrots will do, just try and buy organic if you can, as the taste is so much better. This salad is best made an hour or so in advance, then left to rest so the carrots soak up all the herby flavours from the dressing.
Serves 4 as part of a spread
mixed rainbow carrots 1kg
extra virgin olive oil 3 tbsp
sea salt and freshly ground black pepper
natural yogurt 3 tbsp
garlic 1 clove, crushed
fresh dill 1 tsp, finely chopped, or ½ tsp dried dill
dried mint 1 tsp
nigella seeds ½ tsp
sesame seeds ¾ tsp
Preheat the oven to 200C/gas mark 6. Peel the carrots and slice them diagonally into thick wedges. Toss them with 2 tablespoons of the extra virgin olive oil and ¼ teaspoon of salt and roast for 30–35 minutes, until they are tender, but still have some bite.
Meanwhile, whisk together all the remaining ingredients, except the seeds (and not forgetting the final 1 tablespoon extra virgin of olive oil) with ¼ teaspoon each of salt and pepper.
When the carrots are ready, transfer them to a serving dish and leave them to cool to room temperature. Pour over the yogurt dressing, mix well, then taste and adjust the seasoning. Scatter with the nigella and sesame seeds.
You can tuck in immediately or, for best results, cover and leave to rest for about 1 hour before serving.
Lamb meatballs with tahini
Of the dozens of different types of kefte (meatballs), this is my firm favourite. The unique combination of sticky roasted potatoes, spicy lamb and garlicky tahini never fails to delight. You can prepare the potatoes, meatballs and sauce all in advance, then just assemble the dish and pop it into the oven about 30 minutes before you want to eat. I recommend going to a butcher for some minced shoulder of lamb for this dish, as I think it has the best flavour (and ask them to trim off any excess fat before mincing). Use a large ovenproof dish that doubles up as a serving platter for this recipe, so you can take the dish straight to the table.
Serves 4 as a main or 6 as part of a spread
For the potatoes
potatoes 700g
sea salt
light olive oil 2 tbsp
For the kefte
minced lamb 800g
onion 1, finely chopped
parsley leaves 25g, roughly chopped
garlic 3 cloves, crushed
chilli flakes ½ tsp
ground cinnamon 1½ tsp
ground allspice 1½ tsp
freshly ground black pepper
extra virgin olive oil 2 tbsp
For the tahini sauce
tahini 75ml
lemon juice 2 tbsp
garlic 1 clove, crushed
parsley leaves 10g, chopped, plus more to serve
For the topping
pine nuts 30g
salted butter 15g
Preheat the oven to 180C/gas mark 4. Peel the potatoes and then slice them into 1cm-thick discs. Place them in a large ovenproof dish in a single layer, sprinkle over ½ teaspoon of salt and the light olive oil and toss to coat evenly. Bake for around 40 minutes, or until soft.
Meanwhile, make the kefte by placing all the ingredients, except the extra virgin olive oil, in a food processor, seasoning with 1 teaspoon of salt and ½ teaspoon of pepper. Blitz for a few minutes to combine evenly. (Mincing the meat twice in this way also ensures a better texture.) Mould the meatballs into 5cm ovals. Put the olive oil in a bowl and, using your fingertips, lightly coat each ball with oil to smooth it. (At this stage, you can leave the kefte for a few hours in the fridge if you are preparing the meal ahead of time.)
When the potatoes are soft, place the kefte in a layer on top of them and bake for 15–20 minutes, until just cooked through.
Make the tahini sauce by whisking all the ingredients together, seasoning with ½ teaspoon of salt and adding 75ml of water. Tahini varieties can vary, so add more water or lemon juice if it seems a little thick; you want the consistency of runny honey.
For the topping, fry the pine nuts in the butter until they are golden, then place on kitchen paper to soak up excess oil.
Once the lamb is cooked, drain off any excess fat that has been released during cooking, then spoon over the tahini sauce and top with the pine nuts and chopped parsley. Serve immediately.
1 note
·
View note
Photo

Rhubarb Celli Ripieni – Old School Jam Cookies from Abruzzo http://bit.ly/2rglqNG
There are still a few spots left in our Abruzzo Forage and Cook Retreat in Italy this coming October! We thought we would talk a bit more about the vegan menu that we were able to develop for this retreat, as well as share a traditionally vegan cookie recipe from Abruzzo.
Traveling through Italy as a vegan (and in some cases even as a vegetarian) can be rough. Sure, you will be able to get by ok, but you will also inevitably miss out on a ton of truly authentic and delicious dishes, and may even end up eating more than a few mediocre vegan meals. We’re speaking from experience. That’s why we initially planned our retreat to be strictly vegetarian – we didn’t think we could pull off a vegan menu in such a remote region as Abruzzo. But so many of you expressed an interest in a 100% vegan menu, that we had to rethink the whole thing.
Thankfully, our partner Anna is an Abruzzo local. She was able to take a deep dive into the food traditions of Abruzzo and search for any and all plant-based options. She consulted with local farmers, food artisans, and restaurant owners, and it became very clear that a vegan menu is totally possible (we are still offering a vegetarian option, too). A wealth of plant-based ingredients grows in Abruzzo: ancient grains, indigenous pulses, organic fruit and vegetables, wild greens and herbs, truffles and porcini mushrooms. We will be cooking and tasting them all! It’s going to be so magical, and it’s truly an opportunity of a lifetime.
Read on for more about the retreat and, of course, the super cute cookies :)
Book Now! Click here to book your stay on our retreats website :)
Why come to our Vegan Abruzzo Forage and Cook retreat?
Plant-based menu. We have researched and prepared traditional, plant-based menus, filled with naturally vegan and vegetarian recipes that the locals have enjoyed for centuries. Ancient grains, indigenous pulses, organic fruit and vegetables, wild greens and herbs, truffles and porcini mushrooms – you will get to taste the best of the traditional local cuisine, virtually unheard of abroad. Click here to see a sample menu.
Immersive cultural experience. We forage and cook our way through mountain villages that are mostly untouched by tourism and offer an incredibly authentic, immersive cultural experience. We partner with locals to learn about their crafts and traditions, like foraging for fresh truffles and herbs, as well as wine and olive oil production. Click here to see a sample itinerary.
Affordable, discounted rates. Thanks to our local partner, Abruzzo With Gusto, our guests stay in incredible, 5-star places at discounted rates. We will be staying at Sextantio in the medieval village of Santo Stefano and Pietrantica, a farmhouse guesthouse in Decontra.
Learn traditional recipes. We host hands-on cooking classes, led by Abruzzo locals, where you can gain unforgettable skills, like pasta-making with heritage grain flour, cooking with wild foraged greens, and making local herb cocktails and tea.
Cook with Anya. Inspired by the Abruzzese traditions, I will be teaching a cooking class, where you’ll get to cook through several of my recipes based around fresh, seasonal ingredients, with a modern twist.
Get in touch with your inner wanderer. The retreat is a perfect opportunity to slow down, recharge, make things with your hands, explore, and get in touch with your inner wanderer.
Book Now! Click here to book your stay on our retreats website :)
And these cookies! These are just one great example of a traditionally vegan recipe from Abruzzo that we’ll be serving up at the retreat. Celli Ripieni translates as ‘stuffed birds’ – not a very vegan-friendly name, we know, but it sounds so much better in Italian :). They are made with a very simple, eggless and dairy-free olive oil dough that’s a true pleasure to work with. They are traditionally filled with grape jam and nuts. Since grapes are not in season right now, we thought we would instead fill ours with everyone’s favorite pink plant that is in season – rhubarb.
Anna told us that it’s hard to find these cookies in the traditional bird shape nowadays, and that the cookies are mostly shaped as less elaborate, jam-filled dumplings. We thought it would be fun to recreate the authentic bird shape, and it turned out to be pretty easy. Just take a peek at the gif above, where we demonstrate how to shape one. We love how old-school these feel.
The pastry tastes lovely, almost like shortbread, and it plays so well with the maple-stewed rhubarb and walnut filling. You could basically fill these with any stewed fruit that’s in season, or any jam that you have on hand. We hope you’ll give them a try!
Rhubarb Celli Ripieni - Old School Jam Cookies from Abruzzo
Print
Serves: about 28 cookies
Ingredients
for the pastry
3⅓ cups all purpose flour
½ cup plus 4 tablespoons olive oil
½ cup plus 4 tablespoons white wine
2-3 tablespoons coconut sugar
pinch of sea salt
for the rhubarb filling and assembly
5 medium stalks of rhubarb - sliced into small pieces
¼ cup maple syrup
splash of vanilla extract or seeds from 1 vanilla bean
1 tablespoon arrowroot
1 tablespoon purified water
zest from 1 organic orange
½ cup raw walnuts - chopped
small walnut pieces, cacao nibs or raisins - for the birds' eyes
powdered sugar or more arrowroot powder - for dusting the finished cookies (optional)
Instructions
to make the pastry
Mix all the pastry ingredients in a bowl until you have a smooth, elastic dough. Make sure not to overwork it. Tightly wrap the dough in plastic and let rest while preparing the rhubarb filling.
to make the rhubarb filling
In a medium saucepan, combine the rhubarb, maple syrup, and vanilla. Bring to a boil over medium high heat. Lower the heat to a simmer and let simmer for 10 minutes, until the rhubarb turns into a uniform, jam-like mixture. Turn off the heat.
In a small bowl, whisk together the arrowroot with 1 tablespoon of water. Add the mixture to the rhubarb and mix it in vigorously, until the rhubarb jam starts to thicken. Let the jam cool completely.
Mix in the orange zest and raw walnuts, and you're ready to assemble your cookies.
to make the cookies
Preheat oven to 350° F (175° C). Prepare 2 parchment paper-covered baking sheets.
Divide your dough into two halves. Wrap one of the halves tightly with plastic wrap and set aside. On a well-floured surface, roll out the other half of the dough into a sheet about ⅛" in thickness.
Use a round cookie cutter or a glass/bowl about 3½"-4" in diameter to cut out rounds. Reshape the remaining dough and cut out more, until you've used up all the dough. Keep the dough rounds covered with a kitchen towel while you work.
Place about 1 tablespoon of rhubarb jam in the center of a dough round. Fold it in half and pinch together the edges, like a dumpling. Shape one of the dumpling edges into a bird's head with a pinched out beak. Press a walnut piece, cacao nib, or raisin into the head, where the bird's eye would be. Shape the opposite edge of the dumpling into a tail by flattening it. Use kitchen scissors to cut the beak in half, cut some feathers into the tail, as well as cut some wing marks along the bird cookie's body. Refer to the instructional gif above for a visual. Place the cookie on the prepared baking sheet. Continue with the rest of the dough.
Bake the cookies, one tray at a time, for about 30-40 minutes, until lightly golden. Start checking at 20 minutes. Let cool. Dust the cookies with powdered sugar or arrowroot powder, if desired, and serve.
3.5.3226
You might also like...
Mango Salsa and an Ayurveda Birthday
Summery White Bean ‘Tuna’ Sandwich
Rum and Raisin Bundt with Orange Miso Glaze & A New Cookbook!
Olive Oil Loaf with Hibiscus Beet Icing
The post Rhubarb Celli Ripieni – Old School Jam Cookies from Abruzzo appeared first on Golubka Kitchen.
0 notes
Text
“The way you cut your meat reflects the way you live.”
– Confucius
For many, food is an experience. It is both a science and an art. It is meant to be savored and enjoyed. In a culture with such passion for food, it is no surprise that we also like talking about it. While the Chinese share that love of language, they also have a love of food. Over their centuries-long history, the Chinese have composed an innumerable collection of legacy – including food.
China Wok is a cheerful red and yellow eatery on Purna Das Road. There are narrow steps that take you to a mezzanine floor – and here there are just four tables placed tightly together. The newly opened outlet and has a very fresh feel to it and served authentic Chinese food. China Wok is where you go when you want the classic (somewhat) greasy, succulent, mouth watering, take-out Chinese food that brings back nostalgic memories of brown paper bag family dinners when no-one feels like cooking. Great Chinese food even the Chinese would be impressed.
Where do I start? Well lets do the obvious first then shall we? FANTASTIC, and I don’t say that lightly. Varun Rajgarhia, the absolutely lovely, talented and perfect host and owner. When we arrived, we were greeted with the warmest most sincere smile that was followed by dinner packed with punch. This place is small but mighty. It is a small place, with less than 10 tables. It does not look much from outside. Inside, it is warm, inviting and clean. The biggest thing I can say about this place is call ahead. They are a local institution and fill up quickly. Their small dining room can hold maybe 25-30 covers at a seating so space fills up fast. The cuisine is authentic, delish and served in huge portions for your penny. As a Chinese Food lover, I have been looking for a genuine, original Sichuan restaurant for a long time. This is definitely a must-go one in South kolkata. The service is good, or sweet. They provide a multitude of choices in the menu, all of those we tried today are damn good.
“China Wok is my take on Authentic Chinese and Thai Cuisine at affordable prices. While there is a plethora of Chinese and Thai restaurants in Kolkata, most of them Indianise their Asian delicacies partly to make the same cheap/ affordable and partly becuase that’s what sells. China Wok is my endeavor to bring Authentic Asian Delicacies to the city at affordable prices. While creating the dishes, we have remained true to both traditional cooking techniques as well as traditional ingredients. It was born out of my principle that food tastes best when it is authentic and hopefully the city of joy feels the same and I am sure will find new love for Authentic Asian Food and its simplicity once they try China Wok” – Varun Rajgarhia – owner – Asia House
The Dishes We Had :
Welcome Drinks :
Sweet and Salt Lime & Cold Drinks –
Soups :
Spicy Lemon Burnt Garlic Soup – Spicy soup with fresh lemon, burnt garlic and green chilies with chicken. Given the lemon addition, this soup is as good for summer meals as it is in the winter. The recipe combines two of my favorite ingredients: garlic and lemon. Lemon soups have the lightness and brightness that some savory soups miss. This soup joins the savory of garlic with lemon for a fresh-tasting finish.
Eight Treasure Soup – Traditional coriander and chili flavored thick soup with vegetables and mushrooms with chicken. It’s both warming and delicious – and full of ingredients that are GREAT for your health! The first time I had it was at a dinner. It was one of the most delicious, sweet, creamy soups I’ve ever had. I was hooked at first sip!
Starters :
Prik Kai Sot Sai Thod – Chicken wings tossed in Thai sweet chili sauce with kaffir lemon. The combination of both fragrant Sweet Chili Sauce and kaffir lime leaves are what make this recipe special so don’t leave either of them out! These wings have crispy skin that is full of Thai curry flavor. Yet, they are not spicy hot like some Thai dishes. The crunchy kaffir lime leaves add texture and fragrant, making the wings distinctly Thai.
Asian Barbecued Chicken – Pan roasted Chicken smoked with charcoal and caramelized in Barbecue and butter sauce. This Asian-style version of Berbecued chicken on oyster sauce, soy sauce and roasted garlic, with toasted black peppercorns added a strong and bold flavor to the dish. The sauce is superb glazed on chicken. Grab some napkins everyone!
Chicken Sui Mai – Wafer thin flour wrappers with minced and served with garlic oil. I bet most of you have heard about Dim sum, which is a southern Chinese cuisine that serves with tea and comes in small portions in bamboo steamer! I will never say ‘no’ to Dim Sum and it will always be one of my favourites! Sui Mai is definitely a “must-order” dish. Here they are making it with chicken instead of prawn or pork, just simply because I think We Bengali are more chicken than pork person! Or perhaps, its purely because they feel like trying something different to serve us. Wafer thin floor wrappers with minced chicken served with garlic oil. There is something charming about going for this dim sum, I guess it must be something I treasure for a long time.
Mains :
Kung Pao Chicken – Diced chicken toast in kung Pao sauce and finished with roasted cashew nuts. Apart from the chicken cubes, this famous dish contains chili peppers, spring onions, garlic, ginger, Sichuan peppers and most often toasted peanuts, but according to the author cashew nuts are also encountered. It may seem very simple, but the flavours are very unusual and surprising for someone who knows Chinese cuisine from European restaurants. Two things make this dish very unique: Sichuanese peppercorns and the very light sour, sweet and hot sauce prepared with black vinegar.
Pla Pad Kraprow – Sliced fish tossed in Thai Chili Basil sauce with Birds eye Chili. Healthy bowl of goodness! To be honest this is such a great and uncommon and also a popular dish. Every one like this and i specially like this dish too much. We were amazed by the perfectly cooked fish, crunchy fried crust, and fragrant and flavorful sauce.
Thai Red Curry (Veg) – Traditional medium spicy Thai red curry with fresh chilies and Ginger. This recipe is so simple and tastes amazing! I had Thai Red Curry powder and mixed it into a paste and found Thai Kitchen organic coconut milk in a can. For speed, I blanched the cauliflower and green beans together; and substituted baby bella mushrooms and Living Herbs basil since I couldn’t find fresh cremini or thai basil. Came out delicious, my teenager even liked it!
Rice & Noodles :
Schezwan Rice (Chicken) – Spicy fried rice tossed with roasted Chili paste , bell peppers and dry Red Chilies. It is a Chinese dish of steamed rice that has been stir-fried in a wok and, usually, mixed with other ingredients, such as eggs, vegetables, and meat, and as such, often served as a complete dish. A treat of flavoured rice, with shreds of chicken topped with a spicy schezwan sauce for an unforgettable hit of deliciousness in your mouth!
Chili Garlic Noodles (Egg) – Chill Garlic Noodles is a simple stir-fried noodles recipe infused with bold flavors of garlic and hot red chill. A quick, easy and flavourful meal, perfect for entertaining and busy work day. It is a delight to eat. It was so soul satisfying.
Steamed Rice – Steamed rice is a staple food for almost any Oriental meal. It is soft and sticky compared to other kinds of Asian rice.
Desserts :
Darsoan with Ice Cream – Crispy Fried flour strips tossed with burnt honey and caramelized sugar. A Chinese style dessert which is exquisite. I love it. This is almost every body’s favourite Desert in any Oriental Restaurant.
I have had a lot of Chinese food in a lot of different places but I have to say China Wok is right up there in the top 5, I have ever had. It’s my understanding they have a great Chef and his preparation is outstanding. I find that most Chinese food restaurant dishes all have the same flavour profile. NOT the case here, each dish is unique and flavourful.
Staff were extremely pleasant and seemed genuinely pleased to hear how much we enjoyed the dining experience. You would never expect the quality from looking at the outside of the building, it being so non-descipt. Currently the leading Chinese food restaurant in area. I would definitely come back to try the lunch specials too.
Special Thanks to –
○ Varun Rajgarhia, owner Asia House for the invitation and amazing hospitality.
○ Chef for providing us such a lovely experience of Steam Food
○ Rajdeep Bhattacharjee for leading us.
Proud Member of Panch Phoron #panchphoron
When you need your Chinese fix…China Wok is there! "The way you cut your meat reflects the way you live." - Confucius For many, food is an experience.
0 notes
Text
Apple Bread
Full of fall flavor this deliciously sweet Apple Bread with hints of seasonal spices is a perfectly tender bread. Each bite is packed with chunks of apple with hints of cinnamon and vanilla. Make this your new fall favorite indulgence.
Apples are in season and so delicious during the fall season. Try this Cinnamon Apple Bread, Caramel Apple Slab Pie or Caramel Apple Cinnamon Rolls for more delicious apple recipes.
The Best Apple Bread Recipe
Fall baking is one of my absolute favorite times to be in the kitchen. It’s Aimee Mars and preparing all the seasonal baked goods that fill my kitchen with warm and spicy scents are some of the most heartwarming. Just when the apples come into season I always have to prepare a batch of this delicious apple bread.
This really is the best apple bread recipe with its simplicity and super soft texture. Spread some creamy butter over a slice of warmed bread and you’ll be in fall heaven.
What Are the Best Apples for Making Apple Bread?
When baking it’s best to choose a tart and crisp apple version instead of a sweet one. This helps to balance the flavor so the apple bread isn’t overly sweet. The best options are Honeycrisp or Granny Smith. These apples can be found year-round too if you’re looking to make this bread outside of the fall season.
Can You Freeze Apple Bread?
Yes. In order to freeze the bread let it cool completely before wrapping it in plastic wrap, aluminum foil, or a freezer bag. If using foil or plastic wrap double wrap it to ensure no air gets in.
Do the Apples Have to be Peeled?
Yes. Unfortunately, the peel will begin to separate from the apple during the baking process that will not only create air pockets but also an unappetizing texture. To peel the apples quickly I prefer to use a potato peeler and then just slice them into chunks using a knife.
Ingredients in Apple Bread:
The simple ingredients in this apple bread recipe are all pantry staples and ones you likely already have on hand. I recommend stocking up on all of them because they’re common ingredients in many delicious fall recipes.
Flour
Sugar
Spices: cinnamon and nutmeg
Baking Soda
Baking Powder
Salt
Eggs
Oil
Vanilla Extract
Apples
How to Make Apple Bread:
This deliciously decadent bread is super simple to prepare and will make your kitchen smell like fall. Follow these simple steps to prepare 2 loaves.
Prep: Preheat the oven to 350ºF and grease a 9×13 loaf pan and cover with parchment paper.
Mix the dry ingredients: In a medium bowl whisk the flour, sugar, spices, baking soda, baking powder, and salt together until well combined.
Combine the wet ingredients: Whisk the eggs, oil, and vanilla together in a large bowl until smooth. Pour the dry mixture into the wet and use a spoon to combine (the mixture will be thick). Fold the chopped apples into the batter.
Cook: Pour the batter into the prepared pan and place in the oven to bake for 50 to 55 minutes, or until a toothpick inserted into the middle comes out clean.
Tips For Making the Best Apple Bread:
Once you’ve prepared the batter place it immediately in the prepared pan and then bake it. Letting the batter stand for a bit can sometimes cause the cooked bread to not rise all the way.
Don’t overmix the wet ingredients. Once the ingredients appear to be combined stop whisking them and move on to the next step. Over mixing can cause the bread to be too dense and heavy.
Be careful to not underbake your bread. Each oven has it’s own temperature settings so make sure to test the center with a toothpick. If it comes out clean then it’s ready, if not place it back in the oven for an additional 10 minutes.
Try to avoid opening the oven until you’re sure it’s fully baked. Sometimes a draft can cause the bread to fall if it’s not close to being done.
Options For Adding a Topping:
Vanilla Glaze: In a small bowl whisk together 1 cup of powdered sugar, 1 teaspoon of vanilla, and 1 to 2 tablespoons (depending on how thick you want it) of heavy cream. Pour over the bread once it’s cooled.
Cream Cheese Frosting: Place 1/2 cup (1 stick) of unsalted butter at room temperature, 8 ounces of softened cream cheese, 1 teaspoon of vanilla extract, and 4 cups of powdered sugar into a mixer and combine until smooth. Spread a thick layer over the bread after it’s cooled completely.
Cinnamon Sugar: Place 1/4 cup sugar and 1 tablespoon of cinnamon in a small bowl and stir to combine. Sprinkle the mixture over the top of the bread before placing it into the oven.
Cinnamon Apple Butter: This simple spread will take this bread to the next level!
More Delicious Apple Recipes to Try:
If you love apples as much as I do then you’ll definitely want to try some of these delicious recipes that are guaranteed to fill your kitchen with fall scents.
Apple Butter
Apple Dump Cake
Perfect Apple Pie
Old Fashioned Apple Cobbler
Brown Sugar Cinnamon Baked Apples
Print
Apple Bread
Full of fall flavor this deliciously sweet Apple Bread with hints of seasonal spices is a perfectly tender bread. Each bite is packed with chunks of apple with hints of cinnamon and vanilla. Make this your new fall favorite indulgence.
Course Bread
Cuisine American
Keyword apple bread
Prep Time 15 minutes
Cook Time 55 minutes
Total Time 1 hour 10 minutes
Servings 12 Slices
Calories 445kcal
Author Aimee Mars
Ingredients
3 cups Flour
2 cups Sugar
2 teaspoons Ground Cinnamon
1/2 teaspoon Nutmeg
1 teaspoon Baking Soda
1/2 teaspoon Baking Powder
1/2 teaspoon Salt
4 large Eggs room temperature
1 cup Oil
1 teaspoon Vanilla Extract
2 cups Apples chopped and peeled (about 2 medium)
Instructions
Preheat the oven to 350ºF and grease and line 2 9x13 loaf pans with parchment paper. Then grease the paper.
In a large bowl whisk the flour, sugar, cinnamon, nutmeg, baking soda, baking powder, and salt together and set aside.
In a separate bowl whisk the eggs, oil, and vanilla. Add the flour mixture to the wet ingredients and stir to combine (the mixture will be thick).
Gently fold the apples into the batter and divide between the two prepared pans.
Bake for 50 to 55 minutes or until a toothpick inserted into the center comes out clean. Cool the bread in the pans for 10 minutes before removing to a wire rack to finish cooling.
Nutrition
Serving: 1loaf | Calories: 445kcal | Carbohydrates: 61g | Protein: 5g | Fat: 21g | Saturated Fat: 2g | Cholesterol: 62mg | Sodium: 213mg | Potassium: 96mg | Fiber: 2g | Sugar: 36g | Vitamin A: 101IU | Vitamin C: 1mg | Calcium: 26mg | Iron: 2mg
from The Recipe Critic https://ift.tt/2Yc0QOX
https://ift.tt/325kdun
Full of fall flavor this deliciously sweet Apple Bread with hints of seasonal spices is a perfectly tender bread. Each bite is packed with chunks of apple with hints of cinnamon and vanilla. Make this your new fall favorite indulgence.
Apples are in season and so delicious during the fall season. Try this Cinnamon Apple Bread, Caramel Apple Slab Pie or Caramel Apple Cinnamon Rolls for more delicious apple recipes.
The Best Apple Bread Recipe
Fall baking is one of my absolute favorite times to be in the kitchen. It’s Aimee Mars and preparing all the seasonal baked goods that fill my kitchen with warm and spicy scents are some of the most heartwarming. Just when the apples come into season I always have to prepare a batch of this delicious apple bread.
This really is the best apple bread recipe with its simplicity and super soft texture. Spread some creamy butter over a slice of warmed bread and you’ll be in fall heaven.
What Are the Best Apples for Making Apple Bread?
When baking it’s best to choose a tart and crisp apple version instead of a sweet one. This helps to balance the flavor so the apple bread isn’t overly sweet. The best options are Honeycrisp or Granny Smith. These apples can be found year-round too if you’re looking to make this bread outside of the fall season.
Can You Freeze Apple Bread?
Yes. In order to freeze the bread let it cool completely before wrapping it in plastic wrap, aluminum foil, or a freezer bag. If using foil or plastic wrap double wrap it to ensure no air gets in.
Do the Apples Have to be Peeled?
Yes. Unfortunately, the peel will begin to separate from the apple during the baking process that will not only create air pockets but also an unappetizing texture. To peel the apples quickly I prefer to use a potato peeler and then just slice them into chunks using a knife.
Ingredients in Apple Bread:
The simple ingredients in this apple bread recipe are all pantry staples and ones you likely already have on hand. I recommend stocking up on all of them because they’re common ingredients in many delicious fall recipes.
Flour
Sugar
Spices: cinnamon and nutmeg
Baking Soda
Baking Powder
Salt
Eggs
Oil
Vanilla Extract
Apples
How to Make Apple Bread:
This deliciously decadent bread is super simple to prepare and will make your kitchen smell like fall. Follow these simple steps to prepare 2 loaves.
Prep: Preheat the oven to 350ºF and grease a 9×13 loaf pan and cover with parchment paper.
Mix the dry ingredients: In a medium bowl whisk the flour, sugar, spices, baking soda, baking powder, and salt together until well combined.
Combine the wet ingredients: Whisk the eggs, oil, and vanilla together in a large bowl until smooth. Pour the dry mixture into the wet and use a spoon to combine (the mixture will be thick). Fold the chopped apples into the batter.
Cook: Pour the batter into the prepared pan and place in the oven to bake for 50 to 55 minutes, or until a toothpick inserted into the middle comes out clean.
Tips For Making the Best Apple Bread:
Once you’ve prepared the batter place it immediately in the prepared pan and then bake it. Letting the batter stand for a bit can sometimes cause the cooked bread to not rise all the way.
Don’t overmix the wet ingredients. Once the ingredients appear to be combined stop whisking them and move on to the next step. Over mixing can cause the bread to be too dense and heavy.
Be careful to not underbake your bread. Each oven has it’s own temperature settings so make sure to test the center with a toothpick. If it comes out clean then it’s ready, if not place it back in the oven for an additional 10 minutes.
Try to avoid opening the oven until you’re sure it’s fully baked. Sometimes a draft can cause the bread to fall if it’s not close to being done.
Options For Adding a Topping:
Vanilla Glaze: In a small bowl whisk together 1 cup of powdered sugar, 1 teaspoon of vanilla, and 1 to 2 tablespoons (depending on how thick you want it) of heavy cream. Pour over the bread once it’s cooled.
Cream Cheese Frosting: Place 1/2 cup (1 stick) of unsalted butter at room temperature, 8 ounces of softened cream cheese, 1 teaspoon of vanilla extract, and 4 cups of powdered sugar into a mixer and combine until smooth. Spread a thick layer over the bread after it’s cooled completely.
Cinnamon Sugar: Place 1/4 cup sugar and 1 tablespoon of cinnamon in a small bowl and stir to combine. Sprinkle the mixture over the top of the bread before placing it into the oven.
Cinnamon Apple Butter: This simple spread will take this bread to the next level!
More Delicious Apple Recipes to Try:
If you love apples as much as I do then you’ll definitely want to try some of these delicious recipes that are guaranteed to fill your kitchen with fall scents.
Apple Butter
Apple Dump Cake
Perfect Apple Pie
Old Fashioned Apple Cobbler
Brown Sugar Cinnamon Baked Apples
Print
Apple Bread
Full of fall flavor this deliciously sweet Apple Bread with hints of seasonal spices is a perfectly tender bread. Each bite is packed with chunks of apple with hints of cinnamon and vanilla. Make this your new fall favorite indulgence.
Course Bread
Cuisine American
Keyword apple bread
Prep Time 15 minutes
Cook Time 55 minutes
Total Time 1 hour 10 minutes
Servings 12 Slices
Calories 445kcal
Author Aimee Mars
Ingredients
3 cups Flour
2 cups Sugar
2 teaspoons Ground Cinnamon
1/2 teaspoon Nutmeg
1 teaspoon Baking Soda
1/2 teaspoon Baking Powder
1/2 teaspoon Salt
4 large Eggs room temperature
1 cup Oil
1 teaspoon Vanilla Extract
2 cups Apples chopped and peeled (about 2 medium)
Instructions
Preheat the oven to 350ºF and grease and line 2 9x13 loaf pans with parchment paper. Then grease the paper.
In a large bowl whisk the flour, sugar, cinnamon, nutmeg, baking soda, baking powder, and salt together and set aside.
In a separate bowl whisk the eggs, oil, and vanilla. Add the flour mixture to the wet ingredients and stir to combine (the mixture will be thick).
Gently fold the apples into the batter and divide between the two prepared pans.
Bake for 50 to 55 minutes or until a toothpick inserted into the center comes out clean. Cool the bread in the pans for 10 minutes before removing to a wire rack to finish cooling.
Nutrition
Serving: 1loaf | Calories: 445kcal | Carbohydrates: 61g | Protein: 5g | Fat: 21g | Saturated Fat: 2g | Cholesterol: 62mg | Sodium: 213mg | Potassium: 96mg | Fiber: 2g | Sugar: 36g | Vitamin A: 101IU | Vitamin C: 1mg | Calcium: 26mg | Iron: 2mg
from The Recipe Critic https://ift.tt/2Yc0QOX
via Blogger https://ift.tt/34c59he
0 notes
Quote
Full of fall flavor this deliciously sweet Apple Bread with hints of seasonal spices is a perfectly tender bread. Each bite is packed with chunks of apple with hints of cinnamon and vanilla. Make this your new fall favorite indulgence.
Apples are in season and so delicious during the fall season. Try this Cinnamon Apple Bread, Caramel Apple Slab Pie or Caramel Apple Cinnamon Rolls for more delicious apple recipes.
The Best Apple Bread Recipe
Fall baking is one of my absolute favorite times to be in the kitchen. It’s Aimee Mars and preparing all the seasonal baked goods that fill my kitchen with warm and spicy scents are some of the most heartwarming. Just when the apples come into season I always have to prepare a batch of this delicious apple bread.
This really is the best apple bread recipe with its simplicity and super soft texture. Spread some creamy butter over a slice of warmed bread and you’ll be in fall heaven.
What Are the Best Apples for Making Apple Bread?
When baking it’s best to choose a tart and crisp apple version instead of a sweet one. This helps to balance the flavor so the apple bread isn’t overly sweet. The best options are Honeycrisp or Granny Smith. These apples can be found year-round too if you’re looking to make this bread outside of the fall season.
Can You Freeze Apple Bread?
Yes. In order to freeze the bread let it cool completely before wrapping it in plastic wrap, aluminum foil, or a freezer bag. If using foil or plastic wrap double wrap it to ensure no air gets in.
Do the Apples Have to be Peeled?
Yes. Unfortunately, the peel will begin to separate from the apple during the baking process that will not only create air pockets but also an unappetizing texture. To peel the apples quickly I prefer to use a potato peeler and then just slice them into chunks using a knife.
Ingredients in Apple Bread:
The simple ingredients in this apple bread recipe are all pantry staples and ones you likely already have on hand. I recommend stocking up on all of them because they’re common ingredients in many delicious fall recipes.
Flour
Sugar
Spices: cinnamon and nutmeg
Baking Soda
Baking Powder
Salt
Eggs
Oil
Vanilla Extract
Apples
How to Make Apple Bread:
This deliciously decadent bread is super simple to prepare and will make your kitchen smell like fall. Follow these simple steps to prepare 2 loaves.
Prep: Preheat the oven to 350ºF and grease a 9×13 loaf pan and cover with parchment paper.
Mix the dry ingredients: In a medium bowl whisk the flour, sugar, spices, baking soda, baking powder, and salt together until well combined.
Combine the wet ingredients: Whisk the eggs, oil, and vanilla together in a large bowl until smooth. Pour the dry mixture into the wet and use a spoon to combine (the mixture will be thick). Fold the chopped apples into the batter.
Cook: Pour the batter into the prepared pan and place in the oven to bake for 50 to 55 minutes, or until a toothpick inserted into the middle comes out clean.
Tips For Making the Best Apple Bread:
Once you’ve prepared the batter place it immediately in the prepared pan and then bake it. Letting the batter stand for a bit can sometimes cause the cooked bread to not rise all the way.
Don’t overmix the wet ingredients. Once the ingredients appear to be combined stop whisking them and move on to the next step. Over mixing can cause the bread to be too dense and heavy.
Be careful to not underbake your bread. Each oven has it’s own temperature settings so make sure to test the center with a toothpick. If it comes out clean then it’s ready, if not place it back in the oven for an additional 10 minutes.
Try to avoid opening the oven until you’re sure it’s fully baked. Sometimes a draft can cause the bread to fall if it’s not close to being done.
Options For Adding a Topping:
Vanilla Glaze: In a small bowl whisk together 1 cup of powdered sugar, 1 teaspoon of vanilla, and 1 to 2 tablespoons (depending on how thick you want it) of heavy cream. Pour over the bread once it’s cooled.
Cream Cheese Frosting: Place 1/2 cup (1 stick) of unsalted butter at room temperature, 8 ounces of softened cream cheese, 1 teaspoon of vanilla extract, and 4 cups of powdered sugar into a mixer and combine until smooth. Spread a thick layer over the bread after it’s cooled completely.
Cinnamon Sugar: Place 1/4 cup sugar and 1 tablespoon of cinnamon in a small bowl and stir to combine. Sprinkle the mixture over the top of the bread before placing it into the oven.
Cinnamon Apple Butter: This simple spread will take this bread to the next level!
More Delicious Apple Recipes to Try:
If you love apples as much as I do then you’ll definitely want to try some of these delicious recipes that are guaranteed to fill your kitchen with fall scents.
Apple Butter
Apple Dump Cake
Perfect Apple Pie
Old Fashioned Apple Cobbler
Brown Sugar Cinnamon Baked Apples
Print
Apple Bread
Full of fall flavor this deliciously sweet Apple Bread with hints of seasonal spices is a perfectly tender bread. Each bite is packed with chunks of apple with hints of cinnamon and vanilla. Make this your new fall favorite indulgence.
Course Bread
Cuisine American
Keyword apple bread
Prep Time 15 minutes
Cook Time 55 minutes
Total Time 1 hour 10 minutes
Servings 12 Slices
Calories 445kcal
Author Aimee Mars
Ingredients
3 cups Flour
2 cups Sugar
2 teaspoons Ground Cinnamon
1/2 teaspoon Nutmeg
1 teaspoon Baking Soda
1/2 teaspoon Baking Powder
1/2 teaspoon Salt
4 large Eggs room temperature
1 cup Oil
1 teaspoon Vanilla Extract
2 cups Apples chopped and peeled (about 2 medium)
Instructions
Preheat the oven to 350ºF and grease and line 2 9x13 loaf pans with parchment paper. Then grease the paper.
In a large bowl whisk the flour, sugar, cinnamon, nutmeg, baking soda, baking powder, and salt together and set aside.
In a separate bowl whisk the eggs, oil, and vanilla. Add the flour mixture to the wet ingredients and stir to combine (the mixture will be thick).
Gently fold the apples into the batter and divide between the two prepared pans.
Bake for 50 to 55 minutes or until a toothpick inserted into the center comes out clean. Cool the bread in the pans for 10 minutes before removing to a wire rack to finish cooling.
Nutrition
Serving: 1loaf | Calories: 445kcal | Carbohydrates: 61g | Protein: 5g | Fat: 21g | Saturated Fat: 2g | Cholesterol: 62mg | Sodium: 213mg | Potassium: 96mg | Fiber: 2g | Sugar: 36g | Vitamin A: 101IU | Vitamin C: 1mg | Calcium: 26mg | Iron: 2mg
from The Recipe Critic https://ift.tt/2Yc0QOX
http://easyfoodnetwork.blogspot.com/2020/08/apple-bread.html
0 notes
Text
Buttery Lemon Shortbread Cookies with a Glaze
Buttery Lemon Shortbread Cookies with a Glaze are light and fresh with vibrant sweet and sour flavors that are surprisingly easy to create! Every bite is packed with a burst of lemon flavor and the shortbread has the perfect dense, buttery texture that will make this your new favorite cookie!
For more of the freshness of lemon with the amazing texture of shortbread, try Lemon Tart with a Buttery Shortbread Crust. It is an easy and delicious homemade fresh lemon curd in a buttery shortbread crust.
Buttery Lemon Shortbread Cookies with a Glaze
Warm summer days call for light and vibrant desserts that are both satisfying and refreshing. Classic shortbread cookies are a tried and true choice with their melt-in-your-mouth buttery texture. Now, by adding in the subtle lemon flavor and the sweet glaze, this classic cookie becomes perfectly bright. Calling these the best cookies ever would not be an overstatement. They are heavenly!
Lemon shortbread cookies are perfect for any occasion because of their soft and sweet buttery texture and their inspired lemon zip. Best of all these crowd-pleasing cookies are simple to make and the dough is easy to prepare ahead of time. Make a couple of batches at a time and freeze some of the dough until you are ready to bake them. You will be asked to make these over and over. So, go ahead and pre-heat that oven and see for yourself how perfect this cookie really is!
Shortbread Cookie Ingredients:
Since this recipe requires no special equipment and all pantry staple ingredients, it makes a great beginner cookie. Shortbread cookies are tried and true cookies and adding the lemon glaze makes these a new favorite version of a classic cookie!
Butter: Binding agent and adds moist, smooth texture and flavor.
Powdered sugar: Adds sweetness
Flour: Helps thicken the cookie.
Salt: Just a pinch to bring out the flavors and balance the sweetness.
Baking powder: Leavening agent that helps the cookies rise.
Flour: All purpose flour is best for these cookies.
Glaze
Lemon juice: Whisk together with lemon zest and powdered sugar.
Powdered sugar: A bit of sweetness in the glaze
Lemon zest: This is where the lemon flavor really comes from. Zest in fine pieces and add more or less according to how lemony you want your glaze.
Homemade Cookie Recipe:
Shortbread cookies are one of the easiest cookies to bake! They come together so fast and you will amazed how simple and delicious they are.
Prep: Preheat oven to 350 degrees. Line your baking pan with parchment paper.
Mix: In a stand mixer or using a hand mixer add the butter and beat until fluffy. Add in the powdered sugar, zest of lemon and juice of lemon.
Combine dry ingredients: In a medium sized bowl combine the flour, salt and baking powder. Slowly add it to the butter mixture and mix until combined.
Roll out dough: Add the dough to a lightly floured surface and roll out to 1/4 inch thick. Using a round cookie cutter cut out the cookies and lay them onto a baking sheet.
Bake: Place cookies in the oven for 10-12 minutes or until lightly brown. Remove and let cool.
To make the glaze: In a small bowl whisk the lemon juice, powdered sugar, and zest of one lemon. Dip the top of each cookie into the glaze and place on a wire rack to set.
Tips for the Best Shortbread Cookie:
This familiar dense shortbread cookie is so perfect with the unexpected bright lemon flavor. My pro tips will help you achieve the BEST cookie ever are easier than you think!
Parchment paper: Lining your cookie sheet with parchment paper will save you so much time and help you create the perfect cookie. The parchment paper is naturally non-stick, so you do not have to use any sprays on your pan, and clean up will be so much simpler. Moving your cookies off the tray and onto a cooling rack will be so much easier as well and your cookies will not crack or fall apart as you move them.
Use chilled dough: Once you prepare your dough, place it in the refrigerator to cool for at least 30 minutes before baking. Cooling the dough will keep your cookies from spreading out too much during baking.
Know when to take them out of the oven: Pull the cookies out when they start to turn to a light golden brown on the bottom or the very edges. They should no longer be white.
Add depth of flavor: Adding spices like rosemary or lavender creates an even more complex flavor in the cookie. Very finely chop these spices before adding them into the dough.
Presentation: Play around with different cookie cutters to make a festive display in star shapes or whatever coincides with your theme. Coloring the frosting with bright colors will also liven up any party!
Glaze: Apply the glaze while the cookies are still a little bit warm so the cookies don’t crack.
Storing Shortbread Cookies:
These cookies store very well and the dough can be made ahead too. Keep some of this perfect dough in your freezer and pull it out as needed to bake a last-minute sweet treat!
Cookie dough: Roll dough into a log shape or cut go ahead and cut into cookies. Then place them in the refrigerator or freezer. If storing in already cut pieces, you will want to separate them with wax paper so they don’t stick together. The dough will be good for 2 days in the refrigerator or 4-6 months in the freezer.
Finished cookies: Be sure your cookies are completely cooled, including the glaze before storing them. Stack in layers with wax paper between each layer. They will stay fresh at room temperature for about a week.
More Shortbread Cookie Recipes:
Samoa Thumbprint Cookies
Chocolate Peppermint Dipped Shortbread Cookies
Almond Thumbprint Cookies
Chocolate Chip Shortbread Cookies
Twix Thumbprint Cookies
Print
Buttery Lemon Shortbread Cookies with a Glaze
Buttery Lemon Shortbread Cookies with a Glaze are light and fresh with vibrant sweet and sour flavors that are surprisingly easy to create! Every bite is packed with a burst of lemon flavor and the shortbread has the perfect dense, buttery texture that will make this your new favorite cookie!
Course Dessert
Cuisine American
Keyword buttery lemon shortbread cookies, buttery shortbread cookies, buttery shortbread cookies with a glaze, lemon cookies
Prep Time 15 minutes
Cook Time 15 minutes
Total Time 30 minutes
Servings 24 Cookies
Calories 327kcal
Author Alyssa Rivers
Ingredients
To Make the Cookies:
2 cups butter softened
1 cup powdered sugar
zest of one lemon
juice of one lemon
4 cups flour
1/2 teaspoons salt
1/2 teaspoon baking powder
4 cups flour
To Make the Glaze:
3 Tablespoons lemon juice
1 cup powdered sugar
zest of one lemon
Instructions
Preheat oven to 350 degrees. In a stand mixer or using a hand mixer add the butter and beat until fluffy. Add in the powdered sugar, zest of one lemon and juice of one lemon.
In a medium sized bowl combine the flour, salt and baking powder. Slowly add it to the butter mixture and mix until combined .
Add the dough to a lightly floured surface and roll out to 1/4 inch thick. Using a round cookie cutter cut out the cookies and lay them onto a baking sheet. Bake for 10-12 minutes or until lightly brown. Remove and let cool.
To Make the Glaze:
In a small bowl whisk the lemon juice, powdered sugar, and zest of one lemon. Dip the top of each cookie into the glaze and place on a wire rack to set.
Nutrition
Calories: 327kcal | Carbohydrates: 42g | Protein: 4g | Fat: 16g | Saturated Fat: 10g | Cholesterol: 41mg | Sodium: 185mg | Potassium: 59mg | Fiber: 1g | Sugar: 10g | Vitamin A: 473IU | Vitamin C: 1mg | Calcium: 14mg | Iron: 2mg
from The Recipe Critic https://ift.tt/3e3er05
https://ift.tt/3fb0ONK
Buttery Lemon Shortbread Cookies with a Glaze are light and fresh with vibrant sweet and sour flavors that are surprisingly easy to create! Every bite is packed with a burst of lemon flavor and the shortbread has the perfect dense, buttery texture that will make this your new favorite cookie!
For more of the freshness of lemon with the amazing texture of shortbread, try Lemon Tart with a Buttery Shortbread Crust. It is an easy and delicious homemade fresh lemon curd in a buttery shortbread crust.
Buttery Lemon Shortbread Cookies with a Glaze
Warm summer days call for light and vibrant desserts that are both satisfying and refreshing. Classic shortbread cookies are a tried and true choice with their melt-in-your-mouth buttery texture. Now, by adding in the subtle lemon flavor and the sweet glaze, this classic cookie becomes perfectly bright. Calling these the best cookies ever would not be an overstatement. They are heavenly!
Lemon shortbread cookies are perfect for any occasion because of their soft and sweet buttery texture and their inspired lemon zip. Best of all these crowd-pleasing cookies are simple to make and the dough is easy to prepare ahead of time. Make a couple of batches at a time and freeze some of the dough until you are ready to bake them. You will be asked to make these over and over. So, go ahead and pre-heat that oven and see for yourself how perfect this cookie really is!
Shortbread Cookie Ingredients:
Since this recipe requires no special equipment and all pantry staple ingredients, it makes a great beginner cookie. Shortbread cookies are tried and true cookies and adding the lemon glaze makes these a new favorite version of a classic cookie!
Butter: Binding agent and adds moist, smooth texture and flavor.
Powdered sugar: Adds sweetness
Flour: Helps thicken the cookie.
Salt: Just a pinch to bring out the flavors and balance the sweetness.
Baking powder: Leavening agent that helps the cookies rise.
Flour: All purpose flour is best for these cookies.
Glaze
Lemon juice: Whisk together with lemon zest and powdered sugar.
Powdered sugar: A bit of sweetness in the glaze
Lemon zest: This is where the lemon flavor really comes from. Zest in fine pieces and add more or less according to how lemony you want your glaze.
Homemade Cookie Recipe:
Shortbread cookies are one of the easiest cookies to bake! They come together so fast and you will amazed how simple and delicious they are.
Prep: Preheat oven to 350 degrees. Line your baking pan with parchment paper.
Mix: In a stand mixer or using a hand mixer add the butter and beat until fluffy. Add in the powdered sugar, zest of lemon and juice of lemon.
Combine dry ingredients: In a medium sized bowl combine the flour, salt and baking powder. Slowly add it to the butter mixture and mix until combined.
Roll out dough: Add the dough to a lightly floured surface and roll out to 1/4 inch thick. Using a round cookie cutter cut out the cookies and lay them onto a baking sheet.
Bake: Place cookies in the oven for 10-12 minutes or until lightly brown. Remove and let cool.
To make the glaze: In a small bowl whisk the lemon juice, powdered sugar, and zest of one lemon. Dip the top of each cookie into the glaze and place on a wire rack to set.
Tips for the Best Shortbread Cookie:
This familiar dense shortbread cookie is so perfect with the unexpected bright lemon flavor. My pro tips will help you achieve the BEST cookie ever are easier than you think!
Parchment paper: Lining your cookie sheet with parchment paper will save you so much time and help you create the perfect cookie. The parchment paper is naturally non-stick, so you do not have to use any sprays on your pan, and clean up will be so much simpler. Moving your cookies off the tray and onto a cooling rack will be so much easier as well and your cookies will not crack or fall apart as you move them.
Use chilled dough: Once you prepare your dough, place it in the refrigerator to cool for at least 30 minutes before baking. Cooling the dough will keep your cookies from spreading out too much during baking.
Know when to take them out of the oven: Pull the cookies out when they start to turn to a light golden brown on the bottom or the very edges. They should no longer be white.
Add depth of flavor: Adding spices like rosemary or lavender creates an even more complex flavor in the cookie. Very finely chop these spices before adding them into the dough.
Presentation: Play around with different cookie cutters to make a festive display in star shapes or whatever coincides with your theme. Coloring the frosting with bright colors will also liven up any party!
Glaze: Apply the glaze while the cookies are still a little bit warm so the cookies don’t crack.
Storing Shortbread Cookies:
These cookies store very well and the dough can be made ahead too. Keep some of this perfect dough in your freezer and pull it out as needed to bake a last-minute sweet treat!
Cookie dough: Roll dough into a log shape or cut go ahead and cut into cookies. Then place them in the refrigerator or freezer. If storing in already cut pieces, you will want to separate them with wax paper so they don’t stick together. The dough will be good for 2 days in the refrigerator or 4-6 months in the freezer.
Finished cookies: Be sure your cookies are completely cooled, including the glaze before storing them. Stack in layers with wax paper between each layer. They will stay fresh at room temperature for about a week.
More Shortbread Cookie Recipes:
Samoa Thumbprint Cookies
Chocolate Peppermint Dipped Shortbread Cookies
Almond Thumbprint Cookies
Chocolate Chip Shortbread Cookies
Twix Thumbprint Cookies
Print
Buttery Lemon Shortbread Cookies with a Glaze
Buttery Lemon Shortbread Cookies with a Glaze are light and fresh with vibrant sweet and sour flavors that are surprisingly easy to create! Every bite is packed with a burst of lemon flavor and the shortbread has the perfect dense, buttery texture that will make this your new favorite cookie!
Course Dessert
Cuisine American
Keyword buttery lemon shortbread cookies, buttery shortbread cookies, buttery shortbread cookies with a glaze, lemon cookies
Prep Time 15 minutes
Cook Time 15 minutes
Total Time 30 minutes
Servings 24 Cookies
Calories 327kcal
Author Alyssa Rivers
Ingredients
To Make the Cookies:
2 cups butter softened
1 cup powdered sugar
zest of one lemon
juice of one lemon
4 cups flour
1/2 teaspoons salt
1/2 teaspoon baking powder
4 cups flour
To Make the Glaze:
3 Tablespoons lemon juice
1 cup powdered sugar
zest of one lemon
Instructions
Preheat oven to 350 degrees. In a stand mixer or using a hand mixer add the butter and beat until fluffy. Add in the powdered sugar, zest of one lemon and juice of one lemon.
In a medium sized bowl combine the flour, salt and baking powder. Slowly add it to the butter mixture and mix until combined .
Add the dough to a lightly floured surface and roll out to 1/4 inch thick. Using a round cookie cutter cut out the cookies and lay them onto a baking sheet. Bake for 10-12 minutes or until lightly brown. Remove and let cool.
To Make the Glaze:
In a small bowl whisk the lemon juice, powdered sugar, and zest of one lemon. Dip the top of each cookie into the glaze and place on a wire rack to set.
Nutrition
Calories: 327kcal | Carbohydrates: 42g | Protein: 4g | Fat: 16g | Saturated Fat: 10g | Cholesterol: 41mg | Sodium: 185mg | Potassium: 59mg | Fiber: 1g | Sugar: 10g | Vitamin A: 473IU | Vitamin C: 1mg | Calcium: 14mg | Iron: 2mg
from The Recipe Critic https://ift.tt/3e3er05
via Blogger https://ift.tt/3ixICQu
0 notes
Quote
Buttery Lemon Shortbread Cookies with a Glaze are light and fresh with vibrant sweet and sour flavors that are surprisingly easy to create! Every bite is packed with a burst of lemon flavor and the shortbread has the perfect dense, buttery texture that will make this your new favorite cookie!
For more of the freshness of lemon with the amazing texture of shortbread, try Lemon Tart with a Buttery Shortbread Crust. It is an easy and delicious homemade fresh lemon curd in a buttery shortbread crust.
Buttery Lemon Shortbread Cookies with a Glaze
Warm summer days call for light and vibrant desserts that are both satisfying and refreshing. Classic shortbread cookies are a tried and true choice with their melt-in-your-mouth buttery texture. Now, by adding in the subtle lemon flavor and the sweet glaze, this classic cookie becomes perfectly bright. Calling these the best cookies ever would not be an overstatement. They are heavenly!
Lemon shortbread cookies are perfect for any occasion because of their soft and sweet buttery texture and their inspired lemon zip. Best of all these crowd-pleasing cookies are simple to make and the dough is easy to prepare ahead of time. Make a couple of batches at a time and freeze some of the dough until you are ready to bake them. You will be asked to make these over and over. So, go ahead and pre-heat that oven and see for yourself how perfect this cookie really is!
Shortbread Cookie Ingredients:
Since this recipe requires no special equipment and all pantry staple ingredients, it makes a great beginner cookie. Shortbread cookies are tried and true cookies and adding the lemon glaze makes these a new favorite version of a classic cookie!
Butter: Binding agent and adds moist, smooth texture and flavor.
Powdered sugar: Adds sweetness
Flour: Helps thicken the cookie.
Salt: Just a pinch to bring out the flavors and balance the sweetness.
Baking powder: Leavening agent that helps the cookies rise.
Flour: All purpose flour is best for these cookies.
Glaze
Lemon juice: Whisk together with lemon zest and powdered sugar.
Powdered sugar: A bit of sweetness in the glaze
Lemon zest: This is where the lemon flavor really comes from. Zest in fine pieces and add more or less according to how lemony you want your glaze.
Homemade Cookie Recipe:
Shortbread cookies are one of the easiest cookies to bake! They come together so fast and you will amazed how simple and delicious they are.
Prep: Preheat oven to 350 degrees. Line your baking pan with parchment paper.
Mix: In a stand mixer or using a hand mixer add the butter and beat until fluffy. Add in the powdered sugar, zest of lemon and juice of lemon.
Combine dry ingredients: In a medium sized bowl combine the flour, salt and baking powder. Slowly add it to the butter mixture and mix until combined.
Roll out dough: Add the dough to a lightly floured surface and roll out to 1/4 inch thick. Using a round cookie cutter cut out the cookies and lay them onto a baking sheet.
Bake: Place cookies in the oven for 10-12 minutes or until lightly brown. Remove and let cool.
To make the glaze: In a small bowl whisk the lemon juice, powdered sugar, and zest of one lemon. Dip the top of each cookie into the glaze and place on a wire rack to set.
Tips for the Best Shortbread Cookie:
This familiar dense shortbread cookie is so perfect with the unexpected bright lemon flavor. My pro tips will help you achieve the BEST cookie ever are easier than you think!
Parchment paper: Lining your cookie sheet with parchment paper will save you so much time and help you create the perfect cookie. The parchment paper is naturally non-stick, so you do not have to use any sprays on your pan, and clean up will be so much simpler. Moving your cookies off the tray and onto a cooling rack will be so much easier as well and your cookies will not crack or fall apart as you move them.
Use chilled dough: Once you prepare your dough, place it in the refrigerator to cool for at least 30 minutes before baking. Cooling the dough will keep your cookies from spreading out too much during baking.
Know when to take them out of the oven: Pull the cookies out when they start to turn to a light golden brown on the bottom or the very edges. They should no longer be white.
Add depth of flavor: Adding spices like rosemary or lavender creates an even more complex flavor in the cookie. Very finely chop these spices before adding them into the dough.
Presentation: Play around with different cookie cutters to make a festive display in star shapes or whatever coincides with your theme. Coloring the frosting with bright colors will also liven up any party!
Glaze: Apply the glaze while the cookies are still a little bit warm so the cookies don’t crack.
Storing Shortbread Cookies:
These cookies store very well and the dough can be made ahead too. Keep some of this perfect dough in your freezer and pull it out as needed to bake a last-minute sweet treat!
Cookie dough: Roll dough into a log shape or cut go ahead and cut into cookies. Then place them in the refrigerator or freezer. If storing in already cut pieces, you will want to separate them with wax paper so they don’t stick together. The dough will be good for 2 days in the refrigerator or 4-6 months in the freezer.
Finished cookies: Be sure your cookies are completely cooled, including the glaze before storing them. Stack in layers with wax paper between each layer. They will stay fresh at room temperature for about a week.
More Shortbread Cookie Recipes:
Samoa Thumbprint Cookies
Chocolate Peppermint Dipped Shortbread Cookies
Almond Thumbprint Cookies
Chocolate Chip Shortbread Cookies
Twix Thumbprint Cookies
Print
Buttery Lemon Shortbread Cookies with a Glaze
Buttery Lemon Shortbread Cookies with a Glaze are light and fresh with vibrant sweet and sour flavors that are surprisingly easy to create! Every bite is packed with a burst of lemon flavor and the shortbread has the perfect dense, buttery texture that will make this your new favorite cookie!
Course Dessert
Cuisine American
Keyword buttery lemon shortbread cookies, buttery shortbread cookies, buttery shortbread cookies with a glaze, lemon cookies
Prep Time 15 minutes
Cook Time 15 minutes
Total Time 30 minutes
Servings 24 Cookies
Calories 327kcal
Author Alyssa Rivers
Ingredients
To Make the Cookies:
2 cups butter softened
1 cup powdered sugar
zest of one lemon
juice of one lemon
4 cups flour
1/2 teaspoons salt
1/2 teaspoon baking powder
4 cups flour
To Make the Glaze:
3 Tablespoons lemon juice
1 cup powdered sugar
zest of one lemon
Instructions
Preheat oven to 350 degrees. In a stand mixer or using a hand mixer add the butter and beat until fluffy. Add in the powdered sugar, zest of one lemon and juice of one lemon.
In a medium sized bowl combine the flour, salt and baking powder. Slowly add it to the butter mixture and mix until combined .
Add the dough to a lightly floured surface and roll out to 1/4 inch thick. Using a round cookie cutter cut out the cookies and lay them onto a baking sheet. Bake for 10-12 minutes or until lightly brown. Remove and let cool.
To Make the Glaze:
In a small bowl whisk the lemon juice, powdered sugar, and zest of one lemon. Dip the top of each cookie into the glaze and place on a wire rack to set.
Nutrition
Calories: 327kcal | Carbohydrates: 42g | Protein: 4g | Fat: 16g | Saturated Fat: 10g | Cholesterol: 41mg | Sodium: 185mg | Potassium: 59mg | Fiber: 1g | Sugar: 10g | Vitamin A: 473IU | Vitamin C: 1mg | Calcium: 14mg | Iron: 2mg
from The Recipe Critic https://ift.tt/3e3er05
http://easyfoodnetwork.blogspot.com/2020/07/buttery-lemon-shortbread-cookies-with.html
0 notes
Text
Caprese Sandwich with Basil Pesto
A Caprese Sandwich with Basil Pesto is a thick ciabatta bread stuffed with layers of tomato, mozzarella, and fresh pesto. Add a drizzle of a balsamic glaze and you will have a homemade sandwich that is better than anything you could buy at a restaurant!
The Caprese pairing of mozzarella, tomato, and basil is so amazing you will want to make it again and again. Try Caprese Skewers for a great appetizer version!
Caprese Sandwich with Basil Pesto
This caprese sandwich is a perfect twist on the caprese salad. The soft chewy bread that is coated in fresh pesto is the perfect platform for the sweet tomato and mozzarella. Each bite delivers juicy tomato and tangy balsamic dressing. The nutty flavors from the pesto balance out the flavors perfectly!
Best of all, this caprese sandwich is easy to make and take! It takes just minutes to prepare and is the perfect picnic food. Wrap it tightly in sandwich wrap or aluminum foil and pack it for a beautiful lunch outside. It is so light but filling and is a homemade lunch your whole family will go crazy over!
What do I Need to Make a Caprese Sandwich?
A made from scratch pesto will make a huge difference in the finished sandwich. The pesto will soak into the bread and create the perfect moist texture. To learn how to make the best pesto check out my homemade pesto recipe!
Basil Pesto
Basil: The main source of flavor so choose fresh, green basil leaves.
Parmesan: Freshly grated for the most flavor.
Garlic: We love garlic so 3 cloves works well for us. However, if you aren’t as into a garlic flavor, start with less and add more in as you taste it. Overall, you want the flavor of the pesto to be balanced between all the flavors.
Pine Nuts: Great nutty flavor! Swap for walnuts if you prefer.
Olive Oil: Use a high quality extra virgin olive oil for the best flavor!
Sandwich:
Tomato: Slice to 1/4 inch thick, then layer with mozzarella slices.
Mozzarella Cheese Slices: Lay cheese directly on pesto before adding tomatoes.
Ciabatta Buns: Or bread of your choice.
Balsamic glaze: Drizzle over the tomatoes.
How to Make Caprese Sandwich and Basil Pesto:
This caprese sandwich is easy to make and even easier to fall in love with! First, slather your delicious made from scratch pesto all over the soft bread. Then layer it up with fresh tomato, mozzarella, and balsamic glaze and you have the most amazing sandwich in just minutes!
Blend pesto: In a food processor first combine basil, parmesan, garlic, pine nuts and olive oil. Then pulse until the olive oil looks emulsified and the pesto looks uniform.
Build sandwich: First slice the bread in half and spread pesto on one side. Next, layer the cheese and tomatoes and finally drizzle with balsamic glaze.
Sandwich Variations:
The tried and true caprese ingredients like tomato, mozzarella and basil are the start of any delicious recipe. But when you add bread and pesto and turn it into a sandwich it is even better! Now try a few more variations to create your favorite version of this traditional flavor combination.
Protein: Add turkey, chicken, or flank steak to add a great protein.
Bread: A thick, sturdy bread is best for this sandwich. Ciabatta is great but can easily be swapped out for a sourdough or focaccia.
Warm it up! Heat your sandwich in a panini press or on a grill pan for the perfect ooey gooey sandwich! Before you start, brush the outside of the bread with a little bit of oil to get the perfect crispy toasted bread.
Shortcut: For last minute time saving use store bought pesto.
Make your own Balsamic Glaze: Heat 1 cup of balsamic vinegar over medium-low heat until it reduces down to about half. This will thicken it and bring the flavor out. For a sweeter glaze, add 1/4 cup apple juice to 1/2 cup balsamic vinegar before reducing.
Green: Add arugula to your sandwich for a little bit of crunch and even more color!
No cheese? Replace the cheese with creamy avocado slices!
More Caprese Inspired Recipes:
Caprese Pasta Salad
Farro Caprese Salad
Chicken Caprese Macaroni and Cheese
Easiest Bruchetta Recipe
Chicken Caprese Pasta Casserole
Print
Caprese Sandwich with Basil Pesto
A Caprese Sandwich with Basil Pesto is a thick ciabatta bread stuffed with layers of tomato, mozzarella, and fresh pesto. Add a drizzle of a balsamic glaze and you will have a homemade sandwich that is better than anything you could buy at a restaurant!
Course Dinner, Main Course
Cuisine Italian, Italian American
Keyword basil pesto chicken sandwich, caprese sandwich, caprese sandwich with basil, caprese sandwich with basil pesto
Prep Time 15 minutes
Total Time 15 minutes
Servings 4 Sandwiches
Calories 422kcal
Author Alyssa Rivers
Ingredients
Basil Pesto:
2 cups fresh basil
1/2 cup freshly grated parmesan
3 garlic cloves
1/4 cup pine nuts
1/2 olive oil
Sandwich:
1 medium tomato sliced 1/4 inch thick
8 slices mozzarella cheese 1/4 inch thick
4 ciabatta buns or bread of choice
balsamic glaze for drizzle
Instructions
In a food processor combine basil, parmesan, garlic, pine nuts and olive oil. Pulse until the olive oil looks emulsified and the pesto looks uniform.
To make the sandwiches: Slice the bread in half and spread pesto on one side. Layer the cheese and tomatoes and drizzle with balsamic glaze.
Nutrition
Calories: 422kcal | Carbohydrates: 31g | Protein: 24g | Fat: 23g | Saturated Fat: 10g | Cholesterol: 56mg | Sodium: 823mg | Potassium: 226mg | Fiber: 1g | Sugar: 2g | Vitamin A: 1380IU | Vitamin C: 7mg | Calcium: 453mg | Iron: 1mg
from The Recipe Critic https://ift.tt/3g0Gj6H
https://ift.tt/3dKmAXu
A Caprese Sandwich with Basil Pesto is a thick ciabatta bread stuffed with layers of tomato, mozzarella, and fresh pesto. Add a drizzle of a balsamic glaze and you will have a homemade sandwich that is better than anything you could buy at a restaurant!
The Caprese pairing of mozzarella, tomato, and basil is so amazing you will want to make it again and again. Try Caprese Skewers for a great appetizer version!
Caprese Sandwich with Basil Pesto
This caprese sandwich is a perfect twist on the caprese salad. The soft chewy bread that is coated in fresh pesto is the perfect platform for the sweet tomato and mozzarella. Each bite delivers juicy tomato and tangy balsamic dressing. The nutty flavors from the pesto balance out the flavors perfectly!
Best of all, this caprese sandwich is easy to make and take! It takes just minutes to prepare and is the perfect picnic food. Wrap it tightly in sandwich wrap or aluminum foil and pack it for a beautiful lunch outside. It is so light but filling and is a homemade lunch your whole family will go crazy over!
What do I Need to Make a Caprese Sandwich?
A made from scratch pesto will make a huge difference in the finished sandwich. The pesto will soak into the bread and create the perfect moist texture. To learn how to make the best pesto check out my homemade pesto recipe!
Basil Pesto
Basil: The main source of flavor so choose fresh, green basil leaves.
Parmesan: Freshly grated for the most flavor.
Garlic: We love garlic so 3 cloves works well for us. However, if you aren’t as into a garlic flavor, start with less and add more in as you taste it. Overall, you want the flavor of the pesto to be balanced between all the flavors.
Pine Nuts: Great nutty flavor! Swap for walnuts if you prefer.
Olive Oil: Use a high quality extra virgin olive oil for the best flavor!
Sandwich:
Tomato: Slice to 1/4 inch thick, then layer with mozzarella slices.
Mozzarella Cheese Slices: Lay cheese directly on pesto before adding tomatoes.
Ciabatta Buns: Or bread of your choice.
Balsamic glaze: Drizzle over the tomatoes.
How to Make Caprese Sandwich and Basil Pesto:
This caprese sandwich is easy to make and even easier to fall in love with! First, slather your delicious made from scratch pesto all over the soft bread. Then layer it up with fresh tomato, mozzarella, and balsamic glaze and you have the most amazing sandwich in just minutes!
Blend pesto: In a food processor first combine basil, parmesan, garlic, pine nuts and olive oil. Then pulse until the olive oil looks emulsified and the pesto looks uniform.
Build sandwich: First slice the bread in half and spread pesto on one side. Next, layer the cheese and tomatoes and finally drizzle with balsamic glaze.
Sandwich Variations:
The tried and true caprese ingredients like tomato, mozzarella and basil are the start of any delicious recipe. But when you add bread and pesto and turn it into a sandwich it is even better! Now try a few more variations to create your favorite version of this traditional flavor combination.
Protein: Add turkey, chicken, or flank steak to add a great protein.
Bread: A thick, sturdy bread is best for this sandwich. Ciabatta is great but can easily be swapped out for a sourdough or focaccia.
Warm it up! Heat your sandwich in a panini press or on a grill pan for the perfect ooey gooey sandwich! Before you start, brush the outside of the bread with a little bit of oil to get the perfect crispy toasted bread.
Shortcut: For last minute time saving use store bought pesto.
Make your own Balsamic Glaze: Heat 1 cup of balsamic vinegar over medium-low heat until it reduces down to about half. This will thicken it and bring the flavor out. For a sweeter glaze, add 1/4 cup apple juice to 1/2 cup balsamic vinegar before reducing.
Green: Add arugula to your sandwich for a little bit of crunch and even more color!
No cheese? Replace the cheese with creamy avocado slices!
More Caprese Inspired Recipes:
Caprese Pasta Salad
Farro Caprese Salad
Chicken Caprese Macaroni and Cheese
Easiest Bruchetta Recipe
Chicken Caprese Pasta Casserole
Print
Caprese Sandwich with Basil Pesto
A Caprese Sandwich with Basil Pesto is a thick ciabatta bread stuffed with layers of tomato, mozzarella, and fresh pesto. Add a drizzle of a balsamic glaze and you will have a homemade sandwich that is better than anything you could buy at a restaurant!
Course Dinner, Main Course
Cuisine Italian, Italian American
Keyword basil pesto chicken sandwich, caprese sandwich, caprese sandwich with basil, caprese sandwich with basil pesto
Prep Time 15 minutes
Total Time 15 minutes
Servings 4 Sandwiches
Calories 422kcal
Author Alyssa Rivers
Ingredients
Basil Pesto:
2 cups fresh basil
1/2 cup freshly grated parmesan
3 garlic cloves
1/4 cup pine nuts
1/2 olive oil
Sandwich:
1 medium tomato sliced 1/4 inch thick
8 slices mozzarella cheese 1/4 inch thick
4 ciabatta buns or bread of choice
balsamic glaze for drizzle
Instructions
In a food processor combine basil, parmesan, garlic, pine nuts and olive oil. Pulse until the olive oil looks emulsified and the pesto looks uniform.
To make the sandwiches: Slice the bread in half and spread pesto on one side. Layer the cheese and tomatoes and drizzle with balsamic glaze.
Nutrition
Calories: 422kcal | Carbohydrates: 31g | Protein: 24g | Fat: 23g | Saturated Fat: 10g | Cholesterol: 56mg | Sodium: 823mg | Potassium: 226mg | Fiber: 1g | Sugar: 2g | Vitamin A: 1380IU | Vitamin C: 7mg | Calcium: 453mg | Iron: 1mg
from The Recipe Critic https://ift.tt/3g0Gj6H
via Blogger https://ift.tt/2Z9lnDG
0 notes
Quote
A Caprese Sandwich with Basil Pesto is a thick ciabatta bread stuffed with layers of tomato, mozzarella, and fresh pesto. Add a drizzle of a balsamic glaze and you will have a homemade sandwich that is better than anything you could buy at a restaurant!
The Caprese pairing of mozzarella, tomato, and basil is so amazing you will want to make it again and again. Try Caprese Skewers for a great appetizer version!
Caprese Sandwich with Basil Pesto
This caprese sandwich is a perfect twist on the caprese salad. The soft chewy bread that is coated in fresh pesto is the perfect platform for the sweet tomato and mozzarella. Each bite delivers juicy tomato and tangy balsamic dressing. The nutty flavors from the pesto balance out the flavors perfectly!
Best of all, this caprese sandwich is easy to make and take! It takes just minutes to prepare and is the perfect picnic food. Wrap it tightly in sandwich wrap or aluminum foil and pack it for a beautiful lunch outside. It is so light but filling and is a homemade lunch your whole family will go crazy over!
What do I Need to Make a Caprese Sandwich?
A made from scratch pesto will make a huge difference in the finished sandwich. The pesto will soak into the bread and create the perfect moist texture. To learn how to make the best pesto check out my homemade pesto recipe!
Basil Pesto
Basil: The main source of flavor so choose fresh, green basil leaves.
Parmesan: Freshly grated for the most flavor.
Garlic: We love garlic so 3 cloves works well for us. However, if you aren’t as into a garlic flavor, start with less and add more in as you taste it. Overall, you want the flavor of the pesto to be balanced between all the flavors.
Pine Nuts: Great nutty flavor! Swap for walnuts if you prefer.
Olive Oil: Use a high quality extra virgin olive oil for the best flavor!
Sandwich:
Tomato: Slice to 1/4 inch thick, then layer with mozzarella slices.
Mozzarella Cheese Slices: Lay cheese directly on pesto before adding tomatoes.
Ciabatta Buns: Or bread of your choice.
Balsamic glaze: Drizzle over the tomatoes.
How to Make Caprese Sandwich and Basil Pesto:
This caprese sandwich is easy to make and even easier to fall in love with! First, slather your delicious made from scratch pesto all over the soft bread. Then layer it up with fresh tomato, mozzarella, and balsamic glaze and you have the most amazing sandwich in just minutes!
Blend pesto: In a food processor first combine basil, parmesan, garlic, pine nuts and olive oil. Then pulse until the olive oil looks emulsified and the pesto looks uniform.
Build sandwich: First slice the bread in half and spread pesto on one side. Next, layer the cheese and tomatoes and finally drizzle with balsamic glaze.
Sandwich Variations:
The tried and true caprese ingredients like tomato, mozzarella and basil are the start of any delicious recipe. But when you add bread and pesto and turn it into a sandwich it is even better! Now try a few more variations to create your favorite version of this traditional flavor combination.
Protein: Add turkey, chicken, or flank steak to add a great protein.
Bread: A thick, sturdy bread is best for this sandwich. Ciabatta is great but can easily be swapped out for a sourdough or focaccia.
Warm it up! Heat your sandwich in a panini press or on a grill pan for the perfect ooey gooey sandwich! Before you start, brush the outside of the bread with a little bit of oil to get the perfect crispy toasted bread.
Shortcut: For last minute time saving use store bought pesto.
Make your own Balsamic Glaze: Heat 1 cup of balsamic vinegar over medium-low heat until it reduces down to about half. This will thicken it and bring the flavor out. For a sweeter glaze, add 1/4 cup apple juice to 1/2 cup balsamic vinegar before reducing.
Green: Add arugula to your sandwich for a little bit of crunch and even more color!
No cheese? Replace the cheese with creamy avocado slices!
More Caprese Inspired Recipes:
Caprese Pasta Salad
Farro Caprese Salad
Chicken Caprese Macaroni and Cheese
Easiest Bruchetta Recipe
Chicken Caprese Pasta Casserole
Print
Caprese Sandwich with Basil Pesto
A Caprese Sandwich with Basil Pesto is a thick ciabatta bread stuffed with layers of tomato, mozzarella, and fresh pesto. Add a drizzle of a balsamic glaze and you will have a homemade sandwich that is better than anything you could buy at a restaurant!
Course Dinner, Main Course
Cuisine Italian, Italian American
Keyword basil pesto chicken sandwich, caprese sandwich, caprese sandwich with basil, caprese sandwich with basil pesto
Prep Time 15 minutes
Total Time 15 minutes
Servings 4 Sandwiches
Calories 422kcal
Author Alyssa Rivers
Ingredients
Basil Pesto:
2 cups fresh basil
1/2 cup freshly grated parmesan
3 garlic cloves
1/4 cup pine nuts
1/2 olive oil
Sandwich:
1 medium tomato sliced 1/4 inch thick
8 slices mozzarella cheese 1/4 inch thick
4 ciabatta buns or bread of choice
balsamic glaze for drizzle
Instructions
In a food processor combine basil, parmesan, garlic, pine nuts and olive oil. Pulse until the olive oil looks emulsified and the pesto looks uniform.
To make the sandwiches: Slice the bread in half and spread pesto on one side. Layer the cheese and tomatoes and drizzle with balsamic glaze.
Nutrition
Calories: 422kcal | Carbohydrates: 31g | Protein: 24g | Fat: 23g | Saturated Fat: 10g | Cholesterol: 56mg | Sodium: 823mg | Potassium: 226mg | Fiber: 1g | Sugar: 2g | Vitamin A: 1380IU | Vitamin C: 7mg | Calcium: 453mg | Iron: 1mg
from The Recipe Critic https://ift.tt/3g0Gj6H
http://easyfoodnetwork.blogspot.com/2020/06/caprese-sandwich-with-basil-pesto.html
0 notes
Text
Sticky Asian Glazed Chicken
Sticky Asian Glazed Chicken is tender and juicy chicken coated in a sticky sweet Asian sauce. This meal is ready in just thirty minutes and the flavor is awesome!
The sticky glaze sauce on the chicken is a favorite of ours. While we love the Asian flavor, we also like to mix up the flavors of the glaze. Some of my other glazed chicken recipes like Honey Orange Glazed Chicken, Cider Glazed Chicken, Glazed Lemon Honey Garlic Chicken are also insanely delicious.
Sticky Asian Glazed Chicken
Isn’t life just so dang busy? And now that it is starting to warm up outside we soak up the sun any chance that we can get. But, if there is one thing that I always try to do, its have a meal ready for my family each night. We really do enjoy coming together at the dinner table and talking and joking around. So, I really love when I am able to create an easy and delicious meal!
You have probably noticed by now that I love Asian flavored meals on the blog. Some of my most popular recipes are Asian inspired dishes and they are to die for. My favorite food is Chinese and I have been able to create restaurant quality dishes in my kitchen.
This meal instantly became one of my top five Asian recipes with the first bite!
Asian Chicken Ingredients:
The sticky and sweet sauce on these bad boys is absolutely incredible. It is made with a delicious sauce of soy sauce, hoisin sauce, sweet chili sauce, brown sugar and a squeeze of a fresh lime. Don’t all of those flavors combined sound amazing? I love how thick and sticky the sauce is glazed over the chicken.
And the very best part… it is ready in just 30 minutes. So you are able to bring a delicious Asian inspired meal to your family in no time at all!
Chicken Breasts or boneless chicken thighs: Choose thighs for a juicer softer chicken and a chicken breast for a lower fat option.
Olive Oil: This oil is used to cook the chicken and keep it from sticking to the pan.
Brown Sugar: The molasses in this sugar adds to the rich sweetness of the glaze.
Soy Sauce: This salty sauce adds to the deep savory flavor of this chicken dish.
Hoisin sauce: Look for Hoisin Sauce in the international food isle. It is a much thicker, saltier version of Teriyaki sauce.
Sweet Chili Sauce: Stores in the pantry for 1 month. Refrigerate to keep this ingredient fresh for 6-9 months.
Ginger: Ginger is easy to peel and grate using the back of a spoon and fork.
Dried red pepper flakes: Add to taste
Minced garlic: Chop the garlic yourself or use a garlic press to release intense, immediate flavor.
Juice of one lime: This equates to about 2 tablespoons of lime juice.
How to Make Asian Glazed Chicken:
Our family absolutely loved this meal! Everything about this meal turned out perfect. From the tender and juicy chicken to the sticky and sweet Asian sauce. All you need to do is garnish with some sesame seeds and chopped green onions and you have an easy restaurant quality meal right at home!
Heat a large skillet: Place skillet over medium high heat and add 1 Tbs of olive oil. Add the chicken and salt and pepper.
Cook chicken: Let chicken cook about 3 minutes on each side or until thermometer reads 165 degrees and brown on each side.
Remove Chicken: Set chicken aside on plate.
Wisk together sauce: In the same skillet whisk together brown sugar, soy sauce, hoisin sauce, sweet chili sauce, ginger, red pepper flakes, garlic and lime juice.
Bring to a boil: Let sauce cook over medium heat for 1-2 minutes until sauce thickens.
Add chicken: Place chicken back into the sauce and coat each side with the sauce. Garnish with sesame seeds and chopped green onions.
Tips for Making Asian Glazed Chicken:
Soy Allergy: Use tamari or coconut aminos to replace the soy sauce if you have a soy allergy.
Chicken: My favorite way to cook this insanely delicious meal is to use chicken thighs instead of chicken breasts. Chicken thighs give you the crispy skin on the outside and juicy flavorful chicken on the inside.
Drumsticks: A great variation I loved with this recipe is drumsticks. The bone in chicken takes about twice as long to cook depending on the thickness but was an instant favorite!
What to Serve with Asian Chicken:
Be sure to try it with Easy Fried Rice, Egg Rolls, and an Asian Kale Salad for a complete Asian theme night.
How to Store Chicken:
When you are finished with this meal you will be lucky if you have any leftovers. If so, here are some things to remember when you are storing your chicken:
Let chicken cool completely before storing
Within two hours of cooking, wrap chicken tightly with aluminum foil or put in a shallow airtight container
Refrigerate on the top shelf (when correctly wrapped and stored it should last in the refrigerator for about 3 days)
To extend the length of time you can store your chicken you can freeze it for 2-6 months
More Traditional Asian Recipes:
Asian Turkey Lettuce Wraps
Asian Barbecue Burgers
Slow Cooker Sticky Asian Ribs
Grilled Asian Garlic Steak Skewers
Asian Pan Seared Salmon Salad
Print
Sticky Asian Glazed Chicken
Sticky Asian Glazed Chicken are tender and juicy chicken breasts that get coated in a sticky sweet asian sauce. This meal is ready in just thirty minutes and the flavor is awesome!
Course Main Course
Cuisine Asian American, Chinese
Keyword asian glazed chicken, sticky asian glazed chicken
Prep Time 5 minutes
Cook Time 15 minutes
Total Time 20 minutes
Servings 4 people
Calories 357kcal
Author Alyssa Rivers
Equipment
Large Skillet
Meat Thermometer
Serving Plate
Whisk
Ingredients
1 Pound thinly sliced Chicken Breasts or boneless chicken thighs*
1 Tablespoon Olive Oil
¾ cup brown sugar
⅓ cup soy sauce
2 Tablespoons hoisin sauce
1 Tablespoon Sweet Chili Sauce
1 Tablespoons ginger peeled and grated
Pinch of dried red pepper flakes to taste
½ teaspoon minced garlic
Juice of one lime
Instructions
Heat a large skillet over medium high heat and add 1 Tbs of olive oil. Add the chicken and salt and pepper. Cook chicken about 3 minutes on each side or until thermometer reads 165 degrees and brown on each side. Set chicken aside on plate.
In the skillet whisk together brown sugar, soy sauce, hoisin sauce, sweet chili sauce, ginger, red pepper flakes, garlic and lime juice. Bring to a boil over medium heat for 1-2 minutes until sauce thickens. **
Add chicken back to the sauce and coat each side with the sauce. Garnish with sesame seeds and chopped green onions.
Video
https://therecipecritic.com/wp-content/uploads/2016/03/STICKY20ASIAN20GLAZED20CHICKEN.mp4
Notes
Updated on May 6, 2020
Original Post on: March 13, 2016
Nutrition
Calories: 357kcal | Carbohydrates: 48g | Protein: 27g | Fat: 7g | Saturated Fat: 1g | Cholesterol: 73mg | Sodium: 1395mg | Potassium: 525mg | Fiber: 1g | Sugar: 45g | Vitamin A: 34IU | Vitamin C: 1mg | Calcium: 46mg | Iron: 1mg
from The Recipe Critic https://ift.tt/2YFOAHQ
https://ift.tt/3dlLson
Sticky Asian Glazed Chicken is tender and juicy chicken coated in a sticky sweet Asian sauce. This meal is ready in just thirty minutes and the flavor is awesome!
The sticky glaze sauce on the chicken is a favorite of ours. While we love the Asian flavor, we also like to mix up the flavors of the glaze. Some of my other glazed chicken recipes like Honey Orange Glazed Chicken, Cider Glazed Chicken, Glazed Lemon Honey Garlic Chicken are also insanely delicious.
Sticky Asian Glazed Chicken
Isn’t life just so dang busy? And now that it is starting to warm up outside we soak up the sun any chance that we can get. But, if there is one thing that I always try to do, its have a meal ready for my family each night. We really do enjoy coming together at the dinner table and talking and joking around. So, I really love when I am able to create an easy and delicious meal!
You have probably noticed by now that I love Asian flavored meals on the blog. Some of my most popular recipes are Asian inspired dishes and they are to die for. My favorite food is Chinese and I have been able to create restaurant quality dishes in my kitchen.
This meal instantly became one of my top five Asian recipes with the first bite!
Asian Chicken Ingredients:
The sticky and sweet sauce on these bad boys is absolutely incredible. It is made with a delicious sauce of soy sauce, hoisin sauce, sweet chili sauce, brown sugar and a squeeze of a fresh lime. Don’t all of those flavors combined sound amazing? I love how thick and sticky the sauce is glazed over the chicken.
And the very best part… it is ready in just 30 minutes. So you are able to bring a delicious Asian inspired meal to your family in no time at all!
Chicken Breasts or boneless chicken thighs: Choose thighs for a juicer softer chicken and a chicken breast for a lower fat option.
Olive Oil: This oil is used to cook the chicken and keep it from sticking to the pan.
Brown Sugar: The molasses in this sugar adds to the rich sweetness of the glaze.
Soy Sauce: This salty sauce adds to the deep savory flavor of this chicken dish.
Hoisin sauce: Look for Hoisin Sauce in the international food isle. It is a much thicker, saltier version of Teriyaki sauce.
Sweet Chili Sauce: Stores in the pantry for 1 month. Refrigerate to keep this ingredient fresh for 6-9 months.
Ginger: Ginger is easy to peel and grate using the back of a spoon and fork.
Dried red pepper flakes: Add to taste
Minced garlic: Chop the garlic yourself or use a garlic press to release intense, immediate flavor.
Juice of one lime: This equates to about 2 tablespoons of lime juice.
How to Make Asian Glazed Chicken:
Our family absolutely loved this meal! Everything about this meal turned out perfect. From the tender and juicy chicken to the sticky and sweet Asian sauce. All you need to do is garnish with some sesame seeds and chopped green onions and you have an easy restaurant quality meal right at home!
Heat a large skillet: Place skillet over medium high heat and add 1 Tbs of olive oil. Add the chicken and salt and pepper.
Cook chicken: Let chicken cook about 3 minutes on each side or until thermometer reads 165 degrees and brown on each side.
Remove Chicken: Set chicken aside on plate.
Wisk together sauce: In the same skillet whisk together brown sugar, soy sauce, hoisin sauce, sweet chili sauce, ginger, red pepper flakes, garlic and lime juice.
Bring to a boil: Let sauce cook over medium heat for 1-2 minutes until sauce thickens.
Add chicken: Place chicken back into the sauce and coat each side with the sauce. Garnish with sesame seeds and chopped green onions.
Tips for Making Asian Glazed Chicken:
Soy Allergy: Use tamari or coconut aminos to replace the soy sauce if you have a soy allergy.
Chicken: My favorite way to cook this insanely delicious meal is to use chicken thighs instead of chicken breasts. Chicken thighs give you the crispy skin on the outside and juicy flavorful chicken on the inside.
Drumsticks: A great variation I loved with this recipe is drumsticks. The bone in chicken takes about twice as long to cook depending on the thickness but was an instant favorite!
What to Serve with Asian Chicken:
Be sure to try it with Easy Fried Rice, Egg Rolls, and an Asian Kale Salad for a complete Asian theme night.
How to Store Chicken:
When you are finished with this meal you will be lucky if you have any leftovers. If so, here are some things to remember when you are storing your chicken:
Let chicken cool completely before storing
Within two hours of cooking, wrap chicken tightly with aluminum foil or put in a shallow airtight container
Refrigerate on the top shelf (when correctly wrapped and stored it should last in the refrigerator for about 3 days)
To extend the length of time you can store your chicken you can freeze it for 2-6 months
More Traditional Asian Recipes:
Asian Turkey Lettuce Wraps
Asian Barbecue Burgers
Slow Cooker Sticky Asian Ribs
Grilled Asian Garlic Steak Skewers
Asian Pan Seared Salmon Salad
Print
Sticky Asian Glazed Chicken
Sticky Asian Glazed Chicken are tender and juicy chicken breasts that get coated in a sticky sweet asian sauce. This meal is ready in just thirty minutes and the flavor is awesome!
Course Main Course
Cuisine Asian American, Chinese
Keyword asian glazed chicken, sticky asian glazed chicken
Prep Time 5 minutes
Cook Time 15 minutes
Total Time 20 minutes
Servings 4 people
Calories 357kcal
Author Alyssa Rivers
Equipment
Large Skillet
Meat Thermometer
Serving Plate
Whisk
Ingredients
1 Pound thinly sliced Chicken Breasts or boneless chicken thighs*
1 Tablespoon Olive Oil
¾ cup brown sugar
⅓ cup soy sauce
2 Tablespoons hoisin sauce
1 Tablespoon Sweet Chili Sauce
1 Tablespoons ginger peeled and grated
Pinch of dried red pepper flakes to taste
½ teaspoon minced garlic
Juice of one lime
Instructions
Heat a large skillet over medium high heat and add 1 Tbs of olive oil. Add the chicken and salt and pepper. Cook chicken about 3 minutes on each side or until thermometer reads 165 degrees and brown on each side. Set chicken aside on plate.
In the skillet whisk together brown sugar, soy sauce, hoisin sauce, sweet chili sauce, ginger, red pepper flakes, garlic and lime juice. Bring to a boil over medium heat for 1-2 minutes until sauce thickens. **
Add chicken back to the sauce and coat each side with the sauce. Garnish with sesame seeds and chopped green onions.
Video
https://therecipecritic.com/wp-content/uploads/2016/03/STICKY20ASIAN20GLAZED20CHICKEN.mp4
Notes
Updated on May 6, 2020
Original Post on: March 13, 2016
Nutrition
Calories: 357kcal | Carbohydrates: 48g | Protein: 27g | Fat: 7g | Saturated Fat: 1g | Cholesterol: 73mg | Sodium: 1395mg | Potassium: 525mg | Fiber: 1g | Sugar: 45g | Vitamin A: 34IU | Vitamin C: 1mg | Calcium: 46mg | Iron: 1mg
from The Recipe Critic https://ift.tt/2YFOAHQ
via Blogger https://ift.tt/3fp1m3l
0 notes
Last Seen Blogs

glitter-sprouts
Momo

jacquesmarais
JacqMaraisPhoto

warriorsofwriting
Warriors of Writing

judasbreed
"This is rather urgent...Let us hurry!"

charlestonoralandfacialsurgery
Charleston Oral and Facial Surgery