#and moved my whale art print on the wall next to it
Text
I just got myself an early christmas present in the form of The Great Wave Lego wall art piece and I built it and it's amazing and beautiful and perfect and I love it so much
#noopa rambles#I put it on top of my bookshelf#and moved my whale art print on the wall next to it#said print used to be on the spot where the lego piece went so it had to be moved#I wish the print was a tiny bit closer to the wave but sadly there's a pre-existing hook on my wall#so I can't exactly put the print there in any other position bc the hook would be in the way#then I was like 'lemme put all my nautical decorations around it to fill a few empty spaces at the edges'#and ngl I ended up cackling bc I didn't even put a single compass there before it was full#I have so much nautical shit and I'm Living for it#I put my little spyglass there and I put my little lighthouse lanter in there#I already had my japanese diplomatical ship wooden 3D-puzzle up there#and let me tell you. the ship fits the vibes of the painting perrrrfectly#and then I put a littel book my mom made me that has a plants-meets-nautical theme#despite all these things I still somehow have three compasses and some other nicknacks around#I simply do not want to overcrowd the shelf#so the compasses can just keep living on my lotr shelf bc they designated Adventure#and one of them has not all those who wander are lost engraved on the lid so jfdjfd#it clearly belongs there and this way all three can hang out#the only thing I really need now is a globe#the lego set was so frigging expensive but it was on sale at my local toy store so I went yolo
1 note
·
View note
Text

Friends, my short story Ancient Hearts Unearthed, will be included in Aether Beyond the Binary, an anthology from Duck Prints Press (@duckprintspress). Above is the awesome cover art by non-binary artist Mar Spragge. Our Kickstarter runs through January 25th! It’s all about characters outside the binary (nonbinary, agender, genderqueer, etc.) in an aetherpunk setting! We’re almost 60% funded with 16 days left.
Here’s an excerpt from my story about a pair of archeologists exploring a newly uncovered cave:
Sasha almost ran into Victoria, stopping short. Over her shoulder, they saw the cavern wall. The appearance of the rock was unusual enough to draw Sasha’s attention to the fact that they’d come to a dead end. “Those markings are too regular to be natural.” They stepped around Victoria and reached out to run their fingers over the rock, feeling the way shapes had been carved into it. “They’re pictographs. Or runes, perhaps?” They turned to Victoria. “What does the ancient rune expert have to say about them?”
“I’m…” She took a long, silent moment to look at the wall, moving her light around and tracing the shapes with her fingers. “I can’t see them well enough. We need the supplies to make rubbings. And more light.”
“Where can we get anything other than aetherwork light sources?”
“Candles, I suppose.” Victoria looked down at her hand, pressing the red light on and off. “Or some sort of electricity lamp.” She snickered. “Whale oil?” Then Victoria turned and ran a hand over the runes again. “What bothers me is that these are early Age of Aether markings. You see the way they’re using archaic forms of our letters?”
Sasha leaned closer. “I’ll be damned. This doesn’t match the bronze era artifacts in the rest of the cave, either.” They made a tiny humming noise. “Who else would have this much knowledge of ancient runes?”
As Victoria leaned as close as she could to the wall, she asked distractedly, “What do you mean?”
“Obviously, it’s a fake,” they said, mulling over the problem in their head. “Sanderson has wanted my place on the admissions committee since he joined the department.”
“What if it’s not a fake?” Victoria made a tiny, excited noise. “What if this is early Aether Age work? What if this is a secret that’s been buried for almost a thousand years?”
Sasha’s heart swooped at the thought. “We have to find out what that inscription says.”
If you want to find out what happens next, please back our kickstarter campaign!
#queer fiction#terra writes things#duck prints press#aether beyond the binary#writers of tumblr#writeblr#writing community
13 notes
·
View notes
Text
Arplis - News: My 22 Goals for 2019 Week 49 of 52
My 22 Goals for 2019
Goal #1 Spend More Time Doing What I Love
Red alert people, RED ALERT. It was 6 degrees this morning when I woke up. SIX!!! That.Is.Chilly. The Girl and I were going to walk Lucy on the beach this morning but those plans have been scraped. Gaaaa. I think if its 6 degrees outside, all bets are off and you can most certainly declare it a pajama day. Whos with me on this?
Goal #2 Garden, Garden, Garden
Garden are done for the year. Yipee!
Goal #3 Plant an Orchard {Calling it Quits on this one.}
Lemon baby #3 is on the way and we are patiently awaiting her arrival.
Goal #4 Gussy Up the Potting Shed Done!
I gussied up the potting shed at our old house, but I would like to add some sort of potting station to the backyard here somewhere, but Im not sure where I would put it yet.
I did come across this photo on Author Susan Branchs Instagram page though of a picture she tooth at Colonial Williamsburg. Isnt it cute? I think I need one of those.
Goal #5 Grow Enough Extra Vegetables, Eggs and Flowers to Earn $1500 at my little roadside vegetable stand.
It was totally my intention to grow a ton of fruits and vegetables to sell at the farm-stand when I made my list of goals for 2019 last winter, but then we moved. So, that whole goal was sort of a bust. I do miss it though.
Goal #6 Finish Every Single Unfinished Rug Hooking Project in My Pattern Bin + 10 Things from back Issues of Magazines/Books Ive Been Meaning to Make.
While I didnt add any new finished hooked rug pieces in my Etsy shop this past week, I did hook 4 totally new rugs {1 of which will become a kit and 2 will be offered as patterns} as well as hand dyed a bunch of wool {that I was able to get listed in my Etsy shop}.
I have decided to go back to my old schedule of only listing new hooked rugs items on the first Friday of every month for next year as it seems less stressful to me. It allows me more time to hook, rather than stopping every few days to take photo, write up description and then post a single piece online. Doing it all in one big swoop seems less chaotic to me.
73 rugs in my pattern bin {now down to 16} < SO CLOSE!
183 hooked flowers {finished 150, now down to 33}
10 things from back issues of magazines {finished 0}
Goal #7 Create 12 New Rug Hooking Patterns {with at least half of them being large ones} DONE!
So far this year Ive added 12 new rug hooking patterns and 14 beginner rug hooking kits to my Etsy shop. I just added Santa and Rudy 1892 yesterday and am hoping to squeeze one more kit in before the end of the year.
New rug hooking patterns Ive created and added to My Etsy Shop this year:
Santa and Rudy 1892
Tullia and Thomas Turkey
Double Nantucket Whale Runner
Miss Henny and Penny
Miss Penny
Simple Kitty
Primitive Flowers
2 Fat Cats
Annabells Big Day
Old Fashioned Double Tulip
Fat Brown Hen
Busy Little Bee
Queen Bee
Rug Hooking Kits
Busy Little Bee {in 2 different colors}
Folk Art Heart
Small Nantucket Whale
Primitive Crow
Miss Robin {in 2 different colors}
Simple Kitty
Primitive Flowers
Sunflowers
A Basket of Spring Posies
Fat Brown Hen
Chickys Garden
Goal #8 Split and Stack 2 Cords of Wood for Next Winter
All that firewood! We sold it.
Goal #9 Do Something with the 5,002 Photos on My Phone
Currently at 2415 Back up to 2565.
Goal #10 -Lose the Muffin Top Done!
Sweet digity!
Goal #11 Run, Walk or Crawl a 5k, 10k, Half Marathon and Marathon
As long as its not pouring rain tomorrow. The Girl and I are on for the Half Marathon. Wish us luck!
Goal #12 Read or Listen to 26 New Books {21 down, 5 to go}
No new books this week but we are planning a trip to the library later this week.
Books Ive Read or Listened to So Far This Year:
Marilla of Green Gables #1 Still my favorite
The Great Alone #2
The Aviators Wife #3
Before We Were Yours #4
Secrets of a Charmed Life #5
Whered You Go, Bernadette #6
Carnegies Maid #7
The Gown #8
Unbroken #9
Drama#10
The Alice Network #11
The Shape of Mercy #12
Wills Red Coat #13
Big Little Lies #14
Mr. Churchills Secretary
Born to Run
I Feel Bad About My Neck
Bunny Mellon {Doesnt count because it was my second time}
On Writing {Doesnt count because it was my third time}
Walden
Finders Keepers
Delicious!
50 Things to Do in Maine Before You Die
Following Atticus
Goal #13 Try 52 New Recipes.
39 down, 13 recipes to go. We tried 2 new recipes this week. 1 was a dud and the other I will share on Tuesday. And its a good one!
Goal #14 Clean Up 52 Old Recipes on the Blog
9 down, 44 to go. Why did I make this goal? Note to self: Make fewer goals for next year.
Goal #15 Fill 100 Canning Jars 72 down, 28 to go.
I made a batch of Christmas Jam for gift giving PLUS I tried a new recipe {that was inspired by Mrs. HB} this past week and the HH and I loved it so much, that Ill be making another batch {or maybe 2} of it today {Ill share the recipe on Tuesday}.
So far this year Ive I canned:
9 Jars of..
6 jars Christmas Jam
7 jars Spiced Pomegranate Jelly
7 jars Peach Jam
7 jars of Strawberry Jam
15 jars of Carrot Cake Jam
15 jars of Spiced Pear Jam
4 jars of Almond Pears.
Goal #16 Finish Furnishing Our House
We finished the roman shades for the kitchen nook and kitchen window. I plan on taking a break from making roman shades for the next month so I can finish making kits for my Etsy shop and paint out the entire kitchen area as well as finish a couple of art projects for the walls.
Goal #17 52 Dates with the HH {44 down, 8 to go}
The HH and I went on 2 date days this past week and one of them was to the Sabbathday Lake Shaker Village for their Shaker Christmas Fair and it was so overwhelming, we left after 5 minutes.
Overwhelming in the sense that although we could tell there was going to be a lot of people at the event by the distance we had to walk to the village, what we werent expecting was that once we walked in the doors of the trustees office {where the craft fair was being held}, it was SHOULDER to SHOULDER.
Like, being at a rock concert crowded. The HH didnt even make it 2 feet in before walking out and it took me nearly 5 minutes to get from the entrance and through 3 rooms and back out the door again without even being able to look or pick up anything it was so crowded. It was nuts. And totally not in the calm, welcoming Shaker spirit and all we wanted to do was leave. And so we did.
I do want to go back though at some point to visit the museum, but it will have to be an ordinary weekday with nothing on the event calendar, thats for sure.
Goal #18 Take One Adult Education Class Done {Ive taken 3!}
Block Printing Class with my neighbor.
Spoon Carving Classwith Heather.
Mini pottery lesson {I loved it! and now I want to sign up for a full class}
Goal #19 Secret Holiday Project{s}
Block print towels
Seed packet wreaths
Tea Bag Trees
Goal #20 Create 12 Wowie Zowie Party Platters
8 down, 4 to go. We are planning on making #9 tonight!
Goal #21 Visit 12 General Stores
10 down 2 to go. We visited a new country store yesterday!! The kind that offers human made {and local} baskets to customers to do their shopping with. Ill tell you all about it next week.
H.B. Provisions in Kennebunk, Maine
Chases Daily {I think it should count}
Squam Lake Marketplace
Harrisville General Store
Dodges Store in New Boston, New Hampshire
Zebs General Store in North Conway, New Hampshire
Dan and Whits in Norwich, Vermont
Husseys General Store in Windsor, Maine
Goal #22 Compete with Carole.. Get on My Front Door Game On
Would you believe not a single person walking by {or even a neighbor} has made a comment about the leg lamp in the window? I think theyre showing restraint, while my husband keeps telling me that they are in such awe of it, they just dont know what to say.
Ummmm Okay.
Front Door Bling Ive Made So Far This Year to Compete with Carole:
Late January : Valentine Heart
Late February : Shamrock
Late March : Giant Carrot
May: White wave petunia hanging basket
June/July: Tin Star and Flag Bunting
August : Sunflower
September: Indian corn and pumpkins
October: Pumpkins and spinner do hickeys
November: Indian corn and big pumpkins
December: Leg lamp and nutcrackers in the window and giant Christmas balls on the porch
**************
How about YOU? What are your goals for 2019? If you told us about them HERE, check in! We want to know how you are doing. Because seriously, its so much easier to get those goals checked off your list when you have people rooting for you!
Have a great day everyone,

Mavis
P.S. If you are looking for a last minute gift for neighbor or a friend, I still have a few ornaments left in my Etsy shop and you can find them all HERE. UPDATE: The barred rock chicken is sold out but there are a few more chicken ornaments HERE.
You can read more about my 22 goals for 2019 HERE.
Have a Great Day!
The post My 22 Goals for 2019 Week 49 of 52 appeared first on One Hundred Dollars a Month.
This content was original published at One Hundred Dollars a Month and is copyrighted material. If you are reading this on another website it is being published without consent.
Comments
The bitter winter cold is the worst thing about Maine. On the ... by dj_1973
It's not my department, building fires that is, but maybe. It ... by Mavis Butterfield
Will you be you be using your wood burning fireplace this ... by Kim
Related Stories
My 22 Goals for 2019 Week 48 of 52
My 22 Goals for 2019 Week 47 of 52
My 22 Goals for 2019 Week 46 of 52
Arplis - News
source https://arplis.com/blogs/news/my-22-goals-for-2019-week-49-of-52
0 notes
Text
A brief history of the wall behind my bed
On one side I have a cross-stitched poem my great aunt made for me when I was a baby, and even though I don't believe in god anymore I can't take it down. Above it I have two posters from the broadway series in Aurora, Tommy and Cats. Surrounding the poem I have pictures of me and my family, my favorite of which is a picture of me and JT making silly faces at a restaurant in Chicago. On the other side I have a bunch of prints and stuff I have bought for myself. One is a lily pads picture I took out of a magazine three years ago. Above it I have postcards that say things like 'whale of a time'. I have a print of Georgia O'Keeffe's Red Hills with Flowers that I got from The Art Institute. Next to it there's a print of a pinup girl that says 'you haven't even seen my bad side yet' that Maya got me for Christmas (I love Maya, she knows me so well.) Under those I have an Atlas of the world war from before WWII in a frame (I found it for 2 dollars in a shop in Gettysburg). Next to the atlas is a painting I got in NOLA when it was my birthday a couple years ago. It's rainbow and is a drawing of Metaru Cemetery. I have two little framed paper cut outs my friends from Taiwan brought me when they came to visit last year (I MISS THEM SO MUCH I REMEMBER WHEN JACK TOLD ME HE WAS MOVING BACK TO TAIWAN AND WHEN HE GOT HIS DOG AND WHEN HE BEAT ME AT CHESS FOR THE FIRST TIME I MISS YOU JACK AND CAROLINE). The last two things are another art piece from NOLA (this one is black and white and done in pen, it's a picture of St. Louis Cemetery No. 1. The artist was very kind and had a conversation with me about Chicago) and tile art of a snow leopard I got at the Brookfield Zoo a couple years ago.
1 note
·
View note
Text
We remember the Sega Dreamcast, 20 years on
New Post has been published on https://www.articletec.com/we-remember-the-sega-dreamcast-20-years-on/
We remember the Sega Dreamcast, 20 years on
The Dreamcast itself was pretty compact, but that controller! What a chunker.
Andrew Hoyle/CNET
The Sega Dreamcast launched in Japan 20 years ago on Nov. 27, 1998. The system enjoyed a brief but memorable time in the limelight with some truly fantastic games and a few features that would inspire future consoles — it was the first console with built-in internet.
But ultimately a lack of third-party support, a somewhat underpowered architecture and the fact that the rival PlayStation 2 could play DVDs as well as games would mean a premature demise. None of that will stop us from remembering it fondly — or wishing for a Dreamcast Classic.
Morgan Little
I was in fifth grade, visiting a DisneyQuest while doing the whole Disney World thing, seeing the last gasps of 1990s interactive arcades, and there it was. That Sonic Adventure demo with the whale chase — amazing to watch and awful to play.
I wouldn’t spend any quality time with the Dreamcast until at least a year later, but seeing that showcase was astounding for the time. At that point I still just had a Genesis, so even a brief glimpse of Sonic looking halfway-decent in 3D was a revelation. And no, Sonic 3D Blast doesn’t count.
Though I never bought one myself, a good friend did, and it became the go-to console for sleepovers and wasted Saturdays. The mix of Marvel vs. Capcom 2, Power Stone, Tony Hawk’s Pro Skater 2 and that terrible Chao Garden feature from Sonic Adventure 2 was more than enough to keep us playing that Dreamcast until long after it had died and everyone else moved on. Plus, its giant controllers were still better than the awful DualShock 2 on the PlayStation 2. That’s just a fact.
Now playing:
Watch this:
Remembering the Sega Dreamcast at 20
5:49
Scott Stein
I had every Sega system that was ever made. Yes, even the 32X. I was a Sega kid — the Master System with Superscope 3D glasses was my gift after getting appendicitis. While the Genesis was my favorite, the Dreamcast is a place of special memories. I was living in LA, working as a script reader and story editor, and playing amazing NFL 2K games to connect with my dormant feelings about the New York Jets. That NFL 2K game stunned me… it was the first TV-real sports game I’d ever seen. Crazy Taxi was my LA commuting therapy. I loved the weirdness of Chu Chu Rocket. And even more, I was obsessed with Seaman.
My first E3 I ever attended had the Dreamcast, and I saw the Leonard Nimoy-voiced fish-man in all its Lynchian horror. Seaman was so ahead of its time: It had a microphone I could speak to Seaman with. It was like if Alexa were a depressed cannibal fish. In my dusty little Sherman Oaks apartment, Seaman was my mystic surrealist aquarium. Along with the Museum of Jurassic Technology in Culver City, it was part of my cabinet of curiosities that made me dream of how strange art could be. Space Channel 5, the insanely real-feeling Shenmue, and yes, I owned Typing of the Dead. It was a great system of gaming oddities.
The Dreamcast was small and beautifully designed, had arcade-perfect games, and was my first real online gaming system. May it rest in peace in my mom’s basement.
Rez Infinite is a modernized version of the Dreamcast classic. Other than the graphics, not much else was changed.
GameSpot
Dan Ackerman
The Dreamcast was the first console launch I ever covered as a novice “games journalist” at the long-forgotten (but pioneering!) games-and-culture website UGO.com. My colleagues and I all shelled out for launch day bundles, and Soul Calibur was everyone’s instant favorite.
We all ended up playing a lot of conference room Soul Calibur with UGO’s most famous employee, former child star Gary Coleman. Gary was a total fiend for Soul Calibur, and regularly held court in our Park Avenue office, taking on all challengers and dispensing endless foul-mouthed trash talk. He was actually pretty good, and probably had an 8 out of 10 win ratio.
Other early Dreamcast highlights for me included Power Stone, Shenmue, a Resident Evil knockoff called Blue Stinger (I bet I’m the only one giving that a shoutout), and bizarre fish simulator Seaman. When my now-wife used the Dreamcast microphone attachment to tell Seaman she was going to eat him, he replied, “Or maybe I’m going to eat you.” If that’s not next-gen, I don’t know what is.
I’ve come back to the Dreamcast a few times since its 2001 discontinuation, talking about it on my old talking head video game web series Play Value (circa 2006), and taking a deeper dive for the Dreamcast’s 10th anniversary, which I wrote about here.
Would I buy a new “Dreamcast Classic” micro console? Definitely. Would I plug it in more than once or twice? Probably not.
Tim Stevens
My Dreamcast memories are a little different than most. Like Scott I was a Sega kid and, like Scott, I too owned (and still own) every Sega system. But my memories of the Dreamcast weren’t so much about gaming as they were about coding. Lots and lots and lots of coding.
I was in college studying computer science and writing when the Dreamcast dropped, and my dream was to combine those passions and get a gig in the videogame industry after graduation. It was time to pick a senior thesis, and so I blindly emailed some folks at Sega to see if there was any way I could get permission to write a simple game for their hot new console.
Amazingly, I got a response. As it turns out I would not be allowed to develop anything for the Dreamcast — the development hardware alone cost thousands of dollars and I was lucky if I could afford pizza on Friday night — but I was given access to the Visual Memory Unit developer kit. The VMU, you may remember, was the tiny, Game Boy-looking thing that slotted into the controller. It had a tiny, gray and black LCD, a four-way D-pad and a couple of buttons.
Andrew Hoyle/CNET
Games for the VMU were written in assembler, an arcane language I’d never been exposed to in my studies. If that weren’t daunting enough, the only documentation for the VMU kit was in Japanese, another language I didn’t speak. Despite all that I figured it out over the following few months, then toiled and toiled and toiled to write what would be the first — and to my knowledge only — multiplayer VMU game. You could, you see, connect two of the mini handhelds together at the top thanks to a cunning, reversible connector. So, I wrote a Pong-like game played vertically, with the ball traveling from one screen to the next, back and forth.
Developing that game, plus another simple, Simon-like game, consumed my senior year at school. The resulting code, when printed out for my final thesis presentation, filled a binder as big as a phone book. Along the way I learned enough about the game development industry to realize it wasn’t for me, but that project, just me and my text editor toiling for months, is still the programming project I look back upon most fondly.
The recently remastered version of Shenmue.
GameSpot
Jeff Bakalar
I was 17 when the Dreamcast launched and was working for a dotcom start-up run by three 21-year-olds. I remember the day it went on sale, one of the partners ordered it for same-day delivery from a service called UrbanFetch.
It arrived and we didn’t do any work for the rest of the day. It was just nonstop Ready 2 Rumble. I recall being instantly impressed with how crisp the visuals were. It was a level of fidelity I hadn’t ever seen before.
Everything seemed so fast, so advanced, so futuristic. The Dreamcast arrived in between the other console cycles, so it felt like we were getting a very early glimpse into what the rest of the competition would soon be offering.
I didn’t wind up owning my own Dreamcast until college, but I eventually fell in love with Sonic Adventure, problems and all. I played most of the Tomb Raider and Resident Evil games on the Dreamcast too.
The Dreamcast will always have a place in my heart for its ridiculous memory card adapters, its mostly awful controller and the insane speed at which its disc reader would spin and adjust, like some kind of dot-matrix printer that went off the rails.
Andrew Hoyle/CNET
Jason Parker
I never actually owned a Dreamcast, but for a period in my life, I could not get enough of one game: Fighting Vipers 2. It was while I was in college and one of my friends had a Dreamcast, so when we were not out at night or studying, we’d spend hours fighting match after match.
The funny thing is, it wasn’t called Fighting Vipers 2 as far as I knew back then. My friend had a bootlegged copy on a disc and everything written on the sleeve was in Japanese, as was all the on-screen text in the game. I even had to rely on him to start up games because I couldn’t navigate the menus. At the time, he explained the game wasn’t available in the States, but it didn’t officially come to Dreamcast until 2001 and never in the US.
Now playing:
Watch this:
Our most cherished video game memories
8:00
But once he started a match, it was button-mashing heaven. I remember being blown away at the crisp 3D graphics and cool-looking fighters at that time. But the best mechanic of all, and probably the biggest reason I loved the game, was that you could kick your opponent through the wall of the arena at the end of the match.
Maybe that sounds silly, but fighting games between friends can get tense. When you can send your buddy through the wall at the end of a long fight it’s an exclamation point like no other. We’d get dramatic about it too, yelling “Boooooooom!” as we’d blast the other guy about 50 yards outside of the cage.
So, no, I didn’t own a Dreamcast, because I was a poor college student, but I still have fond memories of stomping out my good friend in Fighting Vipers 2. “You’re going through the wall!”
Jet Set Radio on the PC, running at 2,560×1,440 pixels with largely the same assets as the original, still looks great.
Screenshot by Eric Franklin/CNET
Sean Keane
The Dreamcast was the most incredible console I never owned. Games like Resident Evil: Code Veronica, Sonic Adventure and the mighty Shenmue, and features like online gaming and the VMU made me want one badly, but I just couldn’t afford it as a 12-year-old.
Code Veronica looked incredible at the time of its release — replacing static prerendered environments with fully 3D ones and bringing in some sweet sweeping shots to showcase them. The blur effect as resurrected (and newly superpowered) villain Albert Wesker darted around made my jaw drop (this was shortly after The Matrix had blown my mind at the cinema).
It got an expanded rerelease — Code Veronica X — on the PS2 in 2001, but the original version hasn’t come out on any other systems. So my Resident Evil completionist urges aren’t quite satisfied… but it’s fine. I’m fine.
Sonic Adventure seemed like an incredible expansion of Sega’s mascot into 3D, even if it’s agony to play today. That whale chase looked amazing at the time and it seemed the obvious step forward for Sonic after Mario’s glorious transition into 3D.
Shenmue was the big one though — a glorious life simulator with a rich open world that was unprecedented. Seeing Ryo Hazuki wandering around Yokosuka, Japan, as he tries to unravel the mystery of his father’s murder was fascinating, and something I only got to experience fully through the recent remaster.
Andrew Hoyle/CNET
Eric Franklin
I bought the original Japanese Dreamcast from NCSX back in November 1998 and got two games: Pen Pen Trilcelon and Virtua Fighter 3tb. While Pen Pen was and still is terrible, VF3 was anything but!
Why did I pay a premium to have this system imported? I was a Sega fanboy and the Dreamcast was where I could continue playing Sega games beyond the defunct Sega Saturn.
But as much as I loved playing the Dreamcast, looking back now, it’s clear to me what it really represented for me: A last chance at console success for Sega. I got a Sega Master System in 1987 and from then through the end of the Dreamcast’s life I was not only invested in playing Sega games, but also hugely invested — emotionally, to be sure — in Sega’s success as a console developer.
It’s probably strange for people to understand that, but here’s the way I saw it: The more successful Sega’s consoles were, the more great Sega games the company would make. I not only wanted to play those games, but to also have other people discover how great they were. To see in them what I saw in them: Games with great graphics and simple gameplay that belied a depth you had to uncover.
You could play Crazy Taxi like a normal person, sure. But if you didn’t use the Crazy Dash and the Crazy Stop, which allowed you to go from 0 to 60 in less than a second and instantly stop, then you weren’t playing it right.
That want and need for the Dreamcast to be successful was real. Even at the time I knew that if the Dreamcast didn’t sell a certain number of systems, Sega would likely leave the hardware business, which the company eventually did.
And the anticipation of each new big release was addicting for me. It was less about how much I would like Shenmue and more about whether it would push enough mainstream audience buttons to make people buy a Dreamcast over a PS2. It’s silly to think about now, but that was me.
I guess I just needed something to distract me from my real life at the time. For a few solid years, it was the Dreamcast.
Gifts for the gamer who has everything: Please that hard-to-shop-for PC gamer in your life.
CNET’s Holiday Gift Guide: The best tech gifts for 2018.
Source link
0 notes
Text
How To Create A TV Gallery Wall
Some say gallery walls are trending out in favor of larger scale art. Maybe. It makes sense that gallery walls on every wall (especially the ones with a ton of tiny frames) might feel a little less “new and fresh” these days. But I’d argue that a collection of frames hung together on the wall feels pretty classic if you stop and think about it. Watch Home Alone. They totally have a gallery wall going up their formal staircase in the foyer where Kevin sleds and hurls paint cans. But one spot I love for a gallery wall these days is actually around a TV. Why? Well, that big black box isn’t exactly gorgeous.
It’s often this hulking dark thing on an otherwise bare wall, so why not break things up and add a few other rectangular things to deemphasize it. It’s not like the TV disappears when you add a gallery – but at least you have a few other (prettier) spots to rest your eyes. And you can always turn on Planet Earth, since that makes any TV look like art in a nanosecond.
We first blogged about adding a frame gallery around our living room television, oh, FOUR AND A HALF YEARS AGO (evidence: here – also how funny is the “What Does the Fox Say?” reference – ah, 2013). Things have evolved A LOT in that room since then (hello paint!) and the gallery got a few tweaks (some new art there, some frame switches there) but it has pretty much stood the test of time. And since I get a bunch of questions every time we show a smidge of it on social media, this post is for everyone asking about framing arrangements, what to frame, how to hang them, and where we get our art. So let’s dive in, Planet Earth Style. I’ll be the whale if you’re that big school of tiny reflective fish.
Dealing With The TV
First, if you listened to last week’s podcast you heard that we got a new TV (the old and very faithful one now lives at the beach house, reunited with our old couch and it feels so good). We also decided to mount our new TV on the wall and used one of those in-wall power cord systems to hide the wire. That whole process only takes an hour or so and is SO WORTH IT. We’ve got an entire post dedicated to creating a cord-free TV wall if you’re interested in a step-by-step tutorial on that. That post also shows you how to hide a cable box if you have one. And if you’re looking to cut the cord, here’s how we did that.
But it’s not absolutely necessary to mount your TV to create a good-looking frame gallery around it. As you can see in the old photo below, we had ours resting on the media cabinet for years. But mounting it has definitely made the room feel more spacious and less cluttered. Also, we are BIG FANS of secondhand dressers as TV cabinets – this one is from a thrift store and we have a similar one in our bonus room from Craigslist.
Getting Your Frame Arrangement Right
Ok, now onto actually hanging your frames around the TV. There are a few methods you can use…
1. The Floor Method
Grab whatever frames you have on hand and want to use (or pick up new ones that you love) and lay them out on the floor, with a gap on the floor in the shape of your TV (measure it to get the correct amount of space). Then just move them around on the floor to see what layout you like. That’s how we created this very frame wall in our original post… back when our living room was overwhelmingly, mind-numbingly brown.
2. The Paper Method
This one is really easy too, and if you are worried you won’t like things once they’re up on the wall, it’s the one to try. Because it helps you visualize things right on the wall before you actually hang the frames. How? Use newspaper, brown paper bags, or even printer paper (taped together if you need to make a larger piece of paper) and cut them to the size of each frame you want to hang. Then you just tape them up on the wall using masking or painter’s tape, and move them around until you like the arrangement and are ready to put the actual frames up in place of the paper templates. You can see that method in use here in our last house where we created a frame gallery in the hallway. Less busy paper would be easier on the ol’ eyeballs, but you get the idea.
3. The Sheet Method
This is kind of a combo move of the two above. SHAROOOKEN! You arrange your frames on the floor, but on top of a large sheet of paper (like brown craft paper, red rosin paper, or even wrapping paper if that’s all you have). Once you reach the arrangement you like, trace each frame onto the paper – even marking the spot where each one hangs on the back – creating an oversized template that you can transfer right onto your wall. It’s best on small to medium sized frame groupings (like this one we hung in our last house) because you’re somewhat limited by the size of your paper roll, but this would totally work on either side of the TV (you’d make two in that case).
4. The Figure-It-Out-As-You-Go Method
You also can be a rebel and JUST HANG STUFF ON THE WALLS! I wouldn’t recommend going totally rogue and just making holes willy-nilly (although I’ve done that and spackling takes like three minutes so it’s not the biggest deal if you end up there). But if you break things down into sections it’ll help you stay on track. For example: start by getting the centering and spacing of the frames above your TV to your liking first. Then that’ll help guide the height and spacing of the frames to the left of the TV. Once those are set, you can match them on the right side.
How To Tie Frame Groupings Together
“Should I use all the same frames?” “Is there’s some sort of formula for mixing them?” “Should all of the art be black & white or all the same type of thing (all sketches, all photos, all paintings?)” Questions like this abound. So I’ll try to explain what works for us and why we typically end up there – although this is definitely one of those “we’ve seen it done so many different ways, there are probably a million ways to skin this cat” kind of things. Personally, we started with all white frames in here, and I slowly found myself craving a little more variety, so over time if I found nice light wood frames (like the two over the TV) or some pretty thin gold ones (like the five of those you see below) I slowly brought those in to mix things up.
But despite having different frames up there, these are three factors that help tie the arrangement together:
Mats! See how most of the frames above have white mats? That ties them together and helps your eye take them all in as one big “family”
Color palette! It might not be what you notice right away, but a lot of the art has similar tones – there’s a lot of green, blue, and pink. And again lots of white in the art and the mats too. Even the objects on the wall (the antlers and the faux turtle shell) are white, so nothing is too jarring and it all looks related, yet not super cloned and repetitive.
Spacing! A lot of times this is the thing that makes a wall feel off. If the frames are hung too far apart, they read more like a smattering of islands, too far away from each other to be viewed as a grouping. The ideal spacing for me is usually 2-3″ (any closer and they can feel clumped and crowded). Also remember to treat the TV like just another frame and try to mimic the same spacing around it. This can be tricky because the TV sits off the wall a bit and that depth can change the spacing depending on your vantage point. I try to step back and view things from the couch across the room, since that’s where everyone will be viewing it most frequently.
What Should I Frame?
Since our arrangement is a mix of frame types and sizes, we wanted the items that we framed to be a bit of a mix as well. Had this been a more gridded frame gallery using identical frames – like this one we did above the couch in our last house or down our old hallway – we probably would’ve kept the art more consistent too. But to give you a sense of the random mix we’ve hung here, I added some numbers to the next two photos so you can see we have up there, where we got things, and why we love ’em.
1. Family photos (one of me with our daughter and a similar shot with our son around the same age – the mat didn’t come with that frame, it came from another frame and I switched it out)
2. White faux antlers (these were black and I painted them white years ago, but now they sell them in white all the time – here are some similar ones and this set of three is awesome too)
3. Another family photo (this is one of our favorite wedding pics because it looks like we’re standing in a bush)
4. A little algae/anemone thing I painted (this one is cut off, as is the middle one above the TV, but you can see it if you scroll up to the photo before it. I just wanted something in those colors and did it quickly to throw it up “just for now” and it has been there for years – ha!)
5. A postcard from a local art exhibit (I loved the colors and the artist, so why not frame the postcard?!)
6. Photo of a succulent (this is a photo we took while shooting our second book – love the soothing colors and all that white space – here’s a link to it in our Society6 shop)
7. Original painting (this is one of my favorite Etsy artists who sells tiny original paintings & prints and I LOVE THEM!)
8. A book page (yup, this is from one of my favorite photography books by Gray Malin, who shoots beaches from above)
9. Another succulent photo we took and got printed (here’s the link to it on our Society6 shop)
10. A faux turtle shell by Nate Berkus for Target (this was from his very first collection there, memories) – here’s something similar
11. More family photos (on this side it’s John with our daughter and our son in basically the same exact pose – I switched a mat from a different frame into this one)
12. Another original painting (from the same woman on Etsy who did the one on the other side – so in love with her stuff)
13. Map with pins where we’ve gone (got the map on eBay, took out the glass of the frame and backed it with cork so the pins would stick) – here are some similar maps
14. Another postcard (from the very same art exhibit – gives the wall balance and it’s more of those blue/pink tones that reoccur, so it ties things together)
I talked more about my process for finding frameable “art” recently on Instagram too (on one of our trips to the beach house) so check out the video below for more examples of how we fill our frames without breaking the bank:
Also! Frame PSA! The gold frames you saw in that video are my very favorite, and they don’t hail from a fancy and expensive frame store – they’re from Target! They come with the mats, are extremely pretty, and come in a bunch of sizes (I have all three of these sizes all over our house and the beach house). And the artist from Etsy that I shouted out in that last video is Emily Jeffords, who recently got picked up by Minted! Love her stuff so much.
As for how we hang them, here’s a quick video that I made for InstaStories a little while ago (sometimes videos help more than a static pic):
So there it is, a full succulent-riddled detail-riddled rundown of our TV frame wall. If you’re still feeling like you don’t know where to start or how to approach this, my loving encouragement would be: JUST START! You can see from the video above that holes in the walls behind frames don’t even get seen! So if you hang something too low and have to move it up, it IS NO BIG DEAL. Even if you have to spackle a few holes, that is as easy as spreading butter on bread, and you know you can do that. I believe in you. May your walls be happy and your holes be hidden behind frames like mine, ha!
Oh and if you have a lower TV/media cabinet situation and are left with a big bare spot on the wall above it all, here’s what we did to fill that space in our last house. So easy and so cheap! And for more framing/art ideas, we have a whole archive full of ’em, so have at it!
*This post contains affiliate links*
The post How To Create A TV Gallery Wall appeared first on Young House Love.
How To Create A TV Gallery Wall published first on https://landscapingmates.blogspot.com
0 notes
Photo

How To Create A TV Gallery Wall http://ift.tt/2F8TWOI
Some say gallery walls are trending out in favor of larger scale art. Maybe. It makes sense that gallery walls on every wall (especially the ones with a ton of tiny frames) might feel a little less “new and fresh” these days. But I’d argue that a collection of frames hung together on the wall feels pretty classic if you stop and think about it. Watch Home Alone. They totally have a gallery wall going up their formal staircase in the foyer where Kevin sleds and hurls paint cans. But one spot I love for a gallery wall these days is actually around a TV. Why? Well, that big black box isn’t exactly gorgeous.
It’s often this hulking dark thing on an otherwise bare wall, so why not break things up and add a few other rectangular things to deemphasize it. It’s not like the TV disappears when you add a gallery – but at least you have a few other (prettier) spots to rest your eyes. And you can always turn on Planet Earth, since that makes any TV look like art in a nanosecond.
We first blogged about adding a frame gallery around our living room television, oh, FOUR AND A HALF YEARS AGO (evidence: here – also how funny is the “What Does the Fox Say?” reference – ah, 2013). Things have evolved A LOT in that room since then (hello paint!) and the gallery got a few tweaks (some new art there, some frame switches there) but it has pretty much stood the test of time. And since I get a bunch of questions every time we show a smidge of it on social media, this post is for everyone asking about framing arrangements, what to frame, how to hang them, and where we get our art. So let’s dive in, Planet Earth Style. I’ll be the whale if you’re that big school of tiny reflective fish.
Dealing With The TV
First, if you listened to last week’s podcast you heard that we got a new TV (the old and very faithful one now lives at the beach house, reunited with our old couch and it feels so good). We also decided to mount our new TV on the wall and used one of those in-wall power cord systems to hide the wire. That whole process only takes an hour or so and is SO WORTH IT. We’ve got an entire post dedicated to creating a cord-free TV wall if you’re interested in a step-by-step tutorial on that. That post also shows you how to hide a cable box if you have one. And if you’re looking to cut the cord, here’s how we did that.
But it’s not absolutely necessary to mount your TV to create a good-looking frame gallery around it. As you can see in the old photo below, we had ours resting on the media cabinet for years. But mounting it has definitely made the room feel more spacious and less cluttered. Also, we are BIG FANS of secondhand dressers as TV cabinets – this one is from a thrift store and we have a similar one in our bonus room from Craigslist.
Getting Your Frame Arrangement Right
Ok, now onto actually hanging your frames around the TV. There are a few methods you can use…
1. The Floor Method
Grab whatever frames you have on hand and want to use (or pick up new ones that you love) and lay them out on the floor, with a gap on the floor in the shape of your TV (measure it to get the correct amount of space). Then just move them around on the floor to see what layout you like. That’s how we created this very frame wall in our original post… back when our living room was overwhelmingly, mind-numbingly brown.
2. The Paper Method
This one is really easy too, and if you are worried you won’t like things once they’re up on the wall, it’s the one to try. Because it helps you visualize things right on the wall before you actually hang the frames. How? Use newspaper, brown paper bags, or even printer paper (taped together if you need to make a larger piece of paper) and cut them to the size of each frame you want to hang. Then you just tape them up on the wall using masking or painter’s tape, and move them around until you like the arrangement and are ready to put the actual frames up in place of the paper templates. You can see that method in use here in our last house where we created a frame gallery in the hallway. Less busy paper would be easier on the ol’ eyeballs, but you get the idea.
3. The Sheet Method
This is kind of a combo move of the two above. SHAROOOKEN! You arrange your frames on the floor, but on top of a large sheet of paper (like brown craft paper, red rosin paper, or even wrapping paper if that’s all you have). Once you reach the arrangement you like, trace each frame onto the paper – even marking the spot where each one hangs on the back – creating an oversized template that you can transfer right onto your wall. It’s best on small to medium sized frame groupings (like this one we hung in our last house) because you’re somewhat limited by the size of your paper roll, but this would totally work on either side of the TV (you’d make two in that case).
4. The Figure-It-Out-As-You-Go Method
You also can be a rebel and JUST HANG STUFF ON THE WALLS! I wouldn’t recommend going totally rogue and just making holes willy-nilly (although I’ve done that and spackling takes like three minutes so it’s not the biggest deal if you end up there). But if you break things down into sections it’ll help you stay on track. For example: start by getting the centering and spacing of the frames above your TV to your liking first. Then that’ll help guide the height and spacing of the frames to the left of the TV. Once those are set, you can match them on the right side.
How To Tie Frame Groupings Together
“Should I use all the same frames?” “Is there’s some sort of formula for mixing them?” “Should all of the art be black & white or all the same type of thing (all sketches, all photos, all paintings?)” Questions like this abound. So I’ll try to explain what works for us and why we typically end up there – although this is definitely one of those “we’ve seen it done so many different ways, there are probably a million ways to skin this cat” kind of things. Personally, we started with all white frames in here, and I slowly found myself craving a little more variety, so over time if I found nice light wood frames (like the two over the TV) or some pretty thin gold ones (like the five of those you see below) I slowly brought those in to mix things up.
But despite having different frames up there, these are three factors that help tie the arrangement together:
Mats! See how most of the frames above have white mats? That ties them together and helps your eye take them all in as one big “family”
Color palette! It might not be what you notice right away, but a lot of the art has similar tones – there’s a lot of green, blue, and pink. And again lots of white in the art and the mats too. Even the objects on the wall (the antlers and the faux turtle shell) are white, so nothing is too jarring and it all looks related, yet not super cloned and repetitive.
Spacing! A lot of times this is the thing that makes a wall feel off. If the frames are hung too far apart, they read more like a smattering of islands, too far away from each other to be viewed as a grouping. The ideal spacing for me is usually 2-3″ (any closer and they can feel clumped and crowded). Also remember to treat the TV like just another frame and try to mimic the same spacing around it. This can be tricky because the TV sits off the wall a bit and that depth can change the spacing depending on your vantage point. I try to step back and view things from the couch across the room, since that’s where everyone will be viewing it most frequently.
What Should I Frame?
Since our arrangement is a mix of frame types and sizes, we wanted the items that we framed to be a bit of a mix as well. Had this been a more gridded frame gallery using identical frames – like this one we did above the couch in our last house or down our old hallway – we probably would’ve kept the art more consistent too. But to give you a sense of the random mix we’ve hung here, I added some numbers to the next two photos so you can see we have up there, where we got things, and why we love ’em.
1. Family photos (one of me with our daughter and a similar shot with our son around the same age – the mat didn’t come with that frame, it came from another frame and I switched it out)
2. White faux antlers (these were black and I painted them white years ago, but now they sell them in white all the time – here are some similar ones and this set of three is awesome too)
3. Another family photo (this is one of our favorite wedding pics because it looks like we’re standing in a bush)
4. A little algae/anemone thing I painted (this one is cut off, as is the middle one above the TV, but you can see it if you scroll up to the photo before it. I just wanted something in those colors and did it quickly to throw it up “just for now” and it has been there for years – ha!)
5. A postcard from a local art exhibit (I loved the colors and the artist, so why not frame the postcard?!)
6. Photo of a succulent (this is a photo we took while shooting our second book – love the soothing colors and all that white space – here’s a link to it in our Society6 shop)
7. Original painting (this is one of my favorite Etsy artists who sells tiny original paintings & prints and I LOVE THEM!)
8. A book page (yup, this is from one of my favorite photography books by Gray Malin, who shoots beaches from above)
9. Another succulent photo we took and got printed (here’s the link to it on our Society6 shop)
10. A faux turtle shell by Nate Berkus for Target (this was from his very first collection there, memories) – here’s something similar
11. More family photos (on this side it’s John with our daughter and our son in basically the same exact pose – I switched a mat from a different frame into this one)
12. Another original painting (from the same woman on Etsy who did the one on the other side – so in love with her stuff)
13. Map with pins where we’ve gone (got the map on eBay, took out the glass of the frame and backed it with cork so the pins would stick) – here are some similar maps
14. Another postcard (from the very same art exhibit – gives the wall balance and it’s more of those blue/pink tones that reoccur, so it ties things together)
I talked more about my process for finding frameable “art” recently on Instagram too (on one of our trips to the beach house) so check out the video below for more examples of how we fill our frames without breaking the bank:
Also! Frame PSA! The gold frames you saw in that video are my very favorite, and they don’t hail from a fancy and expensive frame store – they’re from Target! They come with the mats, are extremely pretty, and come in a bunch of sizes (I have all three of these sizes all over our house and the beach house). And the artist from Etsy that I shouted out in that last video is Emily Jeffords, who recently got picked up by Minted! Love her stuff so much.
As for how we hang them, here’s a quick video that I made for InstaStories a little while ago (sometimes videos help more than a static pic):
So there it is, a full succulent-riddled detail-riddled rundown of our TV frame wall. If you’re still feeling like you don’t know where to start or how to approach this, my loving encouragement would be: JUST START! You can see from the video above that holes in the walls behind frames don’t even get seen! So if you hang something too low and have to move it up, it IS NO BIG DEAL. Even if you have to spackle a few holes, that is as easy as spreading butter on bread, and you know you can do that. I believe in you. May your walls be happy and your holes be hidden behind frames like mine, ha!
Oh and if you have a lower TV/media cabinet situation and are left with a big bare spot on the wall above it all, here’s what we did to fill that space in our last house. So easy and so cheap! And for more framing/art ideas, we have a whole archive full of ’em, so have at it!
*This post contains affiliate links*
The post How To Create A TV Gallery Wall appeared first on Young House Love.
0 notes
Text
How To Create A TV Gallery Wall
Some say gallery walls are trending out in favor of larger scale art. Maybe. It makes sense that gallery walls on every wall (especially the ones with a ton of tiny frames) might feel a little less “new and fresh” these days. But I’d argue that a collection of frames hung together on the wall feels pretty classic if you stop and think about it. Watch Home Alone. They totally have a gallery wall going up their formal staircase in the foyer where Kevin sleds and hurls paint cans. But one spot I love for a gallery wall these days is actually around a TV. Why? Well, that big black box isn’t exactly gorgeous.
It’s often this hulking dark thing on an otherwise bare wall, so why not break things up and add a few other rectangular things to deemphasize it. It’s not like the TV disappears when you add a gallery – but at least you have a few other (prettier) spots to rest your eyes. And you can always turn on Planet Earth, since that makes any TV look like art in a nanosecond.
We first blogged about adding a frame gallery around our living room television, oh, FOUR AND A HALF YEARS AGO (evidence: here – also how funny is the “What Does the Fox Say?” reference – ah, 2013). Things have evolved A LOT in that room since then (hello paint!) and the gallery got a few tweaks (some new art there, some frame switches there) but it has pretty much stood the test of time. And since I get a bunch of questions every time we show a smidge of it on social media, this post is for everyone asking about framing arrangements, what to frame, how to hang them, and where we get our art. So let’s dive in, Planet Earth Style. I’ll be the whale if you’re that big school of tiny reflective fish.
Dealing With The TV
First, if you listened to last week’s podcast you heard that we got a new TV (the old and very faithful one now lives at the beach house, reunited with our old couch and it feels so good). We also decided to mount our new TV on the wall and used one of those in-wall power cord systems to hide the wire. That whole process only takes an hour or so and is SO WORTH IT. We’ve got an entire post dedicated to creating a cord-free TV wall if you’re interested in a step-by-step tutorial on that. That post also shows you how to hide a cable box if you have one. And if you’re looking to cut the cord, here’s how we did that.
But it’s not absolutely necessary to mount your TV to create a good-looking frame gallery around it. As you can see in the old photo below, we had ours resting on the media cabinet for years. But mounting it has definitely made the room feel more spacious and less cluttered. Also, we are BIG FANS of secondhand dressers as TV cabinets – this one is from a thrift store and we have a similar one in our bonus room from Craigslist.
Getting Your Frame Arrangement Right
Ok, now onto actually hanging your frames around the TV. There are a few methods you can use…
1. The Floor Method
Grab whatever frames you have on hand and want to use (or pick up new ones that you love) and lay them out on the floor, with a gap on the floor in the shape of your TV (measure it to get the correct amount of space). Then just move them around on the floor to see what layout you like. That’s how we created this very frame wall in our original post… back when our living room was overwhelmingly, mind-numbingly brown.
2. The Paper Method
This one is really easy too, and if you are worried you won’t like things once they’re up on the wall, it’s the one to try. Because it helps you visualize things right on the wall before you actually hang the frames. How? Use newspaper, brown paper bags, or even printer paper (taped together if you need to make a larger piece of paper) and cut them to the size of each frame you want to hang. Then you just tape them up on the wall using masking or painter’s tape, and move them around until you like the arrangement and are ready to put the actual frames up in place of the paper templates. You can see that method in use here in our last house where we created a frame gallery in the hallway. Less busy paper would be easier on the ol’ eyeballs, but you get the idea.
3. The Sheet Method
This is kind of a combo move of the two above. SHAROOOKEN! You arrange your frames on the floor, but on top of a large sheet of paper (like brown craft paper, red rosin paper, or even wrapping paper if that’s all you have). Once you reach the arrangement you like, trace each frame onto the paper – even marking the spot where each one hangs on the back – creating an oversized template that you can transfer right onto your wall. It’s best on small to medium sized frame groupings (like this one we hung in our last house) because you’re somewhat limited by the size of your paper roll, but this would totally work on either side of the TV (you’d make two in that case).
4. The Figure-It-Out-As-You-Go Method
You also can be a rebel and JUST HANG STUFF ON THE WALLS! I wouldn’t recommend going totally rogue and just making holes willy-nilly (although I’ve done that and spackling takes like three minutes so it’s not the biggest deal if you end up there). But if you break things down into sections it’ll help you stay on track. For example: start by getting the centering and spacing of the frames above your TV to your liking first. Then that’ll help guide the height and spacing of the frames to the left of the TV. Once those are set, you can match them on the right side.
How To Tie Frame Groupings Together
“Should I use all the same frames?” “Is there’s some sort of formula for mixing them?” “Should all of the art be black & white or all the same type of thing (all sketches, all photos, all paintings?)” Questions like this abound. So I’ll try to explain what works for us and why we typically end up there – although this is definitely one of those “we’ve seen it done so many different ways, there are probably a million ways to skin this cat” kind of things. Personally, we started with all white frames in here, and I slowly found myself craving a little more variety, so over time if I found nice light wood frames (like the two over the TV) or some pretty thin gold ones (like the five of those you see below) I slowly brought those in to mix things up.
But despite having different frames up there, these are three factors that help tie the arrangement together:
Mats! See how most of the frames above have white mats? That ties them together and helps your eye take them all in as one big “family”
Color palette! It might not be what you notice right away, but a lot of the art has similar tones – there’s a lot of green, blue, and pink. And again lots of white in the art and the mats too. Even the objects on the wall (the antlers and the faux turtle shell) are white, so nothing is too jarring and it all looks related, yet not super cloned and repetitive.
Spacing! A lot of times this is the thing that makes a wall feel off. If the frames are hung too far apart, they read more like a smattering of islands, too far away from each other to be viewed as a grouping. The ideal spacing for me is usually 2-3″ (any closer and they can feel clumped and crowded). Also remember to treat the TV like just another frame and try to mimic the same spacing around it. This can be tricky because the TV sits off the wall a bit and that depth can change the spacing depending on your vantage point. I try to step back and view things from the couch across the room, since that’s where everyone will be viewing it most frequently.
What Should I Frame?
Since our arrangement is a mix of frame types and sizes, we wanted the items that we framed to be a bit of a mix as well. Had this been a more gridded frame gallery using identical frames – like this one we did above the couch in our last house or down our old hallway – we probably would’ve kept the art more consistent too. But to give you a sense of the random mix we’ve hung here, I added some numbers to the next two photos so you can see we have up there, where we got things, and why we love ’em.
1. Family photos (one of me with our daughter and a similar shot with our son around the same age – the mat didn’t come with that frame, it came from another frame and I switched it out)
2. White faux antlers (these were black and I painted them white years ago, but now they sell them in white all the time – here are some similar ones and this set of three is awesome too)
3. Another family photo (this is one of our favorite wedding pics because it looks like we’re standing in a bush)
4. A little algae/anemone thing I painted (this one is cut off, as is the middle one above the TV, but you can see it if you scroll up to the photo before it. I just wanted something in those colors and did it quickly to throw it up “just for now” and it has been there for years – ha!)
5. A postcard from a local art exhibit (I loved the colors and the artist, so why not frame the postcard?!)
6. Photo of a succulent (this is a photo we took while shooting our second book – love the soothing colors and all that white space – here’s a link to it in our Society6 shop)
7. Original painting (this is one of my favorite Etsy artists who sells tiny original paintings & prints and I LOVE THEM!)
8. A book page (yup, this is from one of my favorite photography books by Gray Malin, who shoots beaches from above)
9. Another succulent photo we took and got printed (here’s the link to it on our Society6 shop)
10. A faux turtle shell by Nate Berkus for Target (this was from his very first collection there, memories) – here’s something similar
11. More family photos (on this side it’s John with our daughter and our son in basically the same exact pose – I switched a mat from a different frame into this one)
12. Another original painting (from the same woman on Etsy who did the one on the other side – so in love with her stuff)
13. Map with pins where we’ve gone (got the map on eBay, took out the glass of the frame and backed it with cork so the pins would stick) – here are some similar maps
14. Another postcard (from the very same art exhibit – gives the wall balance and it’s more of those blue/pink tones that reoccur, so it ties things together)
I talked more about my process for finding frameable “art” recently on Instagram too (on one of our trips to the beach house) so check out the video below for more examples of how we fill our frames without breaking the bank:
Also! Frame PSA! The gold frames you saw in that video are my very favorite, and they don’t hail from a fancy and expensive frame store – they’re from Target! They come with the mats, are extremely pretty, and come in a bunch of sizes (I have all three of these sizes all over our house and the beach house). And the artist from Etsy that I shouted out in that last video is Emily Jeffords, who recently got picked up by Minted! Love her stuff so much.
As for how we hang them, here’s a quick video that I made for InstaStories a little while ago (sometimes videos help more than a static pic):
So there it is, a full succulent-riddled detail-riddled rundown of our TV frame wall. If you’re still feeling like you don’t know where to start or how to approach this, my loving encouragement would be: JUST START! You can see from the video above that holes in the walls behind frames don’t even get seen! So if you hang something too low and have to move it up, it IS NO BIG DEAL. Even if you have to spackle a few holes, that is as easy as spreading butter on bread, and you know you can do that. I believe in you. May your walls be happy and your holes be hidden behind frames like mine, ha!
Oh and if you have a lower TV/media cabinet situation and are left with a big bare spot on the wall above it all, here’s what we did to fill that space in our last house. So easy and so cheap! And for more framing/art ideas, we have a whole archive full of ’em, so have at it!
*This post contains affiliate links*
The post How To Create A TV Gallery Wall appeared first on Young House Love.
How To Create A TV Gallery Wall published first on https://novaformmattressreview.tumblr.com/
0 notes
Text
How To Create A TV Gallery Wall
Some say gallery walls are trending out in favor of larger scale art. Maybe. It makes sense that gallery walls on every wall (especially the ones with a ton of tiny frames) might feel a little less “new and fresh” these days. But I’d argue that a collection of frames hung together on the wall feels pretty classic if you stop and think about it. Watch Home Alone. They totally have a gallery wall going up their formal staircase in the foyer where Kevin sleds and hurls paint cans. But one spot I love for a gallery wall these days is actually around a TV. Why? Well, that big black box isn’t exactly gorgeous.
It’s often this hulking dark thing on an otherwise bare wall, so why not break things up and add a few other rectangular things to deemphasize it. It’s not like the TV disappears when you add a gallery – but at least you have a few other (prettier) spots to rest your eyes. And you can always turn on Planet Earth, since that makes any TV look like art in a nanosecond.
We first blogged about adding a frame gallery around our living room television, oh, FOUR AND A HALF YEARS AGO (evidence: here – also how funny is the “What Does the Fox Say?” reference – ah, 2013). Things have evolved A LOT in that room since then (hello paint!) and the gallery got a few tweaks (some new art there, some frame switches there) but it has pretty much stood the test of time. And since I get a bunch of questions every time we show a smidge of it on social media, this post is for everyone asking about framing arrangements, what to frame, how to hang them, and where we get our art. So let’s dive in, Planet Earth Style. I’ll be the whale if you’re that big school of tiny reflective fish.
Dealing With The TV
First, if you listened to last week’s podcast you heard that we got a new TV (the old and very faithful one now lives at the beach house, reunited with our old couch and it feels so good). We also decided to mount our new TV on the wall and used one of those in-wall power cord systems to hide the wire. That whole process only takes an hour or so and is SO WORTH IT. We’ve got an entire post dedicated to creating a cord-free TV wall if you’re interested in a step-by-step tutorial on that. That post also shows you how to hide a cable box if you have one. And if you’re looking to cut the cord, here’s how we did that.
But it’s not absolutely necessary to mount your TV to create a good-looking frame gallery around it. As you can see in the old photo below, we had ours resting on the media cabinet for years. But mounting it has definitely made the room feel more spacious and less cluttered. Also, we are BIG FANS of secondhand dressers as TV cabinets – this one is from a thrift store and we have a similar one in our bonus room from Craigslist.
Getting Your Frame Arrangement Right
Ok, now onto actually hanging your frames around the TV. There are a few methods you can use…
1. The Floor Method
Grab whatever frames you have on hand and want to use (or pick up new ones that you love) and lay them out on the floor, with a gap on the floor in the shape of your TV (measure it to get the correct amount of space). Then just move them around on the floor to see what layout you like. That’s how we created this very frame wall in our original post… back when our living room was overwhelmingly, mind-numbingly brown.
2. The Paper Method
This one is really easy too, and if you are worried you won’t like things once they’re up on the wall, it’s the one to try. Because it helps you visualize things right on the wall before you actually hang the frames. How? Use newspaper, brown paper bags, or even printer paper (taped together if you need to make a larger piece of paper) and cut them to the size of each frame you want to hang. Then you just tape them up on the wall using masking or painter’s tape, and move them around until you like the arrangement and are ready to put the actual frames up in place of the paper templates. You can see that method in use here in our last house where we created a frame gallery in the hallway. Less busy paper would be easier on the ol’ eyeballs, but you get the idea.
3. The Sheet Method
This is kind of a combo move of the two above. SHAROOOKEN! You arrange your frames on the floor, but on top of a large sheet of paper (like brown craft paper, red rosin paper, or even wrapping paper if that’s all you have). Once you reach the arrangement you like, trace each frame onto the paper – even marking the spot where each one hangs on the back – creating an oversized template that you can transfer right onto your wall. It’s best on small to medium sized frame groupings (like this one we hung in our last house) because you’re somewhat limited by the size of your paper roll, but this would totally work on either side of the TV (you’d make two in that case).
4. The Figure-It-Out-As-You-Go Method
You also can be a rebel and JUST HANG STUFF ON THE WALLS! I wouldn’t recommend going totally rogue and just making holes willy-nilly (although I’ve done that and spackling takes like three minutes so it’s not the biggest deal if you end up there). But if you break things down into sections it’ll help you stay on track. For example: start by getting the centering and spacing of the frames above your TV to your liking first. Then that’ll help guide the height and spacing of the frames to the left of the TV. Once those are set, you can match them on the right side.
How To Tie Frame Groupings Together
“Should I use all the same frames?” “Is there’s some sort of formula for mixing them?” “Should all of the art be black & white or all the same type of thing (all sketches, all photos, all paintings?)” Questions like this abound. So I’ll try to explain what works for us and why we typically end up there – although this is definitely one of those “we’ve seen it done so many different ways, there are probably a million ways to skin this cat” kind of things. Personally, we started with all white frames in here, and I slowly found myself craving a little more variety, so over time if I found nice light wood frames (like the two over the TV) or some pretty thin gold ones (like the five of those you see below) I slowly brought those in to mix things up.
But despite having different frames up there, these are three factors that help tie the arrangement together:
Mats! See how most of the frames above have white mats? That ties them together and helps your eye take them all in as one big “family”
Color palette! It might not be what you notice right away, but a lot of the art has similar tones – there’s a lot of green, blue, and pink. And again lots of white in the art and the mats too. Even the objects on the wall (the antlers and the faux turtle shell) are white, so nothing is too jarring and it all looks related, yet not super cloned and repetitive.
Spacing! A lot of times this is the thing that makes a wall feel off. If the frames are hung too far apart, they read more like a smattering of islands, too far away from each other to be viewed as a grouping. The ideal spacing for me is usually 2-3″ (any closer and they can feel clumped and crowded). Also remember to treat the TV like just another frame and try to mimic the same spacing around it. This can be tricky because the TV sits off the wall a bit and that depth can change the spacing depending on your vantage point. I try to step back and view things from the couch across the room, since that’s where everyone will be viewing it most frequently.
What Should I Frame?
Since our arrangement is a mix of frame types and sizes, we wanted the items that we framed to be a bit of a mix as well. Had this been a more gridded frame gallery using identical frames – like this one we did above the couch in our last house or down our old hallway – we probably would’ve kept the art more consistent too. But to give you a sense of the random mix we’ve hung here, I added some numbers to the next two photos so you can see we have up there, where we got things, and why we love ’em.
1. Family photos (one of me with our daughter and a similar shot with our son around the same age – the mat didn’t come with that frame, it came from another frame and I switched it out)
2. White faux antlers (these were black and I painted them white years ago, but now they sell them in white all the time – here are some similar ones and this set of three is awesome too)
3. Another family photo (this is one of our favorite wedding pics because it looks like we’re standing in a bush)
4. A little algae/anemone thing I painted (this one is cut off, as is the middle one above the TV, but you can see it if you scroll up to the photo before it. I just wanted something in those colors and did it quickly to throw it up “just for now” and it has been there for years – ha!)
5. A postcard from a local art exhibit (I loved the colors and the artist, so why not frame the postcard?!)
6. Photo of a succulent (this is a photo we took while shooting our second book – love the soothing colors and all that white space – here’s a link to it in our Society6 shop)
7. Original painting (this is one of my favorite Etsy artists who sells tiny original paintings & prints and I LOVE THEM!)
8. A book page (yup, this is from one of my favorite photography books by Gray Malin, who shoots beaches from above)
9. Another succulent photo we took and got printed (here’s the link to it on our Society6 shop)
10. A faux turtle shell by Nate Berkus for Target (this was from his very first collection there, memories) – here’s something similar
11. More family photos (on this side it’s John with our daughter and our son in basically the same exact pose – I switched a mat from a different frame into this one)
12. Another original painting (from the same woman on Etsy who did the one on the other side – so in love with her stuff)
13. Map with pins where we’ve gone (got the map on eBay, took out the glass of the frame and backed it with cork so the pins would stick) – here are some similar maps
14. Another postcard (from the very same art exhibit – gives the wall balance and it’s more of those blue/pink tones that reoccur, so it ties things together)
I talked more about my process for finding frameable “art” recently on Instagram too (on one of our trips to the beach house) so check out the video below for more examples of how we fill our frames without breaking the bank:
Also! Frame PSA! The gold frames you saw in that last view are my very favorite, and they don’t hail from a fancy and expensive frame store – they’re from Target! They come with the mats, are extremely pretty, and come in a bunch of sizes (I have all three of these sizes all over our house and the beach house). And the artist from Etsy that I shouted out in that last video is Emily Jeffords, who recently got picked up by Minted! Love her stuff so much.
As for how we hang them, here’s a quick video that I made for InstaStories a little while ago (sometimes videos help more than a static pic):
So there it is, a full succulent-riddled detail-riddled rundown of our TV frame wall. If you’re still feeling like you don’t know where to start or how to approach this, my loving encouragement would be: JUST START! You can see from the video above that holes in the walls behind frames don’t even get seen! So if you hang something too low and have to move it up, it IS NO BIG DEAL. Even if you have to spackle a few holes, that is as easy as spreading butter on bread, and you know you can do that. I believe in you. May your walls be happy and your holes be hidden behind frames like mine, ha!
Oh and if you have a lower TV/media cabinet situation and are left with a big bare spot on the wall above it all, here’s what we did to fill that space in our last house. So easy and so cheap! And for more framing/art ideas, we have a whole archive full of ’em, so have at it!
*This post contains affiliate links*
The post How To Create A TV Gallery Wall appeared first on Young House Love.
How To Create A TV Gallery Wall published first on https://ssmattress.tumblr.com/
0 notes
Text
How To Create A TV Gallery Wall
Some say gallery walls are trending out in favor of larger scale art. Maybe. It makes sense that gallery walls on every wall (especially the ones with a ton of tiny frames) might feel a little less “new and fresh” these days. But I’d argue that a collection of frames hung together on the wall feels pretty classic if you stop and think about it. Watch Home Alone. They totally have a gallery wall going up their formal staircase in the foyer where Kevin sleds and hurls paint cans. But one spot I love for a gallery wall these days is actually around a TV. Why? Well, that big black box isn’t exactly gorgeous.
It’s often this hulking dark thing on an otherwise bare wall, so why not break things up and add a few other rectangular things to deemphasize it. It’s not like the TV disappears when you add a gallery – but at least you have a few other (prettier) spots to rest your eyes. And you can always turn on Planet Earth, since that makes any TV look like art in a nanosecond.
We first blogged about adding a frame gallery around our living room television, oh, FOUR AND A HALF YEARS AGO (evidence: here – also how funny is the “What Does the Fox Say?” reference – ah, 2013). Things have evolved A LOT in that room since then (hello paint!) and the gallery got a few tweaks (some new art there, some frame switches there) but it has pretty much stood the test of time. And since I get a bunch of questions every time we show a smidge of it on social media, this post is for everyone asking about framing arrangements, what to frame, how to hang them, and where we get our art. So let’s dive in, Planet Earth Style. I’ll be the whale if you’re that big school of tiny reflective fish.
Dealing With The TV
First, if you listened to last week’s podcast you heard that we got a new TV (the old and very faithful one now lives at the beach house, reunited with our old couch and it feels so good). We also decided to mount our new TV on the wall and used one of those in-wall power cord systems to hide the wire. That whole process only takes an hour or so and is SO WORTH IT. We’ve got an entire post dedicated to creating a cord-free TV wall if you’re interested in a step-by-step tutorial on that. That post also shows you how to hide a cable box if you have one. And if you’re looking to cut the cord, here’s how we did that.
But it’s not absolutely necessary to mount your TV to create a good-looking frame gallery around it. As you can see in the old photo below, we had ours resting on the media cabinet for years. But mounting it has definitely made the room feel more spacious and less cluttered. Also, we are BIG FANS of secondhand dressers as TV cabinets – this one is from a thrift store and we have a similar one in our bonus room from Craigslist.
Getting Your Frame Arrangement Right
Ok, now onto actually hanging your frames around the TV. There are a few methods you can use…
1. The Floor Method
Grab whatever frames you have on hand and want to use (or pick up new ones that you love) and lay them out on the floor, with a gap on the floor in the shape of your TV (measure it to get the correct amount of space). Then just move them around on the floor to see what layout you like. That’s how we created this very frame wall in our original post… back when our living room was overwhelmingly, mind-numbingly brown.
2. The Paper Method
This one is really easy too, and if you are worried you won’t like things once they’re up on the wall, it’s the one to try. Because it helps you visualize things right on the wall before you actually hang the frames. How? Use newspaper, brown paper bags, or even printer paper (taped together if you need to make a larger piece of paper) and cut them to the size of each frame you want to hang. Then you just tape them up on the wall using masking or painter’s tape, and move them around until you like the arrangement and are ready to put the actual frames up in place of the paper templates. You can see that method in use here in our last house where we created a frame gallery in the hallway. Less busy paper would be easier on the ol’ eyeballs, but you get the idea.
3. The Sheet Method
This is kind of a combo move of the two above. SHAROOOKEN! You arrange your frames on the floor, but on top of a large sheet of paper (like brown craft paper, red rosin paper, or even wrapping paper if that’s all you have). Once you reach the arrangement you like, trace each frame onto the paper – even marking the spot where each one hangs on the back – creating an oversized template that you can transfer right onto your wall. It’s best on small to medium sized frame groupings (like this one we hung in our last house) because you’re somewhat limited by the size of your paper roll, but this would totally work on either side of the TV (you’d make two in that case).
4. The Figure-It-Out-As-You-Go Method
You also can be a rebel and JUST HANG STUFF ON THE WALLS! I wouldn’t recommend going totally rogue and just making holes willy-nilly (although I’ve done that and spackling takes like three minutes so it’s not the biggest deal if you end up there). But if you break things down into sections it’ll help you stay on track. For example: start by getting the centering and spacing of the frames above your TV to your liking first. Then that’ll help guide the height and spacing of the frames to the left of the TV. Once those are set, you can match them on the right side.
How To Tie Frame Groupings Together
“Should I use all the same frames?” “Is there’s some sort of formula for mixing them?” “Should all of the art be black & white or all the same type of thing (all sketches, all photos, all paintings?)” Questions like this abound. So I’ll try to explain what works for us and why we typically end up there – although this is definitely one of those “we’ve seen it done so many different ways, there are probably a million ways to skin this cat” kind of things. Personally, we started with all white frames in here, and I slowly found myself craving a little more variety, so over time if I found nice light wood frames (like the two over the TV) or some pretty thin gold ones (like the five of those you see below) I slowly brought those in to mix things up.
But despite having different frames up there, these are three factors that help tie the arrangement together:
Mats! See how most of the frames above have white mats? That ties them together and helps your eye take them all in as one big “family”
Color palette! It might not be what you notice right away, but a lot of the art has similar tones – there’s a lot of green, blue, and pink. And again lots of white in the art and the mats too. Even the objects on the wall (the antlers and the faux turtle shell) are white, so nothing is too jarring and it all looks related, yet not super cloned and repetitive.
Spacing! A lot of times this is the thing that makes a wall feel off. If the frames are hung too far apart, they read more like a smattering of islands, too far away from each other to be viewed as a grouping. The ideal spacing for me is usually 2-3″ (any closer and they can feel clumped and crowded). Also remember to treat the TV like just another frame and try to mimic the same spacing around it. This can be tricky because the TV sits off the wall a bit and that depth can change the spacing depending on your vantage point. I try to step back and view things from the couch across the room, since that’s where everyone will be viewing it most frequently.
What Should I Frame?
Since our arrangement is a mix of frame types and sizes, we wanted the items that we framed to be a bit of a mix as well. Had this been a more gridded frame gallery using identical frames – like this one we did above the couch in our last house or down our old hallway – we probably would’ve kept the art more consistent too. But to give you a sense of the random mix we’ve hung here, I added some numbers to the next two photos so you can see we have up there, where we got things, and why we love ’em.
1. Family photos (one of me with our daughter and a similar shot with our son around the same age – the mat didn’t come with that frame, it came from another frame and I switched it out)
2. White faux antlers (these were black and I painted them white years ago, but now they sell them in white all the time – here are some similar ones and this set of three is awesome too)
3. Another family photo (this is one of our favorite wedding pics because it looks like we’re standing in a bush)
4. A little algae/anemone thing I painted (this one is cut off, as is the middle one above the TV, but you can see it if you scroll up to the photo before it. I just wanted something in those colors and did it quickly to throw it up “just for now” and it has been there for years – ha!)
5. A postcard from a local art exhibit (I loved the colors and the artist, so why not frame the postcard?!)
6. Photo of a succulent (this is a photo we took while shooting our second book – love the soothing colors and all that white space – here’s a link to it in our Society6 shop)
7. Original painting (this is one of my favorite Etsy artists who sells tiny original paintings & prints and I LOVE THEM!)
8. A book page (yup, this is from one of my favorite photography books by Gray Malin, who shoots beaches from above)
9. Another succulent photo we took and got printed (here’s the link to it on our Society6 shop)
10. A faux turtle shell by Nate Berkus for Target (this was from his very first collection there, memories) – here’s something similar
11. More family photos (on this side it’s John with our daughter and our son in basically the same exact pose – I switched a mat from a different frame into this one)
12. Another original painting (from the same woman on Etsy who did the one on the other side – so in love with her stuff)
13. Map with pins where we’ve gone (got the map on eBay, took out the glass of the frame and backed it with cork so the pins would stick) – here are some similar maps
14. Another postcard (from the very same art exhibit – gives the wall balance and it’s more of those blue/pink tones that reoccur, so it ties things together)
I talked more about my process for finding frameable “art” recently on Instagram too (on one of our trips to the beach house) so check out the video below for more examples of how we fill our frames without breaking the bank:
Also! Frame PSA! The gold frames you saw in that last view are my very favorite, and they don’t hail from a fancy and expensive frame store – they’re from Target! They come with the mats, are extremely pretty, and come in a bunch of sizes (I have all three of these sizes all over our house and the beach house). And the artist from Etsy that I shouted out in that last video is Emily Jeffords, who recently got picked up by Minted! Love her stuff so much.
As for how we hang them, here’s a quick video that I made for InstaStories a little while ago (sometimes videos help more than a static pic):
So there it is, a full succulent-riddled detail-riddled rundown of our TV frame wall. If you’re still feeling like you don’t know where to start or how to approach this, my loving encouragement would be: JUST START! You can see from the video above that holes in the walls behind frames don’t even get seen! So if you hang something too low and have to move it up, it IS NO BIG DEAL. Even if you have to spackle a few holes, that is as easy as spreading butter on bread, and you know you can do that. I believe in you. May your walls be happy and your holes be hidden behind frames like mine, ha!
Oh and if you have a lower TV/media cabinet situation and are left with a big bare spot on the wall above it all, here’s what we did to fill that space in our last house. So easy and so cheap! And for more framing/art ideas, we have a whole archive full of ’em, so have at it!
*This post contains affiliate links*
The post How To Create A TV Gallery Wall appeared first on Young House Love.
How To Create A TV Gallery Wall published first on https://aireloomreview.tumblr.com/
0 notes
Text
Check out my newsletter at the above link, or under the read more!
Newsletter #5
January 24, 2024
Welcome to my newsletter! You signed up to be on my mailing list, so first I want to thank you for taking an interest in my work! Thank you!
What have I been up to lately?
Aether Beyond the Binary
24 hours left to back our Kickstarter! Don’t miss your chance to grab this anthology before it’s too late!
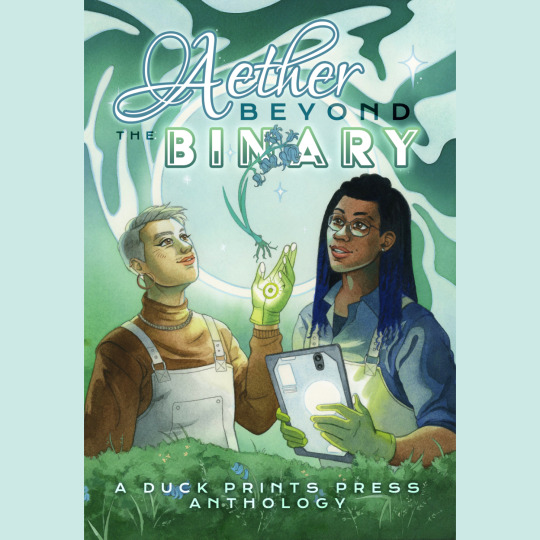
As I mentioned in my last newsletter, my short story Ancient Hearts Unearthed, will be included in Aether Beyond the Binary, an anthology from Duck Prints Press. Above is the awesome cover art by non-binary artist Mar Spragge. It’s all about characters outside the binary (nonbinary, agender, genderqueer, etc.) in an aetherpunk setting! Our Kickstarter runs through tomorrow, January 25th!
Here’s an excerpt from my story about a pair of archeologists exploring a newly uncovered cave:
Sasha almost ran into Victoria, stopping short. Over her shoulder, they saw the cavern wall. The appearance of the rock was unusual enough to draw Sasha’s attention to the fact that they’d come to a dead end. “Those markings are too regular to be natural.” They stepped around Victoria and reached out to run their fingers over the rock, feeling the way shapes had been carved into it. “They’re pictographs. Or runes, perhaps?” They turned to Victoria. “What does the ancient rune expert have to say about them?”
“I’m…” She took a long, silent moment to look at the wall, moving her light around and tracing the shapes with her fingers. “I can’t see them well enough. We need the supplies to make rubbings. And more light.”
“Where can we get anything other than aetherwork light sources?”
“Candles, I suppose.” Victoria looked down at her hand, pressing the red light on and off. “Or some sort of electricity lamp.” She snickered. “Whale oil?” Then Victoria turned and ran a hand over the runes again. “What bothers me is that these are early Age of Aether markings. You see the way they’re using archaic forms of our letters?”
Sasha leaned closer. “I’ll be damned. This doesn’t match the bronze era artifacts in the rest of the cave, either.” They made a tiny humming noise. “Who else would have this much knowledge of ancient runes?”
As Victoria leaned as close as she could to the wall, she asked distractedly, “What do you mean?”
“Obviously, it’s a fake,” they said, mulling over the problem in their head. “Sanderson has wanted my place on the admissions committee since he joined the department.”
“What if it’s not a fake?” Victoria made a tiny, excited noise. “What if this is early Aether Age work? What if this is a secret that’s been buried for almost a thousand years?”
Sasha’s heart swooped at the thought. “We have to find out what that inscription says.”
If you want to find out what happens next, please back our kickstarter campaign!
Nyctophobia Series (and more) under the read more!

For those of you who read my long Stranger Things Stoncy series, Mr. Sandman, Nyctophobia is the original sci-fi series based on elements of that story. Phase Shift is the first book in the series. I’m now posting it to my Patreon and Ream sites.
Details
Rating: Teen and up
Tags: science fiction, alternate dimensions, teen characters, friendship, bisexual main character (minor references), lesbian character, nonbinary character, aliens
Summary: Despite being a self-professed science geek, high school freshman Camilla Mitchell has had a secret imaginary friend for years. It comes as quite a shock when said friend, Emma, accidentally drags her into a dimension full of hostile telepathic creatures. Cam’s friends, her brother, Oliver, and her mother, Kathryn, work furiously to solve her disappearance and bring her home. Other members of their small Minnesota town disappear, one after the other, including Lizzy Becker’s best friend, who is ripped from her arms. Lizzy badgers loner Oliver into working with her to rescue their missing loved ones. They discover a bridge between the two worlds—a bridge that allows the hostile creatures from Cam’s newly-discovered dimension into ours. If there’s a bridge, there’s a way to rescue the people taken. Right?
Content warnings: disordered eating, emetophobia, child abuse mention, homophobic bullying, teen characters in danger, gun violence, physical violence, abduction
The prologue and first chapter are now available for free on both Patreon and Ream! Chapters 2 through 4 are available to the $4/mo subscribers on either platform. New chapters drop weekly, on Wednesdays!
If you can’t subscribe now, backing during any month at the $4 level will get you access to all the members-only chapters posted up to that date while you’re subscribed. I’ll let you guys know when it’s getting close to fully posted, if you want to pay just for that month.
I finished adding all the Phase Shift details to the new series bible, which will help me as I finish the rewrite of the second book in the series, Inertia. This sequel is where the OT3 relationship takes off and I start incorporating elements of Mr. Sandman into the original series. Currently, Inertia is 80k words and about 4 chapters short of the end. I could use some help from an alpha reader to iron out the rest of the plot. If you’re interested, please let me know by emailing [email protected]. I’m more than willing to trade alpha reads/critiques for a similarly sized project (or projects.)
Magnolia Way Series
This series is my take on a “Friends”-like sit-com in novella form. It’s centered on a four-person polycule living together in Chicago, 1999. They move into an apartment building full of colorful characters, and meet the cute girl who lives across the hall.
Moving Day (Book 1)
I finished a rewrite of the first version (that version is still available on Amazon). The rewrite needs to be beta read and edited, and I’ll likely start publishing to Patreon and Ream once Phase Shift is completely posted. It’s 18k, rated Teen on the AO3 scale. If you’d like to beta read the book, please let me know by emailing [email protected]. I’m more than willing to trade beta reads/critiques for a similarly sized project (or projects.)
Spilled Coffee (Book 2)
This book is available now on Amazon. I’ll probably make some significant rewrites before this one goes to Patreon/Ream as well.
Overnight (Book 3)
This one has been beta read and is waiting for my edits!
Besides the above-mentioned editing, the next step for this series is to start writing book 4, which takes place during a Halloween party!
The Deity Tetrarchy
A.K.A Four Gods. This is a fantasy world I’ve been really inspired to write in recently. There are four gods and their domains are Time, Force, Life, and Death. The God of Time, Tempus, rules the Underrealm (where souls are eternal), while the God of Death, Tenemor, rules the Overrealm (where all living things must die). The Goddess of Life, Anivita, spends summer in the Overrealm and winter in the Underrealm. It’s vice versa for the Goddess of Force, Potentia, also known as the Winter Queen. The children of Life and Death are immortals known as clerics, responsible for shepherding the mortal souls in their care through their lives in the Overrealm. The children of Time and Power are immortals known as timekeepers, who care for souls in the Underrealm, where they rest and heal from the rigors of the Overrealm.
I have a few stories I’ve written or that I’m working on in this context.
The Wayward Timekeeper - An immortal cleric must go on a quest through the Underrealm to save his mother, the Goddess of Life. You can read this rated-Teen 9k word fantasy adventure story by backing the Duck Prints Press Patreon at the $10 level. Backing gets you access to a ton of awesome stories by fantastic authors. You can also buy this story as part of the author bundle add-on for the Aether Beyond the Binary Kickstarter!
Dancing for the King (working title) - Andelion has practiced for years to be allowed to dance for the god king of the Overrealm on the summer solstice. It’s the one day of the year his marriage vows lapse and the king can take a lover. This is going to be my contribution to this April’s DPP Patreon. It’ll be explicit, around 7k, m/m, with some delicious size difference content.
Laurel (working title) - When the impossible happens and an immortal cleric is murdered, Laurel must find out how. If someone has figured out how to kill the children of the gods, she and her siblings are all in danger. This is the novel I worked on drafting during Nanowrimo 2023. I’m expecting it to sit at a T rating, mostly a mystery/thriller in this fantasy setting. The main relationship will probably be f/f and maybe an f/f/f V-shaped triad. I’ve got some good content (about 30k), but I decided I needed to start the story further back in the timeline than I initially planned. I’ve also rethought a few of the characters and their roles, but I think a rough draft should be doable. I’ve done a lot more worldbuilding and identified a few characters who were missing from the story structure, so it’s coming along!
Here’s a snippet of Laurel:
Laurel ignored the screeching shouts of the band of children running through the monastery halls, until the door to her workroom opened and closed. A child wearing a hat with cat-shaped ears pressed his back to the door, panting with his eyes closed. Sweat shined on his freckled face, but when he opened his dark eyes and they twinkled, Laurel couldn’t help but smile. She raised one eyebrow at her little brother. “Who did you piss off this time, Teddy?”
“Editha,” he said with a cringe. As he left the door and joined her at the worktable, he held up a curled lock of inky black hair.
Laurel gasped and grabbed it out of his hand. “What did you do?”
He grinned. “She said she wanted me to cut it. I decided she’d look best with short hair.”
“Katysha is going to kill you.”
Teddy tilted his head for a second, then asked, “Does it hurt? Dying?”
“We can’t die.” Laurel set the lock of hair aside.
“Yeah, but do you think it does?”
As a cleric, Laurel had attended the deaths of several Houndsborough residents. She could lie to Teddy, but he’d be ill prepared for when it was his turn to start attending the dead and dying. Nodding, she said, “Yeah. It does.”
Marina (working title) - Marina only meant to go to the autumn equinox festivities in the capital city with her brother. She didn’t expect to be recognized as the reincarnated soul of the god-king’s former lover. I’ve got about 10k of explicit material, and I’m envisioning this as a series of short stories/novelettes as Marina gets pulled into the politics and intrigue of the palace and its harem.
Others—I’ve got a few ideas around how the Goddess of Life, Anivita, would use her powers to experiment, and I’ve written a few snippets, but they’re still really rough.
Get Your Words Out
This year, I decided to focus on editing and planning. I’ve committed to work on writing for 20 minutes a day, for 350 days of the year. So far, I’ve done writing tasks on 22 of 23 days this month! I took the day off when I had a major dental procedure, but I’m still on track!
What am I reading?
I’ve been keeping track of my reading over on storygraph. Feel free to follow me there, and I’d love to follow you back!
Jay’s Gay Agenda by Jason June—I read this for book club. It was a little uneven with the characterization, but I can see why people found it cute.
Sordidez by E.G. Conte—this was an interesting novella about future decolonization of the Caribbean and the Yucatan. I feel like a lot of it went over my head, but I found it an interesting mix of viewpoints and unlike everything else I normally read. I’m glad I picked it up off the library’s choice reads shelf!
Harrow the Ninth by Tamsyn Muir—I’m not quite halfway done with this one, and still very confused, but I’m enjoying the ride!
Ace of Spades by Faridah Àbíké-Íyímídé—This one is my current audiobook. It’s about lies and intrigue in a fancy private school, and I’m eagerly listening on to find out what happens!
Thanks for reading this far!
As you can see, I have a bunch of projects in the works. I’d love some feedback on which of these you’re most interested in. You can reply to this email, or find me on one of my socials.
Bluesky | Instagram | Cohost | Pillowfort | Tumblr
And that’s it for now! Thanks so much for your support!
#queer fiction#duck prints press#terra writes things#aether beyond the binary#writers of tumblr#terra p. waters
1 note
·
View note
Text
Arplis - News: My 22 Goals for 2019
Goal #1 — Spend More Time Doing What I Love
Little Miss Lucy Goose met her new vet this week and absolutely loves her. The fact that they give Lucy little treats while she’s getting her mani/pedi has something to do with it. Also, she is having a blast running around the yard now that it’s all fenced in. And just in time too! Three days after we finished, the ground froze.
Goal #2 — Garden, Garden, Garden
The day before the ground froze we planted a row of arborvitae trees along one side of the fence and moved 6 peony bushes to the side of the house. I would have liked to have gotten more done before the weather turned, but I am so very much ready for winter and all the calmness it brings to life here in New England.
Having 4 true seasons, rocks. And I am looking forward to a restful winter.
Goal #3 — Plant an Orchard {Calling it Quits on this one.}
We are almost there!!! The first harvest could be anyway now. I’m just waiting for the color to deepen a bit.
Goal #4 — Gussy Up the Potting Shed Done!
I gussied up the potting shed at our old house, but I would like to add some sort of “potting station” to the backyard here somewhere, but I’m not sure where I would put it yet.
Goal #5 — Grow Enough Extra Vegetables, Eggs and Flowers to Earn $1500 at my little roadside vegetable stand.
It was totally my intention to grow a ton of fruits and vegetables to sell at the farm-stand when I made my list of goals for 2019 last winter, but then we moved. So, that whole goal was sort of a bust.
Goal #6 — Finish Every Single Unfinished Rug Hooking Project in My Pattern Bin + 10 Things from back Issues of Magazines/Books I’ve Been Meaning to Make.
This week I didn’t hook a single rug, but I did hand dye and put together about 100 bundles of wool for my Etsy shop. I still have a few more colors to do, but after that, my Etsy shop should be stocked well into next year and I’ll be able to start hooking in earnest again.
73 rugs in my pattern bin {now down to 27}
183 hooked flowers {finished 150, now down to 33}
10 “things” from back issues of magazines {finished 0}
Goal #7 — Create 12 New Rug Hooking Patterns {with at least half of them being large ones} DONE!
So far this year I’ve added 12 new rug hooking patterns and 13 beginner rug hooking kits to my Etsy shop.
New rug hooking patterns I’ve created and added to My Etsy Shop this year:
Tullia and Thomas Turkey
Double Nantucket Whale Runner
Miss Henny and Penny
Miss Penny
Simple Kitty
Primitive Flowers
2 Fat Cats
Annabell’s Big Day
Old Fashioned Double Tulip
Fat Brown Hen
Busy Little Bee
Queen Bee
Rug Hooking Kits
Busy Little Bee {in 2 different colors}
Folk Art Heart
Small Nantucket Whale
Primitive Crow
Miss Robin {in 2 different colors}
Simple Kitty
Primitive Flowers
Sunflowers
A Basket of Spring Posies
Fat Brown Hen
Chicky’s Garden
Goal #8 — Split and Stack 2 Cords of Wood for Next Winter
All that firewood! We sold it. 😉
Goal #9 — Do Something with the 5,002 Photos on My Phone
Down to 2867.
Goal #10 –-Lose the Muffin Top Done!
I’m declaring Muffy gone. Thanks to the stress of moving and just getting outside and walking around more and working in the yard, Muffy has melted away.
Goal #11 — Run, Walk or Crawl a 5k, 10k, Half Marathon and Marathon
You are not going to believe this. The Girl had to work on Saturday, and so I asked my husband if he would do the 5K with me and he said YES. I couldn’t believe it. Luckily I had chosen a 5k with a run or walk option and so with it being a whopping 28 degrees outside, we weren’t the only ones there in jeans. 😉
The proceeds of the race went to Honor Flight Maine {a non-profit organization created solely to honor America’s Veterans for all their service and sacrifices. Honor Flight Maine transport America’s heroes to Washington, D.C. to tour, experience and reflect at their memorials.}
Now all that’s left is the Pastry and Tea Half Marathon before I can check this goal off my list.
Goal #12 — Read or Listen to 26 New Books {21 down, 5 to go}
Still listening to Maine by J. Courtney Sullivan.
Books I’ve Read or Listened to So Far This Year:
Marilla of Green Gables #1 Still my favorite
The Great Alone #2
The Aviator’s Wife #3
Before We Were Yours #4
Secrets of a Charmed Life #5
Where’d You Go, Bernadette #6
Carnegie’s Maid #7
The Gown #8
Unbroken #9
Drama#10
The Alice Network #11
The Shape of Mercy #12
Will’s Red Coat #13
Big Little Lies #14
Mr. Churchill’s Secretary
Born to Run
I Feel Bad About My Neck
Bunny Mellon {Doesn’t count because it was my second time}
On Writing {Doesn’t count because it was my third time}
Walden
Finder’s Keepers
Delicious!
Following Atticus
Goal #13 — Try 52 New Recipes.
33 down, 19 recipes to go. Last week I shared a recipe for Turkey Salad. It’s the perfect recipe for using up those last pieces of turkey from Thanksgiving dinner.
Goal #14 — Clean Up 52 Old Recipes on the Blog
9 down, 44 to go. I should get moving… because at this rate, I’ll be in the kitchen cooking the entire month of December. The poor bakeries. They’re going to suffer because I won’t be able to leave the house.
Goal #15 — Fill 100 Canning Jars 48 down, 52 to go.
No canning this past week and because I want to finish getting all that wool dyed, I won’t be canning anything this week either. Oddly enough though, I’m totally not even worried about reaching this goal. Peeps need their holiday jam, I’ll get it done. 🙂
So far this year I’ve I canned:
7 jars Peach Jam
7 jars of Strawberry Jam
15 jars of Carrot Cake Jam
15 jars of Spiced Pear Jam
4 jars of Almond Pears.
Goal #16 — Finish Furnishing Our House
I found a cadet blue vase at the thrift store this week {I found a pretty good one in town I like to pop in and check out every week} and brought it home. I’m not exactly sure what I’m going to do with it yet, but I like it and didn’t want someone else to snatch it up.
We also hung a reproduction vintage map of Maine that was printed with the E.B. White quote “I would rather feel bad in Maine than feel good anywhere else” in a handmade barnwood frame on the wall in the family room. I am going for a coastal look in there and things are starting to come together. I still need to make the roman shades and find {create?} a few more things for the walls, but I’m on track to get the room completed by the end of the month.
Goal #17 – 52 Dates with the HH {38 down, 14 to go}
We went on a lunch date to The Cheese Iron and walked a 5k together. 🙂
Goal #18 — Take One Adult Education Class Done {I’ve taken 3!}
Block Printing Class with my neighbor.
Spoon Carving Class with Heather.
Mini pottery lesson {I loved it! and now I want to sign up for a full class}
Goal #19 — Secret Holiday Project{s}
One of my secret holiday projects this year was block print towels and another was to make a few seed packet wreaths. I do have a couple more projects that would be perfect for gift giving up my sleeve, and plan to share those on the blog soon.
Goal #20 — Create 12 Wowie Zowie Party Platters
6 down, 6 to go. I need to get my game on. Seriously, I am running out of time.
Goal #21 — Visit 12 General Stores
9 down 3 to go. The HH and I have plans to check out another one this week. 🙂 🙂 🙂
H.B. Provisions in Kennebunk, Maine
Chase’s Daily {I think it should count}
Squam Lake Marketplace
Harrisville General Store
Dodge’s Store in New Boston, New Hampshire
Zeb’s General Store in North Conway, New Hampshire
Dan and Whit’s in Norwich, Vermont
Hussey’s General Store in Windsor, Maine
Goal #22 — Compete with Carole….. Get on My Front Door Game On
Much to the horror of my husband, I stood out on the front porch this morning in my pj’s wrapped in a blanket and puffy coat to take this photo. 🙂 🙂 🙂 The corn, along with the big pumpkins on the porch will stay until the day after Thanksgiving. Absolutely NO Christmas decorations until the day after Thanksgiving. Leg lamp included.
Front Door Bling I’ve Made So Far This Year to Compete with Carole:
Late January : Valentine Heart
Late February : Shamrock
Late March : Giant Carrot
May: White wave petunia hanging basket
June/July: Tin Star and Flag Bunting
August : Sunflower
September: Indian corn and pumpkins
October: Pumpkins and spinner do hickeys
November: Indian corn and big pumpkins
**************
How about YOU? What are your goals for 2019? If you told us about them HERE, check in! We want to know how you are doing. Because seriously, it’s so much easier to get those goals checked off your list when you have people rooting for you! 🙂
Have a great day everyone,
Mavis
You can read more about my 22 goals for 2019 HERE.
Have a Great Day!
The post – Week 45 of 52 appeared first on One Hundred Dollars a Month.
This content was original published at One Hundred Dollars a Month and is copyrighted material. If you are reading this on another website it is being published without consent.
Comments
I read The Aviator ‘s Wife on your recommendation and almost ... by Janice
It been a week or 'Sprucing up' the house at our place this ... by HollyG
I finished sewing all the panels (6 panels with 11 pieces each) ... by Mel
Related Stories
– Week 44 of 52
– Week 43 of 52
– Week 42 of 52
#12GoalsForTheNewYear

Arplis - News
source https://arplis.com/blogs/news/my-22-goals-for-2021
0 notes
Text
DOLPHIN 11
Primary research 2
To get a beter understanding of streamline I contacted Dr. John Videler, a biologist who had just published a book, titled ‘Fish swimming’. He introduced me to the concept of ‘Drag’. The shape of most fish seems counter intuitive. One would suppose that the contour of something moving through water would be pointed and then increasing in width and/or height until its end. But most fish, and this goes also for whales and dolphins too, have either a pointed or even rounded front that rapidly increases in volume to about a third of its length and then tapers off to the point where the tail begins. This acts on water splitting its resistance and after the max width decreases, leading the water in a linear flow that squeezes the body forward, preventing vortexes that would drag on the body. Next the tail does create vortexes just behind the body that create a push-off for the body. This did ameliorate my understanding of flow dynamics, but it was of no use to the shape of my body. It was, however of use to the shape of the waterwing. The first series I made were, seen from above, half circular, but relaxing that shape towards the ends. The thickness was something that did not agree with the profiles that were applied for boat keels. There the max width would occur on about one third of the length from the leading edge. The first proto-types in that profile were too steeply cutting into the water and therefor too directional for smooth tilting. I moved the cord (?, Dutch: ‘koorde’) forward and found the best result to be at the radius of the half circle that contained the leading edge. I also found the thinnest workable leading edge was 4 cm thick, so the distance of the thickest point from the leading edge was 2 cm. The leading edge therefor would be half circular. I experimented with several different shapes, wings that were longer than its width, too much drag, straight, wide and narrow, not enough grip, even with a double decker, no noticeable effect. Once committed to the half circular shape the first models were entirely out of wood. Then I began taking out the wood shortly after the leading edge and substituted that with a tin rubber sheet in order to catch more water. The final shape for many years had a tubular frame hinging right after the leading edge with a rubber sheet spanned in between. For an extensive oversight in development you can go to ’The WaterWing Museum’ on the home page of my website ‘Dolphin Address’, www.janploeg.nl , scroll down a bit and find it on the right hand side, it’s in Dutch and in English.
Meanwhile my contact with the ‘Dolfinarium’ led to an invitation for an exhibition. As there were no showcases I also got commissioned to take care of that. I ordered Perspex tubes in three different diameters and got the pedestals for those constructed by a friend and colleague, Onco Tatje. As the Perspex tubes would be vulnerable to scratching the pedestals were somewhat conical as to create an unobtrusive distance between the spectators and the tubes. The exhibition was so successful that I was asked to come back next year. For this I proposed to sculpt two life-sized dolphins out of oak wood before the public. To create a work space that would not be invaded by the public, I worked with a chainsaw and lots of razor sharp tools, I spanned a steel wire between the public and me and hung photos of earlier work on sturdy surfaces along the line to make it more friendly and informative. I asked Onco to construct a wheel with a diameter of my body length on a frame that could revolve and on the face of it glued a series of photos that showed a piece I had made before in several stages of development, so by turning the wheel the public could get an idea of its coming into being. I also had Onco make a rack with three Perspex tubes in which I placed smaller sculptures of whales, the Tubularium. I had a blackboard on which people could read what I was doing that day. These texts were printed out and multiplied on stacks of paper that people could rip off to read about the progress on previous days. From time to time I would take a rest and approached the public. Usually I would say ‘Are there any questions?’ and that was always the case. I’d answer them and improvise on adjacent information and, when rested resumed my work. I had worked for public before, usually on invitation on a variety of occasions, and for honorarium. The latter was also attained at the Dolfinarium and this became a substantial part of my income in other ways as well.
uI was regularly proposed by public institutions to exhibit on terms that it would be good exposure. I would then propose an exhibition on the term that they would by work from me for a certain amount of money or promote it so someone else did. Also I’d suggest, in case someone had been working there for, say 40 years, that, instead of a golden watch, this would be a work of art made by me. Particularly in the four seasons I worked for the Dolfinarium I learned how to get the most out of my work, financially and promotionally. The deal with the exhibition was that the Dolfinarium would buy a five meter Sperm whale in oak from me. The third year I made a Beluga with calf on its back in Bernoulli fashion in oak and the last year, 1997/98 I was asked to make totem poles for a large outdoor basin. The Lagoon. I convinced the directors to outsource this to the Kwakiutl indians as it was their sacred domain and got considerable license to obtain a huge oak trunk that I finally selected myself in Denmark. The tree was felled and transported by a special train wagon, because of it extraordinary size, to the Dolfinarium. I sculpted that into a huge fluke and a part of its peduncle as if it was diving. I obtained another, slightly smaller trunk, also oak, that became the head of the whale submerging a bit further on. These were placed on a lawn in which a bow wave was created of gras hill just before the head of the whale. On several places of that and other waves were parts of seven dolphins using the bow wave for propulsion.
I became a sculptor in 1977 by being accepted in a State program, the BKR, Beeldende Kunstenaars Regeling. Visual Artists Arrangement. This was financial and promotional support for artists that could not live off their work. In 1983 the government decided in November, that artists that had not sold for 3000 guilders (about 1300 euro), would have to leave the BKR. Lots of artists readied for protest. In de association I was a member of, the GKK, Groninger Kunstenaars Kollektief, Artist Collective of Groningen (the most Northern province of Holland). I suggested we would comply with the indecent demand that gave us just a month and a half to achieve that limit by taking our work to the local museum and offer it there for sale. I went to tell this to the director of the museum and he went berserk. We mobilised all the artists in the province and with their support I went to the director of the museum again. This time he contacted a Provincial representative, who happened to be a former class mate of mine. He organised the sale event to take place in a huge church in the very center of town. The exhibition was a great success and everybody made the 3000 margin, some by simply selling work to each other. The concept spread like wildfire over the hole country and only very few artists lost their income. I was a national hero for a week and was interviewed by many newspapers and magazines and appeared on television too. One of the spin-offs was that I was offered a location in the centre of town, a former paint factory above a furniture shop. I spent the rest of the winter cleaning the floor and walls and building vitrines with pine wood and Perspex in such ways that 3D work could be viewed from most sides. One showcase in a corner contained a disc that partly came outside, so people could spin it around and view the piece from all sides. In another corner I made a podium and hung a huge mirror, a donation of a neighbouring clothes shop, on the wall so people coulds see the rear of the piece on display. The work itself could not be touched by the public. The gallery I named ‘ ’t Hoogholtje’ which is Groningen dialect for the typical high wooden bridges one finds in the province. I was only present on Saturdays and on appointment. I ran the gallery for three years and had exhibitions by several artists in wood. There I also learned how to get reviews in the local newspaper. This episode was before I began my interest in whales and dolphins, but I include it because it’s part and parcel of the public relations I learned to put in practice.
In between my work for the Dolfinarium I made many dolphins and whales all of which I was able to sell. I lived for thirty years on a huge farmhouse in the middle of nowhere. There I had three workshops. One for small, often handheld work, one for medium sized work and outside I had a poly tunnel for large work, mostly whales up to five tons. There I also ran what was simply called ’The Woodclub’ up to five participants who came on Monday evening and worked with my tools in mostly pieces of my wood. They did not pay for that, but the understanding was that they would look out for me for opportunities, whether is was a newly felled tree, valuable info on techniques, sales opportunities or other contingencies. That got me more revenue than I ever could have gathered from contributions as everyone was bent on reciprocating their welcome. The most valuable result came from a small advertisement that was headed with an icon of a whale. I contacted them and this turned out to be a huge international pharmaceutical company that was building a new settlement in Amsterdam, ‘EuroCetus’. I made a five meter Sperm whale for them and Onco designed the set up, a steel bar that appeared to go straight up through the whales’ body and only a small pedestal on which he laid his head. This was a very rewarding project and not only financially. The ‘Wood club’ ran for about 10 year.
To be continued
Jan, mobile studio, September 13th 2017
0 notes
Text
Meet the Gawkers
This is our official coming out.
We've been at this thing for a few years now, and we need to clear some things up. On more than one occasion, we've discussed The Loud Pedal with personal friends and acquaintances and figured out that (for better or worse) people don't associate our work/content with us. Part of this is our fault. Since TLP began we have made a concerted effort to keep our faces concealed (trust us folks, it has been for your well being). On the rare occasion that one or both of us has been featured in a blog post or on a FB/Instagram/Twitter post, we have intentionally "helmeted" our ugly mugs. We like to let our followers know that we're doing something awesome, but that the focus is always the cars or the events.
Well, suffice it to say that humility is about to take a back seat in favor of an elevation of our personal status and visibility. Perhaps this is isn't the best idea we've ever had, but we're gonna give it a whirl anyway. Though we will have to show you our hideous visages, we promise to keep the luminaries we meet and cars and events we attend on your behalf, the center of attention. Though you will now have to look at our admittedly self-pufferizing selfies with drivers and personalities, we promise to keep our standards high and the images awesome and relevant.
In addition to forcing you to know what we look like, we decided to give you a little biographical information about each of us. No, this information probably won't enhance your life or help with your understanding of the universe in any way, but it will give you a little background on us and help you understand our passion for all things automotive.
The truth will end up being extremely boring. If we had more talent, we could weave a fictional masterpiece centered around our elevation as heroes of the automotive press. In a story you didn’t ask for, written without the clearest of hindsight, never giving ourselves more credit than we deserve, comes the story The Loud Pedal. We are not aloof journalist that take the high ground toward objective and dispassionate reporting. We are fans and we don't it. When we arrive to report on an event we are just as giddy and excited as all the other fanboys and fangirls.
Andrew Langley:
I turn 41 this year, and when it comes to things automotive, I think that age really belies my reality (in car years?). If I'm honest, when I get to a show or the track, I'm about 13 (some may argue closer to 11 or 12). In my element, I have to look around sometimes and remind myself to act a little more my age. I still like autographs, selfies, hero cards, drivers/celebrities and lots of other bright and shiny objects. For these things, my heartbeat accelerates. When I see a good autograph opportunity, I imagine that I look like George Costanza running from a cake fire at a kids birthday party. Ridiculous, yes, but controllable, no. And speaking of 13 year old boy, here I am:
As far as I'm aware, this was about the time I fell in love with cars and out of love with skateboards. This was probably about the time the obligatory Porsche 911 (red, with whale tail of course) and Lamborghini Countach posters went up on my bedroom wall. That said, it probably wasn't that serious. I mean, sure I was crazy about Kit, Detective "Sonny" Crockett's 365 and 512TR and the A-Team van...but who wasn't???
My serious interest started in the early 90s, when I inherited my mom's 69 Mercury Cougar. This wasn't the boon is sounds like. It was our "family car" for years. It had been sitting on the side of our house for ever and hadn't been started or run for a long long time (today, it would be called a "survivor"). My folks said I could have it if I could get it running and pay for insurance and running costs. My dad and I did end up getting the thing running and moving, if only up and down the driveway #rainman. Unfortunately, because of one big boo boo on my part, and because I soon came to know why FORD was a proper name as well as an acronym, it became apparent that my high school car wasn't going to be a muscle car #sadface. The loss of my Cougar didn't diminish my growing love for muscle cars, which turned into an appreciation of custom cars and trucks. My room became littered with the latest copies of Car Craft, Super Chevy, Hot Rod, Rod & Custom and Super Ford, and probably a few others that don't exist anymore.
The first day of the rest of my life came some time in 1994. I lucked into a job at a local VW Porsche garage in Sacramento, working for Frank and Nick Lettini at Frank's Automotive. It was there that I drove my first VWs, Porsches, Benzes, Beemers and the occasional Ferrari. There was something about those Euro jobs that I really began to like and appreciate. The sound of a mechanically injected 911 got under my skin (probably because it always sounded like all the mechanicals were going to fly apart!). I also started my love for all things VW...yes, both air and water cooled. My magazine collection took a tack toward Top Gear, Autosport, Road and Track, Car and Driver, Evo and 911 and Porsche World. Over the next few years Frank and Nick introduced me to the Monterey Historics, F1 Racing, Le Mans, and historic racing. All of these things are fixtures in my life all these years later and I elevated Nick to best friend and mentor.
I met Mark while in college, and found a willing accomplice with a good sense of humor, a mind thirsty for all things automotive and lots of free time. Our girlfriends at the time (now our wives) had work schedules opposite ours so we had plenty of time to hit the track and car shows whenever we wanted.
The die was cast.
All of these things still excite me and compel me to be part of The Loud Pedal and drive me to want me to share my passion and experiences with you (yes, both of you!)
Mark Farouk:
I was always into cars at some level, but my infatuation developed later in life. It was in college (I know, that’s where everyone “experiments”) that I met Andrew. By this time, he was fully engulfed in fanboy-ism for almost everything with an engine. I was skeptical that the amount time he spent on this hobby was worth it. This friendship introduced me to the automotive world. It wasn’t that I didn’t care before, it was that now I was friends with someone who read every car related publican known to man. Andrew talked about it frequently enough to the point where I finally relented and watched an F1 race. Ok, you have my attention! Enough attention that I would wake up at 4am to watch European F1 races before the days of DVRs and internet streaming. There was no turning back from that point, and I wanted more. California is home to several great race tracks, with one being a little over an hour away from our homes. My first race was an American Le Mans Series race at Sonoma Raceway (aka Sears Point). Within moments of arriving, though not really knowing what was going on, I was hooked. It was from that moment that I wanted to attend and smell (Yes, smell) every race possible.
These were the waning days of film photography (ask your parents), and taking photos was not the cheapest hobby or proposition. I had been into photography from an early age, but the racetrack was my new canvass. Not just a canvass but an organic, always changing backdrop with multiple opportunities to blow through roles of film....and that’s just what I/we did. A race weekend was likely to produce conservatively 15-20 roles of film. Today, you review your work instantaneously, but back then you had to wait until you found the time and money to have the photos developed and printed. Digital photography has made things much easier and cheaper, but I still sometimes miss the excitement of going to the photolab to pick-up prints and see images for the first time.
As the years went by, we both went digital. Rolls of film turned to thousands (and thousands and thousands) of photos and the need for lots of storage. The advent of cheap web space and social media gave us potential outlets to share our work with our fellow enthusiasts. In the early days, even those sharing opportunities that were available had limitations. Web space was expensive and blogging had yet to even arrive on the scene. We were (OK, maybe we still are) an audience two, keeping ourselves entertained with photos and commentary. Over the years though, we have arguably gotten better, made a few connections and improved our craft. Not for any monetary purpose, but just just for the sake of doing it.
Over the years I developed, experimented and sometimes failed at the art of automotive photography. I was lucky enough to have some opportunities to have media access to shoot for a legitimate media organization at several events through a personal contact. All the talent in the world will not get you closer to the action unless you extend your network, meaning making new contacts which later become people, that will take a risk on your talent. Shooting racecars next to the wall as they fly past is addictive and the best rush I’ve ever had. Even today, I cherish every moment in the chaos, and it's really where I feel my zen. Just me, a camera and a snarling beast spitting fire and shaking the ground.
It was during that time of shooting as a “pro”, of attending mandatory photographer briefings, and chatting with other established photographers that I picked up some knowledge of how the digital media world works in relation to being considered for official access. I’ve always been fortunate to be skilled in watching and learning. I didn’t just use my media access to develop the craft of photography, I used it as a learning opportunity so that one day I could shoot for myself rather than for someone else, and get credit for it. You must start out with some talent before anything else to serve as a foundation. I can say with 100% confidence that a social media presence and some great photos aren’t going to get past a good public relations professional, who is likely making the decision on whether you will receive media access. This also means that one must calculate when they are ready to be considered. As I was learning the back side of motorsports journalism, Andrew and I continued to build up a massive catalog of photographs from our years at automotive events.
It was at dinner after a long day the at track that we sat down to eat and I pitched my idea for taking our hobby (sickness) and share it with others. We discussed this over the next hour or so and came away with a shared goal of not just documenting our experiences but upping our game in every way. It was the best combination to build on. While I enjoy shooting the on-track action, Andrew likes documenting the paddock. He also has an uncanny ability to locate obscure things, and find famous personalities and drivers (because his emotional growth is somewhat "paused" at the 12-year-old level). Together, we handle all the angles.
From that day forward, after The Loud Pedal was born, our approach was different. We needed more planning, we entered racing weekends with goals on the material we needed to source to draft a successful review/blog post. To be honest, it is enjoyable in every way, but its not without self-imposed stress to ensure we capture the essence of the event we are documenting. That means we can’t just post some good photos, we need a story to tell.
Finally, this effort is self-funded and self-run. We don’t have wealthy benefactors (we are however open to it) and must use our substantial charms and marginal looks and talent to make this thing work. Most of all, we respect the craft and with our efforts do everything we can to avoid smearing it in any way. We are honored and humbled that you, and maybe one or two more people, follow our exploits, enjoy our photos and wade through our musings. We make no money from this venture, and we do it all for you.
Thank you for for reading.
-Mark and Andrew
The Loud Pedal
0 notes
Text
Hyperallergic: On Life and Work: Hannah Black and Petra Buchegger
Hannah Black, “Beginning, End, None” (2017), three-screen video projection (all photos by the author for Hyperallergic unless noted otherwise)
VIENNA — Hannah Black, a British artist in residence in Berlin, set off a furor in March when she circulated a letter demanding that “Open Casket” (2016), Dana Schutz’s partially abstracted painting of the Civil Rights martyr Emmitt Till, be removed from the Whitney Museum’s 2017 Biennial and burned.
Few artists have introduced themselves to the wider art world in a more polarizing way, and when they do, it’s through their art, not their politics. The museum did not remove the painting, but the controversy did raise some important questions about identity, ownership, censorship, and freedom, despite its indefensible premise.
But what of Black’s own art? At the time of the letter, a solo show at Bodega on the Lower East Side had recently closed after receiving a favorable notice in the Village Voice, and she presented a performance piece commissioned by PS1 MoMA’s Sunday Sessions series in April.
My first encounter with Black’s work was on the second sub-level of Vienna’s Mumok (Museum Moderner Kunst Stiftung Ludwig Wien), where she is presenting Small Room, an elegant installation of projected videos and latex sculptures. The “small room” of the exhibition title is the biological cell, the basic unit of a living body, through which Black attempts to extrapolate a definition of life.
A wall text describes the three-screen video projection, titled Beginning, End, None (2017), as taking “the apparent neutrality of contemporary biology for a loose meditation on the incommensurability of experience and its descriptors, of life in the abstract and the everyday practice of living.”
This is already something of a mouthful, a hazy metaphysics of the essential and the experiential. But then the text goes on to explain:
Utilizing the common educational metaphor of the cell as a factory, Black compares the biological cell to the history of real prisons and factories — symbols of mass production that stand for the victory of capitalism, social control, and the construction of the individual.
Such sweeping pronouncements always lead to trouble, and “symbols of mass production that stand for the victory of capitalism, social control, and the construction of the individual,” if anything, lack subtlety in their imaginings of a hegemonic, lockstep corporate culture — a picture that a close reading of the news, for better or worse, belies every day.
Black presents her tropes handsomely and wittily, however, and the three-screen format, filled with images of stars and prisons, train rides and factories, is often a pleasure to look at, if a little too in keeping with the conventions of biennale art. At the rear of the room, almost hidden by the screens, a stanchion-like, stand-alone monitor featuring a computer graphic of a rotating wireframe box completes the video-based setup.
But if you turn around, the four latex sculptures are standing behind you with disarming simplicity. Three are hung like sheets on a clothesline in an inverse arrangement to the video screens, with the two flanking sculptures in front and the central one behind, while the screens are installed so that the center is forward and the sides hang back. A fourth latex sheet, off to the right, is draped from an armature like a robe on a towel rack.
Hannah Black, “Small Room,” installation view: “Membrane 2,” “Membrane 1,” “Membrane 3,” (all 2017), latex, wool; “Live” (2017), latex, temporary tattoos
These works carry forward the idea of the cell — the horizontal sheets are called “Membrane” (numbered one through three) and the fourth is called “Live” (all 2017) — which, according to the wall text, springs from “an observation from a biology textbook — ‘No life without a membrane of some kind is known.’” The text goes on to mention the artist’s self-awareness that “this show itself is just one example” of the “the commodification of life and the life sciences.”
The beauty of “Membrane” and “Live,” however, is that you can leave the buzzwords on the wall and gaze at their otherworldly translucency, their ghostly lines, and their enfolded light and shadow, reading whatever you like — or nothing at all — into them.
* * *
Tucked into a side street far from the neon bars and Late-Baroque temples of the Museum District, Galerie Eboran is presenting a small but moving exhibition of sculpture, photography, and video by Petra Buchegger, an Austrian artist born in Graz in 1970. Like Black’s installation, it appears to be bifurcated between media, with three-dimensional objects that would seem unrelated to their accompanying photos and video if not for a underlying vision of the body, the earth, women’s work, and fate that stitches everything together.
The photographs are collectively called “Aprons Knots” (2017), and each consists, as the title suggests, of a soiled strip of plaid fabric torn from an apron and tied into a knot. These quietly dignified objects, stiffened by exposure to the elements, are laid against a white backdrop, not unlike Richard Avedon’s fashion shots of crushed cigarette butts, that highlights every stray thread and every speck of dirt.
Petra Buchegger, “Aprons Knots” (2017), C-print on 3mm Dibond, 40 x 60 cm
As beautiful as these photographs can be on an abstract plane, there’s something about their directness and humility that dissuades you from believing they’re operating on a purely formal level. There has to be some kind of connection to the lived-in world, a context that is supplied in the adjacent room, where the video Falisa Invernadero (2016) depicts an abundance of tomato plants, and apron knots tying the vines together.
Buchegger lives part of the year in the Galician region of Spain, where the video was shot. The women of the region typically wear an amulet around their necks as a good luck charm, which they make out of baked dough in the shape of a hand, a boat, or a sardine. The artist has taken the amulets’ varied forms and enlarged them enormously in relation to the original, but the resulting sculptures, made from styrofoam covered in rock-hard papier mâché, are still very much on a human scale, with most of them the size of a three-year-old child.
Petra Buchegger, “La Mano” (2011), Styrofoam, papier mâché, acrylic (photo by Eva Hradil)
For the most part, the upper portion of the sculpture is painted white, and the lower section is crisply demarcated by a clean, dark color: maroon, black, or blue. The surfaces are scored, crimped, stubbled, and gouged with navel-like holes, as if the artist were trying to retain the idiosyncratic features of the original amulet’s hand-molded baked dough.
The enlargement of everyday objects has been a mainstay of Pop Art and neo-Pop, from Claes Oldenberg to Jeff Koons. And the practice has long been accompanied by a sense of at least gentle satire, as with Oldenberg, if not outright condescension, which many observers, myself included, have attributed to Koons, though he would deny it.
Buchegger’s objects, on the other hand, are genuinely playful, light, and buoyant — due in part to her assertively hand-hewn finish (as opposed to Koons’s superhuman sheen). There is nothing Pop about them, despite the demotic sources of their imagery, because there is nothing ironic about them. They simply hang on the wall, sit on the floor, lean against a column, or lie heaped in a corner, their expansive, spongy forms taking over the room, as if bulging with the good luck ascribed by superstition to the amulets.
Each sculpture seems to contain a dissimilar or opposite entity: the sardines bear a kinship with the hand; the boat might mutate into Jonah’s whale; a green, white, and violet ladder evokes both a garden trellis and a slice of DNA; and a multi-pronged floor piece might be interpreted as a bit of coral, a calcite crystal, or a life-bearing spore. The vitality of the sculptures stand in counterpoint to the forlorn strips of fabric in the photographs, their textures as antithetical as goose down and sandpaper.
Petra Buchegger, “La Barca” (2011), Styrofoam, papier mâché, acrylic (photo by Eva Hradil)
But the beauty of the show is its acceptance of the binary, in which contrasting mediums and conflicting styles are reconciled by the artist’s faith in her subject: life defined by the work needed to sustain it. For the Galicians, who live in the northwestern corner of Spain, sustenance springs from the soil and the sea. For Buchegger, a respect for — and surrender to — these perpetual cycles has led her to marking their rhythms with amulets and apron strips, while laying claim to the sacredness of time.
Petra Buchegger: An Aesthetic of Existence continues at Galerie Eboran (Stumpergasse 7, Vienna) through May 27.
Hannah Black: Small Room continues at Mumok (Museum Moderner Kunst Stiftung Ludwig Wien, Museumsplatz 1, Vienna) through June 18.
Travel to Vienna and hotel accommodations were provided by Mumok in connection to the opening and symposium of WOMAN: FEMINIST AVANT-GARDE OF THE 1970s, which will be discussed next week.
The post On Life and Work: Hannah Black and Petra Buchegger appeared first on Hyperallergic.
from Hyperallergic http://ift.tt/2pv5kBd
via IFTTT
0 notes
Last Seen Blogs

puffystar-artdump
PuffyStarz

lightbringerbun
Thank you... and I'm sorry

iykykagainxs2
iykyk

safetypark72-blog
안전놀이터

jumpde
Art’n stuff