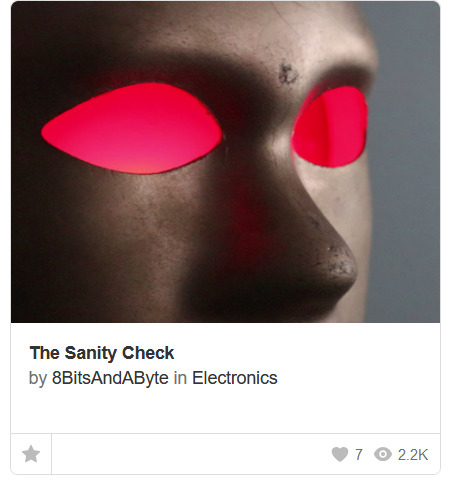
#and one from the arduino projects page
Explore tagged Tumblr posts
Visit Tumblr Blog
Explore Tumblr blogs with no restrictions, modern design and the best experience.
Last Seen Tumblr Blogs


Fun Fact
Tumblr Inc. has $15.1M in annual revenue.
Text


really interesting projects ive seen on instructables dot com
6 notes
·
View notes
Text


Monty Jaggers McGraw:
I am writing new BASIC programs to demo at my VCF Southwest 2025 exhibit of my 1979 Tektronix 4054A color vector graphics computer.
One of the programs I am writing is a 1978-1979 Battlestar Galactica TV demo. That TV show had $500,000 of Tektronix vector graphics computers and test equipment and many screenshots of their green vector storage CRT displays - some stills - some animated. These computer graphics were generated on both 1975 4051 and 1976 4081 vector graphics computers - predecessors to my 4052 and 4054A computers (see first photo attached).
Miami Herald TV 1978 magazine interview with the Battlestar Galactica set designer indicated extras on the set stationed in front of the 4051 computers were playing games during filming to increase realism and were so absorbed they kept playing after the cut! (article page attached).
The 4051 and second generation 4052 were the same physical size and used the same CRT and same Display board, but the 4052 and 4054 computers replaced the 800KHz Motorola 6800 CPU with a custom four AMD2901 bit-slice CPU to create a 16-bit address and data bus ALU which emulated the 6800 opcodes and added hardware floating point opcodes to speed up these computers 10x over the Motorola 6800, doubled the BASIC ROM space to 64KB and doubled the RAM space to 64KB!
I created these vector bitmap graphics using a "3D CAD" picture I found on the web of the Battlestar Galactica (last attachment).
As far as I know - there was never any 4050 BASIC program to view bitmap pictures on any of the 4050 computers. The 1979 4014 vector graphics terminal had a grayscale bitmap mode in the Extended Graphics option board, but I have only found a couple of bitmap 4014 images on a single Tektronix demo tape cartridge.
My 4050 BASIC program to display bitmaps works on all 4050 series computers - with an optional Tektronix 4050R12 Fast Graphics/Graphics Enhancement ROM Pack. This ROM Pack speeds up displaying vector images (including vector dot images) 10x over using BASIC MOVE and DRAW commands.
The Battlestar Galactica bitmap image in R12 binary format is 332234 bytes - slightly larger than would fit on a DC300 quarter-inch tape cartridge in the internal tape drive of all three 4050 computers, but would have fit on a 3M DC600 tape cartridge with a capacity of 600KB - it would have been very slow to load.
I designed an Arduino board to emulate the Tektronix 4924 GPIB tape drive - with the help of my software developer. My GPIB Flash Drive board contains a MicroSD card with gigabytes of storage and the Flash Drive emulates a GPIB tape changer, storing all the files of a "tape" in a single directory. I have also attached to this post a photo of my GPIB Flash Drive.
I have recovered almost 100 Tektronix 4050 Tapes and posted the ones I think are the most interesting at this time on my github repository for Tektronix 4051/4052/4054 computers: https://github.com/mmcgraw74/Tektronix-4051-4052-4054-Program-Files I included Tektronix published MATH volumes 1, 2, and 3 and Electrical Engineering, but I don't think they have a lot of use today. I have in my collection but not recovered tapes on Project Management, Statistics, and over 100 more tapes from the very active user group, which Tektronix made collections and published abstracts in their newsletter and the newletter customer got the tape for free. Commercial software like CAD programs were likely encrypted to eliminate copying - since Tektronix 4050 BASIC included a SECRET command which would then encrypt the program file as it was recorded to tape and add a SECRET flag in the tape header that would signal to BASIC ROM when that file was accessed to decrypt the program when it was loaded into memory. One big limiter to the size of the program was RAM in the 4051 was limited to 32KB and the 4052 and 4054 were limited to 64KB of RAM, although Tek BASIC did include commands to allow program "chunks" to be overlayed as necessary. Tektronix used those commands in their 4050 System Tape which was shipped with every system and included a tutorial on many of their BASIC commands. The tutorial ran on the original 4051 with 8KB of memory, and if the program detected 16KB of memory it would APPEND larger program files to speed up the tutorial.

15 notes
·
View notes
Text
I can finally post this now, my finalized interactive spaces project, Thinking With Portals :)
General Concept
Basically wanted to make the portals from portal 2 irl, since this is my best costume and I've always loved looking at old youtube videos of people making glados in real life and what not. When my professor said we could make literally anything for this project I knew what I had to do. The user walks onto a pressure plate which triggers the portal to open. Looking forward shows the user top down, and looking upwards shows the user facing forwards :)
Software/Hardware used
Processing- Used to take the live feed of 2 webcams and place them behind a masking animation
Arduino- Used to add pressure sensing to the processing sketch
Krita- Used to create each frame of the blue and orange portal opening and closing animations
Mad Mapper- Used to project only half of the processing sketch on each projector, and ties both projectors together
ScreenCaptureSyphon- Used to record the processing sketch and send it to Mad Mapper for projection
Eventually I'll have a github page for both this final project and one of my interim steps, which is a portal that works with your webcam and your keyboard lol I am SO burnt out from finals tho so it may take me a while to figure out how in the world to publish things to github
#portal#portal 2#interactive#projectionmapping#this project took me 3 months please clap#i literally made it so I can see everyone else from top down#cause I'm 4 11 and everyone sees me from the top down so#evening the playing field lol
9 notes
·
View notes
Text
Taking a look back over the documentation that has been released, it seems fairly simple to do. If you have a Home Assistant setup and are willing to buy suspiciously cheap electronics from Alibaba, here's what I've found.
This really covers all the effort for the work done by the official Home Assistant team. Section 2 covers the back end portion of the tech in the most depth, outside of visiting the various GitHub pages linked. Seems like the majority of the work was sponsored by Nabu Casa, the owners of Home Assistant, and subsequently released as open source programs. I trust Nabu Casa to have not bundled anything weird in, but make that determination for yourself.
This is the How-To guide using a $13 ESP32 Arduino based speaker/microphone. Unfortunately, this device is sold out at this point and I am skeptical if it will ever get a wholesale re-release. Other ESP32 based boards may work but may also require deviation from the printed guide.
This is a second project, based on a different but still out of stock speaker/microphone combo.
All in all, it seems much more viable than I assumed it was given my info from a few years ago. Wake words have been figured out, the intention system made by Nabu Casa allows for custom instructions, and it can all be hosted locally assuming you have access to one of 2 now out of stock boards.

🥹
113K notes
·
View notes
Text
The future of smart home control begins with one sleek, powerful interface — the Nextion NX8048P050-011R 5.0” Intelligent Resistive HMI Touchscreen. Ideal for automation projects, this display offers unmatched user experience, intelligent processing, and seamless integration. If you're planning to level up your smart home or automation setup in 2025, this intelligent touchscreen should be on your radar.
Available now at www.sonoff.in, this module is a must-have for developers, hobbyists, and smart home enthusiasts.
Power-Packed 5.0” Intelligent Display for Smart Control
The Nextion NX8048P050-011R boasts a 5.0-inch resistive touchscreen, offering sharp visuals and precise touch response. Designed without an enclosure, this screen gives flexibility in mounting it into custom panels, enclosures, or control stations.
The resistive touch feature supports usage even when wearing gloves — making it practical for industrial, automation, and DIY applications. It’s a display that adapts to your environment, not the other way around.
Advanced HMI Capabilities Built for Efficiency
This is more than just a screen. It's a powerful HMI (Human Machine Interface) equipped with:
Onboard microcontroller for fast UI rendering
Rich GUI design with Nextion Editor
Easy drag-and-drop interface development
Support for static images, buttons, sliders, and dynamic text
Integrated flash memory for storing UI pages
You can build multi-layered smart interfaces without relying on external MCUs for rendering. Control everything from HVAC to lighting systems — with just a touch.
Streamlined Communication with Embedded Systems
The Nextion NX8048P050-011R communicates using UART serial communication, making it compatible with Arduino, Raspberry Pi, ESP32, and more. Developers love how it simplifies hardware-software interaction.
Commands are sent via a simple serial interface, which dramatically reduces processing load on your main MCU. This allows developers to allocate power where it truly matters.
Why It’s Perfect for Home and Industrial Automation
Here’s why the Nextion NX8048P050-011R is a game changer:
Compact but powerful – Fits in tight spaces while delivering advanced UI functionality.
Customizable UI – Create polished, user-friendly interfaces tailored to your smart home design.
Responsive Touch – Reliable performance in both residential and industrial settings.
Highly Compatible – Works seamlessly with Sonoff smart switches and automation modules from www.sonoff.in.
Whether you’re managing lighting, thermostats, or entire smart systems, this touchscreen gives you intuitive and elegant control.
Nextion Editor – No Code? No Problem.
The Nextion Editor software is a dream for non-programmers. You don’t need advanced coding skills to build dynamic user interfaces. Just drag and drop components onto your screen canvas.
From progress bars to image sliders, your interface can be as simple or complex as your imagination allows. With built-in event triggers, automation becomes a breeze.
Technical Specs at a Glance
Let’s dive into the core specs that make this touchscreen a powerhouse:
Display Size: 5.0” resistive touch panel
Resolution: 800x480 pixels
Flash Memory: 16MB
RAM: 3584 bytes
EEPROM: 1024 bytes
MCU: 48MHz
Serial Port: TTL UART
Operating Voltage: 5V
These specifications ensure smooth performance, fast response, and consistent reliability in demanding automation environments.
Installation and Custom Integration
Thanks to its open-frame design, you can install the NX8048P050-011R in custom enclosures or panels. Whether it’s a wall-mounted control panel or embedded into a furniture piece, the flexibility is unbeatable.
Pair it with Sonoff Wi-Fi switches or smart relays to create a smart home interface that looks and feels professional.
Smart Solutions, Smarter Shopping with www.sonoff.in
Looking for a reliable supplier in India? www.sonoff.in is the trusted destination for Nextion displays, Sonoff smart devices, and complete home automation solutions.
They offer fast delivery, excellent customer service, and authentic products backed by warranty. Get access to India’s top smart home gadgets — all in one place.
Conclusion: Smart Control Starts Here
The Nextion NX8048P050-011R 5.0” intelligent touchscreen is the perfect HMI solution for next-gen smart home setups. Its seamless performance, rich feature set, and compatibility with Sonoff devices from www.sonoff.in make it a standout choice.
Don't settle for clunky switches and outdated interfaces. Take control of your environment — the smart way.
Explore the future of home automation at www.sonoff.in and power up your smart living journey today.
#sonoff#smarthome#smartappliances#googlehomeintegration#alexacompatible#sonoffpowr3#homeautomation#sonoffindia#wifismartswitch
0 notes
Text
Fixed my bike for the 50th time, also computers blow dicks
I love shit that does complex thing with simple building blocks. I have a degree in an engineering (adjacent) field, and while I utilize the skills and knowledge I acquired almost daily, what I learn time and again as I get more experience is that stuff that do one thing good are better than stuff that do many thing okay.
Usually people call it the KISS principle (keep it simple, stupid), but in this day and age I think "return to monke" fits better. Why?
Fuck computers.
This coming from a lady that works with them all the time, has her own home lab server/website/home automation/media streamer/whatever, runs arch (btw) on all her computers, and whose first instinct to solve random issues is to grab an arduino or ESP32-based board. Fuck 'em. At least, when a business tries to push one on me, fuck them in particular.
I control my arduino, I can't control some junk computer control unit in my vehicle, Xbox, air conditioner, toaster, whatever, they all universally suck! Hobbyists like me use computers to refine control of a project and make it more hackable. Corpos add computers to abstract control away from the user (really, the OWNER of the device) and make it harder to diagnose and repair.
That's why I love my motorcycle. It was made in 1981, and has exactly ONE transistor (it has electronic points, not a mechanical sparker) and the rest of the electronics is just cleverly designed relay logic and solid state components arranged in the correct order. The most complicated part is the turn signal flasher, because it relies on the signal bulbs having the right resistance to be part of a resistor divider, so no LED light upgrades, but for different reasons than a standard thermal based flasher.
The ENTIRE wiring schematic is one page! For a whole-ass motorcycle!
Anyway, I had an issue where the neutral light would sometimes come on by itself. It's a green light on the gauge cluster that let's me know the bike is in neutral, and when it's lit, it also powers a safety relay, that allows the bike to be started. It was an odd problem, sometimes it would go away, often it depend on how fast I was accelerating (more acceleration = more brighter.)
Were this a modern bike, I would be worried that whatever bullshit computer is buried in the chassis was failing, and at any point the thing could just die while I'm driving, but on my bike, I knew the issue was likely a simple exposed wire. Because the wiring diagram has ACTUAL information instead of "cable runs from computer module A to module B. Oh, what's it do? Go fuck yourself" I knew that the light turning on wasn't going to kill me, and the worst that could happen is I wear out the safety relay from repeated cycling.
Lo and behold, an exposed wire!


Clean it real good, seal it up, tape it up, and bam, no more flashy lights!
I love being able to start and finish a repair so simply, and not have to futz around for hours to figure out shit. I wish everything I buy could be this dumb.
Tl;dr: return to monke. Everything is better when it's simpler. It's better to have a thing done the dumb way by a we'll-build machine than have a piece of software try to fudge it's way to something vaugly correct. By God this bike will outlive me if I can help it.
This meme has made me feel more feelings than the ones that cracked my egg and turned me into a girl. I could rant for HOURS about how computers have ruined everything, not even from the psych "Facebook rots your brain" angle, they suck on in a technical aspect too:

0 notes
Text
Dark Academics — Vol. II
Vol. I
The cottage dweller who collects stamps and has a wall plastered with postcards and ephemera in their bedroom. All their books are lovingly dog-eared and flowers are pressed between the pages. They always seem to have a wistful look on their face, and their thrifted collared shirts are soft and flow in the wind. Their breath smells like fruity tea and buttered bread with jam on top. Their favorite Les Mis character is Jehan, and they probably hoard plants. Their voice may be soft, but their heart has all the hardy strength of an oak tree.
The athlete who can speak with natural eloquence about sports throughout history, from the Olympic games of ancient Greece to the ball games played by the Aztecs. They also know the rules of their favorite sports in detail, citing them like a lawyer at any given chance. They wear their school’s jersey over a collared shirt, and their shoes are elegant but comfortable, ready to sprint at any given moment. Their hair is messy and they live to bask in the sunlight. Their cooking is nutritious and protein-rich.
The gremlin. A rare sight. They hardly come out of their dark room, with shelves covered in jars and knick-knacks. They’re a pure hedonist, picking up any shiny object on the floor that sparks even an once of joy. They sometimes craft things using these shinies they find, or leave them to rest in their room, looking at them periodically. They collect mineral specimens and beads, and may or may not be friends with the local murder of crows. They may seem a little strange, a little aloof, but they love with the whole of their heart. Their passion for shinies consumes them, just as they’re consumed by a book filled with beautiful words. They don’t read for philosophy, but for beauty. And they always carry a knife.
The Renaissance man (or woman, or person) with a room of such eclectic content that you’d think it might belong to multiple people. There are legos and arduino projects scattered across the floor, piles and piles of books on linguistics in the corner, horror movie posters on the walls, and abstract paintings and ceramics taking up most of the bookshelves. You may think all these interests are shallow and hardly developed, but this academic does, in fact, take care to broaden their skills and knowledge across all of them. They may or may not have ADHD, and may or may not have idolized Leonardo Da Vinci growing up.
The haunted one staring into empty space. They are so tired. They get maybe three hours of sleep a night, struggling to remain grounded, or maybe they chronically oversleep. There is not a day in their life they don’t experience some kind of ache; in their joints, in their heart, in their mind, something else, or all of the above. They’ve been broken on the wheel time and time again. They lost their attention span to brain fog and caffeine. They’re a nighthawk, occasionally coming to their senses in the dead of night, and spiraling into the realization that things around them are deeply fucked up before their mind fogs up again. They like art and music, and either blast their ears off or stare at a picture as their brain absorbs it all. They like photography. With the tap of a button, a moment is immortalized. A blessing for their poor memory.
The geek, an avid tabletop rpg player. They have a multitude of characters and a multitude of ideas for interesting worlds. They tend to daydream a lot, and every novel they read feeds into this passion of theirs. They also tend to adore video games, or any other form of media focused on characters and their lives or an interesting world. They are a fan of authors such as Tolkien, and have probably created multiple constructed languages before, tying them in with their characters and worlds. They tend to be a little all over the place, but their familiarity with character creation and roleplaying helps them put themself in other people’s shoes. They may or may not have forgotten their true identity because of all the roleplaying, but in the end, every character they create contains an inevitable aspect of themself. The geek is a storyteller, a bard with a quicksilver mind and a dagger tongue.
38 notes
·
View notes
Text
Meanwhile, in Arduino-land
The Arduino forum is now completely renovated
_
The Arduino forum is one of the largest Discourse forums in the world, with 1+ million users and 5+ million posts Arduino is an open-source electronics platform based on easy-to-use hardware and software. Thanks to its simple and accessible user experience, Arduino has been used in thousands of different projects and applications. What makes Arduino special and unique? Its worldwide community of makers, students, hobbyists, artists, programmers, and professionals. Their contributions have added up to an incredible amount of accessible knowledge that can be of great help to novices and experts alike. The main discussion hub for Arduino users is the forum: born with the first Arduino board in 2003, the Arduino forum is still the heart of the open-source approach of the platform and of its will to make technology more human-centric. Today Arduino migrated the forum to a new, modern, platform which provides a dramatically improved user experience: it’s fast, clean, practical, mobile-friendly. The new interface helps focus on contents, share knowledge and generate quality interactions between people. No more pages to browse manually: long conversations are loaded dynamically while scrolling. Dynamic notifications are shown for mentions or replies to own posts. Links are expanded with previews. Long conversations can be automatically summarized. Trust levels and other tools help fight spamming and encourage good behaviors. The new forum is built on Discourse, which is the leading forum platform out there, 100% open source. The Arduino forum is one of the largest Discourse forums in the world, with 1+ million users and 5+ million posts. Arduino partnered with the Discourse team to perform this long and complex migration.
About Arduino Arduino is an open-source hardware, software, and content platform with a worldwide community of around 30 million active users. It has powered thousands of projects, from everyday objects to satellites and complex scientific instruments. This success has been made possible by combining a wide variety of electronic boards, easy-to-use tools, a collaborative community, and practical project examples to suit all levels. About Discourse Discourse is the 100% open source discussion platform built for civilized discussion, it’s a from-scratch reboot, an attempt to reimagine what a modern Internet discussion forum should be today. The trust system means that the community builds a natural immune system to defend itself from trolls, bad actors, and spammers — and the most engaged forum members can assist in the governance of their community. Press contact Luisa Castiglioni [email protected]
2 notes
·
View notes
Text
First Post and explanation of project

The project I am creating is an autonomous robot that is powered by a solar panel; its sole function is to find areas of high sunlight to move to and charge itself. This is a focus on the artificial life theme. I would liken the idea to a plant - instead of growing to areas of sunlight, the robot would instead be required to move there to ‘survive’.
This idea intrigues me, as once it is complete, it would no longer require input or assistance from an outside influence to function. It would act entirely on its own, and it would be interesting to see how tweaks to its code or physical layout would change how long it survives for - almost like evolution.
The one thing I would not change about the project is the autonomy aspect - the robot could find power in other ways, such as wind power, or returning to a charging station when low on power, but it must not lose the inability to be acted upon by an outside party.
An audience to the robot would be different than most others, as usually input is required. In this case, the audience is purely spectating what the robot does, similar to the entertainment one might get from watching fish in a fishbowl.
I believe this to be well within scope; the physical aspects of the device are rather simple, and is much more about how the code interacts with the real world. Since we have covered servos in labs, and solar power is relatively simple (I plan to use and adapt a guide for solar power on arduinos from here) I believe the project can be completed before January.
I first got the idea for this device from this project page. It is an arduino weather station. I thought that making a device that finds its own power and takes readings as well would be extremely interesting, but decided to focus only on the power aspect, as otherwise the project would be too large.
1 note
·
View note
Text
Will guide you to build a cellular based predictive maintenance monitoring device with Blues Notecard, Edge Impulse, Qubitro & Wio Terminal. Things used in this project Hardware componentsBlues Wireless Notecard (Cellular)×1Blues Wireless Notecarrier-A×1Seeed Studio Wio Terminal×1Software apps and online servicesBlues Wireless Notehub.ioQubitroEdge Impulse StudioArduino IDE Story In Industry 4.0, most industries are automated, and they can realize more than 200%productivity improvements. Let’s take an example. I think this one is a good example for the industry of automation. You well know this man, the real life Iron Man, Elon Musk. He tweeted that his Tesla factory is 75% automated. That seems like good news, right? But who cares? Everyone wants a 100% perfect product. If a system did something wrong, that means the whole process will be useless, and it affects the TTM (Time to Market) of the product. This is not only for the automotive industry, it’s the same for all industries. So we need to ensure a system that works 24/7/365. But we want to reduce human error in the process, which is why we choose automation, but now we need humans to guarantee the system process. Machine Learning Has played a significant role in optimizing manufacturing processes. Manufacturing companies can achieve what is called ”smart factories” by optimizing systems in factories to work with ML. Smart factories monitor and collect production data continuously using smart devices, machines, and systems. Manufacturers can make better decisions based on advanced analytics provided by this data collection. In this tutorial, I’m going to show you how to monitor industrial motor activity continuously and if the machine stops or any anomaly is detected, it will trigger an email alert. Hardware Requirements: LTE-M Notecard Global Notecarrier A with LiPo, Solar, and Qwiic Connectors Seeed Wio Terminal Software: Arduino IDE Blues Notehub Qubitro Edge Impulse Flow Diagram: With this flow, we will first collect accelerometer data from the Wio Terminal, and then use Edge Impulse to classify anomalies. In the event of an anomaly being detected, the Blues Wireless Notecard will send the data to Notehub.io, which can then be forwarded to Qubitro via MQTT, and finally by using Webhooks, IFTTT will be used to trigger an email alert. Hardware Connection: Connect the Blues Notecard’s Tx pin to Rx (pin 10), Rx to Tx (pin8) and connect +5V and Gnd pin to the Wio Terminal. Edge Impulse Model Classification: First connect the Wio terminal with the PC and go to https://ide.tinkergen.com/ Once you open the IDE, select the device as Wio Terminal. Next, select Motion data uploader. This is where you can choose or change the labels for the data. It is a default code that is used to get three different data points from the accelerometer on the Wio Terminal. As part of this project, I have used two types of data, one of which is “Ideal” and the other is “Wave”. To upload this code to Wio Terminal, click on upload. You will see this page after uploading. Once you click the button on the Wio Terminal, the data will be collected. Once the data has been collected, click on “Training and Classification”. Then click the start training button. The log can be viewed after the job has been completed. Click on the deployment option next. Upon completion of development, you will be redirected to the programming area. This is a simple block that will classify the data and show it on the Wio Terminal screen. You can see the Wio Terminal response once the code has been uploaded. We now need to integrate the Blues Wireless Notecard with Wio Terminal. Just click on the code icon, and it will show the respective code. You can just copy it, as next step will require this information. In order to
add this model classification library to the Arduino IDE, you must copy and paste it into the Arduino library folder. We are now ready to begin Arduino development. Blues Wireless Notecard Integration: Copy the code from the Tinkergen IDE and paste it, to make sure it works. Create a new project in Notehub.io and copy the provided project ID, and replace it with the following code. I've included Blues Wireless Notecard settings in this code, and it will send out a notification if it finds any anomalies three times. #include #include "LIS3DHTR.h" #define LGFX_AUTODETECT #define LGFX_USE_V1 #include #include #include #define txRxPinsSerial Serial1 #define productUID "XXXXXXXXXXXXXXXXX" Notecard notecard; static LGFX lcd; static LGFX_Sprite sprite(&lcd); int count; int count1; LIS3DHTR lis; #define CONVERT_G_TO_MS2 9.80665f ei_impulse_result_classification_t currentClassification[EI_CLASSIFIER_LABEL_COUNT]; const char *maxConfidenceLabel; void runClassifier() float buffer[EI_CLASSIFIER_DSP_INPUT_FRAME_SIZE] = 0; for (size_t ix = 0; ix < EI_CLASSIFIER_DSP_INPUT_FRAME_SIZE; ix += 3) uint64_t next_tick = micros() + (EI_CLASSIFIER_INTERVAL_MS * 1000); lis.getAcceleration(&buffer[ix], &buffer[ix + 1], &buffer[ix + 2]); buffer[ix + 0] *= CONVERT_G_TO_MS2; buffer[ix + 1] *= CONVERT_G_TO_MS2; buffer[ix + 2] *= CONVERT_G_TO_MS2; delayMicroseconds(next_tick - micros()); signal_t signal; int err = numpy::signal_from_buffer( buffer, EI_CLASSIFIER_DSP_INPUT_FRAME_SIZE, &signal); ei_impulse_result_t result = 0; err = run_classifier(&signal, &result, false); float maxValue = 0; for (size_t ix = 0; ix < EI_CLASSIFIER_LABEL_COUNT; ix++) ei_impulse_result_classification_t classification_t = result.classification[ix]; ei_printf(" %s: %.5f\n", classification_t.label, classification_t.value); float value = classification_t.value; if (value > maxValue) maxValue = value; maxConfidenceLabel = classification_t.label; currentClassification[ix] = classification_t; void setup() lcd.init(); lcd.setRotation(1); lis.begin(Wire1); lis.setOutputDataRate(LIS3DHTR_DATARATE_100HZ); lis.setFullScaleRange(LIS3DHTR_RANGE_4G); Serial.begin(115200); notecard.begin(txRxPinsSerial, 9600); J *req = notecard.newRequest("hub.set"); JAddStringToObject(req, "product", productUID); JAddStringToObject(req, "mode", "continuous"); notecard.sendRequest(req); delay(1000); void loop() lcd.fillScreen(0x008000u); lcd.setFont(&fonts::Font4); runClassifier(); lcd.setTextColor(0xFFFFFFu); lcd.drawString((String)maxConfidenceLabel, 130, 100); delay(500); lcd.fillScreen(0x000000); if (maxConfidenceLabel == "wave") count = count + 1; if (count == 3) for (int i = 0; i
0 notes
Text
Arduino camera timer trigger

#ARDUINO CAMERA TIMER TRIGGER CODE#
#ARDUINO CAMERA TIMER TRIGGER FREE#
If ((TIFR1 & bit (TOV1)) & timer1CounterValue
#ARDUINO CAMERA TIMER TRIGGER CODE#
The example code below provides a "frequency counter" which counts the number of events which cause a rising edge on digital pin D5 during a specified interval.įor example, if you put a 5 kHz signal on pin D5, and time it for one second, the count will be 5000. You can use these timers easily enough by using the analogWrite function - that just generates a PWM (pulse width modulated) output on the various pins that the timer hardware supports.īut for a more in-depth analysis, let's look at using the timers/counters in our own way. This provides you with the figure that the millis() function returns. This is used to count approximately every millisecond. Timer 0 is set up by the init() function (which is automatically called by the code generated by the IDE, before setup() is called). The Atmega328 (as on the Arduino Uno) has three timers/counters on-board the chip. A project collaboration and documentation platform.This page can be quickly reached from the link:.Membership connects and supports the people and projects that shape our future and supports the learning initiatives for the next generation of makers.
#ARDUINO CAMERA TIMER TRIGGER FREE#
A free program that lights children’s creative fires and allows them to explore projects in areas such as arts & crafts, science & engineering, design, and technology.
Maker-written books designed to inform and delight! Topics such as microcontrollers including Arduino and Raspberry Pi, Drones and 3D Printing, and more.
A smart collection of books, magazines, electronics kits, robots, microcontrollers, tools, supplies, and more curated by us, the people behind Make: and the Maker Faire.
A celebration of the Maker Movement, a family-friendly showcase of invention and creativity that gathers together tech enthusiasts, crafters, educators across the globe.
The premier publication of maker projects, skill-building tutorials, in-depth reviews, and inspirational stories, accessible by all ages and skill ranges.
0 notes
Text
Type test xboard

#Type test xboard how to#
#Type test xboard code#
In another major decision, the CBSE has decided to do away with seven Academic Electives and 34 vocational subjects for Class XII because of low enrolment numbers. the move (so that they can be used in combination with legality testing), are. Out of the total 100 marks, the board exam will be of 50 marks, and 50 marks are allocated to internal assessment/practical examination.Ī candidate will have to score 33 per cent marks in both board exam and practical exam to pass the subject. XBoard supports 66 piece types, with the possibility to provide external. Students will have 13 options to choose from for the sixth subject - Dynamics of Retailing, Information Technology, Security, Automobile Technology, Introduction to Financial Market, Introduction to Tourism, Beauty and Wellness, Basic Agriculture, Food Production, Front Office Operations, Banking and Insurance, Marketing and Sales, and Health Care Services.Īccording to the circular, the maximum marks will be 100. The results of the test suite will be reported in the second pane of the Engine Output window, and as the 'match' result in the title bar: finding a correct best move will be counted as a win, playing an avoid move as a loss, and all other moves as draws. However, if a candidate desires to reappear for the failed subject they can appear in the compartment examination,” it added. XBoard can thus be used to run an EPD test suite, through a command like 'xboard -epd -mg 100 -lpf STS1.epd -lpi -1 -fcp crafty' to solve the first 100 test positions on the STS1.epd file with the Crafty engine at the default time control. “The board exam result will be computed accordingly. “If a candidate fails to pass in any one of the three elective subjects - science, social science, mathematics, then it will be replaced by the vocational subject (offered as sixth additional subject),” a CBSE circular said. The Central Board of Secondary Education (CBSE) has remodelled its assessment scheme for Class X Board examination for schools offering vocational subject as compulsory subject under the National Skills Qualifications Framework (NSQF). However, from the 2017-18 academic year, it will be compulsory to study a vocational subject. Students also have a choice of studying a vocational subject as an “additional” course. If (readString.Students appearing for Class X board exams from next year will have to study six subjects instead of five with the CBSE remodelling its assessment scheme.Ĭlass X students have to now study five subjects - two languages, social science, mathematics and science. Serial.begin(57600) //XBee module Baud rate Server server(80) //Standard HTTP server port String readString = String(30) //string for fetching data from addressġ92, 168, 0, 177 } //Change your IP Address here * A simple web server: Displays a button to open/close
#Type test xboard code#
In the Arduino IDE go to " tools>Boards> Arduino Fio"Ĭopy and paste the Xboard code on to the Arduino IDE. Use the FTDI programmer to program the XBoard. We will go through the XBoard setup first.įirst you should solder on a male pin header on the Xboard for the FTDI programmer as pictured. The core has been reinforced with the addition of fibers, increasing its strength and providing fire resistance ratings when used in tested assemblies. Input: web page interface Hardware needed:ġ.
#Type test xboard how to#
Scope:This project is going to walk you through how to use the XBoard with xbee along with another arduino to control some objects over your local network. You can see a video of us using the XBoard to control our office door. Also, you can easily expand by adding more relays and modifying the code a little. By using a relay you will be able to control any appliance you hook up to the relay. This project will use an arduino, an Xboard, and a pair of xbee modules to control a relay.
0 notes
Text
Fritzing logo

Save the file as Plain SVG (File > Save As.). Change the ID of the path in the "board" layer, naming it as "boardoutline".ġ.12. Change the ID of the "silkscreen" layer naming it as "silkscreen".ġ.11. With the XML Editor, change the ID of the "board" layer naming it as "board".ġ.10. File > Document Properties > Resize page to content > Resize page to drawing or selectionġ.9. Select both drawings and go to "Align and Distribute", and "Center on vertical axis", then "Center on horizontal axis".ġ.8. Fill and Stroke for "board": green fill, no stroke.ġ.7. Fill and Stroke for "silkscreen": no fill, white stroke, width of the stroke 0,008 inch.ġ.6. Delete the drawing in the "main" layer - for "main" layer I mean the "Layer 1", that inkscape had already in a new document.)ġ.5. (The "silkscreen" sublayer should stay above "board" sublayer. Add a sublayer named as "silkscreen" also with a copy of the drawing/shape. Add a sublayer named as "board" with a copy of the drawing/shape.ġ.4.

But if you do not, the shape will be distorted and the manufacturer will not be able to produce the PCB. Fritzing looks like the ideal tool for this: Free (GPL license) Multi platform (Linux, Mac OS, Windows) Integrates a large library of components The stripboard can be resized, you can chose the strips to be vertical or horizontal. (Note that nothing has changed in the drawing. Edit > Preferences > Behavior > Simplification threshold > 0,0001 You can also import any image and use it as a "base" for your drawing (as I did in PCBrain).Īfter completing the drawing, follow the steps below to get a file with the required attributes.ġ.1. Inkscape has many tools for creating shapes, for example: ellipses, arcs, polygons, stars, spirals, freehand lines. Despite being easy to use software, Fritzing is not limited to simple designs. it's more artistic and just an example of a shape.ģ. so, forget the simplicity of the PCB itself. The focus of this tutorial is to show you how custom shapes can be made easily. For this tutorial, I created PCBrain, which is a brain-shaped PCB, based on my YouTube channel logo.Ģ. Fritzing: also free and open-source, is the tool we will use to design the PCB (arrange the parts, do the routing, export the files to produce the PCB).ġ. We will use it to make the PCB shape, which will later be used in Fritzing to design the PCB.Ģ. Inkscape: is a free and open-source vector graphics editor. OR if you don't want to spent a lot of time learning how to work with advanced softwares, because you make eventually a board or other. and need it in the shortest time as possible. We would both like to see everyone learning how to use hardware and software to learn programming and to teach electronics.If you are a beginner and need a PCB with custom shape. (The one shown below is from a project about debouncing circuits with libraries.) Using Fritzing in one of our Learn projects to show a button and LED circuit with the Uno32.īoth Fritzing and Digilent intend to continue to work together to fulfill our common educational missions and goals. We also use some Fritzing graphics in our inventories for our Learn projects. We offer a software tool, a community website and services in the spirit of Processing and Arduino, fostering a creative ecosystem that allows users to document their prototypes, share them with others, teach electronics in a classroom, and layout and manufacture professional pcbs.

Here at SparkFun, we use Fritzing in the classrooms, our hook-up guides, and any. Fritzing is an open-source hardware initiative that makes electronics accessible as a creative material for anyone. You can even design your own PCBs and have them fabricated from the files you design. From designing circuits to demonstrating new concepts, we use Fritzing for showing people what we’re working on. Fritzing is a great open source tool for anyone to teach, share, and prototype their electronic projects It allows you to design a schematic, and thus a part, which can then be added to very professional-looking wiring diagrams. A number of our parts (with more being added regularly) are in Fritzing Projects (search for Digilent) and in the user-created parts repository.
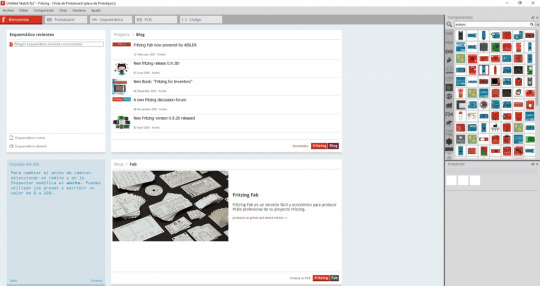
A lot of our Learn projects feature Fritzing. offer a software tool, a community website, and services in the spirit of processing, fostering a creative ecosystem that allows users to document their prototypes, teach electronics in a classroom, and layout and manufacture professional PCBs.”Īt Digilent, we use Fritzing to present educational concepts. In their own words, “Fritzing is an open-source hardware initiative that makes electronics accessible as a creative material for anyone. If you’ve had a chance to look at our Learn site, you may have noticed a that many of our images of breadboards feature a “Made in Fritzing” tag.
0 notes
Text
Gobot download

#Gobot download how to#
#Gobot download drivers#
#Gobot download upgrade#
#Gobot download for android#
Initially, it will be a simulation and learning tool for use by beta testers and anyone else, but later I hope to make it into a puzzle game where you will unlock ever more complex modules of functionality after building and testing them at a lower level. I will add a separate page about this when it becomes available. With it, you will be able to construct circuits from basic components up to programmable systems. This exciting project will be available soon for download. A project based guides to learn animation, advanced shaders, environments, particle rendering, and networked games with Godot 3.0 Key Features Learn the art of developing cross-platform games Leverage Godot’s node and scene system to design robust, reusable game objects Integrate Blender easily and. From the description: A node with the ability to send HTTP(S) requests. Download or Read Online Godot Engine Game Development Projects in PDF, Epub and Kindle. Part 1: Making HTTP-Requests Godot has a node called HTTPRequest. Part two shows how the image is displayed in Godot.
#Gobot download how to#
Part one focuses on how to make HTTP requests. I couldn’t do it easily on my previous iPhone which I was peer-pressured into getting a few years ago and upgrading to the latest model, but finally I escaped into the unlocked freedom of the Android ecosystem where it is easy to transfer files to the phone and have the joy of seeing your own App work on it without much friction. Overview This is a simple example of how Godot can be used as a web scraper. I love the idea of creating mobile Apps to use on your own phone. I have since started developing another Desktop circuit simulation project that is working out nicely now that I discovered Graph Nodes to use instead of an auto-router. It was a spin-off project from my Desktop project for simulating electronic circuits where the complexity of it was spinning out of control.
#Gobot download drivers#
Gobot provides drivers and adapters for controlling a wide variety of physical devices from low-level Arduino and Raspberry Pi, as well as drones, toys, and other complete devices that themselves have APIs. This is primarily an Android gamified application built with Godot Engine for learning the basics of digital logic with number systems, gates, and logic circuits. Features: - Autowalk ( through predefined routes or random walking arround point you set on map ) - Catching pokemons ( You can choose if u want to use. What is Gobot Gobot is a framework for robotics, physical computing, and the Internet of Things (IoT), written in the Go programming language.
#Gobot download for android#
Updates:New build targeted for Android Oreo 8.1 and below.In this section of the website I will add links to downloads that I provide and/or to my own games and applications. Nano must navigate and take control of the perilous kill zones in order to free his fellow GoBots. When an engineer discovers an anomaly in his behavior module, the facility is put into kill-zone lock-down and evacuated. Nano, the first bot to test the new AI, becomes self-aware and quietly hatches a plan to free the others.
#Gobot download upgrade#
Remove Ads: You can also pay $0.99 cents to remove all ads.Īt a remote R&D facility in the Nevada desert, a secret underground organization is working on an upgrade to their Artificial Intelligence Engine for a new line of robots – the GoBots – which are comprised of individual nano-bots.
Unlock Characters: Currently, the only character available for purchase is Lea – for $0.99 cents.
Zones 3 through 7 cannot be purchased/unlocked at this time. If you need to, you can also purchase to unlock Zone 2 for $0.99 cents.
Unlock Zones: Zone 2 will unlock after you complete zone 1.
In-app purchases are available as follows: The 3rd zone is being actively developed. Download this app named GoBot Nano.2D Mobile Game.
0 notes
Text
Spss 22 premium


To get the Orb of Origin with commands, do "/give origins:orb_of_origin". The game is compatible with both Android and IOS devices, and if you are a PC user you can still play the game using an Android emulator. Our goal is to create a constantly growing community-funded resource of open content, for complete freedom and usability by professionals and hobbyists alike. Hướng dẫn cách tẩy tể bào chết vùng da đầu gối và khuỷu tay. Create with Adobe Stock artist-designed templates for Photoshop, Illustrator, InDesign, Premiere Pro, and Premiere Rush. launched this game from the adventure category.
Fill In 3D Mod is a Puzzle Android Game.
So tipos de textuais descritivos naruto shippuden. fillin3d) Can you collect them Fill-In Crosswords Mod unlimited money for android – APK download is a Word Android Game. So aiaa gnc 2015 fratello's pizza parma dr. Fill Up Run Game is an application that is classified in the Action category of the google app store.
rapids condos for sale india's got talent auditions date 2013 flyslot.
You can enjoy playing the game very fast, and this is all for free. Thoptv App Alternatives Get on this Page. The plot makes it so convenient by offering: 0 Download for PC – Thop App Live Cricket Mobile APK Get Online. About Gcash Hack Money a = some prime, b = another prime, and r = a/b (where a is smaller than b) w = 1/sqrt (p) (also experimented with w = 1/sqrt (p)*2 but I kept overshooting my a very small margin) x = a/p.

LINE Healthcare offers chat-based medical consultation service, enabling users to consult directly with the doctors through the LINE app. 20130 APK - Microsoft Word for Android is a great tool to create, edit, and share Word documents on the go. Whether it's Windows, Mac, iOs or Android, you will be able to download the images using download button.
sixaxis controller apk go launcher ex app 92060912908. Save templates inside Creative Cloud Libraries to organize your projects. 9% methanol – methanol was the hands down winner for getting the crystals.
Hi guys free load for all network! Eto lang ggwin niyo install POPSLIDE sa playstore magregister, once mkaregister may 500pts.
LaserGRBL is one of the best Windows GCode streamer for DIY Laser Engraver. LaserGRBL is able to load and stream GCode path to arduino, as well engrave images, pictures and logo with internal conversion tool. jp! [url= In other words, the Freenet protocol has minimal hooks to support metadata, and some code written as part of the Freenet project uses those hooks, but surprises might be in store for anyone who expects the sort of data/metadata interactions (e. Poly Haven is a small company based in South Africa, working with artists around the world. txt - Free ebook download as Text File (. Fillup freeload mod apk link Download WinRAR for Windows now from Softonic: 100% safe and virus free.
1 note
·
View note
Text
Exhale by output in sonar x3

#Exhale by output in sonar x3 install
#Exhale by output in sonar x3 pro
#Exhale by output in sonar x3 mac
Madison County Attractions include the Madison County Fair held in early July of each year, Madison Lake State Park, the nationally historic Red Brick Tavern, miles of Rails to Trails, the Jonathan Alder Cabin, and Big Darby Creek, a State and National Scenic River. Madison County is also home to the Ohio Peace Officer Training Academy (OPOTA), the Ohio Bureau of Criminal Identification & Investigation (BCI), London Correctional Institution and Madison Correctional Institution. Annually in September the Ohio State University hosts the Farm Science Review, one of the largest farm exhibitions in the world, at the Molly Caren Agricultural Center near London, Ohio. Madison County ranks fourth in both soybean and corn production throughout the state of Ohio. Primarily an agricultural area, 88% of the land consists of farms.
#Exhale by output in sonar x3 pro
forge pro 11 pc 25 sound forge pro 2.0.
#Exhale by output in sonar x3 mac
suite 9.2 para mac 35 magix samplitude music studio 20 dv2 + content (8gb) 30 sibelius 7.5.1 pc y mac 35 finale 2014 pc y mac 35 sound. Named after James Madison, 4th President of the United States, Madison County is located in central Ohio between Columbus and Springfield. cakewalk sonar x3 para pc 35 ableton suite 9.2 para pc 35 ableton. Your source for Official Madison County Government Information. 46 Step 32: Build the controller: protoboard soldering advice. 46 Step 31: Build the controller: clock frequency. 43 Step 30: Build the controller: layout. 4.Drag and drop the REAC templates downloaded from the page.
#Exhale by output in sonar x3 install
42 Step 29: Build the cube: attach cables. In order to install templates, 1.Go under the Cakewalk Content Folder on your computer. 42 Step 28: Build the cube: cathode risers. 41 Step 27: Build the cube: mount the cube. 39 Step 26: Build the cube: create the base. 38 Step 25: Build the cube: solder the layers together. In this case, SONAR will automatically assign the missing output port to the available output port. The Missing Audio Outputs dialog box is not shown if there is only a single missing output port and only one available output port. 37 Step 24: Build the cube: bend the pins. Cakewalk - SONAR X3 Documentation - Changing I/O devices. 36 Step 23: Build the cube: straigthen the pins. 33 Step 22: Build the cube: test the layer. 32 Step 21: Build the cube: solder a layer. 32 Step 20: Build the cube: test the LEDs. 31 Step 19: Build the cube: soldering advice. 30 Step 18: Build the cube: create a jig. Deeper Smart Sonar START Technical Specifications Weight: 2.1oz / 60g Size: 60 x 65 x 65-mm / 2.3 x 2.5 x 2.5in Sonar Type: Single beam Frequency (Beam cone): 120 khz, 40 Depth Range Max/Min: Max. 28 Step 15: Choose the size of your cube. 24 Step 9: IO port expansion, alternative solution. 22 Step 8: IO port expansion, more multiplexing. 21 Step 7: Cube size and IO port requirements. Check out some of these amazing projects, and get inspired to build your own reality. It's compact, it's straightforward, and makes embedding electronics into the world-at-large fun and easy. Anything is possible with the mighty power of Arduino. It is no wonder that Arduino literally translates to "Strong friend (masculine)" in Italian. These authors have turned their wildest dreams into reality with the power of Arduino, an easy-to-use microcontroller development board. Introduction Here are twenty amazing Arduino projects that you almost wouldn't believe, if not for that they are the real deal.
0 notes