#brewtool
Explore tagged Tumblr posts
Visit Tumblr Blog
Explore Tumblr blogs with no restrictions, modern design and the best experience.
Last Seen Tumblr Blogs


Fun Fact
130K people were victims of a chain letter scam that affected Tumblr in May 2011.

Text
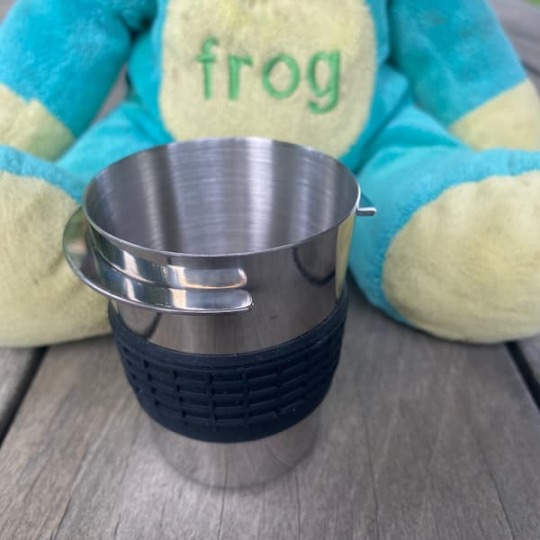
BrewTool dosing cup
A BrewTool dosing cup is a valuable tool for any coffee enthusiast or barista. Benefits of Using an Dosing Cup Below are some of the benefits of using an espresso dosing cup and why it is a great tool to have for any coffee enthusiast or barista. Accurate Bean Measurement A primary benefits of using an espresso dosing cup is that it allows you to easily weigh your coffee beans. By using a coffee…
View On WordPress
0 notes
Photo

Preparing for an early brewday tomorrow. Realized last time that it takes me almost an hour to mill 35kg of grain with my little MattMill and program the bt150. It is a lot more malt since I changed to the 150l system. #brewtools #brewtool #brewtoolsb150pro #mattmill #grainmill #grainmilling #homebrew #homebrewing #homebrewinglovers #homebrewfanatic #homebrewery #homebrewer #homebrewstories #homebrewingequipment #malt #weyermann #weyermannmalt #weyermann® (hier: Pratteln, Switzerland) https://www.instagram.com/p/B_DdPudJLYq/?igshid=16st51z7cy23p
#brewtools#brewtool#brewtoolsb150pro#mattmill#grainmill#grainmilling#homebrew#homebrewing#homebrewinglovers#homebrewfanatic#homebrewery#homebrewer#homebrewstories#homebrewingequipment#malt#weyermann#weyermannmalt#weyermann®
0 notes
Photo
In craftbeer,we trust .🍻🍻🍻underground-lab @jenniferxiao7 @underground_lab_brewery keep brewing forward🍻🍻🍻 #tools #brewtools #instabeer #instabrew #brewista #homebrewingonly #homebrewnation #homebrewer #homebrewery #homebrewingfans #homebrew #homebrewing #homebrewers #homebrewingequipment #instabeer #beerinstagram #beerlife #craftbeerculture #craftbeerlover #craftbeerlife #craftbeers #craftbeer #craftbeerlove #craft #beerlovers #beerlover #beerlove #lovebeer #brewers #inbeer #handmadebeer #handmade (在 Changsha) https://www.instagram.com/p/BsibDtmAogk/?utm_source=ig_tumblr_share&igshid=xqy6t4108cip
#tools#brewtools#instabeer#instabrew#brewista#homebrewingonly#homebrewnation#homebrewer#homebrewery#homebrewingfans#homebrew#homebrewing#homebrewers#homebrewingequipment#beerinstagram#beerlife#craftbeerculture#craftbeerlover#craftbeerlife#craftbeers#craftbeer#craftbeerlove#craft#beerlovers#beerlover#beerlove#lovebeer#brewers#inbeer#handmadebeer
0 notes
Text
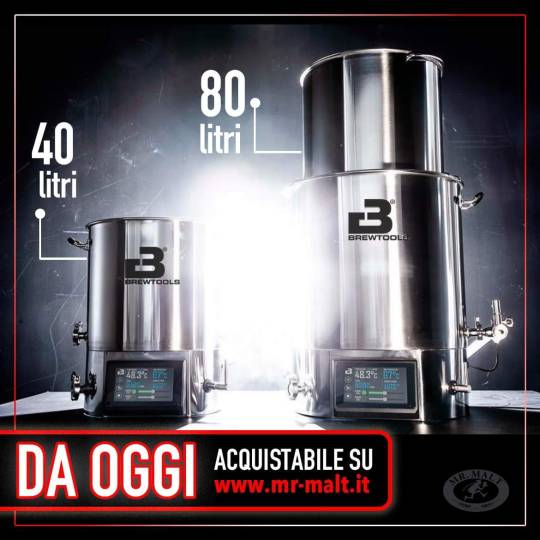
Il momento che stavate aspettando è finalmente arrivato 🤩
Assicuratevi il vostro BrewTools 40 o 80 litri, approfittando del preordine promozionale entro il 10 ottobre ⏰
Scoprite l'impianto automatico all grain senza compromessi, progettato per gli entusiasti dell'homebrewing 😎
➡️➡️➡️ http://bit.ly/brewtools4080
1 note
·
View note
Text
Tutorial: Making Art for the Game Boy
Last time, there was a tutorial on how to write an empty boilerplate Game Boy ROM. Before any useful progress can happen, we will really want to be able to display things on the Game Boy screen. You could make placeholder patterns in code, or by manually typing hex values, but that's a bit of work. It'd be way nicer to just be able to load up some real images!
A big problem with homebrew development is the lack of accessible tools. To help with this effort, I've made a few things available online. You can use them by just opening them in a modern web browser.
Go here to try out "Brew Tool", which is a collection of different tools I've made for homebrew stuff: http://make.vg/brewtool/
Out of all of those, there two tools of interest for making art:
�� Map Tool - You tell it to open an image that adheres to the Game Boy Color restrictions, and it spits out a .chr tileset, a Game Boy Color palettes, and the map data for that image.
◆ CHR Tool - You tell it to open an image, and it tries its best to convert to a 4-color palette. You can adjust the which palette values it uses for each color being converted, and then you can save the final image as a .chr.
The code is open source and available to view, so anyone with some JavaScript knowledge can modify and make improvements. You can also make asks here or submit an issue on GitHub.
Anyway, let's dive into some stuff.
Map Tool
This tool is designed to be pretty simple to use. It will automatically extract tiles and palettes and map data from an image you give it, but it expects images that conform to the Game Boy Color background art limitations:
◆ Maximum of 4 colors per 8x8 area. ◆ 256 unique tiles max (doesn't use the GBC's extra tileset memory -- assumes that you might still want your art compatible with the original GB) ◆ 8 unique palettes (of 4 colors) max
Any image that doesn't follow these requirements is rejected and won't finish loading.
You can give Map Tool an image like this:
And it will spit out a tileset, like this:
and a palette that looks like this:
It does a pretty good job of looking at image, and extracting unique tile patterns and color palettes.
This auto-detection has some weird flaws, and sometimes creates redundant tiles (where the palette is different but pattern is the same) or palettes that may not be the same way an actual person might organize them. Buuuuuut, the important part, is that it extracts enough data from the original image to reassemble it later.
You can save a bunch of junk from here:
Tileset
◆ The raw GB tileset (.chr) can be used to embed the raw art in the ROM in a way the GB and GBC expects. ◆ The tileset image is just a png of the tileset you see. ◆ The combined tileset image is a png of all the tiles in the tileset, used against every palette combination.
Palettes
◆ The raw 15-bit palette (.pal) is a binary file containing the 15-bit RGB palette in a way the Game Boy Color understands. ◆ The attibute set is just an image that contains all the color palettes. Each palette additionally fits in an 8x8 pixel block (which is the size of an attribute tile on the GBC). Might be useful to someone.
Map
There are a bunch of different formats for the tile map: ◆ The tile map is a map using the 8x8 tiles in the tileset to make a background image. It's a CSV text file. ◆ The attribute map is a secondary map that decides which palettes to use for each tile, for the Game Boy Color. It's a CSV text file. ◆ The combined map uses the combined tileset image to make te original map, as a CSV text file. ◆ The combined tiled map uses the combined tileset image to make the original map. This is a .tmx map file, which you can open with Tiled. When you're done messing with the map, you can save it back to an image file! ◆ Binary tile map is the tile map in raw binary format, which you can load on the Game Boy. ◆ Binary attribute map is the attribute map in raw binary format (which decides which palette gets used where), which you can load on the Game Boy.
There's a lot of options here, but for getting a background we can store in the ROM, these are things we're interested in: raw GB tileset (.chr), raw 15-bit palette (.pal), binary tile map, and binary attribute map. Save your art somewhere handy.
CHR Tool
CHR Tool is a little more manual than Map Tool, you give it an image you want to convert into a tileset. It doesn't create maps for you, and it doesn't detect palettes, or cut out redundant tiles. You can also use this tool to preview a .chr file you've already made.
You give CHR Tool an image with a bunch of tiles, maybe something like this:
You can adjust the palette conversion by hand in case it messed something up by changing the numbers between 0 - 3 in the little boxes. Finally, you'll get something like this:
You can save this as a .chr now. This tool is capable of saving Game Boy and NES .chr files, and can also save the color-reduced tileset as a PNG.
Wrapping Up
◆ If you don't want to use this there are other tools, such as YY-CHR, and various commandline tools for converting images into files. Or you might consider using a hex editor if you're comfortable with that. I've also written a Python script that converts paletted PNG images into CHR files that requires Python 2.7 and PIL. None of these tools are quite as accessible though, so this is why I made web-based tools.
◆ These tools mainly spit out simple, raw, uncompressed binary formats. Depending on how much art your game uses down the road, there may need to be another step to add lossless compression to the data. RLE compression is pretty simple, but probably want something like dictionary compression too. Squish is a silly project I've made to that end: https://github.com/Bananattack/squish
◆ Feel free to contribute to make better tools! The homebrew community at large could use them!
Next time, we'll go over how to actually embed some artwork into a Game Boy ROM.
24 notes
·
View notes
Text
BrewTool WDT Espresso needle tool
The BrewTool WDT Espresso needle tool has become an essential accessory for the home and professional Barista.
The BrewTool WDT Espresso needle tool has become an essential accessory. WDT Tool The WDT (Weiss Distribution Technique) is an effective method for breaking down clumps and achieving even distribution of coffee grounds. By utilizing a fine needle or similar utensil, baristas and coffee enthusiasts can enhance the flavor and consistency of their coffee extractions. Developed by John Weiss in 2005,…

View On WordPress
0 notes
Photo
Yesterday’s recipe. As you can see, some hops were involved. Sort of an ipa‘ish belgian‘ish fruit ale. I was in #zermatt on the weekend and got 20kg of fresh local apricots that will go in after first violent fermentation is done. #zermattswitzerland #wallis #walliseraprikosen #aprikosenbier #apricotbeer #belgianbeer #belgianipa #fruitbeer #fruitbeers #homebrewing #homebrew #homebrewfanatic #brewtools #brewtoolsb150pro #brewfatherapp #brewfather #picobrew (hier: Pratteln, Switzerland) https://www.instagram.com/p/CCYMnw1JW4N/?igshid=1dbh4out5xfru
#zermatt#zermattswitzerland#wallis#walliseraprikosen#aprikosenbier#apricotbeer#belgianbeer#belgianipa#fruitbeer#fruitbeers#homebrewing#homebrew#homebrewfanatic#brewtools#brewtoolsb150pro#brewfatherapp#brewfather#picobrew
0 notes
Photo

#firstpour of the mango NEIPA, finished at 6%, looks like it should, carbonation is perfect, aroma nice, but has more bitterness than intended. I think only with water adjustments I could make a nice soft mouthfeel. It has enough body. Look at all that floating debris in the second image. Time to coldcrash.... #mangoneipa #neipa #newenglandipa #homebrewing #homebrew #homebrewingbeer #brewtools (hier: Pratteln, Switzerland) https://www.instagram.com/p/CCELtkOpHyj/?igshid=1mfbpfc6r79w5
0 notes
Photo
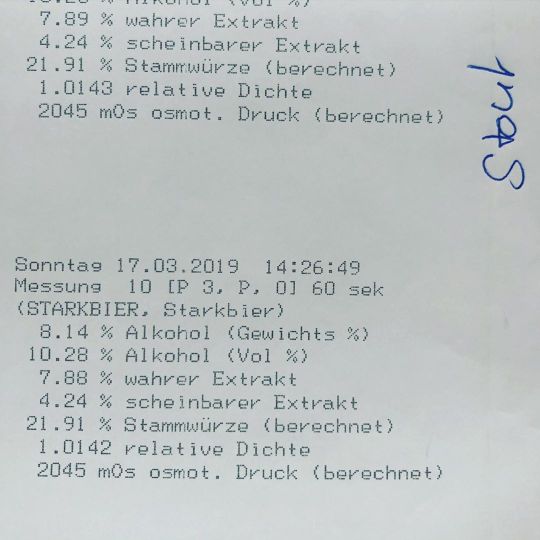
I had my last 5 batches tested, so I can make legally correct labels. What can I say. There’s some serious beers incoming. 😂🍻 I am pretty happy with the results. Apart from the rauchbier, that went way to high. But those numbers give an idea of where you end up with the bt150 and about 100l of bottled beer if ou Max out mash capability. #brewtools #brewtoolsb150pro #homebrewnumbers #strongbeer #strongbeers #stout #barleywine #saisonbeer #rauchbeer #rauchbier #belgiantriple #shrinkbrew (hier: Pratteln, Switzerland) https://www.instagram.com/p/CBSRzwPpkI-/?igshid=1kz6iu52tvfk1
#brewtools#brewtoolsb150pro#homebrewnumbers#strongbeer#strongbeers#stout#barleywine#saisonbeer#rauchbeer#rauchbier#belgiantriple#shrinkbrew
0 notes
Photo
Recipe: mango neipa 5.5%. Had a nice brewday. Start 8.10am- end 15.00, incl cleaning. Little malt pipe flow possible (15% open towards malt pipe) probably because of the amount of oats. And Brewtools advised me to not stir when mashing in. To keep the slimy proteins in the grain. Will try that next time. But efficiency was fine, undershot gravity but had 10l more, so that still is about 70% efficiency. First time I used those fruit purée, smelled delicious and is quite expensive. Added at flameout. I copied mashschedule and fruit addition from diy dog recipes. Always nice to look how they do it. #diydog #diybrewdog #homebrewing #homebrew #homebrewingexperience #homebrewingonly #homebrewfanatic #homebrewer #homebrewery #mangoneipa #neipa #newenglandipa #swisscraftbeer #lallemand #lallemandbrewing #lallemandyeast #lallemandnewengland #brewtools #brewtoolsb150pro #brewfatherapp #brewfather (hier: Pratteln, Switzerland) https://www.instagram.com/p/CBOhMTMp1ta/?igshid=p1cfpxz5ld5u
#diydog#diybrewdog#homebrewing#homebrew#homebrewingexperience#homebrewingonly#homebrewfanatic#homebrewer#homebrewery#mangoneipa#neipa#newenglandipa#swisscraftbeer#lallemand#lallemandbrewing#lallemandyeast#lallemandnewengland#brewtools#brewtoolsb150pro#brewfatherapp#brewfather
0 notes
Photo
Recipe....Easy going brewday today. Made a 120l batch of rooibos raspberry Belgian with 32kg oh grain and everything went fine. I could even do other stuff during mash, boil and cooldown. Started at 9, finished at 15. it’s one of my favorite recipes from the bm20, scaled up and added some malted oats, because I had them, I love the smell and I guess it adds a bit of body. #homebrew #homebrewing #homebrewingexperience #homebrewer #brewtools #brewtoolsb150pro #brewfatherapp #brewfather #belgianbeer #fruitbeer #rooibosbeer #safale #safalebe256 #brewday #brewdays #homebrewingrecipes #swisscraftbeer #swisscraftbeers #heimbrauen (hier: Pratteln, Switzerland) https://www.instagram.com/p/CAp8Z7VJoFV/?igshid=6vhmxsu614jp
#homebrew#homebrewing#homebrewingexperience#homebrewer#brewtools#brewtoolsb150pro#brewfatherapp#brewfather#belgianbeer#fruitbeer#rooibosbeer#safale#safalebe256#brewday#brewdays#homebrewingrecipes#swisscraftbeer#swisscraftbeers#heimbrauen
0 notes
Photo
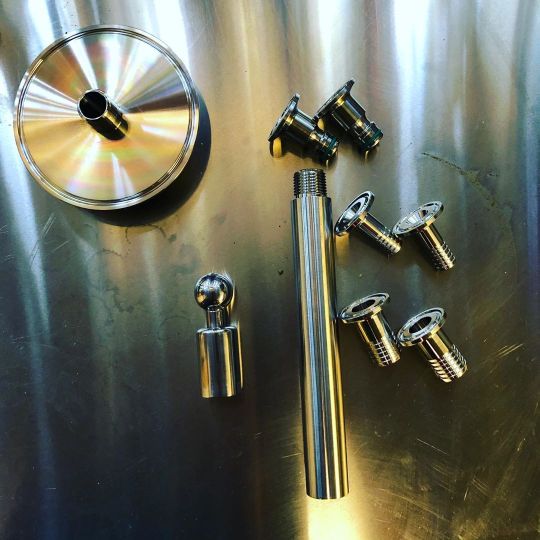
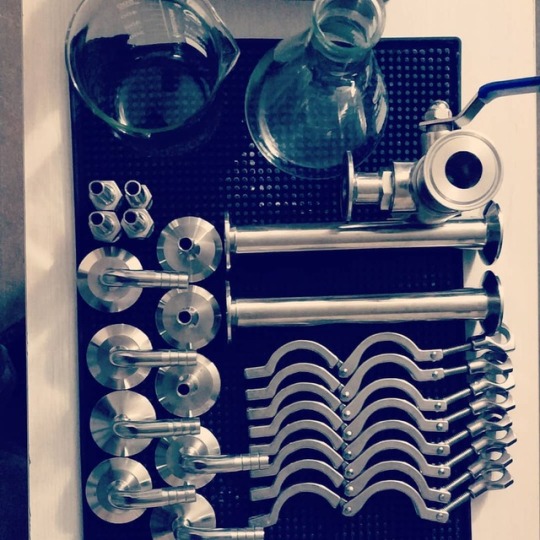
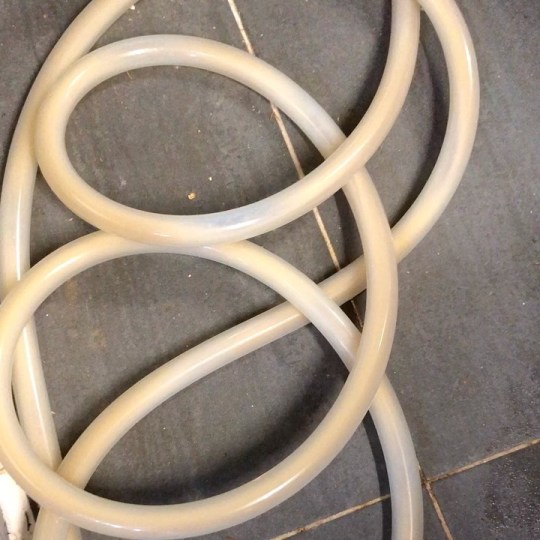
New parts. I have to find out yet how to connect this to the lower inside output (sparge tube) of my b150pro to wash kegs in the mashtun. I might have overseen to order a connecting part? #cip #cleaninplace #brewtools #brewtoolsb150pro #kegcleaning #homebrewing #homebrew #homebrewingonly #homebrewery #homebrewingexperience #picobrewery (hier: Pratteln, Switzerland) https://www.instagram.com/p/CAXRNEippFa/?igshid=egijju11w2i7
#cip#cleaninplace#brewtools#brewtoolsb150pro#kegcleaning#homebrewing#homebrew#homebrewingonly#homebrewery#homebrewingexperience#picobrewery
0 notes
Photo

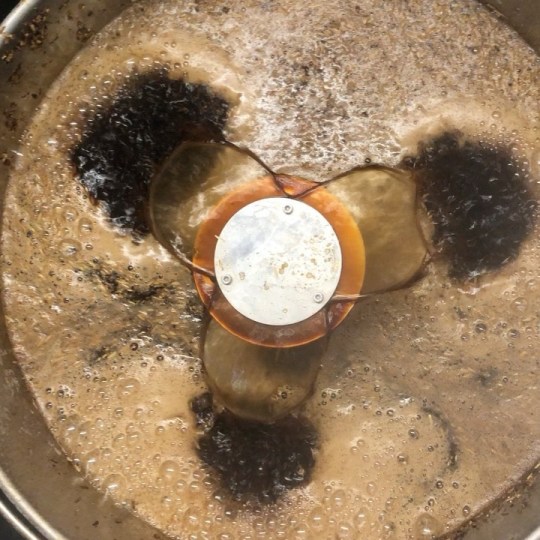
Couldn’t finish cooling down last brewday until I had to pick up the kids from daycare. So I left a Slow whirlpool going for 3.5 hours and did the transfer when they were in bed. This was the result. Never saw such an impeccable hopcone before 😂🍻 #brewtools #brewtoolsb150pro #homebrewing #homebrew #homebrewingonly #homebrewery #homebrewer #homebrewingexperience #homebrewstories #hopcone #hopcones #brewporn #whirlpool #beerwhirlpool #stoutporn #stout #darkforce (hier: Pratteln, Switzerland) https://www.instagram.com/p/CANcph1JqNV/?igshid=1u71hxy61gzy6
#brewtools#brewtoolsb150pro#homebrewing#homebrew#homebrewingonly#homebrewery#homebrewer#homebrewingexperience#homebrewstories#hopcone#hopcones#brewporn#whirlpool#beerwhirlpool#stoutporn#stout#darkforce
0 notes
Photo
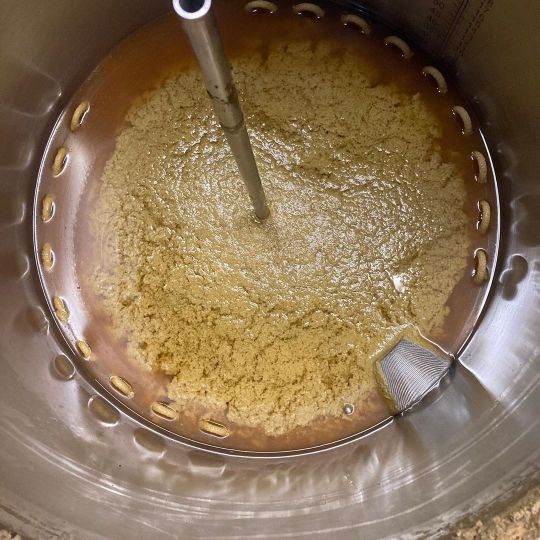
Perfect stout brewday. This time the mash was perfectly fine, circulation without any help or problem. I think the last times was a bit difficult because I always went to the max capacity of the maltpipe. This time I did a imperial stout double mash with two times 30kg and included 1.5kg of rice hulls. Thanks @brewtools ! #homebrewing #homebrew #homebrewingonly #homebrewfanatic #homebrewery #homebrewer #homebrewingexperience #stout #stoutbeer #imperialstout #milkstout #picobrew #picobrewery #brewtools #brewtoolsb150pro #pratteln #swisscraftbeer (hier: Pratteln, Switzerland) https://www.instagram.com/p/CAFuV47JJdx/?igshid=4lxt4wk6r06g
#homebrewing#homebrew#homebrewingonly#homebrewfanatic#homebrewery#homebrewer#homebrewingexperience#stout#stoutbeer#imperialstout#milkstout#picobrew#picobrewery#brewtools#brewtoolsb150pro#pratteln#swisscraftbeer
0 notes
Photo
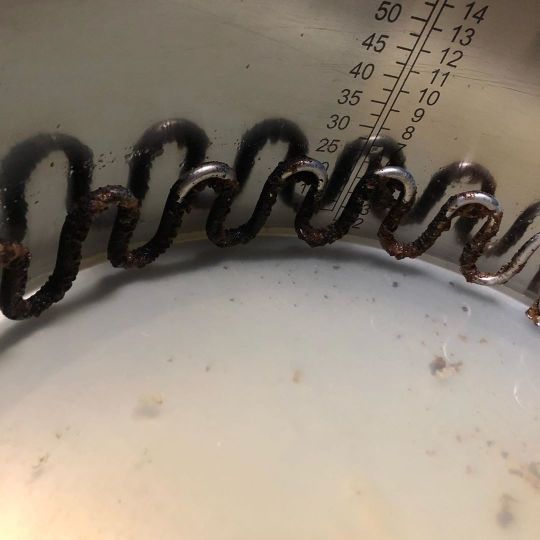
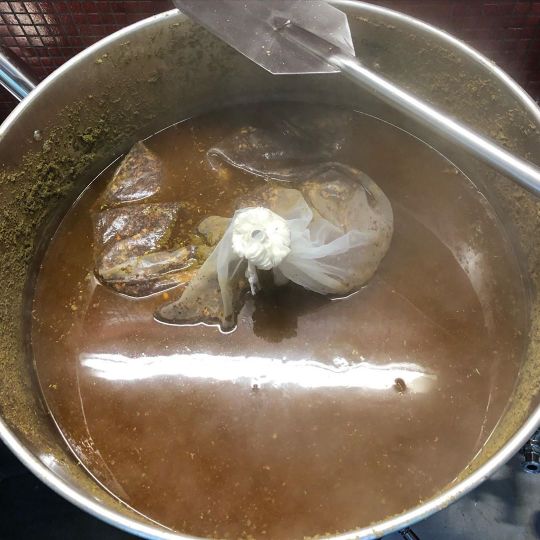
Soooo.... barleywine brewday went.... ok. I expected problems and I got some, but i ended up with 90l of 18plato/ 1.74og in the fermenter. That is about 2% alcohol less than calculated ( 12kg strawberries are yet to enter in secondary that also add some sugar). Main issue: it was too much grain and too little water. When I shortly left for 15‘ the water piled up and the heater got exposed, caramelizing some wort. E.g. burning. There I added 10l of water and with a very minimal upflow and mainly circular flow I found a fragile balance. The rice hulls did not help enough. I think next time I will do a double mash, with 25kg of grain each portion. I wanted to see what is possible and ok it works but not very good. It needs constant supervision, regulating the flow. But I have 90l of 18plato wort in the fermenter, so that’s fine. #homebrewing #homebrew #homebrewer #brewtools #brewtoolsb150pro #thickmash #strongbeer #barleywine #barleywineale #stuckmash (hier: Pratteln, Switzerland) https://www.instagram.com/p/B_iW9j4JSgC/?igshid=i48rm20luset
#homebrewing#homebrew#homebrewer#brewtools#brewtoolsb150pro#thickmash#strongbeer#barleywine#barleywineale#stuckmash
0 notes