#charmedseed
Photo


It’s dangerous to go alone! Take this.
Costume & photography by Charmedseed Cosplay
24 notes
·
View notes
Link
9 notes
·
View notes
Text

Running the costume contest at WhimsyCon this weekend! Ceony Twill is on the job!
#cosplay#paper magician#ceony twill#whimsycon#steampunk#mostly collected#lazy cosplay#charmedseed#book cosplay
25 notes
·
View notes
Text
So I’m working on my KotFE/ET Lana cosplay and finally making some progress. Like writing, cosplay has been missing from my life for the past few years. Aside from the usual last-minute-procrastination cosplay mood, it’s just kinda getting back into the game after an absence.
I am a Serious Cosplayer cosplay grandma with a 20-year history and a recent move into the organization side running contests now, but I’m still learning new things with every costume. It’s wild.
Anyway, I thought I’d share some of the progress while I’m procrastinating putting off leaving the house to get thread.
YO HERE’S OUR GIRL:

Picture-heavy under the cut.
Sewing is my strength and always has been, so on ‘soft’ costume pieces I always feel like I have a lot more control. I use that as an opportunity to nitpick details when I’m not being a lazy asshole and taking shortcuts.
Today, that means the stupid hexagon on the sides of Lana’s tunic.
I decided to go with single-fold bias tape as applique because as I obsessively scrutinized looked at caps and in-game references, I noticed that there was a slight shadow that indicated a ‘raised’ area against the base garment. Speaking of texture, that damn hexagon is rarely an actual hexagon because game textures don’t behave like real fabric AUGH. Other thoughts were paint, fabric applique & satin stitching.
TOOLS:
Bias tape
Pins
Hot af iron (I really need to invest in one of those baby irons for quilting but whatev)
Wonder clips (THEY REALLY ARE A WONDER)
Pattern (made in MS Word)
Assorted stuff like scissors, ruler, ironing board/table, probably a pencil
So the great thing about bias tape is that it holds a fold VERY well when ironed. And a nice crispy fold makes for a great miter. What’s a miter you say? It’s that corner bit on a picture frame or window where an angle is formed. You want it to look tidy & consistent.
How? BEHOLD:
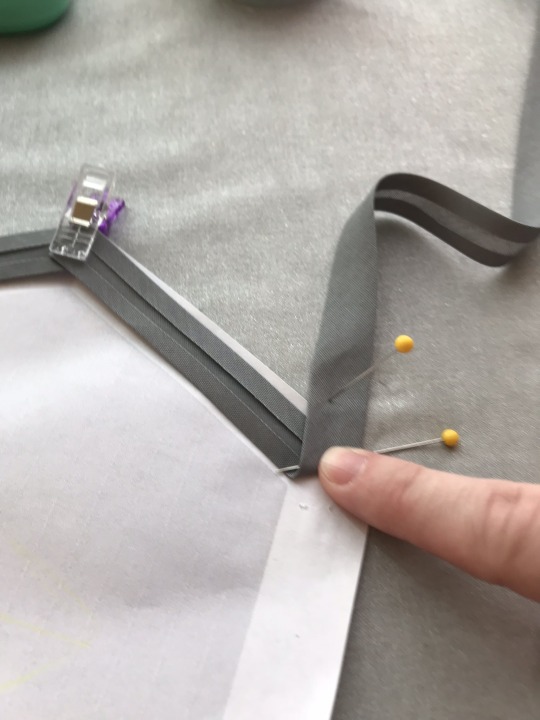
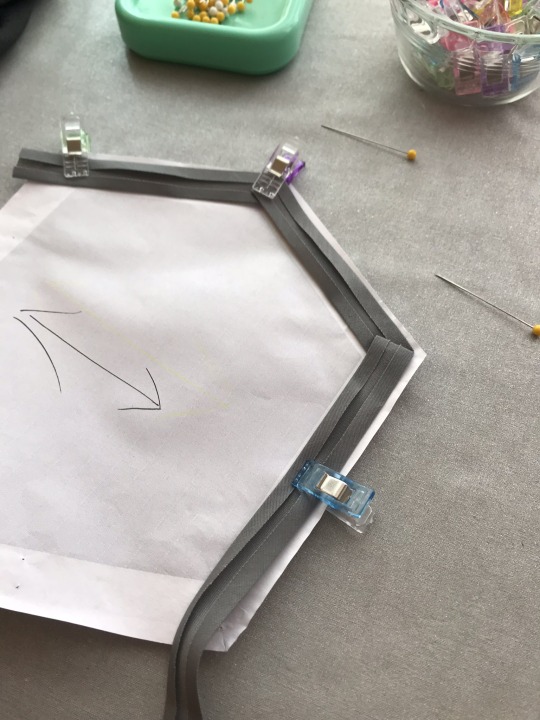
Clip a piece of bias tape to your pattern (make sure it’s long enough to go around and then a little extra. You can always cut off more, but you can’t put it back. Okay, technically you CAN put it back but it’s a pain in the ass and looks like shit. Measure-twice-cut-once and all that). Use what clips/pins you need to keep everything aligned.
Take another pin and use it to help you get a nice fold that lines up with that angle (at an angle that if you extended the line, it would bisect the hexagon). Folding this way ensures that the miter will be consistent at each ‘corner’.
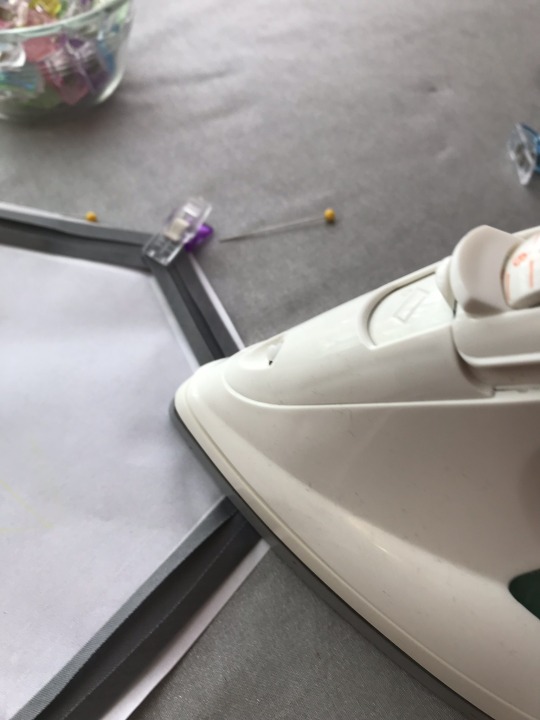
(sorry, kinda fuzzy.) Get your fingers outta the way and iron that motherfucker. Watch out for the pins and clips and stuff.
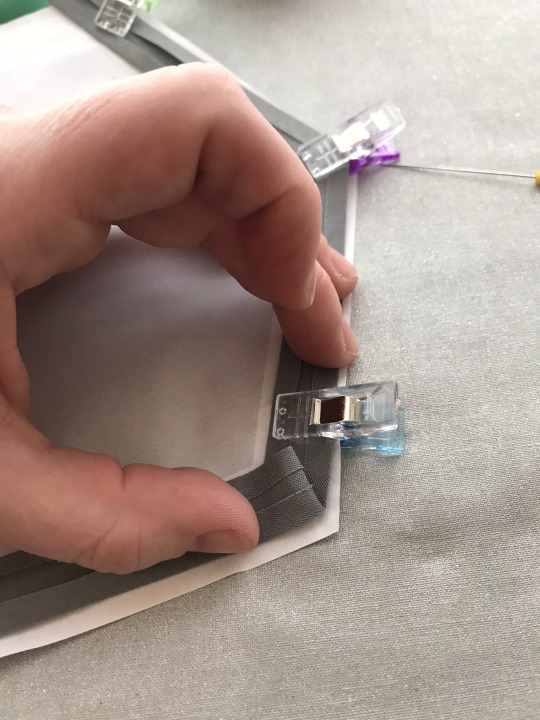
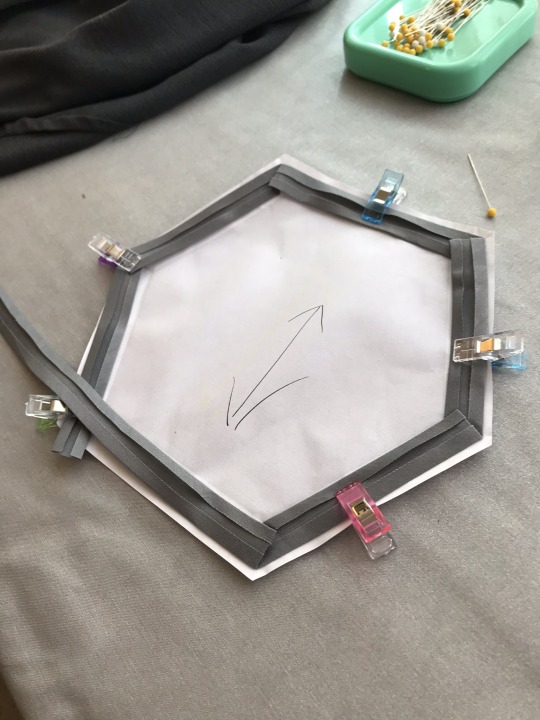
Now fold it BACK over so the original fold is as minimal as possible and line everything up with your pattern. MOAR IRONING. When you turn it over, you shouldn’t see anything aside from that one neat fold.
SO PRETTY. (Pin is just there to hold it for the photo.)
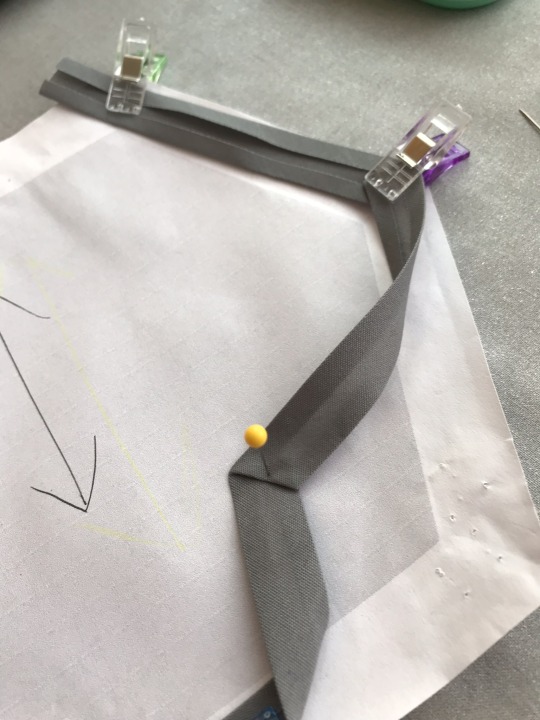
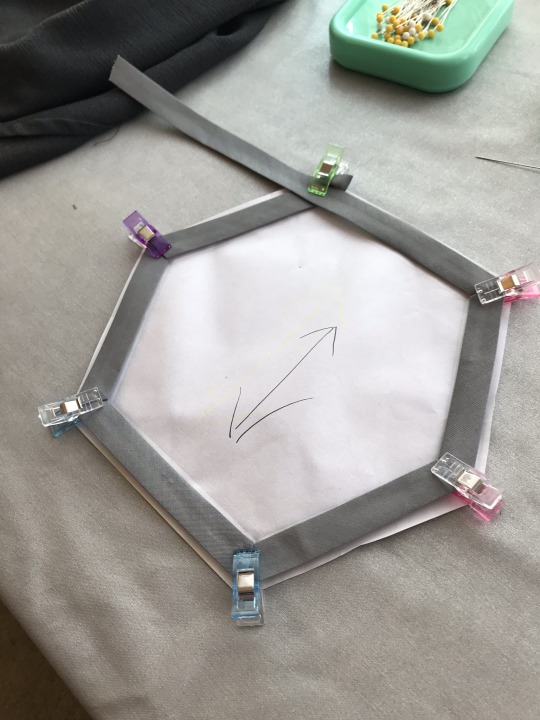
Put some more clips on to keep it out of your way and keep going.
Apparently even Word can’t make a damn equilateral hexagon, so I had to mark on the pattern which way I wanted up and down to be. That up and down will line up with the side seam later. OKAY keep going, all the way around.
I leave the final angle open for later, ‘cause it’s finicky and easier to work with once everything else is glued and sewn.
Right side up ooooo pretty.
So here’s the trick with getting it on the side of the tunic without destroying your patience. Normally we sew a top/shirt/whatever 1) front/back seams 2) shoulder seams 3) side seams 4) sleeves/facings (with slight variations). This pattern actually didn’t have any back seam, but I needed one in the back so I added it.
I needed the side seams to be REALLY flat, so going sides before back was necessary. All that to say THIS IS THE SIDE. Also pictured is the bustline dart on the front.
PS: IRON YOUR DAMN SEAMS or I will find you and iron them for you.
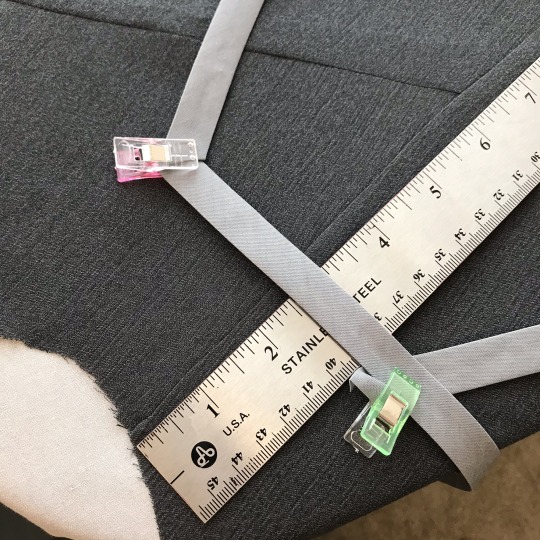
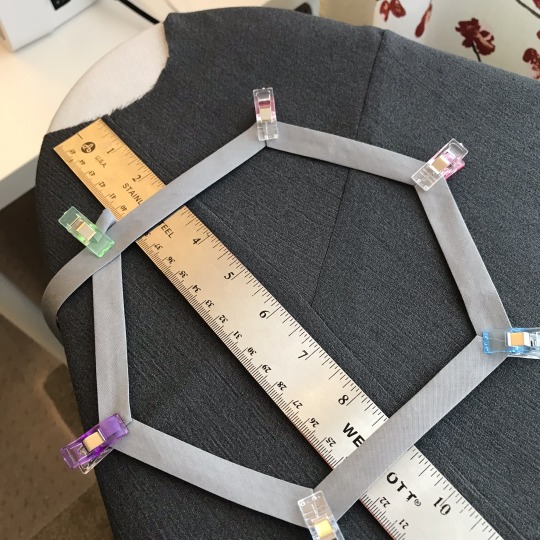
You need to measure down from the arm seam (where the sleeve will attach to the rest of the tunic) for placement. 1) this helps you be consistent with both sides. 2) Like... measure shit. It’s more professional. Don’t eyeball stuff, it never ends well.
You can scale pretty close measurements from your reference images (here’s a link to a website called MATH IS FUN to explain it. I know it sounds insane, but try it, it’s not that bad). tl;dr Based on my reference images vs. my actual measurements (all 5′2″ of them), the top of the hex needs to be about 2.5 inches from the armhole (also how I got the dimensions of the hex itself despite Bioware’s best efforts at thwarting me with inconsistent reference material.)
So line up the hex with your sleeve seam marking AND the side seam (which should line up with the middle/center line of the hex - use your pattern or your ruler, whatever works).
And then do this three more times.
Now, I know you’re going, “Beverly, this is a lot of time-intensive bullshit,” and I’m gonna tell you IT IS NOT. Having to futz around with eyeballing things and making mistakes and fixing said mistakes takes far longer than careful preparation and execution.
NEXT TIME ON BEVERLY’S COSPLAY BULLSHIT: How to get that shit to stay there so you can sew it down without pins and massive frustration (hint: we’ll be making a visit to the quilting section I KNOW RIGHT?).
#cosplay#lana beniko#swtor cosplay#cosplay grandma#bias tape#iron your stuff#measure stuff too#charmedseed#inappropriate language for cosplay#for basically anything
32 notes
·
View notes
Last Seen Blogs

amiliya85
Untitled

oceanicgoat
fear and loathing in Vancouver

meditateandchill-184059
Meditate and Chill

h-sis-y
H-Sis-y

rimzee-razvi
rimzee.razvi