#circular protractor
Explore tagged Tumblr posts
Visit Tumblr Blog
Explore Tumblr blogs with no restrictions, modern design and the best experience.
Last Seen Tumblr Blogs


Fun Fact
Tumblr has been banned in Indonesia for providing people with access to pornographic content.
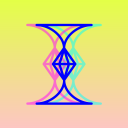
Text
A round protractor, a circular protractor, a 360 degree protractor.
Black and white photography.
#protractor#geometry#math#mathematics#for school#for work#for studying#round protractor#circular protractor#360 degrees#geometric#photography#photo#photograph#picture#photos#photographs#image#black and white#blackandwhite#black and white photography
1 note
·
View note
Text

The circular hex numerals are back, this time in a visualisation of the period of each number under addition modulo 16
The pencil marks are there because protractors are for losers (or non-constructible polygons)
#yes i did choose the colours based on cbeebies numberblocks#mathematical art#modular arithmetic#hexadecimal
19 notes
·
View notes
Text
A Comprehensive Guide to Mathematical Geometry Instruments
Mathematical geometry instruments are essential tools for anyone engaged in mathematical, engineering, architectural, or artistic activities. These tools are designed to help create precise and accurate geometric shapes, measure angles, and facilitate various mathematical calculations. Whether you’re a student, teacher, or professional, understanding the purpose and use of these instruments is crucial for success. In this comprehensive guide, we delve into the world of mathematical geometry instruments, exploring their types, uses, and tips for choosing the best tools.
What Are Mathematical Geometry Instruments?
Mathematical geometry instruments are tools specifically designed to perform geometric tasks such as drawing shapes, measuring angles, and dividing spaces proportionally. These instruments are widely used in schools, colleges, and professional settings for a variety of applications. From basic geometry kits for students to advanced instruments for professionals, these tools cater to diverse needs.
Common Types of Mathematical Geometry Instruments
Here are some of the most commonly used mathematical geometry instruments and their purposes:
Compass
A compass is a pivotal tool used to draw circles and arcs with precision. It consists of two legs—one with a pointed tip and the other with a holder for a pencil.
Uses: Drawing circles, measuring distances on maps, and marking equal segments.
Protractor
This semi-circular tool is used to measure angles in degrees. Protractors are available in various sizes and materials, such as plastic or metal.
Uses: Measuring and constructing angles accurately.
Ruler
Rulers, often made of plastic, metal, or wood, are essential for measuring and drawing straight lines.
Uses: Measuring lengths, drawing straight lines, and scaling.
Set Squares
Set squares come in two types: 45-degree and 60/30-degree triangles. They are used in combination with a ruler for constructing angles and straight lines.
Uses: Creating perpendicular or angled lines and ensuring accuracy in designs.
Divider
Dividers resemble compasses but have two pointed legs. They are used to measure distances or transfer measurements.
Uses: Comparing lengths, transferring dimensions, and plotting points.
Curve Ruler or French Curve
A French curve is used for drawing smooth curves and irregular shapes that cannot be drawn with a compass.
Uses: Designing patterns, drawing curved lines, and creating smooth arcs.
T-Square
T-squares are used in technical drawing and drafting to draw horizontal lines and serve as a guide for set squares.
Uses: Drafting technical drawings and ensuring straight and parallel lines.
Importance of Mathematical Geometry Instruments in Education
Mathematical geometry instruments are integral to education, especially in subjects like mathematics, engineering, and physics. Here are a few reasons why these tools are essential:
Precision and Accuracy
These instruments help students achieve accurate results in geometric constructions and measurements.
Visualization of Concepts
Geometry instruments enable students to visualize abstract concepts by constructing shapes and angles.
Skill Development
Using these tools enhances students’ spatial reasoning and problem-solving skills.
Foundation for Advanced Studies
Geometry tools lay the groundwork for advanced subjects like trigonometry, calculus, and engineering.
Tips for Choosing the Right Mathematical Geometry Instruments
Selecting the right mathematical geometry instruments is crucial for ensuring ease of use and accuracy. Here are some factors to consider:
Quality and Durability
Opt for tools made from high-quality materials such as stainless steel or durable plastic. They should withstand regular use without losing accuracy.
Precision
Ensure the instruments are designed for precision. Check for clear markings and accurate measurements.
Ease of Use
Choose ergonomic designs that are easy to handle, especially for young students.
Purpose
Identify your specific needs. For example, a student might need a basic geometry box, while a professional may require advanced drafting tools.
Brand Reputation
Trusted brands often provide better quality and after-sales support.
Budget
While quality is important, consider your budget and choose tools that offer the best value for money.
Maintenance and Care for Geometry Instruments
To ensure the longevity and accuracy of your mathematical geometry instruments, proper maintenance is essential:
Cleaning
Clean your tools regularly with a soft cloth to remove dust and debris.
Storage
Store your instruments in a protective case to prevent damage and ensure all components stay organized.
Handle with Care
Avoid dropping or mishandling the tools, as this can affect their precision.
Check for Wear
Inspect your instruments periodically for signs of wear or damage. Replace worn-out tools promptly.
Innovative Uses of Mathematical Geometry Instruments
While geometry tools are primarily used for academic purposes, they also find applications in:
Art and Design
Artists and designers use these tools to create intricate patterns and designs.
Engineering and Architecture
Professionals rely on precise instruments for drafting technical drawings and blueprints.
Crafts and DIY Projects
Hobbyists use these tools for crafting and DIY projects that require accuracy.
Astronomy and Cartography
Geometry instruments are crucial in mapping celestial bodies and geographical locations.
Advancements in Mathematical Geometry Instruments
With the advent of technology, traditional geometry instruments are evolving. Digital tools such as electronic compasses and software applications now complement physical instruments, offering enhanced precision and flexibility. These advancements cater to modern needs and are particularly beneficial for professionals.
Popular Brands for Mathematical Geometry Instruments
Several brands are known for manufacturing high-quality mathematical geometry instruments. Here are a few:
Staedtler
Faber-Castell
Maped
Helix Oxford
Classmate
Conclusion
Mathematical geometry instruments are indispensable tools for learning, teaching, and professional work. From basic tools like compasses and rulers to advanced drafting instruments, they play a crucial role in ensuring precision and accuracy in various tasks. By understanding the types, uses, and maintenance of these instruments, you can make informed decisions and maximize their potential. Whether you’re a student mastering geometry or a professional creating technical drawings, investing in the right tools is a step toward success.
3 notes
·
View notes
Text
How To Stretch A Canvas
Stretching a canvas is a multi-step process; one in which you need patience for, and maybe a helping hand.
Materials used:
Cotton canvas
Wooden stretcher bars
Staple gun
Staples
Canvas plier
Speed square protractor (triangle ruler)
Scissors
Hammer
Steps:

Assemble the frame. Fit the wooden stretcher bars together until a frame forms.

Double check that they are even on all sides with a speed square protractor. If not, utilize the hammer from the interior to fix it (don't hammer on the outside, as this can dent the frame).

Once even, staple the pieces together using the staple gun along the cracks on the four sides of the frame.

Now grab your cotton canvas and place the frame on top (leave three to four fingers of space on the side you are going to staple first).

Staple the first side using three staples (leaving 2-3 inches of space between each staple).

Then flip the canvas to the other side and push it all the way against the wall. Proceed to staple the opposite side than the other again with three staples (2-3 inches apart), but this time, utilize the canvas plier to stretch the canvas tightly.

Follow this step on the other two sides.

Now practice folding the corners on all sides until the side of the corner is neatly tucked, utilizing a “bunny ear” method to properly create the folds. This can be done to suit either landscape or portrait.

Once satisfied with hold it’s folded, go back and staple until completely covered on all four sides (utilizing the canvas piler to create a tight finish). Though, once you hit that corner, you’ll want to be extra careful on how you are stapling it, making sure it’s tight, and that the fold doesn’t overlap too much on the side of the canvas. If the canvas overlaps too much on the back, use a scissor to trim any extra pieces.

After stretching the canvas, move it over to an easel and apply one coat of painting medium. Apply this in a circular motion so that the canvas can evenly absorb the consistency of the painting medium. Then, lightly apply three coats of gesso (mixed with water until it reaches a “whipping cream” consistency). All done! :)
1 note
·
View note
Text
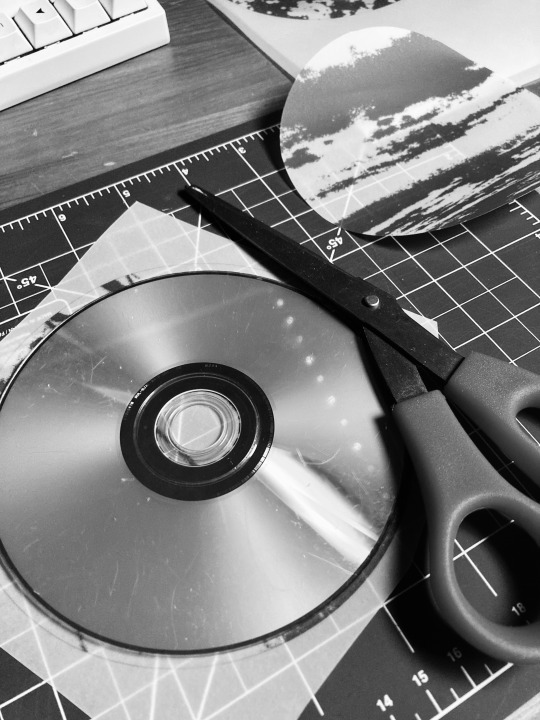
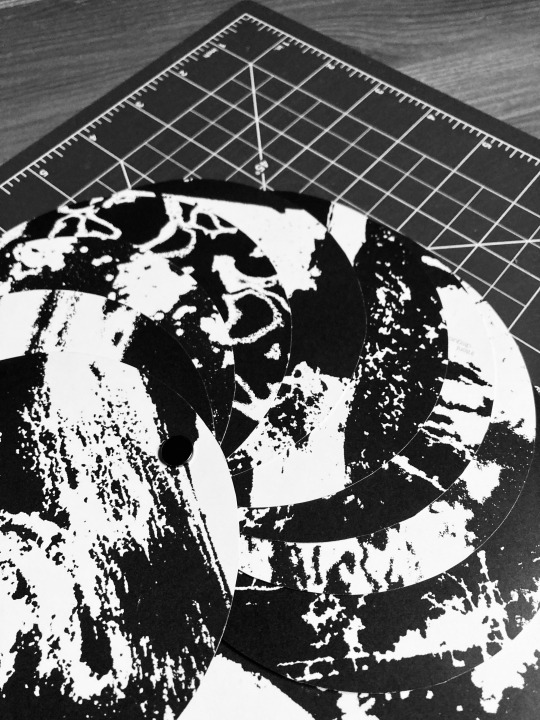
Circle Reflective
For the last one-on-one critique with Paul, I brought in a draft of the rectangular version of my reflective book. While the concept itself was working, he felt that the rectangular shape didn’t quite connect with the rest of my work. My other projects all relied on symmetrical or “perfect” forms (like cubes and hexagons), so the rectangle felt out of place.
He suggested switching to a circular format, to better align with ommateum.
I revised the layout to fit a 5 x 5 inch circle, adjusted the images accordingly, added a few more spreads, and sent two versions to the print shop (anticipating some cutting issues). Once printed, I tested different ways to cut the pages:
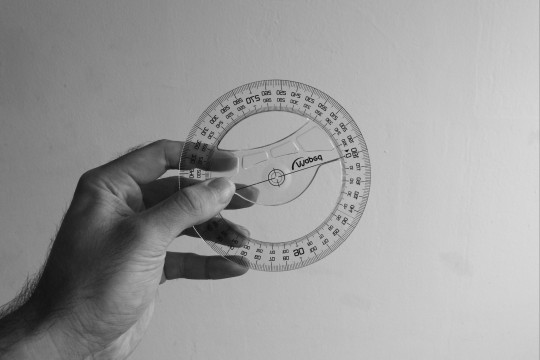
protractor circle cutter (thanks Mandy!)
scissors
olfa knife
Each method had its problems. Some pages ripped; others didn’t cut all the way through; and the black backs made every flaw more visible.
Eventually, I used a pair of scissors with a circular guide (an old Wii Just Dance disc haha) which worked decently. It is still far from perfect, but it was the best result I could get with the tools and time I had.
For the hole punching, Olivia lent me a leather hole punch with adjustable sizes, which worked really well. I used a paper guide to align each page and the results were much cleaner!

0 notes
Text
A bevel protractor is a precise tool
A bevel protractor is a precise tool used for measuring and transferring angles. It’s commonly used in metalworking, carpentry, and other trades where angle measurement is critical. The bevel protractor is designed to measure both internal and external angles, offering a high level of accuracy for various tasks such as setting up machinery, checking parts for fit, and ensuring consistency across multiple pieces.
Structure of a Bevel Protractor
A bevel protractor typically consists of the following components:
Graduated Scale: A circular scale that is calibrated with angular measurements, usually in degrees. Some models may also have a finer scale for more precise measurements, such as half-degrees or minutes.
Protractor Head: The head is the main part of the tool and holds the scale. It is typically made of steel or other durable materials to ensure longevity and stability.
Blade or Arm: The blade or arm, which is adjustable, can be positioned to measure angles. This part often has a fine adjustment screw for more accurate placement.
Locking Mechanism: Once the blade is set to the desired angle, a locking screw or lever is used to hold the blade in place, preventing movement during measurement.
Vernier Scale (optional): Some bevel protractors come with a Vernier scale, which allows for even more precise readings, often down to a fraction of a degree.
How to Use a Bevel Protractor
Set the Zero Point: The protractor is calibrated to zero, so if you’re starting fresh, you should first ensure the blade is aligned with the base scale.
Adjust the Blade: To measure an angle, loosen the locking mechanism and adjust the blade to the desired position. The angle can be read directly from the scale, or if using a Vernier scale, you’ll get a more refined measurement.
Lock in the Angle: Once the blade is in position, tighten the locking screw or lever to hold the angle in place.
Read the Measurement: Depending on the model, you can either read the angle directly from the scale or use the Vernier scale for more precision.
Types of Bevel Protractors
Simple Bevel Protractor: Basic, mechanical design; easy to use for general angle measurement.
Digital Bevel Protractor: Uses electronic sensors to give a digital reading, making it even easier to measure angles and improving precision.
Combination Bevel Protractor: Offers additional features such as the ability to check both angles and slopes.
Applications
Bevel protractors are particularly useful in:
Metalworking: For measuring and adjusting angles on machined parts, ensuring accuracy in components.
Carpentry: In woodworking, where precise angle measurements are needed for cutting joints and other tasks.
Construction: To check angles in framing and installation of structural components.
Engineering: For ensuring the correct setup of machines and equipment in workshops.
Advantages of a Bevel Protractor
Accuracy: Bevel protractors can offer highly accurate angle measurements, particularly when using a Vernier scale.
Versatility: They can measure a wide range of angles, both internal and external, with the flexibility of adjusting the blade.
Durability: Typically made from metal, they are built to last and withstand wear in industrial environments.
Conclusion
A bevel protractor is an indispensable tool in industries requiring precise angle measurements. Whether in manual craftsmanship or industrial applications, it provides a reliable method to achieve accurate results. Whether you’re a DIY enthusiast or a professional, having a bevel protractor in your toolkit can be a great asset for any project requiring accurate angle measurements
1 note
·
View note
Text
Assignment 3 - Nostalgia and Memory
As the only child in the family and not having any playmate, I always tried to observe to discover everything interesting around me. When I was a child, I found it easy to be satisfied and happy all the time. I have a fond memory of something as simple as clothes clips, which I used to play with them for hours. I used my wild imagination to turn the clips into dragons, robots, and all sorts of creations.
When I started my elementary school, I received a multifunctional pencil case as a present. I remembered I love it so much, I had to take it with me wherever I go. It wasn’t just a case of keeping stationeries, it is also my favourite tool for imaginative play. During breaktime, I would ‘transform’ (pretend) my pencil case into a spaceship or aircraft to battle with my classmates. I recall there was a little spring installed on the side of the pencil case. I pretended the eraser was a missile, shooting it with the spring, fighting off my enemies. I also tried to upgrade my pencil case using all kinds of stationeries and peculiar shape rulers. This is a creative and happy memory deeply embedded in my brain, no matter how much time passes, it never fades.
So in this assignment, I decided to use this nostalgic memory to be my inspiration to create my concept art. I tried to research other’s creations using clips and stationeries and I was surprised to find numerous innovative ideas. People used binder clips to create a robot or gundam.

Fig.1 clip robot
Designing a robot using only clip elements could be a creative idea. However, it is difficult to utilise the shape of clips in concept art. Since clips come in various types and shapes, they lack a consistent shape language, which makes it difficult for people to recognise the clip element. Therefore, I decided to integrate my design with stationery elements as well. As stationery items are part of our daily lives, people are more familiar with their shapes. I began my research on some stationary with peculiar shapes like, protractor, triangle ruler, and compass.
Sketch
In the lecture, Leo mentioned that it is convenient and efficient to use a flat hard brush to sketch silhouette designs. So I made a custom flat hard brush in procreate, and used it to sketch my initial ideas. I combined my ideas with clip elements and stationary elements, and delivered the following silhouette designs.

I tried to use the clip elements combined with the protractor to design shoulder armors and floating cannons of the robots. I also used scissors elements to design the weapon or mechanical aurora at the back. However, none of the design stands out. Luckily, Leo pointed out that the shape language is good, and he also suggested that I could use more clip elements on the robot’s torso, for example, clipping them onto the spine might improve the design.

I tried to improve my design by following Leo’s advice. I retained certain shape languages, like the head, and the leg that has a wide end with a large circular ankle. I delivered my final design using thin lineart, as it can better define the details and clarify the robot’s structure. It was my first attempt to draw something mechanical, so I didn’t want to take the risk of drawing this design from a complicated perspective. I delivered my robot design in a three quarter view, which is a simple perspective view for demonstrating spatial depth. In my robot design, I used the shape of the paper clip to be the robot’s head, common hair clip for the giant shoulder armors on both sides, cloth clips on the arms and hair claw clip on the spine design. I also used the elements of paper cutter for the lower legs design, and compass to be the knees and brakes for the robot.
References:
Fig.1: reddit.com Available at:
https://www.reddit.com/r/advancedGunpla/comments/q3o480/its_kind_of_magical_to_make_gundam_with_clips/
(Accessed: January 13, 2025)
@OrigamiArt2.0 (2024) Robot figure using binder clips, Youtube.com. Available at:
https://www.youtube.com/shorts/GKo-NEj02Kk
(Accessed: January 13, 2025)
0 notes
Text
The Essential Guide to Measuring Tools: Precision in Every Task
Whether you're a DIY enthusiast, a professional tradesperson, or someone who enjoys the occasional home improvement project, measuring tools are indispensable. They ensure accuracy, efficiency, and the overall quality of your work. In this blog, we'll explore some of the most common measuring tools, their uses, and why precision matters in every task.

1. Tape Measure
What is it?
A tape measure is a flexible ruler made from various materials like metal, fiberglass, or cloth. It's commonly housed in a retractable case for convenience.
Uses
Measuring lengths, widths, and heights of objects or spaces.
Essential in construction, sewing, and various crafts.
Why Precision Matters
Accurate measurements are crucial for fitting pieces together, ensuring structural integrity, and achieving a professional finish.
2. Ruler
What is it?
A ruler is a straightedge tool, usually made of wood, metal, or plastic, marked with units of measurement.
Uses
Drawing straight lines.
Measuring short distances.
Checking the alignment of objects.
Why Precision Matters
Small errors can accumulate in tasks like drawing, cutting, or aligning, leading to noticeable inaccuracies in the final product.
3. Caliper
What is it?
A caliper is a device used to measure the distance between two opposite sides of an object. They come in digital, dial, and vernier versions.
Uses
Measuring the thickness, diameter, and depth of objects.
Common in metalworking, woodworking, and engineering.
Why Precision Matters
Calipers provide measurements to a high degree of accuracy, crucial for tasks requiring tight tolerances.
4. Laser Measure
What is it?
A laser measure uses a laser beam to measure distances accurately. It's typically more precise than traditional tape measures.
Uses
Measuring long distances quickly and accurately.
Useful in real estate, construction, and interior design.
Why Precision Matters
Laser measures can achieve accuracy up to 1/16 inch, reducing errors and saving time on large-scale projects.
5. Protractor
What is it?
A protractor is a semi-circular or circular tool marked with degrees, used for measuring angles.
Uses
Measuring and drawing angles.
Essential in fields like carpentry, drafting, and geometry.
Why Precision Matters
Accurate angle measurements ensure the proper fitting and alignment of components, especially in complex assemblies.
6. Spirit Level
What is it?
A spirit level, or bubble level, is a tool used to determine whether a surface is horizontal (level) or vertical (plumb).
Uses
Ensuring surfaces are level in construction and DIY projects.
Aligning pictures, shelves, and other installations.
Why Precision Matters
Proper leveling is key to the stability and appearance of structures and installations.
7. Micrometer
What is it?
A micrometer, sometimes known as a micrometer screw gauge, is a device that can measure very small distances with extreme accuracy.
Uses
Measuring the thickness, width, and diameter of small objects.
Common in mechanical engineering, machining, and quality control.
Why Precision Matters
Micrometers provide measurements down to the micron level, essential for high-precision engineering tasks.
Conclusion
Measuring tools are the unsung heroes of countless projects, providing the precision needed to turn ideas into reality. Each tool has its unique purpose and application, and choosing the right one can make all the difference in the outcome of your work. By understanding and utilizing these tools effectively, you ensure that your projects are completed with the highest degree of accuracy and professionalism.
Invest in good quality measuring tools and take the time to learn how to use them correctly. Precision is not just about accuracy; it's about ensuring the longevity, safety, and aesthetic appeal of your projects. Happy measuring!
0 notes
Text
Math Lab Equipments Manufacturers, Suppliers and Exporters in India

Math Lab Equipment List:
Geo Board-Square (Wooden):
Handcrafted Geo Board-Square made from premium quality wood.
Ideal for geometry enthusiasts, educators, and students.
Enhance spatial awareness and geometric understanding.
Durable and eco-friendly construction ensures long-lasting use.
Perfect for classroom activities, homeschooling, or recreational learning.
How to use: Place rubber bands around the pegs to create various shapes and patterns. Use it to explore concepts like area, perimeter, and symmetry. It is great for teaching about polygons and tessellations.
Where: suitable for classrooms, homeschooling environments, educational centers, and recreational spaces.

2. Geo Board-Circle (Wooden):
Crafted from high-quality wood, the Geo Board-Circle offers a unique approach to geometry learning.
Explore the properties of circles, angles, and arcs in a tactile and engaging way.
Versatile tool suitable for students, teachers, and math enthusiasts.
Encourages hands-on exploration and problem-solving skills.
Smooth surfaces and sturdy construction ensure durability and safety.
How to use: Stretch rubber bands around the pegs to create circles, sectors, and other circular shapes. Use it to understand concepts like circumference, radius, and central angles.
Where: Ideal for classrooms, homeschooling settings, tutoring centers, and STEM workshop

3. Geometry Box (Plastic):
A comprehensive geometry set is housed in a durable plastic box.
Includes essential tools such as rulers, protractors, compasses, and more.
Perfect for students, architects, engineers, and drafters.
Portable and lightweight design for convenient use on-the-go.
Ensures precision and accuracy in geometric drawings and measurements.
How to use: Utilize the tools provided to measure angles, draw shapes, and solve geometric problems. Ideal for geometry assignments, technical drawings, and architectural designs.
Where: Suitable for classrooms, drafting studios, engineering offices, and fieldwork.

4. Conic Section (Wooden):
Handcrafted Conic section model made from durable wood materials.
Illustrates the properties and equations of conic sections with precision.
Ideal visual aid for students studying advanced geometry or calculus.
Enhances understanding of parabolas, ellipses, and hyperbolas.
sturdy base provides stability for display and demonstration purposes.
How to use: Use the model to visualize the different types of conic sections and their respective equations. Great for classroom demonstrations, tutoring sessions, and self-study.
Where: Recommended for advanced math classrooms, college mathematics departments, and tutoring centers.

5. Transparent Geometrical Shapes:
Set of transparent geometrical shapes for hands-on learning and exploration.
Made from high-quality acrylic material for clarity and durability.
Allows students to see through the shapes for better visualization of concepts.
Includes various shapes such as triangles, rectangles, pentagons, and more.
Enhances spatial reasoning and geometric understanding in learners of all ages.
How to use: Arrange the transparent shapes to explore concepts like congruence, similarity, and transformations. Perfect for overlaying on graphs or other visual aids to illustrate geometric principles.
Where: Suitable for classrooms, STEM labs, Montessori schools, and educational toy stores.

6. Cylinder cut in parts (wooden):
The wooden cylinder model was cut into sections for educational purposes.
Allows students to examine the cross-sections of a cylinder in detail.
Made from solid wood for durability and longevity.
Enhances understanding of volume, surface area, and geometric properties.
Provides a tactile and visual aid for geometry lessons and demonstrations.
How to use: Arrange the cylinder sections to understand how different cross-sections affect the shape and properties of the cylinder. It is useful for teaching about circles, cylinders, and 3D geometry.
Where: Recommended for math classrooms, STEM workshops, homeschooling environments, and educational supply stores.

0 notes
Text
How to Use Miter Saw Protractor: Mastering Precision Cuts

To use a miter saw protractor, align the saw blade with the 0-degree mark, place the protractor against the saw's base, and adjust the angle to the desired measurement. Using a miter saw protractor is a simple yet essential skill for anyone working with wood or making precise cuts. This tool allows you to accurately measure and set angles for bevel and miter cuts, ensuring the proper fit and finish of your woodwork. Whether you are a novice DIY enthusiast or a professional woodworker, understanding how to use a miter saw protractor will help you achieve clean and precise cuts for your projects. In this guide, we will walk you through the steps to effectively utilize a miter saw protractor, empowering you to tackle a wide variety of cutting tasks with confidence and accuracy.
Miter Saw Protractor Essentials
Understanding how to use a miter saw protractor is essential for woodworking enthusiasts and professionals alike. The precision and accuracy provided by the protractor can significantly impact the quality of the finished product. Understanding The Basic Functions The miter saw protractor is a crucial component of a miter saw, allowing the user to accurately measure and cut angles for various woodworking projects. It typically consists of a circular disc divided into degrees and minutes, providing precise measurements for angle cuts. By understanding how to read and use the protractor, woodworkers can achieve accurate and seamless angle cuts for their projects. The Importance For Precise Woodworking Precision is paramount in woodworking, and the miter saw protractor plays a crucial role in ensuring accuracy. Whether it's creating tight-fitting joints, beveled edges, or complex angle cuts, precise measurements are essential for a professional and polished finish. By mastering the use of the miter saw protractor, woodworkers can elevate the quality of their craftsmanship and produce flawless results.

Choosing The Right Protractor
Material And Build Quality Considerations When choosing a miter saw protractor, it's crucial to consider the material and build quality. Ensure that the protractor is made from durable materials and boasts a sturdy construction to withstand frequent use. Look for protractors crafted from high-quality aluminum or heavy-duty plastic, as these materials offer durability and longevity. A durable protractor ensures reliable and accurate measurements, making it an essential tool for your woodworking projects. Evaluating Features For Specific Projects Each woodworking project may require specific features in a miter saw protractor. Whether you're cutting complex angles or need precise measurements for intricate designs, evaluating the features is vital. Look for protractors with easy-to-read scales and clear markings, allowing for quick and accurate measurements. Additionally, consider protractors with built-in levels to ensure precise alignment. Choose a protractor with locking mechanisms to secure the angle settings for consistent cuts. Understanding the specific requirements of your project and selecting a protractor with the right features will ensure precise and efficient woodworking outcomes.
Setting Up Your Miter Saw Protractor
Setting up your miter saw protractor is crucial for accurate and precise cutting angles. Properly configuring the protractor ensures that your cuts are perfectly aligned, saving time and reducing the margin of error. In this section, we will go through the steps for accurate placement and securing the protractor for stability, enabling you to make the most of your miter saw's potential. Steps For Accurate Placement When setting up your miter saw protractor, it's essential to follow these steps for accurate placement: - Calibrate the Protractor: Begin by calibrating the protractor to ensure its accuracy. Use a reliable 45-degree angle to check if the protractor aligns correctly with the miter saw's default angles. - Clean the Surface: Clear the miter saw table of any debris or sawdust to ensure a flat, stable surface for the protractor. - Align the Markings: Align the notch or center mark on the protractor with the blade of the miter saw. This step is crucial for ensuring that the angle measurements are precisely executed. Securing The Protractor For Stability Securing the miter saw protractor is essential to maintain stability and prevent any accidental movement during the cutting process. Here's how to ensure stability: - Clamp it in Place: Use a reliable and sturdy clamp to secure the protractor firmly to the miter saw's table. This prevents any unwanted movement that could affect the accuracy of your cuts. - Check for Stability: Once the protractor is clamped, ensure that it is stable and doesn't shift while making adjustments or cutting angles. This step is crucial to maintain precision throughout the cutting process. - Double-Check the Alignment: Before making any cuts, double-check the alignment of the protractor to ensure that it hasn't shifted during the setup process. This final verification step can save you from inaccurate cuts.
Calibration For Accurate Cuts
One of the key factors in achieving precise and accurate cuts with your miter saw is ensuring that it is properly calibrated. Calibration involves adjusting the miter saw protractor to ensure that it accurately measures angles, ultimately leading to precise cuts. This process not only enhances the quality of your woodworking projects but also contributes to safety by reducing the likelihood of errors. The Process Of Calibrating Your Tool Calibrating a miter saw protractor involves a few steps to ensure it provides accurate angle measurements. Follow these steps to calibrate your miter saw for precise cuts: - Begin by ensuring that the miter saw is unplugged and the blade is in the lowered position to avoid any accidental start-ups. - Use a reliable protractor to measure a known angle, such as 45 degrees, against the miter saw's protractor scale. - If the measurement on the miter saw protractor does not align with the known angle, adjustments will be needed. - Refer to your miter saw's user manual for specific instructions on making adjustments to the protractor. This may involve loosening screws and carefully repositioning the protractor to align it with the correct angle. - After making adjustments, recheck the angle using the protractor to ensure it now accurately reflects the known angle. - Repeat the process for different angles to ensure the miter saw protractor is accurately calibrated across various measurements. Tips For Maintaining Calibration Over Time Maintaining the calibration of your miter saw protractor is essential for consistent and accurate cuts. Consider the following tips to help preserve the calibration of your miter saw: - Regularly check the accuracy of the protractor by comparing its measurements to known angles using a reliable angle measuring tool. - Keep the miter saw clean and free from sawdust and debris that could affect the protractor's movement and accuracy. - Handle the miter saw with care and avoid impacting the protractor, as physical damage can lead to calibration issues. - Store the miter saw in a stable and secure environment to prevent any jostling or movement that could disrupt the calibration over time. - Refer to the user manual for your specific miter saw model for any additional maintenance recommendations regarding the protractor calibration.
Executing Precision Cuts With Your Protractor
How To Use Miter Saw Protractor: Guiding Through The Process When it comes to woodworking, precision is key. Executing precision cuts with your miter saw protractor is essential to achieving accurate and seamless results. By mastering the use of the protractor, you can ensure that each cut is made with the utmost accuracy and attention to detail. Let's dive into the process of using a miter saw protractor to execute precision cuts. Adjusting The Saw Blade To Match The Protractor Angle Before making any cuts, it's crucial to adjust the saw blade to match the angle indicated on the miter saw protractor. To do this, follow these simple steps: - Align the protractor: Place the miter saw protractor on the saw's base and adjust it to the desired angle. - Secure the angle: Once the protractor is aligned, secure the angle by tightening the bevel lock knob to lock the saw blade in place. - Test the angle: Double-check the accuracy of the angle by making a test cut on a scrap piece of wood. By adjusting the saw blade to match the protractor angle, you can ensure that each cut is executed with precision, resulting in clean and accurate woodworking projects.
Common Mistakes To Avoid
Misreading The Protractor One of the most common mistakes when using a miter saw protractor is misreading the angle markings. This error can lead to inaccurate cuts and wasted materials. To avoid this, take your time to carefully read and understand how the protractor is labeled. Make use of a magnifying glass if necessary, to ensure accurate reading of the angles. Not Accounting For Blade Thickness Another crucial mistake is not accounting for the blade thickness when making miter cuts. Failing to factor in the thickness of the saw blade can result in imprecise cuts, especially when working with intricate joinery. Always make sure to consider the thickness of the blade when setting the miter and bevel angles to guarantee precise and clean cuts.
Advanced Techniques And Tips
Mastering advanced techniques for using a miter saw protractor opens up a world of opportunities for creating precise and complex angled cuts. With the right tips and tricks, you can extend the capabilities of your miter saw protractor to tackle a wide range of woodworking projects. Let's explore some advanced techniques and tips that will help you make the most of your miter saw protractor. Techniques For Complex Angles When it comes to cutting complex angles, having a solid understanding of the miter saw protractor can make all the difference. By leveraging the following techniques, you can achieve precise cuts for intricate designs and complex woodworking projects: - Compound Angles: For projects that require cuts with both miter and bevel angles, use the protractor to accurately set the miter and bevel angles for compound cuts. Take your time to measure and adjust the protractor to achieve the desired compound angle. - Custom Angle Cuts: Utilize the protractor to make custom angle cuts by leveraging its adjustable features. With the ability to fine-tune the angle settings, you can create unique and precise cuts tailored to your specific woodworking needs. - Multi-Sided Cuts: For multi-sided projects such as octagonal shapes, apply the protractor to set the angles for each cut, ensuring seamless and accurate joins for a professional finish. How To Extend The Capabilities Of Your Miter Saw Protractor Unlock the full potential of your miter saw protractor by exploring these tips to extend its capabilities: - Calibration: Regularly calibrate your miter saw protractor to ensure accurate angle measurements. Calibration will help maintain precision and prevent inaccuracies in your cuts. - Utilize Protractor Extensions: Consider investing in protractor extensions to expand the range of angles you can accurately measure and cut. Extensions can provide increased versatility for tackling advanced woodworking projects. - Secure Fixtures for Stability: When working with complex angles, ensure your workpiece is securely fixed in place to prevent movement during cutting. Sturdy fixtures contribute to the accuracy of the cuts and overall safety.

Mastering Precision Cuts With Practice
Mastering precision cuts with practice is essential for anyone using a miter saw protractor. The ability to make accurate and consistent cuts is crucial for a wide range of woodworking projects. Whether you are a novice or an experienced woodworker, developing a reliable workflow can significantly improve the quality of your cuts. By mastering the techniques for repetitive and consistent cuts, you can elevate your woodworking game to the next level. Developing A Reliable Workflow Using a miter saw protractor efficiently involves developing a reliable workflow. This includes ensuring that your miter saw is set up correctly and that your work area is organized. Taking the time to make precise measurements and marking your cuts accurately is fundamental. Additionally, maintaining your tools and keeping them in good condition can contribute to a reliable workflow. Techniques For Repetitive And Consistent Cuts Mastering the art of making repetitive and consistent cuts requires practice and attention to detail. One important technique is to use a stop block to ensure that every piece you cut is the same length. This can be especially useful when working on projects that require multiple identical cuts. Additionally, paying attention to the orientation of the wood and using clamps to secure it can help maintain consistency in your cuts.
Frequently Asked Questions Of How To Use Miter Saw Protractor
What Is A Miter Saw Protractor Used For? A miter saw protractor is used to measure and cut precise angled cuts in woodworking projects. It helps woodworkers accurately set and determine the angle for bevel and miter cuts, allowing for a professional finish. How To Read A Miter Saw Protractor Scale? To read a miter saw protractor scale, align the desired angle with the pointer, ensuring the indicator is accurately positioned for an exact measurement. The scale will indicate the angle setting, allowing for precise and consistent cuts in woodworking tasks. Can A Miter Saw Protractor Be Calibrated? Yes, a miter saw protractor can be calibrated to ensure accuracy in angle measurements. Regular calibration helps maintain precision in cutting angles, contributing to the overall quality and professionalism of woodworking projects. Calibration ensures that the tool delivers precise and reliable results.
Conclusion
Incorporating a miter saw protractor in your woodworking projects can greatly enhance precision and accuracy. With the right techniques, you can maximize the full potential of this tool and achieve professional results. By familiarizing yourself with the protractor's functions and following these steps, you can elevate your woodworking skills and improve the quality of your projects. Read the full article
0 notes
Text
Bermuda Triangle Secrets Revealed: It's Actually More Circular Than Triangular
In a revelation that has left conspiracy theorists and navigators equally puzzled, a group of intrepid cartographers has unveiled a groundbreaking discovery: the Bermuda Triangle, long believed to be a mysterious and ominous triangular region, is, in fact, more circular. Armed with compasses, protractors, and an eye for geographical anomalies, the cartographers embarked on a mission to demystify…

View On WordPress
0 notes
Note
Oh! So unlike all those other people who are wrong, YOU say that the coded message is so obvious it barely even counts as coded. That clears everything up. They never said the coded message was so obvious it barely counts as coded. They never expressed disbelief that anyone could not have made all the inferential leaps they made due to their own obsession with the topic. He had his arm extended at a slight upward angle as part of a gesture he made, why, there's no other reason that a human being would have their arm extended at a slight upward angle at any intermediate stage of a bodily motion!
Why would someone who is not a nazi sympathizer do the nazi salute? Because they didn't do that and having your arm extended at a slight upward angle is not a difficult motion and is not a magic gesture that summons Jew-killing demons. You've seen plenty of pictures of Democratic politicians with their arms extended at a slight upward angle before. He had his arm extended at a slight upward angle as a part of a gesture of "throwing his heart to the crowd," you know, the thing he was literally saying as he was doing it. Hillary Clinton had her arm extended at a slight upward angle while motioning for a crowd to calm down, and you don't think she's a nazi. Anyone who sweeps an arm outward from their chest in a circular fashion, like they are miming or actually throwing an armful of something, will have their arm extended at a slight upward angle at some point of the gesture. Is fucking Mako Mankanshoku giving a nazi salute here? No, obviously not, she's throwing a handful of dosh, and yet at an intermediate stage of that gesture her arm is extended at an upward angle! Are you going to bust out a fucking protractor and say that normal people have to bust out a fucking protractor to determine if they're throwing a handful of something or they're unequivocally a nazi?
You do not believe "nazi" to be a neutral description of a belief system. Don't even fucking try with this. "Nazi" in American discourse is used exclusively as a label to apply to someone to utterly invalidate their existence. A nazi is someone that everyone should hate as much as they possibly can and feel self-righteous about hating.
what’s with you and the Elon thing?
if anyone did that gesture in basically any scenario it’d be seen as questionable at best. I don’t think he’s necessarily a crypto-nazi, but I do think it was an intentional statement of edgelord-ism to rile people up
Why are you going to bat for this guy? It can’t just be contrarianism, you seem genuinely passionate.
personally, I’m no friend of the SJ people, but I don’t think they’re crying wolf this time. Im not sure how to prove my truthfulness, but I was strongly against eg: 2020 BLM, defund the police, Daniel Penny arrest, and so on.
it is more important to believe things that are true than it is to believe things that are mean, even if they are mean about someone you don't like
any situation in which a large group of people are belligerently declaring "How dare you say we should believe things that are true instead of things that are mean! Anyone who cares about anything other than believing things that are mean is despicable and should be destroyed!" is a bad one
people are aggressively, openly, proudly throwing away all capacity for reason, and winning because they are inherently entitled to win for doing that. this makes me sad.
240 notes
·
View notes
Photo

Tahkt-I-Sulayman Variation II, Frank Stella, 1969, Minneapolis Institute of Art: Contemporary Art
Abstract. In 1967, Frank Stella began a series of brightly colored paintings based on the protractor, a drafting tool used for measuring and making angles. With this device he made three semicircular designs including the one you see here, called the “rainbow.” These designs are the basis for the many paintings in his Protractor series. Stella titled the works after circular cities and archaeological sites he saw on a 1963 trip to the Middle East: Tahkt-i-Sulayman is an ancient shrine in Iran’s Azerbaijan province. But Stella has insisted that the meaning of his work is purely formal: “My painting is based on the fact that only what can be seen there is there. It really is an object...You can see the whole idea without any confusion. What you see is what you see.” Size: 120 x 240 in. (304.8 x 609.6 cm) Medium: Acrylic on canvas
https://collections.artsmia.org/art/1704/
67 notes
·
View notes
Text
Week 1
This task was designed to introduce us to our drawing tools. I enjoyed the task a lot as geometry has always been an interest of mine. Despite this, I did run into a few problems during the process.
Part 1
The process: Firstly I read the task carefully, understanding all dimensions before beginning so no surprises would come up. I first drew construction lines using a pencil. I started with all the circular elements, I then drew straight lines with a rule. I followed this by using a circle template to create the curves.
I then went over the drawing in pen, this is where I ran into some problems.

Problems: The first challenge i encountered was a simple mistake, i misread the instructions. Rather than using a 16mm radius circle to create the corner curves in the lower drawing, I used a diameter of 16mm. I saw and corrected this mistake.
The second issue I ran into was caused by my compass lacking the ability to attach a pen. luckily the second largest circle required a radius of 100mm, which happens to be the dimensions of my protractor, I used this to draw the curves in pen. However, I still did not have a solution for the largest circle, so instead I went over the pencil again to make it as dark as possible. Once photographed this did not look as I wanted it to.
Part 2
Process: I used a rule and a protractor to draw the shape. knowing the angle of the triangles are 60 degrees made it a simple process of drawing a line measuring an angle then drawing the next line. I drew the shape onto paper which I then folded on itself twice. This meant 4 shapes would be cut.


I was very happy with the result. There was very fine differences it the shapes. An alternate idea to draw the shape accurately could be to draw a single large equilateral triangle with 120mm sides . Then to draw a triangle of sides 30mm in each corner. This may have been easier as its is working with longer lines and a larger shape.
Overall the task was enjoyable despite its challenges. Lessons were learnt and a new protractor will be bought.
8 notes
·
View notes
Text
Week 1
For this week’s class, we had a number of circular and triangular shapes to create. This isn’t my first foray into technical drawing, but it has been years and years since I last used a protractor!
I thought that the drawing went pretty well. There was definitely an adjustment to be made in my thinking around how to approach the dimensions and construction of the geometry. My background in engineering meant that I am very used to approaching triangles with a set of equations to find out all their exact lengths and heights. After calculating a few heights and realising that it didn’t actually help me draw anything I was able to “lean in” to the process of letting the geometry and straight lines of my drawing tools guide me. Construction was then really easy from there!
It’s my first time using a tee square to reference the paper and rulers off of, but it was amazing to be able to reference a horizontal line to construct perpendicular and angled lines off of. I also hadn’t used a protractor that was able to provide so much fixed accuracy before.
A couple of areas to improve upon include being able to re-reference my lines when going over in pen. In particular with the protractor, and the set circles. The circles were difficult to gauge exactly where the tangent would continue, especially when flipping the guide to avoid pen bleed.
For the tessellating triangles exercise, I decided to use thicker card (rather than bond paper) to be able to join the pieces more firmly. I used markers to colour them for a more visually appealing result, and to show different arrangements clearly.


4 notes
·
View notes
Note
[ * Unimportant, but there is one page of a journal that’s been filled with what looks like an attempt at circular gallifreyan. It’s clearly been made using a protractor. Seems like they gave up on that particular language. (Too much effort.) ]
[ * …Aster, it seems, might be a little bit more of a nerd than previously thought. ]
[ * But other than that little fun bit of insight into their character, it doesn’t look like there’s anything else of import to be found here, in the living room. ]
[ * There is an adjoining room whose entrance is beside the shelf at the far end of the room, but it looks like it might be their bedroom. The lights are off, and the curtains have been drawn over the window, but the dark shapes of the bed and shelves filled with other materials can still be made out by the bits of light that have managed to get past the blackout curtain. ]
i brought you some tea— uh, just checking in and things-! you look… roughed up- uhm… are you.. alright? i can offer a hug-?
[ * Their apartment is almost entirely quiet, as its sole occupant seems to be, er… temporarily incapacitated. A single poppy sits in a vase on a small ledge over what looks like a little alcove that’s been set up as a couch. Aster’s rumpled form lies sprawled across the odd assortment of pillows. Brief snippets of what sounds like mumbled conversation can be heard, occasionally, usually accompanied by some kind of movement from them as they toss and turn. Clearly, whatever they’re dreaming about isn’t exactly providing them with much room to get a good bit of rest in. ]
mhmartinnnnnn……… stupid…..
….Dondospiders….s-no….
28 notes
·
View notes