#clearcoated
Text
today my friend and i fixed an issue sugar was having where she stalled while idling when the blinker was turned on and so we increased idle rpms from 800 to 900 and she runs SOOO MUCH SMOOTHER NOW anyway i love her so much I'm crazy
#also she has a couple clearcoat chips on the hood prob from flying rocks which is less cool 😑#but i am obsessed regardless
109 notes
·
View notes
Text

[bicycling halloweenfully toward you]
#em makes stuff#<- or rather. Paints pre-existing stuff.#hopefully after two coats of furniture-grade clearcoat and one of spray varnish the paint will not come off in the rain#looks at you with my big eyeballs.
25 notes
·
View notes
Text
My Diecast Collection:
VW Golf Mk3 GL Cabrio
#siku #scale1_58 #volkswagen #vw #golf #vwgolf #golfmk3 #golfgl #vwcabrio


#diecast#siku#1/58 scale#volkswagen#vw#vw golf#vw golf mk3#golf 3#golf gl#vw cabrio#diecast customizing#repainted#lowered#diecast wheelswap#hotwheels wheels#diecast detailing#glossy clearcoat#awcustomprojects
10 notes
·
View notes
Text


My dear Bebobo who I 3D printed and spent the entire day yesterday painting. he is looking as miserable as ever
#neopets#ocs#bebobo#going to (hopefully) put a clearcoat on him soon. both to protect the paint and make him shiny and wet looking
158 notes
·
View notes
Text
i want to start painting my nails but not a vivid color because I don't want it to clash with my outfits or my general lowkey-fem prettyguy demeanor and not black because as per the most recent dsm that's no longer considered gender non conforming. so what's the meta
14 notes
·
View notes
Text
auuugyughh
#trying to paint this box but its SO ANNOYING#the paint keeps cracking as it dries and I can't clearcoat it because i have to do that outside but it will not fucking stop raining
2 notes
·
View notes
Text
underglaze job came out patchy im going to kill myself
1 note
·
View note
Photo


mindlessly works on this for hours because its cheaper than anger management classes
2 notes
·
View notes
Text

hand plates

very simplified mudhorn signet. I can add more detail when I paint. I also added a little more detail to the bracers but then I forgot to take a picture of them.

first layer of glue. I know some people use plasti-dip to seal EVA, but this method has worked for me before, so why mess with success? 2-3 coats of white glue (elmers or similar) seal up the foam so it will take paint. I have a couple of different paint options, mirror silver spray paint and good old fashioned rub-n-buff, which ever one looks good with a layer of clear coat over it is what I'll go with. Now I just need to measure Dude's legs so I can make the thigh plates.
#the mandalorian#the mandalorian costume build day 4#halloween costume#spooky season#don't spray clearcoat in an enclosed space kids#i am unintentionally high
5 notes
·
View notes
Text
Automotive Paint Flash Time Explained

So, you have read or been told the flash time between coats is so many minutes. Just what exactly does that mean and how important is it? There are many so called experts that have their own ideas but are they right? In this article; automotive paint flash time explained...
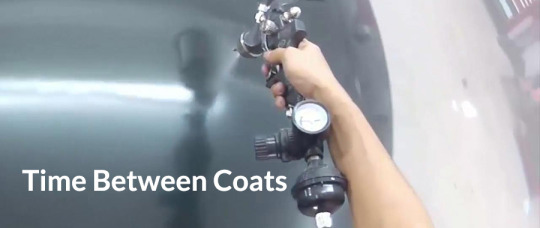
What is flash time between coats, is it something really crucial or just a suggestion? Well, it is both, and I know that is a vague answer but I will explain.
What Does Flash Time Mean When Painting a Car?
Here is the technical definition of what paint flash time is. Flash time in car painting refers to the waiting period between applying coats of paint.
It's essentially the time it takes for the solvents in the first coat to evaporate enough for a second coat to adhere properly.
This definition has everything you really need to know about flash times. Unfortunately, many car painters think they know better, or stick to exactly what the back of the paint can says.
Who is right? The seasoned old painter that says you wait to the next day to spray clear over a base coat? Or, is the directions on the can the best method to follow?
Paints have changed over the years and they keep changing. So, the season old painter is way off, you do not want to wait 24 hours. However, the instructions on the can could also be wrong but for different reasons.
How Do You Know the Proper Flash Time?
I understand that you may be confused on flash times, due to all the conflicting information out there. As the definition for paint flash time explained. You are waiting for the paint solvents to evaporate before applying the next coat.
This applies to primers, base coats, clear coats, single stages and sealers. Now, there are some products that tell you, no flash times. That you keep spraying until the desired coverage is achieved, but that is another topic.
If you kept spraying clear coat and not giving each coat time to tack up, it will run and sag. It is like building a house. You can’t lay several layers of block, and start building the main structure on it before the mortar cures.
Painting basically follows the same methodology. If you apply a layer of paint and then another on top of the first layer before it firms up. The first layer isn’t going to hold the second layer of paint, it will give way.
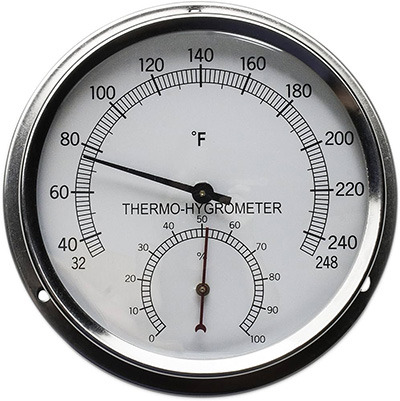
Due to humidity, temperatures and general moisture in the air, flash times vary from specs. The back of the can may say to flash your coats 10 to 15 minutes.
However, if you are painting in a super dry and hot environment. The solvents in your paint will dry far faster. This goes the extreme the other direction as well. If your environment is cool and damp, your solvents may not evaporate for 20 to 30 minutes.
That’s right, the specs on the back of the can are a guide, a general suggestion. They kind of leave it up to the painter to make the best decision based on their painting conditions. So then, how can you know the correct paint flash time?
The Tape Test
What is the flash time between coats and what does tape have to do with it? Well, you do not stick the tape into the paint. But you are going to use some, green, yellow or blue tape is the best.
The tape test is really simple. You take some tape, peel it or rip it off, doesn’t matter. Put your finger to the sticky side. Notice how your finger sticks to it when you pull it away?
This is what you want your coats to feel like. This will apply more to the clear or single stages paints than base coats or sealers. Base coats, sealers and primers dry a bit different but you can still use this method if you are unsure.
If you are applying a clear coat, touch an area that doesn’t matter. Possibly the masking tape or paper or even up in a wheel well.
If you touch the freshly painted surface. Your finger should stick ever so lightly but not pull off with any clear on your finger. If no paint comes off on your finger, your coat is what is called tacky and ready for the next coat. This is paint flash time or often called paint flash-off.
When the specifications indicate a flash time of 10 minutes, you can perform a touch test after that period. If paint still transfers onto your finger, wait an additional 5 minutes and test again. Once the paint feels sticky or dry to the touch, it's time to apply the next coat.
Why Is Paint Flash Time Important
As mentioned, there are painters that claim to wait 24 hours before spraying the clear coat. Why would they think this is correct if specs call for minutes instead of hours?
If you remember the definition of paint flash time, it refers to the solvents evaporating. By spraying the clear over a base coat too soon, you can trap the solvent trying to evaporate. What does that mean?
Trapping the vapors coming off the base coat, can cause tiny white spots, sometimes bubbles in the clear. On the other hand, if you wait too long to apply the clear coat, it will not bond to the base coat. This can also cause lifting and bubbles.
So, you can see that flash times can make or break your paint job. You may not see vapor spots in a light color but for darks and or blacks, it looks horrible.

However, if your clear coat doesn’t bond to the base coat, you can get paint lifting and bubbles like this.
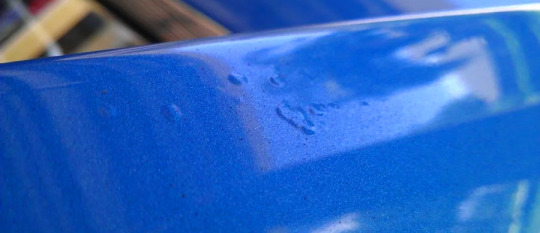
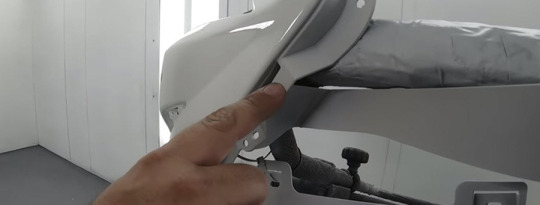
The ideal method is for each coat you apply, allow the solvents to evaporate but the material to not totally dry or cure.
Base coat flash time can be manipulated by heat and cold. If you are spraying a panel that is hot. Either from a heated paint booth to sitting out in the sun. This can deliver bad vapor trapping.
The base coat applied to a hot surface can immediately appear dry. However, this is just the surface, the solvent can be trapped under the surface of the base coat. When you apply the clear, the solvents in it will release the solvents in the base coat and cause vapor spots.
Choosing the Correct Paint Reducers by Temps
Most production clear coats do not normally use reducers. However, the activators you mix in them do commonly come in temperature selections.
Single stage paints, base coats, primers and sealers often require reducers and or basemaker. Ideally, you want to paint in temperatures between 70° and 72°F with the humidity around 50%.
When you have these conditions, it is far easier to experiment with fast to medium reducers or activators. You can decide which is best based on the brand and type of paint or primer you are using.
You may find with the temps between 70° and 72°F. Shooting a base coat with a fast reducer or basemaker, works best. Especially when the need for several coats is required to get the achieved look.
As with clear coats, a medium or even slow drying may work best for how you want to the surface to flow out. Of course, the slower the dry time is for clear, the longer your flash times need to be.
So, the slower your reducer, activator or basemaker, the longer your flash times will need to be. Even with primers. Most people don’t think too much about flashing their primers. But to build good filling coats, flash times for primers help.
If your environment it around 75°F but your humidity is high, like between 75% and 90%. You would want to use a fast-drying reducer, activator or basemaker.
On the reverse side, if the temps are around 75°F, and the humidity is between 10% and 30%. You then would want to use a slower drying reducer, activator or basemaker.
Most paint manufacturers only list temperature ranges. You also need to pay attention to the humidity as well.
What If Your Paint Flash Time Is Too Long
If you wait too long before applying any coat on top of the other, then the coats won’t bond. By the coats not bonding, separation, lifting, bubbling or discolorations can occur.
When spraying a sealer before top coating. Be sure to read the paint flash time on the can. Some sealers can flash up to a few hours. However, no matter the flash time, if you wait too long, you will need to scuffy the surface and clean before applying another layer.
This applies to primers, sealers, base coats and clear coats. For the best outcome, you never want to allow a coat to dry that long to where it would require to be scuffed.
If you have to scuff a surface before applying the next, do not wipe it down with a solvent type cleaner. If you can wipe it off with a mid-coat tack cloth would be best. However, if it is heavy in debris, you can use a cloth dampened with water, then the tack cloth.
Primers are more forgiving and you can just sand them. Sealers and top-coats need to be super clean before spraying them.
Conclusion

From the things I have gone over, you can see that paint flash times are really critical. You may not believe this, but all those clear coat issues Honda’s had between 2003 to 2011, were due to the clear not bonding.
Cars are painted far different at the factory than what a body shop would. They are electrostatically sprayed. However, they still have flash times and the base coats were too cured before the clear was applied. Not to mention they didn’t apply a thick enough coating of clear.
Remember, do not spray a coat on anther too soon, as you can get vapor trap. Also, do not wait too long, as the layers will not bond.
If ever in doubt, just touch the paint somewhere it won’t hurt the looks, to see if it is tacky. Remember to adjust your temps in reducers based on your temperature and humidity.
I have an article on Creating Your Own Paint Booth at Home. Having some form of paint booth can immensely help on the look and quality of your paint job.
Read your paint specifications on the cans, but remember, they are general guides. However, they are close to what the flash times need to be. You just adjust due to your environment.
Do not listen to the people that claim you wait days to apply coats. Read your paint specs or ask your paint store. If you need help, reach out and Contact Me.
Read the full article
0 notes
Text

testin somethin. got a rotary switch fr w/ 4 diff diode clippin arrangements at the end of mostly regular rat w/ a ruetz mod. currently loaded w/ symmetrical bat41s, symmetrical d9e+mullard cv7364, assym red led on one side and two 1n277s on the other, and symmetrical 1n34a's that im pretty sure are counterfeit. i used a jfet common source amp instead of just a fet buffer for the output stage bc the low forward voltage of these diodes kills a bunch of volume & i can use a feedback cap & the fet input capacitance to cut highs w/ 1 less column than if i put a rc filter at the end
#i could do a cap from vol3 to vol1 but thats annoying#box is gettin clearcoated now#diy electronics
0 notes
Text
feeling a bit like a genius and a bit like a bad joke rn
#decided i wanted to paint one of my fingernails black because whenever im left unattended i start painting my nails i guess#but i also didnt want to let it dry (as usual) so i decided to only do one so when i inevitably fucked it up it wouldnt be a huge deal#then while i was waiting for it to dry i was playing with a box knife on my desk (as usual tbh) and decided i wanted stripes#the nail was dry enough that i could cleanly cut the stripes in#doing my makeup with a knife. anyway the stripes came out really nice#then i used my gundam markers to make them yellow because i could#now im considering using craft glue as clearcoat because the nailpolish clearcoat i have FUCKING SUUUUUUCKKSSSSSSSSSSS#i think i will. honestly.
1 note
·
View note
Text

Ore wa Gupla!!
#I don’t feel like fully stickering this one tbh they really need clearcoats otherwis#gupla#rise's shenanigans#black ink only even if nub is so frayed#gunpla
1 note
·
View note
Text
My Diecast Collection:
Custom 1968 Chevrolet Camaro
#hotwheels #hwslammed2023 #scale1_64 #chevrolet #camaro
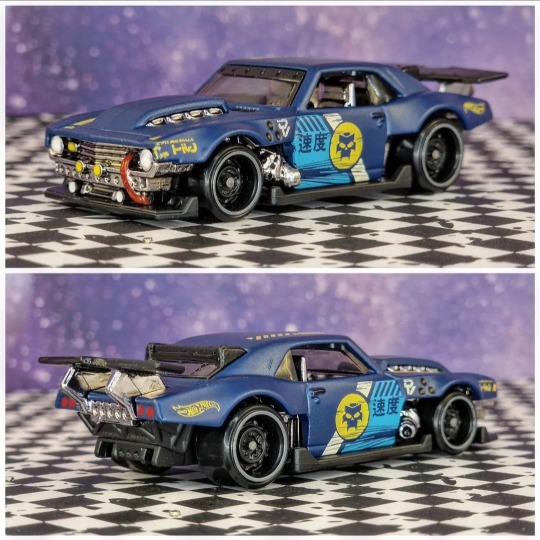
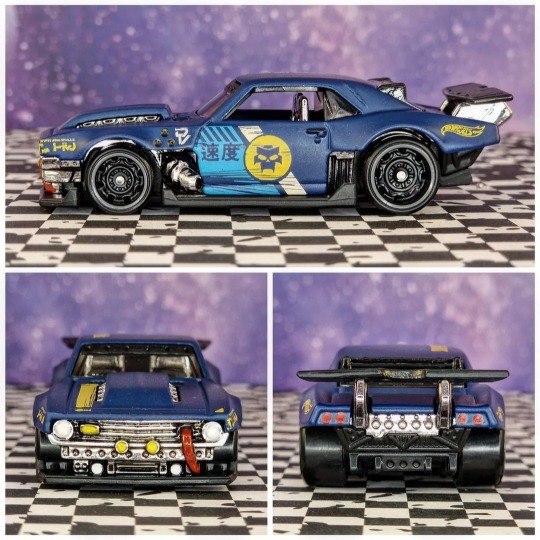
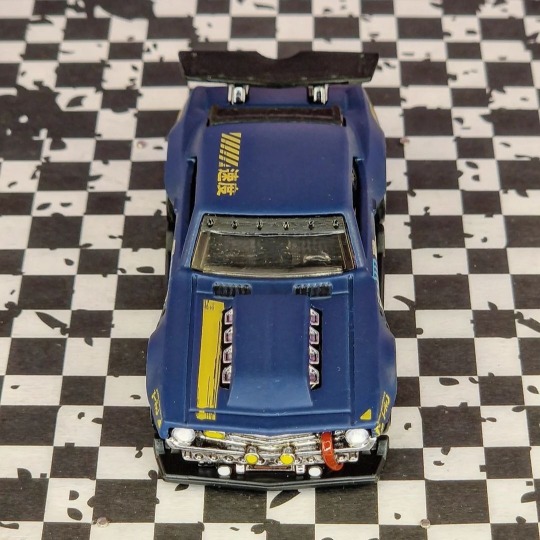
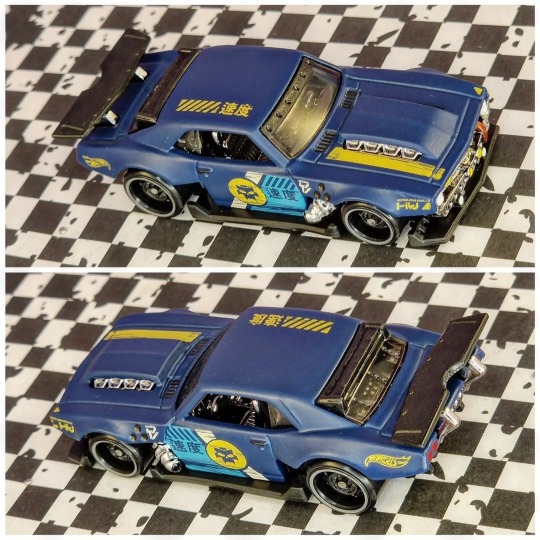
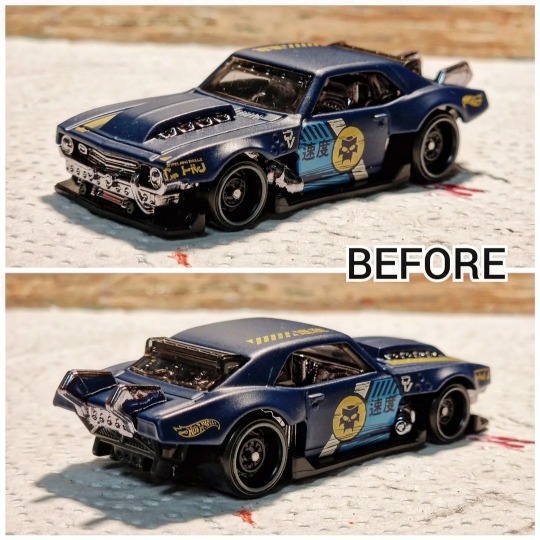
#diecast#hotwheels#hw slammed 2023#1/64 scale#chevrolet#chevy#camaro#1968 chevrolet camaro#diecastdetailing#matte clearcoat#awcustomprojects
9 notes
·
View notes
Photo

Porch Front Yard in Boston
Ideas for a significant craftsman front porch renovation
0 notes
Photo

Porch Front Yard in Boston
Inspiration for a huge front porch remodel
#classical columns with tuscan base and cap#clearcoated fir beadboard#historic#double column cap#hand nailed#spanish cedar
0 notes
Last Seen Blogs

rahavardniroo23
فروشگاه رهاورد نیرو

anthonysperkins
lost in time

jughead-cooper
Anto

wormheamer
WormHeamer

zambomarti
ZAMBETTA