#combo randomizer
Explore tagged Tumblr posts
Visit Tumblr Blog
Explore Tumblr blogs with no restrictions, modern design and the best experience.
Last Seen Tumblr Blogs


Fun Fact
Tumblr was named as a finalist in Lead411’s New York City Hot 125 in Aug 2010.
Text
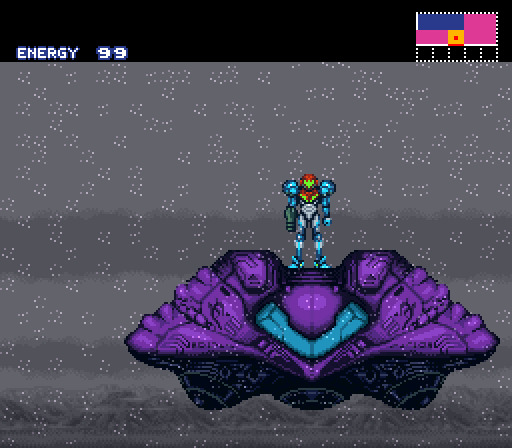
1st time playing the Super Metroid + Zelda 3 combo randomizer
I actually did this a few months ago, but only talked about it on Discord. I'll copy-paste a sort of "liveblog" I did there.
[If anyone else wants to play it, go to https://samus.link/ to generate a randomizer seed from the ROMs of both games. If you wanna play the specific seed I played, the seed's number is 1045710512.]
-------------------------
So... Here are the settings I used:
Super Metroid logic: normal.
Requirements to open Ganon's Tower in Zelda 3: all 7 crystals in the Dark World.
Requirements to open Tourian in Super Metroid: all 4 bosses.
Morphball location: randomized.
Goal: defeat both Ganon and Mother Brain.
Requirements to leave Ganon vulnerable: all 7 crystals.
1st sword location: randomized.
Keysanity: off.
Also, there are these other settings, which are merely aesthetic and don't affect gameplay or the item shuffling of this seed:
Link is replaced with Shantae.
Samus isn't replaced but her suit is replaced with the one from Metroid Dread (and her gunship gets a purple paint-job so it resembles the one from that game as well).
-------------------------
Welp... Got a Power Bomb magazine (Is "magazine" the right word in this context?) where the Morphball would normally be, so I can only go to Hyrule now.
That sure was a good start. /s
-------------------------
I'm not doing very well in Hyrule either. Got arrows and lots of magic, but no weapons to use them with, no sword out of Link's uncle, and no lamp. And in the path to Zelda's cell, the key for one of the doors was replaced by a Missile magazine for Samus.
I might be softlocked.
Now, I know there's a distinction between Normal Logic and Hard Logic: Hard Logic means the seed will require some advanced techniques to exploit glitches (short-charging the Shinespark, for example); Normal Logic will require, at most, basic stuff such as Mockball. But there's another setting, separated from whether to choose Normal or Hard Logic, which is whether or not to activate Keysanity: this randomizes keys as well as the normal items in Zelda 3. I thought I had turned Keysanity off...
-------------------------
I started to look for stuff outside of Hyrule Castle. I already found an Energy Tank and a Reserve Tank for Samus and money for Link in that room behind Sahasralla in Eastern Palace (I was lucky one of the soldiers dropped a bomb, which I could use to break a wall meant to be broken with the Pegasus Boots provided by Sahasralla), but these ain't very useful for now.
I could enter Eastern Palace now as well. I wouldn't beat the boss there, but I could open some of the chests and see if I get something early.
Oh, fun fact: the name "Sahasrahla" is written in Japanese kana as "Sahasurāra", which is also the Japanese name for the 7th chakra, Sahasrāra.
-------------------------
Also, I've just found out those signs in Hyrule hit really, really hard when you throw them at people.
I had to use them because I didn't find any of the swords yet. Someone else mentioned this:
"Zelda 3 wasn't designed with Sword-less in mind. It's not like you can skip it in the standard game, like in Zelda 1. It only has it as a consequence of the tutorial."
-------------------------
I'm starting to realize what kind of Pandora's Box I've just opened.
I enter Eastern Palace...
1st chest I open?
A Big Key.
2nd chest I open?
Gravity Suit.
-------------------------
Found one of the Mitts (the grey one), and the Screw Attack. Now these might actually be helpful.
-------------------------
Space Jump acquired. It was inside the Swamp Ruins.
Still no Morphball, though.
-------------------------
There is one place in Crateria where, in order to reach it, you need either the Speed Booster or a combination of Space Jump and Screw Attack. It's the one with all the worms and the lava going up and down. In the Chozo statue at the end, I found the Fire Rod. At least I have a weapon in Zelda 3 now, even though it depends on magic.
Also, I got a couple of Super Missile magazines in Zelda 3. IIRC, the path from Crateria to the Wrecked Ship requires one Super Missile to open a door, and then Space Jump with Gravity Suit to get easily through that area with the giant pool that is supposed to require the Grapple Beam.
-------------------------
Never mind, it also requires one Power Bomb to open another door.
The same goes for the door that takes me from Crateria to Red Brinstar.
Back to Zelda 3, I guess.
-------------------------
I take it back, I remembered something: there are a few blocks on the path to Green Brinstar that normally are destroyed with Morphball Bombs. But they can also be destroyed with Screw Attack. Which means I can enter Green Brinstar now.
-------------------------
I've just remembered how good the music for Green Brinstar is. It also reminded me of one pretty big coincidence: it sounds like the music for Collision Chaos in Sonic CD. More precisely, Green Brinstar's music has a melody very similar to that on the North-American soundtrack's music tracks for Collision Chaos (especially the Present version), whereas the instruments sound a lot like the ones used for the Past music of that same level (not the melody, though, since the music tracks for Past versions of all Sonic CD levels are made from the Japanese soundtrack's melodies).
King Meteor Studios made their own "North-American Past" remix of Collision Chaos. Leaving the slightly slower tempo aside, it has a lot of Green Brinstar vibes indeed:
youtube
-------------------------
Found Hammer and Hookshot in the "pink" part of Green Brinstar. The Hookshot in particular was very accessible, it didn't need Space Jump.
I also beat Spore Spawn.
-------------------------
I decided to explore Death Mountain (albeit I had to go through the tunnel to Death Mountain without the lamp, which I had never done before) and try to get into the Tower of Hera. In one of the few chests of the tower, I finally found the Morphball, so now I could come back to planet Zebes and clear some stuff there. Especially because I had found the Ice Beam in the Chozo statue after Spore Spawn's room, but I had gotten a soft-lock due to not having Morphball and I had to reset it back then.
I also got the Book of Mudora in one of Death Mountain's caves. Although I'm still swordless and some tombstones with items require both the book and at least the Master Sword (I don't know what they'll give me here, but in the normal Zelda 3, two of those tombstones give you the Ether and Bombos medallions), entering Desert Palace only requires the book AFAIK, so I could go there once there's nothing left to do in Super Metroid.
Lastly, I beat Tower of Hera's boss with the Hammer (that boss is still just as annoying as in the original game), and I saw the Spazer Beam where the Mirror would normally be. I can only reach that place by going through the Dark World, which requires the Moon Pearl.
-------------------------
Just as expected, getting Morphball alone already unlocked a lot in Super Metroid.
The Chozo statue that normally gives you the Morphball Bombs (and then reveals itself as a Torizo and tries to kill you) gave me the Magic Cape instead. I'm not sure how useful the Magic Cape will be for me here: almost half of my weapons require Magic, so I already need to be careful and use it with lots of moderation.
There's a part of Green Brinstar that everyone on YouTube uses to demonstrate the Mockball; behind that, there's a Chozo statue with an item, then another two items behind that. One of those two hidden items was the Pegasus Boots, which in turn unlocks quite some stuff in Zelda 3.
I entered Red Brinstar, but after exploring a bit, I went to the Wrecked Ship from there. If I had stood on Red Brinstar and gone further down there, I probably could have gone to Kraid and beat him only with what I already had.
I've also beat Phantoon and explored almost all of the Wrecked Ship (the only part left of this area requires the Speed Booster to go through) and its surroundings, where I found the Ether medallion. In Zelda 3, freezing enemies -either with Ether (pun not intended) or the Ice Rod- and then killing them with the Hammer makes them drop Magic refills, so getting this item partially solves my little Magic Scarcity Crisis. The one big downside of this is that I'll have to try not to waste uses of Ether in rooms with only one or two enemies.
I'm in the upper areas of Maridia now. To nobody's surprise, getting the Gravity Suit early makes this place much less of a nightmare to explore. On the other hand, my lack of the infinite supply of normal Morphball Bombs is starting to become a problem, as I have to very much manage a finite supply of 10 Power Bombs and I'm finding more and more places where I need to do a Bomb-Jump and those few Power Bombs are the only thing that lets me do that for now.
I've not even set foot in Norfair yet. I guess I could, but I'll leave that for when I get the Varia Suit and I can explore all of Norfair in one go. I know there are ways to beat Super Metroid without getting Varia, such as the Reverse Boss Order run, which explicitly requires entering Norfair and beating Ridley without Varia... but I'm still not enough of a True Gamer™ to pull it off.
And yes, I'm still sword-less. I was also shield-less for quite a long time until I got the basic shield in the Wrecked Ship.
-------------------------
I'm exploring Maridia right now. I didn't notice at first, but that place is huge.
-------------------------
I can't do much more in Maridia for now. About 40% of the region is still inaccessible, because either it requires Speed Booster (like that room with all those "under-developed Metroid larva" things, and another point where I saw the Silver Arrows) or the door is grey and can't be opened at all.
On the good side, I did the Gate Glitch for the first time (Yay!) and got the Blue Boomerang... which isn't a lot, especially when I already have the Hookshot.
There are items in Maridia that require some sick tricks (like jumping, going into Morphball and t h r e a d i n g t h e n e e d l e in a hole for the Morphball near the ceiling... with crumbling blocks below) and I don't have the patience to try to pull them off right now, but those items ain't even important: a red rupee and Heart Pieces (quite a lot of them).
There are also the Silver Arrows, which are locked behind a Speed Booster wall apparently, but that doesn't matter for now because I don't even have the Bow.
I'll go explore what's left of Red Brinstar and beat Kraid while I'm there.
-------------------------
Something particularly frustrating regarding the beam cannon: I have the Ice Beam... and nothing else, not even Charge Beam.
So I shoot the Ice Beam, hoping that it freezes an enemy. And it does, but only after ten or more shots.
-------------------------
Something related to this: I heard that, at least in the Metroid titles on the GameBoy Advance (Fusion and Zero Mission), when the beam types stack, not only do they combine their effects but they also have additive attack power; Samus's fully upgraded beam cannon can already do much more damage than the beam cannon at the beginning of each game because of the minimum damage it does per shot, even if the enemy is a major boss such as Mecha-Ridley or Mother Brain, to whom the Ice Beam doesn't freeze and the Plasma Beam doesn't repeatedly do damage multiple times with each shot.
I also heard that, in Metroid Dread, enemies have specific weaknesses to one beam type or another.
Back to Super Metroid, since each Plasma Beam shot can go through enemies while damaging them, thus inflicting several times more damage than the shot itself (unless it's a major boss such as the aforementioned Mother Brain and Mecha-Ridley in Zero Mission), it has a... unique effect on Crocomire when firing a fully charged shot at its open mouth.
-------------------------
Kraid... eradicated (see you in Metroid Dread, I guess).
I think I'll go back to Hyrule now. Once I'm there, I might find a way to enter the "eastern" areas of Maridia (the ones I couldn't explore yet) from Zelda 3, perhaps even fight Draygon.
There are 4 doors in Zebes and 4 in Hyrule that work as portals between both worlds here. The locations of all these doors, along with which door in Zebes connects with which door in Hyrule, are not randomized. But I don't remember the exact location of every portal; I remember one that connects Crateria with a house in central Hyrule near Link's house (which I found at the very beginning of the playthrough), and there's another one in eastern Maridia that I only know about because I saw it in Maridia's map but I still don't know where in Hyrule it leads to.
-------------------------
Also, in Kraid's Lair the eastern part of Red Brinstar after The Tube (you know which one...), there's a room that can only be entered after killing Kraid. What do I find there?
An Energy Tank.
Which was already there in the original game, IIRC.
-------------------------
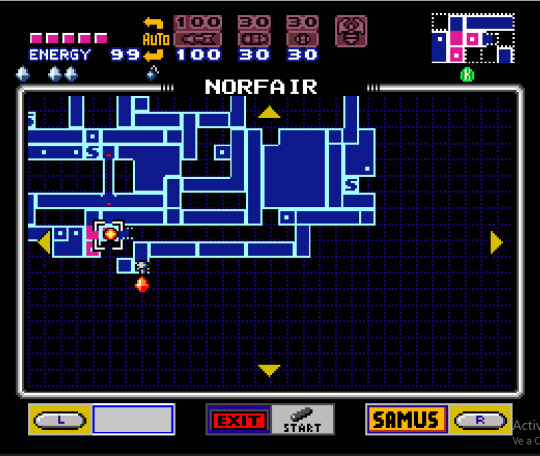
Okay, I decided to enter Norfair anyway, despite not being able to get very far yet without the Varia Suit.
On one hand, where the Ice Beam and the Hi-Jump Boots would normally be, there were just a Normal Missile magazine and 10 Arrows.
On the other hand, right before the Hi-Jump Boots' room (where I have to run a race against an orange Zoomer or something), I found a Power Bomb magazine. With the one I got as a "reward" after defeating Kraid (because it took the Varia Suit's place), I have a maximum of 20 Power Bombs now.
Besides, right after entering Upper Norfair from Red Brinstar, there's a Save Room and another door... that turns out to be another portal to Hyrule. More exactly, a portal to Death Mountain. So now I'll start doing stuff in Zelda 3, starting from there.
-------------------------
After exploring a bit, I've beaten the boss at Desert Palace. I had already made some progress there, but I couldn't go fight the boss until now: the Big Key was behind the only door I hadn't opened, and the one key that would let me open that last door was on top of a column and required the Pegasus Boots.
I have the Mirror but not the Moon Pearl, so I can only do brief "incursions". In one of them, I got the Spazer Beam (to be precise, I found it where the Mirror would normally be).
-------------------------
There's something weird I found upon watching some streamers play this randomizer:
Does anyone here see anything strange in this screencap?
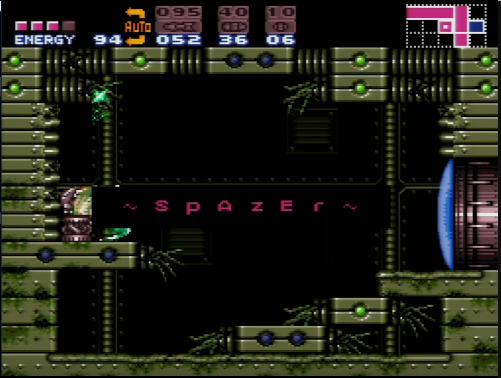
It's not really important, since it doesn't affect the actual gameplay at all. But it still baffles me: this doesn't happen with the Spazer Beam in the original Super Metroid, nor does it happen with any other item (neither the ones for Samus nor the ones for Link) in the randomizer.
-------------------------
I finally got the Moon Pearl. Now I can explore the Dark World as much as I want. I also got the Red Shield, which can at least reflect some attacks.
-------------------------
So... Now that I can enter the Dark World with no problem, I went to its version of Kakariko Town (I think it's called "Thieves' Town") and entered the dungeon below the statue. The first chest I open? The level 1 sword, called "the Fighter's Sword" in the randomizer.
-------------------------
I had to leave the dungeon at Thieves' Town for later. I was dying so much, I couldn't progress much there. Also, I still don't have the Bow, and I'd like to be able to shoot the 40 arrows I've hoarded so far.
So I went to the witch's hut to get a blue potion (I'd gotten one of the Bottles earlier), and when entering the Dark World again, I decided to explore outside of the dungeons.
And I'm getting some important items: Zora's Flippers, the Ocarina, and Half-Magic.
I'm not sure what exactly Half-Magic is for, though. I heard there's only one place in the entire game where it really makes a difference: in the Dark World's version of Death Mountain, there's a cave with its floor covered in spikes; I can either get enough Heart Containers and tank the damage, or use an item that grants me invicibility (either the Magic Cape or the Cane of Byrna), which will require a lot of magic.
Other than that, I guess I could just... get all four Bottles, save money to buy 4 blue potions and get by with that.
-------------------------
Two different people told me this about Half Magic:
"It's a funny moment in-game when you get it. Also, it lets you super-spam the Fire and Ice Rods."
"It's a nice quality-of-life detail but you don't really need it for anything."
-------------------------
Zora's Flippers will be very useful when I get back to the Light World: on the way to the Zoras' Waterfall, I saw the Titan's Mitt on the other side of a river.
-------------------------
Thieves' Town boss, defeated.
Is it just me, or the only way to defeat this boss is to "out-DPS" them? Both here and in the original game, I've beaten it by running into them and damaging them faster than they could hurt me. In the original Zelda 3, I tried to preserve my health so I could fire sword beams (which I don't have yet in the randomizer because... well... no Master Sword) and attack from a distance. But that pair of flying heads kept shooting and the red shield didn't stop all their attacks, so I lost the sword beams very quickly during the fight. The arrows were too slow as a long-range weapon in comparison to the sword, so I just... rammed into the boss and started slashing. The old-fashioned way of using a sword, you know?
-------------------------
Some answers I got from people on Discord:
"That boss is unique in that it takes equal damage from all sword sources. So the best method is to poke it, despite that normally making your damage lower." "Doesn't he just take a set number of hits, basically?" "Three per head, for a total of nine."
-------------------------
Let's do a recap of what I've got until now.
In Super Metroid:
5 Energy Tanks and 2 Reserve Tanks.
Ice and Spazer Beams.
Gravity Suit.
Space Jump.
Morphball and Screw Attack.
100 normal Missiles, 30 Super Missiles, and 30 Power Bombs.
Grapple Beam.
In Zelda 3:
12 Heart Containers, plus 2 Heart Pieces.
40 arrows and at least 18 bombs (I don't know what's my bomb capacity right now, I know about the arrow capacity only because I've hoarded those 40 arrows without a Bow to shoot them with).
Half Magic.
Level 1 Sword and Red Shield (which is level 2, I guess).
Blue Boomerang.
Hookshot.
Magic Powder.
Fire Rod.
Ether.
Lamp.
Hammer.
Shovel.
Ocarina.
Bug-Catching Net.
Book of Mudora.
1 Bottle.
Magic Cape.
Mirror and Moon Pearl.
Titan's Mitt, Pegasus Boots, and Zora's Flippers.
-------------------------
When generating this randomizer seed, I had chosen to shuffle what each defeated boss would represent and unlock. Here's what I've found out:
When I killed the boss at Thieves' Town, according to the game, I actually got the blue pendant, the one from Desert Palace.
Earlier, when I did the same at Desert Palace, I got one of the crystals as a reward instead of that dungeon's pendant.
When I defeated the boss at Death Mountain, I technically killed Kraid.
When I actually killed both Kraid and Phantoon, officially I defeated another two Dark World bosses, thus being rewarded with another two crystals.
The three crystals I've got so far are the 1st, 3rd and 4th ones, which correspond to Dark Palace (Dark World's Eastern Palace), Skull Woods (Dark World's Lost Woods), and Thieves' Town.
According to the maps of Zebes's regions, Ridley is in Maridia, taking Draygon's place. Meanwhile, Ridley's place in Lower Norfair is taken by a red crystal.
Two of the seven crystals are shown as red in the randomizer; to be precise, it's the 5th and 6th crystals, which correspond to Ice Palace and Misery Mire (the lake/swamp in the Dark World that replaces the desert in the Light World). Those are the two bosses I need to kill in order to get the big bomb and go grab the Golden Sword (or whatever it's been replaced with).
According to the map of Hyrule's Light World, Phantoon is still kicking in Eastern Palace. Meanwhile, the map of Hyrule's Dark World says that:
The green pendant (Eastern Palace) is in Skull Woods, and the red pendant (Tower of Hera) is in Turtle Rock.
Draygon is still waiting in Dark Palace.
The crystal in Turtle Rock was sent to Swamp Palace, the one that was originally there was sent to Ice Palace, and the red crystal in Ice Palace was sent to Misery Mire (which means Misery Mire's red crystal is the one replacing Ridley).
-------------------------
Before I continue with this, have a little PSA:
If you wanna try this randomizer out someday (or if you wanna play any randomizer, for that matter), completing the original versions of both games at least once before playing the randomizer should be enough. No need to learn all the ins and outs of each game, or overly complex speedrunning tricks or very advanced sequence-breaking techniques or glitches.
Games Done Quick has its own series dedicated to randomizer runs, "Random Number Generation". The people playing games for that section often remind viewers that randomizers are for players "of any and all skill levels", not reserved or restricted for True Gamers™, and it's okay to play them with only a minimum of knowledge and experience in their respective original games.
-------------------------
Now I've just gotten the Cane of Byrna: it was in Misery Mire, inside one of those two rooms at each side of the entrance to the dungeon. The other room is the portal to Lower Norfair; to be precise, that portal leads me right behind the Golden Torizo room.
The portal connecting Lower Norfair with Misery Mire is here. It doesn't expose me to that area's high temperature, but instead leads me to a room with an energy recharge station. I could try to go to the Golden Torizo's room (a bit further down and to the left), fight it, get whatever is hidden in that corner the Torizo drops itself from, and get the heck back to the recharge station. But with only 7 energy tanks (5 normals + 2 reserves), I don't feel confident enough.
-------------------------
Yes, there is a Chozo statue between the portal and the Golden Torizo's room. And I did go down there to see what it had.
One rupee. I almost died for one rupee.
Anyway, Master Sword... acquired.
In the northeastern corner of the desert, there's a place that can only be accessed by warping to the Dark World, walking to that corner, and warping back to the Light World in that spot. There, in the cave below a light-green rock, the item turned out to be the Master Sword.
-------------------------
I couldn't do anything else in Misery Mire, so I went to explore Ice Palace. Also, I've just got the Tempered Sword.
-------------------------
The Ice Palace boss is down. I also got the Cane on Somaria.
I'm starting to get less and less stuff from the places I explore, and I'm kind of running out of places to go as well.
-------------------------
I managed to beat the boss at Dark Woods, but I didn't get any new items. Many places in Hyrule where there should be an item only have a red rupee instead. Also, I had forgotten how much of a headache that dungeon is: those "falling hand" things that grab me and take me back to the beginning (I know they're called "Hand Masters", but I'll just call them "Za Hando" from now on), a new kind of mummy that's more resistant than the others, and the entire dungeon having a confusing design in general. And there's the boss itself, with the giant conveyor-belt floor and the spikes moving independently from that floor. I could kill that overgrown moth only by spamming the Fire Rod (I was pretty close to running out of magic, due to having only one bottle to carry blue potions), and I had only one heart at the end of the fight.
After that, I tried to get into Dark Palace and get the only pendant left. But there's an enemy that can only be killed with arrows, and the door to the boss doesn't open until that enemy dies; this is the same as in Eastern Palace, where I opened all the chests but I can't fight the boss yet.
On the other hand, while exploring Dark Palace, I got Plasma Beam. Which is... nice, I guess. For now, Plasma is useful as an alternative to Spazer and not much else. I can't fire charged shots yet, so I'm still unable to truly exploit the qualities of Plasma Beam (one-shotting Crocomire, for example), and I still don't have the Wave Beam, which I still need for a few puzzles (a door in the "pink" part of Green Brinstar, which can be opened with the beam cannon but only from one side).
-------------------------
Forget what I said earlier, now I'm making actual progress. I just wasn't looking in the right places.
Two of the bottles were in Death Mountain: one was in the mountain's caves, in the Dark World, and the other one was in the Light World but had to be acquired by using the sword and the book on that gravestone to the east of Tower of Hera (I think it's the one that would normally give me Ether).
That reminded me of the gravestone at the entrance to the desert (the one that would give me Bombos in the original game), which requires going through the Dark World. That 2nd gravestone gave me Varia Suit, so now I can either go back to Zebes or stay a bit more in Hyrule.
-------------------------
A while ago, I was like "I'm gonna stay in Hyrule. Swamp Palace should be available already, maybe I can get something there." One minute later, I found the Charge Beam.
Best. Decision. Of this entire playthrough.
Now I can use Power Bombs as ammo for those s i c c tricks with special beam attacks (though that'll not be a reasonable way to manage my still very limited supply of Power Bombs).
-------------------------
And now the boss at Swamp Palace is dead.
-------------------------
This randomizer seed kind of likes to mess with me via the rewards for defeating a Zelda 3 boss.
There are two rewards. One of them is the pendant or crystal assigned to that dungeon (or the corpse of a Super Metroid boss in this randomizer, I guess); as I said earlier, randomizing this is optional and I had turned that on when generating the seed, so I knew what I was expecting in that regard. The other reward, awarded to the player before the dungeon's pendant/crystal, is some other item; just like everything else here, this item can be almost anything other than small keys (randomizing those keys is optional, and I had turned that off).
After defeating each boss in this seed, I've often been rewarded with a "dungeon item", either the Map or the Compass. This time, after defeating the Swamp Palace's boss, I was rewarded with the 3rd "dungeon item": the Big Key.
Also, I hadn't found the Map anywhere else in Swamp Palace, so I'm pretty sure it's in the giant chest that requires the Big Key.
Now I'll go back to Zebes. I still don't have normal Morphball Bombs, but with what I've got for Samus so far, it should be enough. I might even be able to defeat Mother Brain already.
-------------------------
Before going back to Zebes, I did one last quick search through Swamp Palace. Just as I thought, the Map was in the chest locked by the Big Key.
But there was also one normal chest I hadn't opened yet. That chest had the last of the 4 Bottles.
-------------------------
I've just got out of Norfair. I had entered by "cheating", going through the portal from Misery Mire.
Many important items were in Norfair this whole time: the Speed Booster in a room at far-eastern Norfair that requires the Spring Ball, the Spring Ball in a room very close to where I needed it to get the Speed Booster, the Golden Sword hidden in a pool of lava near the entrance to Norfair, and the Blue Mail at... some point between them, I don't remember. On the other hand, I still don't have the Bow.
I also found the normal Morphball Bombs (finally...). Turns out they were behind Ridley. So yeah, I had to fight Ridley.
I won, but it seems 12 Energy Tanks (3 of them are actually Reserve Tanks, though), 40 Super Missiles and 150 normal Missiles might not be enough to beat him, not to mention that I can't avoid ramming my face into a boss as part of my "strategy" to defeat them. The only way I managed to survive was by shooting all the normal Missiles first, then shooting all the Super Missiles after them, so Ridley turned red but didn't have enough time to kill me with the stronger attacks on his "angry phase".
-------------------------
I've just finished exploring Maridia. Draygon is dead, and thanks to the Speed Booster, I've got the Silver Arrows, which I had already seen earlier. Still no Bow, though. There are a few locations in Brinstar and the Wrecked Ship that I couldn't access until now, so I'll look for items there.
Also, the portal in eastern Maridia connects to the South-East of Hyrule's Dark World; more exactly, the entrance to a cave, to the east of the lake where the Ice Palace is. In that same spot of the Light World, there's the 8th arrival point available when using the ocarina to move around Hyrule (those arrival points for the Ocarina Boy's Bird).
I'll have to go back to Hyrule eventually, anyway. Due to the "boss shuffle" thing, according to this randomizer seed, Draygon is in Dark Palace, and I couldn't fight the boss there yet.
-------------------------
I forgot to mention a few things:
In Norfair, I found the two medallions left (Bombos and Quake).
In Maridia, I found the Mirror Shield. It took the Plasma Beam's place, behind a door that remains locked until after you beat Draygon.
-------------------------
Welp... I'm pretty much done with the Super Metroid part of the randomizer for now. I found the Red Mail, but not much else, so I still don't have either the Bow or the Wave Beam. There's one item I haven't checked yet, but it's behind that one-way door in Brinstar. It'll be so cruel (but not unexpected) if it turns out the Wave Beam is behind that same door and can only be acquired by using the Gate Glitch (which is even harder here, since this door is high above the ground). Now I'm back in Hyrule, trying to defeat all the remaining bosses there.
-------------------------
I began to explore Turtle Rock, and during the boss fight, I realized something else: both the Fire Rod and the Ice Rod are needed to fight the boss.
I still don't have the Ice Rod, and I thought Ether would be a good replacement since it has the same effects.
...
Guess I'll die.
-------------------------
Okay, I've just defeated the boss at Misery Mire, so I have all 7 crystals now because of Boss Shuffle. Now I can grab the big bomb and get the item that took the Golden Sword's place, and I might be able to fight Ganon already.
-------------------------
Well, Plan "Big Bomb" didn't work: I just found an Energy Tank in the Golden Sword's place.
On the other hand, I've unlocked Ganon's Tower. I hope any important item left is in there; right now, Bow and Ice Rod are all I'd really need, since I can enter Tourian and kill Mother Brain without Wave Beam.
Also, I remember seeing someone beat Ganon without shooting arrows. They had to slash Ganon with the sword... like... 50 times or something. I could try that since I've got no Bow but at least I have the sword at max level.
-------------------------
After learning some advanced variants of the Wall Glitch (which was for nothing, because the one item left in Zebes was just a Missile pack) and also the Mimic Clipping (which isn't very useful anyway) and revisiting everything in Hyrule, I finally found out where the important items left were located this entire time:
The Bow was in the "c-shaped house" at northeast Thieves' Town, which means it was totally available ever since I was able to enter the Dark World.
The Ice Rod was in the cemetery to the east of the Sanctuary, in a room hidden below a tomb on the northeast corner of that cemetery. Until a few minutes ago, I only knew of a similar secret room below a tomb on the northwest corner of the cemetery.
The Wave Beam had to be acquired by completing a task, the one where you have to find a purple chest in the Dark World (in the Dark World's version of the twin blacksmiths' house, to be precise), warp to the Light World with it, and bring it to some moustache guy meditating in the middle of the path between the ruins and the desert. I had completed that task in my 1st playthrough of standard Zelda 3, and I still remembered there was a purple chest, something important in the Dark World's version of the blacksmiths' house, and that guy meditating, but I had completely forgotten the connection between all those things.
Anyway... Now I can beat the randomizer with no problem.
-------------------------
Every boss in both Super Metroid and Zelda 3 has been defeated.
(Also, after gathering the three pendants, I went to Lost Woods and found out the Red Boomerang was the item that replaced the Master Sword in this randomizer seed)
Now I could go beat both games' final bosses in any order I want. There's only one noteworthy difference gameplay-wise between defeating either Ganon or Mother Brain first: if I beat Mother Brain before Ganon, Super Metroid's escape sequence only has a countdown until Samus crosses the door that takes her out of New Tourian and into Old Tourian, which makes the escape less anxiety-inducing. From that point onward, Samus can either go back to her ship or keep exploring Zebes since it's not gonna explode (or the player can warp back to Hyrule to fight Ganon).
There's this tradition (at least on Games Done Quick) of leaving Mother Brain for last. But I'll go kill Mother Brain first, I'm not really in the mood to deal with the entire countdown.
-------------------------
Since I've got most items and I can go beat both final bosses, I decided to try some of those glitches with the mysterious VAR Beam (which is just Spazer and Plasma Beam activated at the same time). But then I saw that Hi-Jump Boots are required to get the VAR Beam in the first place, and I can't do any of those glitches without that.
Oh, well... I guess I'll beat the game(s) without doing any weird experiments.
-------------------------
Okay, to be precise, the VAR Beam (along with all the other glitches that are based on it, like Murder Beam and Space-Time Beam) requires the Hi-Jump Boots only for the option to appear on the "Boots" section of the pause menu.
I also saw a glitch to be able to move during the entirety of the Mother Brain boss fight, even when the controls are supposed to be temporarily turned off (the scene where "The Baby" sacrifices themself for Samus and she gets the Hyper Beam). Unlike more advanced stuff such as short-charging the Shinespark, this glitch seems to be rather easy to do.
-------------------------
And now this randomizer seed has been beaten. Finally.
I had forgotten about the funny lines Randomized Ganon can say at the beginning of the battle.
"Thanks for dropping in, the first passengers in a hot air balloon were a duck, a sheep and a rooster."
"I feel like we keep ending up here. Don't you? It's like deja vu all over again."
"JOIN ME, HERO, AND I SHALL MAKE YOUR FACE THE GREATEST IN THE DARK WORLD! OR ELSE YOU WILL DIE!"
"IMPA SAYS THAT THE MARK ON YOUR HAND MEANS THAT YOU ARE THE HERO CHOSEN TO AWAKEN ZELDA. YOUR BLOOD CAN RESURRECT ME."
"Don't stand don't stand so Don't stand so close to me Don't stand so close to me back off buddy"
And then there's the Essence of the Triforce saying nothing but "L O L".
-------------------------
The results:
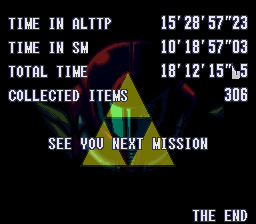
(Now, I wonder what's up with that digit on the hundredths of seconds of the total time...)
#metroid#super metroid#the legend of zelda#zelda no densetsu#kamigami no triforce#a link to the past#zelda 3#loz alttp#randomizer#super metroid + zelda 3 randomizer#super metroid + zelda alttp randomizer#combo randomizer#smz3#Youtube
4 notes
·
View notes
Text

who, me?
#this was a warm-up and then i was like. well! it's not gonna be that hard to clean up the lines.#really satisfying doing a 6-stars run of this game because youre just a random doomed woman sprinting into the hell dimension#and annihilating everyone with an axe. well let's be honest i mained the pistol. axe/shotgun was too slow to comfortably land the combos#my art#sorry we're closed
2K notes
·
View notes
Text


UPDATED SYMBOLS & EMOJIS :p
᭢ຶ⵿ू✿ ࿔ ⠀ིιྀ ྀᖭ༏ᖫི ! ๎𑜓 ̵̼͓̥͒̾͘ ✿ ྒྒ ຶ𒂭⬮ °ཐི♡̵̼͓̥͒̾͘ཋྀ° ཐི☆̵̼͓̥͒̾͘ཋྀ ꣓ི༏ྀ𑇒͙ ᭰͒̑͡✿ ུ⃨ ❀꫶̯͙ࣺ˖̑͡. =͟͟͞ 𖧷⛾⡷⃨ ̶̲̌͜ ͟͞͞, ༺ ᓭི༏ᓯྀ ♰१˚̣̣̣͙𖦹︎ ᭩ ྀ#⃞͏ᅟ✧ ✱✱✱ ▬ 🐰ྀིྀིྀིྀིྀི🌷*ೃ ̸⃨ ‘🌀⃜⃞ ⓘཊ 𓈒ིུ ᭒᭄ ✴︎ 🐲 ͟͟❘❙❚Ꮺ 𝆬⃞ ͙᭰͒̑͡✿ ུ⃨ (˃̣̣̥ヘ˂̣̣̥) 𖥨᩠ׄ݁🀄️ 𝜗℘ 🗒️ ᝰ.ᐟ ⃟͚̊▞ ❙❘❙❘.. ꯳⃘꤫ .ᐟ”🫥 ྀ᭩ ♬ 💮𓈒ིུ𓈒ིུ▞♬◌ ✱ ཻུ۪۪͎ 🥃ཐི ೫ ✱ 𒂭ུ۪۪۪۪᳝۟⓵⃜🎸❙❘♫ུ ⌗ ♬◌🥨#⃞ ❤︎ ུ۪۪۪۪᳝۟ 𝄞 ♪ ♭♫ ✸🥨ཐིཋྀ𑄾ㅤ۫ㅤㅤིྀㅤ▞ 𓈒ིུ▞♬◌ #♪ྀ#⃞͏ 👙🆙 ♪ᅟ✧ °°。 ♪𓈒ིུ❀📬 ☎️ #L֍✹ ཆིཆྀ ⃟͚̊✿ ━╋ *️⃣ ཻུ۪۪͎ ཐི ೫ ͒ౢ ⇨ ꩇׁׅ݊⭔ 𖡄̽ᭂ🦈⑱ ᯤ̸ཻུ۪۪۪۫🍣୭ৎ ཻུ۪۪͎ ཐི ೫🥮͡꒱ 𓈈 ♬◌ㅋㅋ ﹫⩇⩇:⩇⩇ ↲ ▞♬ ꯳⃘꤫✿⃘໋ׅ 🏈🦷 ᯤ̸ཻུ۪۪۪۫ 🏯 ⃜꯳⃘꤫⃛͡🫙+📲⇧!! 𓊆ྀི ൃུㅤ♫ ❝ ❞ 𝒾t-B☆Y ๋۟ ݃♱ཐི♡⃟͚̊ཋྀ ུ᳝᳜᳝ ✿🆒ྀིྀིྀིྀིྀི ░⃕⃝𒌩🎐ᚙ𖥨᩠ׄ݁ #𝟶6 🎋 ⟡˙˖ ıl 🧉🝳 ৯▒ 🧷⃨݃ 🥟🍀░⃜ ͠𝒷𝓁oss❀m ٩(•̤̀ᵕ•̤́๑)ᵎᵎᵎᵎ ᅠ✦ ⛩️🚞𓈈🗯️𓊍ㅤׂㅤ͡𖩩̈ ﹠̲ ④everྀིྀིྀིྀིྀི ၇͜ᩘ𑁍 ⓲ ♪ #️⃣ 👙▩ུ⃨ ❤︎. ▞▞ 🥬 ⃛ 🥐𖦞’#⃞20͟0͟5.. ❚❘❘❙ ͟ ₊˚⊹ ⒙ ൄ ⃪꫶͜ᩘ◍ [MONTH]월 [DAY]일❤︎ ▭▬★ 형. ✱🥘ཐི̲̲ཋྀ̲̲🍈 𝒹oꪶꪶ 𝄡ㅤ ☘︎ ̼ ⑰ 𓊍ㅤׂㅤ͡⊹ ✱ ✸ ✿ ꩜ ♡⃝ ᰔ ⏎*️⃣ 🎌���❘❙ ͒⬚🎏 ❞❙❘❙𒀭 ⬤⬮⬤ ⬮ ..݁▓۪۪۫۫ 𒁍 ໂ‧‧᪲ ໃ 𑜞᭠ *˚⁺‧͙˚◌ ̵̵ུ ░𖣠͢🍎 ᬽ 🌐♰ ▒᳜᳝᳝᳜᳝᳜᳝᳜᳝⃛ ❥. ᭄ ꩜ ͏᪖.᪲.ᩤ᭔ㅤㅤ ͏ ͏ ͏ ͏ ྀི。 โ··᪲ใ ⬚✿ ໑ৎ ׁ ׅ♡ 𓏵 𝜗℘ ⃛͡ †⏝ིི᭨ ྀ ♥︎̼̻♥︎̼̻♥︎̼̻ ̩̩͙༑𓈒̩̩͙༑𓈒̩̩͙ ㅤ༩ᭊㅤ♡⃟❜୧ 𑜞᭄ೃㅤㅤ ⃬۫🍜̸᩠໋࣪꣹۫ ͏⏝ི ✿ㅤㅤ ͏𓍯 ྀི𝆬․ ᱹ̫ ․ ꛒ ꣓ི༏ྀ𑇒🌺 ꒰͡ ͜ू 𓋜 ꒷⊹˚Ꮺ ㅤ ೃ❀𓈒𓏶ྀིㅤㅤ ﹒✷﹒◉ ・ᴗ・ ࣪ 🥥ֶָ֢﹆ ❥ ҉ ༄ ⋆.ೃ࿔*:・✺ ༚༅༚˳✿˳༚༅༚ ͡˚̣̣̣𓎟𓎟 𝄞⨾𓍢ִ໋ ıllı 𐚁๋࣭⭑ ໒·͜:)𑇓 🪷"♪ ♥︎⁎̯͡ ̵̼͓̥͒̾͘ ✿" ໒᪲᪲᭢᜴꤬⬚͒❀ ͟ ͟ ͟ ͟ ♥︎̼ ᨶᯃྀི✿ ༩ ♪⃝ 𒑟 ✱ ♫ིྀ ❶❺ ?👔꯳⃘꤫✿⃘໋ׅ🍎 ✹ ᮫͙ ⒅ བྷ།ᬼ ̳͟͞͞🌍 𝓲t-𝓫oy ™🌐˖ ◌◍ᬊཻུ۪۪ 🎻 ꦽ⬮ ᬼ˖͢ ‧͡‧̫ໃ🥭𝓞6𝄢۫🌐᭢˚̣̣̣͙͏◗ ᬊཻུ۪۪𖣠͢✿𑜞 ꦽ ⬮ ꠹ ۭۭۭ۫ࣳ۫֗❘ ꯭﹖ ᥀࣪ ★ ▓⃞⃯♫🌺ြ◗ ⿴ㅤ𓄼░ 🌼⃝˚ ♱ ✮ 𖦹 ⌁ ꉂ 𖡎 ∿ 𖥊 ҂ ꏍ 🜸𖣦 Ꮺ ๛ 𖠗 𖧧 𖤠 𖦆 𖧡 ⟆ ꒺ ∿ ∞ ޱ🛵🧠👔💋ヽִֶָ 𒄬 ⍝⍝ ꐑꐑ ฅฅ ༨ ༢ ༣ ྅ ̑̑៹ ❁ ꌨ❀✿ ☆⃞★⃞ ༀ 𖥟 ✱✱✱ ㅤ͡ ⊹ ✱ ✸ ✿ ꩜ ♡⃝ ᰔ ⏎ ⬤⬮⬤ ⬮ (˃̣̣̥ヘ˂̣̣̥) ᭢ຶ⵿ू✿ ࿔ ⠀ིιྀ ྀᖭ༏ᖫི ! ๎𑜓 ̵̼͓̥͒̾͘ ✿ ྒྒ ຶ𒂭⬮ °ཐི♡̵̼͓̥͒̾͘ཋྀ° ཐི☆̵̼͓̥͒̾͘ཋྀ ꣓ི༏ྀ𑇒͙ ᭰͒̑͡✿ ུ⃨ ❀꫶̯͙ࣺ˖̑͡. =🔮🌃͟͟͞ 𖧷⛾⡷⃨ ̶̲̌͜ ͟͞͞, ༺ ᓭི༏ᓯྀ ♰१˚̣̣̣͙𖦹︎ ᭩ ྀ#⛩️🚞 ໋ࣧ𓍼⃘꯭໋۟ 🫙🍃 ⃞͏ᅟ✧ ⇧!!🩸🏞️🪱 ཻུ۪۪͎ ཐི ೫ ͒ౢ ⇨ ꩇׁׅ݊⭔ ⓘཊ 𓈒ིུ ᭒᭄ ✴︎ ❝ ❞ ﹫⩇⩇:⩇⩇ ↲ ▞♬ ꯳⃘꤫✿⃘໋ׅ (°¯᷄◠¯᷅°) 𝜗℘ ━╋ ⊱。❀̩͙̾͒༺★༻❀꫶̩͙ࣺ̾͒᭮᭰ ⋆。‧₊♱༺𓆩❦︎𓆪༻♱༉‧₊˚. — ㅅ — ´ ω` ᴗ . ᴗ ꒡⌓꒡ ⇀‸↼ ˃ ⤙ ˂ ˘ 、 ˘ ᴖᗜᴖ ๑'ꇴ'๑ ˆ⌣ˆ 🏮ᵔ⤙ᵔ -﹏- ㅠㅠ ᴥ︎ > . ✩ ◞‸◟ ♪؞ؖ ̳̳̳̳̳̳̳̳̳ᩘᨯ𓂂𓏸 ཐི̲̲ཋྀ̲̲ 𓊍ㅤׂㅤ͡⊹▩ᬉ ̣̣̣͙͏❘❙⢀⣀ ̎̿͞͞͞͞͞͞͞͞ ིུ͠*: ཐི܂.᭨ᩧ⣷ ᭅᬻ ݴ᭄ ❚❘❙❘⎯⎯╾⃰◌̺̺͙ ⬤ 𖢅𝅮໒꒰ྀི ˊ͈ 𐦫 ˋ͈ ꒱ྀིა 𖥟𓈃❰❰ (★ 。✯ ⁄⁄͈꒱ა₊̣̇.🌺🌕🎯 ໒ ྀ ♰१ ᭢ຶ⵿⁕— ͟͞͞ ᭩͡ᰯ ⏁ ཆི♡̼͓ཆྀ ⍝⍝ ꐑꐑ ฅฅ ᡴꪫ ꯳⃘꤫ ͡ ︶ ִ ✧ ❀ ۪۪۫۫ᤢ ⣬ ཆི♡ཆྀ ਉl̈́ਉ ཊ♡⃛ཉ 𐚁 𓉳 𖤓 𖢖ུ⃨ ໂ᳜᳝‧͡‧̫ໃ᳜᳝ ̑ 𓊈❀𓊉 𓊆𔘓𓊇 ༒ ᬊ᭄ ᓭི༏ᓯྀ (>ཀ< ∠) 𑇍ׂ𓂂 ▒⃝ ⚝ Ƹ̵̡Ӝ̵̨̄Ʒ †ᭃ ༄༽❜ 𖤛 ♡̶ ༒ ◌✦ 。* 味ㅤ✧✦ㅤㅤꨴ ໂ᳜᳝‧͡‧̫ໃ᳜᳝ ㅤ ೄ ㅤ ✿ᩨ ㅤ ⬚͒꣓ ㅤ ❀ᮬᦾ ㅤ 花 ㅤ ী ㅤ ♬ ᪇ꫭ 𖧧˚̣̣̣͙ 🆙 ୧ 🚟 𓍊𓋼✴︎ 💋 ⁺˳𖦹︎‧₊˚✩ 🍱 4 o’clock ^_< 𓇼 ‘ 𓆠 🀢͟ ͟ ͟ ⏎⓵⃜🎏 !𒀀 ⛩️ ۪ܺׄ ̸ཻུ۪۪۪۫ ۪ܺ 🎇🥬 {+81 - *** - ****} 𝄡𓍼⃘꯭໋۟. 𖡄̽ ཽ🈖⃨ 🔎 i COULD EAT THAT GiRL FOR LUNCH 𓉯 ྀ ूੂ 🫁 ✿﮾᳜⡴ ✟ ❤︎ ?? ̼ 🗯️𓊍ㅤׂㅤ͡⊹ 𝒾t-G☆rl ूੂꐑꐑ 𝒾T~BⓄY 🍢 ཻུ۪۪͎ 𖣠👔͢ ⛩️ ᜴꤬🌺 ❤︎𝄢۫.ࣨ. ݁🥍 ㉇ི⃨ࣺ᭮ᬊ ᕕ( ᐕ )ᕗ (ʘ言ʘ╬)
👘🌊🪴💻☄️🔆⛽️🌺⚛️🌬️🪺🈯️📁💷📲🛣️⛩️🚆🛵🎯🎻🎟️🪀🍹🍱🥭🌟🪷🎍🪻🫎🎒🧦🦺👔🫁💭🔛🔝⏯️🆗🆒🚸☢️🔖🗳️📮🎐📸🎆🏩🗻🚧🚢🩰🏓🎣🍬🆔💮🐶🍇🏡🏬🔮📿🩻💶🖨️ 🛬🛫🌎🎨🌧️🎮🧉🍡💭🧋🐢🧸📠🏮🦦🫀🐠🍄🍄🟫🫐🍎🍏🍢🍙🍽️🏀⚽️🏐🍶🎟️🚠🚆⛵️🚧🌋🏟️📲🧭📥📮📃🗓️📘🔞❇️🈳
#aesthetic moodboard#alternative moodboard#kpop moodboard#messy moodboard#cute symbols#moodboard#symbols#kpop aesthetic#aesthetic bios#messy bios#emoji combos#cute emoji#krp bios#long bios#random bios#kpop bios#instagram bios#symbols combo#krp theme#krp help#rp resources#rp help#kpop messy#messy aesthetic#emoji#messy locs#messy layouts#aesthetic#kpop locs#kpop layouts
5K notes
·
View notes
Text

𓏲𓎢𓎡 Random Bio Layouts 𓏲𓎢𓎡

🍀🎶 ⡴⠞⠞ 𝒟oe 𝐸yed 𝒜ngel ━╋ 𒂭۪۪۪۪᳝۟ 𓏶 🩵🪽ㅤ ׁ۪
𖠪᭄ּ۫ɞ #2ꪮꪮ6 𓎢🤍𓎡 𓊆ྀི 19M 𓊇ྀི 🎹✿⃨ᰯᰭ 🪜
⠀ஓㅤ🏥🪲 ♪ NineT͟e͟e͟n͟ Y/O ♫ ㅤ✽ 🍣 ♥︎𝄞 ॱ़۫ ✿ᩨ
🕷️🕸️ 𒂭۪۪۪۪᳝۟ 𓏶 + 𝕾t͟a͟r͟𝐁oy幻想 ♡🍙🐛̸̴̢̣͘͜ ∬ ♡̸̴̢̣͘͜ ✚
ྀི𓈒♪⃝☘︎ 🦌🌹 ❤︎⋆. ꪶoverGirl 𝓮𝓼𝓽 ‘O6 ܢ ✿ूੂ
∬ ♡̸̴̢̣͘͜ 🎼🤍𓈒. dnir 𒂭۪۪۪۪᳝۟ 𓏶. ⋅ॱ ᩙ♫ #19F
..・。.・゜🎐🪷 sincerely, ❤︎.⋅ॱ ᩙ 🫖 ⡴ ͏❤︎⬚
ິ #⃝🎹 ུ ິ ໒꒱ ‧₊˚ 𝓎𝑜𝓊𝓇𝓈 Truly ━╋ ۪۪۪۪᳝۟ 𓏶. ॱ 19.


#͏❤︎ 。oO ྀི𓈒. ━╋ 𒂭۪۪۪۪᳝۟ 𓏶. ॱ़۫ ✿ᩨ#emoji combos#messy bios#messy moodboard#krp#symbols#symbols combo#aesthetic#aesthetic bios#kpop#krp theme#krp bios#symbol pack#soft bios#random bios#rp resources#emoji combinations#kpop locs#kpop bios#messy locs#long locs#short locs#locs#short bios#dark bios#cute bios#carrd resources#kpop moodboard#layouts#kpop layouts
926 notes
·
View notes
Text
𓈒.˖ ❀ ᪲🌌 𖠁 motion sickness ゚ * 🦋
🐌🍀𖦹 ˚ 夏の雨 。 ✦ ・. ♫
˚*���ॱ ˙ 𝄞 ˚*・ॱ ˙ 𝄞 ˚*・ॱ ˙ 𝄞 ˚*・ॱ ˙
・..・⬭ᩙ 傷ついた心を癒す ♥️🌀
🏵️🦕 dAydR3ams.com ⋆ ❙❘❙❘❙❘ ₊꒪ ༚
RAM❤︎NA ・ ゚ 𓈒 ✚ 🪼゚・✿✼
・。. 🐞⭐⠲ ( ᵕ‿‿ᵕ )♡ * °
◦○ ♡゙🌇⠀̼̻ ⃜♫ ꩜ STATiON PARADiSE
*˚⁺‧͙•. ͟░☾˚*¸*˚ *˚⁺‧͙•. ͟░☾˚*¸*˚ *˚⁺‧͙•. ͟░☾˚*¸*˚

#random bios#instagram bios#kpop bios#cute bios#short bios#messy bios#symbols#emoji combos#emoji pack#dividers#messy icons#random icons#random moodboard#messy moodboard#aesthetic moodboard#kpop aesthetic#kpop icons#kpop moodboard
773 notes
·
View notes
Text

ㅤㅤㅤㅤㅤㅤ𝗋ɑ𝗇𝖽𑄝𝗆 ꯱𝗒𝗆𝖻ᨣ𝗅 𝗉ɑ𝖼𝗄𝗌 ♡
ㅤི۪۪۪۪ꪆ 𖣶 ୧ྀ۪۪۪۪ㅤㅤㅤㅤˑ 𐂯 ۪── 𔓘 ۟ㅤㅤㅤㅤ 𐔌ׁ ︩︪࣭𖣂︪︩ ּ۫ 𐦯 𔘓
ㅤ ׁ۪ 𖠪᭄ּ۫ɞ ㅤㅤㅤ ㅤㅤ𖦞͠ ۪ 𐂂⸞ °ㅤㅤㅤㅤㅤ𓈒 ֹ ၄၃ႄ ˑ ˳
ㅤ𖧷͜͡⊹𓈒 ꕮ ִ ۫ㅤㅤㅤㅤㅤ𓄼 ּ⟅︪︩♡︩︪⟆ּ 𓄹ㅤㅤㅤ ㅤㅤ˳ 𝜕𝜚 ֢𝀈⊹

#͏͏͏ ͏͏͏ ͏͏͏ ͏͏͏ ͏͏͏ ͏͏͏ ͏͏͏ ͏͏͏ ͏͏͏ ͏͏͏ ͏͏͏ ͏͏͏ ͏͏͏ ͏͏͏ ͏͏͏ ͏͏͏ ͏͏͏ ͏͏͏ ͏͏͏ ͏͏͏ ͏͏͏ ͏͏͏ ͏͏͏ ͏͏͏ ͏͏͏ ͏͏͏ ͏͏͏ ͏͏͏ ͏͏͏ ͏͏͏ ͏͏͏ ͏͏͏ ͏͏͏#aesthetic#bio ideas#bio idea#short bios#text symbols#bts#acc help#random symbols#soft symbols#cute symbols#coquette symbols#messy coquette#messy bios#symbol pack#emoji combos#cute simbols#cute bios#rp help#aesthetic symbols#cottagecore#coquette core#lizaalzhy.
2K notes
·
View notes
Text


ㅤㅤ𝖺𝗇𝗀𝖾ㅤ𝗌𝒪𝗎𝗌ㅤㅤ៶ㅤㅤ她ㅤㅤ 𝑙𝑎 ㅤ𝖿𝗈𝗋𝗆𝖾ㅤ 𝑑'𝗎𝗇𝖾ㅤ 𝗉𝖾𝗋𝓈𝗈𝗇𝗇𝖾
𝗅𝖾𝓈 𝖠𝖭𝖦𝖤𝖲 𝗌𝗈𝗇𝗍 𝖼𝗈𝗆𝗆𝖾 𝗍𝗈𝗂, 𝑡𝑜𝑢𝑗𝑜𝑢𝑟𝑠 𝗉𝗅𝖾𝗂𝗇𝗌 𝖽𝖾 𝐛𝐞𝐚𝐮𝐭𝐞́ 𝖾𝗍 𝖽𝖾 𝗃𝗈𝗂𝖾
𝐬𝐞𝐬 𝗒𝖾𝗎𝗑 𝖻𝗅𝖺𝗇𝖼𝗌 ⭒ 𝖾𝗍 𝖼𝗋𝓢𝗌𝗍𝖺𝗅𝗅𝗂𝗇𝗌 𝑏𝑟𝑖𝑙𝑙𝑒𝑛𝑡.
𝑢𝑛𝑒 ៶ ♡ personne 𝐛𝐫𝐢𝐥𝐥𝐚𝐧𝐭𝐞 et glamour
𝗍𝗈𝗇 𝑟𝑒𝑔𝑎𝑟𝑑 𝗌𝖾𝗋𝖾𝗂𝗇 ✿ 𝖾𝗍 𝗉𝗅𝖾𝗂𝗇 ៸ 𝖽𝖾 𝐩𝐚𝐢𝐱
𝖺𝗏𝖾𝖼 𝗅𝖺 𝐩��𝐫𝐞𝐭𝐞́ 𝖽𝖾 𝗌𝗈𝗇 𝑠𝑜𝑢𝑟𝑖𝑟𝑒, 𝖾𝗅𝗅𝖾 𝗋𝖾𝗌𝗌𝖾𝗆𝖻𝗅𝖾 𝖺̀ 𝗎𝗇 𝖺𝗇𝗀𝖾 𝖽𝖾 𝑙𝑢𝑚𝑖𝑒̀𝑟𝑒.
des gestes ♥︎ 冬天 délicats et 𝑝𝑟𝑒́𝑐𝑖𝑒𝑢𝑥

inspo em — @baenuit
#bios aesthetic#bios messy#bios simple#soft minimalism#bios twitter#bios ideas#cute bios#bios soft#messy bios#bios locs#bios ig#bios instagram#soft bios#short bios#bios short#bios symbols#bios for twitter#bios dark#winter aespa#aesthetic bios#symbols combo#symbols aesthetic#symbols pack#symbols#aespa winter#winter moodboard#aespa moodboard#bios random#bios rpg#bios textuais
1K notes
·
View notes
Text
⠀
͏ ͏ ͏ ͏ ͏ ͏ ͏ ͏ 𝟢𝟥𝟣𝟢⠀ ‹𝟹⠀ 𝟤 𝗆⠀ 𝗈𝖿 ⠀ ꒪⠀⠀❀⠀ 𝗆𝗎︦𝗌𝗂𝖼⠀ ꒱
͏ ͏ ͏ ͏ ͏ ͏ ͏ ͏ ͏


͏ ͏ ͏ ͏ ͏ ͏ ͏ ͏ ͏
⠀ 🍋🪈🧂⠀ ⠀⠀ ⠀🦢🔌☁️⠀ ⠀⠀♡ ⠀🗞️🥛🐨
⠀ 🐄🍴🍙⠀ ⠀⠀♡ ⠀🍎☘️🐜⠀ ⠀⠀ ⠀🌸💡🧾
⠀ 🥜❕🚿⠀ ⠀⠀ ⠀🧹🍶🪑⠀ ⠀⠀ ♡ ⠀🖋️🎐🐚
͏ ͏ ͏ ͏ ͏ ͏ ͏ ͏ ͏ ͏ ͏ ͏ ͏ ͏ ͏ ͏ ͏ ͏
⠀ 𝖾𝗆𝗈𝗃Ꭵ ⠀ 𝖼𝗈𝗆𝖻𝗈 ⠀ 𝗆𝖺𝖽𝖾 ⠀ 𝖻𝗒 ⠀﹫𝖾𝗌𝗉𝗎𝗈𐐲
͏ ͏ ͏ ͏ ͏ ͏ ͏ ͏ ͏
#͏ ͏ ͏ ͏ ͏ ͏ ͏ ͏ ͏ ͏ ͏ ͏ ͏ ͏ ͏ ͏ ͏ ͏ ͏ ͏ ͏ ͏ ͏ ͏ ͏ ͏ ͏ ͏ ͏ ͏ ͏ ͏ ͏ ͏ ͏ ͏ ͏ ͏ ͏ ͏ ͏ ͏ ͏ ͏ ͏ ͏ ͏ ͏ ͏ ͏ ͏ ͏ ͏ ͏ ͏ ͏ ͏ ͏ ͏ ͏ ͏ ͏ ͏ ͏ ͏ ͏ ͏#soft symbols#symbolos#cute symbols#symbols#simbolos soft#random simbols#simbols#simbolos#random#cute emoji#emoji combos#emoji combinations#cute#soft#kaomojis#moodboard
2K notes
·
View notes
Text

͏ ͏ ͏ ͏ ͏ ͏ ͏ ͏ ͏ ͏ ͏ ͏ ͏ ͏ ͏ ͏ ͏ ͏ ͏ ͏ ͏ ͏ ͏ ͏ ͏ ͏ ͏ ͏ ͏ ͏ ͏ ͏ ͏ ͏ ͏ ͏ ͏ ͏ ͏ ͏ ͏ ͏ ͏ ͏ ͏ ͏(🎀) Random Usernames


͏ ͏ ͏ ͏ ͏ ͏ ͏ ͏ ͏ ͏ ͏ ͏ ͏ ͏ ͏ ͏ ͏ ͏ ͏ ͏ ͏ ͏❤︎ yearlied ͏ ͏ ͏ ͏ ͏ ͏ ͏ ͏ ͏ ͏ ͏ ͏ ͏ ͏ ͏❤︎ blushtied ͏ ͏ ͏ ͏ ͏ ͏ ͏ ͏ ͏ ͏ ͏ ͏ ͏ ͏ ͏❤︎ fatalblurs
͏ ͏ ͏ ͏ ͏ ͏ ͏ ͏ ͏ ͏ ͏ ͏ ͏ ͏ ͏ ❤︎ bunifiled ͏ ͏ ͏ ͏ ͏ ͏ ͏ ͏ ͏ ͏ ͏ ͏ ͏ ͏ ͏❤︎ ropedhisneck ͏ ͏ ͏ ͏ ͏ ͏ ͏ ͏ ͏ ͏ ͏ ͏ ͏ ͏ ͏❤︎ scentofwrist
͏ ͏ ͏ ͏ ͏ ͏ ͏ ͏ ͏ ͏ ͏ ͏ ͏ ͏ ͏ ͏ ͏ ͏ ͏ ͏ ͏ ͏ ͏ ͏ ͏ ͏ ͏❤︎ sojuvile ͏ ͏ ͏ ͏ ͏ ͏ ͏ ͏ ͏ ͏ ͏ ͏ ͏ ͏ ͏❤︎ spitefleur ͏ ͏ ͏ ͏ ͏ ͏ ͏ ͏ ͏ ͏ ͏ ͏ ͏ ͏ ͏❤︎ scentedmsgs
͏ ͏ ͏ ͏ ͏ ͏ ͏ ͏ ͏ ͏ ͏ ͏ ͏ ͏ ͏ ͏ ͏ ͏ ͏❤︎ faejunkied ͏ ͏ ͏ ͏ ͏ ͏ ͏ ͏ ͏ ͏ ͏ ͏ ͏ ͏ ͏❤︎ fluviors ͏ ͏ ͏ ͏ ͏ ͏ ͏ ͏ ͏ ͏ ͏ ͏ ͏ ͏ ͏❤︎ notedsoju

#kpop moodboard#kpop theme#messy bios#aesthetic#messy moodboard#aesthetic moodboard#clean moodboard#gg moodboard#cute moodboard#wonyoung#wonyongism#username ideas#random usernames#cute usernames#kpop locs#kpop lq#kpop icons#messy layouts#coquette#krp layouts#krp bios#krp moodboard#krp theme#krp#instagram users#ig users#twt users#symbols combo#symbols#emoji combos
1K notes
·
View notes
Text
़.꒪ꦼ ݄݃ ͏ ິํ้ ͏ ͏ ͏ ͏ ͏ ͏ ͏ ͏ ͏ ͏ ͏ ͏ ͏͏ ͏ ͏ ͏ ͏͏ ͏ ͏ ͏ ͏ ͏͏ ͏ ͏ ͏ ͏ ͏ ͏ ྇݁☘️ ͏ ິํ้𓃇͏ ͏ ͏ ͏ ͏ ͏ ͏ ͏ ͏ ͏ ͏ ͏ ͏͏ ͏ ͏ ͏ ͏͏ ͏ ͏ ͏ ͏ ͏͏ ͏ ͏ ͏ ͏ ͏ ͏𓂒 ⨾ 🪷
✿᪇ꫭ🍈⠀⠀͏ ͏ ͏ ͏ ͏ ͏ ͏ ͏ ͏ ͏ ͏ ͏ ͏͏ ͏ ͏ ͏ ͏͏ ͏ ͏ ͏ ͏ ͏͏ ͏ ͏ ͏ ͏ ೄী ͏͏ ͏ ͏ ͏ ͏ ͏ ͏ ͏ ͏ ͏ ͏ ͏ ͏͏ ͏ ͏ ͏ ͏͏ ͏ ͏ ͏ ͏ ͏͏ ͏ ͏ ͏ ͏ ͏ ͏ ͏۶༩📋˚̣̣̣͙͏᪇ꫭ ̼̻ ͏ ͏ ͏ ͏ ͏͏ ͏ ͏ ͏ ͏ ͏ ͏
#⠀⠀ ू✿ ू✿⠀⠀invierno⠀⠀❤︎#messy#cute blog#symbols cute#symbols combo#simbolos#messy simbols#random simbols#messy bios#simbols bios#cute simbols#symbols#baul de lnvierno
1K notes
·
View notes
Text
͏ ͏ ᅠ ᅠᅠ ᅠᅠ ᅠ
(...) 綻放出雄偉的色調 ♡
熱情玫瑰, the aromatic.
asleep in dry beauty.
͏ ͏ ͏ ͏ ͏ ͏ ͏ ͏ ͏ ͏ ͏ ͏ ͏ ͏ ͏ ͏ ͏ ͏ ͏ ͏ ͏ ͏ ͏ ͏ ͏ ͏ ͏ ͏ ͏ ͏ ͏ ͏ ͏ ͏ ͏ ͏ ͏ ͏ ͏
平靜的時光 ❀ 𝖾 𝖺𝗊𝗎𝖾𝗅𝖾 𝗌𝗈𝗅.
玻璃翅膀, 𝖺𝗌𝖺𝗌 𝖽𝖾 玻璃
refletindo o arco───íris.
͏ ͏ ͏ ͏ ͏ ͏ ͏ ͏ ͏ ͏ ͏ ͏ ͏ ͏ ͏ ͏ ͏ ͏ ͏ ͏ ͏ ͏ ͏ ͏ ͏ ͏ ͏ ͏ ͏ ͏ ͏ ͏ ͏ ͏ ͏ ͏ ͏ ͏ ͏
͏ ͏ ͏ ͏ ͏ ͏ ͏ ͏ ͏ ͏ ͏ ͏ ͏ ͏ ͏ ͏ ͏ ͏ ͏ ͏ ͏ ͏ ͏ ͏ ͏ ͏ ͏͏͏♡ 🖋 ͏ ͏ ͏ ͏ ͏ ͏ ͏
academia dos poetas
versos melanc��licos da poesia.
͏ ͏ ͏ ͏ ͏ ͏ ͏ ͏ ͏ ͏ ͏ ͏ ͏ ͏ ͏ ͏ ͏ ͏ ͏ ͏ ͏ ͏ ͏ ͏ ͏ ͏ ͏ ͏ ͏ ͏ ͏ ͏ ͏ ͏ ͏ ͏ ͏ ͏ ͏
𝖻𝗂𝗈𝗌, 𝗌𝗁𝗈𝗋𝗍 𝗅𝗈𝖼𝗌 𝖺𝗇𝖽 𝗐𝖾𝖻𝗌𝗂𝗍𝖾. ─── 𝖿𝗂𝗇𝖽 𝗍𝗁𝖾 𝗉𝗂𝗇𝗇𝖾𝖽𝗌 𝗈𝗇 𝗁𝖾𝗋𝖾, 𝖺𝗇𝖽 𝗍𝗁𝖾 𝗉𝗋𝖾𝗏𝗂𝖾𝗐 𝗈𝗇 𝗁𝖾𝗋𝖾.͏͏
#͏ ͏ ͏ ͏ ͏ ͏ ͏ ͏ ͏ ͏ ͏ ͏ ͏ ͏ ͏ ͏ ͏ ͏ ͏ ͏ ͏ ͏ ͏ ͏ ͏ ͏ ͏ ͏ ͏ ͏ ͏ ͏ ͏ ͏ ͏ ͏ ͏ ͏ ͏ ͏ ͏ ͏ ͏ ͏ ͏ ͏ ͏ ͏ ͏ ͏ ͏ ͏ ͏ ͏ ͏ ͏ ͏ ͏ ͏ ͏ ͏ ͏ ͏ ͏ ͏ ͏ ͏#twitter combo#twitter#bios#short locs#short bios#pinned bios#layouts#icons#long locs#kpop layouts#kpop users#messy layouts#moodboard#random layouts#random users#gg layouts#soft#messy#dark#rp#rpg#rpg bios#blackpink#bts#aespa#users#short users#short#locs
2K notes
·
View notes
Text
Bio Layouts ❤︎
࣪⊹♥︎(─‿‿─) Cutest Girl 𝒾n Town! 💝
𖥔۪ׄ♡ ⟡ ˖͢ 𝓜rs. Vanilla Conejita 🍎 ⊹ . ♡ 🐰
📞 D𝒾al! +55 (777 *** ****) ၇͜ᩘ♥︎ ▒🫕
🪪 Where’s your 𝒾D? ____ 17+ 🥃✵ㅤ⌒ 𓈒 ֹ
𖥔 . ૮( ྀི ੭˶ᵔᵕᵔ˶ )ྀི੭ ⊹ 👩🏻 This That 𝒫retty 𝒢irl Mantra ⟡ ֺ 𓂂 ❜୧ 🐾🧁
♥︎⁎̯͡🐻⊹ 2𝓞𝓞8 ‘s 𝒾dol ⊹ ྀིུ͙͙͙ ♪⃝ ♥︎
(☉-⚆) 𝒟runk 𝒾n 𝓁ove 🍙🍤⁺‧͙❤︎ ▓ ⃘໋ׅ ᭢˚̣̣̣͙͏ ⃨۪̃۟🍺
𓄯ྀི。˚Owner Of 𝒮weetheart 𝒞ity 🐹𓈒𝄢۫🌐𖥔۪ׄ🍀
#krp#moodboard#bio layout#emoji combinations#emoji combos#krp theme#symbols#random bios#twitter bios#krp help#messy bios#rp#rp theme#short bios#kpop bios#cute bios
576 notes
·
View notes
Text

﹡ rkivoculto ﹡ ninfamania
﹡ vazioespacial ﹡ virtualdelirio
﹡ diariodelmar ﹡ coralitos
﹡ ninfacita ﹡ digitalnebula
#users#twitter users#coquette users#icons#cute users#random users#messy users#symbols#symbols pack#random symbols#soft symbols#cute symbols#emoji combos#emoji bios#bios#simple bios#cute bios#short bios#random bios#twitter bios#tumblr users#short locs#locs#messy#ulzzang#ulzzang icons#layouts#aesthetic users
1K notes
·
View notes
Text
symbols / emoji combos
❀̶̥ᰱ꫶ ۫ ᮫͙♰ྀ ᭡ ྀ̥̥̥̥̥ ◌❤︎ ☘️̶͜͡ᰱ᭡
♬̥̥̥̥‧̥𝅘𝅥𝅮 ུ空想† ུ ᅠ❀𖣁 ˚᭄̣̣̣
︶ྀི⃝ ❤︎᭮ ·̩͙˖ ❀𝆬⃝𗈵ུ 。 ͏⏝ི🥥 ͟ ͟_𓉯ྀ
���
𖣁 ॢུ༚༅࣪ . 音楽 ♫𗈵ུ ⡴◌⃘❀ 𓂂 °


#࿙֒͜ s-eulip ♪#fakeland#bios#discord bios#messy bios#short bios#coquette#cute bios#discord users#cute#coquette symbols#soft symbols#soft grunge#soft aesthetic#soft moodboard#soft girl#pink#pastel#random symbols#simbolos#symbols#cute symbols#messy symbols#archive moodboard#carrd decor#carrd resources#carrd symbols#aesthetic symbols#emoji#emoji combos
755 notes
·
View notes
Text

soft highlights + theme Click here for hl pics
🥒၇*️⃣˖◌◍ ᥫ᭡⓲살🐻❄️♪𓈒ིུ
📂𓈒ིུ❤︎🧖🏼♀️⟡ıllı 𝒟♡⃝ll..⟡˖͢ ▞ ུ۪۪


#thanks for the req ❤︎#emoji combos#kpop#krp#krp theme#messy bios#messy moodboard#symbols#symbols combo#aesthetic#aesthetic bios#krp bios#krp moodboard#krp bio#kpop locs#messy locs#short locs#long locs#locs#kpop bios#kpop moodboard#kpop layouts#twt layouts#messy layouts#layouts#moodboard#random bios#bios#short bios
3K notes
·
View notes
Text
bios by @galapogos ♡


✼:*゚¸░͏͏͏͏☽ °̩̥ 𝑀𝛳𝛳𝛱𝐿𝐼𝐺𝐻𝑇 ✧ ᩙ͏͏͏͏ ☪️ 月光*:..。
私たちは無限です ₊ ♡·̩̩⁝̣̥*̩̩͙🌌.•.•.•꩜🎹
・ ゚🥩᭄ᬬ ㅤ 。 ᨫ͜ hasta los huesos ✟ ✟
𓊆 2008 𓊇 🍀 ִ °. •̩̩͙ ִ #𝚋𝚎𝚊𝚞𝚝𝚒𝚏𝚞𝚕 𝚋𝚘𝚢 °❤︎ ִ ۫
🌹 ೋ ⭐️ ♫ ˚ ࣪ ᎢᎪᏦᎬ ᎷᎽ ᏴᎡᎬᎪᎢᎻ ᎪᎳᎪᎽ ᮫ 𖥟 ♡
#messy icons#random icons#random moodboard#messy moodboard#aesthetic moodboard#alternative moodboard#grunge moodboard#symbols#random bios#instagram bios#short bios#messy bios#kpop bios#cute bios#emoji combos#emoji pack#kaomoji#archive moodboard#moodboard aesthetic
415 notes
·
View notes