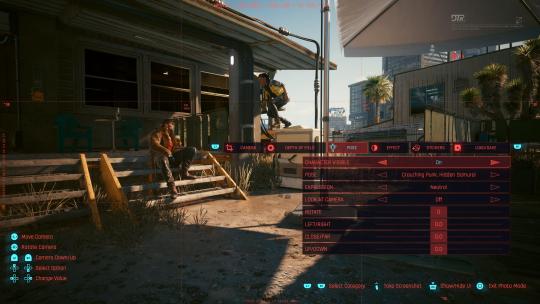
#console photomode is one of the tools of all time
Text

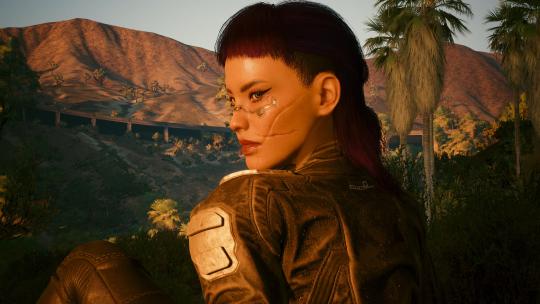
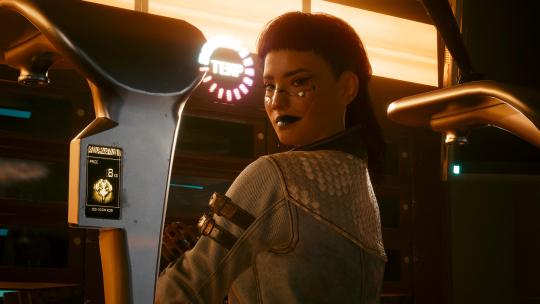
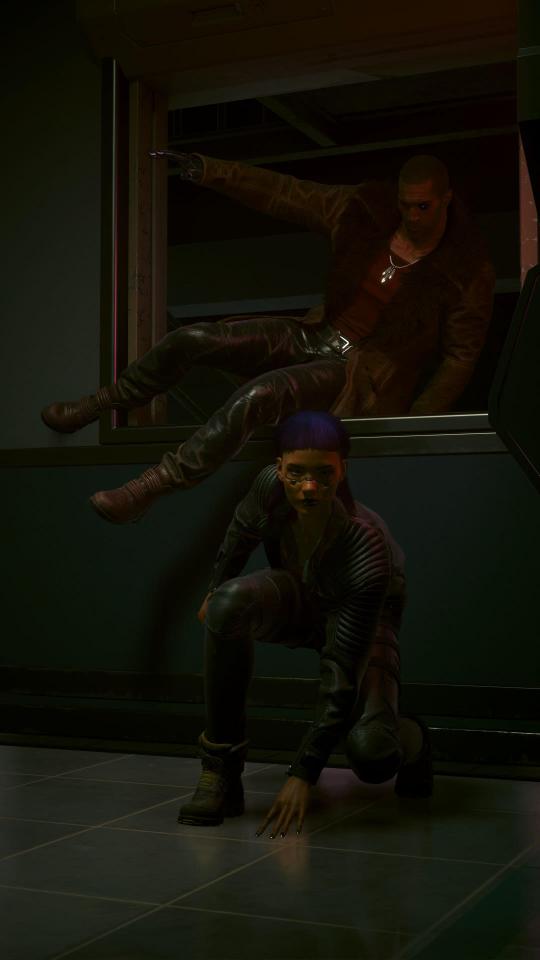
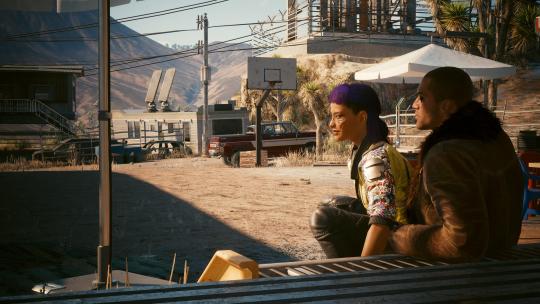
River looked really hot in this little scene and deserves more love, soooo
Don’t mind V standing there like a dork, console photomode is a bit restrictive.
#cyberpunk 2077#cyberpunk 2077 photomode#virtual photography#river ward#night city#oc: Ivan#nomad v#male v#xbox series x#console photomode is one of the tools of all time
34 notes
·
View notes
Text
Glitching The Matrix: Portrait Photos and Getting Up-close And Personal With NPCs In Cyberpunk 2077 Vanilla Photomode
Howdy, folks! Ghost here, back with some more tips and tricks for vanilla photomode. Some of you may have read my previous tips and tricks guide (laundry list?) a few months back, but I’ve learned some more fun things since then that I thought I’d share with you all. Specifically, in terms of taking portrait style photos and getting intimate with your favorite NPCs. (Well, as intimate as vanilla will allow.)
With the 2.0 update and the release of the PL expansion, I imagine a lot of people might be going minimal with the mods until they get up to speed, or maybe you just want to take some bomb photos if you’re running on a console, or you don’t have access to mods. Whatever the case, just know that with the right application of cheese whiz, you too can get dope photos.
I don’t claim to be the world’s best anything, but I’m always happy to share what I know and what I've learned.
Portraits
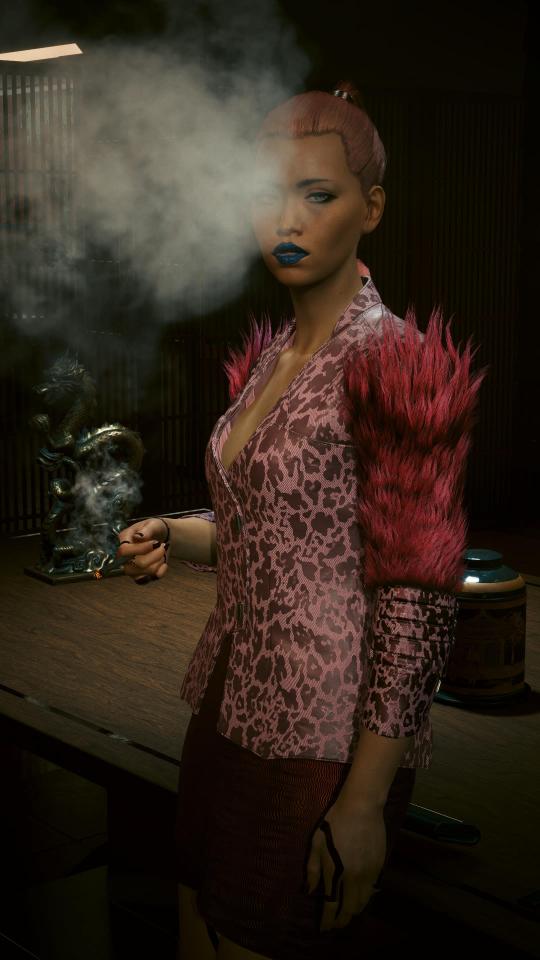
I have yet to actually play any of the expansion, but I’ve seen that there are some sweet new outfits and some hella cool new backdrops, and who doesn’t want to show off their Vs & OCs?
Now, there is nothing wrong with pulling out photomode and snapping a photo with the standard settings and not touching any of the sliders. I'm not here to ruin anyone's good time or dictate style. However, if you're looking for techniques to add a bit more panache to your photos, I’m going to do a quick rundown of some key things that I keep in mind when I'm taking portrait-style photos.
If you've been taking VP for a while, you may already know these things. But, hey, never hurts to review the basics.
Field Of View
The Field of View (FOV) slider is one of the most important tools in your toolbox and is basically the zoom on your camera. (Okay, it's a bit more complicated than that but I'm not that technical) It’s located on the far left tab. I utilize the shit out of it, and, if you aren't already acquainted, I’d recommend you become friends with it.
Rather than simply moving the camera closer to your subject, which, if you leave it at the standard 60 setting produces a lot of distortion and doesn’t give you much detail of your subject, slide that setting all the way to 15 to zoom in and then adjust the position of the camera to frame your shot how you want. At this point if you want to you can pull the Field Of View out to a higher setting or play around with where exactly you want the camera, for instance if you want to include more of the background or if there’s additional characters.
By using FOV in conjunction with the camera position, it’s possible to get crisper detailed shots of your subject with less visual distortion. And if you have decent lighting and play around with some of the other settings (exposure, contrast, highlights) you can get some stellar shots with minimal editing.

Just for reference, I usually don’t do any post-production on my photos. They’re all straight off my PS5. Photo editing is a bit of a time sink so it's personal preference that I don't do it. I barely have enough time for most of my other hobbies, so it's one less thing for me to do. If you want to do photo editing after the fact, more power to you.
Play with poses, look at camera, rotate poses, and camera location
I know that heading is a long list, but seriously, play with the angles! Since we’re working in vanilla photomode, all the poses are canned, everyone’s got the same stock poses and unfortunately some of them are just downright goofy. Which is fun on occasion, but maybe you're looking for something a bit more natural. So, in order to jazz things up and give yourself as much variety as possible, you’re going to want to keep angles in mind.
A lot of times I’ll cycle through all of the poses to find one that gels with the photo I’m trying to take, and at times I’m surprised at which ones those end up being. You zoom in close enough, you can barely tell you're using the JoJo poses. And rotating your character, rather than having them face straight on, can also help spice up the stock poses.
Swinging the camera around wildly in a circle also helps me scout out interesting compositions and backgrounds. I'll pan the camera around 360 so I can find the spots with the most visual interest. And I typically will make attempts to jam the camera in the weirdest places possible. (Through door ways, behind furniture, along walls, in between people and other objects etc.) I often think I know what I want when I go into grab photos, but often times a change of perspective helps me find something even cooler.


Not every pose has a look at camera option, but some of them do. Rotating your V/OC or changing camera position while using this feature will allow you to add some extra variety to your poses and expressions. You can get your character to look straight at the camera (which can be very striking), get some side-eye action, gaze off into the distance, and my personal fave, over the shoulder shots.
You can also add some additional flair by doing low-angle or high-angle shots too. And if you want a portrait orientation instead of landscape? Rotate the camera 180 degrees. It’s a bit disorienting at first, and try not to crik your neck, but now you can get full body shots. The only editing you'll have to do after exporting is rotating the photo to the intended viewing orientation, which you should be able to do in most photo viewers. No editing software required.
NPCs
If you’re taking photos of an NPC, you don’t have the option of posing these characters in vanilla, but if you time it right you can grab some awesome shots! The easiest time to snag photos of NPCs is usually right before you select dialogue options. They’re static, will cycle through a handful of actions, and main NPCs also eye-track V, so you can use this to your advantage if you need them to turn or want them to look in a specific direction.

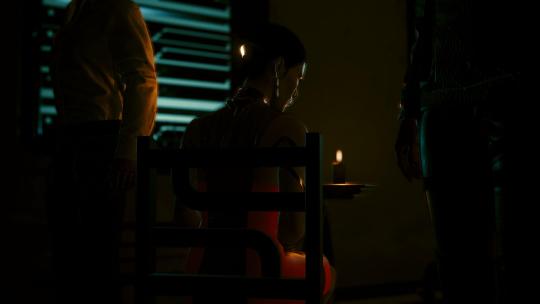
It’s possible to grab action shots as well! They’re a bit trickier as it requires a lot of timing and you may need to hop in and out of photomode or even reload a previous save if you miss the monent, but totally doable. It also helps to be familiar with the flow of action for the quest by having done it at least once, that way you know when to bust out the camera. (I've lost count how many times I've played this game... Too many.)
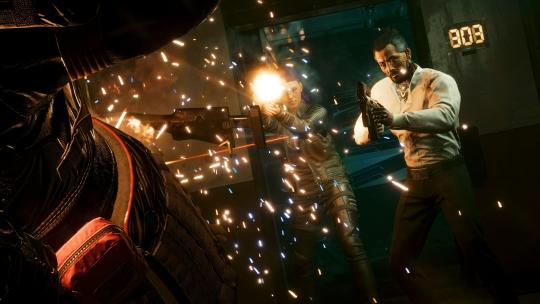
Unfortunately, lighting is going to be very hit or miss during missions. If you keep your eyes peeled for good lighting opportunities it's possible to find them, and sometimes you can even kite NPCs over to it if they're following you. (Turning the muzzle flash on when your character is in a gun pose also works in a pinch, but might look a little silly depending on the context and if you're also trying to get your character in the frame.) When you're out and about free roaming though, it's much easier to come across good lighting sources as you can adjust the time of day or utilize the lighting you do come across.
But remember field of view, camera angles, playing with the poses, and adjusting the effects sliders can all help enhance a portrait shot.
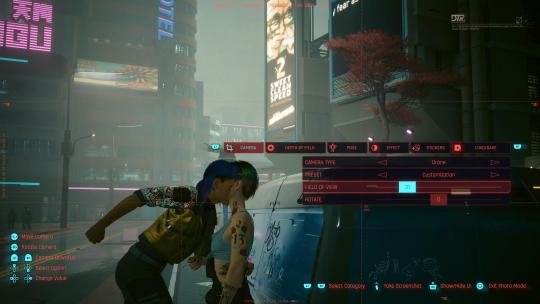
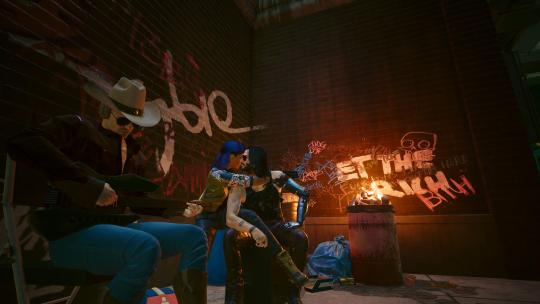
Glitching The Matrix
Sooooo, I may have mentioned previously that I couldn’t do anything to help you all take shippy/otp pics… I’m more than happy to have proven myself wrong. Obviously, there are limits to this (you're not going to be able to get anywhere close to posed pics like you can with mods), but it’s a hell of a lot more feasible than I thought it was.
With help from this post (Thanks again, Heather!) and applications of sheer stubbornness on my part, I did in fact manage to glitch the matrix. It is entirely possible to bypass the collision physics around characters and certain objects with a little ingenuity.
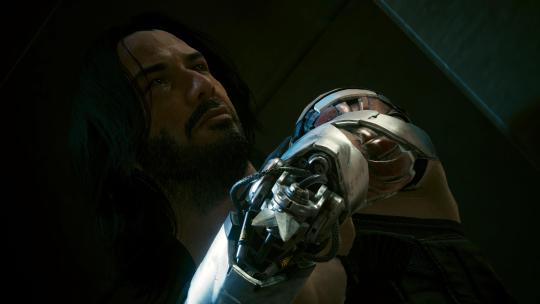
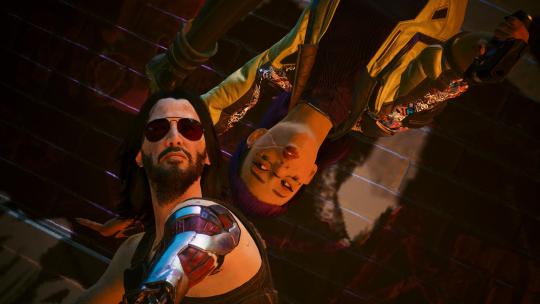
Grandpa V & Old Man River are my otp, but I went ahead and took some additional photos for the sake of science. They aren’t cannon to my V’s timeline, but I just wanted to show you all the realms of possibility. And for all you SilverV shippers out there running vanilla, yeah, you can finally kiss your own brain worm.

This is as close as I'm gonna get to kissing Keanu Reeves lol.
(SilverDyne shippers… I’m sorry, I have no control of either rockerboy. It’s out of my hands, they’re just too spicy for vanilla. Or if you got a multi-ship or rare pair outside of the player character, can't help you there. Ask your local modder for assistance.)
Be advised, in order to take these kinds of photos, there are specific environmental parameters that need to be met and getting your V/OC posed correctly is going to test your patience the first couple tries. It's a finicky technique but once you get a feel for how to do it, it gets much easier and you'll know what to look for in order to setup this kind of photo.
Steps:
Find a time when your NPC is static (i.e. not moving from a particular spot. Doesn’t matter if they’re standing or seated. I don't want to say it's impossible to attempt from moving, but getting everything timed right is mega tricky and I haven't had much luck with the times I've tried so far.)
Make sure you have plenty of overhead clearance and that you have some room to pan the camera around. (If there’s an overhead barrier like a ceiling, cabinets, umbrellas, awning etc. it’ll impede your ability to move your character into position. For those of you that know me, I tried on the water tower and in the kitchen with River. I really did, but no dice. Dumb cabinets, and there weren't any objects at the right height that were close enough to use on the actual water tower.)
Get some height in proximity to your destination. You want something relatively close and around shoulder/head height of the NPC. (Can be anything really so long as it's the right height and close enough. If it's too high up, or too far away, you won’t be able to get your character in range. Too low, you won’t be able to circumvent the collision physics.)
Open photomode and hope you have access to all the action poses.
Find an action pose that has the up/down slider (Off to the Races is a good one to start with) and move your character all the way up. Then position character above NPC, lower them down into the NPC, and pray they clip through.
Mess with all the poses and pose sliders until desired results are achieved.
*If you cannot complete 4 or 5, exit out of photomode, adjust position, and repeat until you can clip through the NPC. If you can't get any kind of clipping to occur or you keep sliding around the NPC when you're positioning, you may not have the right environmental settings and may need to try in a different spot. It happens.

(Trust me, the horror face sucking is a good sign.)
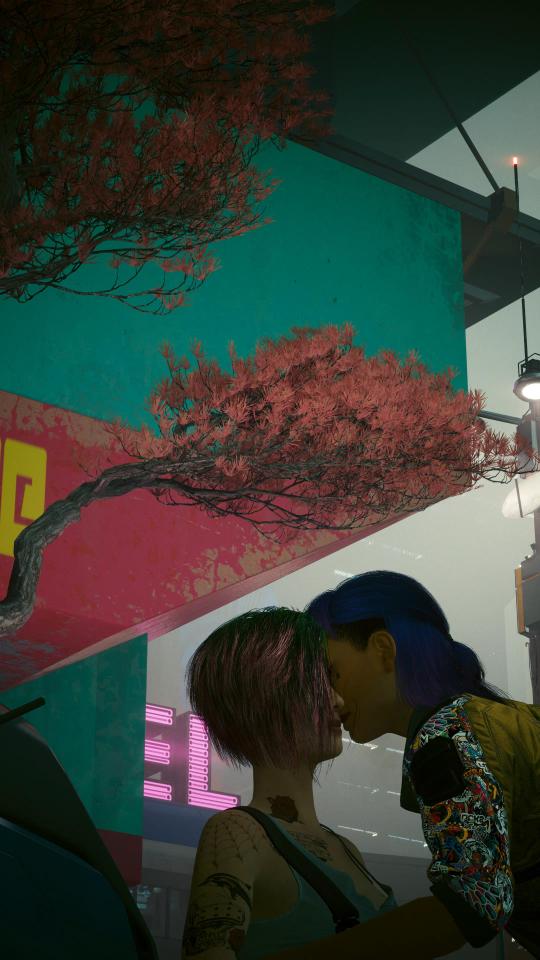
Panning around so it looks less awkward, make some camera adjustments, and voila! (Good thing Judy's rocking that asymmetrical haircut.)
Your object also does not have to be right next to the NPC, like with Judy and the van. I used the white box thingy that Grandpa's hovering over in the photo above. The roof did get in my way on a couple of my attempts, but I did get it to work.
If you can get the full catalog of action poses to populate and you can get your V/OC to fully clip through your desired character/object without suddenly rubberbanding or deflecting when you move them around, know that you made it.
Getting to this point though, may take several attempts. It’s also important that you use the action poses to move your character around as most of those have the up/down slider positioning, which is not available on the idle poses with a few exceptions. I’ve had the best luck with Roundhouse Shot to the Face, Just a Peek, Take Cover (left or right), Crouching Tiger Hidden Dragon, and Off to the Races.
Unfortunately, I don’t have any solid advice on best practice for getting them into position however. You’re just gonna have to feel it out as the position sliders have a tendency to behave very erratically since you’re doing shit you’re not supposed to.
Do your best to not accidentally exit out of photo mode, be patient, and if you get a half-way decent shot or even kinda close, snap pictures for posterity in case something goes awry and you have to start over. If nothing else, you can have a good laugh about it later.
Utilize the tips from the portrait section above as well. You can’t change the NPCs expression or make your characters close their eyes (unless you get really lucky with your timing), so you’ll have to pull out all the camera tricks in your arsenal to make the setup look sort of natural.
Behind the scenes is pretty hilarious though.

And you can use this technique for objects and certainly for non-ship pics too. I demoed kissy pics because those are the hardest to set up. Maybe you just wanna hang with the chooms instead, y’know? S'all cool.
Grandpa gets tired and sometimes she needs to sit down. There's no pose to get your character to sit, but with some creative camera angles and poses, it sure does look like she's sitting.
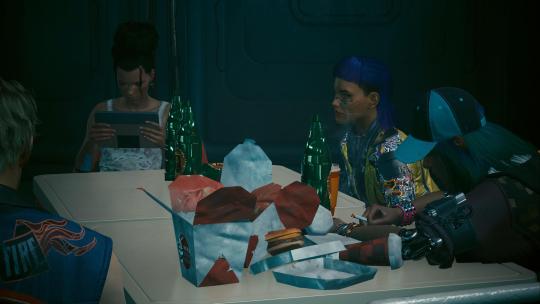

Or you can finally just annoy the crap out of Johnny.
Anyway, hope this was helpful, and feel free to hit up my inbox if you’ve got questions!
May all your cheese be fine and remember the most important thing:
Have fun!
Grandpa's got the best seat in the house as far as I'm concerned.
#yes you can kiss your fave npcs#i made grandpa kiss johnny for science lol#and now you can too#cyberpunk 2077#virtual photography#vanilla photomode#vanilla photomode tutorial#vp tutorial#tips and tricks#cp2077 photomode#long post#reference#night city streets#return of the cheese#the cheese strikes back#a new cheese#tyromancer#from the top#console shots
36 notes
·
View notes
Text

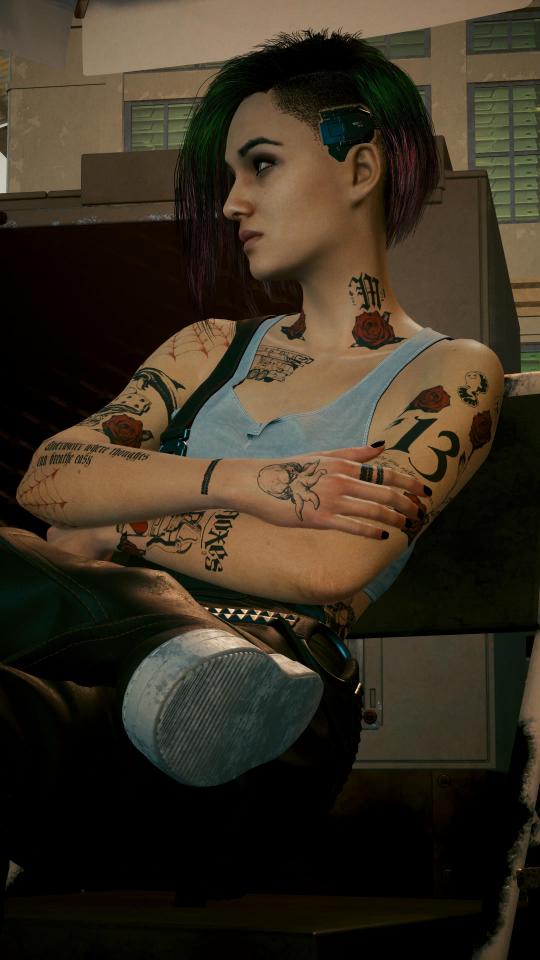
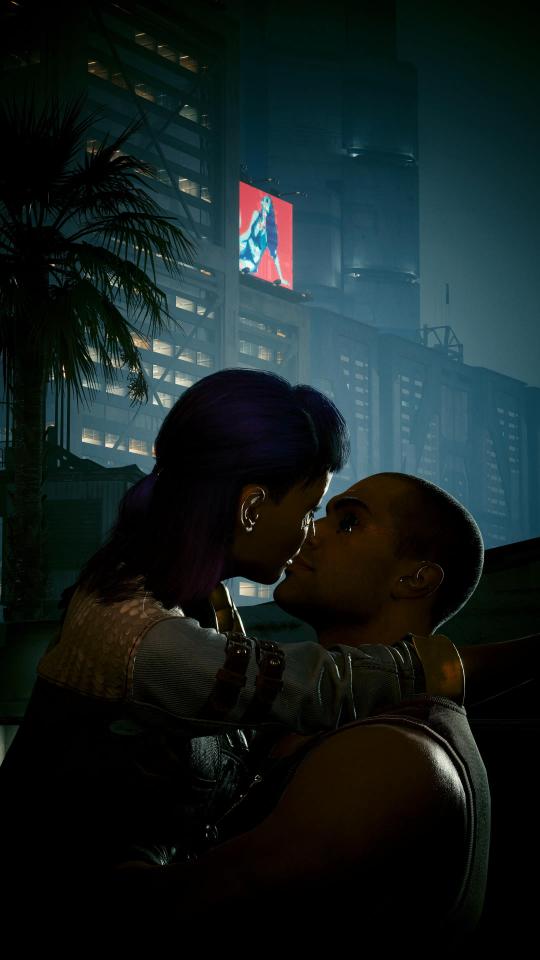
Him 🖤
#cyberpunk 2077#oc: ivan#nomad v#male v#meet my oc#virtual photography#xbox series x#console photomode is one of the tools of all time
13 notes
·
View notes
Text
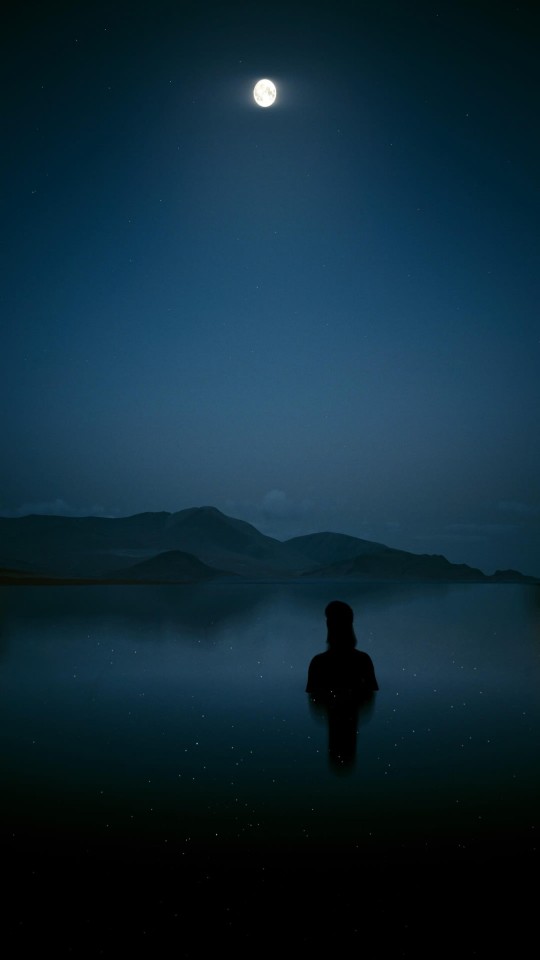

@reilleclan-blog since you asked...
I try not to make my VP process a secret, there's literally nothing to hide, all the tools I use already come with the game, I utilize techniques anyone can learn, I don't do any fancy post-editing (other than rotating), and I think VP should be accessible for everyone.
I took these shots at "Star Lake", which is technically an out of bounds asset - you drive over this thing in the Star Ending of the game in the tank with Panam, so it requires some cheese in order to get to this location. I got inspired by a couple other bloggers here with their trips down to "Langley" (@arachnophobic-larantula & @mynonsenseistingling) and decided to go on a road trip myself. I spent about five hours exploring out of bounds and went all the way from the SoCal Border Checkpoint up to the Oil Fields. (I'll post my tourist photos another time. Technically, I'm still stuck behind the fence at the oil fields, but I'll figure it out later.)
If you need some detailed instructions on how to cross the border in vanilla versions of the game and get to Langley (and yes, you do need the fortified ankle cyberware, double jump will not cut it), this video is helpful:
youtube
If you're trying to get to Star Lake, once you cross the border follow the road south and when you get to the intersection head east. If you roughly follow the curve of the border wall and the ridge that splits thae map between in bounds and out of bounds, you should bump into it.
It was dark when I got to the lake, so the lighting actually wasn't optimal but I stopped because the ground was shiny. It took me a minute to figure out what the heck I was looking at, but funny thing about this lake is that it's just a reflective texture suspended over the lake bed, it's not even water. You can drive and walk through it.
Once I realized the lake was just texture, I walked in, popped open the camera, and started swinging the thing around and playing around with all the effect settings and the poses just to see what I could get. And that's the process for all my VP. I mainly rely on whatever lighting I can find, intersting locations, angles, and juxtaposition, because those are the techniques you have the most leeway with on console and in vanilla photomode.
Anyway, the shot on the left was one of the first pics I took at this location. With how dark the water is and the limited amount of light, I realized that a shilouette style photo was only gonna work at a distance. But I wanted to see what else I could get, so I went the opposite direction of what I thought I wanted. I turned V around so her back was facing the moon towards the light, pretty much maxed out the exposure and brightness settings, bumped up the contrast a smidge, cycled through the poses (Night City Strut is always a favorite), put the field of view down to 15, rotated the camera angle 90 degrees, adjusted my camera to frame the shot how I wanted. Boom. Photo on the right.
P.S. If you do venture out of bounds, make a save file from before you cross the broder (do not overwrite it just in case you need an easy exit out) and save often and keep multiple save files while you are out there. You will die and you will get stuck and there is no fast travel. Also, make sure you have a decent amount of eddies on hand, insurance kept charging me everytime I called a vehicle. Fucking rat bastards...
#cyberpunk 2077#virtual photography#reference#resource#i'm not a corporation i have no trade secrets#more than happy to share and learn#console shots#ps5#out of bounds#Youtube
19 notes
·
View notes
Last Seen Blogs

gubb7k
Gubb7k

edilpepe
Edil Pepe

msjillyjelly
arts and farts

ritamorrisua
Untitled
nobodywillunderstand20
Pinkrose2403