#datetime difference in laravel
Explore tagged Tumblr posts
Visit Tumblr Blog
Explore Tumblr blogs with no restrictions, modern design and the best experience.
Last Seen Tumblr Blogs


Fun Fact
When “GIF” was named word of the year in 2012, Oxford Dictionaries U.S.A. credited Tumblr for pushing the word.
Text
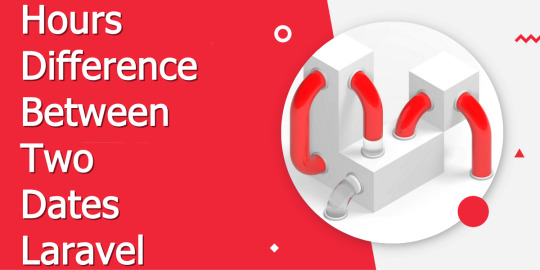
Hours difference between two dates in Laravel?
Hours difference between two dates in Laravel?
In this blog, we will see how to get hours difference between two dates in Laravel.Whenever you need to get the difference between two dates in hours in laravel 5 then you can get easily using Carbon. Laravel by default provides the Carbon class. Carbon class through you can calculate the difference between two dates in hours. In the Following example you can see, we have two dates, the first…
View On WordPress
#date difference in laravel query#datetime difference in laravel#get difference between two times in laravel#get hour difference between two dates php#laravel calculate time difference between two dates in hours and minutes#php calculate time difference between two dates in hours and minutes
0 notes
Photo

Hello, Laravel? Communicating with PHP through SMS!
In this article, we will modify our Laravel-powered phone-capable weather forecast app so that it is accessible via SMS (text message) in addition to the voice telephone system. It is recommended you read the previous post if you haven't done so yet - it's a 10 minute read for an excellent outcome.
Note: If you're confused by the development environment we're using, it's Homestead Improved and you can learn more about it here, or go in detail by buying our book about PHP environments.
Adding Routes
To allow for SMS communication, we need some more routes. Open up the routes/web.php file and append the following code to it:
Route::group(['prefix' => 'sms', 'middleware' => 'twilio'], function () { Route::post('weather', 'SmsController@showWeather')->name('weather'); });
The prefix for the route is sms, so that routes will have a path like /sms/weather, as the one in the example. This is the only route we need for SMS, as Twilio will call the same route over and over again. Twilio will access it via HTTP POST. We could also do this without the prefix, but it's more flexible this way if we decide to add more functionality to the SMS side later.
Service Layer
Next, we'll modify the service we wrote previously. Open up the app/Services/WeatherService.php file and remove the current getWeather method, then replace it with the one below:
public function getWeather($zip, $dayName, $forSms = false) { $point = $this->getPoint($zip); $tz = $this->getTimeZone($point); $forecast = $this->retrieveNwsData($zip); $ts = $this->getTimestamp($dayName, $zip); $tzObj = new \DateTimeZone($tz->timezoneId); $tsObj = new \DateTime(null, $tzObj); $tsObj->setTimestamp($ts); foreach ($forecast->properties->periods as $k => $period) { $startTs = strtotime($period->startTime); $endTs = strtotime($period->endTime); if ($ts > $startTs and $ts < $endTs) { $day = $period; break; } } $weather = $day->name; $weather .= ' the ' . $tsObj->format('jS') . ': '; $response = new Twiml(); if ($forSms) { $remainingChars = 140 - strlen($weather); if (strlen($day->detailedForecast) > $remainingChars) { $weather .= $day->shortForecast; $weather .= '. High of ' . $day->temperature . '. '; $weather .= $day->windDirection; $weather .= ' winds of ' . $day->windSpeed; } else { $weather .= $day->detailedForecast; } $response->message($weather); } else { $weather .= $day->detailedForecast; $gather = $response->gather( [ 'numDigits' => 1, 'action' => route('day-weather', [], false) ] ); $menuText = ' '; $menuText .= "Press 1 for Sunday, 2 for Monday, 3 for Tuesday, "; $menuText .= "4 for Wednesday, 5 for Thursday, 6 for Friday, "; $menuText .= "7 for Saturday. Press 8 for the credits. "; $menuText .= "Press 9 to enter in a new zipcode. "; $menuText .= "Press 0 to hang up."; $gather->say($weather . $menuText); } return $response; }
This function is very similar to the old one. The only difference is that it takes into consideration that the weather request might be coming form a telephone device via SMS, so it makes sure that the weather forecast isn't too long and tries to limit it to less than 140 characters. The response for SMS is still TwiML, just formatted for SMS.
Continue reading %Hello, Laravel? Communicating with PHP through SMS!%
by Christopher Thomas via SitePoint http://ift.tt/2s4qHpk
0 notes
Text
Hello, Laravel? Communicating with PHP through Phone Calls!
Twilio is a SaaS application which enables developers to build telephone applications using web technologies. In this two-part series, we will leverage Twilio to build a weather forecast app that is accessed using the telephone system. The backend will be written with the Laravel framework (an exploratory video course is available for purchase here, or in the form of written tutorials here).
In this part, we will create a simple program that will allow a user to call a phone number that we buy from Twilio, enter a zipcode, and receive the current weather forecast. The user can also get the weather for any day of the week via the voice menu prompts. In the second part of this series, we will leverage what was built in this article to allow the user to interact with the app via SMS (text message).
Prerequisites
Development Environment
This article assumes Homestead Improved is installed. It is not necessary to use it, but the commands might differ slightly if you use a different environment. If you are not familiar with Homestead and want to produce similar results as this article aims to produce, please visit this SitePoint article that shows how to set up Homestead, and if you need a crash course in Vagrant, please see this post. Additionally, if this whets your appetite and you feel like exploring PHP development environments in depth, we have a book about that available for purchase.
Dependencies
We will create a new Laravel project and then add the Twilio PHP SDK and Guzzle HTTP client library to the project:
cd ~/Code composer create-project --prefer-dist laravel/laravel Laravel 5.4.* cd Laravel composer require "twilio/sdk:^5.7" composer require "guzzlehttp/guzzle:~6.0"
Development
Let's go through all the steps, one by one.
Routes
Open up the routes/web.php file and add the following ones:
Route::group(['prefix' => 'voice', 'middleware' => 'twilio'], function () { Route::post('enterZipcode', 'VoiceController@showEnterZipcode')->name('enter-zip'); Route::post('zipcodeWeather', 'VoiceController@showZipcodeWeather')->name('zip-weather'); Route::post('dayWeather', 'VoiceController@showDayWeather')->name('day-weather'); Route::post('credits', 'VoiceController@showCredits')->name('credits'); });
In this app, all requests will be under the /voice path. When Twilio first connects to the app, it will go to /voice/enterZipcode via HTTP POST. Depending on what happens in the telephone call, Twilio will make requests to other endpoints. This includes /voice/zipcodeWeather for providing today's forecast, /voice/dayWeather, for providing a particular day's forecast, and /voice/credits for providing information on where the data came from.
Service Layer
We are going to add a service class. This class will hold a lot of the business logic that will be shared between the voice telephone app and the SMS app.
Create a new sub-folder called Services inside the app folder. Then, create a file called WeatherService.php and put the following content into it:
<?php namespace App\Services; use Illuminate\Support\Facades\Cache; use Twilio\Twiml; class WeatherService { }
This is a large file in the project, so we will build it piece by piece. Put the following pieces of code in this section inside our new service class:
public $daysOfWeek = [ 'Today', 'Sunday', 'Monday', 'Tuesday', 'Wednesday', 'Thursday', 'Friday', 'Saturday' ];
We will use this array to map a day of the week to a number; Sunday = 1, Monday = 2, etc.
public function getWeather($zip, $dayName) { $point = $this->getPoint($zip); $tz = $this->getTimeZone($point); $forecast = $this->retrieveNwsData($zip); $ts = $this->getTimestamp($dayName, $zip); $tzObj = new \DateTimeZone($tz->timezoneId); $tsObj = new \DateTime(null, $tzObj); $tsObj->setTimestamp($ts); foreach ($forecast->properties->periods as $k => $period) { $startTs = strtotime($period->startTime); $endTs = strtotime($period->endTime); if ($ts > $startTs and $ts < $endTs) { $day = $period; break; } } $response = new Twiml(); $weather = $day->name; $weather .= ' the ' . $tsObj->format('jS') . ': '; $weather .= $day->detailedForecast; $gather = $response->gather( [ 'numDigits' => 1, 'action' => route('day-weather', [], false) ] ); $menuText = ' '; $menuText .= "Press 1 for Sunday, 2 for Monday, 3 for Tuesday, "; $menuText .= "4 for Wednesday, 5 for Thursday, 6 for Friday, "; $menuText .= "7 for Saturday. Press 8 for the credits. "; $menuText .= "Press 9 to enter in a new zipcode. "; $menuText .= "Press 0 to hang up."; $gather->say($weather . $menuText); return $response; }
The getWeather method takes a zipcode with the day of the week and crafts the text of a weather forecast. First, it figures out the reference time for the day requested, and then looks up the weather forecast by doing a foreach over the array of forecast data. After that, it returns a Voice TwiML response. Below is a sample of what is returned:
<?xml version="1.0" encoding="UTF-8"?> <Response> <Gather numDigits="1" action="/voice/dayWeather"> <Say> This Afternoon the 31st: Sunny, with a high near 72. South southwest wind around 8 mph. Press 1 for Sunday, 2 for Monday, 3 for Tuesday, 4 for Wednesday, 5 for Thursday, 6 for Friday, 7 for Saturday. Press 8 for the credits. Press 9 to enter in a new zipcode. Press 0 to hang up. </Say> </Gather> </Response>
The <Gather> tag tells Twilio to expect input from the user's keypad. The numDigits attribute says how many digits to expect. The action attribute says what endpoint to contact next.
protected function retrieveNwsData($zip) { return Cache::remember('weather:' . $zip, 60, function () use ($zip) { $point = $this->getPoint($zip); $point = $point->lat . ',' . $point->lng; $url = 'http://ift.tt/2siEbBl' . $point . '/forecast'; $client = new \GuzzleHttp\Client(); $response = $client->request('GET', $url, [ 'headers' => [ 'Accept' => 'application/geo+json', ] ]); return json_decode((string)$response->getBody()); }); }
The retrieveNwsData method gets the weather forecast data. First, the method checks to see if a copy of the zipcode's weather forecast is in cache. If not, then the Guzzle HTTP client is used to make an HTTP GET request to the National Weather Service's (NWS) API endpoint http://ift.tt/2siJ4Kk. To get the geographic point of the zipcode, a call is made to the getPoint method before doing the request to the weather API. The response from the API endpoint is the weather forecast in GeoJSON format. The forecast is for every day and night for a week (with some exceptions we will discuss later); 14 entries in all. We cache the API response for an hour because making the request is slow, plus we do not want to hit the government servers too frequently and get banned.
protected function getPoint($zip) { return Cache::remember('latLng:' . $zip, 1440, function () use ($zip) { $client = new \GuzzleHttp\Client(); $url = 'http://ift.tt/1p5neFv'; $response = $client->request('GET', $url, [ 'query' => [ 'postalcode' => $zip, 'countryBias' => 'US', 'username' => env('GEONAMES_USERNAME') ] ]); $json = json_decode((string)$response->getBody()); return $json->postalCodes[0]; }); }
The getPoint method maps a zipcode to a geographic point. This is done by using the GeoNames API. The results are cached for a day because using the API is slow.
protected function getTimeZone($point) { $key = 'timezone:' . $point->lat . ',' . $point->lng; return Cache::remember($key, 1440, function () use ($point) { $client = new \GuzzleHttp\Client(); $url = 'http://ift.tt/1C9XM7m'; $response = $client->request('GET', $url, [ 'query' => [ 'lat' => $point->lat, 'lng' => $point->lng, 'username' => env('GEONAMES_USERNAME') ] ]); return json_decode((string) $response->getBody()); }); }
The getTimeZone method is used to get the timezone that a geographic point resides inside. The GeoNames API is also used and the results are cached for a day for the same reasons.
Continue reading %Hello, Laravel? Communicating with PHP through Phone Calls!%
via SitePoint http://ift.tt/2siIbSa
0 notes
Photo

Hello, Laravel? Communicating with PHP through Phone Calls!
Twilio is a SaaS application which enables developers to build telephone applications using web technologies. In this two-part series, we will leverage Twilio to build a weather forecast app that is accessed using the telephone system. The backend will be written with the Laravel framework (an exploratory video course is available for purchase here, or in the form of written tutorials here).
In this part, we will create a simple program that will allow a user to call a phone number that we buy from Twilio, enter a zipcode, and receive the current weather forecast. The user can also get the weather for any day of the week via the voice menu prompts. In the second part of this series, we will leverage what was built in this article to allow the user to interact with the app via SMS (text message).
Prerequisites
Development Environment
This article assumes Homestead Improved is installed. It is not necessary to use it, but the commands might differ slightly if you use a different environment. If you are not familiar with Homestead and want to produce similar results as this article aims to produce, please visit this SitePoint article that shows how to set up Homestead, and if you need a crash course in Vagrant, please see this post. Additionally, if this whets your appetite and you feel like exploring PHP development environments in depth, we have a book about that available for purchase.
Dependencies
We will create a new Laravel project and then add the Twilio PHP SDK and Guzzle HTTP client library to the project:
cd ~/Code composer create-project --prefer-dist laravel/laravel Laravel 5.4.* cd Laravel composer require "twilio/sdk:^5.7" composer require "guzzlehttp/guzzle:~6.0"
Development
Let's go through all the steps, one by one.
Routes
Open up the routes/web.php file and add the following ones:
Route::group(['prefix' => 'voice', 'middleware' => 'twilio'], function () { Route::post('enterZipcode', 'VoiceController@showEnterZipcode')->name('enter-zip'); Route::post('zipcodeWeather', 'VoiceController@showZipcodeWeather')->name('zip-weather'); Route::post('dayWeather', 'VoiceController@showDayWeather')->name('day-weather'); Route::post('credits', 'VoiceController@showCredits')->name('credits'); });
In this app, all requests will be under the /voice path. When Twilio first connects to the app, it will go to /voice/enterZipcode via HTTP POST. Depending on what happens in the telephone call, Twilio will make requests to other endpoints. This includes /voice/zipcodeWeather for providing today's forecast, /voice/dayWeather, for providing a particular day's forecast, and /voice/credits for providing information on where the data came from.
Service Layer
We are going to add a service class. This class will hold a lot of the business logic that will be shared between the voice telephone app and the SMS app.
Create a new sub-folder called Services inside the app folder. Then, create a file called WeatherService.php and put the following content into it:
<?php namespace App\Services; use Illuminate\Support\Facades\Cache; use Twilio\Twiml; class WeatherService { }
This is a large file in the project, so we will build it piece by piece. Put the following pieces of code in this section inside our new service class:
public $daysOfWeek = [ 'Today', 'Sunday', 'Monday', 'Tuesday', 'Wednesday', 'Thursday', 'Friday', 'Saturday' ];
We will use this array to map a day of the week to a number; Sunday = 1, Monday = 2, etc.
public function getWeather($zip, $dayName) { $point = $this->getPoint($zip); $tz = $this->getTimeZone($point); $forecast = $this->retrieveNwsData($zip); $ts = $this->getTimestamp($dayName, $zip); $tzObj = new \DateTimeZone($tz->timezoneId); $tsObj = new \DateTime(null, $tzObj); $tsObj->setTimestamp($ts); foreach ($forecast->properties->periods as $k => $period) { $startTs = strtotime($period->startTime); $endTs = strtotime($period->endTime); if ($ts > $startTs and $ts < $endTs) { $day = $period; break; } } $response = new Twiml(); $weather = $day->name; $weather .= ' the ' . $tsObj->format('jS') . ': '; $weather .= $day->detailedForecast; $gather = $response->gather( [ 'numDigits' => 1, 'action' => route('day-weather', [], false) ] ); $menuText = ' '; $menuText .= "Press 1 for Sunday, 2 for Monday, 3 for Tuesday, "; $menuText .= "4 for Wednesday, 5 for Thursday, 6 for Friday, "; $menuText .= "7 for Saturday. Press 8 for the credits. "; $menuText .= "Press 9 to enter in a new zipcode. "; $menuText .= "Press 0 to hang up."; $gather->say($weather . $menuText); return $response; }
The getWeather method takes a zipcode with the day of the week and crafts the text of a weather forecast. First, it figures out the reference time for the day requested, and then looks up the weather forecast by doing a foreach over the array of forecast data. After that, it returns a Voice TwiML response. Below is a sample of what is returned:
<?xml version="1.0" encoding="UTF-8"?> <Response> <Gather numDigits="1" action="/voice/dayWeather"> <Say> This Afternoon the 31st: Sunny, with a high near 72. South southwest wind around 8 mph. Press 1 for Sunday, 2 for Monday, 3 for Tuesday, 4 for Wednesday, 5 for Thursday, 6 for Friday, 7 for Saturday. Press 8 for the credits. Press 9 to enter in a new zipcode. Press 0 to hang up. </Say> </Gather> </Response>
The <Gather> tag tells Twilio to expect input from the user's keypad. The numDigits attribute says how many digits to expect. The action attribute says what endpoint to contact next.
protected function retrieveNwsData($zip) { return Cache::remember('weather:' . $zip, 60, function () use ($zip) { $point = $this->getPoint($zip); $point = $point->lat . ',' . $point->lng; $url = 'http://ift.tt/2siEbBl' . $point . '/forecast'; $client = new \GuzzleHttp\Client(); $response = $client->request('GET', $url, [ 'headers' => [ 'Accept' => 'application/geo+json', ] ]); return json_decode((string)$response->getBody()); }); }
The retrieveNwsData method gets the weather forecast data. First, the method checks to see if a copy of the zipcode's weather forecast is in cache. If not, then the Guzzle HTTP client is used to make an HTTP GET request to the National Weather Service's (NWS) API endpoint http://ift.tt/2siJ4Kk. To get the geographic point of the zipcode, a call is made to the getPoint method before doing the request to the weather API. The response from the API endpoint is the weather forecast in GeoJSON format. The forecast is for every day and night for a week (with some exceptions we will discuss later); 14 entries in all. We cache the API response for an hour because making the request is slow, plus we do not want to hit the government servers too frequently and get banned.
protected function getPoint($zip) { return Cache::remember('latLng:' . $zip, 1440, function () use ($zip) { $client = new \GuzzleHttp\Client(); $url = 'http://ift.tt/1p5neFv'; $response = $client->request('GET', $url, [ 'query' => [ 'postalcode' => $zip, 'countryBias' => 'US', 'username' => env('GEONAMES_USERNAME') ] ]); $json = json_decode((string)$response->getBody()); return $json->postalCodes[0]; }); }
The getPoint method maps a zipcode to a geographic point. This is done by using the GeoNames API. The results are cached for a day because using the API is slow.
protected function getTimeZone($point) { $key = 'timezone:' . $point->lat . ',' . $point->lng; return Cache::remember($key, 1440, function () use ($point) { $client = new \GuzzleHttp\Client(); $url = 'http://ift.tt/1C9XM7m'; $response = $client->request('GET', $url, [ 'query' => [ 'lat' => $point->lat, 'lng' => $point->lng, 'username' => env('GEONAMES_USERNAME') ] ]); return json_decode((string) $response->getBody()); }); }
The getTimeZone method is used to get the timezone that a geographic point resides inside. The GeoNames API is also used and the results are cached for a day for the same reasons.
Continue reading %Hello, Laravel? Communicating with PHP through Phone Calls!%
by Christopher Thomas via SitePoint http://ift.tt/2rwsNPa
0 notes
Text
Quick Tip: Display Dates Relatively in Laravel
We have previously looked at the Carbon package by Brian Nesbitt as well as all the functionality it adds to PHP's DateTime class.
In this article, we will take a look at how Laravel takes advantage of this package.
Introduction
As already mentioned, The carbon class does not rebuild PHP's DateTime class from scratch, it builds upon it.
<?php namespace Carbon; class Carbon extends \DateTime { // code here }
This means that you can access the default functionality of PHP's DateTime class on top of the awesomeness that is Carbon.
Laravel already includes the Carbon class by default so we do not need to install it separately. To get started with Carbon in Laravel, simply create a new project using the laravel command.
$ laravel new scotch-dates
Carbon Dating in Laravel
See what I did there? Turns out Brian Nesbitt had the same idea in mind while creating the Carbon package.
Now by default, if the timestamps variable in a Laravel model class is not explicitly set to false, then it is expected that it's corresponding table should have the created_at and updated_at columns.
We can however go ahead and add our own date columns such as activated_at, dob or any other depending on the type of application or the nature of the Laravel model we are working on.
But how does laravel know that these fields should be cast to date?
Simple. Add all the date fields to the protected dates variable in the model class.
<?php namespace App; use Illuminate\Database\Eloquent\Model; class User extends Model { /** * The attributes that should be mutated to dates. * * @var array */ protected $dates = [ 'created_at', 'updated_at', 'activated_at', 'dob' ]; }
Setup
In our scotch-dates application that we just created, we already have a our first migration setup for the user's table. We will need to have some user records to work with, so let's seed some data in our database with the factory helper method on tinker.
$ php artisan tinker >>> factory('App\User', 10)->create()
To get started, we'll go ahead and create a new UserController class to get all the user's from the user's table into a view and add a /users route.
/routes/web.php
Route::get('/', function () { return view('welcome'); }); Route::get('/users', 'UserController@users');
I have gone ahead to add a few helper variables courtesy of the Carbon class to give me access to a few dates such as now, yesterday, today and tomorrow.
/app/Http/Controllers/UserController.php
<?php namespace App\Http\Controllers; use Illuminate\Http\Request; use App\User; use Carbon\Carbon; class UserController extends Controller { public function users() { return view('users', [ 'users' => User::all(), 'now' => Carbon::now(), 'yesterday' => Carbon::yesterday(), 'today' => Carbon::today(), 'tomorrow' => Carbon::tomorrow() ]); } }
Let's play around with Carbon dates on the user's view.
Displaying Absolute Dates
Having setup our user's details and passed them on to the users view, we can now display each of the users with the following blade template.
<table> <tr> <th>Name</th> <th>Created</th> </tr> @foreach($users as $user) <tr> <td></td> <td></td> </tr> @endforeach </table>
With this, we should have the following.
Displaying Dates Relatively
Displaying dates relatively is quite popular since it is easier for humans to read out a post as created 30 minutes ago as opposed to 2017-01-08 19:15:20.
Let's play around with the Carbon class to see how we can display the dates relatively in different ways.
When comparing a value in the past to default now:
This comes in handy when you want to display a date in the past with reference to the current time. This would be something like:
A few seconds ago
30 minutes ago
2 days ago
1 year ago
To achieve this, we simply use the diffForHumans method.
$user->created_at->diffForHumans() // 1 hour ago
When comparing a value in the future to default now:
You'd probably want to use this in cases where you need to publish a post in the future or show an expiration date.
1 hour from now
5 months from now
$user->created_at->addDays(5)->diffForHumans() //5 days from now
When comparing a value in the past to another value:
1 hour before
5 months before
$yesterday->diffForHumans($today) //1 day before
When comparing a value in the future to another value:
1 hour after
5 months after
$tomorrow->diffForHumans($today) //1 day after
More About Diffs
While it may be nice to display to the user fully quallified diffs such as 2 hours ago, you may at times simply want to show the user the value without the text.
This may come in handy where you have many comments coming in and the text is just too repetitive. diffInSeconds() in particular can be used in cases where the difference in time between two entities, say, lap times, is of significance.
This can achieved by the diffInYears, diffInMonths(), diffInWeeks(), diffInDays(), diffInWeekdays(), diffInWeekendDays() diffInHours(), diffInMinutes() and diffInSeconds() methods.
$user->created_at->diffInHours(); //2 $user->created_at->diffInMinutes(); //134 $user->created_at->diffInSeconds(); //8082
The carbon class also come with methods that return the number of seconds since midnight or to the end of the day (midnight) which can be used to create a countdown, say, for a product sale.
$now->secondsSinceMidnight() //77825 $now->secondsUntilEndOfDay() //8574
Conclusion
There's alot you can achieve with the Carbon class and sometimes you will not find out about a functionality that it provides until you need it.
Take a look at the documentation here. Happy Carbon dating!
via Scotch.io http://ift.tt/2koKYn4
0 notes