#diyenthusiast
Text
Crafting Backyard Bliss: A Review of ‘My Shed Plans

Embarking on the mission to transform my backyard into a sanctuary of craftsmanship, I stumbled upon “My Shed Plans,” a product boasting top affiliates making a staggering $50k per month and a conversion rate of 9%. Intrigued by its claims, I ventured into the world of shed-building with this guide.
#MyShedPlans#DIYProjects#BackyardTransformation#Craftsmanship#ShedBuilding#Blueprints#Carpentry#Woodworking#VideoTutorials#CommunitySupport#CostEffectiveness#HomeImprovement#Construction#DIYEnthusiast#BuildingCommunity#ValueForMoney#BuildingMaterials#CreativeProjects#HomeRenovation#BuildingDreams#UserFriendly#MasterCarpenter#DoItYourself#BuildingSkills#HomeDesign#OutdoorLiving#BackyardOasis
0 notes
Text
Choosing the Right Tools for DIY Electrical Repairs and Upgrades

Beginning a DIY electrical project is thrilling, but have you ever felt frustration when things go wrong due to the wrong tools? I have. That's why I'm here to guide you. Safety is paramount, and it all begins with the right tools. Let's dive into the essentials for successful DIY electrical repairs and upgrades.
Essential Tools for Every DIY Electrician's Toolbox
Must-haves
Voltage Tester: This tool is your electrical guardian angel, ensuring circuits are dead before you proceed. Non-contact or contact, pen or multimeter – choose wisely based on your project's needs.
Wire Strippers/Cutters: Master safe stripping techniques, matching them with the right gauge. Precision matters, and a smooth wire-stripping dance avoids potential hazards.
Screwdrivers (Various Sizes and Types): Phillips, flathead, Torx – understand the language of screws. Each type has a unique purpose, and having a variety on hand ensures you're ready for any fastening challenge.
Pliers (Needle Nose, Lineman's): Grip and cut wires like a pro. Different pliers serve distinct functions, making your toolbox versatile and your projects seamless.
Flashlight: Shed light on the darkest corners of your electrical endeavours. Consider a headlamp for hands-free brilliance when juggling wires becomes an art form.
Level: Achieve precision in every installation – switches, outlets, and fixtures. A level ensures your upgrades are not only functional but also aesthetically pleasing.
Additional helpful tools
Circuit Breaker Finder: Quickly locate hidden breakers, a time-saving device that eliminates the guesswork.
Utility Knife: A versatile companion for stripping cables, scoring conduits, and other general purposes. This handy tool is a silent hero in your toolkit.
Wire Caps/Connectors: Choose wisely based on wire gauge and material. These little connectors play a crucial role in keeping your connections secure.
Electrical Tape: A multitasking marvel – insulation, marking, and serving various electrical purposes. Don't underestimate the power of a good electrical tape.
Safety Glasses and Gloves: Protect yourself from potential hazards, ensuring your DIY journey is injury-free.
Considerations for Choosing Quality Tools
When it comes to tools, quality should be your steadfast companion:
Safety Features: Prioritize tools with insulated handles, non-conductive materials, and shock protection. Your safety is non-negotiable.
Quality vs. Cost: Invest wisely. Durable tools from reputable brands might cost a bit more, but they pay dividends in the long run.
Functionality: Seek multi-function tools or sets for versatility. A tool that can wear multiple hats is a valuable asset in any DIY project.
Ergonomics: Comfortable grip and design prevent fatigue during prolonged usage. Your hands deserve the best; choose tools that understand that.
Project-Specific Needs: Tailor your tool selection to the specifics of each project. For instance, consider a drywall saw for recessed lighting – a small adjustment that makes a big difference.
Safety First: Working with Electricity the Right Way
Before you embark on any electrical journey, follow these commandments:
Always turn off the power before starting any work.
Double-check and triple-check that the power is off.
Use proper voltage testers and safety gear.
Work within your skill level and know when to call a professional.
Follow local electrical codes and regulations.
Conclusion
Armed with the right tools, knowledge, and a safety-first mindset, your DIY electrical projects are destined for success. Electrical contractors stress the importance of using the right tools, not just for efficiency but, more crucially, for your safety.
So, whether you're a seasoned DIY enthusiast or a novice looking to enhance your home, let this guide be your beacon. Electrical services can be within your grasp with the right tools and a bit of know-how. Before any electrical task, familiarize yourself with What Electrical Work Can Be Done Without A License
#DIYElectrical#ToolboxEssentials#HomeSafety#ElectricalUpgrades#DIYProjects#SafetyFirst#ElectricalTools#DIYHomeImprovement#WiringWonders#HandymanTips#ToolTalk#HomeElectrical#DIYEnthusiast#EmpoweredDIY#SafetyGear#ElectricalKnowledge#PowerUpgrades#HomeRenovation#DIYGuides#HandyHacks
0 notes
Text

Hotshot Flatbed Winch Bundle: Ultimate Cargo Control
Experience the pinnacle of cargo control with our Hotshot Flatbed Winch Bundle, specially designed for securing loads on trailer winch tracks. Whether you're a professional hotshot trucker or a DIY enthusiast, this bundle is your all-in-one solution for ensuring your cargo stays firmly in place during transportation.
Product Features:
Complete Kit: This bundle includes everything you need to secure your cargo efficiently, including high-quality winch tracks, versatile winches, durable straps, and all the necessary hardware.
Easy to Install: Designed for quick and hassle-free installation, saving you time and effort.
Extreme Versatility: Suitable for various load types and sizes, making it ideal for a wide range of cargo.
Professional Grade: Trusted by professionals in the industry for its reliability and strength.
Enhanced Safety: Ensures your cargo remains secure, minimizing the risk of accidents or damage during transit.
Applications:
Transportation: Perfect for securing cargo on trailers, flatbeds, and more, guaranteeing safe and damage-free delivery.
Construction: Essential for securing loads of construction materials and equipment, enhancing worksite safety.
Industrial: Used in various industrial applications where heavy loads need secure fastening for safe transportation.
DIY Projects: Even if you're a DIY enthusiast, this bundle is a must-have for securing loads during home improvement or large-scale projects.
Elevate your cargo control with the Hotshot Flatbed Winch Bundle. Trust in its complete kit, easy installation, and extreme versatility to keep your valuable cargo safe and secure on every journey.
#CargoControl#HotshotTrucking#TrailerWinchTracks#SecureCargo#TransportationSolutions#DIYEnthusiast#CargoProtection#ProfessionalGrade#SafeTransit#QualityMatters
0 notes
Text
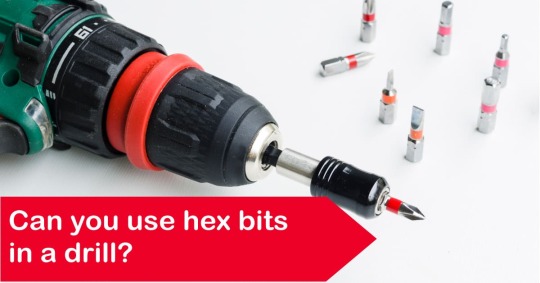
Unleash the Hex-citement! 💥 Can you power up your drill with hex bits? Discover the versatility and precision of hex bits in action. 🔧
0 notes
Text
Exploring the Top Power Tools for DIY Enthusiasts in Dubai

Discover the best power tools for DIY enthusiasts in Dubai! From drills to saws, these tools empower you to tackle projects with ease. Upgrade your toolkit and unleash your creativity today!
Read on: https://safatcotrading.com/exploring-the-top-power-tools-for-diy-enthusiasts-in-dubai/
0 notes
Text
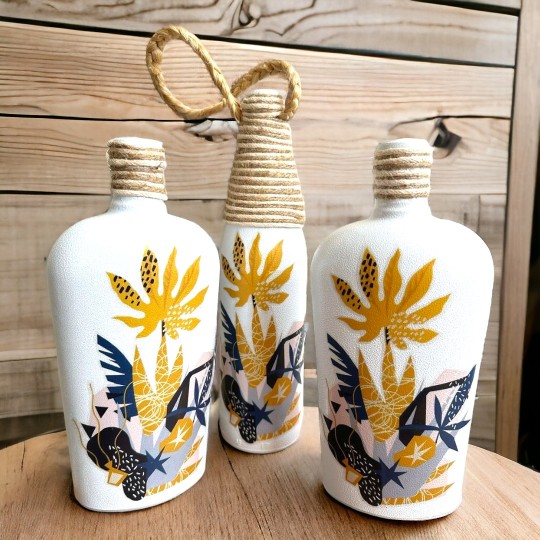
Handmade Green Grow Bottles | Ancient Crafting
Discover our range of DIY Bottle Planters! Elevate your gardening game with our eco-friendly solutions, turning ordinary bottles into charming homes for your favorite plants. Perfect for indoor or outdoor use, these stylish creations add a touch of greenery to any space while promoting sustainability in a fun and creative manner.


Add a charming touch to your home with our Handmade Green Grow Bottles! 🌿
Perfect for DIY lovers and those who adore plants. 🏡
✨ Elevate your décor with these unique pieces!
Get yours now and bring nature inside! 💚
Hurry Up & Order Now!
DM to order or
Visit : Ancient Crafting
.
.
#BottleBlossom #DIYDecor #SustainableLiving #homedecortransformation #diyplanter #bottleplanters #homedecorindia #indianhome #upcycledbottle #upcyclingideas #diyenthusiast #diyideas #diydesiway #homedecorplanters #bottleplanters #dmtoorder #ancientcrafting
0 notes
Text

SAYTONE ST-830D DIGITAL MULTIMETER
STOCK AVAILABLE !!!
FOR PRICE AND MORE INFORMATION FOLLOW US ON OUR WHATSAPP CHANNEL :
For any Query:
☎ : +91-9899391155, +91-9910772484
Know More: https://www.indiamart.com/rajendra-electronics-newdelhi/
Facebook: https://www.facebook.com/profile.php?id=61550818087962
Instagram: https://www.instagram.com/rajendra.electronic/
LinkedIn: https://www.linkedin.com/in/rajendra-electronics-144b73290/
Reddit: https://www.reddit.com/user/Rajendra_Electronics
Youtube: https://www.youtube.com/@Rajendra_Electronics/about
Twitter: https://twitter.com/Rajendra_Elec
Pinterest: https://in.pinterest.com/rajendraelectronics314/
Tumblr: https://www.tumblr.com/blog/rajendra314
#digitalmultimeter #diyelectronics #techtools #electricaltesting #diyprojects #ElectronicEngineering #multimeter #ElectronicsGadgets #TechInnovation #digitaltools #homeimprovements #electronicstech #DIYenthusiast #TechSavvy #ElectronicDevices #techlife #digitalinstruments #electricalwork #handyman #electronicslab
0 notes
Text

🚰🔧 Dive into a World of Plumbing Tools at Our Store! 💧
Welcome to our store, your go-to destination for all your plumbing needs! Step into our plumbing tools section and immerse yourself in a world of high-quality products and solutions. Whether you're a professional plumber or a DIY enthusiast, we have everything you need.
#PlumbingToolsHub #ProfessionalPlumbingSupplies #DIYEnthusiast #EfficientRepairs #ExpertAdvice tackle any plumbing project. 🛠️🏬
0 notes
Text
🔨 Power up your DIY game with BLACK+DECKER! 🔨
🛠️ Introducing our top-notch range of power tools designed to make your projects a breeze! From drilling to sawing and everything in between, we've got you covered.
🔧 Discover the versatility of our BLACK+DECKER tools:
✅ #HammerDrill - Conquer tough materials effortlessly with our hammer drill's hammering action!
✅ #CircularSaw - Cut through wood and metal like a pro with precision and ease.
✅ #Jigsaw - Create intricate cuts and curves for your woodworking masterpieces.
✅ #Sander - Achieve a smooth finish on your surfaces with our efficient sanding tools.
✅ #PowerDriver - Tackle your screwdriving tasks with speed and precision.
🛒Call +91 7377017377 Get yours now and experience the BLACK+DECKER difference! Available at our store (https://industrywaala.com/) or visit us today#BLACKDECKER #PowerTools#DIYProjects#HomeImprovement#ToolTime#QualityTools#DIYEnthusiast#GetItDone

0 notes
Text
🔩 Upgrade your toolkit with the Bosch GSB 180-LI 18V Cordless Impact Drill! 🔨
Experience the ultimate convenience and power with this versatile drill. Whether you're a professional tradesperson or a DIY enthusiast, this tool is perfect for tackling a wide range of tasks. 💪
Key features of the Bosch GSB 180-LI include:
✅ Cordless freedom for unrestricted movement and accessibility.
✅ Powerful 18V battery for long-lasting performance.
✅ Impact function for drilling through tough materials effortlessly.
✅ Two-speed gearbox for precise control and versatility.
✅ LED light for improved visibility in dark or tight spaces.
✅ Comfortable ergonomic design for extended use without fatigue.
✅ Quick and easy bit changes with the keyless chuck.
🎯Contact for your queries @ 9710076550 For Online, please visit us at - https://veerco.online/. 🟡🖤 #BoschPowerTools #GSB180LI #CordlessDrill #PowerAndVersatility #DIYEnthusiast

0 notes
Text
🌟✨ Stay Informed, Stay Inspired! ✨🌟
🌟✨ Stay Informed, Stay Inspired! ✨🌟
Join our vibrant community at Shehzi Creations and discover a world of creativity, passion, and inspiration! 🎨✨ We're here to spark your imagination and fuel your artistic journey. Whether you're an aspiring artist, a DIY enthusiast, or simply love all things creative, this is the place to be. 💫
🔥📚 Explore our captivating blog at shehzicreations.in and unlock a treasure trove of valuable insights, tutorials, and exciting projects that will elevate your skills and ignite your creativity. 💡🎉
🌈🌸 From mesmerizing paintings to unique crafts, from enchanting photography to mind-blowing fashion tips, we have it all! 🎨📸✂️ Discover the latest trends, master new techniques, and embrace your inner artist like never before. 🌟💫
💫🔥 Ready to take your creative journey to the next level? 🚀✨ Join us today and become a part of our incredible community. Connect with like-minded individuals, share your creations, and inspire others with your unique artistic perspective. Together, we can make magic happen! ✨🌟
🔔💌 Don't miss out on our latest updates, exciting giveaways, and exclusive content! 🎁✉️ Click the link in our bio to subscribe to our newsletter and be the first to know about our newest blog posts, creative challenges, and special offers. 💌🎉
📣🌐 Follow @ShehziCreations for daily inspiration and creative delights. 🎨✨ Join the conversation by using the hashtag #ShehziCreations and let the world witness your artistic brilliance. 🌟🎉
#StayInformed #StayInspired #CreativityUnleashed #ArtisticJourney #DIYEnthusiast #ArtInspiration #BlogCommunity #ShehziCreations #UnlockYourCreativity #ArtisticSkills #IgniteYourPassion #EmbraceYourArtistry #PaintingMagic #CraftingIdeas #PhotographyPassion #FashionTips #JoinTheCommunity #LikeMindedIndividuals #ShareYourCreations #InspireOthers #SubscribeNow #ExclusiveContent #CreativeChallenges #SpecialOffers #FollowUs #ArtisticDelights #ExpressYourself
1 note
·
View note
Text


5 in 1 Combo Havy Duty Heat Press Sublimation Machine! 🎉🌟 Now you can create customized products with ease! This amazing machine allows you to sublimate on a variety of surfaces including mugs, shirts, phone cases, hats, and more! 💻👕📱⚽️🎁 Perfect for small businesses, hobbyists, and anyone who wants to add a personal touch to their products. Get yours today and start creating! 😍
Contact Details :
📞 +91 9818493808
📞 +91 9771000144
📞 +91 8287846963
#fabloons #sublimationmachine #customproducts #smallbusiness #5in1sublimationmachin #sublimationheatpressmachine #sublimation #5in1combo #combomachine #combo #tshirtprintingmachine #sublimationprinting #sublimationblanks #personalizedgifts #diyprojects #sublimationmachine #customproducts #smallbusinessowner #DIYenthusiast
0 notes
Text

Introducing the 5 in 1 Sublimation Machine! 🎉🌟 Now you can create customized products with ease! This amazing machine allows you to sublimate on a variety of surfaces including mugs, shirts, phone cases, hats, and more! 💻👕📱⚽️🎁 Perfect for small businesses, hobbyists, and anyone who wants to add a personal touch to their products. Get yours today and start creating! 😍
https://dittoboss.com/product/5-in-1-sublimation-machine/
Hurry Up and Order Now
For Order Call at +91 9891679168
WhatsApp Link
https://wa.me//919891679168
DittoBoss #sublimationmachine #customproducts #smallbusiness #5in1sublimationmachin #sublimationheatpressmachine
sublimation #5in1combo #combomachine #combo #tshirtprintingmachine #sublimationprinting #sublimationblanks #personalizedgifts #diyprojects #sublimationmachine #customproducts #smallbusinessowner #DIYenthusiast #personalizedgifts #creativity #innovation #trendingnow
0 notes
Text
How to Create Stunning Etched Glass Mirrors for Your Home

Unleash Your Creativity with Rotary Tools
Glass mirror etching is a popular DIY project that allows you to add a unique and personalized touch to your home decor. One of the most versatile tools for this project is a rotary tool. Rotary tools are handheld power tools that can be used for a wide range of applications, including etching glass mirrors. They offer precision and control, making them the perfect tool for creating intricate designs on glass surfaces.
The benefits of using rotary tools for glass mirror etching are numerous. Firstly, they offer versatility. Rotary tools come with various attachments and accessories that can be used for different tasks, such as engraving, sanding, and polishing. This means that you can use the same tool for multiple projects, saving you time and money.
Secondly, rotary tools provide precision. The small size and high-speed rotation of the tool allow for detailed and accurate etchings on glass surfaces. Whether you want to create simple patterns or intricate designs, a rotary tool can help you achieve the desired results.
Understanding Rotary Tools: A Versatile Tool for DIY Enthusiasts
Rotary tools are handheld power tools that operate by spinning a small cutting or grinding attachment at high speeds. They are typically powered by electricity or batteries and have variable speed settings to accommodate different materials and tasks.
One of the key features of rotary tools is their interchangeable attachments and accessories. These include cutting wheels, grinding stones, sanding drums, polishing pads, and engraving bits, among others. Each attachment is designed for a specific task, allowing you to switch between them depending on your needs.
Rotary tools have a wide range of applications in DIY projects. They can be used for cutting, grinding, sanding, polishing, engraving, and etching various materials, including wood, metal, plastic, and glass. This versatility makes them a must-have tool for any DIY enthusiast.
Why Etching Glass Mirrors? Elevate Your Home Decor with a Unique Touch
Etched glass mirrors can add a touch of elegance and sophistication to any home decor. The etching process involves removing a thin layer of glass to create a design or pattern. This creates a frosted or matte appearance on the glass, which can be used to create stunning visual effects.
One of the main reasons why people choose to etch glass mirrors is for their aesthetic appeal. Etched glass mirrors have a unique and timeless look that can elevate the overall design of a room. They can be used as focal points or accent pieces, adding a touch of elegance and personality to any space.
Etching glass mirrors also allows for personalization and customization. You can create your own designs or patterns, making each mirror a one-of-a-kind piece. Whether you prefer simple geometric shapes or intricate floral motifs, etching gives you the freedom to express your creativity and style.
Getting Started: Essential Tools and Materials for Glass Mirror Etching
Before you start etching glass mirrors, it's important to gather all the necessary tools and materials. Here's a list of what you'll need:
1. Rotary tool: Look for a rotary tool that comes with a variety of attachments and accessories suitable for glass etching. Some popular brands include Dremel, Black & Decker, and Bosch.
2. Safety equipment: Safety should always be a priority when working with power tools. Make sure to wear protective eyewear, gloves, and a dust mask to protect yourself from flying debris and glass particles.
3. Glass mirror: Choose a high-quality glass mirror that is clean and free from any scratches or imperfections. The size and shape of the mirror will depend on your design preferences and the space where it will be displayed.
4. Stencils or designs: If you're not confident in your freehand etching skills, you can use stencils or pre-made designs to create your etchings. These can be purchased online or at craft stores.
5. Etching cream: Etching cream is a chemical compound that is used to remove the top layer of glass and create the etched design. Look for a cream that is specifically designed for glass etching.
6. Painter's tape: Painter's tape is used to create borders or outlines for your etchings. It helps to keep the etching cream contained and prevents it from spreading to unwanted areas.
7. Soft cloth or sponge: You'll need a soft cloth or sponge to apply the etching cream and remove any excess cream after the etching process.
Step-by-Step Guide: How to Etch Glass Mirrors with a Rotary Tool
Now that you have all the necessary tools and materials, it's time to start etching your glass mirror. Follow these step-by-step instructions for a successful etching process:
1. Prepare your workspace: Find a clean and well-lit area to work in. Lay down a protective covering, such as a drop cloth or newspaper, to catch any debris or spills. Make sure you have easy access to all your tools and materials.
2. Clean the glass mirror: Use a glass cleaner and a soft cloth to clean the mirror surface thoroughly. This will remove any dirt, fingerprints, or smudges that could interfere with the etching process.
3. Secure the stencil or design: If you're using a stencil or pre-made design, secure it onto the mirror using painter's tape. Make sure it is centered and aligned properly.
4. Attach the appropriate attachment to your rotary tool: Depending on the design you're creating, choose the appropriate attachment for your rotary tool. For fine lines and details, use an engraving bit. For larger areas, use a grinding stone or sanding drum.
5. Start etching: Turn on your rotary tool and begin etching the design onto the glass mirror. Start with light pressure and gradually increase it as needed. Move the tool in a slow and steady motion, following the lines of the stencil or design.
6. Apply the etching cream: Once you have completed the etching process with the rotary tool, remove the stencil or design. Apply a thick layer of etching cream onto the etched areas using a soft cloth or sponge. Make sure to cover all the etched areas evenly.
7. Let it sit: Follow the instructions on the etching cream packaging for the recommended amount of time to let it sit on the glass mirror. This can vary depending on the brand and type of etching cream you're using.
8. Rinse off the etching cream: After the recommended time has passed, rinse off the etching cream under running water. Use a soft cloth or sponge to remove any excess cream and reveal your etched design.
9. Clean and dry the mirror: Once all the etching cream has been rinsed off, clean the mirror again with glass cleaner and a soft cloth. Make sure to dry it thoroughly before handling or displaying it.
Exploring Design Options: Tips and Ideas for Creating Stunning Etched Glass Mirrors
When it comes to designing your etched glass mirrors, the possibilities are endless. Here are some tips and ideas to help you create stunning designs:
1. Stenciling: Stencils are a great option for beginners or those who prefer a more precise and uniform design. You can find a wide variety of stencils online or at craft stores, ranging from simple geometric shapes to intricate floral patterns.
2. Freehand etching: If you're confident in your artistic skills, freehand etching allows for more creativity and spontaneity. You can create unique designs or patterns that reflect your personal style and taste.
3. Layering: Consider layering different designs or patterns to create depth and visual interest. For example, you can etch a border around the mirror and then add a central design or monogram.
4. Negative space: Instead of etching the design itself, you can etch the background around the design, leaving the design itself clear. This creates a striking contrast and adds a modern and minimalist touch to the mirror.
5. Custom designs: If you have a specific design or image in mind, you can create your own custom stencil or design using software or by hand. This allows for complete customization and ensures that your mirror is truly one-of-a-kind.
Troubleshooting Common Issues: Overcoming Challenges in Glass Mirror Etching
While glass mirror etching can be a rewarding and enjoyable process, it's not without its challenges. Here are some common issues that may arise during the etching process and how to overcome them:
1. Uneven etching: If your etched design appears uneven or patchy, it may be due to inconsistent pressure or movement of the rotary tool. Make sure to apply even pressure and move the tool in a slow and steady motion to achieve consistent results.
2. Bleeding or smudging: If the etching cream spreads beyond the intended areas or smudges the design, it may be due to applying too much cream or not removing it properly. Use a soft cloth or sponge to apply a thin and even layer of cream, and make sure to rinse it off thoroughly after the recommended time.
3. Scratches or marks: If you notice scratches or marks on the glass mirror after etching, it may be due to using an incorrect attachment or applying too much pressure with the rotary tool. Use a lighter touch and switch to a finer attachment if necessary.
4. Incomplete etching: If your etched design appears faint or incomplete, it may be due to not etching deep enough into the glass. Make sure to apply enough pressure with the rotary tool to remove a sufficient amount of glass and create a visible etching.
5. Safety concerns: Always prioritize safety when working with power tools and chemicals. Follow the manufacturer's instructions for using the rotary tool and etching cream, and wear appropriate safety equipment at all times.
Finishing Touches: Enhancing Your Etched Glass Mirrors with Paint or Stain
Once you have completed the etching process, you can enhance your designs further by adding paint or stain. This can help to make the etched designs stand out and add a pop of color to your glass mirrors. Here are some tips for achieving a professional and polished finish:
1. Choose the right type of paint or stain: Look for paints or stains that are specifically designed for use on glass surfaces. These are typically transparent or translucent and allow the etched designs to show through.
2. Apply the paint or stain carefully: Use a small brush or applicator to apply the paint or stain onto the etched areas. Take your time and work in small sections to ensure even coverage and avoid smudging or bleeding.
3. Remove excess paint or stain: After applying the paint or stain, use a soft cloth or sponge to remove any excess from the non-etched areas. This will help to create a clean and polished finish.
4. Let it dry: Follow the manufacturer's instructions for drying time. Make sure to let the paint or stain dry completely before handling or displaying the glass mirror.
Displaying Your Masterpieces: Creative Ways to Showcase Etched Glass Mirrors in Your Home
Once you have completed your etched glass mirrors, it's time to showcase them in your home. Here are some creative ways to display your masterpieces:
1. Wall art: Hang your etched glass mirrors on the wall as standalone pieces or as part of a gallery wall. You can mix and match different sizes and shapes to create a visually appealing display.
2. Tabletop decor: Place your etched glass mirrors on tabletops, shelves, or mantels as decorative accents. You can pair them with candles, vases, or other decorative objects to create a cohesive and stylish arrangement.
3. Bathroom vanity: Etched glass mirrors can add a touch of elegance to any bathroom vanity. Install them above the sink or on the walls to create a spa-like atmosphere.
4. Room dividers: If you have a large open space, you can use etched glass mirrors as room dividers. This not only adds privacy but also creates a stunning visual effect as the light passes through the etched designs.
5. Backsplash: Install etched glass mirrors as a backsplash in your kitchen or bathroom. This adds a unique and eye-catching element to the space and can be easily cleaned and maintained.
Safety Precautions: Protecting Yourself and Your Workspace While Using Rotary Tools
When working with rotary tools, it's important to prioritize safety to prevent accidents or injuries. Here are some safety precautions to follow:
1. Wear protective eyewear: Always wear safety glasses or goggles to protect your eyes from flying debris or glass particles.
2. Use gloves: Wear gloves to protect your hands from cuts or abrasions while handling the rotary tool or glass mirror.
3. Use a dust mask: When etching glass, fine particles may be released into the air. Wear a dust mask to prevent inhalation of these particles.
4. Work in a well-ventilated area: Etching cream can emit fumes that may be harmful if inhaled in large quantities. Make sure to work in a well-ventilated area or use a fan to circulate the air.
5. Keep your workspace organized: A cluttered workspace can increase the risk of accidents. Keep your tools and materials organized and clean up any spills or debris immediately.
6. Follow the manufacturer's instructions: Read and follow the manufacturer's instructions for using the rotary tool and etching cream. This will ensure that you are using the tools and materials correctly and safely.
In conclusion, glass mirror etching is a creative and rewarding DIY project that can elevate your home decor with a unique touch. Rotary tools are versatile and precise tools that are perfect for etching glass mirrors. By following the step-by-step guide and exploring different design options, you can create stunning etched glass mirrors that reflect your personal style and taste. Remember to prioritize safety by wearing protective gear and following safety precautions while using rotary tools. With a little practice and creativity, you can unleash your artistic potential and create beautiful etched glass mirrors that will be admired by all who see them.


Read the full article
#creativeprojects#DIYenthusiasts#DIYhomedecor#etchedglassmirrors#glasscrafting#glassetching#homeimprovement#interiordesign#personalizeddesigns#rotarytools
0 notes
Text
DIY Bottle Planters | DIY Planters Ideas | Ancient Crafting
Turn your bottles into plant homes! 🌱
♻️ Explore our easy DIY Bottle Planters - perfect for indoors or outdoors.
Add some greenery to your space in a fun and eco-friendly way! 🌿✨
Handmade with Love❤️

Order Now : DIY Planter Ideas
.
.
#homedecortransformation
#diyplanter
#bottleplanters
#homedecorindia
#diyenthusiast
#homedecorplanters
#bottleplnaters
#ancientcrafting
#diy planters#bottle planters#handmade bottle planters#bottle planter ideas#ceramic planters#planter collection#planter for sale#ancient crafting
0 notes
Video
Here is a little footage of us tearing the roof off of the vocal booth during the move to the new studio. That was a pretty serious night of work! . . . . . #mystudioflow #vocalbooth #diyvocalbooth #movablevocalbooth #recordingstudio #recordingstudiolife #floridastudio #floridarecordingstudio #studioconstruction #newstudio #downtownfortmyers #fortmyers #fortmyersrecordingstudio #capecoral #capecoma #diyaudio #diyacoustics #diyenthusiast #musicmaker #gogetter #vaynernation @teamgaryvee #musicmaker #musicstudio #musicproducer #musicmakers #studioconstruction #studiodesign (at EQ Recording And Multimedia)
#floridastudio#downtownfortmyers#musicproducer#fortmyersrecordingstudio#studioconstruction#musicmakers#capecoral#fortmyers#movablevocalbooth#diyacoustics#diyaudio#diyenthusiast#recordingstudiolife#diyvocalbooth#vaynernation#gogetter#musicstudio#vocalbooth#floridarecordingstudio#newstudio#musicmaker#recordingstudio#studiodesign#mystudioflow#capecoma
1 note
·
View note
Last Seen Blogs

roguepuppy
Roguepuppy

tuoi69hd
tuoi69hd

gearsfics
Fic space of the gears

travbaler
SEE THE NATURAL BEAUTY OF THE PHILIPPINES

wait-what-no-way
Writers Ink