#experiments with microcontrollers
Explore tagged Tumblr posts
Visit Tumblr Blog
Explore Tumblr blogs with no restrictions, modern design and the best experience.
Last Seen Tumblr Blogs


Fun Fact
Tumblr’s reach among the 26-to-35-year-olds in the US is 11%.
Text
Birdwatching got really popular in the early days of the Unpleasantness. However, now that the bosses are forcing us all back to the office, the birds don't have anyone to watch them. That's why I built an autonomous bird-observation robot. Its name is SparrowScope 9000, and I recommend not becoming too emotionally attached to it, because it is your competition.
There's a lot of obvious benefits to having a robotic birdwatcher. It can start up early in the morning and go to its charging dock late at night. It never makes a mistake identifying a bird. It won't get tired, cold, hungry, or develop pointless drama with "Uncle" Hudson Carl online over his fucking misdocumentation of Northern Cardinals. You can pop over to its little webpage and see what it spotted that day, and feel pretty good. It's like you're really there, even though you're stuck in an office building wondering if you have enough staples loaded in your stapler to get through the month, or if you should maybe talk to Jan in Requisitioning to get a fresh refill.
However, there are flaws. One of the big things is that the US military doesn't let regular people – civilians – have super-accurate GPS. They fuck with the data a little bit, so that you can't somehow threaten national security by knowing where you are. I didn't know this before I started on the project, and the bird sanctuary has a lot of elevated walkways ever since the flood. SparrowScope 9000 became more of a SoggyScope Wet-Thousand.
If a real technology company had assembled it, that would probably have been the end of the story. They'd have put in some total garbage like a modern microcontroller, maybe some parts made in this century. Not me. This thing is half old pinball machine parts and the other half Aibos. It kept trucking right down the river, and I never saw it again. I do get updates from it periodically as it spots a new bird, but my work schedule forbids me from taking a few days off to drive to the next county over and see if I can figure out which swamp it's floated into this time.
Even with this small disaster, I'm pretty proud of what I accomplished. Our avian friends get looked at by a creepy robot covered in seaweed, and we can all experience what it was like for one brief, shining moment in which we still had hobbies.
420 notes
·
View notes
Text
For future reference (my own and others), if your TI SilverLink USB cable stops working and starts showing up as "TUSB3410 Boot Device" or similar under device manager (AKA this issue on TI's help page), this is how you can fix it:
Download the TUSB3x10 EEPROM Burner. This is a Windows-only program, but to my knowledge will work on basically any windows machine from XP on -- so long as it's got USB ports. No clue if it'll work in a VM. (You might want to consult this user's manual.)
Download the SilverLink firmware. I got it from here, and compiled it from their de-compilation. It's just a standard 'make' to build. The output file you're looking for is called "ti_graph_link_silver.eep".
Rename "ti_graph_link_silver.eep" to "ti_graph_link_silver.bin".
Open the TUSB3x10 EEPROM Burner, click on the options dropdown and click "Show the 'Program Full Binary Image' button". (page 7 of the manual).
Select the entry under "Computer" labeled "TUSB3410 EEPROM Burner Instance (1.00)".
Set EEPROM size to "64Kb".
Set "File Path" to point to "ti_graph_link_silver.bin". (The renamed .eep, not the original .bin)
I don't know if the VID, PID, Manufacturer string, Product string and Serial # need to be set manually or not with a 'Full Binary Image' burn. Just to be safe, I set VID to 0451, PID to e001, Manufacturer to "Texas Instruments", Product to "TI-GRAPH LINK USB", and checked "Not Serialized"*.
Click the "Program Full Binary Image" button (yellow triangle with the exclamation point), and proceed with the write.
Unplug and re-plug your cable, and it should show up as a SilverLink again!
Additional notes:
The reason that this happens is because the SilverLink cable (revision b, at least) is based on the TUSB3410 microcontroller. That microcontroller's boot process involves checking for an I2C EEPROM containing program code. If it finds that EEPROM and its contents are properly formatted, it'll copy that code into internal RAM and start executing it. If it can't find the EEPROM, or its contents aren't properly formatted, it'll fall back to looking for boot code over USB. Thus: "TUSB3410 Boot Device". Your cable has, in essence, forgotten who it is and and is begging for you to give it a purpose.
The default page-write buffer size (32 bytes) and I2C bus speed (400 KHz) in the burner app are already correct, so no need to change them.
*I don't remember exactly what the Manufacturer string, Product string, or serial number fields were set to pre-corruption. Likewise, no idea about the advanced descriptor options. If someone wants to send the output of lsusb -v -s [whatever their silverlink's bus/id numbers are], I'd really appreciate it!
You might be able to skip the header rigamarole by taking the ti_graph_link_silver.bin file directly ("directly coming from the compiler") -- but I again I don't know exactly what information is in the .eep file and what isn't. Are the PID and VID encoded somewhere in there? I peeked with a hex editor but have no clue. If someone has hardware lying around they're willing to experiment with/potentially brick, I'd love to hear your results!
If you mess up and accidentally forget to do a "Full Binary Image" write, or otherwise brick the firmware, you can force the TUSB3410 to fall back to USB boot mode by opening the plastic shell around the PCB (one Torx screw under the sticker, then just normal plastic tabs) and shorting the right-bottom (Vss) and right-top (SDA), or right-bottom (Vss) and center right-top (SCL) pins of the EEPROM (the chip labeled "24LC64") as you plug it into the USB port. You may need multiple attempts. This works because it temporarily convinces the TUSB3410 that the EEPROM is missing/corrupt, and thus it decides to fall back into USB boot mode -- until you reset it. It might be better to do this with a ~1k resistor instead of a jumper wire, but IDK I'm not an electrical engineer. All I know is that shorting Vss and SDA worked for me. Again, would love feedback.
No clue what causes the corruption in the first place, or how long this fix will last. It might be because the EEPROM's write protect pin is set to "write enable"? It could also just be degrading hardware, for all I know, so no idea how long the fix will last. All I do know is that everything seems nominal right now (immediately after performing this procedure).
10 notes
·
View notes
Text
Zolatron: RTC, SRAM and SD board
After my fun with real-time clock chips (here and here) I figured it was time to add one to the Zolatron 64. But there was a catch. The previous experiments had involved microcontrollers with built-in SPI capabilities. That was something the Zolatron sadly lacked. Luckily, someone else has already come up with a solution. The 65SPI project by Daryl Rictor is a very easy way to add an SPI…

View On WordPress
16 notes
·
View notes
Text
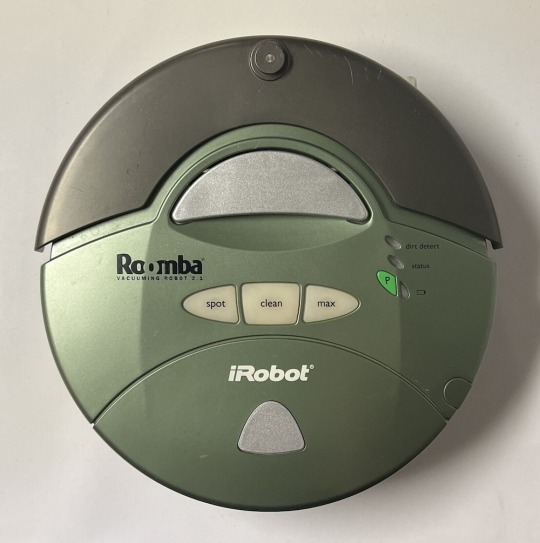


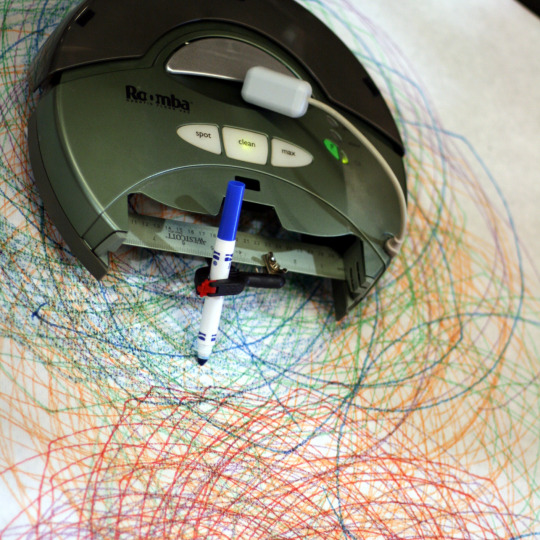

Roomba Sage (models 4105, 4110, 416) iRobot, Bedford, MA (2004). Sage is a member of the Discovery, or 400 series. Where the Roomba Red charges in seven hours, the Roomba Sage charges fully in just three. Roomba manufactured after October 2005, including those in the 400 series, include a Mini-DIN connector supporting the Roomba Serial Command Interface (SCI), later renamed the Roomba Open Interface (ROI). This interface, beloved by hackers everywhere, allows you to connect the Roomba to a small microcontroller like the Arduino, to monitor Roomba's sensors and override its normal behaviour. "Since the release of the SCI/ROI specification, there has been an explosion of new Roomba hacks. The Roomba hacking community has blossomed to include not just professional hardware engineers, but people from all experience levels, from normal people looking to play with their Roomba in a new way to academics experimenting with low-cost robotics. The ROI turns the Roomba into a true robotics platform." – Hacking Roomba, by Tod E. Kurt.
52 notes
·
View notes
Note
What languages do you speak?
Let's see... I started out learning Visual Basic. Later on I tried out Commodore 64 BASIC and Casio BASIC, I have more experience with the latter. I started learning Minecraft commands way back when command blocks were first added too. Probably before that too, but that's when I really started getting into it. Then a tiny bit of JavaScript, but I've forgotten most of that by now. (I already knew some HTML but I'm only counting Turing-complete languages in this list) Then I learned Python, and that's what I was most comfortable with for years. Later I tried some microcontrollers so I messed around with Arduino's language a bit (not sure if it's C or C++, it doesn't matter as I'll mention both later anyway) though I wouldn't say I actually speak that one. I know every command in Brainfuck, but I'm not gonna count that either as I have no clue how to write anything useful in it. During my college years I was taught C and PIC assembly, the latter was definitely interesting so I also taught myself a bit of 6502 assembly. At around this time I was fixing up some really old gamemaker projects of mine, and moved from the drag-and-drop blocks to the actual GameMaker Language. Then during the lockdowns I found the leaked script code for Psychonauts so I looked into Lua. (I first tried it at around the Minecraft time for the ComputerCraft mod, but only now did I really understand the language. In fact, Lua is what my own 3DS game was written in!) I learned C# for my job and that's by far what I'm most comfortable in now. If HLSL counts as Turing-complete (I think it does) I'm counting it here, also for job reasons. I'm also looking into C++ again for Nintendo homebrew but I just can't seem to get my development environment set up properly. And I think that brings us to the present, I can't wait to see what other languages I'll learn in the future!
2 notes
·
View notes
Text
Why Python Will Thrive: Future Trends and Applications
Python has already made a significant impact in the tech world, and its trajectory for the future is even more promising. From its simplicity and versatility to its widespread use in cutting-edge technologies, Python is expected to continue thriving in the coming years. Considering the kind support of Python Course in Chennai Whatever your level of experience or reason for switching from another programming language, learning Python gets much more fun.

Let's explore why Python will remain at the forefront of software development and what trends and applications will contribute to its ongoing dominance.
1. Artificial Intelligence and Machine Learning
Python is already the go-to language for AI and machine learning, and its role in these fields is set to expand further. With powerful libraries such as TensorFlow, PyTorch, and Scikit-learn, Python simplifies the development of machine learning models and artificial intelligence applications. As more industries integrate AI for automation, personalization, and predictive analytics, Python will remain a core language for developing intelligent systems.
2. Data Science and Big Data
Data science is one of the most significant areas where Python has excelled. Libraries like Pandas, NumPy, and Matplotlib make data manipulation and visualization simple and efficient. As companies and organizations continue to generate and analyze vast amounts of data, Python’s ability to process, clean, and visualize big data will only become more critical. Additionally, Python’s compatibility with big data platforms like Hadoop and Apache Spark ensures that it will remain a major player in data-driven decision-making.
3. Web Development
Python’s role in web development is growing thanks to frameworks like Django and Flask, which provide robust, scalable, and secure solutions for building web applications. With the increasing demand for interactive websites and APIs, Python is well-positioned to continue serving as a top language for backend development. Its integration with cloud computing platforms will also fuel its growth in building modern web applications that scale efficiently.
4. Automation and Scripting
Automation is another area where Python excels. Developers use Python to automate tasks ranging from system administration to testing and deployment. With the rise of DevOps practices and the growing demand for workflow automation, Python’s role in streamlining repetitive processes will continue to grow. Businesses across industries will rely on Python to boost productivity, reduce errors, and optimize performance. With the aid of Best Online Training & Placement Programs, which offer comprehensive training and job placement support to anyone looking to develop their talents, it’s easier to learn this tool and advance your career.

5. Cybersecurity and Ethical Hacking
With cyber threats becoming increasingly sophisticated, cybersecurity is a critical concern for businesses worldwide. Python is widely used for penetration testing, vulnerability scanning, and threat detection due to its simplicity and effectiveness. Libraries like Scapy and PyCrypto make Python an excellent choice for ethical hacking and security professionals. As the need for robust cybersecurity measures increases, Python’s role in safeguarding digital assets will continue to thrive.
6. Internet of Things (IoT)
Python’s compatibility with microcontrollers and embedded systems makes it a strong contender in the growing field of IoT. Frameworks like MicroPython and CircuitPython enable developers to build IoT applications efficiently, whether for home automation, smart cities, or industrial systems. As the number of connected devices continues to rise, Python will remain a dominant language for creating scalable and reliable IoT solutions.
7. Cloud Computing and Serverless Architectures
The rise of cloud computing and serverless architectures has created new opportunities for Python. Cloud platforms like AWS, Google Cloud, and Microsoft Azure all support Python, allowing developers to build scalable and cost-efficient applications. With its flexibility and integration capabilities, Python is perfectly suited for developing cloud-based applications, serverless functions, and microservices.
8. Gaming and Virtual Reality
Python has long been used in game development, with libraries such as Pygame offering simple tools to create 2D games. However, as gaming and virtual reality (VR) technologies evolve, Python’s role in developing immersive experiences will grow. The language’s ease of use and integration with game engines will make it a popular choice for building gaming platforms, VR applications, and simulations.
9. Expanding Job Market
As Python’s applications continue to grow, so does the demand for Python developers. From startups to tech giants like Google, Facebook, and Amazon, companies across industries are seeking professionals who are proficient in Python. The increasing adoption of Python in various fields, including data science, AI, cybersecurity, and cloud computing, ensures a thriving job market for Python developers in the future.
10. Constant Evolution and Community Support
Python’s open-source nature means that it’s constantly evolving with new libraries, frameworks, and features. Its vibrant community of developers contributes to its growth and ensures that Python stays relevant to emerging trends and technologies. Whether it’s a new tool for AI or a breakthrough in web development, Python’s community is always working to improve the language and make it more efficient for developers.
Conclusion
Python’s future is bright, with its presence continuing to grow in AI, data science, automation, web development, and beyond. As industries become increasingly data-driven, automated, and connected, Python’s simplicity, versatility, and strong community support make it an ideal choice for developers. Whether you are a beginner looking to start your coding journey or a seasoned professional exploring new career opportunities, learning Python offers long-term benefits in a rapidly evolving tech landscape.
#python course#python training#python#technology#tech#python programming#python online training#python online course#python online classes#python certification
2 notes
·
View notes
Text
Essential Skills Every Electronics Engineer Should Master
Electronics engineering is an exciting and constantly evolving field. With new technologies emerging every day, the need for skilled professionals has never been greater. If you're pursuing a B Tech in Electrical and Electronics Engineering or exploring options at B Tech colleges for Electrical and Electronics, it's crucial to know which skills can set you apart in this competitive domain.
Let’s dive into the essential skills every aspiring electronics engineer should master.
Strong Foundation in Circuit Design
Circuit design is at the heart of electronics engineering. Understanding how to create, analyze, and optimize circuits is a must-have skill. Whether you’re designing a simple resistor network or a complex integrated circuit, mastering tools like SPICE and PCB design software can make your designs efficient and innovative.
Programming Proficiency
Electronics and programming often go hand in hand. Languages like Python, C, and MATLAB are widely used to simulate electronic systems, automate processes, and even build firmware for devices. Engineers proficient in programming can troubleshoot problems effectively and add versatility to their skill set.
Knowledge of Embedded Systems
Embedded systems are everywhere—from your smartphone to your washing machine. As an electronics engineer, understanding microcontrollers, sensors, and actuators is crucial for creating devices that work seamlessly in our daily lives. Hands-on experience with platforms like Arduino and Raspberry Pi can be a great way to start.
Problem-Solving and Analytical Thinking
Electronics engineers often face unique challenges, such as debugging faulty circuits or improving system performance. Strong problem-solving and analytical thinking skills help them identify issues quickly and find effective solutions. To cultivate these skills, tackle real-world projects during your coursework or internships.
Familiarity with Power Systems
As the world moves toward renewable energy and smart grids, knowledge of power systems is becoming increasingly important. Engineers in this field should understand how electrical power is generated, transmitted, and distributed and how to design energy-efficient systems.
Effective Communication Skills
Electronics engineering often involves working in teams with other engineers, designers, or clients. Communicating your ideas clearly—whether through reports, presentations, or technical drawings—is just as important as your technical skills. Strong communication ensures that your brilliant ideas come to life effectively.
Adaptability to New Technologies
Technology evolves rapidly, and staying updated is essential for electronics engineers. Whether you’re learning about IoT (Internet of Things), AI integration, or 5G communication, an adaptable mindset will ensure you remain relevant and capable of tackling emerging challenges.
Hands-On Experience
While theoretical knowledge is important, nothing beats practical experience. Participating in labs, internships, or personal projects gives you the opportunity to apply what you’ve learned and develop confidence in your skills. Employers often value hands-on experience as much as your academic achievements.
Preparing for Success in Electronics Engineering
Pursuing a B Tech in Electrical and Electronics Engineering is the first step toward mastering these skills. The best B Tech colleges for Electrical and Electronics not only provide a strong academic foundation but also opportunities for practical learning and industry exposure. By focusing on the skills mentioned above, you can position yourself as a competent and innovative engineer ready to tackle real-world challenges.
4 notes
·
View notes
Text
Gear Up! A Beginner's Guide to Learning Robotics
Hey Tech Enthusiasts!
Are you fascinated by robots and want to dive into the world of robotics? Learning robotics can seem daunting, but with the right resources and mindset, you can get started!
Step 1: Understand the Basics
- Familiarize yourself with programming languages like C++, Python, or Java
- Learn about electronics, circuitry, and microcontrollers (e.g., Arduino, Raspberry Pi)
- Get a grasp on mechanical concepts (e.g., kinematics, dynamics)
Step 2: Choose Your Path
- Robotics kits (e.g., Lego Mindstorms, Makeblock)
- Online courses (e.g., Coursera, edX, Udemy)
- Books (e.g., "Robotics, Vision & Control" by Peter Corke)
- Join online communities (e.g., Reddit's r/robotics, r/learnprogramming)
*Step 3: Practice & Build*
- Start with simple projects (e.g., line follower, robotic arm)
- Experiment with sensors, actuators, and control systems
- Join robotics competitions or hackathons
Step 4: Network & Learn from Others
- Attend robotics conferences, meetups, or workshops
- Collaborate with fellow robotics enthusiasts
- Participate in online forums
Resources:
- Code.org's Robotics Course
- Robotics Academy
- Robot Operating System (ROS)
Inspiration:
- Boston Dynamics' robots
- NASA's Robotics Alliance Project
- Robot Wars
Conclusion:
Learning robotics takes time, patience, and dedication. Stay curious, persistent, and creative!
What's your favorite robotics project or resource? Share in the comments!
[Reblog if you're interested in robotics!]
3 notes
·
View notes
Text
Top 10 Projects for BE Electrical Engineering Students
Embarking on a Bachelor of Engineering (BE) in Electrical Engineering opens up a world of innovation and creativity. One of the best ways to apply theoretical knowledge is through practical projects that not only enhance your skills but also boost your resume. Here are the top 10 projects for BE Electrical Engineering students, designed to challenge you and showcase your talents.
1. Smart Home Automation System
Overview: Develop a system that allows users to control home appliances remotely using a smartphone app or voice commands.
Key Components:
Microcontroller (Arduino or Raspberry Pi)
Wi-Fi or Bluetooth module
Sensors (temperature, motion, light)
Learning Outcome: Understand IoT concepts and the integration of hardware and software.
2. Solar Power Generation System
Overview: Create a solar panel system that converts sunlight into electricity, suitable for powering small devices or homes.
Key Components:
Solar panels
Charge controller
Inverter
Battery storage
Learning Outcome: Gain insights into renewable energy sources and energy conversion.
3. Automated Irrigation System
Overview: Design a system that automates the watering of plants based on soil moisture levels.
Key Components:
Soil moisture sensor
Water pump
Microcontroller
Relay module
Learning Outcome: Learn about sensor integration and automation in agriculture.
4. Electric Vehicle Charging Station
Overview: Build a prototype for an electric vehicle (EV) charging station that monitors and controls charging processes.
Key Components:
Power electronics (rectifier, inverter)
Microcontroller
LCD display
Safety features (fuses, circuit breakers)
Learning Outcome: Explore the fundamentals of electric vehicles and charging technologies.
5. Gesture-Controlled Robot
Overview: Develop a robot that can be controlled using hand gestures via sensors or cameras.
Key Components:
Microcontroller (Arduino)
Motors and wheels
Ultrasonic or infrared sensors
Gesture recognition module
Learning Outcome: Understand robotics, programming, and sensor technologies.
6. Power Factor Correction System
Overview: Create a system that improves the power factor in electrical circuits to enhance efficiency.
Key Components:
Capacitors
Microcontroller
Current and voltage sensors
Relay for switching
Learning Outcome: Learn about power quality and its importance in electrical systems.
7. Wireless Power Transmission
Overview: Experiment with transmitting power wirelessly over short distances.
Key Components:
Resonant inductive coupling setup
Power source
Load (LED, small motor)
Learning Outcome: Explore concepts of electromagnetic fields and energy transfer.
8. Voice-Controlled Home Assistant
Overview: Build a home assistant that can respond to voice commands to control devices or provide information.
Key Components:
Microcontroller (Raspberry Pi preferred)
Voice recognition module
Wi-Fi module
Connected devices (lights, speakers)
Learning Outcome: Gain experience in natural language processing and AI integration.
9. Traffic Light Control System Using Microcontroller
Overview: Design a smart traffic light system that optimizes traffic flow based on real-time data.
Key Components:
Microcontroller (Arduino)
LED lights
Sensors (for vehicle detection)
Timer module
Learning Outcome: Understand traffic management systems and embedded programming.
10. Data Acquisition System
Overview: Develop a system that collects and analyzes data from various sensors (temperature, humidity, etc.).
Key Components:
Microcontroller (Arduino or Raspberry Pi)
Multiple sensors
Data logging software
Display (LCD or web interface)
Learning Outcome: Learn about data collection, processing, and analysis.
Conclusion
Engaging in these projects not only enhances your practical skills but also reinforces your theoretical knowledge. Whether you aim to develop sustainable technologies, innovate in robotics, or contribute to smart cities, these projects can serve as stepping stones in your journey as an electrical engineer. Choose a project that aligns with your interests, and don’t hesitate to seek guidance from your professors and peers. Happy engineering!
5 notes
·
View notes
Text
Arduino Mega 2560 Starter Learning Kit
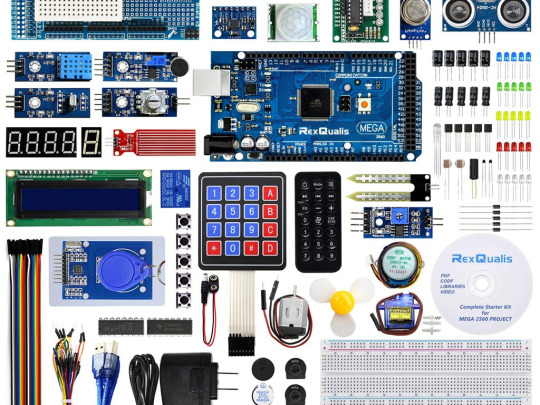
The AINOW Arduino Mega 2560 Starter Learning Kit is an ideal choice for those interested in microcontrollers and electronic components. It includes instructional videos and a guidebook to make learning easy. The tutorials cover basic coding using Arduino software and operating electronic devices. Previous experience is not necessary as the kit teaches coding and working with electronics from the ground up. And, there’s no need for soldering skills – simply plug and play for a fun learning experience.
The main idea is that repetition should be avoided when rephrasing the following paragraph with the same tone.
A fantastic set suitable for all levels, from novice to advanced.
These components have versatile applications and are built for durability.
The kit contains a diverse range of materials to create a multitude of Endless Projects.
An excellent method to gain knowledge on sensors of both analog and digital varieties.
The characteristic is a prominent aspect that sets it apart and makes it stand out.
This kit is ideal for both novices and seasoned professionals in this particular area.
Our selection includes both Analog and Digital Sensors, perfect for those looking to make their own DIY projects.
Discovering the world of microcontrollers is a breeze with Arduino Mega 2560.
Our resources include a User Guide, Codes/Sample Programs & Reference books/Video Tutorials, and other valuable materials.
3 notes
·
View notes
Text
How to Transform Your Smartphone with a DIY Smart Ink Screen Phone Case

Click here: https://amzn.to/45r4SVe
Imagine a phone case that does more than just protect your device. A case that turns your phone into a canvas, allowing you to customize and update your display whenever you desire. Welcome to the world of Smart Ink Screen phone cases. Here’s how you can create your very own DIY Smart Ink Screen phone case and take your phone to the next level.
The Revolutionary Concept of Smart Ink Screens
Smart Ink technology, also known as E Ink, is transforming how we interact with our devices. Unlike traditional LCD or OLED screens, E Ink screens consume less power, are easily readable in sunlight, and provide a paper-like reading experience. This makes them ideal for a multitude of applications, including phone cases.
Why DIY?
Why settle for a mundane phone case when you can craft something extraordinary? A DIY Smart Ink Screen phone case not only adds a touch of personal flair but also serves as a functional extension of your device. Whether you want to display notifications, a to-do list, or your favorite artwork, the possibilities are endless.
What You Need
Creating your own Smart Ink Screen phone case is simpler than you might think. Here’s what you’ll need:
1. A Smart Ink Display Module: Choose a screen size that fits your phone model.
2. Microcontroller: To control the display and connect it to your phone.
3. Power Source: A small, rechargeable battery pack.
4. Phone Case: Preferably one that’s easy to modify.
5. Tools: Screwdrivers, soldering iron, and adhesive.
Step-by-Step Guide
Choose the Right Smart Ink Screen
Start by selecting a Smart Ink display module that is compatible with your phone’s dimensions. Look for one with good resolution and contrast.
2. Prepare the Phone Case
Carefully measure and cut out a section of the phone case where the Smart Ink screen will be placed. Ensure the cut-out is precise to avoid any gaps or misalignment.
3. Assemble the Components
Solder the microcontroller to the Smart Ink screen following the manufacturer’s instructions. Connect the power source to the microcontroller. Test the setup by loading some basic images or text to ensure everything works correctly.
4. Secure the Screen
Attach the Smart Ink screen to the phone case using a strong adhesive. Make sure it is firmly in place but not so tight that it risks damage.
5. Final Integration
Place the assembled components into the phone case. Tuck the wires neatly to avoid any obstruction or bulkiness. Double-check all connections and the screen’s visibility.
6. Personalize Your Display
Once everything is set up, you can start personalizing your Smart Ink screen. Use dedicated apps to update the display with images, notifications, or even your favorite quotes. The low power consumption of E Ink means your phone case display will last for days on a single charge.
The Benefits
• Customization: Change your display whenever you like.
• Battery Efficiency: Smart Ink screens use minimal power.
• Readability: Perfect for outdoor use with clear visibility in sunlight.
• Innovation: Stand out with a unique, functional phone case.
Make It Yours
Creating a DIY Smart Ink Screen phone case is more than just a fun project; it’s a way to express your individuality and innovation. With a bit of creativity and some basic tools, you can transform your ordinary phone case into something extraordinary.
Ready to start your DIY journey? Enhance your smartphone experience today. Click here to find all the tools and components you need to create your own Smart Ink Screen phone case.
By embracing this cutting-edge technology and combining it with your personal touch, you’ll not only protect your phone but also turn it into a dynamic and interactive accessory. Dive into the world of DIY and let your phone case speak volumes about who you are.
Link https://amzn.to/45r4SVe
2 notes
·
View notes
Text
Become an Embedded Systems Expert with Top-Rated Training at Technoscripts
The Embedded Training Program at Technoscripts is a comprehensive and immersive course designed to equip individuals with the essential skills and knowledge required to excel in the field of embedded systems. The program is 100% job-oriented, focusing on practical learning and real-world applications. It is available in both online and offline batches, making it accessible to students from all over the world.
The program is taught by industry experts with extensive experience in the field of embedded systems. They are passionate about sharing their knowledge with the next generation of embedded engineers and are committed to providing students with the best possible learning experience. The program covers a wide range of topics, including microcontrollers, digital signal processing, operating systems, and more.
One of the key features of the Embedded Training Program at Technoscripts is its emphasis on interview preparation. As part of the program, students will undergo intensive interview preparation sessions aimed at helping them land jobs in the embedded systems industry upon completion of the program. These sessions will include mock interviews, resume building workshops, and tips on how to effectively communicate technical concepts during interviews.
Throughout the program, students will participate in live projects, allowing them to apply their knowledge and gain valuable experience. These projects will expose students to real-world scenarios and enable them to demonstrate their problem-solving abilities. The program also includes regular assessments and feedback sessions, ensuring that students stay on track and make progress throughout the course.
In summary, the Embedded Training Program at Technoscripts is an exceptional opportunity for anyone looking to advance their career in the embedded systems industry. With a focus on practical learning and real-world applications, this program will provide students with the skills and knowledge needed to succeed in the rapidly evolving embedded systems industry. Its emphasis on interview preparation ensures that students are well-equipped to secure a job in the field upon completion of the program. So if you're ready to take your career to the next level, enroll in the Embedded Training Program at Technoscripts today!

#marketing#automotiveembeddedtestingcourse#automotiveembeddedsystemscourse#automotiveembeddedinstitute#automotiveembeddedcourse#python#machine learning#accounting#automotiveembeddedclasses#linux
2 notes
·
View notes
Text
The Universal Serial Bus is often not universal...
So there is this problem you often run into when doing development. You come up with a solution. You research the solution, and find only tiny amounts of people talking about it, and/or they seem to say many different things and disagree. Most of the time, that is for 2 reasons 1: it is a very novel solution, so no one have tried it much, and everyone who have, has made very custom versions of it. 2: There are variables that makes it impossible to do it in one single way. I needed a rechargeable battery system to power my robot. These can get... VERY complicated, and pre-made solutions can quickly be expensive and you might end up with batteries catching fire, or destroying the batteries so they can never be used again. You need protections on them, but which kind depends on a bunch of things. I know electronics, but I am mainly a software guy, and I know when I do not know enough about electronics to do it myself. This being such a case. So, I came up with the idea to use powerbanks. One for each steppermotor, and one for the microcontroller(so the noise fromt he motors could not cause issues).If I use ones that can output enough amperage, they should just work and they are cheap. They are meant to be used by normal costumers, so have all the protection needed, and are quite idiot-proof(Which is a very handy thing when you are an idiot, like me) so should be easy to use. But I could not find much info about doing this... and I did not realize I was looking at reason 2. Basically, BECAUSE powerbanks are idiotproof, they do not want to discharge themselves unless there is a real device at the end of the USB cable. So if they cannot detect one, they turn off after about a second. How do they determine if there is a real device? Depends on the power bank.... No really, there is NO standard way to do it, as far as I can tell. And it does not depend on the power bank MODEL. I have 2 identical power banks, bought at the same time, and they do NOT behave the same. Which means that when I connected the powerbanks to supply my system, they (SOMETIMES) did not supply anything. Some check how much current is being drawn, which can be faked with a resistor wasting some power. 500mA was being quoted a lot, but that is more of a "That is probably enough to get it going". Others check for impedance(Basically, also resistance, but from frequency dependent sources). Those can be "faked" by having a coil or a device that acts like one to the faking resistor. I wanted a tiny 5 volt fan to cool the stepper motor drivers anyway, so I had one power bank also power that. That ensured that it actually stayed on (But if I used the other, (identical!) power bank it just turned off anyway). The other one could be connected up directly. If I used the powerbanks lower amperage socket. If I used the high amperage one, it just turned off. So now it works... I have 2 powerbanks for the motors, each with painters tape marking which powerbank and socket to use for what. Took me a week longer than I had hoped to figure all this out and do all the experiments. Sometimes, things that should be simple are just headaches.
7 notes
·
View notes
Text
Ignite Minds: The Power of STEM Robotics in Education
In today's technology-driven world, STEM robotics has emerged as a dynamic and engaging educational tool. Integrating STEM in robotics classrooms encourages creativity, critical thinking, and real-world problem-solving. At Technobotics, STEM robotics classes and robotics courses bring these benefits to life, making STEM education more exciting, relevant, and accessible for learners of all ages.

Why STEM Robotics Matters
The term STEM robotics combines science, technology, engineering, and mathematics with the hands-on construction of robots. This blend helps students:
Apply theoretical knowledge to tangible projects
Develop essential skills like coding, electronics, and mechanical design
Foster creativity and collaboration through team challenges
Prepare for future careers in engineering, AI, and automation
By integrating STEM in robotics, educators create an interactive learning experience that directly aligns with real-world industries. This is why STEM robotics classes are gaining popularity—and why parents and educators are more interested in robotics STEM education than ever before.
Robotics Courses by Technobotics
Technobotics specializes in equipping learners with the tools and knowledge to thrive in the world of STEM in robotics. Their structured robotics courses include:
Introductory Programs: Basic electronics, programming, and mechanical builds
Intermediate Tracks: Sensor integration, logic control, and robotics challenges
Advanced Workshops: AI-based programming, IoT-enabled robots, and competition training
This progressive approach ensures that whether a student is new to STEM robotics or ready for advanced robotics STEM education, they find the right course.
Benefits Students Gain
1. Strong STEM Foundations
By actively participating in STEM robotics, students solidify their understanding of scientific and technical concepts. They move from passive learning to active innovation.
2. Technological Literacy
Working with microcontrollers, sensors, and coding software builds confidence in modern technology—a skill increasingly required in today's job market.
3. Critical Soft Skills
Teamwork, patience, and communication are all naturally reinforced during robotics group projects, preparing students for future academic and professional environments.
4. Early Career Inspiration
Engaging with robotics in a STEM setting can spark a passion for careers in engineering, software development, or research in robotics. These courses can even lead learners toward career paths in tech.
5. Academic & Competitive Success
Students often perform better in science and math through robotics—plus, they gain confidence to participate in robotics competitions, which further enhance learning and motivation.
Choosing the Right Path: Factors to Consider
When exploring robotics STEM education, consider these points:
Curriculum Structure: Programs should offer progressive levels, from beginner to advanced, based on students' development.
Expert Instruction: Quality educators can tailor learning to individual needs and inspire curiosity.
Hands-on Experience: Look for courses that emphasize actual robot building and practical coding.
Technobotics fits these benchmarks, offering structured robotics courses that guide learners from basic understanding to innovative project execution.
Preparing for a Future in Robotics
With technology advancing rapidly, robotics courses give students a competitive edge. Skills learned in STEM robotics—problem-solving, coding, design thinking—are relevant in industries like manufacturing, healthcare, and even entertainment. By starting early, young learners gain a head start in a future filled with technological possibilities.
Your Next Step Toward Innovation
Take action today to bring STEM robotics into your learning environment:
For Parents: Enroll your child in a local robotics STEM course or club.
For Educators: Integrate robotics kits and modules into your curriculum or after-school offerings.
For Students: Start with beginner robotics and progress toward advanced robotics in STEM education programs.
By embracing robotics, you're not just teaching children—it's inspiring tomorrow's thinkers, creators, and problem-solvers.
Conclusion
STEM in robotics education isn't just a trend—it's a significant shift toward more interactive and relevant learning. Through Technobotics' thoughtfully designed robotics courses, learners gain confidence, foundational knowledge, and passion for innovation. As STEM and robotics continue to shape our future, equipping students today ensures a smarter, more capable generation ready for tomorrow's challenges.
Let's empower the next generation through STEM robotics—where science meets imagination and learning truly comes alive.
#STEMRobotics#RoboticsEducation#STEMLearning#FutureEngineers#RoboticsForKids#TechEducation#LearnToCode#RoboticsCourses#Technobotics
0 notes
Text
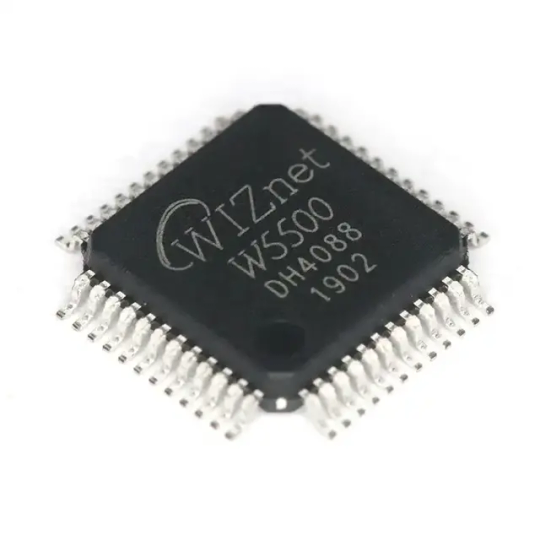
Introduction of Wiznet W5500 The Wiznet W5500 is an advanced Ethernet module designed specifically for embedded systems. This powerful device provides an easy-to-use interface, enabling seamless connectivity to the internet. If you are looking to enhance your projects with robust networking capabilities, look no further than the network chip. Whether for IoT applications or other types of communication, this module is engineered to deliver reliability and performance. MOQ of the Network MCU Wiznet W5500 As seen online, online MOQ is 100pcs,more quantity welcome chat us to inquire the price. The W5500 features a built-in TCP/IP stack, allowing for easy integration into various applications. This highly versatile module supports multiple sockets for simultaneous connections, making it ideal for a wide range of networking tasks. With its support for both IPv4 and IPv6 protocols, the network chip ensures that your devices can communicate effectively in any networking environment. Additionally, the integrated hardware-based processing saves CPU load, allowing your microcontroller to focus on other tasks. Interested with much more integrated circuits online price,view here. Simple Integration and Compatibility Designed for convenience, the Wiznet W5500 is compatible with various microcontrollers and development platforms. Its user-friendly API and comprehensive documentation simplify the integration process, enabling developers to start using the module quickly. Whether you are an experienced developer or new to embedded systems, the network ic offers an accessible pathway to add Ethernet capabilities to your projects. With the network chip, you can elevate your embedded systems with excellent network performance and connectivity. Gain access to real-time data exchange, remote access, and control for your devices. Choose the W5500 for your next project and experience the difference in networking efficiency and ease of use. If you interested with w5500 ethernet module,view here to know more our company business. Read the full article
0 notes
Text
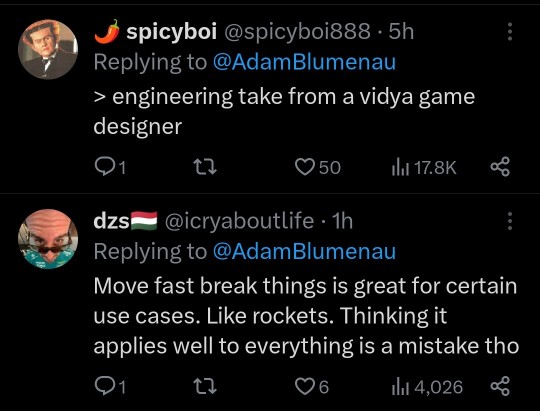
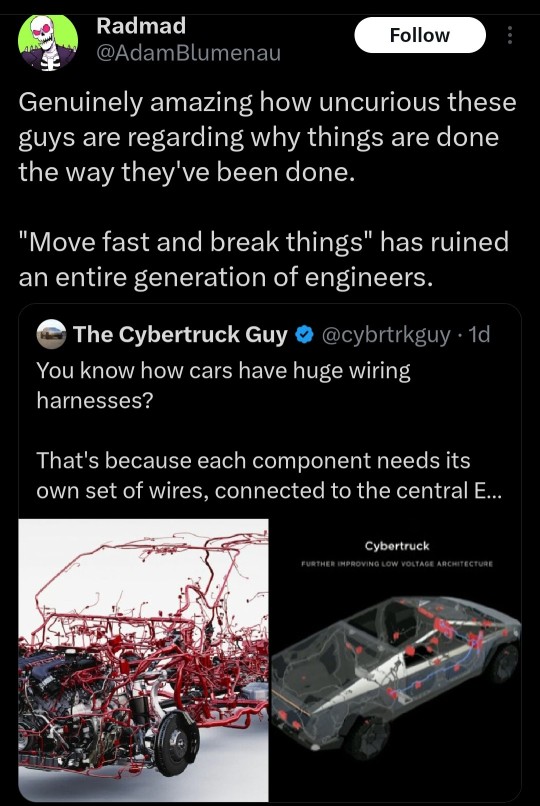
I was referencing the things put forth by OP, in order:
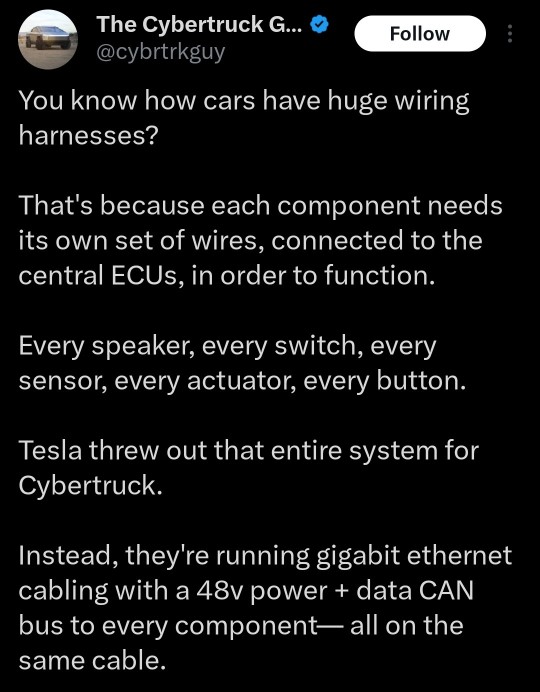
Huge wiring harnesses simplified: Cybertruck Guy and Radmad are both wrong, for different reasons.
Current industry standards don't have separate wires for each individual switch or control, either. They group several switches, lights, etc. that are nearby together, run them into a microcontroller, and put that controller on a vehicle bus. Currently that's usually a CAN (redundant, fault-tolerant) or LIN (neither, but much simpler) bus. This drastically simplifies wiring harnesses.
The main thing Tesla has done is change the DC voltage for that bus from 12 V to 48 V nominal. Since power is voltage times current, and wire thickness is dependent on current, this cuts about half the copper mass out of the power lines in the harness. The other (data) lines were already using smaller wires. The industry has been flirting with a 48V bus for around two decades by now; Tesla just went and did it and dealt with the engineering problems when they popped up. And this is a rare case where "they're a bunch of Silicon Valley nerds" may have helped: datacenters have been using 48V DC for in-rack power delivery for decades, so they had more familiarity with it than Detroit.
They've also adopted single-pair Ethernet (1000base-T1) for the high-speed entertainment data links. This technology has been in the industry since late 2016. It's usually integrated directly onto the custom ICs in ECUs. I remember another thread like this with a tweet where someone was complaining about the fragility of RJ-45 plugs and how that's disqualifying for a vehicle, and he's right, but single-pair Ethernet does not use those jacks; it's integrated into wiring harnesses with everything else.
Astronauts laded on the moon with altitude markers hand etched on the window: That was a backup system dramatized by the Apollo 13 movie. They had an inertial navigation system, like aircraft do, as their primary navigation.
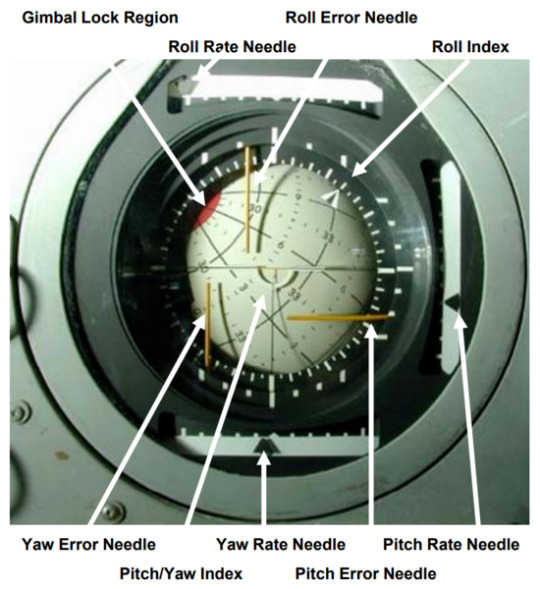
Oh, and it's attitude, not altitude. Very different concepts that folks should not mix up.
Can't get a rocket off the pad without blowing up: Neither could NASA their first few years. Meanwhile SpaceX had 98 successful orbital flights last year, and they can reuse their boosters (the record is 18 times). But that's way off topic.
Tesla Model Y broke: It's not news when non-Teslas lose power steering, apparently. And I've had cars that took many more than three appointments to fix. We can throw around anecdata all day.
Series wiring like Christmas lights: Come on, you've got no basis for that.
It's like the Titan sub: Sigh. Really?
Okay, now to the RDN link:
the vehicle’s angular design and stainless steel body could pose danger to other road users
Absolutely true. Also true of almost every luxury pickup truck on the market. One example:

I'm all for figuring out some kind of regulatory regime to rein this in. Or maybe a modification of liability rules and increased insurance coverage minimums.
“The big problem there is if they really make the skin of the vehicle very stiff by using thick stainless steel, then when people hit their heads on it, it’s going to cause more damage to them,”
True, but it's not that thick or stiff; the speaker was speculating. Other have pointed out that "we shot it with a Tommy gun" is a lousy test because the bullets are rather low velocity. If you watch the side impact crash test, you can see the side panels visibly flexing.
And right after that, an IIHS rep said, “IIHS hasn’t evaluated the Cybertruck. The discussions we’ve seen so far appear to be based on speculation. I would add that our experience with Tesla is that they aim for the highest safety ratings in IIHS tests. We have no reason to expect anything different with the Cybertruck.”
The biggest problem with Teslas, from insurance companies' perspectives, has been that airbag-deployed collisions tend to result in totaling the vehicle more often than in other cars. Occupant safety, on the other hand, seems to be better than average. We've seen people walk away from their Model 3s after they got T-boned by speeding pickups (60-ish MPH in a 30 zone). We know this from accident reconstruction and camera data.
There's a linked video in the article comparing the Tesla Cybertruck collision to a Dodge Ram 1500. There are several others like it on YouTube (I saw one that had six trucks in it, all synced up). They all have the same flaw: they're comparing different crash types. The Cybertruck is doing a full frontal crash, where you drive the vehicle into a solid, immovable wall, while the others are moderate overlap crashes, where the hood goes over the obstacle and only the left 1/3 of the vehicle is obstructed, so the engine can deflect to the sides instead of going into the firewall and then the passenger compartment. The Cybertruck, of course, does not have a large engine in that space; it's mostly cargo storage. And we can clearly see it crumpling and the front wheel moving outward instead of back into the passenger compartment, like practically all cars do now.
(Some folks like to point out how the rear wheel breaks away, too: this is expected because it's a steering wheel, since the Cybertruck has four-wheel steering, and uses the same suspension technology as the front, instead of connecting the rear wheels more directly to the rear axle like most vehicles. Not completely directly, though, like the Chevy Corvair's swing axles. In any case, kinetic energy breaking the rear wheels off like that is energy that isn't compromising the cabin.)
The article addresses the "lack" of crumple zones:
Samer Hamdar, a George Washington University auto safety professor, told Reuters that while a lack of crumple zones concerned him, there could be other factors that accounted for it. “There might be a possibility of shock-absorbent mechanism that will limit the fact that you have a limited crumple zone,” Hamdar said.
I'm not going to speculate about crumple zones beyond the above ("the cargo area collapses, taking some energy with it; we have to see if that's enough to call a crumple zone, but it's not nothing") until someone tears one down and documents it. But crumple zones aren't the only means of keeping kinetic energy out of the passengers.
The rest of the article goes back to concerns about pedestrian safety, which seem to be the main substantive concern, and is noted at the end of this video:
youtube
And again, pedestrian safety is an industry-wide problem. We need another Ralph Nader, but demonizing Tesla alone (god it's so easy, Elon is such an asshole) only gives cover to the rest of the industry. And none of the tweets in OP's post spoke of this.


42K notes
·
View notes