#failed to authenticate on smtp server with username
Explore tagged Tumblr posts
Visit Tumblr Blog
Explore Tumblr blogs with no restrictions, modern design and the best experience.
Last Seen Tumblr Blogs


Fun Fact
BuzzFeed published a report claiming that Tumblr was utilized as a distribution channel for Russian agents to influence American voting habits during the 2016 presidential election in Feb 2018.
Text
A Complete Guide to BT Login Email: How to Access and Troubleshoot Your Account
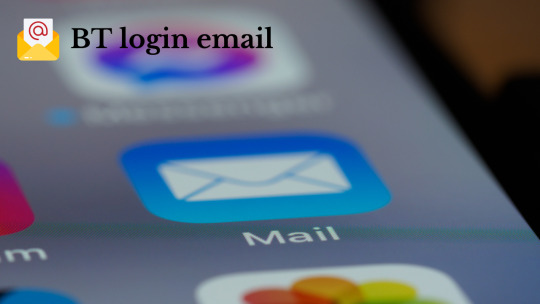
BT login email, a reliable email service provided by British Telecommunications, offers its users seamless access to manage their communications. Whether you use BT login email as your primary email provider or simply rely on it for specific services, understanding how to log in securely and manage your account is crucial. This comprehensive guide will take you through the process of logging in to BT login email, troubleshooting common login issues, and ensuring your account remains safe and secure.
Why BT Login Email is Essential
BT login email offers a wide array of features for both personal and business use, including organizing your emails, cloud storage, contacts, and calendar management. It’s integral to staying connected, whether you’re handling important business communications or managing your personal messages. Understanding how to log in to your BT Email account is key to ensuring that you can access these features at all times. Moreover, BT Email is equipped with security features to help protect your sensitive data.
How to Log In to BT Email
Step-by-Step Process to Access Your BT Login Email
Visit the BT Email Login Page: To begin, open your preferred web browser and type in https://mail.btinternet.com or simply visit BT’s official website at www.bt.com and click the Sign In button.
Enter Your BT Email Address: On the login page, input your full BT Email address, including the domain (e.g., [email protected]), and click Continue.
Input Your Password: Next, type in your password associated with your BT Email account. If you’ve forgotten your password, simply click Forgot Password? and follow the prompts to reset it.
Click on ‘Sign In’: After entering your password, click Sign In to access your inbox and other features associated with your BT Email account.
Troubleshooting Common BT Login Email Issues
Incorrect Password or Username
Solution: Double-check your username and password for typos. If you can’t remember your password, use the Forgot Password? link to reset it.
Account Locked After Multiple Failed Login Attempts
Solution: After several failed login attempts, BT may lock your account for security reasons. Wait for 15-30 minutes and try again. If you still can’t log in, contact BT support for assistance.
Two-Factor Authentication (2FA) Problems
Solution: If you’re using 2FA and can’t receive your verification code, ensure your phone number is up-to-date. Alternatively, use backup codes if available or contact BT support for help.
Browser Cache Issues
Solution: Clear your browser’s cache and cookies or try logging in using a different browser or device to avoid issues with loading the login page.
Account Suspended or Disabled
Solution: If your account is suspended, you’ll need to check for any notifications from BT about the suspension. If the issue persists, contact BT customer support to resolve it.
Improving Security for Your BT Login Email
To protect your BT Email account and sensitive data, it’s important to enhance the security of your login process:
Use a Strong Password: Avoid using easily guessable passwords. Combine uppercase, lowercase, numbers, and special characters for a secure password.
Enable Two-Factor Authentication (2FA): Turn on two-factor authentication for an added layer of security. This requires an additional verification step, such as a code sent to your phone or authentication app.
Stay Vigilant Against Phishing: Be cautious of phishing scams that attempt to steal your login credentials. Never click on suspicious links or share your password with anyone.
Setting Up BT Email on Other Devices
You can also set up your BT Email on third-party email clients such as Outlook, Apple Mail, or mobile email apps. Here’s how:
Open your email client and go to the account settings.
Enter your BT Email credentials (your BT Email address and password).
Enter the IMAP and SMTP server settings: IMAP server: imap.mail.btinternet.com SMTP server: smtp.mail.btinternet.com IMAP Port: 993 (SSL encryption) SMTP Port: 465 (SSL encryption)
Save the settings and verify that your email client successfully syncs with your BT Email account.
FAQs
Q1: What should I do if I forgot my BT Email password? Click on the Forgot Password? link on the login page and follow the prompts to reset it via your registered recovery email or phone number.
Q2: Can I access BT Email on my mobile device? Yes, you can access BT Email on your smartphone by using the BT Mail app or setting it up in your mobile email client with the correct IMAP/SMTP settings.
Q3: How do I recover my BT Email account? If you’re having trouble logging in, use the Forgot Password? link or contact BT customer support for assistance with account recovery.
Q4: How do I improve the security of my BT Email account? Enable two-factor authentication (2FA), use a strong password, and remain cautious of phishing attempts to enhance the security of your BT Email account.
Conclusion
Logging in to your BT Email account is a straightforward process, but being aware of potential issues and how to resolve them is important for smooth access. By following the step-by-step instructions above and implementing best security practices, you can ensure that your BT Email account is both accessible and secure. Additionally, setting up your BT Email on third-party email clients can help streamline your communication across various platforms. If you face any login difficulties, don't hesitate to contact BT support for further assistance.
0 notes
Text
peer certificate cn did not match expected laravel
peer certificate cn did not match expected laravel
Hello, buddy I hope you are doing well, in today’s article we will see how we can resolve the issue peer certificate did not match Stream Socket Enable Crypto Error in laravel. If you are reading this article it means you are trying to send an email from your live server but you are unable to do so due to this CN did not match error. Definitely, you go to the StackOverflow and some others sites…
View On WordPress
#connection failed error 2 stream socket enable crypto peer certificate#failed to authenticate on smtp server with username#laravel gmail integration#laravel mail configuration env#laravel mailtrap failed to authenticate on smtp server with username#pdo peer certificate did not match expected#peer certificate cn did not match expected cn#peer certificate cn= did not match expected cn=#stream socket enable crypto laravel#stream socket enable crypto peer certificate#stream_socket_enable_crypto laravel#stream_socket_enable_crypto(): peer certificate
0 notes
Text
How To Rectify SMTP Relaying Denied Problem?
If you haven’t set up your email account correctly and try to send an email from it, then there is a chance for the SMTP relaying denied error to occur. Usually, when you send an email, first, it is verified by your mail server. i.e., the sender’s mail server.

Step 1:
Unknown user
Step 2:
The sender email account is not configured correctly.
Step 3:
The sender’s email message fails to satisfy the Spam filtering policy of the mail server.
Relaying Denied Error On SMTP
Step 1:
Click your Outlook server’s mail logs.
Step 2:
When prompted, enter the correct username and passwords in the given fields.
Step 3:
After entering your Outlook account credentials correctly, verify if the SMTP relaying denied problem is solved.
Step 4:
If not, enable the SMTP authentication settings option on your Outlook application by following the instructions given below.
Visit us for more details.
0 notes
Text
Outlook reported error 0x800ccc0f (solved) | Gmailinformation

The Outlook email is mainly used for business purposes. If any error occurs then it can your work for the entire day. It is a technology that means the error is common then one of the common errors is Outlook error 0x800ccc0f.
Outlook error 0x800ccc0f generally occurs when you try to send any SMTP based emails but the Outlook cannot connect to the user’s mail server.
When this error occurs you will see a pop-up message saying “your server has unexpectedly terminated the connection” or “connection to the server was interrupted’ along with this code.
The complete error code message looks like:
Your server has unexpectedly terminated the connection. Possible cause for this includes server problems, network problems, or a long period of inactivity. Account: mail.domain.com, server: ‘mail.domain.com’, Protocol: POP3, Server Response: ‘+OK’, Port: 110, Secure (SSL): NO, Error Number 0x800ccc0f
Solutions to fix Outlook reported error 0x800ccc0f:- Here are many quick and easy solutions provided to fix Outlook error 0x800ccc0f. Follow the below-given steps:
Settings of Outlook email:-
If Outlook email settings are wrong then it Creates the error Outlook error 0x800ccc0f. Always make sure with username or password, wrong SMTP host, SMTP ports, authentication, etc could badly affect the entire email delivery.
In most cases, ISPs block the common SMTP port 25 to reduce spam. Therefore, in this situation, users cannot communicate to the mail server on port 25 and email delivery fails.
So, set up the mail server on an alternate port like 587 to override ISP port blocks and also ask the customer to change the SMTP settings from 25 o 587.
Also, check the Outlook email basic settings and make sure it is correct. Also, check for server timeout settings in the Outlook email.
Clear suspicious email or emails with faulty attachment, if any available. Also, delete the unsent messages which are stuck in the outbox.
Server Firewall restrictions:-
Outlook error 0x800ccc0f generally occurs if the server firewall blocks the customer IP range or IP address which is based on the abnormal behavior.
So, for removing this restriction verify hosting engineers whether the user’s IP address is blocked in the server firewall. You can try this command to check the IP block on cPanel servers:
Csf –g xx.xx.xx.xx
If the list shows to you, then remove it and restore the email connectivity immediately. Now, we recognize the cause of the block and update the users.
For instance removals of IP block on cPanel server use the following command: Csf –dr xx.xx.xx.xx By doing this activity you can easily fix the error.
0 notes
Text
メールサーバーからメールが送信できないトラブル-OP25Bの回避-
ー前置きー
長いこと放置していたメールサーバーの問題にメールが送信できないというのがある。
実は運用して5年くらい気づかなかったが半年くらい前に気づいて色々調べた結果op25b問題にぶち当たった。
OP25B問題に関しては以下を参照
OP25Bとは|「分かりそう」で「分からない」でも「分かった」気になれるIT用語辞典(https://wa3.i-3-i.info/word14981.html)
要するにプロバイダが設定している迷惑メールの対策である。
自宅ではBB.exciteを使用しているが、OP25Bがかかっているためポート25番はふさがっているしリレーホストは月額300円くらいで取得できる有料メールアドレスを取得しないと利用できない模様。
結局のところ一度もメールの送信が成功していないのでOP25B問題なのか設定の記載ミスなのか、原因の切り分けができていないため金銭を投入するのは早計と判断しフリーのメールアドレスからリレーホストを設定し対応にあたった。
ー対応内容(postfix側の設定変更)ー
リレーホスト先を設定するために以下を参考にする。
OP25Bを回避するため Postfixのリレー先を gmailに設定する方法(https://www.walbrix.co.jp/blog/2014-02-gentoo-postfix-relay-gmail.html)
[Postfix]メールのリレー設定あれこれ(http://park1.wakwak.com/~ima/centos_postfix_relay0001.html)
PostfixでYahooメールにリレーする方法(https://kagasu.hatenablog.com/entry/2019/02/10/084418)
gmail、yahooともにフリーのアドレスは取得しているが色々紐付いて厄介なので新たにアドレスを取得。まずは使いなれたyahooで対応を試みる。
上記のサイトに記載の通りmain.cfに以下を追記する。
smtp_sasl_auth_enable = yes
smtp_sasl_password_maps = hash:/etc/postfix/password_maps
smtp_sasl_security_options = noanonymous
次にpassword_mapsファイルを作成し
[smtpサーバー名]:587 ログインアドレス:パスワード
を記載しpostmapコマンドでデータベースを作成
# postmap password_maps
(transport_mapsの記載とtransport ファイルの作成を行うと受信に対しても後述のエラーが影響するため対応は省略)
が、失敗。
ー対応内容(ログの確認からpostqueueを確認)ー
メールが届かないのでmaillogかpostfixのログを確認するとステータスがdeferred つまり一時的に配送できなかったのでリトライ中となっている。
ログもしくは配送できなかったキュー自体のエラーメッセージを以下のコマンドで確認すると
# cat /var/log/mail.log
(私の環境ではmaillogは上記にあったが環境によっては別の場所、別の名前の場合があります)
# postqueue -p
コマンドは以下のサイトを参考にしました。
Postfixで未配信メールの確認(https://open-groove.net/postfix/check-deferred-mail/)
Postfixのキューが詰まった時の対処(https://qiita.com/yudai09/items/88a0a70a214c63fb4817)
SASL authentication failed; cannot authenticate to server smtp.mail.yahoo.co.jp[182.22.109.120]: no mechanism available
上記のエラーが確認できた。直訳すると
「SASL認証が失敗しました。サーバーの認証ができませんsmtp.mail.yahoo.co.jp [182.22.109.120]: 利用可能なメカニズムなし」
とのこと。ログインアドレスとパスワードを記載したpassword_mapsファイルにでたらめを記載してデータベースを再作成しても同じエラーが出たので認証のための要素が足りていないかそもそもできない模様。
エラーメッセージに対して調べてはみたが有力な情報は見つからなかったのでgmailをリレーホストとにして再挑戦。
gmailの場合、SMTP認証に追加してTLS認証も必要なためmain.cfに以下を追記する。
smtp_use_tls = yes
smtp_sasl_mechanism_filter = plain
smtp_tls_CApath = /etc/ssl/certs/ca-certificates.crt
ー対応内容(gmailの���定)ー
追記後にメールを再送するとエラーメッセージが以下に変わる。
SASL authentication failed; server smtp.gmail.com[74.125.203.109] said: 535-5.7.8 Username and Password not accepted. Learn more at?535 5.7.8 https://support.google.com/mail/?p=BadCredentials b17sm10685190pfb.18 - gsmtp
直訳すると
「SASL認証が失敗しました。サーバーsmtp.gmail.com [74.125.203.109]は言った:535-5.7.8ユーザー名とパスワードは受け入れられません」
ユーザーとパスワードが受け入れらないと記載があるが要は接続が受け入れられない模様
以下のサイトを参考にしgmail側の設定を変更して安全性の低いアプリを許可する。
PostfixからGmailへリレーする方法と受信したメールがSOFTFAILになる対策(https://mseeeen.msen.jp/how-to-relay-from-postfix-to-gmail/)
ちなみに設定後にメールを送信すると、smtpへログインするアカウントの受信フォルダに外部からの接続に関するセキュリティの連絡が届くので「アクティビティの確認」で「心当たりがある」と回答して接続ができる状態にしておく必要がある。
アクティビティの確認もDDNSではなくグローバルIPで判断されているのでIPが変わるごとにアクティビティの再確認が必要になるので気が向いてたらgmailにログインして受信フォルダをチェックしたい。
ー対応内容(送信元の変更)ー
ここまで来てメーラーからメールを送信し相手にメールが届くところまで完了。
が、届いたメールを見ると送信元がsmtpサーバーにログインしたアカウント、つまりgmailになっている。
リレーホストの設定を記載したサイトにはその辺りの記述がなかったので調べ直すとgmail側の仕様で、gmailのsmtpサーバーを使用すると送信元がgmailに書き換えられる模様。
当たり前だが受信したメールでそのまま返信するとgmailに届くので自分のアドレスに帰ってこない。自分でサーバーを立てる意味がない。
ちょっと調べて以下のサイトのGmailの設定の項目に対応方法が記載してあったのでgmail側の設定を変更する。
Postfixのリレー設定 -Gmail-(http://kulog.org/pc/software/k2071/)
gmailの設定項目から「アカウントとインポート」タブを選択
ページ内の他のメールアドレスを追加から自宅のメールアドレスを入力
登録したいアドレス宛に承認コードが届くのコード入力し登録
最後に登録したアドレスをデフォルトに設定すると送信元が自分のアドレスになる。
設定変更後に送信テストを行う。
ー対応内容(検証結果と残課題)ー
全ての設定を完了し携帯と別のフリーメールに送信すると受信を確認し、受信メールから返信をすると自宅のメールサーバーに帰ってくることを確認した。
セキュリティ的に不備は多そうだが下記のサイトから不正中継のチェックを行い一応チェックは問題がないとしたところでテスト完了とした。
第三者不正中継チェックサイトメモ 2019(https://www.yuulinux.tokyo/2299/)
open relay checker(http://check.jippg.org/)
(余談だがこのメールサーバーを立ち上げたころに比べて不正中継のチェックをするサイトは随分と減ってしまった。当時保存していたサイトは軒並み閉鎖しており今回のも新たに探してきた)
今回の対応の内容は少なく、リンク先の記載以上のことはしなかったが時間はかかってしまった。
使い慣れていないgmailを忌避してyahooメールにこだわったためエラーへの調査と対応に時間をかけていた。yahooメールを早々に諦めてgmailで試せばもっと早く対応できた。
以下の問題点が残っているがとりあえず自宅にメールサーバーを設置し受信と送信ができるところまでは漕ぎつけた。
gmailでデフォルトの送信アドレスを自分のものに変更したが別のアドレスを作成し、作成したアドレスから送信しても今回設定したアドレスになると思われる。
→現状、他のアドレスから送信をする予定はないので必要になったら有料メールアドレスを取得してリレーホストの変更をすることで対応を考えている。
SMTP認証の設定を変更したためか不明ではあるが、現在メーラーから自宅の送信(SMTP)サーバーへの接続に対して保護した状態(SSL/TLS)での接続ができなくなった。
→要調査と修正が必要。現在は平文での接続なのでセキュリティ的に不安が残る
上記の認証に関連しているか不明だがgmailの送信元設定は25ポートに接続している。
→かなり怖い。元々587番か465番にTLSかSSLで接続するのだが全てエラーが出てしまったので25番にパスワードなしで接続している。
ー後書きー
全体的にセキュリティ周りがザルな状態でとりあえず動いた状態なので少しずつ直していきたい。
ただ、サーバーに使用している本体(ノートパソコン)が12年前のものなのでそろそろ別のPCに移行をしたいとも考えている。
移行先のPCは用意できているのでOSの設定とアプリ周りを導入する作業がある。この作業と合わせて設定を修正したいとも考えている。
とりあえず一つ大きな山場は超えたがまだまだやることはたくさんある。
願わくばこの記事が導入に困った人の一助になることと自分への備忘録になることを祈って。
0 notes
Text
How to configure your Outlook GMail account
Why should I use Outlook for my Gmail address?
Although the web based system of Google Gmail is one of the most feature rich webmail platforms, you may want to handle your Gmail account & messages from a client email software program such as Microsoft Outlook. For example, if you are using other email addresses and not just the Gmail account, most likely you would want to read and handle all your email accounts from the same interface & program.
Configuring the Outook Gmail settings
.You can configure Outlook to handle your Gmail account as a POP3 or as an IMAP account. Depending on your choice, you have to enable the related account option in your Gmail account (Gmail Settings -> Forwarding and POP/IMAP).
Below, we will detail how to setup Microsoft Office Outlook 2000 to 2010 to send, receive and store email messages for a Gmail address. Before getting started, please make sure you know your Gmail email address and your Gmail password.
Start Outlook: from the main Outlook window, go to Tools -> Email Accounts.
On the Outlook popup window, select to "Add a new e-mail account" and click on Next.
On the server type step, select POP3 or IMAP (depending on your needs) for the Outlook email account type, then click on Next. There is no need to select the IMAP type, because the Gmail web based account will anyway keep a copy of all emails, just like an IMAP account would do.
On the next screen, you will have to specify your Outlook Gmail settings, such as your Gmail username and password, Gmail server addresses, Gmail server ports and Outlook Gmail display name.
On the User Information section, enter your Name (it can be anything, but remember this is going to be the name/text that people will see when you will send them an email via your Outlook Gmail account) and your Gmail email address.
On the Server Information section, enter the Google Gmail servers: POP Gmail servers for Outlook: - Incoming mail server: pop.gmail.com - Outgoing mail server: smtp.gmail.com. IMAP Gmail server for Outlook: - Incoming mail server: imap.gmail.com - Outgoing mail server: smtp.gmail.com. As an alternative, you may setup any other outgoing mail server that you have access to, such as your ISP's SMTP server or your own hosted outgoing server. However, if you setup a 3rd party outgoing mail server, you will not have access to sent emails via your web based Gmail account panel.
On the Logon Information section, enter your Gmail User Name (which is the same as your Gmail email address) and your Gmail password. Tick the box "Remember password" in order to make Outlook to store the Gmail password, so it will not ask you about it every time when Outlook will send/receive emails for the Gmail account.
Click on the "More Settings" button and go to the "Advanced" window tab. If you use Gmail as a POP Outlook account: - On the "Incoming server (POP3)" field, enter 995 and mark the box "This server requires an encrypted connection (SSL)"; - On the "Outgoing server (SMTP)" field, enter 465 and mark the box "This server requires an encrypted connection (SSL)". If you use Gmail as an IMAP Outlook account: - On the "Incoming server (IMAP)" field, enter 993 and mark the box "This server requires an encrypted connection (SSL)"; - On the "Outgoing server (SMTP)" field, enter 587 and mark the box "This server requires an encrypted connection (TLS)". For both POP and IMAP, you also have to enable the option "My outgoing mail server requires authentication" from the Outgoing Server tab. You can also change the server timeouts period: this defines the time interval for which Outlook will wait to establish a Gmail connection, before triggering a connection error. The slower your Internet connection is, the greater period you should put. The "Delivery" options are not important for an Outlook Gmail account: no matter what you would change here, Gmail will always keep a copy of each email on the Gmail server. When you are done setting up your Outlook Gmail advanced settings, click on OK to return to the Outlook Gmail account window. To verify your Outlook Gmail setup, click on the "Test Account Settings" button: this will make Outlook to attempt to login to your Gmail account and to send & receive an Outlook test email. If the test will succeed, you will notice the test email in your Outlook Inbox folder. If the test fails, Outlook will prompt you with the error messages - most likely, you didn't setup the correct server settings or the Gmail password is wrong. Facebook Account Recovery Without Email , Facebook Account Recovery, Facebook Password reset without email, how to change facbook password
0 notes
Text
Using Gmail with OAUTH2 in Linux and on an ESP8266
One of the tasks I dread is configuring a web server to send email correctly via Gmail. The simplest way of sending emails is SMTP, and there are a number of scripts out there that provide a simple method to send mail that way with a minimum of configuration. There’s even PHP mail(), although it’s less than reliable.
Out of the box, Gmail requires OAUTH2 for authentication and to share user data, which has the major advantage of not requiring that you store your username and password in the application that requires access to your account. While they have an ‘allow less secure apps’ option that allows SMTP access for legacy products like Microsoft Outlook, it just doesn’t seem like the right way forward. Google documents how to interact with their API with OAUTH2, so why not just use that instead of putting my username and password in plaintext in a bunch of prototypes and test scripts?
Those are the thoughts that run through my head every time this comes up for a project, and each time I’ve somehow forgotten the steps to do it, also forgotten to write it down, and end up wasting quite a bit of time due to my own foolishness. As penance, I’ve decided to document the process and share it with all of you, and then also make it work on an ESP8266 board running the Arduino development environment.
Before we continue, now would be a good time for a non-technical refresher on how OAUTH works. The main differences between OAUTH and OAUTH2 are that the latter requires HTTPS, and the access tokens that allow an application to use specific services in a user account have an expiry.
To use Gmail with OAUTH2, we will need to start with five things: An application registered in the Google APIs, its client ID and client secret, a computer running LAMP (a by-the-hour VPS works just fine here), and a domain name that points to it.
Registering an application with Google API is easy. Go to the Google API console, log in, create a new project, and enter it. Enable the Gmail API; it should be suggested on the front page.
With the project created and the Gmail API enabled, the dashboard should look something like this
Then click on ‘credentials’ on the sidebar, create credentials, and finally ‘create OAUTH Client ID’. Before you can continue, you need to create a consent screen. The only entry you really need to fill out at this time is ‘Product Name Shown to Users’.
After saving that form, select ‘Web Application’ as your application type. Note the field called ‘Authorized redirect URIs’, we’ll return to it later. It’s important that it be correctly set for us to be able to receive a refresh token later on in this process.
For now, just press ‘Create’. A pop-up will display containing your Client ID and Client secret. You’ll need them soon, so best to copy/paste them into a local file on your computer for now.
Next, we will use those two pieces of data to request an access token and refresh token. We may as well accomplish two things at the same time here by installing the popular PHP email sender called PHPMailer on our web server. It includes a tool to request an OAUTH2 access/refresh token as well as being easily capable of sending a quick test email. To install it, we’ll use the Composer PHP dependency management tool:
$sudo apt-get install composer
Then we should navigate to our web-accessible directory, in my case /var/www/html, and install a few PHP scripts. Note that this should not be done as root, so create another user if needed and give them access to the directory:
$composer require phpmailer/phpmailer $composer require league/oauth2-client $composer require league/oauth2-google
Now enter the directory vendor/phpmailer/phpmailer. There will be a script called get_oauth_token.php. Move this script up three directories into the directory you just ran the ‘composer’ commands from. The location of this script as seen from the web needs to be entered into the ‘Authorized redirect URIs’ field of the Google API that we saw earlier. In this case it would have been https://mydomain.com/get_oauth_token.php. Public IP addresses will not work, this is why a domain name pointed to your web server is a requirement.
Now, open get_oauth_token.php in a text editor and paste in your Client ID and Client Secret where needed. Don’t try to run the script locally, it will fail. Open up a web browser on any computer, and navigate to the URL you entered as the ‘Authorized redirect URI’. Then select Google from the list of email services – at this point if it worked you will be asked to log in and then authorize the unverified application, under ‘Advanced’ under the warning prompt, at which point you will finally receive a refresh token. If you only want an access token for some reason you’ll have to edit the script to echo it back.
If that didn’t work, there are two common reasons: a wrong redirect URI or the script cannot find its dependencies. In the former case, the error message from Google will tell you the script URL as it sees it, and you can use that information to update the redirect URI in the Google API Console to fix the issue. For the latter, check your apache error log, probably located in /var/log/apache2/error.log, to see what dependency is not being found. You might see something like this:
PHP Warning: require(vendor/autoload.php): failed to open stream: No such file or directory in /var/www/html/mydomain/get_oauth_token.php on line 59, referer: http://mydomain.com/get_oauth_token.php
If you have received your refresh token, congratulations: the painful part is over. You can just go to the PHPMailer Github page and fill out their OAUTH2 example (gmail_xoauth.phps), and it ought to just work. If all you needed to do is send mail from a project on your VPS, you’re more or less ready to move on to more interesting parts of your project:
$email = '[email protected]'; $clientId = 'RANDOMCHARS-----duv1n2.apps.googleusercontent.com'; $clientSecret = 'RANDOMCHARS-----lGyjPcRtvP'; //Obtained by configuring and running get_oauth_token.php //after setting up an app in Google Developer Console. $refreshToken = 'RANDOMCHARS-----DWxgOvPT003r-yFUV49TQYag7_Aod7y0';
Remember to clean up any unnecessary scripts that contain your refresh token and other sensitive data before continuing.
ESP8266: We Don’t Need No Stinking Servers
Now what if we wanted to use these tokens to send email directly from project on a Raspberry Pi without needing a server in the middle? It turns out that once we have the client ID, client secret, and refresh token, we no longer require the server and domain name we’ve been using so far, and a mail-sending application, e.g. PHPMailer, can be installed on a computer anywhere with Internet access as long as it is configured with those values.
Things get a little more complicated when we try to do this on an ESP8266. OAUTH2 requires that we use SSL, and access tokens regularly expire and need to be refreshed. Thankfully, [jalmeroth] generously wrote a proof-of-concept and published it on GitHub. If provided with an access token, it can access your Gmail account and use it to send an email. It can also directly update/get data from Google Sheets, but I didn’t test this. However, if the access token was expired, it couldn’t detect that, although it did include working code to actually request a new token, but not parse it out and use it.
In an attempt to add to the functionality of that proof of concept, I forked the project and made a few changes. First, I changed to order of operations in the code to make it check if the current access token was valid before doing anything else. Second, Google API was responding ‘400 Bad Request’ if the access token was invalid, and everything but ‘200 OK’ responses were being filtered out by the code. Finally, I wrote a couple of JSON parsers that check the reason for the ‘400 Bad Request’ and extract and use the access token returned by Google API when a new one is requested.
It works, but it’s hardly reliable – not surprising considering I’ve never really used the Arduino platform before. Notably, the SHA1 fingerprint for Google API fails often. Checking from my local machine, the SHA1 fingerprint varies between two signatures there too. It would be fairly easy to check for either of them, or just keep trying, but I’d rather understand what’s going on first. (Is it just a CDN or something else?) Or perhaps I should rewrite the whole application in Lua where I’m more competent.
A fun little application built on the above was to place a button on my office that sends an email to my phone. I don’t want people to contact me at that email address frivolously, but do want to know immediately if someone is waiting outside my office. The big red button is for normal requests, but urgent requests require lockpicking. If it’s urgent it better also be interesting.
Finally, did you know that Hackaday provides an API for accessing hackaday.io? It uses the simpler OAUTH (not OAUTH2) authentication, so should be more straightforward than the above to implement on the ESP8266. Have any of you used it?
Filed under: Arduino Hacks, google hacks, how-to, Original Art
Using Gmail with OAUTH2 in Linux and on an ESP8266 was originally published on PlanetArduino
0 notes