#finally got a halfway decent screenshot of these two that reflects their current looks!!
Text


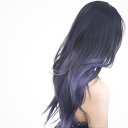
eckhart and emerleigh finally got to moonrise towers and got Extremely Necessary Evil Disguises for the infiltration. no, neither of them remember how easily they were able to infiltrate the goblin camp without said disguises.

lae'zel just doesn't appreciate good fashion sense. gods.
#bg3#art#bg3 tav#eckhart and emerleigh#bg3 eckhart#bg3 emerleigh#bg3 art#tav#tav twins#bg3 marcolak twins#god these two are so stupid it physically hurts me#finally got a halfway decent screenshot of these two that reflects their current looks!!#please god dont ask me what mods exactly i have here because i cannot tell you for the life of me what every single one is#also the screenshot is an edit so they can be in the same picture. obvs i just took 2 screenshots and stitched em together haphazardly
47 notes
·
View notes
Text
Mini art tutorial!
Hi! I’m currently drawing some characters of mine, so I want to show you guys how my art process runs! This tutorial works in both FireAlpaca and Paint Tool Sai, and I’ll explain how it translates. The post will be long, so click on below!
For those who just want to see the finished product, here you are!

Alright! So, first, I try to think of some references I already have for the character. For these, I’m translating images done on bases into images of my own. Furthermore, these images go from animal to human!

So right now, this is her ‘reference.’ Mostly. Base credits to Starwuff on DeviantART, by the way! That links directly to the base
Now, how... how do you translate the above image into a HUMAN?
It’s simple, really. Even if you’re... uh... bad at people.
Step one, think about the character. What are they like? Is there a pose that suits them? Can you not think of one, but you can think of a character who acts or looks like them? Yes?
Great!
Look up references for THAT character. Wiki, HD images, etc.
For Lena, I go to @kingdomheartsinhd and look for images of Kairi. That search turns up this image:

(you can find that here)
Now, this image absolutely SCREAMS Lena at me. Especially the face. I love that expression. So I copy it, and paste it into FireAlpaca, onto a 6x8 inch canvas(6inch wide, 8inch tall), then transform it to the proper scale.
I’d show this part, but I’ve already sketched over it.
Obviously, that’s the next step! Figure out where things go, what does what, and sketch away!

Don’t mind the off look of everything, it gets fixed.
I use a pencil brush to sketch in FireAlpaca, but a 70% opacity colored pen brush works just as well for PTS. I recommend coloring smaller details differently, like how the right hand is pink to show that it needs more detail, how the ears and tail are blue to show that they don’t need as much.
After doing that, move on to working on the outfit. Open a new layer(you can see layer3 there, that’s where you’ll be sketching the outfit). Like with the body, everything should be sketched a different color!

The main body sketch is still there, but greatly reduced. Next, on the same layer or separate, I’d draw the hairstyle. I recommend doing this twice so you have an idea of what fits the character, especially if you’ve never drawn them before. I’ve drawn her before on paper, so I’ve already got a firm idea. This is also, in her case, a perfect time to draw in the facial details.

Yes I am aware her right eye is missing. This brings us to linework! Drag everything up to 100% opacity and switch to whatever tool you use best! If you use FireAlpaca, I recommend pen, and if you’re on PTS, just use a linework layer.
Make a layer for your lines above everything, set your brush to 100% black and about 18 pixels,0% min width, and get to work!

Lines always look weird on my drawings. It’s the outfits, I swear. Anyway, on FireAlpaca, you can use the wand tool to select things. Tolerance should be between 10 and 25(mine’s at 21). I can’t recall if you can do the same on PTS or not, but oh well. While we’re here, go look for the flesh cloud! You’ll need the flesh cloud! You’re on Tumblr anyway. Go find it. Just select everything you don’t want colored, flip it, and fill the whole thing on a new layer, then lock it.
You’ll want to start with the most detailed part of the design. Here’s what it looks like right now.

((Side note: If you’re like me and leave shirt designs for last, but love graphic tees and self-reflection, use the brush select tool to safely pattern your shirts, or whatever else you like! Scatter brushes are also great!))

Gradients also work well with the select tool...

And it’s not just clothing I use the gradient tool for, either...

This was done with two layers, one set to overlay and merged down. It was also edited to make it a bit more opaque.

This is the final color pattern. Now, these pieces.... they have shading. Minimal shading is necessary, but more shading = more depth to the image, making the pose look better. Take a very light grey and shade it! I usually shade with the light source from the right.
I forgot to screenshot the process, oops! But you’ll take a light grey, a dark grey, and another light grey. Use the first two to shade, the third to light. Copy the color layer, set it to clipping and overlay, then put them above a multiply(shading) and add(lighting, I think Luminescence works for Sai) layer. Then merge them together and set them to clip again.

Now sign the piece, maybe name the character, and save the image. I recommend both a layered file and a PNG, for obvious reasons!
And...

Voila!
In review, sketch with a pencil, have an idea, make it look halfway decent through time and effort. This took me about six hours.
#art#original character#I can not be bothered to tag too much#there's a KH3 screenshot in there so if that bugs you don't look#it's pretty early on#but still#art tutorial#I guess#long post#can you tell I'm tired of this
1 note
·
View note
Last Seen Blogs

beyzayenerpolat-blog
Meryem Beyza Polat

nikeunofficialblog
Nike Unofficial Blog
shoponlinemalls
Fashion & Beauty

vexvexes
melons and scutes

swartstephanie
Stephanie Swart