#g0thyongs
Note
hey bestie (>__☆) any recommendations for editing apps ^__^
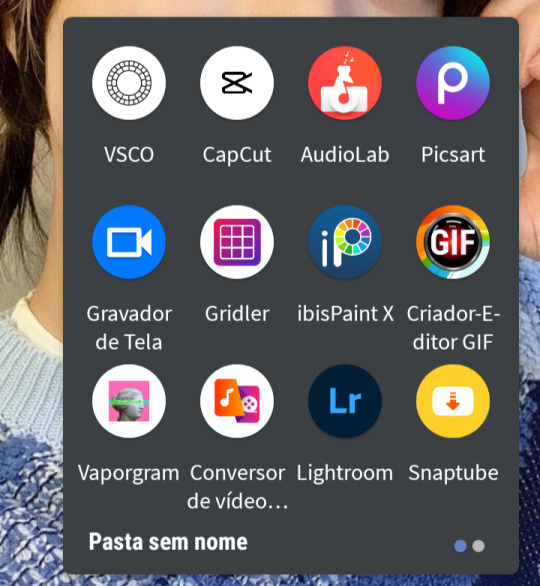
Apps que eu uso pra ajudar e pra editar!
Apps I use to help and edit!. 👋🗂
PicsArt
IbisPaint X
Criador-Editor
Fonts
WhatsMock
Prequel
Vsco
CapCut
AudioLab
Gravador de Tela
Snaptube
VaporGram
Conversor de video ...
Lightroom
Gridler
Pinterest
Instagram
LingoTube
Twitter
B612 (forgot it)
app images: 🔓🔄


#666 henry#666-henry#recommendeds tag#recommendations#apps#mod apps#google images#facts#daily facts#tip#tips#tips tumblr#beomgyu icons#g0thyongs#^__^#inspiration
101 notes
·
View notes
Text
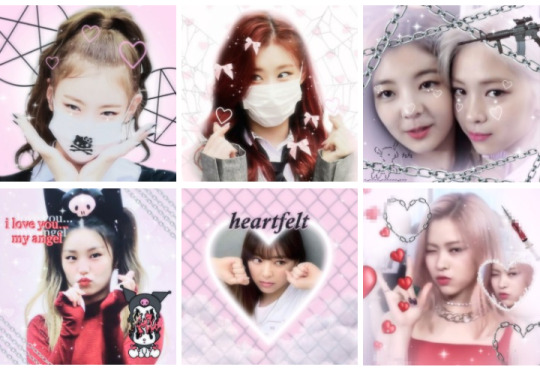
HOW I MADE ICONS LIKE THESE PT. 1
I go reeeaally in depth in this one but it's very well described!!
you can find the icons here! part 2 is here!
requested by @g0thyongs
hi! this is the first part of how i usually edit my icons :) im doing this in multiple parts because you can only attach ten images to a post so i can't fit them all in one 😓
this part is about the lia and chaeryeong icons, they're edited similarly!
I used picsart for the entire thing, it's best to start out with a transparant image (you can find it by scrolling down all the way and clicking the checkered-grey block), this isn't necessary.. it just makes it easier.
STEP 1. PICK N CUT

Pick out the pictures you want to use and add them, it's best to pick a picture of a headshot with a clear outline of the person you're editing. do what you want though im not your mom
you then either erase the background of the pic of the person you're editing or erase the background around the person you're editing. If it looks weird, you can try lowering the opacity of the top image just a little bit. It just looks a bit better that way.
Don't worry too much about it being perfect, it's not gonna be noticeable when you add the effects trust me.
STEP 2. STICKEERZZZZ
Just add the stickers you like (and fit with the image of course, unless you're going for the messy look, then go wild). I already picked a pretty busy background so i didn't add too much. If you want cool stickers you can go to my account on picsart (@/4ngelspit) and go through my saved ones (they’re nicely sorted ( •̀ ̫•́ ))
Here are also some good keywords : drain, draincore, softcore, angelcore, sanriocore, hello kitty, ...
STEP. 3 KIRA!

Here you just add some sparkles, I usually use the same two, answered here. I also use the third more spiky sparkle to accentuate the eye highlight. When I’m feeling extra i’ll add some under the eyes becuz it looks cute ₍ˆ‧ ̫‧ˆ₎
You can be very extra during this step, i was a bit minimal here but do what you like. again, im not your mom.
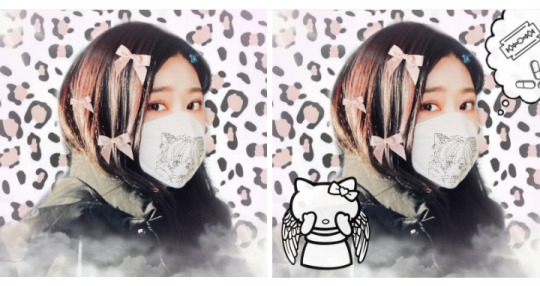
STEP. 4 FX N COLOURS
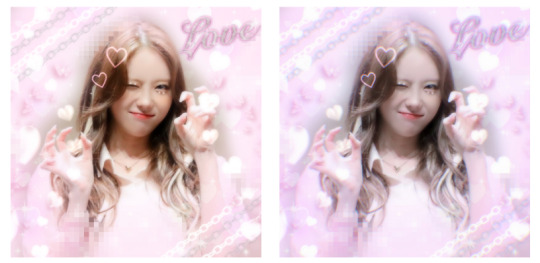
This is my fav step because you can see everything come together. The left picture is still in picsart. Click on fx and start playing around.
Here are my most used effects : motion blur, pixelize, brightness, blur (i used to use smart blur but i’ve become more of a normal blur person), halftone dots (i use this EVERY TIME IDK WHY IT DOESN’T EVEN DO THAT MUCH)
The right image is after I changed the colours in the SNOW app (🤢🤢🤮🤮🤮 Im sorry i don’t have another app like dis okay???) You can see how it’s a little more vibrant and glowy, i think it looks better. I basically just lowered the saturation, made the image cooler, made the image brighter, raised the contrast and voila ~~
#kpop edit#drain edit#BTS edit#red velvet edit#blackpink edit#itzy icons#tutorial-ish#blackpink layouts#minju edit#minju icon#izone edit#cybercore icons#softcore icons#gg messy pack#bg messy packs#bts packs#messy packs#messy icons#soft icons#soft moodboard#kpop drain icons#kpop messy icons#messy moodboard#angelcore#softcore#gg icons#bg icons#messy layouts#messy exo#୨♡୧ likeme ! * tutorial
75 notes
·
View notes
Text
HOW I MADE ICONS LIKE THESE PT. 2
you can find the icons here! part 1 is here!
again, requested by @g0thyongs 🤸

this is the second tutorial on how i edit my icons <3 part 1 covered the lia and chaeryeong icons
this part will be covering the lia + ryujin icon (top right), yeji icon and ryujin icon.
these were also done on picsart, it's best to start out with a transparant image (you can find these by scrolling all the way down and clicking the grey checkered block). 🕳️🚶♀️
STEP 1. PICK N CUT ( ˙º̬˙ )و

Pick out the pictures you want to use and add them, like the yeji and ryujin icons i picked a picture where you can fully see the person’s silhouette. however, if you’re making an icon like the lia + ryujin one it doesn’t matter. as you can see in the three images above, i first added a white (faded) background, you don’t have to do this. the main reason i did that was so you’d see less of the original background and it would look more cohesive and brighter. (also, yes im aware i missed a spot in the left upper corner leave me alone 😭)
the third image shows how i added a pink glowy border. this is a sticker you can find on picsart, 👉 here is a link to helpful stickers 👈 to help you achieve this effect. they’re the exact stickers i used with these icons!
STEP 2. ADD STICKERS (ꆤ ﻌ ꆤ) !

Here i copied the yeji icon (i didn't feel like coming up with something new 🧍), i basically just added chains in both corners. you can achieve this ‘white’ effect by going to 'blend' (after clicking on the sticker) and scrolling all the way to the right, then clicking on ‘add’. i did the same with the hearts in her hair and the hearts on the side (it’s the same sticker i used on the ryujin icon). i then added some other stickers around it (look at image three).
if you want the hearts to look brighter you should go to ‘adjust’ (after clicking on the sticker) and raise ‘brightness’ and ‘clarity’ all the way. i did this with the hearts on the ryujin and lia icon, i then lowered the opacity and put them on their faces (it looks cute in my opinion 🙃).
if you look at the ryujin icon you’ll see the heart with her face in it. i basically just added the original image of her and cropped it into a heart (i believe it’s called ‘shape crop’ or smthn idk) and then added the burning heart like a border around it.
the yeji icon is pretty simple, if you want the exact stickers i used you can go to my picsart, @/4ngelspit , and go through my saved stickers.
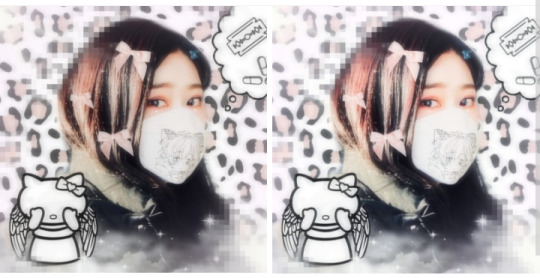
STEP 2. FX, SPARKLES AND COLOURS (๑മܫമ) <44
First i added sparkles, they’re quite minimal in this edit so it’s not a separate step. i answered which sparkles i use the most here, you can find them in brushes. i did the same as the lia + ryujin icon, two extra sparkles under luda’s eye and two on her eyelid. i almost always do this cuz it looks cool. 🧐
Click on FX and pick the effects you want to use. on all the previous icons i either used ‘smart blur’ or just ‘blur’. i specifically used ‘motion blur’ for the yeji and ryujin ones.
on this icon i used ‘smart blur’, ‘halftone dots’ (just a liiitle bit because it kind of messes up the contrast and saturation) and ‘pixelize’. you can see the little pixelized bits, like on the top of luda’s hair. i also used ‘pixelize’ on the ryujin icon.
the left image is after i changed the colours in polarr (thanks, @hmcute ( ˈ ∘̬ ˈ ) ). as you can see the icon looks way cooler (as in cold lmao) and less orange than b4. i prefer them this way but i’ll still be posting both versions on my pinterest because im extra. 🌚
i basically went to adjust, lowered the exposure, raised the brightness. i lowered the temperature. then hsl, i lowered the red and orange hue. then i dehazed it a bit. (i also used fringing but i regret that now).
N E WAYZ tutorial over (i spent way too much time doing this 😒)
#tutorial-ish#luda icon#wjsn icon#itzy icons#soft icons#messy icon#messy layouts#polarr#cute icons#itzy layouts#kpop gg layouts#kpop gg icons#gg icons#bg icons#drain icons#drain edit#bts icon#bts edit#red velvet icon#red velvet edit#blackpink edit#blackpink icon#kpop icon#kpop edit#tutorial#soft edits#itzy moodboard#gg moodboard#cyber icons#୨♡୧ likeme ! * tutorial
81 notes
·
View notes
Last Seen Blogs

freshscissorsgardencalzone
Magnificent

aphotoofyou
Celebrity Blog

worm-gal
:)

proshieldwindowtinting65252
Untitled

hxhbigbang2020
Hunter x Hunter Big Bang 2020