#how to install flutter in windows 7 64-bit
Explore tagged Tumblr posts
Visit Tumblr Blog
Explore Tumblr blogs with no restrictions, modern design and the best experience.
Last Seen Tumblr Blogs


Fun Fact
BuzzFeed published a report claiming that Tumblr was utilized as a distribution channel for Russian agents to influence American voting habits during the 2016 presidential election in Feb 2018.
Text
What is Flutter Reflection with Reflectable in Dart?

Flutter: Overview
Free and open-source, Flutter is a framework for creating native-looking applications for both iOS and Android. When it comes to developing mobile apps that are both speedy and functional, Flutter is an excellent tool for any Flutter agency to have on their side!
Flutter aids in the development of cross-platform mobile apps that are quick, well-designed, and universally compatible. Let’s take a look at Google’s newest UI framework, Flutter, and see how it works with reflection.
Metadata for Dart
Dart Metadata is used to provide more information about the Dart program. It is often preceded by the @ symbol and followed by a reference to a compile-time variable or a call to the variable constructor.
Annotating Metadata
We can specify our own metadata annotations in Dart. Here is an example of how to define a @student annotation that accepts two parameters –
library student; Class Student { final String studentName; final String rollno; const Student(this.studentName, this.rollno); } Likewise, in the following example, we will utilize the @student annotation. import 'student.dart' ; @Student('studentName', 'rollno') void greetHii() { print("Hii Welcome to flutter agency"); }
In Dart, metadata is often defined immediately before a library reference, class, class parameter, typedef, field, factory, method, constructor, variable, or a variable expression, as well as immediately before an import or export command. In runtime, we may access the metadata via reflection.
Interpreting Dart’s Reflection and Annotation
Reflection enables us to inspect and adjust a program’s structure and behavior at runtime. We will do this by utilizing the dart:mirrors library, which offers assistance classes and functions. We’ll conclude by discussing a frequent use case for Annotations.
Example with Reflection
Begin by creating a main.dart file and importing the dart:mirrors dependency. Before we begin implementing our reflection logic, let us construct a class with the following method:
import 'dart:mirrors'; main() { // TODO: Implement Reflection logic } // Our example class to reflect on class Endpoint { handle() => print('Request received'); }
Three ways are available for reflecting on types and objects:
reflect(): Tends to reflect on a class instance. reflectClass(): Reflects a class definition using the reflectClass() method. reflectType(): Returns the type specified as an input.
In our example, we’ll utilize reflect (). Let’s use reflection to call the handle function on an Endpoint we’ve just created.
main() { var reflectedClass = reflect(Endpoint()); // Invoke the handle() method reflectedClass.
After that, let us execute the following file:
$ dart /path/to/main.dart
Reflecting on an instance gives us an InstanceMirror that reveals the invoke() function, which we can use to call the invoke() method. Symbol types are used to represent the components of our instance.
The handle method is invoked in the example above by giving its Symbolic name, as well as an array of positional arguments, if any are supplied, to the method’s callback function.
To facilitate the passing of parameters, let us alter the signature of the handle() function as follows:
handle(String a) => print('Request received $a'); And now for the invocation: reflectedClass.invoke(Symbol('handle'), ['argument 1']); // => Request received argument 1 You may also use the handle() symbol in its literal form, which is as follows: reflectedClass.invoke(#handle, ['argument 1']); reflectedClass.invoke(#handle, ['argument 2']);
This strategy can be used when the method name is received as a value from an operation or when the user gives the method name. When you aren’t sure which strategy to use, this is the best option to choose.
The use of Annotations for Reflection
import 'dart:mirrors'; import 'lib/some_class.dart'; import 'lib/some_annotation.dart'; void main() { printAnnotationValue(String); printAnnotationValue(SomeClass); } void printAnnotationValue(final Type clazz) { final DeclarationMirror clazzDeclaration = reflectClass(clazz); final ClassMirror someAnnotationMirror = reflectClass(SomeAnnotation); final annotationInstsanceMirror = clazzDeclaration.metadata.firstWhere((d) => d.type == someAnnotationMirror, orElse: () => null); if (annotationInstsanceMirror == null) { print('Annotation is not on this class'); return; } final someAnnotationInstance = (annotationInstsanceMirror.reflectee as SomeAnnotation); print("${someAnnotationInstance.someField}"); }
Let’s take a look at some of the lines that need attention:
Line 1: The dart mirrors are imported in the first line. There are many reflection abstractions in the dart mirrors library. All three of these types of mirrors are available in the Mirror class: one for Instances and one for Declarations, and the third one for Classes.
Line 5: This is our main program, and we will compare the results of running printAnnotationValue on two classes: one that contains the SomeAnnotation and one that does not. As you can see, String does not have this annotation at all.
Line 11: We obtain a DeclarationMirror for the given type by utilizing the reflectClass helper (both are included in the mirrors lib) (either String or SomeClass in this app)
Line 12: we obtain the mirror in order to annotate SomeAnnotation
Line 13: we traverse over the metadata for the specified type, looking for instances of the type SomeAnnotation.
Line 15: If no such instance mirror is discovered, we print that the specified type lacks the annotation.
Line 20: If the annotation’s instance reflection is discovered, we obtain the actual instance (not the instance mirror) and simply display the value.
Conclusion
In this post, we’ve given you all the details you need about Flutter Reflection using Reflectable. We hope you find this information helpful, and if you have any suggestions or feedback, please feel free to contact us.
FlutterAgency.com is a portal platform for Flutter advanced technologies and Flutter professionals. Resources like Flutter Widget Guide, Flutter Projects, Code libs, and more may be found in our portal.
0 notes
Text
How to Install Flutter on Windows
How to Install Flutter on Windows
Windows install System requirements To install and run Flutter, your development environment must meet these minimum requirements: Operating Systems: Windows 7 SP1 or later (64-bit), x86-64 basedDisk Space: 1.64 GB (does not include disk space for IDE/tools).Tools: Flutter depends on these tools being available in your environment.Windows PowerShell 5.0 or newer (this is pre-installed with…

View On WordPress
1 note
·
View note
Text
Travel Guide Application in Flutter
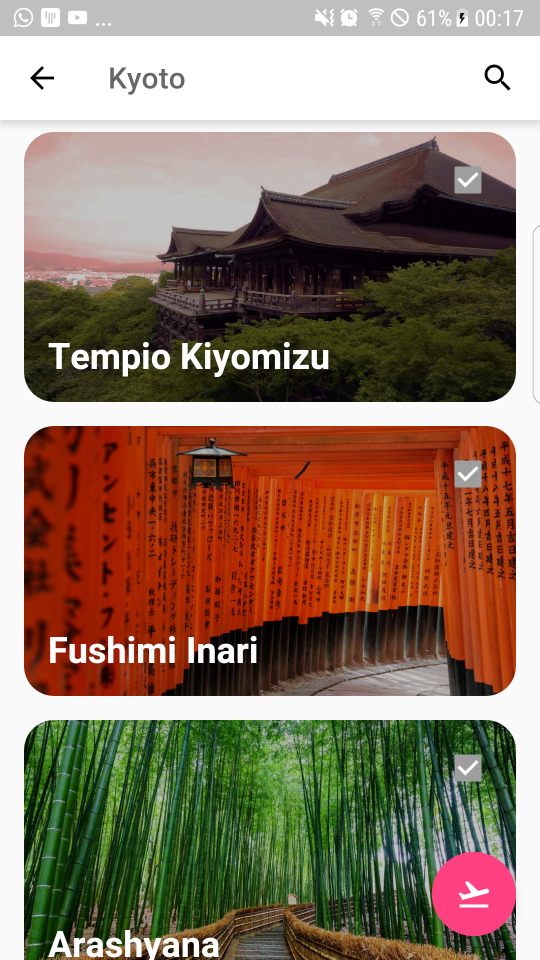
Project: Travel Guide Application in Flutter with Source Code About Application This travel guide app is made in flutter which provides information to where you go, your destination, and how far can you go. The app provide the about location of your destination, details of the package, and itinerary of your travel. Screenshots System requirements To install and run Flutter, your development environment must meet these minimum requirements: Operating Systems: Windows 7 SP1 or later (64-bit) Disk Space: 400 MB (does not include disk space for IDE/tools). Tools: Flutter depends on these tools being available in your environment. Windows PowerShell 5.0 or newer (this is pre-installed with Windows 10) Git for Windows 2.x, with the Use Git from the Windows Command Prompt option. Requirements: Download the last version of Android Studio SDK Download and Install Flutter SDK Install the plugin Flutter and Dart for VS Code or Flutter in Android Studio Run on the project folder: Check if the branch is origin/develop. Then run in terminal flutter packages get. If you don’t want to emulate the SDK on your computer, you need to connect your mobile phone. After that run with F5 if you use Visual studio code or run with the button play in Android Studio. #2020bestflutterproject #2020bestflutterprojects #2020bestflutterprojectstodownload #2020downloadflutterprojects #2020flutterprojects #2021bestflutterprojectstodownload #2021downloadflutterprojects #2021flutterprojects #alldownloadinflutter #allflutterprojects #allflutterprojects2020 #allflutterprojects2021 #allflutterprojectsdownloadwithsourcecode #allflutterprojectsdownloadwithsourcecode2020 #allflutterprojectsdownloadwithsourcecode2021 #allflutterprojectssourcecodedownload #allflutterprojectssourcecodedownload2020 #allflutterprojectssourcecodedownload2021 #allfreedownloadprojectsinflutter #allfreedownloadprojectsinflutter2020 #allfreedownloadprojectsinflutter2021 #allprojectsofflutter #bestflutterprojectstodownload #bestflutterprojectstodownload2020 #bestflutterprojectstodownload2021 #bestprojectsforflutter #bestprojectsforflutter2020 #bestprojectsforflutter2021 #bestprojectstodownload2020 #bestprojectstodownloadin2020 #bestprojectstodownloadin2021 #downloadallprojectsinflutter #downloadallsourcecodeinprojectsofflutter #downloadbestflutterprojects #downloadbestflutterprojects2020 #downloadbestflutterprojects2021 #downloadbestflutterprojectswithsourcecode #downloadbestflutterprojectswithsourcecode2020 #downloadbestflutterprojectswithsourcecode2021 #downloadprojectsforflutter #downloadprojectsinflutter #downloadprojectsinflutter2020 #downloadprojectswithflutter #downloadsourcecodeforflutterprojects #downloadsourcecodewithflutterprojects #flutter #flutterbestprojects #flutterbestprojects2020 #flutterbestprojects2021 #flutterbestprojectsdownload #flutterbestprojectsdownloadsourcecode #flutterbestprojectstodownload #flutterdownloadsourcecode2020 #flutterdownloadsourcecode2021 #flutterdownloadsourcecodeprojects #flutterfullsourcecode #flutterfullsourcecode2020 #flutterfullsourcecode2021 #flutterfullsourcecodeprojects #flutterfullsourcecodeprojects2020 #flutterfullsourcecodeprojects2021 #flutterfullsourcecodeprojectsdownload #flutterfullsourcecodeprojectsdownload2020 #fluttergetallprojects #flutterproject #flutterprojectfreedownload #flutterprojectfreedownloadsourcecode #flutterprojectfreesourcecode #flutterprojectsourcecode #flutterprojectsourcecodedownload2020 #flutterprojectsourcecodedownload2021 #flutterprojects #flutterprojects2020 #flutterprojects2021 #flutterprojectsallfreedownload #flutterprojectsallfreedownload2020 #flutterprojectsallfreedownload2021 #flutterprojectsallfreedownloadsourcecode #flutterprojectsallfreedownloadsourcecode2021 #flutterprojectsdownloadsourcecode2020 #flutterprojectsdownloadsourcecode2021 #flutterprojectsfreedownload #flutterprojectsfreedownloadsourcecode #flutterprojectsfreesourcecode #flutterprojectsfreetodownload #flutterprojectsfreetodownload2020 #flutterprojectsfreetodownload2021 #flutterprojectsfreetodownloadsourcecode #flutterprojectsfreetodownloadsourcecode2020 #flutterprojectsfreetodownloadsourcecode2021 #flutterprojectsfullsourcecodedownload #flutterprojectswithdemo #flutterprojectswithfullsourcecode2020 #flutterprojectswithfullsourcecode2021 #flutterprojectswithfullsourcecodedownload #flutterprojectswithfullsourcecodedownload2020 #flutterprojectswithfullsourcecodedownload2021 #flutterprojectswithsourcecode #flutterprojectswithsourcecode2020 #flutterprojectswithsourcecode2021 #fluttertravelguideapp #fluttertravelguideappsourcecode #fluttertravelguideappsourcecodedownload #fluttertravelguideappsourcecodefree #fluttertravelguideapplication #freedownloadflutterprojects #freedownloadsourcecodeflutterprojects #freeprojectsinflutter #freeprojectsinflutter2020 #freeprojectsinflutter2021 #freeprojectswithflutter #freeprojectswithflutter2020 #freeprojectswithflutter2021 #getflutterprojects #getflutterprojects2020 #getflutterprojects2021 #projectsofflutterdownload #projectstodownloadforflutter #projectstodownloadinflutter #projectstodownloadwithflutter #projectstodownloadwithflutter2020 #projectstodownloadwithflutter2021 #projectstodownloadwithfluttersourcecode #projectstodownloadwithfluttersourcecode2020 #projectstodownloadwithfluttersourcecode2021 #projectstolearnforflutter #projectstolearninflutter #projectstolearnwithflutter #sampleflutterprojects #sitetodownloadflutterprojects #sitetodownloadflutterprojects2020 #sitetodownloadflutterprojects2021 #travelguideapp #travelguideappinflutter #travelguideapplication #travelguideapplicationinflutter #travelguideapplicationinflutterdownloadsourcecode #travelguideapplicationinfluttersourcecode #travelguideapplicationinfluttersourcecodedownload #travelguideapplicationinflutterwithsourcecode #travelguideapplicationmadeinflutter #websitetodownloadflutterprojects #websitetodownloadflutterprojects2020 #websitetodownloadflutterprojects2021 #websitetodownloadflutterprojectsforfree #websitetodownloadflutterprojectsforfree2020 #websitetodownloadflutterprojectsforfree2021 #websitetodownloadflutterprojectswithfreesourcecode #websitetodownloadflutterprojectswithfreesourcecode2020 #websitetodownloadflutterprojectswithfreesourcecode2021 Read the full article
0 notes
Text
How to Install flutter in Windows?
How to Install flutter in Windows?
Windows Installation System requirements
To install and run Flutter, your development environment must meet these minimum requirements:
Operating Systems: Windows 7 SP1 or later (64-bit)
Disk Space: 400 MB (does not include disk space for IDE/tools).
Tools: Flutter depends on these tools being available in your environment.
Windows PowerShell 5.0 or newer (this is pre-installed with Windows…
View On WordPress
0 notes
Text
Spitfire Audio Presents: Orchestral Swarm
Spitfire Audio Presents: Orchestral Swarm

Orchestral Swarm
The Tidal Orchestra
Normal Price $249 Intro Price $199
A new standard in orchestral sample library innovation, this will significantly expand your existing orchestral palette to include a huge variety of totally unique textures. As an alternative to just using straightforward long notes, this library draws upon the pointillistic effect of having multiple players perform short notes at random intervals to create an undulating swell of sound that can be performed in real time for inspiring results. Taking our Swarm approach, but adapted for the orchestra, it gives access to even greater detail by utilising the huge variety of articulations and playing styles of orchestral instruments and will give your compositions a liquid dynamic that dances alongside the picture. This library has been created exclusively in collaboration with Bleeding Fingers, and is featured in Blue Planet ii and Hans Zimmer/Radiohead’s collaboration “(ocean) bloom”.
A New Orchestral Sound
This library is an innovative collaboration with Bleeding Fingers (Planet Earth II, Sons Of Liberty, Roman Empire: Reign Of Blood), who wanted to create this library to use for the BBC’s flagship series: Blue Planet II. Their concept was to record multiple players performing random short notes of the same pitch. The effect would be a granular “cloud” of notes - beautiful long sonic textures created from layers of micro-moments to be used in place of more traditional long notes; a perfect soundtrack to the oceanic goings-on as featured in the groundbreaking television show.
Now, we at Spitfire know this approach well - it was this technique that we use for our Swarm libraries, and this opportunity pushed us towards a new territory - to utilise the power of an orchestra in this Swarm technique. We delivered an initial library quickly and in secret for the team at Bleeding Fingers to use exclusively for the show. Hans Zimmer and Radiohead even went on to use it as part of their “(ocean) bloom” collaboration. We then later returned to the studio to capture even more with the orchestra, including short notes and expanded techniques and layers, to create the most complete tool for media composers.
If you tire of static sounding longs, or have fallen out of love with shorts ostinatos, this new textural approach to orchestral sampling will add life to your arrangements. Join the pioneers of modern concert music and scoring to explore a new league of orchestral compositions.
An Ocean Of Variety
The library consists of various string, brass and woodwind ensembles, recorded individually and with the Swarm pointillistic approach, using techniques most idiomatic for those instruments. Many of these sounds have never been sampled before. From bassoon ‘pops’ to horn ‘flutter tongues’, we’ve taken a wide range of techniques and combined them via the Swarm approach (where players each randomly play short notes to create a beautifully random cloud of sound) to give a vastly increased sound palette to your existing orchestra. The included individual ensemble shorts also further extend your options, enabling you to add a rhythmic element to your work. In addition, the provision of two reverbs on board - a tight ‘stage’ sound and a longer more lush ‘hall’ sound - makes blending the Swarms with your existing orchestral libraries a breeze.
The British Grove Sound
We’ve applied the same no-expense-spared approach to these sessions as any other Spitfire library, this time at one of the most well-stocked and highly-maintained studios on the planet: British Grove. Founded by Mark Knopfler, British Grove is one of the few large-scale studios to have been built in the new millennium, and its unique vision to combine state-of-the-art technology alongside legendary original pieces (it owns two original and fully-restored EMI desks as used by Sir George Martin and The Beatles) has it marked out to leave behind a noteworthy legacy.
The signal path on the day featured the Neve 88r console, utilising both the onboard pres as well as the Broadhurst Gardens pres for room mics and the EMI TG console pres for some of the mid room mics. Transducers included: Royers, Ela M, Neumanns and Coles.
The recording stage is a medium-sized, semi-reverberant room allowing for precise detail but with enough energy to maintain a character and fullness.
GUIs
The Overview PanelGives you a quick and easy way to access, view and load the different articulations, mic mixes and essential controller functions which you can then re-assign to suit your workflow.
General Controls PanelA deeper but still simple UI panel that allows you to tweak the general settings. How many round robins you would like and how you would like them to behave. How would you like memory to be organised alongside pitch options and how velocity works.
The OstinatumQuite simply a little inspiration machine. Not quite an arpeggiator, not quite a sequencer. This intuitive device allows you to build up complex patterns that react to your playing to achieve wild systems results tantalising Zimmeresque tension beds or cheeky multi-tonguing effects!
Presets / Articulations / Mics / Mixes
Presets / ArticulationsStrings High:
Combo Swarm
Combo Swell
Flautando Swarm
Pizzicato Swarm
Short Pizzicato
Short Spiccato
Short Swarm 1
Short Swarm 2
Short Swarm Harmonics
Spiccato Molto Sul Pont
Tenuto CS Tasto Swarm
Tenuto Swarm
Whisper Swarm
Strings Low:
Combo Swarm
Combo Swell
Flautando Swarm
Pizzicato Swarm
Short Pizzicato
Short Spiccato
Short Swarm 1
Short Swarm 2
Short Swarm Harmonics
Spiccato Sul Pont
Tenuto CS Tasto Swarm
Tenuto Swarm
Tenuto Trem Swarm
Whisper Swarm
Woods High:
Air Swarm
Clari Whisper Swarm
Combo Swarm
Flute Whisper Swarm
Flutter Swarm
Short
Staccatissimo Swarm
Tenuto Swarm 1
Tenuto Swarm 2
Tongued Swarm
Upper Mordent Swarm Semitone
Upper Mordent Swarm Wholetone
Woods Low:
Bassoon Pop
Combo Swarm
Flutter Swarm
Slap Staccatissimo
Sparse Swarm Stacc
Tenuto Swarm
Tongued Swarm
Horns:
Flutter Swarm
Muted Swarm
Short
Staccatissimo Swarm
Tenuto Swarm
Tonguing Swarm
Upper Mordent Swarm Semitone
Upper Mordent Swarm Wholetone
Bones and Tubas:
Flutter Swarm
Muted Swarm
Short
Staccatissimo Swarm
Tenuto Swarm
Tongued Swarm
Upper Mordent Swarm Semitone
Upper Mordent Swarm Wholetone
Brass:
Swells Cresc
Swells Dim
Mics & MixesMics
Close
Tree
Outriggers
Stereo
R88 Ribbon
Mid Room
Key Stats
25565 Samples
50.1 GB Uncompressed .WAV
29.7 GB disk space required
59.4 GB disk space required during install
Mac system requirements Mac OS X 10.10, 10.11 or macOS 10.12 (latest update), Intel Core 2 Duo
PC system requirements Windows 7, Windows 8, or Windows 10 (latest Service Pack, 32/64-bit) Intel Core 2 Duo or AMD Athlon 64 X2
Kontakt version requirements Kontakt or Kontakt Player 5.6.8 or higher
Free Kontakt Player Included
User manual
Apply for educational discount
youtube
youtube
youtube
#news#spitfireaudio#spitfire audio#kontakt#komplete#nks#kompletekontrol#composer#filmcomposer#music composer#film composer#music composition#game audio#trailer music
0 notes
Text
How To Increase Your App Downloads & Popularity In 2022?

Users have many alternatives for shopping apps, leisure, health, education, money, and other services, with roughly 4 million applications accessible in the Apple App Store and Google Play Store. Increasing the number of app downloads is a tactic and a feat in and of itself. Unfortunately, about 70% of accessible apps will never receive 5,000 downloads. Your app is likely to flop if you don’t have the right mobile marketing plan in place, and you’ll stay hidden in the app stores for the rest of your life.
A competent Flutter development company will guide you through investing your time, energy, and resources into building an app, which will then be tested for accessibility, advertising, and launching success. Most apps presented to popular app markets, on the other hand, receive little to no attention or acknowledgment from prominent app reviewers, resulting in no downloads. Is this to say that your app is gone before it ever gets off the ground? Is there a genuine approach to generate interest in your software and increase its download rate? Continue reading to find out.

1. Choose An Attractive App Icon
Visual cues extremely influence consumer behavior. Because your app’s icon is the very first thing a potential consumer sees when they visit an app store, make sure it’s aesthetically attractive. The emblem you pick should be easily recognized and appealing to the eye. It should reflect both your business and the app’s purpose. The symbol should offer customers a good indication of what they’ll get when they download and use your program.

2. Make App Store Optimization A Top Priority
Most marketers are familiar with SEO, but app developers who want more downloads need to learn about app store optimization (ASO). While the two are comparable, ASO helps boost your app’s exposure in the marketplace.
Relevance of keywords: Optimizing the keywords you are using in your app’s description, and the title is one critical thing you can do. To find the most relevant search phrases, use Google’s AdWords keyword tool or a keyword tracker.
Categories: Choose your categories carefully and strategically when submitting your application to an app store. Make sure the category you choose is related to your app yet not overcrowded.
Positive feedback: As your app receives more favorable reviews, it will be rated higher, automatically increasing download numbers. Prompting in-app evaluations at critical points in the app’s life cycle can enhance those ratings.
Location: Consider your target audience’s location and adjust your app description accordingly. It might entail changing your google play store summary into a different language or choosing relevant and acceptable photos for that location.

3. Create A Blog And A Website
Building a decent app isn’t enough for effective mobile app marketing; you also need to make it easy to locate. Linking your app to a blog or website, as per marketing experts, might help you broaden its reach and effectively serve your prospective customers. People turn to Google first when searching for answers to their difficulties. If you don’t have search engine rankings, you’re missing out on a considerable percentage of your audience, whether they’re seeking assistance with purchasing, planning, efficiency, or entertainment. You may create an SEO-friendly website that complements the content in your Google play store listing.

4. Make A Demonstration Video
Not everyone will grasp all of your app’s advantages simply by reading a brief description or looking at a few screenshots. Creating a sample video is another technique to promote your software and increase downloads. Make a 30-second film that explains what, when, and why your software works. Put special attention on usability and your product’s most popular features. Share your video on your website or social media networks, and don’t forget to mention it to your mobile app listing after it’s finished.

5. Analytical Tools And Attribution Techniques
You may make the most out of your marketing initiatives by monitoring and assigning downloads so that you can study about and invest in the most productive channels while making required modifications to the ones that aren’t. A smartphone attribution tool allows you to link your app’s installation to a target demographic, particular ad type, or platform, allowing you to enhance your marketing efforts.

6. Use Social Media To Promote The App
Because there are over 3.5 billion active social media users on the planet, it’s critical to market your app on at least one of these sites. Over 70% of internet firms promote mobile apps through social media. Where do you begin, though? The first stage should be to determine your target audience. You could market your app on Twitter or LinkedIn if other companies or industry experts are your target audience. Customers who have expressed their interest in items or services comparable to yours are available on Instagram and Facebook, on the other hand. Then, to generate pre-launch excitement, increase brand recognition, or advertise new and enhanced features, you may use hashtagged social media campaigns.
Conclusion
Consumers will discover many applications to help them obtain what they want, whether they need assistance with a specific activity or pass the time. Make sure the app is the first thing people look for. To position your brand in front of every pack and maximize downloads, use a mix of these smartphone app marketing tactics.
0 notes
Text
How to Create a Sliding Animation to Bottom In Flutter?

Bottom Navigation Bar always stays at the bottom of your mobile application and provides navigation between the views of the mobile application. Each Bottom Navigation Bar item denotes a different sub screen or feature of an application So in this article we will go through how to create a sliding animation to bottom in Flutter ??
How to Create a Sliding Animation to Bottom In Flutter ??
To create sliding animation for your indicator we would simply suggest using the SlideTransition Widget. It should not require much work to integrate it into your existing code.
The code below shows a minimal example of the SlideTransition. If you’d like to keep displaying it during the navigation from one screen to another, you’d have to draw it in a layer above your Navigator.
Consider a code snippet like the below:
createState() => HomeState(); } class HomeState extends State with SingleTickerProviderStateMixin { late AnimationController controller; late Animation offset; @override void initState() { super.initState(); controller = AnimationController(vsync: this, duration: const Duration(seconds: 1)); offset = Tween(begin: Offset.zero, end: const Offset(0.0, 1.0)) .animate(controller); } @override Widget build(BuildContext context) { return Scaffold( appBar: AppBar(title: const Text("Bottom Animation Example")), body: Stack( children: [ Center( child: RaisedButton( child: const Text('Show / Hide'), onPressed: () { switch (controller.status) { case AnimationStatus.completed: controller.reverse(); break; case AnimationStatus.dismissed: controller.forward(); break; default: } }, ), ), Align( alignment: Alignment.bottomCenter, child: SlideTransition( position: offset, child: const Padding( padding: EdgeInsets.all(70.0), child: CircularProgressIndicator(), ), ), ) ], ), ); } }
The above code will give us output like the below:
Output

Kindly drop us your suggestion/feedback to serve you much better.
FlutterAgency.com is our portal Platform dedicated to Flutter Technology and Flutter Developers. The portal is full of cool resources from Flutter like Flutter Widget Guide, Flutter Projects, Code libs and etc.
0 notes
Text
How to Solve Vertical Viewport Was Given Unbounded Height In Flutter?

ListView Widget is one of the important widget types that can be used anywhere and basically used to bind data in a list. So in this article, we will go through how to solve vertical viewport was given unbounded height in Flutter.
How to Solve Vertical Viewport Was Given Unbounded Height in Flutter?
Adding these two lines:
ListView.builder( scrollDirection: Axis.vertical, shrinkWrap: true, ... )
This generally happens when you try to use a ListView/GridView Widget inside a Column Widget, there are many ways of solving it.
Wrap ListView in Expanded
Wrap ListView in SizedBox and give a bounded height
Use shrinkWrap: true in ListView Widget like a below.
Column( children: <Widget>[ Expanded( // wrap in Expanded child: ListView(...), ), ], )
Column( children: <Widget>[ SizedBox( height: 400, // fixed height child: ListView(...), ), ], )
Column( children: <Widget>[ ListView( shrinkWrap: true, // use this ), ], )
ListView( scrollDirection: Axis.vertical, shrinkWrap: true, children: const [ Card( child: ListTile( title: Text('January'), ), ), Card( child: ListTile( title: Text('February'), ), ), Card( child: ListTile( title: Text('March'), ), ), Card( child: ListTile( title: Text('April'), ), ), Card( child: ListTile( title: Text('May'), ), ), Card( child: ListTile( title: Text('June'), ), ), Card( child: ListTile( title: Text('July'), ), ), Card( child: ListTile( title: Text('August'), ), ), Card( child: ListTile( title: Text('September'), ), ), Card( child: ListTile( title: Text('October'), ), ), Card( child: ListTile( title: Text('November'), ), ), Card( child: ListTile( title: Text('December'), ), ), ], ),
Output
What is shrinkWrap In Flutter ??
As the official document states
” Whether the extent of the scroll view in the [scrollDirection] should be determined by the contents being viewed.
If the scroll view does not shrink wrap, then the scroll view will expand to the maximum allowed size in the [scrollDirection]. If the scroll view has unbounded constraints in the [scrollDirection], then [shrinkWrap] must be true.
Shrink wrapping the content of the scroll view is significantly more expensive than expanding to the maximum allowed size because the content can expand and contract during scrolling, which means the size of the scroll view needs to be recomputed whenever the scroll position changes ”
Defaults to false
ListView will complain that
” … a vertical viewport was given an unlimited amount of vertical space in which to expand ”
By simply setting ShrinkWrap to true will make sure that it wraps its size defined by the contents. A sample code to illustrate:
// ... ListView( // Says to the `ListView` that it must wrap its // height (if it's vertical) and width (if it's horizontal). shrinkWrap: true, ), // ...
You can also put GridView inside Flexible or Expanded Widget
return new Material( color: Colors.deepPurpleAccent, child: new Column( mainAxisAlignment: MainAxisAlignment.center, children:<Widget>[ Flexible( child: GridView.count(crossAxisCount: _column,children: new List.generate(_row*_column, (index) { return new Center( child: new CellWidget(), ); }),))] ) )
Users can also set GridView Widget has ShrinkWrap property/named parameter, to set it true my problem is fixed.
GridView.count( shrinkWrap: true, // rest of code )
If you want scrolling functionality, you can add physics property:
ListView.builder( scrollDirection: Axis.vertical, shrinkWrap: true, physics: ScrollPhysics(), ... )
MaterialApp( home: Scaffold( appBar: AppBar( title: const Text('MyApp'), ), body: GridView.count( shrinkWrap: true, crossAxisCount: 2, children: List.generate(50, (index) { return Center( child: Text( 'Data $index', style: Theme.of(context).textTheme.headline5, ), ); }), ), ), );
OutputVideo Player00:0000:07Conclusion:
Thanks for being with us on a Flutter Journey !!!
Thanks for Reading !!!
Do share your valuable suggestions/feedback to serve you better.
FlutterAgency.com is our portal Platform dedicated to Flutter Technology and Flutter Developers. The portal is full of cool resources from Flutter like Flutter Widget Guide, Flutter Projects, Code libs and etc.
0 notes