#how to run multiple commands in ubuntu terminal
Text
How to List Your Computer's Devices From the Linux Terminal
Key Takeaways
There are multiple commands to list devices in Linux, each with variations in content and detail, catering to different use cases and preferences.
Most of these commands are already included in Linux distributions, but some installations may require additional commands like procinf, lsscsi, hwinfo, lshw, and hdparm.
Run “sudo apt install hwinfo” on Ubuntu or “sudo dnf install…
0 notes
Text
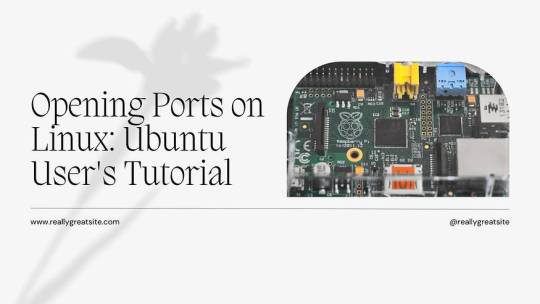
How to Open a Port on Linux: A Guide for Ubuntu Users
If you’re running a residential server on Ubuntu, or if you’re using it as your primary OS and need to configure network access, knowing how to open a port is essential. This guide will walk you through the process step-by-step, ensuring that your server or application, such as RDPextra, can communicate effectively over the network. We’ll cover the basics of port management on Ubuntu, using the ufw firewall, and ensuring your system remains secure.
Understanding Ports and Their Importance
Before diving into the technical details, it’s crucial to understand what ports are and why they are important. In the context of network communications, a port is a virtual point where network connections start and end. Each port is identified by a number, and different services and applications use different port numbers to communicate. For instance, web servers typically use port 80 for HTTP and port 443 for HTTPS.
Using UFW to Open Ports on Ubuntu
Ubuntu’s default firewall management tool, UFW (Uncomplicated Firewall), makes it easy to manage firewall rules. Here’s how you can open a port using UFW.
Step 1: Check UFW Status
First, check if UFW is active on your system. Open a terminal and type:bashCopy codesudo ufw status
If UFW is inactive, you can enable it with:bashCopy codesudo ufw enable
Step 2: Allow a Specific Port
To open a specific port, use the following command. For example, if you need to open port 3389 for RDPextra, you would type:bashCopy codesudo ufw allow 3389
Step 3: Verify the Rule
After adding the rule, verify that the port is open by checking the UFW status again:bashCopy codesudo ufw status
You should see a line in the output indicating that port 3389 is allowed.
Configuring Ports for Residential Server Use
Opening Multiple Ports
You can open multiple ports in one command by specifying a range. For example, to open ports 8000 to 8100:bashCopy codesudo ufw allow 8000:8100/tcp
This command specifies that the range of ports from 8000 to 8100 is allowed for TCP traffic. If you also need to allow UDP traffic, add a separate rule:bashCopy codesudo ufw allow 8000:8100/udp
Specific IP Address Allowance
For additional security, you might want to allow only specific IP addresses to connect to certain ports. For example, to allow only the IP address 192.168.1.100 to connect to port 22 (SSH), use:bashCopy codesudo ufw allow from 192.168.1.100 to any port 22
This command is particularly useful for residential servers where you may want to restrict access to known, trusted devices.
Ensuring Security While Opening Ports
While opening ports is necessary for network communication, it also opens potential entry points for attackers. Here are some tips to maintain security:
Use Strong Passwords and Authentication
Ensure that all services, especially remote access tools like RDPextra, use strong passwords and two-factor authentication where possible. This reduces the risk of unauthorized access even if the port is open.
Regularly Update Your System
Keeping your Ubuntu system and all installed software up to date ensures that you have the latest security patches. Run these commands regularly to update your system:bashCopy codesudo apt update
sudo apt upgrade
Monitor Open Ports
Regularly review which ports are open and why. Use the sudo ufw status command to see current rules and ensure they match your intended configuration.
Troubleshooting Common Issues
Even after configuring UFW, you might encounter issues. Here are some common problems and their solutions:
UFW is Inactive
If UFW is not active, ensure you have enabled it with sudo ufw enable. Additionally, check that there are no conflicts with other firewall software that might be installed.
Rules Not Applied Correctly
If a rule isn’t working as expected, double-check the syntax. Ensure there are no typos and that the correct protocol (TCP or UDP) is specified.
Application-Specific Issues
For applications like RDPextra, make sure the application itself is configured to use the correct port. Sometimes, the issue might be within the application settings rather than the firewall.
Conclusion
Opening a port on Ubuntu is a straightforward process with UFW, but it requires careful consideration to maintain system security. Whether you’re setting up RDPextra for remote access or configuring a residential server, following these steps ensures that your ports are open for the right reasons and remain secure. Always monitor and review your firewall rules to adapt to changing security needs and network configurations.
0 notes
Text
Aligning Security Practices with Your Ubuntu Server's Lifecycle - Technology Org
New Post has been published on https://thedigitalinsider.com/aligning-security-practices-with-your-ubuntu-servers-lifecycle-technology-org/
Aligning Security Practices with Your Ubuntu Server's Lifecycle - Technology Org
Understanding your Ubuntu server version is not just about staying updated; it’s a strategic move in fortifying your digital fortresses. Each release comes with its own set of security protocols, and as these evolve, so should your defenses.
A computer screen – illustrative image. Credit: ADMC via Pixabay, free license
Periodically verifying your OS version isn’t merely a checkmark on the list—it’s an integral part of your cybersecurity regiment, ensuring you’re locked in step with the latest safeguards. Now let us delve deeper into why aligning security practices with the life cycle of Ubuntu Server is vital for maintaining a secure IT environment.
Lifecycle Logistics
Ubuntu releases come in two flavors: Standard and Long-Term Support (LTS). Knowing which you’re running is akin to understanding the expiry date on your data’s shield. With standard releases receiving a brief 9 months of support, they can quickly become outdated.
LTS versions, however, offer a more substantial 5 years of security updates. One cannot overstate the importance of aligning with an LTS release—akin to choosing a fortified bunker over a temporary shelter amidst digital warfare.
This choice impacts how often you must upgrade and patch, which in turn affects your overall security posture. It’s essential not just to select the right version but also to anticipate its end-of-life date—predetermining the crucial junctures for necessary action steps that keep your server secure.
Command Line Clarity
To shield your data effectively, you must first check your Ubuntu version quickly using the command line—a direct and powerful tool at your disposal. A simple invocation of ‘lsb_release -a’ lays bare the details of your operating system’s identity.
This knowledge is pivotal; it’s the foundation upon which you can strategize a security framework that stays in sync with software patches and updates. Familiarity with the terminal is not just for the tech-savvy—it’s an essential skill for all defenders of digital realms.
By harnessing such commands, you ensure rapid response capabilities, swiftly identifying when your server enters a vulnerable phase as its support cycle wanes. Acting on this intelligence can mean the difference between a secure server and one that’s susceptible to attack.
Update Urgency
Once you’re aware of your Ubuntu version, immediate action becomes the cornerstone of cybersecurity. Updates are not mere enhancements; they are pivotal in closing security gaps. An unpatched system is a beacon for cyber threats, as vulnerabilities are often publicly disclosed following an update release.
By delaying, you extend the window of opportunity for potential breaches. Regular updates align with proactive defense tactics—think of them as routine patrols that keep intruders at bay.
And yet, it’s not just about haphazardly applying patches; it involves a calculated sequence that ensures stability and minimizes downtime. This critical rhythm between identifying the need and executing updates is what keeps your server robust against relentless attempts at destabilization by digital adversaries.
Security Strategies Synthesis
Aligning security practices with your Ubuntu server’s lifecycle demands more than just updates—it requires a synthesis of strategies. Think automation: crafting scripts that regularly check for updates or employing tools that manage patches across multiple systems.
Such measures ensure consistency in defense, akin to a well-drilled squadron prepared at all times. Consider also the broader picture—a server doesn’t live in isolation. It interacts with applications and user data, each aspect needing scrutiny under the security lens.
Integration of intrusion detection systems, firewalls, and regular security audits forms a layered approach to protection. This convergence of tactics transforms your server into a dynamic bastion capable of adapting to new threats as swiftly as they emerge.
Endgame Preparedness
As all things commence, so must they conclude—the same holds for your Ubuntu server’s lifecycle. Endgame preparedness is essential; it’s the final act in maintaining security integrity. When an Ubuntu version nears its end of life, security updates cease, leaving your system exposed like a fortress without guards.
Transitioning to a supported version before this deadline is critical. It’s akin to relocating to higher ground before the floodwaters rise—an act of foresight that preserves continuity and safeguards against looming threats.
Comprehensive backup strategies and testing new releases in sandbox environments ensure that when you do upgrade, it’s with precision and minimal operational disruption. This strategic foresight in lifecycle management encapsulates the vigilance necessary to keep server security unbreached.
Continual Vigilance
The lifecycle of an Ubuntu server is not a static timeline—it’s a cycle of ongoing vigilance. This involves constant monitoring for announcements from the Ubuntu Security Notices, which could dictate immediate action to safeguard against newly discovered vulnerabilities.
In this landscape, being reactive isn’t enough; you must be predictive. It’s about forecasting potential security storms and adjusting your sails accordingly. By maintaining an active subscription to security newsletters and joining relevant communities, you stay abreast of developments that could impact your server’s resilience.
In essence, continual learning and adaptation solidify the defense mechanism that is vital for repelling today’s sophisticated cyber threats.
The Final Lockdown
Do not merely ride the wave of technological advancements—be at its helm. Understanding and aligning with your Ubuntu server’s lifecycle is non-negotiable in executing robust security measures. With diligence and forward-thinking, each step from version checks to upgrade plans forms part of an overarching strategy securing your digital horizons against any storm that may come.
#adversaries#Announcements#applications#approach#automation#backup#checkmark#command#command line#comprehensive#computer#cyber#Cyber Threats#cybersecurity#data#defenders#defense#defenses#details#detection#Developments#Difference Between#disruption#Environment#firewalls#Forms#Foundation#framework#how#identity
0 notes
Text
How to Install PostgreSQL on Ubuntu
How to Install PostgreSQL on Ubuntu. Study how to install PostgreSQL on Ubuntu with our simple step-by-step guide. Ensure our tutorial and explore the ability of this open-source database management method.
List of blogs you will read in this content:
1. What exactly is PostgreSQL?
2. How to install PostgreSQL on Ubuntu
3. What are the benefits of installing PostgreSQL on Ubuntu?
4. Wrap up
5. Frequently Asked Questions
PostgreSQL is a powerful and popular open source relational database management system used by many organizations and developers worldwide. If you’re looking to install PostgreSQL on Ubuntu, you’re in luck, as the process is relatively straightforward.
In this guide, we’ll walk you with the steps required to install PostgreSQL on Ubuntu and grow you up and running fast. If you are a developer looking to use PostgreSQL for your project or a method administrator tasked with setting up a new database server, this tutorial will provide you with all the instructions you need to install PostgreSQL on Ubuntu.
What exactly is PostgreSQL?
PostgreSQL is a powerful open source relational database management system (RDBMS) that uses and extends the SQL language. It is considered one of the most advanced RDBMS available and is known for its stability, reliability and robustness. PostgreSQL is free to use and supported by a large and active community of developers and users who contribute to its development, documentation, and maintenance.
PostgreSQL offers many features including multiple programming languages, data types, transaction processing, and scalability. It also has potent safety and replication capabilities that do it worthy of use in enterprise-level applications. PostgreSQL is widely used by organizations of all sizes, along with large corporations, regime agencies, and non-profit organizations. It is often used for web appeal, data warehousing, and analytics, among other applications. With its mighty features, elasticity, and ease of use, PostgreSQL is an lovely choice for developers and organizations looking for reliable, high-performance RDBMS.
How to Install PostgreSQL on Ubuntu
The following steps will help you install PostgreSQL easily on your Ubuntu operating system:
1. First, open Terminal on your Ubuntu operating system. You can do this by pressing the keyboard shortcut “Ctrl+Alt+T” or by inquiring about the “Terminal” application in the Ubuntu Dash.
2. You need to update the packages on your system to ensure you have access to the latest version of PostgreSQL. To do this, run the following order: sudo apt-get update
3. After the method package list is updated, install PostgreSQL by running the following order: sudo apt-get install postgresql postgresql-contrib
4. During installation, you will be asked to create a new PostgreSQL user account. You should make a new user account to manage the PostgreSQL database. You can create a new user account by entering the following command: sudo -u postgres createuser –interactive
5. The next step is to create a new database. To make a new database, enter the following order: sudo -u postgres createdb mydatabase
6. After the installation is complete, you can accomplish that PostgreSQL is running by entering the following command: systemctl status postgresql
7. There are several ways to access the PostgreSQL prompt. One of the most general ways is to use the psql order. To entry PostgreSQL prompt, enter the following command: sudo -u postgres psql
8. To departure the PostgreSQL prompt, type \q and press Enter.
Congratulations! You have well installed PostgreSQL on your Ubuntu operating system.
The benefits of installing PostgreSQL on Ubuntu?
Value-untility: PostgreSQL and Ubuntu are open-source software, signification they are free to use, modify and give away.
Durability: PostgreSQL is known for its stability, reliability, and acting, making it an ideal choice for high-traffic sites and mission-critical applications.
Scalability: PostgreSQL can handle large amounts of data, making it a great choice for organizations that need to store and process large amounts of data.
Ease of Installation: Installing PostgreSQL on Ubuntu is relatively easy, and there is plenty of support from a large and active community of users and developers.
Customizability: PostgreSQL is highly customizable, and many tools and plugins used to enhance its functionality and add new features.
Security: PostgreSQL has a range of security features, including encryption, authentication and authorization, making it suitable for use in applications that require a high level of data security.
Elasticity: PostgreSQL can used with a wide range of programming languages and data types, making it a versatile choice for developers and organizations.
Community: The PostgreSQL group is large and active, providing support, documentation, and contributions to the ongoing development of the software.
Unveiling
Installing PostgreSQL on Ubuntu is a relatively expansive method that can performed in just a few steps. From updating your system packages to creating a new database, this guide provides a step-by-step process to help you get started installing and using PostgreSQL on Ubuntu. If you are a developer or just shortage to set up a database for your biz, PostgreSQL is a mighty and versatile database management method that can help you grow the job done. Follow these steps gingerly to enjoy the full benefits of PostgreSQL on your Ubuntu operating system
PostgreSQL is a powerful open source relational database management system is highly extensible and customizable.
Installing PostgreSQL on Ubuntu is a quick and easy process that can done using the command line or the Ubuntu Software Center.
PostgreSQL offers a variety of benefits for developers and businesses, including advanced security features, SQL and NoSQL data support, and community-driven development and support.
Visit Oudel
0 notes
Text
Limit standard accounts ubuntu

LIMIT STANDARD ACCOUNTS UBUNTU HOW TO
LIMIT STANDARD ACCOUNTS UBUNTU FULL
LIMIT STANDARD ACCOUNTS UBUNTU PASSWORD
LIMIT STANDARD ACCOUNTS UBUNTU DOWNLOAD
To display soft limits, use option -S: ulimit -S It is also possible to see either of these respective limits with a flag. This view displays a description, the assigned flag (that can be used for changing the limits), and the configuration. Your default values may be different than mine, of course. Let me show you the limits set up for me by default: :~$ ulimit -a If you omit the user_name, it shows limits for you. The -a flag will display all options and their configuration for your specific user name. You can display all kind of limits for a specified user in this manner: ulimit -a user_name Here’s the syntax for ulimit command: ulimit Display all limits for any user The user would be authorized to increase their limit from 25 up to 50. Then, you could establish a hard limit that could not be exceeded by that user (50). This would be your soft limit (let’s say 25). So from the admin perspective, you may prefer your user to hover around a certain value. This is where soft and hard limits come into play. You may be wondering why even set a limit if a user can adjust it. Soft vs Hard LimitsĪs a user, you can actually adjust your ulimit settings. Ulimit allows us to edit that configuration quickly. Your exact location may vary but it is typically something like /etc/security/nf. Ulimit is linked to a security configuration file. In addition to ensuring smooth processing of tasks, it prevents unwanted processes from being able to devour system resources like RAM, and CPU power. This type of control can be enforced at the global, group, and user levels. It is essential for any system to regulate these types of controls. Ulimit is a built-in shell command designed to display, allocate, and limit resources.
LIMIT STANDARD ACCOUNTS UBUNTU HOW TO
You’ll how to use it to control system resource allocations.
LIMIT STANDARD ACCOUNTS UBUNTU DOWNLOAD
You can create multiple users with different directories to securely upload and download files on your server.In this beginner tutorial, you’ll learn about the ulimit command in Linux. In this guide, you successfully set up SFTP on a Ubuntu 20.04 server, then tested connectivity through a terminal session and FileZilla. sftp> cd uploadsĬonfirm creation of the new directory: sftp> lsįileZilla and Cyberduck are the most popular SFTP clients available for Windows, Mac, and Linux desktop to test connectivity using a desktop client. Your output should be similar to the one below: password:Īlso, try creating a new directory within the subdirectory to test user permissions. $ sftp $ sftp (If running within the same server SSH session) Open a new terminal window and log in with sftp using a valid user account and password. Restart the SSH server for changes to take effect. Subsystem sftp /usr/lib/openssh/sftp-server The line below should be uncommented in /etc/ssh/sshd_config: # override default of no subsystems
ForceCommand internal-sftp: Enable SFTP only with no shell access.Īlso, confirm if SFTP is enabled (it is by default).
X11Forwarding no: Don't permit Graphical displays.
AllowTcpForwarding no: Disable TCP forwarding.
LIMIT STANDARD ACCOUNTS UBUNTU PASSWORD
PasswordAuthentication yes: Enable password authentication.ChrootDirectory %h: Restrict access to directories within the user's home directory.Match Group sftpcorner: Match the user group sftpcorner.Match Group sftpcornerīelow are the functions for each of the above configuration lines: Replace sftpcorner with your actual sftp group. $ sudo vim /etc/ssh/sshd_configĪdd the following lines to the end of the file. Using an editor of your choice, open the file /etc/ssh/sshd_config. With the sftp group and user accounts created, enable SFTP in the main SSH configuration file. Then, allow read and write permissions to all files within the home directory. $ sudo chown -R exampleuser:exampleuser /home/exampleuser/uploads Grant the user ownership rights to the subdirectories. Now, create new subdirectories within the user home directory. Restrict the user from accessing files outside the home directory.
LIMIT STANDARD ACCOUNTS UBUNTU FULL
$ sudo adduser exampleuserĮnter the user’s full name, password to continue. Replace exampleuser with your desired user name. $ sudo addgroup sftpcornerĬreate a new user account. Replace sftpcorner with your desired group name. PrerequisitesĬreate a new SFTP Users Group. In this guide, you will set up SFTP User accounts on Ubuntu 20.04, and allow the user to strictly access files within the home directory. It is an improved version of the traditional file transfer protocol (FTP), which adds a layer of security during the file transfer and connection establishment processes. Secure file transfer protocol (SFTP) is a secure way of transferring files between a local and remote computer using an encrypted SSH session.
0 notes
Text
Ubuntu soundconverter

#Ubuntu soundconverter how to
#Ubuntu soundconverter install
#Ubuntu soundconverter install
If you don’t want to use the terminal, you can choose to install the program in Ubuntu from the internet. If you are going to use the terminal, you just have to type the soundconverter command and press the “Enter” key and you will immediately access the application. When the installation is complete, you will be able to run SoundConverter from the applications menu or through the terminal. The system will be in charge of carrying out the installation automatically. Once you have entered the Ubuntu terminal, type the following command line: sudo apt install soundconverter and press the “Enter” key. Immediately, you will see a new window where you can install SoundConverter. To enter the Ubuntu terminal, press the keys “Ctrl + Alt + T”. If you want to install SoundConverter in Ubuntu you should know that this application is in the repositories of this system so we recommend you learn to install programs from the terminal in order to follow the following steps. How to install SoundConverter on Ubuntu to convert sound formats? This application has various functions such as converting files, creating directories according to certain tags, and changing file names. SoundConverter is for process audio files through multiple processes by making use of all the CPU available on a computer. This tool was created by GNOME and allows you to process audio files of any format.Īlso, SoundConverter can write over certain audio files, use any audio profile from GNOME and get only the audio from a video file. SoundConverter is an application that is used to convert audio files quickly and in “multithreaded” mode or “Multiprocess”. Next, we explain everything related to the installation process of SoundConverter in Ubuntu in order to convert sound formats. For this reason, many users consider SoundConverter to be a veteran app. This application has a friendly and simple interface. However, SoundConverter stands out among many multimedia tools for its effectiveness and practicality. There are numerous applications for converting audio files.
#Ubuntu soundconverter how to
If you wonder How to install SoundConverter on Ubuntu to convert sound formats?, then this article is for you. In this regard, SoundConverter allows to achieve this purpose quickly and effectively. The audio file conversion process is usually a must for any user.
0 notes
Text
Ssd health test

#SSD HEALTH TEST INSTALL#
#SSD HEALTH TEST FULL#
#SSD HEALTH TEST DOWNLOAD#
Through this short test, you’ll test the electrical and mechanical properties along with read/verify. Now you can launch a short test, using the following command: $sudo smartctl -t short -a /dev/sda Once the service has been started, get the information of your hard drive through the following command: $sudo smartctrl -i /dev/sda You’ll get an output similar to the following: Testing the health of your HDD/SSD Type this command to check the status: $systemctl status smartd Since you need the service running, you need to check the status of the service before running any tests. Once done, you’ll need to start the service through the following command $systemctl start smartd
#SSD HEALTH TEST INSTALL#
In your terminal, type the following: $sudo apt-get install smartmontools -y Through the terminal, you’ll need to start by installing the SmartCtl package. If there are multiple storage devices, you can go back to the previous window and select the other device to test it. In the window that opens up, you’ll be able to see the status of your data storage device. Open the options menu, it’s next to the minimize button.Once the application opens up, it will list the data storage devices in your computer, as shown below. When the text box for search pops up, type “Disks”, now click on the icon and launch the application.You can either start by pressing the “window” key or by clicking on “Activities” in the upper left corner of the screen.You can start by opening up the “Disks” Application. With this method, you can perform the tests without much knowledge of terminal commands. In this post, we’ll outline the main ways how you can check the health of your HDD/SSD in Ubuntu 20.04. If you want to ensure that your computer performs optimally, it is crucial that your HDD/SSD performs well. The main differences between these two boils down to the price and the IO speeds, but that’s a discussion for another post. The two main types are known as HDD aka Hard Disk Drive and SSD aka Solid-State Drive. A data storage device is a core-component of any computer. The operating system will not recognize a drive that is not formatted and partitioned.Though laptops and desktops are very resilient, you should keep checking the health of the components to ensure the longevity. Please see Document ID: 005707 : The BIOS does not detect my SSD. If the BIOS does not recognize the drive, or the drive does not spin up, Seatools will not detect the drive either. Consult your host controller (motherboard) documentation or system manufacturer for assistance with SATA / SAS controller capabilities. Reconfirm all cable connections and controllers, as well as the operating system. Please see Document ID: 184611 for instructions. If all the tests pass (no trouble found), the problem remains elsewhere in your system. Seatools will test your S.M.A.R.T-compliant SSD for proper function.
#SSD HEALTH TEST FULL#
If the drive fails the test but is out of warranty, you may continue to use it as long as you can, but remember to keep a full backup of your data at all times. If the drive fails the test, please begin the replacement process at our Warranty Services Page. The tests in Seatools will indicate Pass or Fail. See a full tutorial in Document ID: 202435.
#SSD HEALTH TEST DOWNLOAD#
The first step to test the drive: Please download and run SeaTools for Windows. To save time and the hassle of shipping a SSD that may not be defective at all, please test your drive to see if it really is defective. Tips for testing and finding out whether a SSD is faulty.Īll Seagate Solid State Drives have built-in error-checking capabilities.
0 notes
Text
In this article we provide the steps for installing UniFi Network Application / UniFi Controller on Ubuntu 18.04 / Debian 9 Linux system. Ubiquiti offers a wide range of Access Points, Switches, Firewall devices, Routers, Cameras, among many other appliances which are managed from a single point. The commonly used management interface is provided by UniFi Dream Machine Pro.
The UniFi Network Application (formerly UniFi Controller), is a wireless network management software solution from Ubiquiti Networks™. This tools provides the capability to manage multiple UniFI networks devices from a web browser. UniFi Network Application can be installed on Windows, macOS and Linux operating systems. In the guide that we did earlier, we covered installation process on macOS:
Install UniFi Network Application on macOS
For running in Docker see guide in the link below:
How To Run UniFi Controller in Docker Container
Below are the installation requirements for UniFi Network Application;
A DHCP-enabled network
Linux, Mac OS X, or Microsoft Windows 7/8 – Running controller software.
Java Runtime Environment 8
Web Browser: Mozilla Firefox, Google Chrome, or Microsoft Internet Explorer 8 (or above)
For UniFi Network Application installation on Linux, supported operating systems as of this article update are;
Ubuntu 18.04 and 16.04
Debian 9 / Debian 8
Software versions requirements:
Java 8 (My test with Java 17 and Java 11 failed).
MongoDB =3.6 (We’ll install MongoDB 4.0)
Before you proceed further query OS details through contents in /etc/os-release file to ensure OS version requirement is met.
$ cat /etc/os-release
NAME="Ubuntu"
VERSION="18.04.6 LTS (Bionic Beaver)"
ID=ubuntu
ID_LIKE=debian
PRETTY_NAME="Ubuntu 18.04.6 LTS"
VERSION_ID="18.04"
HOME_URL="https://www.ubuntu.com/"
SUPPORT_URL="https://help.ubuntu.com/"
BUG_REPORT_URL="https://bugs.launchpad.net/ubuntu/"
PRIVACY_POLICY_URL="https://www.ubuntu.com/legal/terms-and-policies/privacy-policy"
VERSION_CODENAME=bionic
UBUNTU_CODENAME=bionic
From the output we can see this installation is on Ubuntu 18.04 (Bionic Beaver), which is supported.
Add UniFi and MongoDB APT repositories
It’s always a good recommendation to keep your system updated. Run the commands below to update your OS.
sudo apt update && sudo apt -y full-upgrade
After the update perform a reboot if it’s required.
[ -f /var/run/reboot-required ] && sudo reboot -f
Install software packages required to configure UniFi and MongoDB APT repositories.
sudo apt install curl gpg gnupg2 software-properties-common apt-transport-https lsb-release ca-certificates
Add UniFi APT repository
Import repository GPG key used in signing UniFi APT packages.
sudo wget -O /etc/apt/trusted.gpg.d/unifi-repo.gpg https://dl.ui.com/unifi/unifi-repo.gpg
Add UniFi APT repository by executing commands below in your terminal.
echo 'deb https://www.ui.com/downloads/unifi/debian stable ubiquiti' | sudo tee /etc/apt/sources.list.d/ubnt-unifi.list
Add MongoDB APT repository
Start by adding GPG key to your system keyring.
wget -qO - https://www.mongodb.org/static/pgp/server-4.0.asc | sudo apt-key add -
You should get a message in the output that says “OK” if this was successful. Next add repository to your system.
### Ubuntu 18.04 ###
echo "deb https://repo.mongodb.org/apt/ubuntu bionic/mongodb-org/4.0 multiverse" | sudo tee /etc/apt/sources.list.d/mongodb-org-4.0.list
### Debian 9 ###
echo "deb https://repo.mongodb.org/apt/debian stretch/mongodb-org/4.0 multiverse" | sudo tee /etc/apt/sources.list.d/mongodb-org-4.0.list
Once all the repositories have beed added, test if they are functional.
### Ubuntu 18.04 ###
$ sudo apt update
Get:1 http://mirrors.digitalocean.com/ubuntu bionic InRelease [242 kB]
Ign:2 https://repo.mongodb.org/apt/ubuntu bionic/mongodb-org/4.0 InRelease
Hit:3 https://repos-droplet.digitalocean.com/apt/droplet-agent main InRelease
Get:4 https://repo.mongodb.org/apt/ubuntu bionic/mongodb-org/4.0 Release [2989 B]
Hit:6 http://mirrors.digitalocean.com/ubuntu bionic-updates InRelease
Hit:7 http://security.ubuntu.com/ubuntu bionic-security InRelease
Get:8 https://repo.mongodb.org/apt/ubuntu bionic/mongodb-org/4.0 Release.gpg [801 B]
Hit:9 http://mirrors.digitalocean.com/ubuntu bionic-backports InRelease
Get:5 https://dl.ubnt.com/unifi/debian stable InRelease [3038 B]
Get:10 https://repo.mongodb.org/apt/ubuntu bionic/mongodb-org/4.0/multiverse amd64 Packages [18.4 kB]
Get:11 https://dl.ubnt.com/unifi/debian stable/ubiquiti amd64 Packages [732 B]
Fetched 268 kB in 1s (319 kB/s)
Reading package lists... Done
Building dependency tree
Reading state information... Done
### Debian 9 ###
$ sudo apt update
Hit:1 http://security.debian.org stretch/updates InRelease
Ign:2 http://mirrors.digitalocean.com/debian stretch InRelease
Hit:3 http://mirrors.digitalocean.com/debian stretch-updates InRelease
Hit:4 http://mirrors.digitalocean.com/debian stretch Release
Ign:5 https://repo.mongodb.org/apt/debian stretch/mongodb-org/4.0 InRelease
Hit:6 https://repos-droplet.digitalocean.com/apt/droplet-agent main InRelease
Get:8 https://repo.mongodb.org/apt/debian stretch/mongodb-org/4.0 Release [1490 B]
Get:9 https://repo.mongodb.org/apt/debian stretch/mongodb-org/4.0 Release.gpg [801 B]
Get:7 https://dl.ubnt.com/unifi/debian stable InRelease [3038 B]
Get:11 https://dl.ubnt.com/unifi/debian stable/ubiquiti amd64 Packages [732 B]
Fetched 6061 B in 1s (5707 B/s)
Reading package lists... Done
Building dependency tree
Reading state information... Done
Install Java 8 on Ubuntu 18.04 / Debian 9
Restrict Ubuntu and your Debian system from automatically installing Java 11 / Java 17:
sudo apt-mark hold openjdk-11-*
sudo apt-mark hold openjdk-17-*
Install Java 8 from OS default APT repositories.
sudo apt install openjdk-8-jdk openjdk-8-jre
Remove any newer version of Java installed – Java 11 or Java 17.
sudo apt remove openjdk-11-* openjdk-17-*
sudo apt install openjdk-8-jdk openjdk-8-jre
Confirm installed Java version with the command java -version , it should show openjdk 1.8
$ java -version
openjdk version "1.8.0_312"
OpenJDK Runtime Environment (build 1.8.0_312-8u312-b07-0ubuntu1~18.04-b07)
OpenJDK 64-Bit Server VM (build 25.312-b07, mixed mode)
Install UniFi Network Application on Ubuntu 18.04 / Debian 9
We can now install UniFi Network Application on Ubuntu 18.04 / Debian 9 once Java 8 is confirmed to be the default Java version in the system.
Run the commands below to install the latest release of UniFi Network Application (UniFi Controller).
sudo apt install unifi
Accept installation prompt as requested.
Reading package lists... Done
Building dependency tree
Reading state information... Done
The following additional packages will be installed:
binutils binutils-common binutils-x86-64-linux-gnu ca-certificates-java fontconfig-config fonts-dejavu-core java-common jsvc libasound2 libasound2-data libavahi-client3 libavahi-common-data
libavahi-common3 libbinutils libboost-filesystem1.65.1 libboost-iostreams1.65.1 libboost-program-options1.65.1 libboost-system1.65.1 libcommons-daemon-java libcups2 libfontconfig1
libgoogle-perftools4 libgraphite2-3 libharfbuzz0b libjpeg-turbo8 libjpeg8 liblcms2-2 libnspr4 libnss3 libpcrecpp0v5 libpcsclite1 libsnappy1v5 libstemmer0d libtcmalloc-minimal4 libyaml-cpp0.5v5
mongo-tools mongodb-clients mongodb-server mongodb-server-core openjdk-17-jre-headless
Suggested packages:
binutils-doc default-jre libasound2-plugins alsa-utils java-virtual-machine cups-common liblcms2-utils pcscd libnss-mdns fonts-dejavu-extra fonts-ipafont-gothic fonts-ipafont-mincho
fonts-wqy-microhei | fonts-wqy-zenhei fonts-indic
The following NEW packages will be installed:
binutils binutils-common binutils-x86-64-linux-gnu ca-certificates-java fontconfig-config fonts-dejavu-core java-common jsvc libasound2 libasound2-data libavahi-client3 libavahi-common-data
libavahi-common3 libbinutils libboost-filesystem1.
65.1 libboost-iostreams1.65.1 libboost-program-options1.65.1 libboost-system1.65.1 libcommons-daemon-java libcups2 libfontconfig1
libgoogle-perftools4 libgraphite2-3 libharfbuzz0b libjpeg-turbo8 libjpeg8 liblcms2-2 libnspr4 libnss3 libpcrecpp0v5 libpcsclite1 libsnappy1v5 libstemmer0d libtcmalloc-minimal4 libyaml-cpp0.5v5
mongo-tools mongodb-clients mongodb-server mongodb-server-core openjdk-17-jre-headless unifi
0 upgraded, 41 newly installed, 0 to remove and 57 not upgraded.
Need to get 280 MB of archives.
After this operation, 724 MB of additional disk space will be used.
Do you want to continue? [Y/n] y
Manually installing UniFi Network Application on Ubuntu 18.04 / Debian 9
If you prefer to manually download a .deb package, visit the download the UniFi Controller software from the Ubiquiti Networks website.
Choose “Debian / Ubuntu Linux and UniFi Cloud Key” from software list.
Click the “Download” button that shows up after selecting.
Use “Download File” button or copy Direct URL and use command line downloaders to get the file in your local system.
Downloading the file with wget:
wget https://dl.ui.com/unifi//unifi_sysvinit_all.deb
Installation of .deb package can be done with apt while passing dowloaded file path as an argument.
$ sudo apt install ./unifi_sysvinit_all.deb
Reading package lists... Done
Building dependency tree
Reading state information... Done
Note, selecting 'unifi' instead of './unifi_sysvinit_all.deb'
The following additional packages will be installed:
binutils binutils-common binutils-x86-64-linux-gnu ca-certificates-java fontconfig-config fonts-dejavu-core java-common jsvc libasound2 libasound2-data libavahi-client3 libavahi-common-data
libavahi-common3 libbinutils libboost-filesystem1.65.1 libboost-iostreams1.65.1 libboost-program-options1.65.1 libboost-system1.65.1 libcommons-daemon-java libcups2 libfontconfig1
libgoogle-perftools4 libgraphite2-3 libharfbuzz0b libjpeg-turbo8 libjpeg8 liblcms2-2 libnspr4 libnss3 libpcrecpp0v5 libpcsclite1 libsnappy1v5 libstemmer0d libtcmalloc-minimal4 libyaml-cpp0.5v5
mongo-tools mongodb-clients mongodb-server mongodb-server-core openjdk-17-jre-headless
Suggested packages:
binutils-doc default-jre libasound2-plugins alsa-utils java-virtual-machine cups-common liblcms2-utils pcscd libnss-mdns fonts-dejavu-extra fonts-ipafont-gothic fonts-ipafont-mincho
fonts-wqy-microhei | fonts-wqy-zenhei fonts-indic
The following NEW packages will be installed:
binutils binutils-common binutils-x86-64-linux-gnu ca-certificates-java fontconfig-config fonts-dejavu-core java-common jsvc libasound2 libasound2-data libavahi-client3 libavahi-common-data
libavahi-common3 libbinutils libboost-filesystem1.65.1 libboost-iostreams1.65.1 libboost-program-options1.65.1 libboost-system1.65.1 libcommons-daemon-java libcups2 libfontconfig1
libgoogle-perftools4 libgraphite2-3 libharfbuzz0b libjpeg-turbo8 libjpeg8 liblcms2-2 libnspr4 libnss3 libpcrecpp0v5 libpcsclite1 libsnappy1v5 libstemmer0d libtcmalloc-minimal4 libyaml-cpp0.5v5
mongo-tools mongodb-clients mongodb-server mongodb-server-core openjdk-17-jre-headless unifi
0 upgraded, 41 newly installed, 0 to remove and 57 not upgraded.
Need to get 280 MB of archives.
After this operation, 724 MB of additional disk space will be used.
Do you want to continue? [Y/n] y
Successful installation output;
Note, selecting 'unifi' instead of './unifi_sysvinit_all.deb'
unifi is already the newest version (7.1.66-17875-1).
0 upgraded, 0 newly installed, 0 to remove and 57 not upgraded.
Access UniFi Network Application on Web browser
To restart the service run the following commands:
sudo systemctl restart unifi.service
Confirm that the status is running:
$ systemctl status unifi.service
● unifi.service - unifi
Loaded: loaded (/lib/systemd/system/unifi.service; enabled; vendor preset: enabled)
Active: active (running) since Mon 2022-07-11 23:46:08 UTC; 18s ago
Process: 12237 ExecStop=/usr/lib/unifi/bin/unifi.init stop (code=exited, status=0/SUCCESS)
Process: 12307 ExecStart=/usr/lib/unifi/bin/unifi.init start (code=exited, status=0/SUCCESS)
Main PID: 12375 (jsvc)
Tasks: 101 (limit: 2314)
CGroup: /system.slice/unifi.service
├─12375 unifi -cwd /usr/lib/unifi -home /usr/lib/jvm/java-8-openjdk-amd64 -cp /usr/share/java/commons-daemon.jar:/usr/lib/unifi/lib/ace.jar -pidfile /var/run/unifi.pid -procname unifi -ou
├─12377 unifi -cwd /usr/lib/unifi -home /usr/lib/jvm/java-8-openjdk-amd64 -cp /usr/share/java/commons-daemon.jar:/usr/lib/unifi/lib/ace.jar -pidfile /var/run/unifi.pid -procname unifi -ou
├─12378 unifi -cwd /usr/lib/unifi -home /usr/lib/jvm/java-8-openjdk-amd64 -cp /usr/share/java/commons-daemon.jar:/usr/lib/unifi/lib/ace.jar -pidfile /var/run/unifi.pid -procname unifi -ou
├─12397 /usr/lib/jvm/java-8-openjdk-amd64/jre/bin/java -Dfile.encoding=UTF-8 -Djava.awt.headless=true -Dapple.awt.UIElement=true -Dunifi.core.enabled=false -Xmx1024M -XX:+ExitOnOutOfMemor
└─12449 bin/mongod --dbpath /usr/lib/unifi/data/db --port 27117 --unixSocketPrefix /usr/lib/unifi/run --logRotate reopen --logappend --logpath /usr/lib/unifi/logs/mongod.log --pidfilepath
Jul 11 23:45:51 unifi-controller systemd[1]: Stopped unifi.
Jul 11 23:45:51 unifi-controller systemd[1]: Starting unifi...
Jul 11 23:45:51 unifi-controller unifi.init[12307]: * Starting Ubiquiti UniFi Network application unifi
Jul 11 23:46:08 unifi-controller unifi.init[12307]: ...done.
Jul 11 23:46:08 unifi-controller systemd[1]: Started unifi.
Services should be available on port 8080 and port 8443.
jmutai@unifi-controller:~$ ss -tunelp | egrep '8080|8443'
tcp LISTEN 0 100 *:8443 *:* uid:112 ino:47897 sk:a v6only:0
tcp LISTEN 0 100 *:8080 *:* uid:112 ino:47891 sk:e v6only:0
Access UniFi Network Application on a web browser using the server IP address an port 8443.
https://172.20.30.20:8443/
You’ll get SSL warnings while trying to access the portal.
Click “Advanced” and “Proceed” to the portal.
From your clients (UniFi devices), ping UniFi controller IP address to validate network connectivity.
U6-LR-BZ.6.0.21# ping 172.20.30.20 -c 2
PING 172.20.30.20 (172.20.30.20): 56 data bytes
64 bytes from 172.20.30.20: seq=0 ttl=63 time=0.883 ms
64 bytes from 172.20.30.20: seq=1 ttl=63 time=0.885 ms
--- 172.20.30.20 ping statistics ---
2 packets transmitted, 2 packets received, 0% packet loss
round-trip min/avg/max = 0.883/0.884/0.885 ms
Pointing UniFi Devices to new Network Application (UniFi Controller)
if this setup is new, your Network Application will discover all UniFi network devices in your network. Check out initial UniFi Network Application configuration in our recent macOS guide:
Configure UniFi Network Application
If you’re replacing an old Controller, then login to your UniFi devices and set inform address to the new server address and port. See below example.
set-inform http://172.20.30.20:8080/inform
Give it sometime and status should reflect the recent update we populated.
US-16-150W-US.6.2.14# info
Model: US-16-150W
Version: 6.2.14.13855
MAC Address: 98:8a:20:fd:ea:94
IP Address: 192.168.1.116
Hostname: US-16-150W
Uptime: 992330 seconds
Status: Connected (http://172.20.30.20:8080/inform)
Your uniFi devices will be available for administration from Web browser once they’re enrolled / imported for management via UniFi Network Application.
Log Files Location
UniFi Network Application have log files that are essential for any troubleshooting required. Logs files available are;
/usr/lib/unifi/logs/server.log
/usr/lib/unifi/logs/mongod.log
We’re working on more articles around UniFi network infrastructure and other integrations. Stay tuned for updates.
0 notes
Text
Draftsight linux download

Draftsight linux download how to#
Draftsight linux download for mac#
Draftsight linux download mac os#
Draftsight linux download install#
Draftsight linux download software#
Draftsight linux download software#
New versions of the software are issued once a year. Minimal system requirements are Intel Pentium 4 processor with 2 GHz or faster, 300 MB of free hard disk space, at least 1 GB of RAM, a High Color at least 16 bit graphics card and display that has support for at least 1024 x 768 resolution mode.ĭraftSight is available for Windows, Mac and Linux operating systems and all users have access to extensive online community support that features an abundance of learning resources. Download new versions, service packs, and add-ins for SOLIDWORKS, Simulation, PDM, and Free CAD Tools (eDrawings, Composer Player, SOLIDWORKS Explorer). With DraftSight you will be able to easily build, manage and look at your own design.
Draftsight linux download install#
How to Install Draftsight 2017 SP1 3D Software on Ubuntu 17.04, Ubuntu. The program allows users to easily make professional CAD drawings and with the DWG format as a primary drawing file format and support for DWN and DXF files up to version 2010, this tool offers compatibility and allows for exchange capabilities with all kinds of graphics and construction design programs all around the globe. As we know, draftSight is a professional 2D design and drafting software that. The latest setup file that can be downloaded is 443.7 MB in size. Our antivirus check shows that this Mac download is safe. The following versions: 2014.7, 2014.5 and 1.0 are the most frequently downloaded ones by the program users.
Draftsight linux download for mac#
It features user friendly interface and it can be used by both beginners or students and professional CAD users or educators. version of DraftSight for Mac is available as a freeload on our software library. This application has been created as a professional grade open 2D CAD product for people who need to improve the process of creating and later on editing and viewing of DWG files.
Draftsight linux download mac os#
The DraftSight package has almost 300MB, so wait patiently that everything will be installed and do not close the Terminal window.Offering a better way for creating, modifying and viewing DWG filesĭraftSight offers users a new and improved way to create, edit and view DWG file formats. DraftSight generally takes a few minutes to download and runs on multiple operating systems, including Linux and Mac OS in beta, and Windows XP, Windows Vista. Minimal system requirements are Intel Pentium 4 processor with 2 GHz or faster, 300 MB of free hard disk space, at least 1 GB of RAM, a High Color at least 16 bit graphics card and display that has support for at least 1024 x 768 resolution mode. As soon as you accept the terms, wait for the installation to complete. With DraftSight you will be able to easily build, manage and look at your own design. If not, the installation will be interrupted. Note that you will have to accept the terms in order to proceed with the installation. To install DraftSight on Ubuntu, Debian, Linux Mint run the commands below: cd /usr/local/src/ So, if you need a free CAD software, DraftSight is undoubtedly a right choice. Get a virtual cloud desktop with the Linux distro that you want in less than five minutes with Shells With over 10 pre-installed distros to choose from, the worry-free installation life is here Whether you are a digital nomad or just looking for flexibility, Shells can put your Linux machine on the device that you want to use. Also, the one to take advantage of a structure to make different designs in the same project. This feature is exciting for those who need to use basic objects in different projects. The program has guides that separate the basic design template from the final version design sheets. It has a new tool to preview the last 12 files opened as an advanced editing table. It is available only for 64-bit systems.ĭraftSight 2019 supports two-dimensional drawing and the tools make your creations much easier. , DraftSight provides users with a better way to read, write and share DWG files. Currently in public beta and available for download at. The application offers: clear and pleasant interface, wide set of drawing tools (point. DraftSight V1R6.3: DraftSight is a free, professional-grade 2D CAD product centered upon an open business model. Being a good substitute for AutoCAD, it allows users to read and write. DraftSight is an advanced and fully functional 2D CAD software. DraftSight is a free CAD software for Linux.
Draftsight linux download how to#
This post explains how to install DraftSight on Ubuntu. Total installation time was less than three minutes. I double clicked on the download and the Ubuntu Software Center automatically took care of the rest. The installation on my Ubuntu 10.10 system was cake. Install DraftSight on Ubuntu and Derivatives The b is rather small, 68.8 Mb (I was surprised it was bigger than the Windows install 55.5 Mb).
0 notes
Text
How convert jpg to pdf

How convert jpg to pdf how to#
How convert jpg to pdf install#
How convert jpg to pdf full#
How convert jpg to pdf free#
How convert jpg to pdf how to#
We also learnt how to convert multiple files at once, and also how to automate JPG to PDF conversion using shell scripts & cronjobs. You can also use it to convert PNG and other image types to PDF. In this article, we have learnt how to convert JPG to PDF using ImageMagick. This will run your above shell script daily at 10.a.m. $ crontab -eĪdd the following line to it. Just open crontab with the following command. You may even create a cronjob to run the above script daily at 10.a.m. $ sudo chmod +x jpg_to_pdf.shĮxecute it with the following command. Make it executable with the following command. If you want to automate JPG to PDF conversion, then you can add the above command in a shell script as shown below. You can even embed these commands inside shell scripts or use them as cronjobs if you want. Imagemagick provides many commands and options to help you work with images. $ mogrify -format pdf -path /home/data /home/ubuntu/*.jpg If you want to convert and save the PDF files in another folder /home/data then use -path option also. The following command will convert all JPG files in /home/ubuntu directory to PDF files. If you want to convert multiple images, use mogrify command, -format option. The convert command above converts only one image. In such cases, open file /etc/ImageMagick-6/policy.xml in a text editor $ sudo vi /etc/ImageMagick-6/policy.xmlīefore the following tag at the end of the file. Sometimes you may get a policy error message saying “convert: attempt to perform an operation not allowed by the security policy…”
How convert jpg to pdf full#
Please note, if you do not specify full file paths, convert command will look for it in your present working directory. $ sudo convert /home/ubuntu/flower.jpg to /home/files/flowers.pdf In the above command you need to specify file paths to both image and pdf files. Here is the syntax of convert command $ sudo convert /path/to/image /path/to/pdf Once it is installed, you can simply use convert command to convert images to PDF, as shown below.
How convert jpg to pdf install#
Open terminal and run the following command to install ImageMagick. It allows you to convert JPG as well as other image file types to PDF documents. We will use ImageMagick utility for this purpose. Here are the steps to convert JPG to PDF in Linux. Since it is a CLI tool, you can easily add it to your application/website. It provides a command line interface (CLI) to work with image files. In this article, we will look at how to convert JPG to PDF in Linux, using ImageMagick library. In fact, you may even need to provide this feature in your application or website for your users. Many times you may need to convert JPG images into PDF documents. PDF’s removes the disadvantages of using a JPG file making it easier for you to repurpose the function of the image.JPG and PDF are two commonly used file types in organizations. Besides converting the file into PDF, the converter will also act as a compressor and compress your file without having to worry too much that you are creating something too wide or big. For such reasons, our online JPG o PDF converter acts as a rescuer.
How convert jpg to pdf free#
But important thing to notice is that most of these software’s and online converters are usually not free and difficult to use. Internet is filled with lots of software’s and online converters that can convert your JPG files to PDF.
0 notes
Text
Install gfortran-6 slink

#Install gfortran 6 slink how to
#Install gfortran 6 slink install
#Install gfortran 6 slink software
You may redistribute copies of GNU Fortran GNU Fortran comes with NO WARRANTY, to the extent permitted by law. Warranty not even for MERCHANTABILITY or FITNESS FOR A PARTICULAR > gfortran -version
#Install gfortran 6 slink software
This is free software see the source for copying conditions. And it worked perfectly thanks to the great binaries from Gaurav Khanna at > gcc -versionĬopyright (C) 2010 Free Software Foundation, Inc. bash_profile:Īfter these installations I was finally able to compile and link my fortran programs using both my Intel Fortran compiler and my new gfortran compiler. The files for GCC4.6 and gfortran installs by default into /usr/local (make sure you make a copy prior to installation), which you have to add to your PATH environment in. Sudo tar -xvf gfortran-snwleo-intel-bin.tar -C / Next I also downloaded the Fortran compiler gfortran binaries that was compiled for GCC4.6 and installed them according to the HPC website: Then I downloaded the files for GCC 4.6 for Intel Snow Leopard ( found here) and installed the files following the recipe on the website of HPC: But to my luck I found the website of which offers Intel Snow Leopard binaries for GCC 4.6! First I made a backup of my /usr/local/ directory using 7-zip ( excellent compressor): Any comments are highly appreciated as it would be nice to compile from source. I could not find a solution to his error message and I still have not understood what it means. configure: error: in `/Users/trond/GMT/gcc/OBJECTDIR/x86_64-apple-darwin10.6.0/libgcc':Ĭonfigure: error: cannot compute suffix of object files: cannot compile Alas, after following the instructions on the GNU website my compilation of GCC ended in error with a strange error messageĬhecking for suffix of object files. I dreaded doing the compilation from source as I knew it would be error prone and time consuming, and it did not turn out to good either.
#Install gfortran 6 slink install
Please share this post with your friends.The reason I wanted to install GCC 4.6 on my machine was that my Intel Fortran compiler had trouble linking with my GCC 4.2.1 version, which is the default installation on my Snow Leopard. If you are a developer, you can get more post about programming. In this case, we have Fortran and the GNU Fortran compiler. However, there are sectors where it is very important and that is why there are still tools for the language. :~$ gfortran-9 -o hello hello.f90įortran is a very old programming language. Press CTRL + O to save the changes and CTRL + X to close.Īfter that, compile it using the terminal. Warranty not even for MERCHANTABILITY or FITNESS FOR A PARTICULAR PURPOSE. GNU Fortran (Ubuntu 9.3.0-10ubuntu2) 9.3.0Ĭopyright (C) 2019 Free Software Foundation, Inc. :~$ sudo apt updateįinally, install GNU Fortran 9 by using this command: :~$ sudo apt install gfortran-9Ģ.- Install GNU Fortran on Ubuntu 20.04 / 18.04 :~$ sudo add-apt-repository ppa:ubuntu-toolchain-r/test So, let us install GNU Fortran on Ubuntu.įirst, open a terminal and add the Ubuntu test repository. It has many improvements in every Fortran version it supports. The latest version available is version 9. With the aim of creating a modern compiler capable of running on multiple systems and multiple environments. It is open source, released under the GPL license. It is also known on the Internet as GFortran. GNU Fortran is a Fortran 95/003/2008 compiler created by GNU. Getting GNU Fortran on Ubuntu 20.04 / 18.04 It is because of this that many programmers have turned their eyes to Fortran. But the banking sector, in the scientific sector and in other companies that still use this language, pay good amounts of money for experts in the language. You might think that nobody uses it anymore or something does. Therefore, Fortran was very important in computer science in the last century. It is a language focused on numerical calculation, designed in its beginnings for IBM computers and used in scientific and engineering applications and is the oldest of the high-level languages. If we speak mythical programming languages, we will have to talk about Fortran. This compiler created by GNU is an open source alternative to other compilers that are not.
#Install gfortran 6 slink how to
In this post, I will teach you how to install GNU Fortran on Ubuntu 20.04 / 18.04. However, many companies still need development in this language and not only that but there are tools that have evolved in favor of this language. Well, while it is true that there are many programming languages today, there are some that have been a little forgotten as Fortran.
0 notes
Text
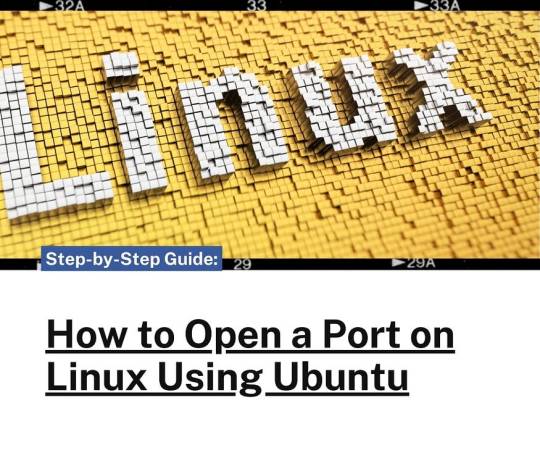
How to Open a Port on Linux

Understanding Ports and Firewalls
Before diving into the technical steps, it’s crucial to understand what ports and firewalls are. Ports are logical endpoints in a network, used by various applications and services to communicate. Firewalls are security systems that control incoming and outgoing network traffic based on predetermined security rules, often blocking or allowing traffic to specific ports.
When working on an Ubuntu open port system, the default firewall management tool is ufw (Uncomplicated Firewall). This tool simplifies the process of configuring your firewall and managing ports.
Prerequisites
To follow this guide, ensure you have:
A running Ubuntu system.
Sudo privileges to execute administrative commands.
Basic knowledge of the terminal.
Opening a Port on Ubuntu Using UFW

Step 1: Install UFW
First, you need to ensure that ufw is installed on your Ubuntu open port system. Most modern Ubuntu distributions come with ufw pre-installed. However, you can install it manually if it’s not available.bashCopy codesudo apt update
sudo apt install ufw
Step 2: Enable UFW
Enable ufw if it’s not already enabled. This step is crucial for applying any firewall rules.bashCopy codesudo ufw enable
Step 3: Open a Specific Port
To open a port, use the following command. For instance, if you want to open port 8080:bashCopy codesudo ufw allow 8080
This command modifies the firewall rules to allow traffic through port 8080.
Step 4: Verify the Port is Open
After opening the port, verify that the firewall rules have been updated:bashCopy codesudo ufw status

Configuring RDPextra on Ubuntu
If you’re using RDPextra for remote desktop access on your residential server, you’ll need to open the default RDP port (3389). Here’s how you do it:bashCopy codesudo ufw allow 3389
This command allows RDPextra to communicate through the network, enabling remote desktop access to your Ubuntu server.
Managing Ports for a Residential Server
For residential servers, especially those hosting multiple services, managing ports efficiently is critical. Each service (web server, FTP, SSH) uses different ports. For example, to open ports for a web server (port 80) and SSH (port 22), use:bashCopy codesudo ufw allow 80
sudo ufw allow 22
Ensuring these ports are open allows web traffic and secure shell access to your residential server, facilitating smooth operation and maintenance.
Closing a Port on Ubuntu
If you need to close a port, use the ufw delete command followed by the port number. For example, to close port 8080:bashCopy codesudo ufw delete allow 8080
This command removes the rule that allows traffic through port 8080, effectively closing it.
Advanced UFW Features
Allowing Specific IP Addresses
Sometimes, you may want to allow traffic from specific IP addresses only. This is useful for securing your residential server. For instance, to allow SSH access only from a specific IP:bashCopy codesudo ufw allow from 192.168.1.100 to any port 22
This rule ensures that only the specified IP address can access the SSH service on your server.
Limiting Connections
To prevent brute-force attacks, you can limit connections. For example, to limit SSH connections:bashCopy codesudo ufw limit 22/tcp
This rule restricts the number of attempts an IP can make to connect to your SSH port, enhancing security.
Conclusion
Opening and managing ports on an Ubuntu system is a fundamental skill for administrators and users alike. Whether configuring RDPextra for remote desktop access, managing a residential server, or simply allowing traffic through specific ports, the ufw tool provides an uncomplicated yet powerful way to handle firewall rules. Following this guide, you can ensure your Ubuntu system is properly configured to handle network traffic securely and efficiently.
0 notes
Text
Vmware workstation player 12 copy to another pc

VMWARE WORKSTATION PLAYER 12 COPY TO ANOTHER PC HOW TO
VMWARE WORKSTATION PLAYER 12 COPY TO ANOTHER PC INSTALL
VMWARE WORKSTATION PLAYER 12 COPY TO ANOTHER PC 64 BIT
VMWARE WORKSTATION PLAYER 12 COPY TO ANOTHER PC 32 BIT
VMWARE WORKSTATION PLAYER 12 COPY TO ANOTHER PC HOW TO
Now, if you want to automatically map your shared folders to another location, here's how to do it on the command line.įirst, open a terminal and get root rights using the "su" or "sudo su" command (depending on the distribution used). In this folder, you will find the shared folder that you added in the settings of your virtual machine. To access this folder from the Debian GUI, open the File Explorer and click : Other Locations. Plain Text Filesystem Size Used Avail Used% Mounted on Leave the "Enable this share" box checked and check the "Read-only" box if you want this share to be read only.īy default, if the VMware Tools are correctly installed, you will see that these shares will be available automatically in the folder : /mnt/hgfs Important : although there are open-vm-tools and open-vm-tools-desktop packages for many Linux distributions, the VMware Tools (supplied with VMware Workstation) will also need to be installed for the file sharing system of VMware is supported by the guest OS.įor this, refer to our tutorial : Installing VMware Tools on Linux.Ĭlick Browse to share a folder on the physical PC and specify the name under which it will appear in the guest OS. Select "Always enabled" to enable file sharing, and then click Add. Important : for drag and drop to work with Linux-based guest OSs, you will need to have the open-vm-tools and open-vm-tools-desktop packages installed (as explained here).Īs you can see, the option to create a network drive (to facilitate access to shared data from your virtual machine settings) is not available, because it's a feature only for Windows. If you have properly installed VMware Tools on Linux, you can also use drag and drop (even if you use Windows as a host and Linux as guest and vice versa). File transfer on Linux (Debian / Ubuntu) 2.1. Operating System: Windows 10 / Window 8 / Windows 7 / XP / VistaĬlick on the given below button of ‘Download Now’ and start VMware Player 12.5.4 freeload.2.Minimum System Requirements for VMware Player 12.5.4īe sure for the listed below minimum system requirements before going to start VMware Player 12.5.4 freeload. Latest Version Release Date: March 15, 2017.Setup Type: Offline Installer / Full Standalone Setup.Software Full Name and Version: VMware Player V12.5.4.Technical Details of VMware Player 12.5.4 Setupįor instant information about the Setup file you can go through the following details before starting VMware Player 12.5.4 freeload. Broad host and guest operating system support.Use 3rd-party virtual machines and images.
VMWARE WORKSTATION PLAYER 12 COPY TO ANOTHER PC 64 BIT
Run both 32 and 64 bit virtual machines.
Share data between host computer and virtual machine.
Experience the benefits of preconfigured products without any installation or configuration issues.
Run multiple operating systems simultaneously on a single PC.
Listed below are some of the key features of VMware Latest Version that could be experienced by performing the VMware Player 12.5.4 freeload. This free pc virtualization software program makes it simple to operate any exclusive machine created by VMware Workstation, VMware Fusion, VMware Server or VMware ESX. VMware has the ability to run more than one OS at the same time. Most of the time when designers need to run two or more operating-system, they create another exclusive OS inside an exclusive device. It uses the time of the device and helps to create a new exclusive atmosphere. VMware Player is an awesome application when you want virtualization.
VMWARE WORKSTATION PLAYER 12 COPY TO ANOTHER PC 32 BIT
Its a completely standalone setup file and compatible with windows 32 bit and 64 bit architecture. You can run a separate PC in your PC by using VMware free.
VMWARE WORKSTATION PLAYER 12 COPY TO ANOTHER PC INSTALL
VMware Player 12.5.4 Free Download will let you download and install this useful application in your PC.
0 notes
Text
Mac terminal edit file in python

#Mac terminal edit file in python how to#
#Mac terminal edit file in python install#
#Mac terminal edit file in python update#
#Mac terminal edit file in python download#
#Mac terminal edit file in python update#
How do I update python in Kali Linux 2020? You need to update your update-alternatives, then you will be able to set your default python version. But we should check what versions of Python are installed in your Linux. Does Kali use Python?Įxecuting Python scripts in Kali linux is easier as Python is installed by default. You are done! Now check your default interpreter version by simply run “python -V” command in the terminal. Open terminal and write “alias python=python3” and hit enter. 2019 How do I make Python 3 default in Kali Linux? Step 6: Add Python Path to Environment Variables (Optional)Meer items. Step 4: Verify Python Was Installed On Windows.
#Mac terminal edit file in python download#
Step 2: Download Python Executable Installer. Python 3 Installation on WindowsStep 1: Select Version of Python to Install. Once the installation is complete, verify the installation by checking the pip version: pip3 -version.
#Mac terminal edit file in python install#
Installing pip for Python 3Start by updating the package list using the following command: sudo apt update.Use the following command to install pip for Python 3: sudo apt install python3-pip. On terminal type - sudo su.Write down the root user password.Execute this command to switch to python 3. Steps to Set Python3 as Default On ubuntu?Check python version on terminal - python -version.Get root user privileges. It does not come bundled with Python and must be installed separately. This is not to be confused with the previously mentioned depreciated pyvenv script. If you wish to use multiple versions of Python on a single machine, then pyenv is a commonly used tool to install and switch between versions. Can I have 2 versions of Python installed? You'll see path to one of the python installations, change that to path of your desired version. On bottom you'll find 'Environment Variables'Double-click on the Path. How do I change Python version?įor Windows:Advanced System Settings > Advance (tab). Whenever your programs need to work with files, folders, or file paths, you can refer to the short examples in this section. Path is a module inside the os module, you can import it by simply running import os. How do I change directory in Jupyter notebook? How do I install a specific version of PIP?.How do I install the latest version of Python in Kali Linux?.How do I update python in Kali Linux 2020?.How do I make Python 3 default in Kali Linux?.Can I have 2 versions of Python installed?.How do I get the current path in Python?.How do I know where Python is installed?.Where is the working directory in Jupyter notebook?.How do I navigate to a different drive in Jupyter notebook?.How do I change directory in Jupyter notebook?.
#Mac terminal edit file in python how to#
So how to install python 3.7 as the standard-python-installation on a mac? (Could be also python3.8 by all means). I also ran the following command with an error: $ brew switch python 3.7Įrror: python does not have a version "3.7" in the Cellar.Īnd restarted the computer, but without success. bash_profile, but still python is only 3.6: $ python -V I also executed the suggested line to have python 3.7 symlinked: echo 'export > /Users/me/.bash_profile So I tried to install python 3.7 as follows brew install a lot of output. It was migrated from homebrew/cask to homebrew/core. There seems to be python 3.7 available: $ brew search pythonĪpp-engine-python boost-python3 ipython python-markdown reorder-python-importsīoost-python gst-python micropython python-yq ✔ wxpythonĪwips-python kk7ds-python-runtime mysql-connector-python I am running MacOS Mojave (10.14.6) and want to install python 3.7.Ĭurrently I have python 3.6 installed: $ python -V
0 notes
Text
How to install java on mac youtube.com

HOW TO INSTALL JAVA ON MAC YOUTUBE.COM HOW TO
HOW TO INSTALL JAVA ON MAC YOUTUBE.COM MAC OS X
HOW TO INSTALL JAVA ON MAC YOUTUBE.COM INSTALL
HOW TO INSTALL JAVA ON MAC YOUTUBE.COM MAC
The Ubuntu repository offers two (2), open-source Java packages, Java Development Kit (Open JDK) and Java Runtime Environment (Open JRE). In this document, we look at different packages within the Java SE. Access to the command-line/terminal window.Installing Java on CentOS 7 or CentOS 8.If you are looking for other Java installation guides, please refer to: HelloWorld.Note: This guide provides instructions that work on Ubuntu 18.04, Ubuntu 20.04 and any other Ubuntu-based distribution (including Linux Mint, Kubuntu, and Elementary OS). We are mapping the local directory with the directory: /usr/src/myapp inside the containerĬreate a docker-compose.yml file: version: "2".Here we are specifying the Java container running version 8 of the SDK ( java:8 - to use Java 7, you could just specify: java:7).Project dependencies are installed within the container - so if you mess up your config you can simply nuke the container and start again.Very easy to switch to different versions of Java by simply changing the tag on the container.No need to set up any version of Java on your local machine (you'll just run Java within a container which you pull from Docker Hub).You can simply run your application within the official JDK container - meaning that you don't have to worry about getting everything set up on your local machine (or worry about running multiple different versions of the JDK for different apps etc)Īlthough this might not help you with your current installation issues, it is a solution which means you can side-step the minefield of issues related with trying to get Java running correctly on your dev machine! To set JAVA_HOME: $ jenv enable-plugin exportĪn option that I am starting to really like for running applications on my local computer is to use Docker. To see all the installed java: $ jenv versionsĪbove command will give the list of installed java: * system (set by /Users/lyncean/.jenv/version)Ĭonfigure the java version which you want to use: $ jenv global oracle64-1.6.0.39 $ jenv add /Library/Java/JavaVirtualMachines/jdk1.11.0_2.jdk/Contents/Home $ echo 'eval "$(jenv init -)"' > ~/.bash_profileĪdd the installed java to jenv: $ jenv add /Library/Java/JavaVirtualMachines/jdk1.8.0_202.jdk/Contents/Home $ echo 'export PATH="$HOME/.jenv/bin:$PATH"' > ~/.bash_profile
HOW TO INSTALL JAVA ON MAC YOUTUBE.COM INSTALL
Install and configure jenv: $ brew install jenv If you want to install/manage multiple version then you can use 'jenv': To install java 8: $ brew cask install adoptopenjdk/openjdk/adoptopenjdk8 To install latest java: $ brew cask install java Install cask (with Homebrew 0.9.5 or higher, cask is included so skip this step): $ brew tap caskroom/cask
HOW TO INSTALL JAVA ON MAC YOUTUBE.COM MAC
Why doesn't Oracle's installer put it where it really goes? And how can I work around this problem?Īssumption: Mac machine and you already have installed homebrew. Ironically, the "Java" control panel under System Preferences shows only Java 1.8! usr/libexec/java_home -V still only lists the old Java 1.6. I've tried adding a symbolic link to make it look like 1.8 is in the /System/Library.
HOW TO INSTALL JAVA ON MAC YOUTUBE.COM HOW TO
But /usr/libexec/java_home doesn't find 1.8, so all the posts I've found on how to set your current java version don't work. Not sure why the latest installer puts this in /Library instead of /System/Library (nor what the difference is). I ran Oracle's Java 8 installer, and the files look like they ended up at /Library/Java/JavaVirtualMachines/jdk1.8.0_05.jdkīut previous versions are at /System/Library/Java/JavaFrameworks/jdk1.6.
HOW TO INSTALL JAVA ON MAC YOUTUBE.COM MAC OS X
I'm using IntelliJ 13 CE and Mac OS X 9 Mavericks. I want to do some programming with the latest JavaFX, which requires Java 8. Editors note: This question was asked in 2014, and the answers may be outdated.
0 notes
Text
Install spiceworks ubuntu

#INSTALL SPICEWORKS UBUNTU HOW TO#
#INSTALL SPICEWORKS UBUNTU INSTALL#
#INSTALL SPICEWORKS UBUNTU FULL#
#INSTALL SPICEWORKS UBUNTU SOFTWARE#
#INSTALL SPICEWORKS UBUNTU PASSWORD#
If CPU Temp is not Coming/not accurate in the System Monitor, then run below command in your Terminal/Shell.
#INSTALL SPICEWORKS UBUNTU INSTALL#
sudo apt-get install ubuntu-restricted-extras without this you would not be able to play videos inside the app. Ubuntu-restricted-extras package allows users to install ability to play popular non-free media formats, including DVD, MP3, Quicktime, and Windows Media formats.
App settings for adjust frequencies and measure units.
Realtime Internet speed indicator (Combine upload/download speed).
SYS INFO is a Best GUI looking Application for Monitoring Internet speed with System Monitor Utility. But for further information see paul2019’s comments below.IF APP IS NOT LAUNCHING AFTER INSTALL, THEN RUN CMD BELOW IN YOUR SHELL.** sudo snap remove htop-pro -purge & sudo snap install htop-pro & sudo snap refresh htop-pro & sudo snap install pyqt5-runtime-lite & sudo snap refresh pyqt5-runtime-liteįYI: Be Patient, Sometimes Snap Applications Takes A While To Launch At First Time Installations I am not a linux geek so I cant explain it. Ubuntu 10 changed around some stuff in the init folders. UPGRADE NOTE: If Upgrading Ubuntu from 9 to 10, you will need to re-install fog.
#INSTALL SPICEWORKS UBUNTU HOW TO#
This tutorial should have gotten you to the point where you can start to play with FOG yourself even if you have absolutely NO idea how to run Linux.įrom here you can start creating groups to image, advanced tasks and start shaping things to your environment. Make sure you have enough storage for your images. Verify image by booting computer and making sure everything works. In Host Image select the proper image that you created in the previous step from the dropdown.įrom another machine log onto login with fog/passwordĬlick on active Tasks, and either wait for the PC to check in and autoreboot or Reboot it manually. For dell computers with a utility partition you will HAVE to select multiple partition single disk.Īssign the Image to a host, this will be the image the host uses to restore and deploy from, You can assign this image to as many PCs as you want. Give it a name, description, default storage group, filename, and Image type (choose wisely). This would also be a good time to make sure that PXE is your primary boot option in BIOS, you might need to enable it. Run Setup.exe in the Fogservice folderĪccept defaults (FOG does not like to be installed in locations other than default)Įnter the ip or preferrably the hostname if you created one. Scroll down to number 67 check and give the value pxelinux.0Ĥ. Scroll Down to number 66 check and give the hostname of FOGSERVER Right Click Scope Options -> Configure Options eg I would recommend putting an A record in your DNS called FOGSERVER this will make things easier to remember.ģ. You can now reach this webpage from anywhere on the network where your server is installed by using it’s ip address.
#INSTALL SPICEWORKS UBUNTU PASSWORD#
Gksu gedit /var/It has been noted that you also should change the MYSQL password here while you are at it /opt/fog/service/etc/config.php.Ĭlick to log in. (I like to notify the FOG group, they have made a great product and deserve my feedback, choice is yours here) (will require changing my current DHCP server.) No do not change the default network interface.(you may not get this prompt if you have 1 nic) Set up a DNS IP, just accept the default. You dont need to set up a router IP but I will in case I ever use the server for DHCP. Open Terminal Applications->Accessories->TerminalĬd Desktop (Remember Linux is case sensitive) So go to their website, download the workstation x86 ISO and burn it.Įnter User Information and Computer information, I named mine ‘foghat’ with foguser I wanted a GUI so I went with the desktop Ubuntu, you may want to go with Ubuntu server. I would suggest setting aside about 4 hours to do this, depending on the size of the test PC. Please post feedback, this has potential to be an amazing asset to all of you who are in need of an imaging solution. Use this menu to remove any listed package. In this menu, you’ll be able to click Remove on any application that wish to uninstall.
#INSTALL SPICEWORKS UBUNTU FULL#
To access a full list of installed applications, click on the Installed tab at the top.
#INSTALL SPICEWORKS UBUNTU SOFTWARE#
I have tried to include as many of the video tutorials from their site as I could find… Open the Ubuntu Software application from GNOME’s app launcher. It can also boot the pcs to a memtest utility or a disk utility. This guide will walk you through creating a FOG server from scratch to deployment of an image.įOG is a image management server that can be used for multicasting an image to hundreds of PCs or imaging a single one. This how-to was created by DigitalBlacksmith from the Spiceworks Community Forums. At Canonical, we’ve been doing work to make sure Ubuntu OpenStack deploys on ARM servers as easily as on x86.
1 note
·
View note
Last Seen Blogs

louise5137-blog
I'm addicted

malepulchritude4
Male Muscle, Mostly Hairy

louis-and-harry-love-blog1
larry is real

tonicitaa
☆Toni/Jay☆

tscdshipin
全网最齐全最便宜Ts【人妖】Cd【伪娘】资源,视