#httpclient
Explore tagged Tumblr posts
Visit Tumblr Blog
Explore Tumblr blogs with no restrictions, modern design and the best experience.
Last Seen Tumblr Blogs


Fun Fact
The “We are the 99%” Tumblr blog became the slogan for the Occupy Wall Street movement.
Text
Angular HTTP: Connecting to the REST API by Abdelfattah Ragab
In this book, I explain everything you need to know about connecting to backend Rest APIs from your Angular application. In this book, I will show you how to invoke different methods like GET, POST, and the like, how to use interceptors to inject an authentication token into every outgoing request, and much more. We will cover all areas of calling Rest APIs with Angular. By the end of this book, you will be able to call Rest APIs from your Angular application in any scenario. Let us get started.
The e-book is only available on the author's website https://books.abdelfattah-ragab.com with amazing discounts of up to 40%.

0 notes
Text
Integrating Third-Party APIs in .NET Applications
In today’s software landscape, building a great app often means connecting it with services that already exist—like payment gateways, email platforms, or cloud storage. Instead of building every feature from scratch, developers can use third-party APIs to save time and deliver more powerful applications. If you're aiming to become a skilled .NET developer, learning how to integrate these APIs is a must—and enrolling at the Best DotNet Training Institute in Hyderabad, Kukatpally, KPHB is a great place to start.
Why Third-Party APIs Matter
Third-party APIs let developers tap into services built by other companies. For example, if you're adding payments to your app, using a service like Razorpay or Stripe means you don’t have to handle all the complexity of secure transactions yourself. Similarly, APIs from Google, Microsoft, or Facebook can help with everything from login systems to maps and analytics.
These tools don’t just save time—they help teams build better, more feature-rich applications.
.NET Makes API Integration Easy
One of the reasons developers love working with .NET is how well it handles API integration. Using built-in tools like HttpClient, you can make API calls, handle responses, and even deal with errors in a clean and structured way. Plus, with async programming support, these interactions won’t slow down your application.
There are also helpful libraries like RestSharp and features for handling JSON that make working with APIs even smoother.
Smart Tips for Successful Integration
When you're working with third-party APIs, keeping a few best practices in mind can make a big difference:
Keep Secrets Safe: Don’t hard-code API keys—use config files or environment variables instead.
Handle Errors Gracefully: Always check for errors and timeouts. APIs aren't perfect, so plan for the unexpected.
Be Aware of Limits: Many APIs have rate limits. Know them and design your app accordingly.
Use Dependency Injection: For tools like HttpClient, DI helps manage resources and keeps your code clean.
Log Everything: Keep logs of API responses—this helps with debugging and monitoring performance.
Real-World Examples
Here are just a few ways .NET developers use third-party APIs in real applications:
Adding Google Maps to show store locations
Sending automatic emails using SendGrid
Processing online payments through PayPal or Razorpay
Uploading and managing files on AWS S3 or Azure Blob Storage
Conclusion
Third-party APIs are a powerful way to level up your .NET applications. They save time, reduce complexity, and help you deliver smarter features faster. If you're ready to build real-world skills and become job-ready, check out Monopoly IT Solutions—we provide hands-on training that prepares you for success in today’s tech-driven world.
#best dotnet training in hyderabad#best dotnet training in kukatpally#best dotnet training in kphb#best .net full stack training
0 notes
Text
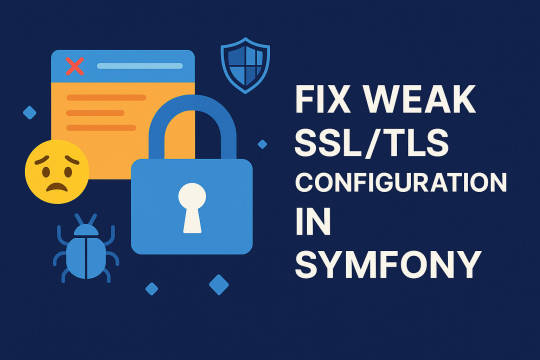
Weak SSL/TLS Configuration in Symfony — Risks & Fixes
Introduction
Secure communication is critical in today’s web applications, especially when handling sensitive user data. Symfony, one of the most popular PHP frameworks, relies heavily on SSL/TLS protocols to secure HTTP connections. However, weak SSL/TLS configurations can expose your application to man-in-the-middle (MITM) attacks, data breaches, and regulatory penalties.
In this blog, we’ll explore what weak SSL/TLS configuration means in Symfony applications, why it’s dangerous, and how you can fix it with practical coding examples. Plus, you’ll get a peek at how our Website Vulnerability Scanner online free, helps identify such vulnerabilities automatically.
What is Weak SSL/TLS Configuration?
SSL (Secure Sockets Layer) and TLS (Transport Layer Security) are cryptographic protocols designed to secure communication over the internet. A weak SSL/TLS configuration involves:
Using deprecated protocols like SSL 2.0, SSL 3.0, or early TLS versions (TLS 1.0/1.1).
Employing weak cipher suites (e.g., RC4, DES).
Missing forward secrecy (PFS).
Poor certificate validation or expired certificates.
These weaknesses can be exploited to intercept or alter data during transmission.
Common SSL/TLS Weaknesses in Symfony
Symfony itself relies on the underlying web server (Apache, Nginx) or PHP cURL/OpenSSL for TLS. Misconfigurations can happen at various layers:
Web server allows weak protocols/ciphers.
PHP cURL requests do not enforce strict SSL verification.
Symfony HTTP clients or bundles not configured for secure TLS options.
Detecting Weak SSL/TLS Configurations with Our Free Tool
You can scan your website for SSL/TLS issues quickly at https://free.pentesttesting.com/.
Screenshot of the Website Vulnerability Scanner tool webpage

Screenshot of the free tools webpage where you can access security assessment tools.
Our tool will generate a detailed vulnerability report, highlighting SSL/TLS weaknesses among other issues.
Assessment report screenshot to check Website Vulnerability

An Example of a vulnerability assessment report generated with our free tool, providing insights into possible vulnerabilities.
How to Fix Weak SSL/TLS Configuration in Symfony
1. Configure Your Web Server Correctly
Ensure your Apache or Nginx server uses strong protocols and ciphers. For example, in Nginx:
ssl_protocols TLSv1.2 TLSv1.3; ssl_ciphers 'ECDHE-ECDSA-AES256-GCM-SHA384:ECDHE-RSA-AES256-GCM-SHA384'; ssl_prefer_server_ciphers on; ssl_session_cache shared:SSL:10m; ssl_session_tickets off;
This disables weak protocols and uses strong cipher suites with Perfect Forward Secrecy.
2. Enforce SSL Verification in PHP cURL Requests
When Symfony makes external HTTP calls via PHP cURL, enforce strict SSL checks.
$ch = curl_init('https://api.example.com/secure-endpoint'); curl_setopt($ch, CURLOPT_RETURNTRANSFER, true); curl_setopt($ch, CURLOPT_SSL_VERIFYPEER, true); // Verify SSL certificate curl_setopt($ch, CURLOPT_SSL_VERIFYHOST, 2); // Verify host name matches cert $response = curl_exec($ch); if(curl_errno($ch)) { throw new \Exception('SSL Error: ' . curl_error($ch)); } curl_close($ch);
3. Use Symfony HTTP Client with Secure Defaults
Since Symfony 4.3+, the HTTP Client component uses secure defaults, but always ensure SSL verification is enabled:
use Symfony\Component\HttpClient\HttpClient; $client = HttpClient::create([ 'verify_peer' => true, 'verify_host' => true, ]); $response = $client->request('GET', 'https://secure-api.example.com/data'); $statusCode = $response->getStatusCode(); $content = $response->getContent();
4. Regularly Update Your Certificates and Libraries
Expired or self-signed certificates can break trust chains. Use trusted CAs and update OpenSSL and PHP regularly.
Bonus: Automate SSL/TLS Testing in Your Symfony CI/CD Pipeline
You can add an automated SSL check using tools like testssl.sh or integrate vulnerability scanning APIs such as our free tool’s API (check details at https://free.pentesttesting.com/).
About Pentest Testing Corp.
For comprehensive security audits, including advanced web app penetration testing, check out our service at Web App Penetration Testing Services.
Also, don’t miss our cybersecurity insights and updates on our blog.
Subscribe to our newsletter for the latest tips: Subscribe on LinkedIn.
Conclusion
Weak SSL/TLS configurations put your Symfony apps and users at significant risk. By following secure web server settings, enforcing SSL verification in PHP/Symfony, and leveraging automated scanning tools for a Website Security test, you can greatly improve your application’s security posture.
Stay safe, keep scanning, and secure your Symfony apps today!
If you found this blog helpful, please share and follow our blog at Pentest Testing Corp.
1 note
·
View note
Text
Boost Angular Performance: Mastering Ivy & HttpClient
1. Introduction Angular is one of the most widely-used frameworks for building dynamic web applications. However, as applications grow in complexity, performance can become a bottleneck. In this tutorial, we will explore two key areas to boost Angular performance: mastering Ivy and optimizing HttpClient. Ivy, Angular’s next-generation rendering engine, and HttpClient, Angular’s powerful HTTP…
0 notes
Photo

New Post has been published on https://codebriefly.com/state-management-and-data-handling-in-angular-19/
State Management and Data Handling in Angular 19
Efficient state management and data handling are essential for building dynamic and responsive web applications. Angular 19 introduces new strategies and techniques that simplify managing complex state logic while improving performance and scalability. In this article, we will explore advanced state management techniques, data handling best practices, and modern libraries like NgRx and Akita that enhance data flow in Angular applications.
Table of Contents
Toggle
Why State Management Matters
Popular State Management Libraries in Angular 19
Using NgRx for State Management
Key Concepts of NgRx
Setting Up NgRx in Angular 19
Creating Actions
Defining Reducers
Using Selectors
Akita: State Management Made Simple
Key Concepts of Akita
Setting Up Akita
Creating a Store
Advanced Data Handling Techniques in Angular 19
Signal API for Real-Time Data
HttpClient for Data Fetching
Example of Using HttpClient
Handling Errors
Final Thoughts
Why State Management Matters
State management is critical in Angular applications to ensure consistent data flow and predictable behavior. Without proper management, applications can become cumbersome and prone to bugs, especially as they grow in size and complexity.
Popular State Management Libraries in Angular 19
Angular 19 supports several robust state management libraries, each with its unique features and benefits. The most commonly used libraries include:
Library Key Features Use Cases NgRx Redux-like state management, immutability, actions, and reducers Large-scale applications with complex state Akita State management with observables and entity-based architecture Medium to large applications requiring reactive state management NGXS Simple and modular state management Small to medium applications MobX Reactive state management with observables Applications requiring automatic state updates
Using NgRx for State Management
NgRx is a popular library in the Angular ecosystem for implementing reactive state management. It follows a Redux-inspired pattern, using actions, reducers, and effects.
Key Concepts of NgRx
Actions: Define what needs to change in the state.
Reducers: Handle state transitions based on actions.
Selectors: Retrieve data from the state.
Effects: Handle side effects such as HTTP requests.
Setting Up NgRx in Angular 19
To install NgRx, run the following command:
ng add @ngrx/store @ngrx/effects @ngrx/store-devtools
Creating Actions
import createAction, props from '@ngrx/store'; export const loadUsers = createAction('[User API] Load Users'); export const loadUsersSuccess = createAction('[User API] Load Users Success', props< users: any[] >());
Defining Reducers
import createReducer, on from '@ngrx/store'; import loadUsersSuccess from './user.actions'; export const initialState = users: [] ; const userReducer = createReducer( initialState, on(loadUsersSuccess, (state, users ) => ( ...state, users )) );
Using Selectors
import createSelector from '@ngrx/store'; export const selectUsers = (state: any) => state.users;
Akita: State Management Made Simple
Akita offers a straightforward way to manage state using observables and stores. It is ideal for applications that require a reactive and modular state management approach.
Key Concepts of Akita
Stores: Hold the application state.
Queries: Select data from the store.
Entities: Manage collections of records.
Setting Up Akita
npm install @datorama/akita
Creating a Store
import Store, StoreConfig from '@datorama/akita'; export interface UserState users: string[]; @StoreConfig( name: 'user' ) export class UserStore extends Store<UserState> constructor() super( users: [] );
Advanced Data Handling Techniques in Angular 19
Efficient data handling is vital to keep applications responsive and optimized. Angular 19 introduces improved support for handling data through:
Signal API for Real-Time Data
Signals in Angular 19 allow developers to build responsive applications by automatically tracking changes without manual subscriptions.
HttpClient for Data Fetching
Angular’s HttpClient provides a robust way to make HTTP requests while maintaining type safety and handling errors.
Example of Using HttpClient
import HttpClient from '@angular/common/http'; import Observable from 'rxjs'; constructor(private http: HttpClient) getUsers(): Observable<any[]> return this.http.get<any[]>('https://api.example.com/users');
Handling Errors
Use RxJS operators like catchError to manage API errors gracefully.
getUsers().pipe( catchError(error => console.error('Error fetching users', error); return of([]); ) );
Final Thoughts
State management and data handling are vital for building robust and scalable Angular applications. Angular 19’s support for libraries like NgRx and Akita, coupled with advanced data handling techniques, enables developers to build highly efficient apps. By mastering these concepts, you can create responsive and dynamic applications that cater to modern user expectations.
Keep learning & stay safe 😉
You may like:
Angular 19 Fundamentals
Advanced Concepts and Features in Angular 19
Angular 19 Forms and Validation
0 notes
Text
Selenium, JMeter, Postman: Essential Tools for Full Stack Testers Using Core Java
Testing in software development has evolved into a critical discipline, especially for full-stack testers who must ensure applications function seamlessly across different layers. To achieve this, mastering automation and performance testing tools like Selenium, JMeter, and Postman is non-negotiable. When paired with Core Java, these tools become even more powerful, enabling testers to automate workflows efficiently.
Why Core Java Matters for Full Stack Testing?
Core Java provides the foundation for automation testing due to its:
Object-Oriented Programming (OOP) concepts that enhance reusability.
Robust exception handling mechanisms to manage errors effectively.
Multi-threading capabilities for parallel execution in performance testing.
Rich library support, making interactions with APIs, databases, and UI elements easier.
Let's explore how these three tools, powered by Core Java, fit into a tester’s workflow.
1. Selenium: The Backbone of UI Automation
Selenium is an open-source tool widely used for automating web applications. When integrated with Java, testers can write scalable automation scripts that handle dynamic web elements and complex workflows.
How Core Java Enhances Selenium?
WebDriver API: Java simplifies handling elements like buttons, forms, and pop-ups.
Data-driven testing: Java’s file handling and collections framework allow testers to manage test data effectively.
Frameworks like TestNG & JUnit: These Java-based frameworks provide structured reporting, assertions, and test case organization.
Example: Automating a Login Page with Selenium & Java

This simple script automates login validation and ensures that the dashboard page loads upon successful login.
2. JMeter: Performance Testing Made Simple
JMeter is a powerful performance testing tool used to simulate multiple users interacting with an application. Core Java aids in custom scripting and result analysis, making JMeter tests more versatile.
Java’s Role in JMeter
Writing custom samplers for executing complex business logic.
Integrating with Selenium for combined UI and performance testing.
Processing JTL results using Java libraries for deep analysis.
Example: Running a Load Test with Java

This Java-based JMeter execution script sets up a test plan with 100 virtual users.
3. Postman: API Testing and Core Java Integration
Postman is widely used for API testing, allowing testers to validate RESTful and SOAP services. However, for advanced automation, Postman scripts can be replaced with Java-based REST clients using RestAssured or HTTPClient.
Core Java’s Power in API Testing
Sending GET/POST requests via Java’s HTTP libraries.
Parsing JSON responses using libraries like Jackson or Gson.
Automating API test suites with JUnit/TestNG.
Example: Sending an API Request Using Java

This snippet retrieves a JSON response from a dummy API and prints its contents.
Key Takeaways
Selenium + Core Java = Robust UI Automation.
JMeter + Core Java = Advanced Load Testing.
Postman + Core Java = Scalable API Automation.
Mastering these tools with Core Java sets full-stack testers apart, enabling them to build comprehensive, scalable, and efficient test automation frameworks.
Frequently Asked Questions (FAQ)
Q1: Why is Core Java preferred over other languages for testing? A: Java’s portability, object-oriented features, and vast libraries make it an ideal choice for automation testing.
Q2: Can I use Postman without Java? A: Yes, but using Java-based libraries like RestAssured provides more control and scalability in API automation.
Q3: How do I choose between Selenium and JMeter? A: Selenium is for UI automation, while JMeter is for performance testing. If you need both, integrate them.
Q4: Is Java mandatory for Selenium? A: No, Selenium supports multiple languages, but Java is the most widely used due to its reliability.
Q5: What are the best Java frameworks for test automation? A: TestNG, JUnit, Cucumber, and RestAssured are the most popular for various types of testing.
#TestingTools#AutomationTesting#FullStackTesting#Selenium#JMeter#Postman#CoreJava#JavaTesting#SoftwareTesting#APITesting#PerformanceTesting#TestAutomation#QA#QualityAssurance#TechBlog#Coding#DevLife
1 note
·
View note
Text
Java蜘蛛池
在当今互联网时代,数据的获取和分析变得越来越重要。而爬虫技术作为数据抓取的重要手段之一,被广泛应用于各个领域。其中,Java作为一种强大的编程语言,在构建高效的爬虫系统中扮演着关键角色。本文将深入探讨Java蜘蛛池的概念、优势以及如何构建一个高效且稳定的Java蜘蛛池。
什么是Java蜘蛛池?
Java蜘蛛池,也称为Java爬虫池,是一种利用Java语言开发的分布式爬虫系统。它通过多个爬虫节点协同工作,能够高效地从互联网上抓取大量数据。与单个爬虫相比,蜘蛛池可以显著提高数据抓取的速度和效率。
Java蜘蛛池的优势
1. 高并发性:通过多线程或多进程的方式,Java蜘蛛池可以同时处理大量的请求,极大地提高了数据抓取的速度。
2. 稳定性:分布式架构使得系统更加稳定,即使某个节点出现问题,其他节点仍然可以继续工作,保证了系统的正常运行。
3. 可扩展性:随着需求的增长,可以通过增加节点来扩展系统的处理能力,灵活应对不断变化的需求。
4. 安全性:通过合理的配置和管理,可以有效避免被目标网���封禁,确保爬虫任务的顺利进行。
如何构建一个Java蜘蛛池
构建一个Java蜘蛛池需要以下几个步骤:
1. 需求分析:明确爬虫的目标和需求,确定要抓取的数据类型和来源。
2. 设计架构:根据需求设计系统的整体架构,包括爬虫节点的设计、任务调度机制等。
3. 选择工具和技术栈:选择合适的Java框架(如Spring Boot)和库(如Jsoup、HttpClient),以及数据库管理系统。
4. 实现功能:编写代码实现爬虫的功能,包括页面解析、数据存储等。
5. 测试和优化:对系统进行全面的测试,找出并修复问题,优化性能。
结语
Java蜘蛛池作为一种高效的数据抓取工具,已经在许多场景中得到了广泛应用。无论是用于市场调研、数据分析还是内容监控,Java蜘蛛池都能提供强大的支持。希望本文能为想要涉足这一领域的开发者们提供一些启示和帮助。你是否也在考虑构建自己的Java蜘蛛池?欢迎在评论区分享你的想法和经验!
请确认以上内容是否符合您的要求,如果有任何修改意见,请随时告知!
加飞机@yuantou2048

负面删除
EPS Machine
0 notes
Text
Learn Full Stack Development with Spring Boot and Angular
Full stack development is a powerful skill, enabling developers to create seamless and scalable applications by integrating front-end and back-end technologies. Combining Spring Boot for back-end development with Angular for the front-end provides a robust framework for building modern web applications. This guide will walk you through learning full stack development with these two technologies.
Why Choose Spring Boot and Angular?
Spring Boot
A Java-based framework that simplifies the creation of production-ready applications.
Provides built-in configurations to reduce boilerplate code.
Offers excellent support for REST APIs and database management.
Angular
A TypeScript-based front-end framework by Google.
Enables the development of dynamic, single-page applications (SPAs).
Offers features like two-way data binding, dependency injection, and a component-based architecture.
By integrating Spring Boot and Angular, you can create full stack applications that are efficient, scalable, and maintainable.
Prerequisites
Before diving into Spring Boot and Angular, ensure you have a basic understanding of:
Java and Object-Oriented Programming (OOP) concepts.
TypeScript and JavaScript fundamentals.
HTML, CSS, and basic front-end development.
Familiarity with RESTful APIs and database concepts.
Setting Up Your Development Environment
For Spring Boot
Install Java Development Kit (JDK).
Set up an Integrated Development Environment (IDE), such as IntelliJ IDEA or Eclipse.
Add Maven or Gradle for dependency management.
Use Spring Initializr to bootstrap your Spring Boot project.
For Angular
Install Node.js and npm (Node Package Manager).
Install the Angular CLI using the command: npm install -g @angular/cli
Set up a code editor like Visual Studio Code.
Key Concepts to Master
Back-End with Spring Boot
Creating REST APIs
Use annotations like @RestController, @RequestMapping, and @PostMapping.
Implement services and controllers to handle business logic.
Database Integration
Use Spring Data JPA with Hibernate for ORM (Object-Relational Mapping).
Work with relational databases like MySQL or PostgreSQL.
Security
Implement authentication and authorization with Spring Security.
Use JWT (JSON Web Tokens) for secure communication.
Testing
Write unit tests with JUnit and integration tests using MockMvc.
Front-End with Angular
Component-Based Architecture
Learn to create reusable components with Angular CLI.
Manage application state and communication between components.
Routing and Navigation
Use the Angular Router to create SPAs with multiple views.
HTTP Client
Communicate with back-end APIs using Angular’s HttpClientModule.
Forms and Validation
Implement reactive forms and template-driven forms.
Validate user inputs effectively.
Integrating Spring Boot and Angular
Set Up Cross-Origin Resource Sharing (CORS)
Configure Spring Boot to allow requests from the Angular front-end.
Connect Front-End and Back-End
Use Angular’s HttpClient to send requests to Spring Boot endpoints.
Serve Angular from Spring Boot
Build the Angular project and place the output in the Spring Boot static directory.
Deploy the Application
Use tools like Docker to containerize the application for deployment.
Fullstack course in chennai
Fullstack development course in chennai
Fullstack training in chennai

0 notes
Text
Top 10 API Testing Tools
API testing is a crucial aspect of software development, ensuring that APIs function as intended and integrate seamlessly with other systems. Selecting the right testing tool is vital for efficiency and reliability. Several leading API testing tools cater to diverse needs, offering unique features and functionalities.
Postman stands out as a popular tool, offering a user-friendly interface for manual and automated testing, with robust collaboration features. SoapUI is another notable choice, ideal for testing SOAP and REST APIs, providing advanced functionalities for security and load testing. For developers seeking a lightweight and scriptable tool, REST Assured is a strong contender, leveraging Java for seamless integration.
Katalon Studio combines API testing with web and mobile testing, streamlining workflows through its all-in-one platform. JMeter, while primarily a performance testing tool, effectively handles API load testing to measure scalability under stress. Apache HttpClient supports API testing through its Java library, suitable for developers preferring a programmatic approach.
For open-source enthusiasts, Karate DSL offers an integrated framework for API testing, while ReadyAPI provides enterprise-level capabilities for complex environments. Hoppscotch is an efficient alternative to Postman, emphasizing simplicity and speed in API testing. Lastly, Swagger Inspector simplifies testing during API development, ensuring compliance with design standards.
Each tool caters to specific requirements, from ease of use to advanced features, making it crucial to evaluate them based on project needs. Proper API testing with the right tool ensures software quality, reliability, and user satisfaction, solidifying a project's success.
0 notes
Text
Angular HTTP: Connecting to the REST API by Abdelfattah Ragab
Angular HTTP: Connecting to the REST API by Abdelfattah Ragab
In this book, I explain everything you need to know about connecting to backend Rest APIs from your Angular application. In this book, I will show you how to invoke different methods like GET, POST, and the like, how to use interceptors to inject an authentication token into every outgoing request, and much more. We will cover all areas of calling Rest APIs with Angular. By the end of this book, you will be able to call Rest APIs from your Angular application in any scenario. Let us get started.
Available on https://shop.tredition.com and https://www.amazon.com

0 notes
Text
JwtDecoder
@Configuration
@Slf4j
public class JwtDecoderConfig {
@NotBlank
@Value("${spring.security.oauth2.resourceserver.jwt.issuer-uri}")
private String issuerUri;
@NotBlank
@Value("${keycloak.truststore}")
private Resource trustStore;
@NotBlank
@Value("${keycloak.truststore-password}")
private String trustStorePw;
@Bean
public JwtDecoder jwtDecoder() {
return NimbusJwtDecoder
.withIssuerLocation(issuerUri)
.restOperations(restTemplate())
.build();
}
private RestTemplate restTemplate() {
log.info("RestTemplate for issuer-uri");
SSLContext sslContext = null;
try {
sslContext = new SSLContextBuilder()
.loadTrustMaterial(trustStore.getURL(), trustStorePw.toCharArray())
.build();
} catch (KeyManagementException | NoSuchAlgorithmException | KeyStoreException | CertificateException
| IOException e) {
log.error("ERROR while SSLContext building.", e);
return null;
}
final TlsSocketStrategy tlsStrategy = new ConscryptClientTlsStrategy(
sslContext, NoopHostnameVerifier.INSTANCE);
final HttpClientConnectionManager cm = PoolingHttpClientConnectionManagerBuilder.create()
.setTlsSocketStrategy(tlsStrategy)
.setDefaultTlsConfig(TlsConfig.custom()
.setHandshakeTimeout(Timeout.ofSeconds(30))
.setSupportedProtocols(TLS.V_1_3)
.build())
.build();
final CloseableHttpClient httpClient = HttpClients.custom()
.setConnectionManager(cm)
.build();
final var requestFactory = new HttpComponentsClientHttpRequestFactory();
requestFactory.setHttpClient(httpClient);
return new RestTemplate(requestFactory);
}
}
0 notes
Text
Integrating Third-Party APIs in .NET Applications
In the world of modern software development, building applications that are both powerful and flexible often involves tapping into external services. These services, commonly offered through third-party APIs (Application Programming Interfaces), allow developers to access features like payment processing, real-time notifications, map integrations, and much more. If you want to become an expert in this essential area, enrolling in the best dotnet training in Hyderabad is a great way to build your skills and stay ahead in the industry.
What Are Third-Party APIs?
Third-party APIs are pre-built interfaces provided by external companies or platforms that allow your application to communicate with their services. For instance, if you want to include Google Maps, integrate PayPal, or fetch weather updates from OpenWeatherMap, you would use their APIs. Instead of developing these complex features from scratch, you can simply connect and use them in your own .NET applications.
Why Use APIs in .NET Projects?
Using APIs in your .NET projects provides many advantages:
Time Efficiency: APIs offer ready-made solutions, reducing the time and effort needed to develop features.
Reliability: Established APIs are tested and maintained by their providers, ensuring better performance and fewer bugs.
Scalability: APIs are built to handle large volumes of data and users, making them a good fit for scalable apps.
Innovation: Access to APIs opens up a wide range of features you can integrate into your app, enhancing user experience.
How to Integrate APIs in .NET
APIs can easily be connected with ASP.NET Core. Here’s a basic approach:
In .NET, the HttpClient class is the primary way to send HTTP requests and receive responses.
Work with JSON – Most APIs return data in JSON format. In .NET, either System.Text.Json or Newtonsoft.Json can be used to serialize and deserialize JSON data.
Secure Configuration – Store API keys and credentials in configuration files using appsettings.json or environment variables for better security.
Best Practices for API Integration
Error Handling: Always check for status codes and handle errors gracefully. Timeouts and API failures should not crash your app.
Rate Limiting Awareness: Be mindful of how many requests you send to an API.The purpose of rate limits is to prevent abuse by providers.
Secure Your Data: Never hard-code sensitive information like API keys into your codebase. Use secure storage methods instead.
Conclusion
Integrating third-party APIs is a must-have skill for any modern .NET developer. It enables you to create feature-rich, scalable, and highly responsive applications with less effort and faster turnaround times. By mastering this through real-world practice, you position yourself for greater opportunities in software development.
To get started on your learning journey with expert guidance, real-time projects, and industry-relevant skills, we recommend enrolling at Monopoly IT Solutions Pvt. Ltd, a trusted name in .NET training and professional development.
#best dotnet training in hyderabad#best dotnet training in kukatpally#best dotnet training in kphb#best .net full stack training
0 notes
Text
Fix Weak Password Policy in Symfony Securely
In today’s digital age, user credentials are gold. Yet, many Symfony-based applications still rely on weak password policies, making them vulnerable to brute-force attacks and credential stuffing. In this guide, we'll break down how to detect and fix weak password policy in Symfony, provide live code examples, and show you how our free Website Security Scanner tool can help.

👉 Visit our full blog at Pentest Testing Corp for more cybersecurity insights.
🔐 Why Weak Password Policy in Symfony is a Security Threat
A weak password policy allows users to set passwords that are:
Too short
Lacking complexity (e.g., no numbers or special characters)
Common or predictable (e.g., "123456", "password")
Not checked against previously compromised passwords
Such policies invite attackers to exploit user accounts easily using automated tools or stolen credential dumps.
🛠️ How to Fix Weak Password Policy in Symfony
Let’s walk through practical Symfony code examples that enforce a strong password policy and validation during registration.
✅ 1. Enforce Validation Rules in UserType Form
Symfony uses form classes for user input. Here's how to validate passwords using constraints.
📄 src/Form/UserType.php
use Symfony\Component\Form\AbstractType; use Symfony\Component\Form\FormBuilderInterface; use Symfony\Component\Validator\Constraints\Length; use Symfony\Component\Validator\Constraints\NotBlank; use Symfony\Component\Validator\Constraints\Regex; class UserType extends AbstractType { public function buildForm(FormBuilderInterface $builder, array $options) { $builder ->add('password', PasswordType::class, [ 'constraints' => [ new NotBlank([ 'message' => 'Password should not be blank.', ]), new Length([ 'min' => 8, 'minMessage' => 'Your password should be at least {{ limit }} characters', ]), new Regex([ 'pattern' => '/^(?=.*[A-Z])(?=.*\d)(?=.* [^A-Za-z0-9])/', 'message' => 'Password must contain at least 1 uppercase letter, 1 digit, and 1 special character.' ]) ] ]); } }
✅ This ensures users cannot create weak passwords during signup or password updates.
🧰 2. Add Password Strength Meter (Frontend UX)
To improve usability, show users how strong their password is.
📄 templates/registration.html.twig
<input type="password" id="plainPassword" name="password" /> <progress value="0" max="100" id="strengthMeter"></progress> <script> document.getElementById('plainPassword').addEventListener('input ', function(e) { const val = e.target.value; let strength = 0; if (val.length >= 8) strength += 20; if (/[A-Z]/.test(val)) strength += 20; if (/[0-9]/.test(val)) strength += 20; if (/[^A-Za-z0-9]/.test(val)) strength += 20; if (val.length >= 12) strength += 20; document.getElementById('strengthMeter').value = strength; }); </script>
This gives real-time feedback to users, encouraging them to choose stronger passwords.
🔄 3. Check for Compromised Passwords Using HaveIBeenPwned API
Prevent users from using known breached passwords.
📄 src/Service/PasswordBreachedChecker.php
use Symfony\Contracts\HttpClient\HttpClientInterface; class PasswordBreachedChecker { private $client; public function __construct(HttpClientInterface $client) { $this->client = $client; } public function isBreached(string $password): bool { $sha1 = strtoupper(sha1($password)); $prefix = substr($sha1, 0, 5); $suffix = substr($sha1, 5); $response = $this->client->request('GET', 'https://api.pwnedpasswords.com/range/' . $prefix); $body = $response->getContent(); return strpos($body, $suffix) !== false; } }
⚠️ If isBreached() returns true, you should reject the password and ask the user to try a stronger one.
📸 Screenshot 1: Our Website Vulnerability Scanner Tool

This tool automatically detects issues like weak password policy, outdated libraries, misconfigurations, and more. No sign-up required.
📸 Screenshot 2: Sample Security Report to check Website Vulnerability

Use the report insights to quickly patch weaknesses and apply secure password policies.
🧪 Test Your Symfony App Now (FREE)
Want to know if your Symfony app is secure? Run a free scan now: 🔗 https://free.pentesttesting.com/
📌 Need Help? Try Our Web App Penetration Testing Services
We offer advanced web application penetration testing services tailored for Symfony apps.
👉 Learn more here: 🔗 https://www.pentesttesting.com/web-app-penetration-testing-services/
📬 Stay Updated with the Latest Security Tips
Subscribe to our weekly newsletter on LinkedIn for industry updates, new tools, and expert insights.
🔗 Subscribe on LinkedIn
📚 More Guides on Symfony Security
Check out our latest security tutorials and guides on our official blog: 🔗 https://www.pentesttesting.com/blog/
💬 Have questions or want your site reviewed? Leave a message or DM us!
0 notes
Text
How to Consume a REST API with Angular HttpClient | Todo App Guide
1. Introduction 1.1 Overview In this tutorial, we explore how to build a Todo application using Angular’s HttpClient to interact with a REST API. We will cover fetching, sending, and manipulating data, showcasing both basic and advanced techniques. 1.2 Learning Outcomes By the end, you’ll know how to: – Use Angular HttpClient for REST API communication. – Implement CRUD operations in a real…
0 notes
Text
Moving from exist-db 3.0.1 to 6.0.1 6.2.0
That's an awful lot of release notes to read through but it needs to be done, even though its hard to know how the changes will affect my code.
As a first step I need to get things working without being tempted to utilise new XQuery features (I haven't used maps and arrays ) [see https://www.w3.org/TR/xquery-30/] and new modules (spatial index)
Very tempting to clear out old stuff whilst I do this but of course would be better done beforehand.
Need to be sure which scripts are being invoked from Apache
Getting one website running - Bristol Sailing Association, loading from an unzipped backup of the 3.0.1 database + others
Usual problem of testing applications which use my approach a REST-style - most have a config set up to allow path prefix to be changed from /Tree/ to ?_path= For this to work care needed on where script is located in the directory tree .... and Ive been inconsistent about how I implement this scheme
lots of permissions to change since these are not included in the backup - no function for this in the eXide UI - need to write a small tool to set permissions and do reindexes - about time but why is it necessary - ask dannes
missing the old dashboard application - problems in using the eXide db:Manager can't get below the db level - Cant get client.sh to work - problem with X11 ; using webdav instead is working
math module import has changed to
import module namespace math ="http://www.w3.org/2005/xpath-functions/math"; (actually no longer needs to be declared at all)
math:power () changed to math:pow()
math:abs to fn:abs()
math:floor() to fn:floor()
math:ceil() to fn:ceiling()
? are the arguments to atan2 ($y,$x) the same as in the old Math module -yes
math:radians() and math:degrees() have gone - no replacement (I put them in geo but should I have a standalone module for these bits - some in tp, some in wfn ?
fn:round() takes a precision argument so can replace fn:round-half-to-even()
xsl:format-date() to fn:format-date() but the picture format is quite different see https://www.w3.org/TR/xpath-functions-31/
eg "DD MMM - HH:mm" becomes "[D01] [MN,*-3] - [H01]:[m01]"
httpclient module has gone - use http://expath.org/ns/http-client instead - API is here http://expath.org/modules/http-client/ httpclient offered different calls for different services eg head() which have to be done explicitly in expath version - could make a front with the same api but prob. not worth it - at least write a script to template and test the calls
The basic get call converts to :
import module namespace http ="http://expath.org/ns/http-client"; declare namespace html ="http://www.w3.org/1999/xhtml";
let $doc := http:send-request(
<http:request href="{$pageurl}" method="get"> </http:request> )
let $title := $doc[2]//html:body/html:h1[1]
util:catch() has gone - use XQuery3.0 construct try {} catch * {}
Exist now catches declarations of functions with the same name and arity (previously the last declaration was used)
util:serialize() has gone - use fn:serialize but the parameters element must be either an output:serialization-parameters element or a map
see the Altova documentation
eg to serialize to html
fn:serialize($description,map{"method":"xhtml","media-type":"text/html"}
SItes tested
BSA - needs more work on httpclient replacement
Morley sq - my REST Scheme but implemented on level deeper so hack to replace root with ?_path= works but paths to resources like javascript and css dont work
slow without indexes - now added but the eXide db:Manager doesn't do reindexing - have to use the client or write my own script
aremiti - working all except Tracks which hasnt worked for a while since it uses an obsolete API to google maps
berger - working through the faults -
medTrees - the Guide and Book fine out-of-the box - tools need testing because these use scraping
logger - dashboard working
Wikibook - this a set of comparisons of XQuery solutions to problems. It uses my REST scheme so can be run locally by configuring path. tests so far indicate the general architecture is working fine (very fast on the Dell). Some individual task solutions fail (but nicely since they are execute with try {} . This means that a new script which executes all tests and logs those that fail is possible.
util:parse has gone - use util:parse-html() which tidies HTML too
after a day's work, progress seems quite good - the lack of a unit test framework for this code is a problem when migrating code but the most time-consuming stuff is editing the code to update - not sure how to take the main trees application forward - good to do this while I'm away , just little by little because the server version wont be being updated at the same time - must ensure they stay in sync.
Sept 23
Resumed this work but with version 6.2.0 now
Version installed on the old thinkpad - tried to install on Marks' Asus but problems encountered which have yet to be resolved.
Jan 24
Windows replaced with Ubuntu and version 6.2.0 loaded and running - will be the test machine
full aremiti bitfolk database as of 2024-01-06 unzipped onto the ASUS
Oct 24
ported the newly consolidated knots and polyhedra applications (bar the STL files) - no new issues
ported medtrees
ported nabg - reverted to a query string
The dashboard has changed significantly
no shutdown - has to be done in admin client
no way to change permissions - the functions are no longer in xmldb module - can only be done in the admin client
porting BSA3
replacement needed for httpclient:post-form()
In most cases, inclusion of these resources is done in the main script rather than a lib/module
BSA3 ported
porting morleysq
same problem with paths to resource
problem with paths to images
Problem testing applications which use rest urls - consistent use of $root is the key - so it can be changed from eg "MS/" to "?_path="
This works in urls but I haven't found a way of making it work in forms
using a setting $local:rest allows the $root to be selected and conditional code to be generated where needed
also when using URL rewriting, the target directory is one above the app directory to allow the same path to be used with other scripts in the same directory. Without this , the script is running in the application directory so all the paths to resources are one level different - need to sort this out - perhaps base should just be to the app directory and the root then includes the app directory OK that works
MorleySq now working but exist was thrashing and had to be killed
logging disabled
home - landing page
terrain - needs the maths in geo to be updated as does theroadnew
2025-01
geo module updated
new work scapping json from a website for BNG -test for geo and JSON handling
0 notes
Text
Posting SOAP message via HttpClient in .Net
HttpClient can send SOAP messages. Perhaps you need to work with an ancient SOAP backend and don’t have easy access to a WSDL or generated service payer. You can POST a SOAP message XML string using HttpClient. ⚠️ There are a few gotchas. Here’s the final product if you just want that: private async Task<string> PostSOAPRequestAsync(string url, string soap) { var httpClient = new…

View On WordPress
0 notes