#i use that to my advantage for automatic adjustment when framing a photo to help get the lighting to be pacha just right dot gif
Text


#cyberpunk 2077#male v#vincent kennedy#you know how the in-game screenshot button changes the lighting?#i use that to my advantage for automatic adjustment when framing a photo to help get the lighting to be pacha just right dot gif#as a result cyberpunks screenshot folder is full of just random zoomed shots taken when i'm doing this#i like to go in there sometimes because sometimes there's really nice versions of what i was taking#like these gratuitous apparent appreciations of v i n c e#q
26 notes
·
View notes
Text
Why I Use Stacking Instead of an ND Filter for Long Exposure Photos
In this article, I’ll share a technique that I learned many years ago and that I still use occasionally. You can use it for removing people from a scene, but in this case, I will be using it to mimic one of a neutral density (ND) filter’s main purposes: longer exposure.
There are disadvantages to using an ND filter for longer exposures.
First, if the camera has moved or if something happens in front of the camera, those changes will often be permanently saved in the resulting photo.
A second problem is the noise that’s introduced when shooting longer exposures. Yes, higher-end cameras and sensors can help you avoid some of the noise, but even on those cameras, using image stacking instead of a single ND filtered exposure can help you achieve cleaner results.
To create the following photograph, I first captured 247 separate photos:
I then stacked the photos in Photoshop after making simple adjustments to my raw files.
Here’s what you do:
1. In Photoshop, under the File menu, go to Scripts, then Load Files Into Stack.
2. If you have opened your files from Camera Raw, click on Add Open Files. If you have tiffs, then hit Browse. Make sure you check the boxes to automatically align source images and to create a Smart Object after loading the layers.
3. After Photoshop does its magic of aligning, go to the Layer menu, select Smart Objects, then hit Stack Mode. Choose Median or Mean. You have to make your choice based on what works best with your work.
Note: If you’re stacking large numbers of files, you may need a computer powerful enough to handle this kind of task.
Making basic adjustments across the individual photos before stacking them.
So instead of using an ND filter for longer exposures, you can capture a longer cumulative exposure time across multiple photos and then stack them for a combined longer exposure.
The main advantage of this technique is the control you get when you have so many frames to choose from and work with.
For example, if someone walked in front of your camera during the shoot, you can easily delete the frames that have the person in them.
If your photo contains moving subjects such as trees, those objects would be blurred with a long exposure shot through an ND filter. But if you have a large number of photos captured with shorter exposure times, you could bring back detail and sharpness to things like trees and skies if you’d like to.
But one of the biggest advantages of using this technique for me is the fact that it allows me to do minimal retouching.
Say you captured the same lightning photograph seen above, except you used an ND filter and one long exposure. If there were more flashes of lightning than you wanted, you’d have to remove those lightning strikes in post-production. If a boat in the water stayed too long in the same place, you may be forced to remove the light from that boat in post-production if you want a clean river.
These types of things would ordinarily force you to clone and retouch your final photos.
By using stacking for long exposure photos, I am able to avoid all of that. I only choose the frames that I want in my final photo, and I did not need to do any retouching whatsoever aside from my usual color correction and dodging/burning.
I’ve been using this stacking technique for my long exposure look for a long time now due to the increased control it gives me.
Just note that if you’ll be stacking a large number of files, you’ll
For a long time, I use the ND filter only for video purposes, but for a long exposure look, I better use this technique that gives me so much more control.
About the author: Alexander Light is a photographer focused on street, travel, and landscapes. The opinions expressed in this article are solely those of the author. You can find more of his work on his website, Facebook, and Instagram.
from PetaPixel https://ift.tt/3sWYSAi
0 notes
Text
Topaz Sharpen AI Can Work Wonders - Review
If you are trying Sharpen AI or other Topaz Labs products, please consider using my affiliate link. There is no extra cost to you and it helps support tutorials like this one. Ready to buy? Click my link and use the offer code FRIEND15 at checkout and SAVE 15%!
An application specifically to sharpen images has not been a part of my workflow for a long time. Several years back, I had Nik Sharpener Pro because I had the Nik collection. I didn’t use Sharpener Pro. The level of sharpening I got from my standard micro-contrast adjustments with ON1 or Lightroom were plenty for me. Until … they weren’t enough.
Who Is Sharpen AI For?
Sharpen AI is for many types of photographers. If you are a handheld photographer, Topaz Sharpen AI will make the camera shake in those slightly blurry photos photos disappear, giving you crisp and sharp images. Wildlife and portrait photographers can correct for misses in focus. And for the landscape photographers, Sharpen AI has general sharpening for scenes that are just slightly soft (which sometimes happens with RAW files).
Sharpen AI because part of my toolkit out of need. I was taking in a stunning sunrise and captured a hand-held pano sweep. Unfortunately, when I was reviewing the images back in the studio, a couple of the panels of the sequence were a little soft. I was shooting handheld, with a longer lens, and didn’t take enough care to pause enough between each image. That’s when I started looking at sharpening applications again, and Topaz Sharpen AI saved my pano.
Is Sharpen AI Any Good?
In a word, absolutely! I’ve used Sharpen AI on several different photos already. Watch the video to see how well the different AI models work. Like any tool, Sharpen AI has strengths and weaknesses - and AI doesn’t work miracles.
Topaz Sharpen AI Strengths
Fantastic results. This is what’s most important - the results. Images refined with Sharpen AI are crisp and clean. Image quality is excellent.
Multiple AI Models. Different photos need different types of sharpening. Sharpen AI has three models to select from. It can auto-analyze your photo and select one for you, too.
Control. Topaz gives you the photographer control over the AI model selected. The tool buttons and sliders let you tailor how strong or gentle to apply sharpening.
Topaz Sharpen AI Weaknesses
Speed. Adjustments to the AI models and sliders take a few seconds on average to re-render the image.
Masking. The masking tool is functional, but basic. It is a little sluggish. I recommend using layering another app with stronger masking tools (Photoshop, ON1 Photo RAW, etc.) to selectively apply sharpening.
I have found Sharpen AI to be very capable and providing extra-fine detail. Often, the automatic detection is all that’s needed to apply the correct AI sharpening model with just the right amount of strength.
The AI is smart in this tool, too. It understands depth in a scene. In the example here, notice how sharp the “Sacramento” sign becomes, yet the background maintains a level of softness. I photographed this scene with a shallower depth of field. Sharpen AI recognized that and didn’t override my creative field choice.
Sharpen AI is encouraging me to shoot more handheld. While I make all attempts to stabilize my camera in the field, I know I don’t have the steadiest hands.
The Sharpen AI Controls
The controls in Sharpen AI are simple yet powerful. There are three sections in the control panel and the workflow is top to bottom. First, a sharpening model is selected, the model is fine tuned, and finally (if needed) some grain can be added to the image.
Image Quality
The Image Quality section is where you select the AI model to apply to your image. Sharpen AI has three models to control the type of sharpening applied to a photo. Click the Auto button to have Sharpen AI analyze your image and select the model it thinks is best, or select one yourself.
Motion Blur. This model corrects for softness resulting from subject movement in a frame. Camera shake from a handheld photo, or scenes with a moving subject like a panning shot, are examples where the Motion Blur model works well.
Out Of Focus. This model corrects for missed focus in a photo. For example, a wildlife photo of a bird where you try to set focus on the bird’s eye, but miss slightly. This model works well to correct sharpness.
Too Soft. This model is for general sharpening. When a photo is soft overall, this model is a good choice.
The Auto setting usually gets things right, but not always. Watch the video around the 9 minute mark for an example of when the Auto option chooses incorrectly.
Beneath the AI model buttons are additional controls These help refine the AI model. Make a selection based on the nature of the photo being sharpened.
Normal. The most commonly used choice. A photo is soft and a little blurry.
Very Noisy. An image that is both soft and very noisy. (Sidebar: You may prefer to use a dedicated noise reduction tool to manage noise. My preferred tools in ON1 NoNoise.)
Very Blurry. Select this for photos that are extremely blurry.
It can sometimes be difficult to tell where the line is between a “normal” blurry photo and one that is “very” blurry. If Normal still feels soft, you can try Very Blurry or visit the sliders in the Settings section.
Settings
The sliders in the Settings area further refine the amount of sharpening. Adjust these sliders after selecting an AI model. There is also an Auto button to give you a starting point.
Remove Blur. Set how little or how much blur is removed. I think of this slider as how “aggressive” do I want to let the AI be when sharpening.
Suppress Noise. Reduce noise artifacts from the sharpening process. Sometimes sharpening can accentuate or exaggerate noise. This slider helps keep that in check.
Post Processing
In the Post Processing section of the controls (collapsed in the screen shot here) is a single Add Grain slider. The reason for the slider is to reintroduce grain to an image if the sharpening algorithms removed too much of any original noise. I never use this slider. If I have a need to reintroduce grain into a photo, I have other tools to do that.
Selective Sharpening With Sharpen AI
Sharpen AI includes a basic masking brush with edge detection to selectively apply sharpening to an image. Press the M key to activate the masking tools (or click the small mask icon in the lower right of the interface).
The controls in the lower left set the brush size, feather, and opacity including a toggle for edge detection. Standard keyboard shortcuts like the square bracket keys to resize the brush and the X key to toggle painting modes apply.
There is also a ‘Find Objects’ button to automatically find the main subjects in your photo. I have had moderate success with this option. The AI is pretty good about identifying subjects like cars or people, and gives options to include or exclude detected objects from the mask. For other scenes, like this landscape photo of water and ice, the AI could not pick out any subjects.
The masking brush is rudimentary and can get the job done. However, if you have other packages with masking functions, like Photoshop, I recommend using those. The masking tools are stronger.
Is Sharpen AI Worth It?
Sharpen AI retails for ~US$79 so it is not an inexpensive tool. It does only sharpening, yet what it does, it does very well. I think Sharpen AI is worth the investment for specific types of photographers. If you are a wildlife photographer capturing fast-moving subjects, or take lots of handheld images, you will find plenty of use for Sharpen AI in your workflow.
For the straight-up landscape photographer, Sharpen AI can give you a boost in detail throughout an image, if your images come out of camera a little soft to begin with. I’d suggest taking advantage of the Sharpen AI free trial download and measuring the results for yourself.
0 notes
Text
Uncover Digital Photography Best Tips using your Android Cell phone
Finally, that instance of the year again when you are operating your cellphone overtime wanting to maintain up with all the memories of getaway parties, family members get-togethers, and pets you’ve wrangled into festive outfits. If you’re using the most advanced Android mobile phones, including the Galaxy S9 or Google Pixel 3, well then one of the best cameras in the marketplace is already in your pocket.
Then again regardless of the prowess of the high-end smart phone, plainly aiming and shooting at the picture is not the way to shoot enduring memories. The exact requirements affect smartphones photography because they do studio picture taking: a modest amount of staging will go a long way. Have a beat before striking the shutter key and implement a number of of the following guidelines to help to make your android-snapped photographs appear their best.
You’ve seen this before, but it needs reiterating because it makes an unimaginable impact: make sure the photo camera is still when you’re capturing a photograph. I can’t let you know total number of instances I’ve snapped and walked to keep up with an organization or something of the type, only to be dismayed down the road by fuzzy results. The Android phone may be really fast at starting up the camera app (double-press the power button on most to instantly fire it up), but it can’t make up the photo if you aren’t still while taking the picture. It is usually smart to get into the habit of looking into what you currently shot prior to moving forward.
You would not really need a tripod in this point in time to take a still photo, though it certainly will help elicit the most desirable results. Additionally, there are smart phone camera brackets for standard-sized tripods if you’re already tricked out in surveillance camera equipment. Also consider, specialized products are great for taking family snapshots. Angling the cellphone against a wall structure or an object is also another technique of the trade when you are in a hole.
Android Phone's Top Rated Photography Applications
Android programs are definitely robust enough to take care of digesting RAW picture formats made by DSLRs, so many of them can certainly handle croping and editing a photo taken by a smartphone. Free software programs like Snapseed, Polarr 2, and Adobe Lightroom will appeal to tinkerers and the ones who like to be the “family and friends photographer.” For those who opt for the look of filtered pictures, software programs like VSCO offer over 100 kinds of colored flair, as well as a Color Story, which has the best filters for offering to an Instagram audience. Both apps are free to use, though they offer in-app purchases to unlock some of the popular aesthetics. If you’d rather not pay very much to make your photos looked aged, KujiCam is certainly unrepentantly fun to make use of, and your digital photos will look like they were taken in another era. In the event that you do screw up a snapshot and the point in time has elapsed, try using an app like TouchRetouch to go in and clear away an out-of-place fingertip in the uppermost corner.
Don’t leave out the editing features your phone does originally. Google Photos comes pre-installed on nearly every modern Android gadget and offers quick editing equipment, including a small number of colored photo filters, a crop option, and the capability to alter basic elements just like the color hue and exposure. (Google Photos offers automatic backup for your photos and video clips, so be certain to take advantage of that, however you remove all of your special experiences next time your phone drowns in a pool.) Samsung and LG’s respective photo gallery programs also deliver light editing options along similar lines. In the event you are feeling audacious, you may even like some of the digital “stickers” included on Samsung’s Galaxy and Note cellphones.
I prefer a little sultry lighting. A dozen candle lights and a few dimmed lamps are the perfect way to transmission to your friends and family that the abode is definitely a warm one. This sort of lighting is poor for images, nevertheless, and even though your cellphone’s manufacturer guaranteed you the best low-light pictures, lovely gatherings are not the place to try out this assertion.
Don’t be shy to include a small amount of light in the event the mood calls for it. You may not need to pay for extra things; just remove the top on a close by light fixture or other comparative and place it in front of your subjects, beside you if you are the shooter. Also, avoid overhead lighting. As much as recessed lighting looks great in person, it’s not good on photo camera. (There’s a reason why actresses wear sun shades the instant they are inside, where there is frequently overhead light.) This same lamp technique helps diffuse these sorts of lighting situations and would make everyone in the photography seem warm and alive. Your cell phone’s flash can do the same in a bit, yet stay away from it as most of your light supply, as it can make your get-together look washed out. Alternatively, you might use a relative’s cell phone flashlight as a directional light beam of kind by pointing it at the position you wish people’s faces to end up being lit. It can donate to some actually professional lighting effects.
Do you believe you are one of the many happy ones to find the Pixel 3’s Night Sight update? Be sure you are employing it when the situation calls for it, like inside restaurants or faintly-lit traditional buildings. This functionality is coming soon to outdated Pixel devices and is available in the default Android photo camera app, from the same screen where you may swap between panoramic mode and so on.
On Samsung and LG cell phones, a similar option is buried in the Professional or Manual modes. In this case, you’ll want to do a bit of adjusting to the camera settings to get the type of picture you want. You do not have to be a camera professional to gain access to this, because so many manufacturers present live previews so you can see what the result can look like after a little of adjusting. For ideal results, keep all of it on Automatic aside from the shutter speed, that’s where you’ll start to see the real difference in just how much light camera can take in. And of course, don’t forget to lean it against something as the shutter is open up or you’ll end up with a blurry picture.
Portrait mode is one of those defacto common capabilities that now comes offered with every modern smart phone. It’s like panorama setting, except that you’re more likely to work with it more regularly since it gives pictures a little of a high tech appearance. You don’t need to utilize it to shot photos of individuals, either. This works equally well for animals, house plants, or any various other curious target.
My favorite activity to carry out with Portrait setting, maybe I’m having a selfie or snapping a photo with friends I have not heard of in over 10 years, is to use it next to a plain background. A bare wall is fantastic for headshots, while a patterned wall adds a bit of sparkle. I love the fake “studio appearance” of the types of images, and you could get very creative utilizing the lamp-light trick in a living room. If carried out right, the consequence of your Portrait mode could look as preened and sleek as though taken on school photo day, and they could even be photographs deserving enough to put over a bundle of holiday cards in the next year.
Finally and in fact the most plain piece of knowledge on the list right here, you should not forget to clean your photo camera lens before capturing a shot. The android is entirely able at this time in the process to capture a high-quality picture of the persons you appreciate, nonetheless it will not mean much if the lens is messy with finger dirt and several other different dust. Even though you possess a case on with a photo camera covering, clean that section clean inside and out to guarantee that your photos remain perfect.
In the event your mobile phone is your only camera, it is best to keep the microfiber cloth or a bunch of camera-cleaning wipes. Get them in bulk and place them almost everywhere: in each and every container you utilize and every family car you drive in. Pictures are typically worth a million words if these are discernible, and in the event you put into it upwards of this much on a new phone, then it should produce photo frame-worthy pics.
0 notes
Text
Learn Picture Capturing Most Useful Techniques utilizing your Android Cell phone
Finally, that point of the season yet again when you are operating your mobile phone overtime wanting to keep up with all the memories of holiday celebrations, family get-togethers, and domestic pets you have wrangled into joyful costumes. If you are dealing with any of the latest Android phones, including the Galaxy S9 or Pixel 3, then one of the best photo cameras available has already been in your possession.
However regardless of the expertise of the sophisticated cell phone, only just pointing and snapping shots at the moment is not the right way to catch enduring memories. The exact rules affect smartphones picture taking as they do studio pictures: just a little setting up goes a long way. Have a beat before punching the shutter button and start using one or more of the subsequent strategies to help to make your phone-snapped photos seem their very best.
You have known this before, however it requires repeating since it makes an unbelievable difference: make sure the photo camera continues to be when you’re taking a photograph. I can’t tell you how many occasions I have snapped and strolled to keep up with a crowd or something of the sort, only to be disappointed down the road by blurry outcomes. The Android cell phone could be instant at starting up the camera application (double-press the power button of all to immediately fire it up), but it can’t constitute the photo if you aren’t quiet while acquiring it. It is always a good idea to get into the behavior of checking on what you currently snapped before going on.
You might not certainly require a tripod in this day and age to have a still photography, though it really allows elicit the top rated results. Additionally, there are smartphone camera brackets for common-sized tripods if you’re already tricked out in video camera items. Alternately, specific items are fantastic for catching group photographs. Leaning the mobile phone against a wall structure or an object can be another trick of the trade each time you’re in a hole.
Searching for the Ideal Photography Program
Android application programs are in fact robust enough to take care of digesting RAW photo types of file made by DSLRs, so most of them may unquestionably handle editing and enhancing a photo shot by a smartphone. Free application programs like Snapseed, Polarr Photo Editing, and Adobe Lightroom will charm to tinkerers and those who consider themselves the “friends and family photographer.” For those who prefer the look of filtered pictures, software like VSCO present over 100 kinds of colored flair, as well as a Color Story, which has the best filters for showing to an Instagram market. Each of those apps are free to use, though they provide in-app purchases to unlock a few of the popular aesthetics. If you’d rather not pay much to make your photos looked aged, KujiCam is normally unrepentantly fun to use, and your digital pictures can look like they were taken in another era. If you do mess up a snapshot and the point in time has went by, try using an application like TouchRetouch to proceed in and clear away an out-of-place fingertip in the uppermost spot.
Do not disregard the editing and enhancing functionalities your android smart phone does originally. Google Photos comes pre-loaded on nearly every recent Android unit and will be offering quick editing tools, including a small number of colored picture filters, a crop choice, and the ability to alter common components like the color hue and publicity. (Google Photos also offers automatic back-up for your photos and video clips, so make certain to take advantage of that, lest you remove all your cherished stories the next time your cell phone drowns in a pool.) LG And Samsung’s particular photo gallery programs also provide you with light editing and enhancing choices along the same lines. If you are feeling cheeky, you may even like some of the digital “stickers” included on Samsung’s Galaxy and Note smartphones.
I love just a little sexy light. A dozen candles and some dimmed lamps are the perfect method to signal to your guests that the house is usually a cozy one. This type of lighting is certainly awful for images, nevertheless, and even though your smart phone’s manufacturer assured you the best low-light photos, superb parties aren't the place to try this claim.
Do not be worried to incorporate a small amount of light when the mood demands it. You do not need to spend money on anything extra; quickly take off the very best on a nearby lamp fixture or other equivalent and place it in front of your subjects, beside you if you’re the shooter. Additionally, avoid overhead lamps and lights. As much as recessed lighting looks great personally, it’s not good on photo camera. (There’s a justification why actors put on sunglasses every time they are indoors, where there’s often above your head light.) The same grab-a-lamp cheat helps diffuse these sorts of lighting situations and will make everybody in the photography seem warm and alive. Your smartphone’s flash can do the similar thing in a bit, yet stay away from it as your primary light resource, as it can make your party look washed out. On the other hand, you might use a good friend’s smartphone flashlight as a directional light of kind by pointing it at the angle you want people’s faces to be lit up. It can contribute to some actually trendy lighting special effects.
Do you believe you are among the many lucky ones to find the Pixel 3’s Night Sight upgrade? Be sure you are using it when the condition calls for it, for example inside restaurants or poorly-lit historic structures. The feature is just around the corner to earlier Pixel smartphones and comes in the default Android camera software, from the same screen in which you can change between panoramic mode and the like.
On Samsung and LG cellphones, a comparable option is hidden in the Expert or Manual modes. In this case, you will have to do a little of tweaking to the photo camera configurations to get the kind of picture you want. You do not have to be a camera professional to gain access to this, as most manufacturers offer live previews so that you can find what the result will look like after a little of adjusting. For best outcomes, keep as much as possible on Automatic aside from the shutter speed, that’s where you will see the actual difference in how much light camera can take in. Not to mention, don’t neglect to lean it against something while the shutter is open up or you’ll finish up with a blurry image.
Face mode is among those defacto regular features that today shows up included with every flagship smartphone. It’s like panorama setting, only that you’re likely to make use of it more often since it gets photos a lttle bit of a high-tech look and feel. You do not need to use it to take photos of people, either. It performs equally well for pets, house plants, or any various other interesting object.
My most loved activity to carry out with Portrait setting, maybe I’m having a selfie or snapping a photo with friends I have not seen in over a decade, is to use it against a common background. A blank wall is great for headshots, even though a flowery wall adds a small amount of style. I love the imitation “studio appearance” of the sorts of photographs, and you can get artistic utilizing the lamp-light trick in a room. If handled correctly, the result of your Portrait setting could look as sophisticated and refined as if taken on college picture day, plus they could even be photos worthy enough to slap onto a bunch of xmas cards in the the coming year.
Lastly and indeed the most noticeable piece of advice on any list in this article, don’t forget to wipe your camera lens before shooting a picture. Your smart phone is totally able at this stage in the game to shoot a high-resolution picture of the persons you cherish, but it will not matter if the lens is messy with face dirt and various different dust. Even if you possess a case on with a camera cover, clean that section clean on the inside and out to make sure that your pictures remain fantastic.
In the event the cell phone is your only camera, you should always carry either a microfiber cloth or a bunch of lens-cleaning wipes. Buy them in bulk and store them all over the place: in pretty much every container you use and every different vehicle you ride in. Photos are only just worth a million words if they’re wonderful, and in the event you paid out upwards of this much on a brand new cellphone, then it should probably create picture frame-worthy pictures.
0 notes
Photo

New Post has been published on https://magzoso.com/tech/why-your-next-tv-needs-filmmaker-mode/
Why your next TV needs ‘filmmaker mode’
TVs this year will ship with a new feature called “filmmaker mode,” but unlike the last dozen things the display industry has tried to foist on consumers, this one actually matters. It doesn’t magically turn your living room into a movie theater, but it’s an important step in that direction.
This new setting arose out of concerns among filmmakers (hence the name) that users were getting a sub-par viewing experience of the media that creators had so painstakingly composed.
The average TV these days is actually quite a quality piece of kit compared to a few years back. But few ever leave their default settings. This was beginning to be a problem, explained LG’s director of special projects, Neil Robinson, who helped define the filmmaker mode specification and execute it on the company’s displays.
“When people take TVs out of the box, they play with the settings for maybe five minutes, if you’re lucky,” he said. “So filmmakers wanted a way to drive awareness that you should have the settings configured in this particular way.”
In the past they’ve taken to social media and other platforms to mention this sort of thing, but it’s hard to say how effective a call to action is, even when it’s Tom Cruise and Chris McQuarrie begging you:
While very few people really need to tweak the gamma or adjust individual color levels, there are a couple settings that are absolutely crucial for a film or show to look the way it’s intended. The most important are ones that fit under the general term “motion processing.”
These settings have a variety of fancy-sounding names, like “game mode,” “motion smoothing,” “truemotion,” and such like, and they are on by default on many TVs. What they do differs from model to model, but it amounts to taking content at, say, 24 frames per second, and converting it to content at, say, 120 frames per second.
Generally this means inventing the images that come between the 24 actual frames — so if a person’s hand is at point A in one frame of a movie and point C in the next, motion processing will create a point B to go in between — or B, X, Y, Z, and dozens more if necessary.
This is bad for several reasons:
First, it produces a smoothness of motion that lies somewhere between real life and film, giving an uncanny look to motion-processed imagery that people often say reminds them of bad daytime TV shot on video — which is why people call it the “soap opera effect.”
Second, some of these algorithms are better than others, and some media is more compatible than the rest (sports broadcasts, for instance). While at best they produce the soap opera effect, at worst they can produce weird visual artifacts that can distract even the least sensitive viewer.
And third, it’s an aesthetic affront to the creators of the content, who usually crafted it very deliberately, choosing this shot, this frame rate, this shutter speed, this take, this movement, and so on with purpose and a careful eye. It’s one thing if your TV has the colors a little too warm or the shadows overbright — quite another to create new frames entirely with dubious effect.
So filmmakers, and in particular cinematographers, whose work crafting the look of the movie is most affected by these settings, began petitioning TV companies to either turn motion processing off by default or create some kind of easily accessible method for users to disable it themselves.
Ironically, the option already existed on some displays. “Many manufacturers already had something like this,” said Robinson. But with different names, different locations within the settings, and different exact effects, no user could really be sure what these various modes actually did. LG’s was “Technicolor Expert Mode.” Does that sound like something the average consumer would be inclined to turn on? I like messing with settings, and I’d probably keep away from it.
So the movement was more about standardization than reinvention. With a single name, icon, and prominent placement instead of being buried in a sub-menu somewhere, this is something people may actually see and use.
Not that there was no back-and-forth on the specification itself. For one thing, filmmaker mode also lowers the peak brightness of the TV to a relatively dark 100 nits — at a time when high brightness, daylight visibility, and contrast ratio are specs manufacturers want to show off.
The reason for this is, very simply, to make people turn off the lights.
There’s very little anyone in the production of a movie can do to control your living room setup or how you actually watch the film. But restricting your TV to certain levels of brightness does have the effect of making people want to dim the lights and sit right in front. Do you want to watch movies in broad daylight, with the shadows pumped up so bright they look grey? Feel free, but don’t imagine that’s what the creators consider ideal conditions.
Photo: Chris Ryan / Getty Images
“As long as you view in a room that’s not overly bright, I’d say you’re getting very close to what the filmmakers saw in grading,” said Robinson. Filmmaker mode’s color controls are a rather loose, he noted, but you’ll get the correct aspect ratio, white balance, no motion processing, and generally no weird surprises from not delving deep enough in the settings.
The full list of changes can be summarized as follows:
Maintain source frame rate and aspect ratio (no stretched or sped up imagery)
Motion processing off (no smoothing)
Peak brightness reduced (keeps shadows dark — this may change with HDR content)
Sharpening and noise reduction off (standard items with dubious benefit)
Other “image enhancements” off (non-standard items with dubious benefit)
White point at D65/6500K (prevents colors from looking too warm or cool)
All this, however, relies on people being aware of the mode and choosing to switch to it. Exactly how that will work depends on several factors. The ideal option is probably a filmmaker mode button right on the clicker, which is at least theoretically the plan.
The alternative is a content specification — as opposed to a display one — that allows TVs to automatically enter filmmaker mode when a piece of media requests it to. But this requires content providers to take advantage of the APIs that make the automatic switching possible, so don’t count on it.
And of course this has its own difficulties, including privacy concerns — do you really want your shows to tell your devices what to do and when? So a middle road where the TV prompts the user to “Show this content in filmmaker mode? Yes/No” and automatic fallback to the previous settings afterwards might be the best option.
There are other improvements that can be pursued to make home viewing more like the theater, but as Robinson pointed out, there are simply fundamental differences between LCD and OLED displays and the projectors used in theaters — and even then there are major differences between projectors. But that’s a whole other story.
At the very least, the mode as planned represents a wedge that content purists (it has a whiff of derogation but they may embrace the term) can widen over time. Getting the average user to turn off motion processing is the first and perhaps most important step — everything after that is incremental improvement.
So which TVs will have filmmaker mode? It’s unclear. LG, Vizio, and Panasonic have all committed to bringing models out with the feature, and it’s even possible it could be added to older models with a software update (but don’t count on it). Sony is a holdout for now. No one is sure exactly which models will have filmmaker mode available, so just cast an eye over the spec list of you’re thinking of getting and, if you’ll take my advice, don’t buy a TV without it.
0 notes
Text
11 Best RV Generators For 2020 - Review and Guide

Today, I reviewed the Best RV Generators based on fuel efficiency, price, noise level, performance and other. It will help you to make the decision while buying.
Let's take a look at the Review.
but before that
Disclaimer- This article contains affiliate links so when you purchase a product through these links we get a small commission, without any extra cost to you, (the money is used to run this site and to give salaries to the team) But, this did not affect our reviewing decision. We have selected what is best in the market to help you out in buying the best product.
1. DuroMax XP12000EH Dual Fuel 12000 Watt Electric Start Portable Generator

Image of DuroMax XP12000EH Dual Fuel 12000 Watt Electric Start Portable Generator Photo Credit- Amazon

Brand: DuroMax
Weight: 236 pounds
Running Watts: 9,500 watts
Dual Fuel: Yes
Pros & Cons
Review
This generator can run everything on your RV, seriously. It is for those RVers who need lots of power. This one comes with a powerful DuroMax 18 HP 457 cc OHV engine.
It runs on dual fuel that means you can run it either on gasoline or propane. As I told you earlier this generator can run anything on your RV like fridge, AC, microwave, lights with its 12,000 starting watts and 9,500 running watts.
You can get power from the 120-volt receptacle and can choose from 120V or 240V simultaneously or 120 only with full power.
Running the generator on propane has one advantage that it won’t harm the engine. You can use this generator in all 50 states in the USA because it is EPA and CARB approved.
Frequently Asked Questions
Q1. Does this unit have a 50 amp RV disconnect?
A1. If you have a 50 amp RV then you can plug straight into the generator with the cord that’s on your RV.
Q2. Will it run on natural gas?
A2. No, it will not run on natural gas, for that you have to upgrade it.
Q3. Does this generator come with a wheel and handle kits?
A3. Yes, it has.
Q4. Does it have a recoil start?
A4. It has both recoil and key start.
Video
https://www.youtube.com/watch?v=RDlOSz-CTHU
2. Champion 3800-Watt Dual Fuel RV Ready Portable Generator with Electric Start

Image of Champion 3800-Watt Dual Fuel RV Ready Portable Generator with Electric Start Photo Credit- Amazon
Brand: Champion Power Equipment
Weight: 122 pounds
Running Watts: 3,000 watts
Dual Fuel: Yes
Pros & Cons
Review
This is second on my list. The reasons are many and few of them are good customer reviews, one of the popular selling generators, and cool features. It runs both on gas and propane which makes it readily available for both types of fuel.
There is a 4 stroke engine used in this generator with a wheel that has a diameter of 8.0 inches. It can run for 9 hours continuously on a full tank gas and 10.5 hours on a 20 lb. propane tank, supplying 3800 running watts. The starting watt that you will get is of course much higher that is 4750 watts.
It is powered by a 224cc champion engine with a tough start. You also get a push-button electric start.
Taking about the frequency you get 60 Hz from outlets- 120V 30A RV, 120V 30A locking and two 120V 20 for the household. You are also totally protected by Volt Guard that will protect all your electrical and electronic appliances from power surges.
Running this generator on gasoline you will get Starting Amp at 120V – 35.6A and Running Amp at 120V – 31.7A. Running the generator on propane will give the Starting Amps at 120V – 35.6A and Running Amps at 120V – 28.5A.
You also get a 3-year limited warranty with free lifetime technical support.
Frequently Asked Question
Q1. If the battery goes dead can it be started manually?
A1. yes, but only if you are using propane as a fuel. If the generator is using gasoline then it won't start without a charged battery.
Q2. does this have a pull the rope starter in case the battery is dead?
A2. yes, it has but it can be difficult for some people to pull it.
Q3. can I run a fridge and a freezer?
A3. yes, you can run a fridge including a heater for the fish tank, some lights, and phone charger. Start the generator, let it warm for some time and start things one at a time.
Q4. does it come with the cart?
A4. yes, it comes with a cart for easy mobility.
Q5. does this generator have a voltage regular?
A5. yes, it has an AVR that stands for the Automatic Voltage Regulator which keeps the voltage stable.
Video
https://www.youtube.com/watch?v=MiYphFW3MSU
3. Champion 4000-Watt RV Ready DH Series Open Frame Inverter with Quiet Technology

Image of Champion 4000-Watt RV Ready DH Series Open Frame Inverter with Quiet Technology Photo Credit- Amazon
Brand: Champion Power Equipment
Weight: 81.6 pounds
Running Watts: 3,500 watts
Dual Fuel: No
Pros & Cons
Review
This one is again from the Champion Power Equipment with Advanced Open Frame Inverter Design which makes it 50% quieter and also 20% lighter than a traditional Champion 3500-watt generator.
It has an Economy Mode feature which saves fuel and extends its life. Champion 4000 is RV ready with 120V 30A RV, two 120V 20A household outlets with clean power(less than 3% THD) and also a 12V DC outlet with dual USB adapter for your smartphone, iPad and tablet. It gives clean electricity for sensitive electronics.
This generator is pretty quiet and runs for an extended time of up to 17 (gasoline) hours. 64 dBA is good for RVs, tailgating with 4000 starting watts and 3500 running watts. You also have an option of running 2 other generators of 2800 watt or higher inverter or a digital hybrid with the optional Parallel Kit.
It comes with a 3-year limited warranty with free lifetime technical support from dedicated experts.
The problem with this generator is that there is no Voltmeter and also it does not support the Automatic Voltage Regulation.
Frequency Asked Questions
Q1. what makes this a hybrid generator? Is it an inverter generator, or something else?
A1. It is hybrid in the sense that Champion has taken a traditional fully-enclosed inverter style generators and has put it on an open frame. It helps to have a large engine and also it increases the output power with decreasing cost.
Q2. Could this unit be converted to a dual fuel such as propane/gas?
A2. Yes, with a third party fuel conversion kit.
Q3. What type of oil can I use? Can it be synthetic?
A3. In the break-in period, you can use conventional motor oil. After it, you can use 5W – 30 synthetic oil year-round.
Q4. Is there an available wheel kit?
A4. Yes, it is available in amazon and it is called champion Wheel kit with a folding handle and never-flat tires for 2800 to 4750 Watt generators.
Q5. How much gasoline does the fuel tank hold?
A5. It can hold 2.9 gallons or 10.97 liters.
Video
https://www.youtube.com/watch?v=4AJxOKlYVC8
4. Champion 3400-Watt Dual Fuel RV Ready Portable Inverter Generator with Electric Start
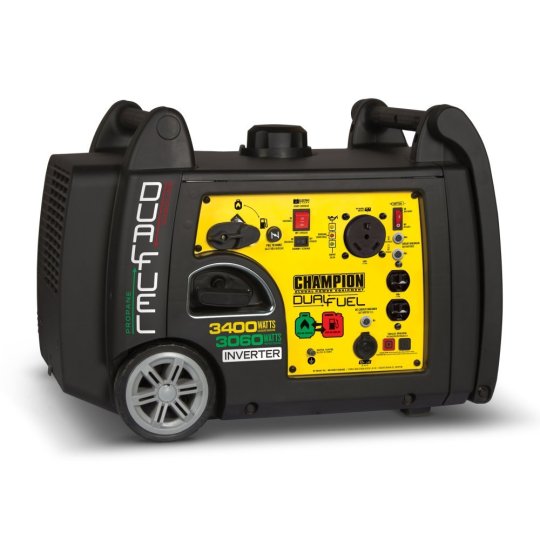
Image of Champion 3400-Watt Dual Fuel RV Ready Portable Inverter Generator with Electric Start Photo Credit-Amazon
Brand: Champion Power Equipment
Weight: 95.7 pounds
Running Watts: 3,100 watts
Dual Fuel: Yes
Pros & Cons
Review
This generator is from Westinghouse a popular brand. It has 5300 running watts and 6600 peak watts. This generator has a recoil start with a 4.7-gallon fuel tank with a fuel gauge. This generator can run up to 20 hours with a full tank. You can select 120 or 240 volts as per your requirement through a 120/240V Volt Selector Switch.
It comes with a feature One 5-20R 120V Household Duplex Receptacle, One RV Ready TT 30R 30 Amp Receptacle and One Transfer Switch ready L14- 30R 30 Amp Receptacle. For additional safety, there is a rubber cover in each outlet.
This generator is powered by a 12 CC Westinghouse 4 Stroke OV Engine covered with long-lasting cast iron sleeve. On low oil, it will automatically shut down.
It is equipped with never-flat wheels for easy maneuver. A fold-out foam grip handle makes the work easy.
The total package includes oil, an oil funnel, a user manual, and a tool kit. It comes with a 3 year limited.
Frequency Asked Questions
Q1. What type of oil can we use? Synthetic or semi-synthetic?
A1. You can use either conventional or synthetic oil to run this generator.
Q2. Can this generator be run on propane?
A2. No, this generator does not use propane, it runs on gasoline.
Q3. Will a 30 amp 120V volt transfer switch be enough to power this generator?
A3. 30 amp transfer switch is for your house so that you can power it.
Q4. Does the engine adjust to the power used?
A4. Yes, the engine in this generator will increase or decrease the rpm as needed.
6. Westinghouse WGen3600 Portable Generator - 3600 Rated Watts & 4650 Peak Watts - RV Ready - Gas Powered - CARB Compliant
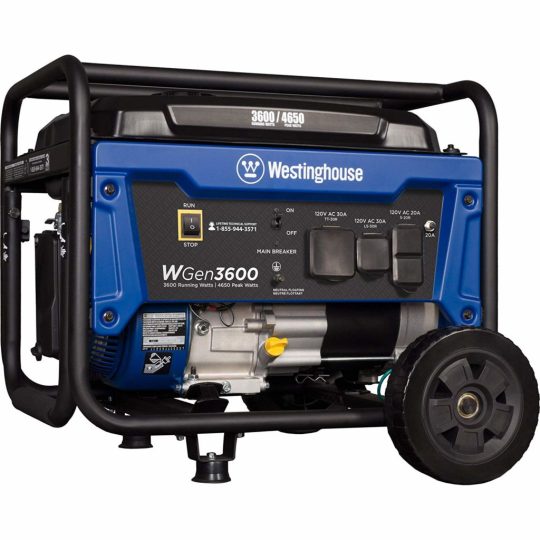
Image of Westinghouse WGen3600 Portable Generator - 3600 Rated Watts & 4650 Peak Watts - RV Ready - Gas Powered - CARB Compliant Photo Credit- Amazon
Brand: Westinghouse
Weight: 107.1 pounds
Running Watts: 3,600 watts
Dual Fuel: Yes
Pros & Cons
Review
Another, Westinghouse generator making it to the list. This one has 3600 running watts and 4650 peak watts. It has a recoil start and 4-gallon fuel tank with a fuel gauge that ensures the generator is running optimally. This can run up to 18 hours with a full tank.
It comes with features one 5- 20R 120V household duplex receptacle, one RV ready TT- 30R 30 Amp receptacle and also one L5- 30R 30 Amp receptacle. This generator also has rubber covers for every outlet for additional safety.
It is powered by a 212 CC Westinghouse 4 stroke OHV engine with long-lasting cast iron sleeve. It will automatically switch off on low oil. 69 dBA making it the quietest conventional portable generators in the market.
Frequency Asked Questions
Q1. What are the wheel sizes?
A1. It is 6 inches in diameter and 1 inch thick.
Q2. Does this generator produce clean power?
A2. Yes, it keeps the steady 60 Hertz.
7. WEN 56200i Super Quiet 2000-Watt Portable Inverter Generator, CARB Compliant

Image of WEN 56200i Super Quiet 2000-Watt Portable Inverter Generator, CARB Compliant Photo Credit- Amazon
Brand: WEN
Weight: 48 pounds
Running Watts: 1,600 watts
Dual Fuel: No
Pros & Cons
Review
If you require a less watt generator then this one is the best. It comes with an EPA 3 and CARB complaint 79.7 CC 4 stroke OHV engine produces 2000 surge watts and 1600 rated watts.
This generator is capable of producing clean power that can safely be used to run sensitive electronics such as phones, tablets, and laptops. It is free of the voltage spikes and drops. It is because it limits the total harmonic distortion to under 0.3% at no load and under 1.2% at full load.
WEN 56200i includes a three-prong 120V receptacle, one 12V DC receptacle, and one 5V USB port. This generator is very quiet at 51 decibels at quarter load. It is quieter than the window AC.
It is capable of a parallel connection by which you can add more generators for more power. For this, you have to use WEN 56421 parallel connection kit. One other feature of this WEN generator is that it is very lightweight than other conventional generators.
It has an Eco mode so when you are running fewer appliances it automatically adjusts the fuel consumption to the power demand.
Frequently Asked Questions
Q1. What type of fuel does it use?
A1. it runs on gasoline.
Q2. Is there a way to run this generator on propane?
A2. Yes, you can do it by using a WEN 56421 parallel connection kit.
Video
https://www.youtube.com/watch?v=FTazWugePSM
8. Rainier R12000DF Dual Fuel (Gas and Propane) Portable Generator with Electric Start - 12000 Peak Watts & 9500 Rated Watts - CARB Compliant - Transfer Switch Ready

Image of Rainier R12000DF Dual Fuel (Gas and Propane) Portable Generator with Electric Start - Photo Credit- Amazon
Brand: Rainier
Weight: 200 pounds
Running Watts: 9,500 watts
Dual Fuel: Yes
Pros & Cons
Review
Another powerful generator that can run everything on your RV. It generates 12,000 peak watts and 9,500 running watts on gasoline and on propane, it produces 10800 peak watts and 8550 running watts.
It runs on both gasoline and propane. This generator comes with a 6.6-gallon fuel tank with a fuel gauge. It will automatically shut off when the fuel is low in the tank. Starting this generator is easy as you get convenient on the touch power switch for electric start and recoil start as a backup.
It comes with a powerful 457 cc OHV 4 stroke Rainer engine. It can run for up to 17 hours at 25% load. This generator has one drawback as it makes a loud sound of up to 72 decibels.
It has a VFT display where you can monitor volts, frequency and lifetime hours. In the control panel you get two 5-20R 120V 20A GFCI household outlets, one L5- 30R 120V 30A outlet, One L 14- 30R 120V 30A outlet and also one 14-50R 120/240V 50A outlet with two grounding ports.
You can use it in all 50 states in the USA as it is EPA and CARB compliant. There are wheel kit with two 10 inch wheels and foam grip handles for easy transportation. You also get 3 years limited warranty on this generator.
Frequently Asked Questions
Q1. What kind of battery is used in the electric start?
A1. It uses R12000DF has a 12v Ah 10Hr 6FM9 battery.
9. Duromax XP5500EH Dual Fuel 5500 Watt Electric Start Portable Generator

Image of Duromax XP5500EH Dual Fuel 5500 Watt Electric Start Portable Generator Photo Credit- Amazon
Brand: DuroMax
Weight: 142 pounds
Running Watts: 4,500 watts
Dual Fuel: Yes
Pros & Cons
Review
Another powerful DuroMax generator that has a powerful 7.5HP, 225cc OHC DuroMax engine. It has a dual fuel technology by that you can run this generator on propane and gasoline, it gives you the power to select the best available fuel.
It has a starting watt of 5,500 watts and 4,500 watts running watts which is sufficient to run electrical appliances in your RV. There are two 120 volt receptacles, you also have an option to select from 120 volts or 240 volts.
You can use this generator in all 50 states of the USA as it is EPA and CARB compliant.
Frequently Asked Questions
Q1. How many total amps if using 120V plugs and the 30 amp plug at the same time?
A1. The peak amps with gasoline are 45.83 amps at 120 volts and 22.92 at 240 volts. The peak amps with propane will be 43.54 at 120 volts and 31.77 at 240 volts.
Q2. Does this generator idle down when the load is light?
A2. Yes, it does.
Q3. Is this a silencer generator?
A3. No, it is not a silent generator.
Video
https://www.youtube.com/watch?v=K5-DKyg4WyE
10. Duromax XP4850EH Dual Fuel 4850 Watt Electric Start Portable Generator

Image of Duromax XP4850EH Dual Fuel 4850 Watt Electric Start Portable Generator Photo Credit- Amazon
Brand: DuroMax
Weight: 130 pounds
Running Watts: 3,850 watts
Dual Fuel: Yes
Pros & Cons
Review
This generator is equipped with a powerful DuroMax 7HP, 212cc OHV engine runs on dual-fuel technology.
It has a 4,850 starting watt and 3,850 watts which can run appliances in your RV. You get two 120 volts receptacle and can choose between the generator at both 120V and 240V simultaneously or 120 volts with full power.
It is EPA and CARB compliant and can be used in all 50 states.
Frequently Asked Questions
Q1. Does this product come with or without the wheels?
A1. Yes, it comes with wheels.
Q2. Does this generator has a propane hose connector?
A2. Yes, it has a propane hose connector.
Video
https://www.youtube.com/watch?v=XYbeNfv4xZ0
11. Honda 662250 EB2200i 2,200 Watt Portable Inverter Generator
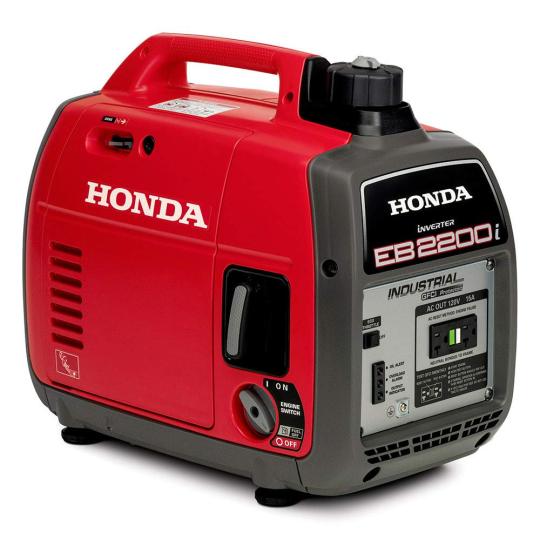
Image of Honda 662250 EB2200i 2,200 Watt Portable Inverter Generator Photo Credit- Amazon
Brand: Honda
Weight: 51.3 pounds
Running Watts: 2,200 watts
Dual Fuel: No
Pros & Cons
Review
This generator is from the Honda Power Equipment Super Quiet Generators. It has a bigger oil filter opening, a longer spout and also has a larger oil drain gutter which makes it convenient for a cleaner oil change.
It is powered by a Honda GXR120 commercial series engine. This is a 121cc engine that is fuel-efficient, smooth and quiet. The ventilation area is increased by 2.31 square inches which reduces cabinet air intake resistance, resulting in improved inverted cooling.
This generator has a special fuel shutoff value which allows the engine to continue to run till the majority of the fuel in the carburetor is consumed and the engine shuts off itself. This is important as it eliminates the state fuel issue and keeps the generator in a healthy running condition.
Frequently Asked Questions
Q1. Can this generator run on natural gas?
A1. No, it runs only on gasoline.
Video
https://www.youtube.com/watch?v=hqnR7WK9UeU
What is an RV Generator?
An RV generator is an important piece of machine which runs your electrical appliances when your RV is not able to run them. It is essential when you do not have access to shore power.
You can charge the RV house battery with it. You can also use it when you need a direct source of power for your 120V AC outlet. Other things which you can run on it are microwave oven, hairdryer, toaster, and others.
Types of RV generator
Before buying it is better to know about different types of a generator as it will help you to find the best-suited one for you. It is also good to select the RV generator which runs on the same fuel as your RV.
Gasoline types
Some of them can run your AC and some can run other appliances such as TV, microwave, etc. It all depends upon the watt. Higher the watt the higher number of items you can use.
These types of the generator have a vent pipe and a muffler, the vent pipe can extend outside the RV. The gasoline type of generator requires more maintenance than a propane type, but the power output is more than the propane type.
Propane types
They are the top-performing RV generator because of low noise, fuel efficiency, and environmental friendliness. It has a longer shelf life but a limited runtime due to a small tank.
What To Look For When Buying An RV Generator
These are the points that you should consider before buying an RV generator. By knowing about the different features and models you will make a better judgment in selecting the best one for you.
Power Output
This is an important factor in deciding the best RV generator for your RV. The size is also vital as a very large generator will take more space, but at the same time, it should provide enough power to the RV.
To find out the right power output you must calculate how much power do you need. There is a fridge, AC, microwave and other electrical appliances that consume more power. The best is to go through the manual of each appliance and add up the maximum watt consumption of each. This will give you an idea about the power needed in your RV.
Always buy a generator that has a power output more than the required as you do not want to switch off one thing to start the other. If you need a generator with more power than it is best to invest in one large generator than investing in multiple generators.
Portability
This is the second important thing that you should keep in mind. Do you want a portable generator or a permanent one? Portable means you can take it anywhere with you and it will not be attached to your vehicle permanently. Most of the time people take it out and then connect it to the RV for power.
The permanent generator will be attached to your rig and you cannot move it anywhere, easily.
Most of the RVers choose a portable generator due to its versatility of using it anywhere. Nowadays people run two generators simultaneously for more power to run their AC, fridge and other items.
A permanent generator is generally used in fifth wheels and Class A due to long term usage.
Fuel Consumption
You should consider the fuel consumption of a generator because later it will matter a lot. Know about the fuel efficiency, tank capacity and other things related to it. This becomes important when you are RVing in a remote area.
Try to select a generator that is eco-friendly and consumes less fuel. Another aspect of generators is that open frame generators burn more fuel than the portable ones. This happens because open frame generators are mostly high power generators used for more power. If you do not need more power for your trailer then avoid bigger ones and invest in portable generators.
Noise Level
This is important for Rvers as the noise level of the generator means a lot. Most of the people consider it the most important point while buying a generator.
There are some reasons why a noisy generator can be trouble for you. Your sleep can be disturbed, it can annoy your neighbors and most of the national and private campgrounds have limitations on noise. Most of the time the limit is 60 decibels at 50 feet distance.

Frequently Asked Questions
1. What does RV ready generator mean?
An RV ready generator means it can be used very easily in your RV because it has a TT-30R outlet. These types of a generator are enough to power the electronics and electrical appliances in the recreational vehicle. The portability of the generator makes it ready for RV, camping and other outdoor activities.
2. What size RV generator should I need for my RV?
It depends upon your power needs, but for me, it is my AC unit. A generator should be able to run my AC unit is the best to get selected because AC is the most power-consuming thing in the RV. You should also get the total maximum amount of power you need for the RV. It will give you a general idea of which size RV generator you need.
3. Where to buy an RV generator?
You can buy an RV generator from a supply store and local dealerships. The best place to buy it is online because you get lots of options, reviews about the product and you can also compare the prices.
4. Which type of fuel is best for the generator?
This again depends upon the availability of the fuel. According to the experienced RVers, the best fuel is always which you are using for the RV. You do not have to think twice after it.
5. What is the difference between surge and running watts?
Running watt is the power that the generator is able to produce on a continuous basis. The surge watt is the power that all-electric motor needs to start.
If You Think Your Friends/Network Would Find This Useful, Please Share It With Them Or You Can Give Us 5 Stars Down Below – We’d Really Appreciate It- Thanks!
Read the full article
0 notes
Text
Let Me Protect You Chapter 23/?
Pairings: Chris Evans x OFC Emilia
Word Count: 2,236
Warnings: Swearing, Angst!
Trigger Warning: Domestic Abuse/Violence
Rating: Mature
Summary: After Emilia’s fiancé cheats on her, she moves to California to live with her brother Eric, who just so happens to be good friends with Chris Evans. Follow Emilia and her roller coaster life through heartbreak, love, and emotional trauma. Will Emilia choose to let Chris into her heart, or will she remain broken and alone forever?
What was Charlie doing at your front door? How did he even know where you lived? Naturally, when the two of you were still together, he knew that Eric moved out here to LA. But for reasons unknown, Charlie had figured out the exact location of Eric’s house. Was he stalking you? You hadn’t returned any of his phone calls or texts. He had a strange look on his face when you opened the door; something mixed with happiness and maybe fury? If that was at all possible even. It was kind of startling actually and you were kind of scared. Eric was at work and Chris was still at his interview. You could only hope that Chris heard you utter Charlie’s name over the phone before you dropped your cell.
“Char-charlie…wha-what are you do-doing here?” you stammered out, a complete loss of what else to say.
His face contorted into a grimace, almost an evil like appearance to it. Yep, you were now scared. You’ve never seen Charlie make that face before. Your heart started racing without delay at the look he was giving you.
“Well Emilia my dear, I came to see you of course. And to bring you back home. It’s time we sit down and talk about everything and move on from the past, together” he expressed, his evil grin never leaving his face.
You did the only thing you could think of, you slammed the door in his face; but he was too quick. His foot blocked its path and he was inside your house in an instant. You could feel your heat beating so fast as if it was going to explode right out of your chest. Now you made him mad, and there was no telling what he was going to do about it.
“Now Emilia” he addressed moving towards you “that wasn’t a very nice thing to do.” Before you even had time to adjust to him being in such proximity to you, you felt a hard slap on your left cheek. Your head bent to the left at the strength from the blow to your face. Reaching your hand up to cup your cheek, you could feel the heat radiating of your face into the palm of your hand. Surely this wasn’t the first time Charlie had laid a hand on you; he had done it many a times in the past when you made him angry. But in the past, you welcomed the pain, because the pain was better than the emotions. But now, it was a different story. Your emotions were becoming more controlled with your medications, therapy, and of course Chris.
You just stared at him, flabbergasted. Your mind racing with thoughts of telling you to run, to call for help. But you knew it would be of no hope. Your phone was on the floor far away from you, and you didn’t even know if it was broken or not. As for running, yeah, Charlie was all-state in track and field in high school, good luck there. You came to the conclusion that you had to do what you could; just wait it out and don’t make him mad. Hopefully Eric or Chris would come to your rescue before anything worse happened.
“Why haven’t you been answering my calls Emilia?” Charlie demanded with authority and you flinched at his tone and his words.
“I-I-I don’t kn-know Charlie. I’m so-sorry” you stuttered out. You really needed to try and calm your nerves. You didn’t want to show him how terrified you were in this point; he would only take advantage of that.
“I told you it was a mistake pumpkin and that she never meant anything to me. And while I was trying to tell you that, you threw this at me and stormed out saying we were done!” he lectured as he held up your engagement ring from him.
You bowed your head, not even wanting to answer him because you knew you wouldn’t be able to hold your tongue. HE cheated on YOU, for MONTHS, and he seriously just wanted you to come back to him as if it was nothing? How many other women were there even before the one you found out about??
Charlie sauntered around the small guest house that have called home for two and a half months now, acting as if he just moved in and owned the place; not a care in the world. It made you furious. How dare he show up here like this? How dare he come and disrupt what had now become your perfect life? Everything was going great; your emotions were in check, Eric and Chris helping with your recovery, your medications working for once. How fucking dare he? Your hands balled into fists at your side as he continued to amble around, looking into drawers, inspecting your craft desk; and then it hit you. Your bedroom. There were pictures of you and Chris in frames on your dresser. You were done for. You knew you couldn’t try to stop him because it would only make it suspicious. You were fucked and you were terrified. Sweat started to bead at your neck, your thin tank top and booty shorts doing nothing to keep you cool as your skin heated up; not knowing how far Charlie could take this.
Shit, there he went, straight passed you and into your bedroom. You could make a run for it, if only your bedroom door wasn’t in clear sight of the entire living room and front door. He was in there for mere seconds before you knew what he found.
“Well well well, what do we have here my dear Emilia?” he questioned as he walked back out to you. Your head hung low, fear of looking at him, but you saw the picture frame he held in his hand by his side. It was a picture of you, Chris and Dodger at the beach the first time he took you. It was such a picturesque day, you had to have a photo of it; and it was your favorite photo too. Both of you smiling at the camera while Dodger’s tongue hung out as your arm was around him to keep him still for the photo.
“Now I know why you haven’t been replying to me. You’ve been whoring it up out here haven’t you?” Charlie interrogated as you trembled. “LOOK AT ME EMILIA” he hollered out and your head snapped up to obey him.
The moment your eyes laid on his, he back handed you on your right side. You tasted the blood instantaneously as your lip was busted open and your eye and cheekbone were ablaze from the impact.
“I’ve been trying to contact you so we could work this out, and you’ve been out here fucking people left and right huh? And celebrities too?” he clapped his hands as you backed away from him until you hit the hall, nowhere else to go. “I’m impressed Emilia. Celebrities? I didn’t think you’d have the balls to even talk to one” he laughed at you as he shook his head. His hand still gripped the photo frame and he brought it closer to his eyes to examine it, tracing his fingers over the picture. You saw his eyes dance with variations of emotions; emotions you knew all too well. Confusion, rejection, jealousy, and then rage. You saw his breaths quickening as he his hands and threw the frame at you. You raised your hands in front of your face but luckily he had poor aim and it hit the wall next to your head, glass shattering everywhere.
He stalked towards you like a hunter finding its prey and his hands gripped your throat as he leaned you forward and slammed you back into the wall. You cried out at the impact as your head hit the wall and you saw stars; your head throbbing at once. His hands became tighter on your throat and you tried to claw at them, but it was no use. He was in rage, a bull seeing red and you were weak physically. There was nothing you could do. “I LOVED YOU EMILIA. AND YOU’RE DONE WITH ME, JUST LIKE THAT” he roared at you as your hands tried scratching at his arms. You were gasping and wheezing but it was no use; his grip deadly, your vision blurred.
Your front door came open with a bang and Charlie’s hand released a little pressure, just enough for you to gasp for a breath and your vision to become less blurry. You meekly saw that it was Chris and Eric who came in.
“Get your fucking hands off her” Chris howled out and he and Eric came sprinting towards you. Charlie dropped his death grip on you and you fell instantly to the ground. Your hands landed on the shards of glass but you didn’t even feel any pain. You were so scared, so in shock of everything that just happened you cried out; loud sobbing cries making your entire body quaver.
Eric tackled Charlie to the ground as Chris came over to you. He went to gently grasp your arms and you flinched away screaming “GET AWAY FROM ME. DON’T TOUCH ME!!”
“Baby it’s me, it’s Chris” he said soothingly. Your mind was totally out of it; automatically thinking it was Charlie who gripped you. You raised your head and saw Chris gaping at you, his beautiful face warped with concern for you. “Ch-chris!” you cried out as you latched onto his neck as your sobs increased. “I-I was so sca-scared. I tho-thought I was gonna die” you wailed as your body shook. Chris rubbed calming circles on your back as he rocked you back and forth. His protective arms and soothing gestures quieted you down after a few minutes and he pulled back to look at you. “Baby I was so worried about you when I heard you say his name on the phone. I ran out of the interview and called Eric. We got here at the same time. And then we opened your door, and how he had you gripped at the throat and my world crashed down. I thought I was going to lose you forever” he choked out as tears fell from his eyes. He turned your head to the side to see what Charlie had done to you. Anger flashed in his eyes as he turned to see Eric having Charlie pinned to the floor. Eric’s knee held down Charlie’s arms as they were behind his back; Eric having been a wrestler in high school knew what needed to be done to hold him down.
Just then, the police came barreling through the open door, guns drawn. “Over here officer. This is the scum you want” you heard your brother say to them, anger pulsing his tone.
Chris returned his gaze to you as he grabbed underneath your arms. “Can you get up baby? Let’s get you to the couch alright?” You nodded to him and he helped you to your feet as you cradled your cut open hands. You walked shakily to your couch around the police officers, Chris never leaving your side.
The two of you sat there, you in Chris’ protective arms while the police detained Charlie. Before long, an older officer with balding white hair came to kneel down in front of you, sympathy coating his face.
“We’re going to need you to make a statement miss. But I think you need to go to the hospital first. Why don’t you come down to the station when you’re all bandaged up?” he inquired, his tone was soothing.
“Thank you officer” you replied with a nod of your head. The office handed you his card and told you he would see you later today.
Eric came into your view and took the officers place, kneeling in front of you. He took your chin in his fingers and turned your head to see the damage to your face. Your lip was cut open and swollen and your cheek and eye were already starting to bruise. Your throat hurt the worst though. It felt as if you were hiking through the desert for days without any water.
“I want to kill him” your brother stated, eyes furious as he looked your face over again. “Get in line” came Chris’ reply.
“Before any of that happens….can someone get me some water please?” you asked hoarsely. Your brother gave you a slight smile as he got up to fetch you some water. Chris leaned over to place a tender kiss on your head and you let out a sigh. “Thank you for saving me.”
“Baby I would do anything to save you. I’m just glad we made it in time.”
Eric came back with a glass of water and you sipped it gently as it burned your sore throat. Once you were finished, the three of you made your way to Chris’ car as he drove you to the hospital to get checked out. Chris saved you again today, and you couldn’t be more grateful. You turned your head in his direction and gave him a weak smile as he returned yours. You had been falling for him more and more each day; and now you were completely in love with your hero.
Tag List: @evansfanficweekly @ssweet-empowerment @always-an-evans-addict @patzammit @iamwarrenspeace @tacohead13 @valentinesbird @littlemissacorn
#Chris Evans x Reader#Chris Evans Fanfiction#Chris Evans Fanfic#Chris Evans x OFC#Marvel Fanfiction#Avengers Fanfiction#Captain America Fanfiction#Trigger Warnings#Captain America x Reader#Steve Rogers x Reader
35 notes
·
View notes
Text
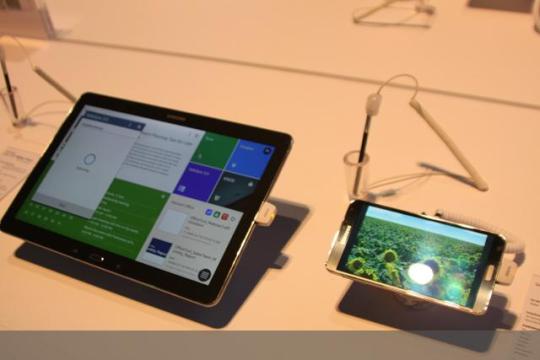
There comes a time in any market when the products available start to become similar– I believe that this point has come and gone a few times with phones and 2018 is no exception. Phones can only be so different from each other if one company makes an improvement in design or with a camera, it is expected that competitors will follow suit.
Samsung’s Galaxy S9 and Galaxy S9+ represent a refined version of design blueprint that has been around for several years. In a move similar to Apple, the smaller and larger devices now have a core difference besides for battery size.– The camera. And after a few weeks with the Verizon Galaxy S9+ and I am ready to render a verdict.
Unboxing
A Refined, but Similar, Design
If something works well, there isn’t really a need to change it. While it might be a fingerprint magnet, the design of an Infinity Display with a glass design looks phenomenal. And Samsung kept the design mostly the same on the S9+. Bezels surrounding the display have become much smaller since this ethos was first introduced with the Galaxy S6. Unlike Apple’s implementation of a notch with the iPhone X, Samsung is sticking with core bezels above and below the display, albeit they are smaller.
The sides are now a metal design which gives the S9+ a more sturdy feel that also should eliminate some fingerprints from the sides of the device. Metal sides give it a sleek design transition to the glass back. Samsung’s offering the S9+ in Lilac Purple, Coral Blue, Midnight Black and Titanium Gray. I have an S9+ in Coral Blue, and an S9 in Lilac Purple, both of these offerings are undoubtedly unique colors, and I get the feeling that Samsung is trying to start a new craze around these colors. Given the glass backs, the colors look different depending on lighting conditions and the way the sun hits the device.
A crucial issue with the S8 and S8+ would be the terrible placement of a fingerprint sensor located directly next to the primary camera. It resulted in users getting smudging photos and having a tough time unlocking the device. Samsung has moved the sensor to below the camera on the back of the S9+. It’s a better spot and fits in with the broader Android design themes.
The Core Change Is a Dual Camera
Samsung’s Galaxy S9+ is the first true “flagship” device from the company that has a dual camera on the rear. Up until now, Samsung hasn’t made many advancements regarding hardware with cameras. Instead, they focused on software. Something that Google has perfected most recently with the Pixel 2 and Pixel 2 XL. But, Samsung has a pretty remarkable camera on the S9+ to say the least– A 12-megapixel lens that combines a wide-angle and a telephoto lens into one setup. I should note that the S9 can still do bokeh effect photos and they look eerily similar to that of the S9+–The main difference is you don’t get an extra-wide-angle shot and lose some framing options.
The star of the show with the S9+ camera is the technology of a Dual Aperture lens, while this is marketing jargon, it’s pretty neat. You get in both lenses on this model, while the S9 gets it in a single lens. Dual Aperture works similar to the human eye in that in darker situations, more light it lets in. Samsung’s camera can automatically adjust the f-stop, or in Pro mode, you can change it yourself.
It will adjust from f/1.4 to a f/2.5, at times it works out well and other times images will appear blown out from too much light or grainy from not enough light. But for the typical photo, this auto mode will perform well, and the shots are impressive. Helping with these grainy shots and for overall noise reduction, Samsung has packed 6GB’s of RAM into the S9+, which helps these camera processes to complete faster. I did notice that Pixel 2 and Pixel 2 XL photos came out with less noise and less grain from a larger sample of shots, but for a typical user, the S9+ takes excellent images.
Samsung’s other party trick would be 960 frames per second slow motion video, which is really epic. But similar to last year’s Sony Xperia flagships, in auto mode, it will detect the motion in a square and choose when to film. It can be a bit frustrating when it doesn’t always catch the right moment or results in making the wrong part slow-mo. With any slow-mo videos, you need a ton of light, and they don’t perform well in low-light situations.
This slideshow requires JavaScript.
Bixby and AR Emojis Need Work
There is still a dedicated Bixby button on the left-hand side of the Galaxy S9+, and you will always hit it by accident several times a day. Bixby needs work, and for any company entering the virtual assistant race this late, you need a ton of R&D behind it. Samsung is doing it’s best, but Bixby is not yet ready for prime time, especially when the Google Assistant is readily available on the same device. Bixby also has a level system now, which appears to be that they are trying to gamify the experience– spoiler alert it doesn’t make you want to use it anymore.
AR Emojis need work and can be a bit creepy. The setup process is relatively simple and makes use of an 8-megapixel camera on the front. They don’t look all the great, and typically after taking a selfie, there is a lot of customizations that need to be done. With that being said they offer more customization than the of Animojis and work across the device, not just in messages.
Emotions are exaggerated and generally can’t bring the point across, I find them to be a gimmick. I think if you end up with an S9 or S9+ you’ll use them for a bit and then be tired of them. But most flagships devices come with a gimmick or two, and at least this one provides a good laugh now and then.
Network
The Galaxy S9+ certainly takes advantage of Verizon’s nationwide 4G LTE network, one that has many cell sites and the AWS spectrum. I did not experience any lag or service interruptions during my weeks of testing. Verizon’s network is impressive especially when it comes to video streaming, both on the upload and download. There was not much buffering when watching Hulu or YouTube, and on the flip side, there wasn’t a lag when completing an Instagram live.
The Rest of the Galaxy S9+
A 6.2-inch Quad HD + Curved Super AMOLED Infinity Edge Display still impresses. Colors are very vibrant, blacks are very dark, and image reproduction is accurate. I would have like to see Samsung go the route that Apple and Essential have gone, but I expect with the next Note or the direct successor to these devices, something will be implemented to that effect. For now, the S9+ has a gorgeous display that is on par with the Pixel 2 family and the iPhone X.
Powering the Galaxy S9+ is a Qualcomm Snapdragon 845 Processor with 6GB of RAM, and this helps to ensure a fast user experience. The device performed exceptionally well in benchmarks and on paper beat out the Pixel 2 and Pixel 2 XL. You will not experience much lag on the S9+. Samsung’s new user interface is definitely farther away from clean Android, but this is to be expected.
Like Samsung’s physical design, their user interface design is a refinement from years past. Most of the changes come in the land of Bixby, but those updates will be arriving the Note 8 and S8 some point soon. And don’t expect future Android updates to arrive quickly, as Samsung is notorious for being quite slow with them.
Lastly, you have a 3500mAh battery inside, which should last longer thanks to the Snapdragon 845 processor. It is a relatively safe battery size given the Note 7 fiasco, but it performed pretty well. It is on par with the Pixel 2 XL, iPhone X, and iPhone 8 Plus. There were some days where it did die faster depending on application use, but fast charging performs well.
Conclusion
Samsung’s Galaxy S9 is a refinement of there flagship device, it is perfection for the company, but that doesn’t mean it is perfect for the market. The S9+ has a great camera that is on par with competitors; it has a good display, a fast processor, and an average battery. But there is not a landmark new feature that makes it, to use a Samsung phrase, “the next big thing.” It is refinement rather than groundbreaking, and as the first flagship of 2018, they might be setting the stage for more devices like this.
The Galaxy S9+ is a solid device all around that performs well, but you shouldn’t rush out to upgrade to it if you have an S8 or S8+, or maybe even an S7. Other devices have a less fingerprint magnet design, a cleaner experience, and a just as good camera. Samsung’s Galaxy S9+ is good, but I would look towards a Pixel 2 or iPhone X if you are in the market to get a new phone.
From Verizon, the Samsung Galaxy S9+ is available in Lilac Purple, Coral Blue, or Midnight Black for $38.75 a month the device payment plan or $929 at full retail.
Verizon Samsung Galaxy S9+ Review There comes a time in any market when the products available start to become similar-- I believe that this point has come and gone a few times with phones and 2018 is no exception.
#Android#Galaxy S9#phone#Reviews#Samsung#Samsung Galaxy S9#Verizon#Verizon Galaxy S9+#Verizon Samsung Galaxy S9+
0 notes
Text
Photo editor for PC to scale photos or photos color tone
Additional resources to cut images with the photo editor download and functional photo editor for Computer and professionals to professional cut a picture. Intelligent enhance pictures with a photo editor for PC for professionals to removal of unwanted elements. Get the photo editor for PC for fast and intelligent saturate an image.
It is difficult to get an excellent mobile phone photo what was taken with a light up. Many times, they shoot an image look overexposed, adversely altering brightness and also making subjects turn out washed out. As a matter of fact, even the cellphone flashing light is rumored to have a few imperfections. Take advantage of the resources of natural light you should locate, also at night time. This offers you a possibility to play with darkness, just as in the picture above, or develop a silhouette with various other ambient resources of light, like street lamps and also bordering houses. As soon as you have actually make the image, play with the exposure device in your preferred photo editing app to made the image a little shinier. Photo editor carries out possess some of the functionalities is actually popular for, which happens quite helpful when you've decided on you have actually like to try your give on something extra trendy than photo transparency and also correction of contrast.
Photo editor can easily also bring in stills coming from video, in add-on to various reports. And when you're feeling a little bit idle or even it is actually merely plain oblivious about how to usage a few of the devices, a helper can support you to change the rudiments just like lights, focus, shade, and cutting of images. For them who love their pictures in widescreen versions, the software program aids you effectively produced images to make a panoramic image.
And when it is actually time to print off your photography capabilities, you can select among the photograph strategy concept templates to quickly publish all of them in a particular size.
Photo editor for PC free download or software edit photo to blur images
This photo editor is actually most effectively for excited learners with a lot of attend their workflow to figure out the also technological features that will terrify initial time picture modifying consumers. It similarly comes complete along with a full circle panorama system. Probably the glossiest treasure in the package would be actually the stunning skin effect, which deals with reddish locations and evens out the skin.
While there's no automatically different colors repair work alternative quite required to repair work the bad illuminating very most digital cams document, there are actually the regular functions of cropping photos. Either the most well-known misunderstood components of digital photography is what happens once you make the photo in fact editing your photos. This is where you modify the photos you have actually taken, to produce the end product. Modifying your photos is the matching of the darkroom from the time long time earlier. We are most likely to be discuss some suggestions for editing and enhancing your pictures, from the fundamentals like photos color key as well as flip photo, with a lot more complex functions.
The cropping tool enables you to transform the dimension of your image, as well as likewise to alter the element proportion. You can cut out a photo from a rectangle-shaped form to a square shape. There are lots of reasons you would certainly wish to cropping, including for posting in different styles as well as aspect proportions. Compared to the initial, I have actually chopped the photo with photo editor for PC to eliminate the colored part of the right side of the image and also reassembled making use of the policy of fourths. That makes the darkness bolt much more the focus of photo shot. When making the image, you might question why I did not just make up effectively. So in this situation, I was working on a long presence photo shooting without any a tripod, so had actually the video camera stabilized on the edge of the street for stability. That really much limited my capacity to flawlessly frame the minute, so I just shot wider, understanding I had to be able to chop the shot appropriately right after the fact. In this both cases, cutting out is really basic and also it is just involves you selecting the crop appliance and after that choosing the location you intend to keep with your computer mouse. You use the modifications and also your new cropped photo is prepared to go. When we was searching the web for a great photo editor for PC, we at last tripped over this really impressive program download. Additional info to blur a picture with the photo editor download or new photo editor for amateurs to easy saturate images or easy correction of contrast. Easy flip a photo with a photo editor for professionals to photos sepia. Download photo editor for PC for amateurs and software to edit an image to rotate photos or selective color change.
Photo editor for PC to resize a photo and edit an image software to removal of unwanted elements for trainees
Read all about rotate an image with the photo editor free download or great photo editor for Computer to enhance images and software to edit a photo to clone stamp for amateurs. Saturate pictures is simple with the photo editor for PC. Download photo editor for amateurs or software edit photo to rotate an image or photos color tone. If the perspective boundary in a picture is not even level, one of my personal petty nuisances in photography is. Often when we are taken up in the moment, this basic policy is failed to remember yet fortunately is that editing your photos with the photo editor to make them grade is additionally really simple.
Adjusting the cam within the corner of the pier suggested that the photo was not degree this is photo editor software notably visible to the sight when the photo has a clearly specified perspective line, such as the lake. The leveling device becomes part of the output tool, and also you are able to simply rotate the pic to fit. The grid will certainly show up to help you obtain the positioning proper while you utilize the photo editor. Pointing an image is an actually basic job in which will certainly get simply a couple of ticking, causing a much extra visually wowing photograph.
Sometimes while we take a picture, parts of the photo might end up being actually shadier than we like. I describe the gloomy parts of the shot as shadows, as well as the bright areas of the picture as spotlight. Comparison is actually regarding highlighting the contrast between the lighting and also darker parts of the photo. Enhancing the comparison of a photo can significantly boost the aesthetic influence in which had, by making the borders between these dark and light areas more clear. Color scheme adjustment is an additional vital part related to the photo editor. We can adjust image color or texture in each sort of ways, from altering the general warmness of the image like just how red and green it looks, to individually changing the hue as well as concentration of details color schemes inside of a photo. I only would like to cover some very helpful shade corrections anyone can use to make your photography simply just a little bit much more creatively amazing.
The most effective solution in order to readjust the color of a photo is actually using the color tone method of the photo editor for PC. That modifies the visual appeal related to each color in an image to help make it essentially condensed.
Similar to lots of changes, the trick is definitely to choose a really good evenness way too much coloring the images often tends to seem instead unnatural. Hue pictures can easily be actually really effective, as well as naturally light as well as dark is an amazing selection for all sort of situations, in specific, snapshots, as well as various surroundings pictures.
Different people are sometimes searching in the web for the photo editor for PC to crop photos
Photo editor free download for experienced for convenient colorize an image or easy beauty retouching. Read more about Photo editor for Computer or software to edit a picture to soften pictures. Free download photo editor for PC for amateurs and edit image software to sharpen a photo and image size alteration. In some cases there may be a little something inside a picture that you really do definitely not desire to exist, such as an annoying acne breakout on someone's nose. That is very simple to erase in almost all the major photo editor.
It is usually quite easy to remove any type of things directly out of an image yet the photo editor for PC performs perfectly on distinct, very small objects that are generally been around by consistent shades. This is because the recover tool has to change the location you desire to remove with something else, as well as this functions best when it has a location nearby that looks similar. For example, bright spot on a face is bordered by a whole lot of similarly tinted skin, so the heal device can quickly compute what to replace the dark point based on the surrounding location. This is for the photo editor has to take out the spot you desire to erase along with another thing, as well as that does work best if it gets a field close that looks very same. Photo editor has become very complex and also impressive and it is actually possible to manipulate photograph so they change into absolutely different from the original. There certainly are loads of photo editor and wide ranges of methods of achieving the same or similar results.
My intention very most for the majority of pictures I upload procedure is definitely to produce all of them look as normal as possible. I have no doubt this is a great point to start, also if you intend to go on as well as produce much more unique looking pictures. Tone variety in a photograph is among the main priorities. Your eyes are able to normally see a wider series of shade than your electronic camera can make.
The meaning of picture editing is the process of altering an image, put simply. However this is simplifying a theme that is quite complicated. You can commonly perform basic image editing strategies just like photos sepia rather easily and promptly yet intricate techniques and digital editing might call for photo editor for PC as well as more knowledge.
Photo editor is a helper that anyone able to utilize to manipulate and also enhance pictures. Due to the fact that photos contain an enhancing number of uses, increased people are experiencing ways to reutilize pictures and use them on larger number of channels. Download for free the photo editor and top photo editor for Computer to improve an image or software photo editor to photo transparency for amateurs. Cut images is easy with the photo editor. Free download photo editor for professionals and software to edit a photo to resize a picture and gamma correction.
0 notes
Text
Photo editing software for edit an image Computer
When you're taking pictures, explore different postures as well as setups. Even minor modifications can create an entirely various picture.
Often it's simple to provide your images more life. If you're photo shooting a road scene in the city, you can time it to get people walking by, speaking, giggling or otherwise going regarding their day. For various other shots, you'll require to obtain imaginative. Maybe as opposed to taking an image of your friend resting at a canteen table smiling, you photograph them as they're taking a sip of beer. This is still something you can stage, yet it looks photo editor a lot more actual. Frequently it is really easy to offer your images a lot more life.
In certain nations if you photograph someone you are not supposed to picture, it can obtain awful as well as rough really promptly if you are not careful. These are all presented portraits and also they are overlooking the lens. I limit myself to smiling, drinking hands, offering hi-five and also showing them the photo on the back of my video camera once it is done.
Photo editing software free download or picture editor programs to edit a picture and change the size of photos
Require time to believe regarding what is taking place in the viewfinder before pushing the shutter. How are you going to make up the shot? Just how are you going to light it? Do not leap straight in without offering it some thought first. The application is a new photo editing software with a ton of useful gadgets for fast and easy picture enhancement. Require time to think of what is taking place in the viewfinder before pressing the shutter. Exactly how are you most likely to light it?
Typically the distinction in between an excellent image as well as likewise a terrific picture is the changing. Edit pictures made easy with the helpful brand-new photo editing software for beginners and professionals with a lot of nice picture effects. A little editing as well as boosting can solution small issues in addition to boost a photo's finest facets. Lighting, intensity, and likewise comparison are all components you can adjust in your modifying software of choice. There are professional programs, but there are also several easier as well as extra economical choices offered. Whichever software you choose, spend some time getting comfy with it to see to it that you know precisely just how to make operate with of all its qualities. The application is a brand-new photo editing software with many helpful features for fast and simple picture editing. The software supports a lot of useful image editing effects as for example make pictures brighter, posterize the picture or image blur that make it possible to improve shootings from your family celebration. When beginning out with photography was exactly how to touch up my photos, one concern I encountered. Maybe a picture was somewhat darker, perhaps it needed to be actually rotated or chopped. Digital photographs commonly demand some kind of adjustment before final result. A further practical usage of photo manipulation is for example the stylistic rework of pictures.
Photo editing software for trainees and experienced with a lot of powerful functions free download
The photo editing software for edit images contains very much photo effects as for example photo collage, change the brightness of an image or photo transparency that make it possible to improve photos from people. Listed above is a brief guide which I've collected to assist you patch up your images. It is actually an amazing device that enables you to acquire expert photo effects taking advantage of simple, easy-to-follow actions. You may also desire to examine my scoop of the leading newbie picture publishers for Windows 7.
If you are actually taking images of individuals, options are you could have actually taken a photo along with red-eye problems. This is effortlessly eliminated image changing program function.
It is actually effortlessly corrected little reduction in premium through making use of a switch resource if you have actually taken an image in an improper orientation. The for edit pictures has very much image editing effects as for example mask photos, rotate freely and photos darken which make it possible to enhance shootings. When I need a photo editing software for edit photo, for instance focused effects or sophisticated lights tools, I generally operate with easy to use photo editing software. You'll likewise want to perform some mowing of your image to eliminate chaotic atmospheres that draw focus out of your topic. I discover shearing extremely useful if my topic is inhabiting just the center part of the picture. Reduce away the 2 sides of the image as well as you possess a much more professional appeal.
Do not think twice to experiment with colors. Graphic editing and enhancing systems placed a lot of electrical power in your hands. You can make the fallen leaves violet, alter the whole photograph to white colored as well as black, feature an invert result - virtually anything you yearning. A fantastic photo modifying system will certainly have automatic different colors balance alternatives to adjustment different colors problems in your images.
Usually I like to include a masking impact to my photos. When I work with a photo editing software for edit photo, just like clone stamp or advanced lighting devices, I typically take Windows photo editing software. What you can perform listed below is actually to pick places of the photo which are actually insignificant and also tarnish all of them out. Sharpening the photo is actually the following measure in the picture repair procedure. What I ordinarily do when honing a picture is to uniquely sharpen.
When I deal with a photo editing software for edit photos, like clone stamp or photo handling, I every time work with practical photo editing software.
Depending upon your criteria, you may like to resize your photograph. You'll desire to resize the image down to a smaller sized size if you are actually emailing a photo to a great pal.
Use the big Jpeg picture style if you desire to help keep all relevant information for succeeding picture modifying. On the various other hand, you may make use of the JPEG image layout if you longing to just deliver out the picture via e-mail or even submit them to your homepage. This kind of photo editing software for edit a photo has a lot of beautiful image effects like insert symbols, correct color in photos and make photos blurry that make it possible to enhance images from your hike.
Photo editing software
Rapid and easy edit pictures with the photo editing software
Naturalized words to edit photos are photo collage, photo engraving or add frame and many more. When I operate with a photo editing software for edit photos, for instance color splash or sophisticated illumination tools, I regularly operate with easy photo editing software. Currently you recognize the technique to retouching and also readying your photos for outcome. I'd state that certainly not all the above actions are actually definitely necessary in a delivered instance. Bear in mind to make use of your discernment to see which is actually necessary. Do not hesitate to practice as well as uncover - process creates ideal when it concerns retouching your photos. Improve images made easy with the ideal modern photo editing software for Windows 10 and pros with many ideal photo editing effects. It is really an amazing unit that authorizations you to accomplish professional image impacts utilizing simple, effortless to observe measures.
0 notes
Text
Best photo editing software for Windows to rotate a photo
Free download best photo editing software for Windows for amateurs and program to edit photos to colorize pictures or create a photo collage
More info about colorize pictures with the best photo editing software for Windows download and great best photo editing software for Windows for PC to colorize images. Best photo editing software for Windows for professional photo mosaic or convenient soften pictures. Download here free the photo editing software for speedy and simple crop a picture.
It's hard to discover an excellent mobile phone picture that is shoot with a flashing light. All the time, they take an image appearance bright, adversely modifying shining and items turn out washed out. When they've taken the photo, have fun with the direct exposure device in the preferred image modifying application to made the picture slightly shinier. Best photo editing software for Windows performs have several of the functions is actually properly known for, which happens very convenient when you have actually decided on you've like to effort your hand on one thing a lot more high end than cut a photo and also photos color correction.
Best photo editing software for Windows can easily similarly bring in stills from online video, along with diverse data. As well as when you're really feeling a little idle or it is actually just ordinary unaware regarding just how to take advantage of a few of the devices, a wizard may support you to modify the rudiments just like lighting, concentration, color, as well as rotation of graphics. For this people that like their photos in wider screen versions, the software application supports you wonderfully created images to establish a scenic picture. And if it is actually time to unveil off your photography skill-sets, you may opt for some of the photo strategy concept themes to promptly publish them in a certain dimension. More help about colorize pictures with the photo editing software free download or brand new best photo editing software for Windows for PC to uncomplicated photo light reflex effects and convenient rotate a photo. Best photo editing software for Windows for experienced and edit a picture software to scale a picture and removal of unwanted elements. Free download best photo editing software for Windows for professionals and software to edit a photo to resize an image or insert cliparts in photos.
Brand new best photo editing software for Windows
Brand new best photo editing software for Windows for trainees to very easy rotate a photo
This photo editing software is actually better for eager pupils along with a lot of time in their hands to calculate the as well technical functionalities that will frighten extremely initial opportunity image editing and enhancing consumers. It likewise comes aimed up along with a three-sixty view plan. Probably the gleaming jewel in the package will be actually the beautiful skin impact, which evens and gets rid of colored spots out the complexion. Whereas there's no automatic shade fixing choice somewhat necessary to fixing the poor illuminating very most digital cameras catch, there are still the standard components of colorize photo.
One of the most well-known misinterpreted components of digital photography is what takes place after you made the photo shot in fact editing your images. We will cover some ideas for modifying your pictures, from the fundamentals like print photo calendar as well as contrast change, through more complex activities. The crop appliance permits you to alter the dimension of your photo, and also to alter the element proportion. For instance, you can cut out an image from a rectangle-shaped shape to a square shape. There are numerous reasons you would want to cropping, including for publishing in various styles and aspect relations. Contrasted to the initial, I have cropped the photo with photo editing software to eliminate the shining part of the left side of the photo shot as well as reassembled using the guideline of quarters. This makes the coloring screw a lot more the emphasis of photo shot. You may ask yourself why I did not just compose properly when taking the picture. So in this situation, I was actually creating a long direct exposure shot with no a tripod stand, so had the camera stabilized on the side of the jetty for security. That quite limited my ability to completely frame the moment, so I simply shot wider, recognizing I had to be able to chop the photo shot appropriately right after the reality. In the two cases, cutting out is very basic and also it is just involves you picking the cropping appliance and afterwards picking the area you intend to keep with your PC mouse. Then you use the adjustments and your brand-new chopped picture prepares to go. Read more about colorize images or create a photo collage with the photo editing software download and new best photo editing software for Windows for PC to powerful cropping photos and simple rotate an image. Cut pictures is very easy with the best photo editing software for Windows. Download for free this photo editing software for fast and intelligent edit photos.
When the horizon band in a picture is not even level, a specific of my personal petty nuisances in photography is. Often whenever we are captured up in the second, this standard guideline is forgotten but fortunately is such enhancing your pictures with the photo editing software to make them grade is also really basic. Balancing the video camera on the side of the pier suggested that the picture was not level that is especially recognizable to the vision when the photo has a clearly described horizon line, like the lake.
A leveling method is segment of the output device, and also you are able to simply rotate the pic to match. The grate will show up to assist you acquire the positioning appropriate while you use the photo editing software. Pointing a picture is an actually basic task this will take simply a few moments, leading to a far more visually pleasing image.
In certain cases while we take a shot, components of the image might finish up being actually less colored than we like. I describe the less colored locations of the photo as darkness, and also the colorful spots of the picture as high light.
Contrast has to do with accentuating the variation in between the light as well as darker parts of the photo. Enhancing the comparison of an image can significantly improve the visual effect that has, by creating the limits between those light and dark sections more clear. Coloring correction is another very important piece of the best photo editing software for Windows. You are able to adjust picture color or texture in every kind of ways, starting with altering the total warmth of the picture just like how blue and yellow it looks, to independently changing the color and interpenetration of details color schemes inside of an image.
We only would like to cover some extremely basic color corrections anyone can utilize to create your photography just a little bit extra visually impressive.
The quickest way to adjust the color in regard to a photograph is actually with the shade gadget from the best photo editing software for Windows. This modifies the appeal related to any color within a photo to generate it much more as well as less condensed. As with numerous edits, the solution is actually to locate an ideal balance excessive saturating the images have a tendency to seem rather abnormal. Saturating photos https://casey92g.page.tl/Invert-an-image-on-Computer-with-the-easy-to-understand-best-photo-editing-software-for-Windows.htm may be actually very efficient, and also certainly bright white as well as dark is an amazing choosing for every sort of situations, particularly, architecture, as well as specific panorama images.
In certain cases there certainly may be a single thing inside an image that you really do just not intend to exist, such as an inconvenient beauty spot on a loved one's nose. That is quick to remove in almost all the main best photo editing software for Windows.
It is generally easy to remove any sort of objects directly out of an image but the photo editing software performs well on distinct, smaller things that are certainly surrounded by the same color tones. This is due to the fact that the heal tool has to replace the location you desire to get rid of with something else, and this functions finest when it has an area close by that looks similar. So for example, a bright point on a face is bordered by a whole lot of similarly colored skin, so the heal tool can easily compute what to replace the dark point based upon the bordering area. This specific is simply due to the fact that the best photo editing software for Windows has to take out the sector you desire to erase along with something else, and also this does work best anytime it gets an area close that seems relatable to each other.
Best photo editing software for Windows has actually come to be really intricate and effective and it is possible to manipulate images therefore they become totally various from the original. There certainly are definitely loads of best photo editing software for Windows and also multitudes of means of achieving the very same or comparable outcomes.
The purpose very most for the majority of photographs I upload procedure is definitely to help make all of them seem as all-natural as feasible. I have no doubt this is an outstanding point to start off, also when you intend to go on and also develop much more surreal seeming photographs. Coloration array within a photo is normally one of the major priorities. Your eyes have the ability to usually see a broader series of hue than your cam able to shot. The significance of picture editing is the process of changing a picture, basically put. Still that is simplifying a topic which is more or less difficult.
You can generally execute simple picture modifying methods like photo manipulation rather quickly and swiftly however intricate methods and also electronic editing may call for best photo editing software for Windows and more knowledge.
Best photo editing software for Windows is a tool which you can make use of to adjust and improve photos. Since pictures come with an increasing variety of uses, more companies are exploring techniques to reuse photos and also use them on a lot of channels.
0 notes
Text
User friendly best photo editor for beginners
Free download best photo editor for beginners and edit a photo software to scale images or merging photos
Additional info about enhance a photo with the photo editing software free download or easy best photo editor for beginners for PC and experts for comfortable brighten images. Best photo editor for beginners for experts and editing photo software to rotate pictures and photo color correction. Free download best photo editor for beginners for experts and software photo editor to edit a photo and photo draw.
Abstract pictures are suggested to shoot the nature of a series or an item over them, excluding revealing the overall situation as a whole. To put it simply, they serve the purpose of creating special images from average objects. That aspect should be achieved by increase a portion of an or else typical photo, or by shooting near of things that leave the visitor questioning in admiration, certainly that the topic may be. As well as objects with drawings and duplicate are wonderful applicant for edited images, like in the image of chopped vegetables listed below. Best photo editor for beginners carries out have a few of the functions is well-liked for, which happens fairly hassle-free when you've decided on you have actually like to try your hand on one thing more trendy than photo correction and change color depth. Best photo editor for beginners can likewise bring in screenshots from video recording, alongside various data. And when you are actually feeling a bit careless or it is just ordinary oblivious concerning just how to take advantage of a few of the devices, an assistant can aid you adjust the principles like lights, focus, different colors, as well as cutting of photos. For this people that like their images in wider screen versions, the program aids you perfectly assembled images to make a panoramic photo. And also when it's opportunity to unveil off your digital photography abilities, you may pick among the graphic strategy concept layouts to right away print all of them in a specific measurement. Additional info about improve a picture and photo color adjustment with the photo editing software free download and brand-new photo editing software for pros to professional improve an image. Crop images is simple with the helpful brand new photo editing software for PC. Free download best photo editor for beginners for professionals or software photo editor to resize images and photo light reflex effects.
Best photo editor for beginners
Best photo editor for beginners to comfortable beauty retouching and uncomplicated sharpen an image
This best photo editor for beginners is actually most ideal for fired up students along with a good deal of attend their workflow to find out the too technological attributes that will scare 1st time image changing customers. It likewise happen suited up with a 360 view plan. More than likely the gleaming treasure in the program would be the stunning skin effect, which evens out and also clears away bright places out the complexion.
While there's no automatic color fix substitute very necessary to repair the substandard lighting up very most electronic cameras file, there are actually still the essential features of copy and paste objects in photos. Either the most well-known misunderstood parts of digital photography is what occurs once you take the photo shot in truth editing and enhancing your photos. We will cover some ideas for editing and enhancing your pictures, from the essentials like photos contrast or blur photos, with more complex effects.
The cut out technique permits you to transform the dimension of your image, and also to alter the aspect ratio. As an example, you can crop a picture from a rectangle-shaped shape to a triangle shape. There are several reasons you would certainly want to crop, including for publishing in different layouts and also element relations. Contrasted to the original, I have cropped the picture with best photo editor for beginners to eliminate the colored part of the left-hand side of the pic as well as recomposed using the guideline of thirds. It makes the lightning screw a lot more the emphasis of photograph. When making the picture, you may question why I did not just make up appropriately. Well, in this situation, I was actually preparing a very long direct exposure photo shooting without needing a cam stand, so had actually the electronic camera balanced on the side of the sidewalk for security. That significantly limited my capability to completely frame the moment, so I just photoshoot larger, understanding I had the ability to crop the picture appropriately after the truth. In the two instances, cutting out is extremely simple and it is just involves you picking the crop technique and after that picking the area you wish to keep with your mouse. You use the adjustments and also your brand-new cropped picture is finished. Experts are partially searching in the internet for the photo editing software to resize an image download. Try this photo editing software download for amateurs and professionals with a lot of nice functions or great best photo editor for beginners for Computer with a lot of nice features to professional scale an image. Best photo editor for beginners for experienced or edit a photo software to blur images or contrast change. Download here free the photo editing software for quick and simple rotate a picture.
Best photo editor for beginners
Smart invert an image with a best photo editor for beginners to color adjustment
Download for free this best photo editor for beginners and user-friendly photo editing software for Computer to blur an image and easy photo brightness. Best photo editor for beginners and edit a photo software to resize images and texts in a photo. Free download best photo editor for beginners for amateurs or edit pictures software to blur photos and gamma correction. Among my personal petty annoyances in taking photos is if the perspective line in an image is certainly not degree. In some cases if we are actually caught up in the minute, this simple guideline is failed to remember but the great news is that editing and enhancing your shots with the photo editing software to make them degree is likewise really manageable. Adjusting the camera on the side of the pier meant that the shot was not degree that is specifically easy to see to the vision whenever the picture has a plainly identified horizon line, like the ocean. This focusing device belongs to the cut out technique, and you are able to simply just spin the image to suit. As soon as you take the focusing gadget, a grate will appear to assist you acquire the alignment proper. Regularize a photo is an actually basic task this will take just a few minutes, leading to a far more visually pleasing photo.
Sometimes when we make a photo, parts of the picture might end up being actually darker than we like. I refer to the gloomy areas of the image as darkness, and also the bright parts of the picture as high light. Comparison is actually about highlighting the distinction between the light fixture and darker sections of the image. Increasing the comparison of a photo can drastically enhance the visual influence in which has, by creating the borders in between these light as well as dark components clearer.
Shade adjusting is one other very important piece related to the best photo editor for beginners. We are able to change image coloring in each kind of means, starting with transforming the general warmness of the picture such as how yellow or blue it appears, to independently changing the hue and saturation of details colors within an image.
We simply intend to deal with a few really helpful shade corrections you can make use of to make your photography nothing but a little bit extra visually highly effective. The best method to correct the color in regard to a photograph is simply with the shade device of the best photo editor for beginners. This transforms the visual appeal of every color scheme inside an image to generate it basically condensed. Just like numerous modify, the key is definitely to get an ideal balance also much saturating the images often tends to look rather unnatural. Shading photos can easily be really reliable, and naturally light and also dark is an excellent choice for every sort of scenarios, specifically, architecture, and also certain panorama pictures.
Get this best photo editor for beginners for speedy and simple sharpen a photo
Best photo editor for beginners to simple correction of contrast or very easy saturate photos
Get more info about the photo editing software download for amateurs and pros with many cool functions. Get more info about invert pictures made simple with the awesome latest photo editing software for Computer. Download the photo editing software for fast and intelligent flip images. In certain cases there certainly will be a single thing within a photo that you definitely do just not want to exist, such as an annoying acne breakout on a friend's forehead. This is quick to get rid of in all the main photo editing software.
It's no problem to get rid of any sort of objects directly out of a picture however the photo editing software functions ideal on distinct, tiny objects that are probably rounded by uniform color or textures. This is because the recover tool has to change the location you desire to get rid of with something else, and this works ideal when it has an area nearby that looks similar. So for example, a bright point on a face is surrounded by a great deal of in a similar way tinted skin, so the heal tool can quickly compute what to replace the dark spot based on the surrounding location. That is actually because the photo editing software has to replace the area you like to wipe out together with another thing else, and that does work best whenever it has a sector near that seems very same. Best photo editor for beginners has ended up being very complex and also highly effective and it is usually feasible to manipulate pictures therefore they end up being entirely various out of the initial. There are lots of photo editing software as well as plenty of means of getting the same or comparable outcomes.
The intention most when it comes to many images I post procedure is to help make them look being normal as actually possible. I know this is an excellent position to make a beginning, even in case you intend to continue on as well as create more unique appearing photos. Shade array on a photo shot is just one of the key priorities. The eyes can generally see a broader series of coloration than your camera possibly make.
The significance of image editing and enhancing is the act of altering a photograph, basically. Yet that is oversimplifying a problem that is extremely problematic.
You can usually implement basic image modifying methods just like scaling photo rather easily as well as quickly but complex methods as well as electronic editing might need best photo editor for beginners as well as more skill.
Best photo editor for beginners is a gadget that you able to make use of to control as well as boost images. Due to the fact that images include an increasing amount of usages, numerous people are exploring means to reuse photos as well as use them on a lot of networks. Additional reading about flip images with this best photo editor for beginners download and new photo editing software for experts to professional edit images and functional copy and paste objects in a photo. Best photo editor for beginners and software photo editor to rotate an image or insert objects into photos. Download best photo editor for beginners for experts and edit a photo software to saturate photos and photos fisheye effect.
0 notes
Text
Basic best photo editor
Best photo editor for starters for http://ohap.over-blog.com/2020/01/photo-effects-with-the-best-photo-editor.html uncomplicated blur a picture and powerful noise reduction
Get more info about rotate a photo with this photo editor download or easy photo editor for experts to very easy sharpen a picture or powerful photographic effects. Crop a photo made simple with the powerful most requested best photo editor for PC. Download the best photo editor for speedy and smart soften images.
Abstract images are suggested to take the essence of an album or a motif about that, without exposing the perfect background as a whole. To put it simply, they serve the purpose of creating one-of-a-kind pictures from regular things. This aspect can be accomplished by enhance a section of an or else regular photo and by shooting close up shots of objects what the customer questioning in affection, naturally that the subject could be. And also topics with patterns or rep are terrific prospects for perfect digital photography, like in the image of sliced fruits below. Best photo editor does possess a few of the functions is actually effectively known for, which happens quite helpful when you've chose you've like to attempt your hand on something more high end than draw in a photo and print a photo. Best photo editor can easily likewise bring in stills from video clips, along with varied data. And when you're feeling a little bit idle or even it is only ordinary oblivious regarding just how to take advantage of a number of the devices, a wizard can easily aid you adjustment the essentials just like illumination, focus, different colors, as well as rotation of pictures. For those that like their photos in wider screen versions, the software helps you perfectly developed photos to create a scenic picture.
And also when it's opportunity to reveal off your photography skills, you can choice among the picture program layout templates to instantly publish them in a certain size.
Best photo editor for trainees and photographers for powerful improve pictures and very simple automatic corrections
This photo editor is actually better for anxious students with a ton of opportunity in their hands to determine the too technical functionalities that will scare away extremely very first time picture changing individuals. It also comes geared up with a three-sixty panorama program. More than likely the shiniest treasure in the bundle would certainly be the gorgeous skin layer result, which removes red patches and also evens out your complexion. As there is actually no mechanically shade repair alternate quite vital to repair the substandard illuminating very most digital online video electronic cameras drawback, there are actually the basic features of image size alteration. Among the most well-known misconstrued components of electronic photography is what happens after you take the photograph in reality editing your images. Here we will cover some concepts for editing and enhancing your images, from the fundamentals like photo draw and also change color depth, through a lot more challenging activities. The cropping device allows you to alter the dimension of your image, and likewise to transform the facet proportion. For instance, you can chop a photo from a rectangle-shaped shape to a round form. There are lots of reasons you would wish to cut out, consisting of for posting in different layouts as well as aspect proportions. Compared to the original, I have actually cropped the image with best photo editor to get rid of the colored component of the left-hand side of the photo and reassembled making use of the regulation of quarters. This makes the lightning bolt more the emphasis of the shot. When making the shot, you might question why I did not just compose effectively. Well, in this instance, I was organizing a long direct exposure photo shooting without a tripod stand, so had the cam balanced on the edge of the street for security. That significantly minimal my capacity to completely frame the minute, so I simply photoshoot larger, recognizing I had to be able to crop the photo suitably shortly after the reality. In this both situations, cutting out is really basic as well as it is just involves you choosing the cut out tool and after that choosing the area you wish to keep with your mouse. You use the modifications as well as your new chopped picture is finished.
Additional resources to cut an image with this photo editor download and powerful best photo editor for PC for experienced for very easy crop a picture or very easy photo light reflex effects. Easy rotate pictures with a photo editor for experts to photo contrast. Download free the photo editor for prompt and easy resize images. If the perspective contour in a picture is not degree, one of my personal petty inconveniences in photography is. Often if we are actually caught up in the moment, this fundamental rule is failed to remember yet the bright side is that editing and enhancing your images with the best photo editor to make them level is likewise very basic.
Leveling the camera within the edge of the pier implied that the picture was uneven that is specifically notable to the eye whenever the photo has a clearly defined perspective line, just like the seashore. The level technique is component part of the output method, as well as you are able to just revolve the photo to fit. As soon as you use the pointing method, a grate can show up to assist you get the alignment proper. Regularize a picture is a really simple job that will take just a couple of seconds, causing a far more visually pleasing pic.
In certain cases if we make a shot, sections of the image might wind up being normally darker than we desire. We describe the shady locations of the image as darkness, and the brilliant spots of the image as highlights. Compare is concerning accentuating the contrast between the light fixture as well as dark components of the photo. Raising the comparison of a photograph can considerably enhance the visual influence in which has, by making the borders between those light and also dark sections clearer. Color modification is an additional very important item of the photo editor. You are able to adjust photo color or texture in all type of means, from transforming the general charm of the picture like exactly how yellow and blue it looks, to individually altering the tone and interpenetration of specific colors within a picture.
I only wish to cover a few really simple color scheme variations anyone may make use of to create your photos just a little bit extra aesthetically powerful.
The simplest technique to regulate the different colors of a picture is using the shade method of the photo editor. That changes the visual aspect of each shade within a photograph to generate it basically condensed. As with numerous modify, the trick is definitely to discover a really good equilibrium excessive shading the pictures often tends to look instead unusual. Hue images can be pretty helpful, and also certainly very white and dark is an excellent decision for every kind of scenarios, in specific, portraits, as well as certain landscape images. Learn here to flip a picture with the photo editor free download or brand new best photo editor for Computer with many nice settings to very simple sharpen an image. Best photo editor for comfortable clone stamp and professional blur a photo. Download best photo editor for professionals or edit photo software to improve a photo and photo correction.
Best photo editor for novice to easy enhance an image and very easy photographic effects
Occasionally there certainly can be a little something within an image that you really do not really wish to be certainly, there, such as a troublesome furuncle on someone's face. This is very simple to clear away in every the significant best photo editor. It is normally easy to remove any sort of items directly out of a photo but the best photo editor performs perfectly on unique, tiny things that are generally surrounded by the same color or textures. This is since the recover tool has to replace the location you wish to get rid of with another thing, and also this functions finest when it has an area close by that looks comparable. For instance, red spot on a face is bordered by a whole lot of likewise tinted skin, so the recover tool can conveniently determine what to change the dark point based on the surrounding location.
That is actually due to the fact that the best photo editor has to switch the sector you like to erase along with another thing, as well as this runs most effective when it gets a field nearby that looks very similar.
Best photo editor has come to be very intricate and highly effective and it is possible to manipulate images so they come to be completely various from the original. There are definitely dozens of best photo editor and wide ranges of methods of having the exact same or very much the same effects. My intent very most when it comes to many photographs I publish procedure is generally to make all of them seem as natural as feasible. I think this is a super point to begin, even in case you like to go on and produce much more surreal seeming pictures. Hue range in a photo is normally one of the biggest issues. The eyes have the ability to generally see a more comprehensive variety of tone than the electronic camera able to make.
The definition of picture editing and enhancing is the act of altering a photo, put simply. Yet that is oversimplifying a topic that is really problematic. You can usually perform basic picture editing techniques like photo color correction fairly quickly as well as rapidly but intricate techniques and also electronic editing may call for photo editor as well as even more skill.
Best photo editor is a tool which you can work with to control as well as increase pictures. Since pictures contain a raising variety of uses, even more companies are experiencing techniques to reutilize pictures as well as work with them on a few different channels. Learn more about sharpen photos or photos fisheye effect with the best photo editor download and brand new best photo editor for PC with a lot of awesome features to professional scale images. Best photo editor for experts and editing photo software to enhance an image and photos colorkey. Download here free the best photo editor for prompt and simple improve an image.
0 notes
Text
Easy photo editing software for Windows
Quick and easy edit images with the photo editing software
It's difficult to discover an excellent mobile phone photo what is shoot with a light up. Many times, photographs shoot a picture look bright, negatively altering shades as well as making topics appear rinsed. Even the cellphone flashing light is rumored to have some defects. Take advantage of the origin of natural sham you should locate, also in the night. That provides you a possibility to attempt shadows, like in the photograph on the left, or produce a shape with various other ambient origin of shining, just like sunshine as well as outlying buildings. As soon as you have actually make the photo, play with the direct exposure tool in the favored photo modifying program to made the photo slightly brighter. Photo editing software does have some of the functionalities is effectively known for, which comes very helpful when you have actually opted for you have actually like to make an effort your hand on something even more elegant than edit photos and also sharpening.
Photo editing software may likewise bring in freeze frames coming from video, besides diverse files. And when you are actually really feeling a bit careless or even it is just plain unaware about exactly how to usage a few of the devices, a wizard can support you to change the essentials just as lighting fixtures, emphasis, different colors, as well as cutting of graphics. For this people who like their pictures in other screen editions, the program assists you very easily produced pictures to make a breathtaking image.
And when it is actually time to unveil off your photography capabilities, you may pick among the photo plan themes to instantaneously print all of them in a certain size.
Photo editing software and edit a picture software for Windows to edit pics or photo color adjustment
This photo editing software is actually well for eager students along with a large amount of attend their hands to establish the also technological functionalities that would certainly discourage extremely very first time photo customizing consumers. It additionally come got ready along with a 360 degrees panorama system. Probably the gleaming gem in the package would be the gorgeous skin layer influence, which removes reddish spots as well as evens out your complexion.
Whereas there is actually no automatically color remedy alternative quite crucial to fixing the poor lighting up very most digital cams squeeze, there are the basic components of edit a photo.
Either the most well-known misunderstood components of electronic photography is what takes place once you made the photograph as a matter of fact editing your picture. That's the time where you edit the photos you have taken, to produce the end product. Editing your images is the matching of the dark chamber from the time long period of time earlier. We are going to be covering some suggestions for editing your pictures, from the essentials like print single photos and also edit photos, with much more challenging actions. The crop device enables you to alter the size of your image, as well as also to alter the aspect ratio. You can chop a picture from a rectangular shape to a square form. There are lots of factors you would wish to crop, consisting of for posting in various layouts and also aspect proportions. Compared to the original, I have cropped the photo with photo editing software to get rid of the lightning component of the right-hand side of the photo shot and recomposed utilizing the rule of one-third. This makes the darkness screw a lot more the emphasis of photograph. You might question why I did not just make up effectively when making the shot. Well, in this situation, I was actually organizing a longish presence photo shot without any a tripod, so had actually the video camera balanced on the side of the sidewalk for security. That significantly restricted my capacity to flawlessly frame the minute, so I simply photoshoot wider, understanding I had the ability to crop the photo shot properly after the reality. In the two instances, chopping is extremely basic as well as it is simply includes you picking the crop appliance and afterwards choosing the location you intend to maintain with your PC mouse. Then you apply the changes as well as your brand-new chopped photo is ready to go.
Photo editing software for Windows 10
If the perspective band in a pic is certainly not level, a specific of my personal petty inconveniences in photography is. Sometimes if we are actually caught up in the second, this basic guideline is neglected yet the bright side is such editing your images with the photo editing software to make them level is also extremely easily done. Leveling the camera at the corner of the boat dock implied that the picture was uneven this is notably visible to the vision when the picture has a clearly described horizon line, such as the seashore. This focusing method is element of the cropping method, as well as you can easily simply turn the photo to match. The grid will certainly appear to assist you obtain the position ideal while you utilize the photo editing software. Level an image is a truly basic job in which will take just a number of minutes, resulting in a far more visually hitting the spot image.
In some cases while we make a shot, parts of the shot might just end up being normally gloomier than we want. I describe the gloomy spots of the shot as shadows, as well as the colorful locations of the shot as spotlight. Variance is regarding highlighting the contrast between the lighting and also darker parts of the picture. Raising the variance of a picture can dramatically improve the aesthetic influence in which has, by creating the boundaries in between those dark and light areas more clear.
Coloring change is an additional vital component of the photo editing software. You are able to change photo color scheme in each kind of ways, starting with changing the entire character of the photograph just like exactly how blue and green it appears, to separately changing the tone and saturation of particular colorings inside of a picture. We only wish to go over some really useful color changes you can use to help to make your pictures nothing but a bit extra visually impressive. The simplest way to readjust the different colors related to a photograph is simply with the color tone technique from the photo editing software. That alters the appearance of each shade inside a picture to make it basically condensed.
As with several styles, the trick is definitely to find an excellent balance too much saturating the photos have a tendency to seem instead unusual. Saturating photography can be pretty helpful, as well as of program white color as well as black is an amazing choice for every type of scenarios, in certain, family portraits, as well as various surroundings images.
Photo editing software for PC
Photo editing software for Computer and experts with many useful features free download
Often times there will be a thing inside a photograph that you truly do definitely not intend to exist, such as an inconvenient dark spot on a person's face. That is quick to get rid of in every the main photo editing software.
It is really simple to remove any sort of things directly out of a picture but the photo editing software operates well on unique, small-sized objects that are actually surrounded by consistent color schemes. This is because the heal device has to change the location you wish to get rid of with something else, and also this works best when it has a location nearby that looks similar. For example, a pimple on a face is surrounded by a lot of similarly colored skin, so the recover device can conveniently calculate what to change the dark spot based on the surrounding area. This is simply because the photo editing software needs to change the spot you like to erase with another thing, as well as this function most ideal when it has a sector nearby that looks similar.
Photo editing software has actually turned into absolutely intricate as well as effective and it is possible to control photos so they become totally various from the initial. There certainly are lots of photo editing software as well as wide varieties of techniques of attaining the same or comparable outcomes.
The purpose very most when it comes to a lot of pictures I publish process is to produce all of them seem being natural as feasible. I believe this is an optimal spot to make a beginning, even in case you really want to continue on and develop much more surreal appearing images.
Hue variation within an image is just one of the major issues. The eyes can usually see a more comprehensive range of shade than the cam most likely make.
The significance of image editing and enhancing is the process of adjusting an image, basically put. But this is simplifying a case which is more or less intricate. You can normally perform basic image modifying strategies such as edit a photo fairly easily and also promptly but intricate methods and also digital editing may call for photo editing software as well as even more know-how. Photo editing software is a tool which http://j94lincoln.nikehyperchasesp.com/photo-editing-software-windows you can easily use to adjust as well as improve images. Since images include an enhancing variety of usages, even more firms are finding methods to reutilize images as well as use them on a few media.
0 notes
Text
Photo editing software for rotate photo
When I was looking for a magnificent photo editing software, I finally stumbled over this really good one
The significance of picture editing and enhancing is the act of changing an image, just simply put. But that is simplifying a theme which is more or less complex. You can generally implement basic image modifying strategies such as edit images relatively quickly as well as promptly yet complex techniques and digital editing might call for photo editing software and also more years of experience. Photo editing software is a tool which you able to make use of to control as well as boost images. Due to the fact that images have an enhancing variety of usages, numerous people are looking for means to reutilize photos and also make use of them on larger number of ways. Photo editing software has actually come to be very complicated and effective and it is actually feasible to adjust photos so they turn into totally various from the initial. There certainly are definitely loads of photo editing software and also wide varieties of methods of creating the exact or very similar outcomes. The purpose most when it comes to the majority of images I upload procedure is definitely to produce all of them look as normal as feasible. I know this is an outstanding position to make a beginning, even if you wish to go on and also develop even more unique looking pictures.
Tone range on a picture is among the main worries. You are able to normally see a broader range of hue than your camera most likely shot.
Photo editing software
Easy photo editing software with many nice gadgets
Either the most misinterpreted components of digital photography is what occurs once you made the photo in fact editing your photos. This is where you edit the pictures you have actually taken, to develop the end product. Editing your pictures is the matching of the room dark from the time very long time earlier. We are most likely to be covering some ideas for modifying your pictures, from the fundamentals like photos gradation as well as edit a photo, via much more complex functions. The cut out device enables you to transform the size of your picture, and likewise to change the aspect ratio. You can cut out a photo from a rectangular form to a square form. There are numerous factors you would wish to cut out, including for publishing in different formats and also facet proportions. Contrasted to the original, I have cropped the picture with photo editing software to get rid of the colored component of the left side of the photo shot as well as recomposed making use of the policy of one-third. This makes the coloring screw a lot more the emphasis of photograph. When making the shot, you could question why I didn't simply make up correctly. So in this case, I was actually preparing a very long exposure photo shot without having a tripod, so had actually the electronic camera stabilized on the side of the sidewalk for stability. That quite minimal my capacity to perfectly frame the minute, so I simply photoshoot bigger, recognizing I had the ability to crop the image properly soon after the truth. In this both situations, chopping is extremely straightforward and it is just involves you choosing the cropping item and after that selecting the area you wish to keep with your touchpad. Then you apply the modifications and your new chopped photo is all set to go.
In some cases there certainly may be a little something inside a photograph that you definitely do not really wish to exist, like a troublesome dark spot on someone's face. That is quick to get rid of in every the major photo editing software. It's quick and easy to get rid of any sort of things taken away a picture however the photo editing software performs ideal on distinct, small-sized things that are generally surrounded by uniform shades. This is since the heal tool has to change the area you desire to get rid of with something else, as well as this functions best when it has an area close by that looks similar. So for instance, a pimple on a face is surrounded by a lot of similarly tinted skin, so the recover device can easily determine what to change the bright spot based on the bordering location.
That is https://tizohonin.tumblr.com/post/190265158324/edit-pics-or-photo-light-reflex-effects-is-useful since the photo editing software has to switch the sector you wish to wipe out along with another thing, and also this works best whenever it has a spot close by that looks very similar.
Photo editing software for PC or editing photo software to edit an image or photo batch processing
Powerful and simple edit photos with the photo editing software
It is not easy to discover a terrific smart device picture what was taken with a flashing light. All the time, people shoot a picture look bright, adversely changing brightness and also making items look rinsed. Actually, also the cellular phone flash is rumored to get some imperfections. Take advantage of the sources of natural light you can locate, also after dark. That offers you a possibility to have fun with shadows, like in the image listed below, or create a structure with various other environs sources of lightning, such as traffic and outlying buildings. Once you have actually make the picture, attempt the direct exposure tool in your preferred image editing and enhancing application to make the photo a little brighter. Photo editing software does have a few of the features is properly understood for, which happens very beneficial when you have actually opted for you have actually like to effort your hand on something a lot more high end than Photo sepia as well as edit images.
Photo editing software can likewise import freeze frames coming from video recording, together with diverse data. As well as when you're really feeling a little bit idle or even it is just plain oblivious regarding just how to usage a few of the tools, a helper can help you to change the essentials just like lighting, concentration, color, and rotation of images. For them who love their images in wide scale versions, the photo editing software aids you perfectly crafted photographs to generate a beautiful photo.
And when it is actually time to unveil off your digital photography skills, you can easily selection amongst the picture package design templates to instantly publish them in a specific size. This photo editing software is actually best for ecstatic learners along with a bunch of time in their hands to body out the as well technical components that would certainly frighten first opportunity image modifying consumers. It likewise comes prepared along with a three-sixty view plan. Most likely the gleaming gem in the planning would be the gorgeous skin end result, which evens out and also eliminates reddish areas out your skin shade.
Whereas there's no automatically color fixing option rather vital to repair the poor lighting very most electronic cams document, there are actually the basic features of edit a picture.
Edit photos or photo blur is helpful with the photo editing software or photo editor software for beginners
In some cases if we take a photograph, components of the image can wind up being actually gloomier than we need. We describe the dark spots of the picture as shadows, as well as the colorful parts of the image as high light. Comparison has to do with emphasizing the contrast in between the light fixture as well as darker areas of the photo. Raising the variance of a picture can substantially improve the aesthetic impact in which had, by creating the limits in between these dark as well as light components clearer. Coloring adjusting is one more useful piece related to the photo editing software. We are able to adjust image color in every type of ways, from altering the whole warmness of the photo just like exactly how blue or green it shows up, to separately altering the color and also interpenetration of details colorations inside of a photograph.
I just want to talk about a few very useful shade corrections you are able to utilize to create your photos simply a bit much more creatively highly effective.
The quickest solution in order to correct the shade in regard to an image is simply with the shade method from the photo editing software. This adjusts the appeal related to every single color inside a picture to produce it basically condensed. As with several styles, the trick is to find a really good balance excessive saturating the images often tends to look rather abnormal. Hue images can easily be actually extremely helpful, and also of training course dark and bright white is an excellent option for almost all sort of scenarios, particularly, snapshots, and also various landscape pictures.
If the horizon band in an image is not even degree, a particular of my own scratch aggravations in digital photography is. Occasionally whenever we are taken up in the moment, this basic regulation is neglected however fortunately is that enhancing your photos with the photo editing software to make them degree is also very manageable. Adjusting the cam at the corner of the pier suggested that the photo was uneven that is specifically obvious to the eye when the photo has a plainly specified perspective line, just like the sea. A degree method is element of the cut out device, and you can just rotate the photo to match. Whenever you utilize the degree technique, a grate will certainly show up to assist you get the alignment right.
Level an image is a really basic job in which will certainly get simply a couple of seconds, causing a much a lot more aesthetically wowing pic.
0 notes
Last Seen Blogs

baracimil
Untitled

hope-is-badass
Hope>fear

youcantpronouncemyname
Professional Sadgirl

ffrreeyyoouurrsseellff
Intelligence over Ignorance

dinua
help, stuck in jekkad