#icons seleção br
Text


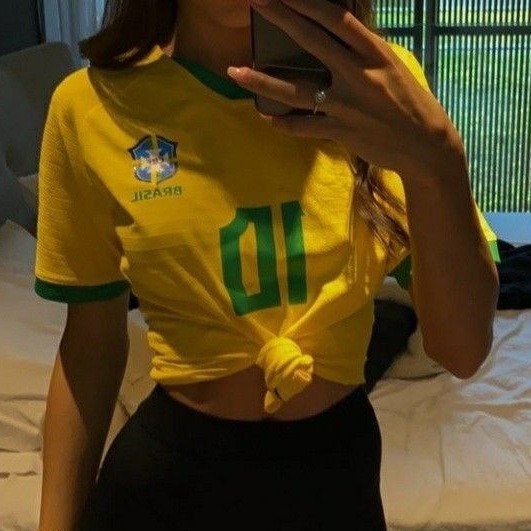
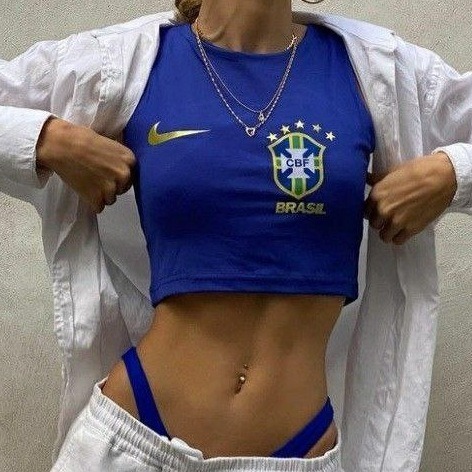
— like or reblog if you save/use 🇧🇷
#site girls icons#icons site models#site models icons#site models girls#site model girls#site model tumblr#site model twitter#icons site girls#icons girls#girls icons#brasil#icons brazil#icons brasileiras#body icons#icons body#icons br#icons brasil#seleção brasileira#copa do brasil#copa do mundo#copa 2022#brasil icons#brazilian girls#brazilian#brazil#brazil icons#brazilian icons#brazilian girls icons#icons brazilian girls
169 notes
·
View notes
Text
After Impressionism: Inventing Modern Art.
The National Gallery. Uk
Explore a period of great upheaval when artists broke with established tradition and laid the foundations for the art of the 20th and the 21st centuries.
The decades between 1880 and the outbreak of the First World War in 1914 were a complex, vibrant period of artistic questioning, searching, risk-taking and innovation.
The exhibition celebrates the achievements of three giants of the era: Paul Cézanne, Vincent van Gogh and Paul Gauguin and follows the influences they had on younger generations of French artists, on their peers and on wider circles of artists across Europe in Barcelona, Berlin, Brussels and Vienna.
With nearly a hundred works by artists ranging from Klimt and Munch, Matisse and Picasso to Mondrian and Kandinsky complemented by a selection of sculpture by artists including Rodin and Camille Claudel, the exhibition follows the creation of a new, modern art, free of convention, taking in Expressionism, Cubism and Abstraction.
The exhibition includes some of the most iconic works of art created during these decades. Important loans come to the exhibition from institutions and private collections worldwide including Museum of Modern Art, New York; Musée d’Orsay, Paris; Art Institute of Chicago; Musée Rodin, Paris; National Galleries of Scotland, Edinburgh; Museu Nacional d’Art de Catalunya, Barcelona; and Wadsworth Atheneum Museum of Art, Hartford, Connecticut.
Image: André Derain, 'The Dance / La Danse', 1906 (Detail) © ADAGP, Paris and DACS, London 2023 / photo courtesy of the owner
Until 13 August 2023
The National Gallery
#edisonmariottihttps://shre.ink/l8GO
Edison MariottiEdison Mariotti
.br
Depois do impressionismo: inventando a arte moderna
Explore um período de grande agitação, quando os artistas romperam com a tradição estabelecida e lançaram as bases para a arte dos séculos XX e XXI.
As décadas entre 1880 e a eclosão da Primeira Guerra Mundial em 1914 foram um período complexo e vibrante de questionamento artístico, busca, tomada de riscos e inovação.
A exposição celebra as realizações de três gigantes da época: Paul Cézanne, Vincent van Gogh e Paul Gauguin e segue as influências que tiveram nas gerações mais jovens de artistas franceses, em seus pares e em círculos mais amplos de artistas em toda a Europa em Barcelona, Berlim, Bruxelas e Viena.
Com quase uma centena de obras de artistas que vão de Klimt e Munch, Matisse e Picasso a Mondrian e Kandinsky, complementadas por uma seleção de esculturas de artistas como Rodin e Camille Claudel, a exposição segue a criação de uma nova arte moderna, livre de convenções, abrangendo o Expressionismo, o Cubismo e a Abstração.
A exposição inclui algumas das obras de arte mais icônicas criadas durante essas décadas. Empréstimos importantes vêm para a exposição de instituições e coleções particulares em todo o mundo, incluindo o Museu de Arte Moderna de Nova York; Musée d'Orsay, Paris; Instituto de Arte de Chicago; Museu Rodin, Paris; Galerias Nacionais da Escócia, Edimburgo; Museu Nacional d'Art de Catalunya, Barcelona; e Wadsworth Atheneum Museum of Art, Hartford, Connecticut.
Imagem: André Derain, 'The Dance / La Danse', 1906 (Detalhe) © ADAGP, Paris e DACS, Londres 2023 / foto cortesia do proprietário
Até 13 de agosto de 2023
A Galeria Nacional - Reino Unido

0 notes
Note
amg oiii! pode fazer icons de meninas com camisa da seleção br de futebol????? obrigada <333
postados! xx
0 notes
Text
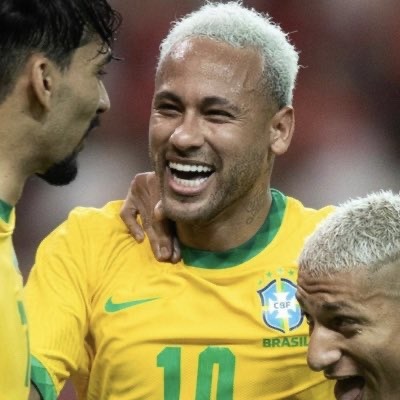

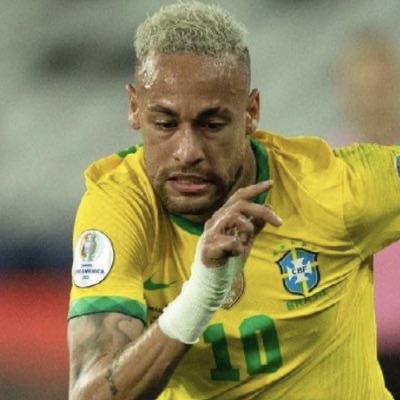


like se gostou/pegou!
#neymar#neymar seleção#icons neymar#icons seleção brasileira#icons seleção br#seleção brasileira#icons cbf#icons neymar cbf#icons neymar seleção#neymar icon#cbf icons neymar#neymar cbf#brasil#icons brasil#icons copa do mundo#icons br#copa do mundo#icons for twitter#icons neymar junior#icons neymar junior brasil#neymar junior brasil
85 notes
·
View notes
Photo


VEM HEXAAAA
#liz gillies#liz gillies icons#elizabeth gillies#elizabeth gillies icons#icons liz gillies#icon liz gillies#liz gillies icon#br icons#icons br#brasil icons#seleção icons
18 notes
·
View notes
Photo

tutorial by sistaround.
portuguese (br) + english
please if this tutorial was useful to you reblog/like.
i really hope that this tutorial will be useful to you.
sorry, english is not my first language.
Primeiro tutorial: Icon transparente simples
First tutorial: Simple transparent icon

1) Abra a imagem que vai usar e corte da forma que desejar, respeitando a proporção quadrada
Open the picture that you’re going to use and cut as you wish, but always respecting the square proportion
2) Daí, usando a ferramenta Quick Selection, selecione somente a parte que ficara em seu icon
Then, using the Quick Selection Tool, select just the part of the picture that you want in your icon


3) Copie e cole (ctrl+c ctrl+v) a seleção feita
Copy and paste (ctrl+c ctrl+v) the selection that you did

4) Apague a camada de fundo e aplique um .psd de sua escolha (aqui temos vários)
Delete the background layer and add a .psd of your choice (here we have a lot for you choose)

5) Agora é só mesclar as camadas (ctrl+shift+e) e redimensione para o tamanho de icon (100x100)
Now is just merge your layers (ctrl+shift+e) and resize to a icon size (100x100)

6) Agora é só aplicar a nitidez
Now is just aply the sharpen

Essas são as configurações de nitidez que uso para esse tipo de icons:
Those are the sharpen settings that i use those kind of icons:

7) Salve seu icon em formato .png para garantir que o fundo fique transparente, e pronto, é só usar no perfil ♥
Save your icon in .png format to ensure that the background is transparent, and that's it, just use it in the profile ♥
Segundo tutorial: Icon redondo
Second tutorial: Circle icon

1) Crie um novo documento em branco (eu uso o tamanho 300x300 para ter espaço para visualizar melhor)
Create a new blank document (I use the size 300x300 to have space for a better view)

2) Usando a ferramenta Ellipse eu crio dois círculos:
Using the Ellipse Tool i create two circles:

O primeiro círculo em 150x150 preenchido com cor (a escolha da cor não influencia no resultado final):
The first circle in the size 150x150 filled with color (the choice of color does not influence the final result):


O segundo círculo em 170x170 sem nenhum preenchimento, somente como contorno (cor de sua preferência):
The second circle in the size 170x170 without any padding, only as an outline (color of your preference):


3) Arraste a imagem que você quer para o icon em cima da camada do primeiro circulo (o preenchido) e ajuste (ctrl + t) do tamanho desejado:
Drag the picture that you want for your icon on top of the layer of our first circle (the filled one) and adjust (ctrl + t) the size as you wish:

4) Feito isso, clique com o botão direito em cima da camada da imagem e selecione a função de máscara de corte:
After that, right-click on the image layer and select create clipping mask function:


5) Corte a imagem mais próximo ao círculo maior, sempre respeitando a proporção quadrada
Cut the picure right next no the big circle, always respecting the square proportion

6) Apague a camada de fundo e aplique um .psd de sua escolha (aqui temos vários)
Delete the background layer and add a .psd of your choice (here we have a lot for you choose)


7) Redimencione para 100x100 e aplique nitidez somente na camada da imagem:
Resize to 100x100 e aply sharpen only in the picture layer:

8) Agora é só mesclar as camadas (ctrl+shift+e) e salvar seu icon em formato .png para garantir que o fundo fique transparente, e pronto, é só usar no perfil ♥
Now is just merge your layers (ctrl+shift+e) and save your icon in .png format to ensure that the background is transparent, and that's it, just use it in the profile ♥
#yeahps#completeresources#chaoticresources#icon tutorial#tutorials#sistar: tutorial#sistar: tutorials#sistar: icon tutorial#sistar: gabs#gabs
168 notes
·
View notes
Note
faz icons da bia zaneratto e da andressinha da seleção br, amor? obgg
andressinha, bia ♡ espero que goste!
1 note
·
View note
Photo


seleção br icons
like ou créditos no @futebolpacks no twitter
#icons#seleção brasileira icons#seleção brasileira#cbf icons#cbf#brazil nt icons#brazil nt#neymar jr icons#neymar jr#richarlison icons#richarlison#casemiro icons#casemiro#philippe coutinho icons#philippe coutinho#arthur melo icons#arthur melo#everton icons#everton#marquinhos icons#marquinhos#lucas paqueta icons#lucas paqueta#edit
20 notes
·
View notes
Photo


seleção br icons
like
#neymar#neymar jr#philippe coutinho#coutinho#marcelo#willian#icon#icons#seleção brasileira#brazil nt#thiago silva#gabriel jesus#cbf
24 notes
·
View notes
Photo


seleção br icons
like
#seleção brasileira#cbf#brazil nt#icon#icons#edit#marcelo#neymar#coutinho#philippe coutinho#willian#filipe luis
17 notes
·
View notes
Photo


seleção br icons
like ou c @nwcoIIe
#seleção brasilera#brazil nt#icon#icons#phillipe coutinho#roberto firmino#gabriel jesus#willian#thiago silva#marcelo vieira#cbf#brasil
23 notes
·
View notes
Last Seen Blogs

jsnow01love-blog
Untitled

obatambexa
Untitled

marta-szostka
Sexy GIFs

2dkunn
くコ:彡

comodooneblog-blog
Comodo One