#install kodi url resolver
Explore tagged Tumblr posts
Visit Tumblr Blog
Explore Tumblr blogs with no restrictions, modern design and the best experience.
Last Seen Tumblr Blogs


Fun Fact
Tumblr was created by web developers David Karp and Marco Arment.
Text
Install Kodi URL Resolver and Update - Guide + Error Fix
Install Kodi URL Resolver and Update – Guide + Error Fix
KODI URL RESOLVER
Kodi URL Resolver is a comprehensive tool used for addons to play stored videos of the File Locker website like Gvideo, Clicknupload, Zshare, Dizilab, etc. In a URL Resolver, the addons send a command to play then the desired URL. Then the URL Resolver will process the coding and streams the video on the host. If the Kodi URL Resolver is not available, the developer of addon…
View On WordPress
0 notes
Text
Considerations To Know About Kodi 18
It’s also opened the door for ISPs to trace and throttle Kodi streaming site visitors, violating customers’ rights to standard on the net privateness in the process. The procedure is sort of simple, however, you should Keep to the steps cautiously as stated inside the guideline so you will not come upon errors in a later stage. – Choose the scraper in the list you desire to to use to categorize your movies (click on Get a lot more… button to put in a lot more scrapers) This video clip is produced beneath the intentions of truthful usage of educational uses to only educate the viewer. If we utilised your online video and you want to it removed, remember to Make contact with us on the subsequent e-mail address: Kodi permits builders to generate addons using a crafted-in Python interpreter (Edition 2.6 or greater dependant upon technique[134]) and its very own WindowXML software framework, which with each other kind an XML-primarily based widget toolkit for which they could increase the aptitude of Kodi by making a GUI for widgets. Hello Tom, all of it is determined by the addons or builds that you install. Barebones Kodi doesn’t have any Grownup material. KFire Tv set - […] I recommend which you don’t install Kodi 18 nonetheless – but I attempted several builds and these are generally… ⭐Kodi is the last word leisure center computer software. Supporting all the leading movie formats which includes stream-in a position on the net media, Kodi enables you to completely alter the full overall look of the interface with skins. Kodi has greater essential components specifications than conventional second fashion program purposes: it demands a 3D capable graphics components controller for all rendering. Highly effective 3D GPU chips are frequent nowadays in Most recent computer platforms, which includes many set-best boxes, and XBMC, now Kodi, was from the start created to be in any other case extremely resource successful for becoming as potent and flexible framework as it really is. now i am wanting to work out the kodi log which i dont realize also the kodi viewer for kodi states mistake along with the kodi logfile uploader dont work file to huge i have mounted a url resolver i cant discover the handle dependencies or the addon while in the settings/process menu it appears to be diverse towards the one online which was carried out in 2018 . To cut back the upkeep difficulties involved with this, the development staff switched to generic managers that assist additional Linux drivers. This suggests more and more people can have a lot quicker entry to Kodi streams on Linux equipment without having to set issues up manually. As a consequence of its open resource and cross-platform nature, with its core code published in C++, modified variations of Kodi-XBMC together with a JeOS are actually used to be a application appliance suite or computer software framework in a variety of products together with sensible TVs, established-top rated containers, digital signage, lodge television methods, network related media players and embedded programs according to armhf platform like Raspberry Pi. Kodi media center is an award-successful free and open up supply cross-System software program media player and entertainment hub for electronic media for... So, before kodi 18 builds for firestick stream any content material on FireStick with Kodi, Enable’s see the best way to use ExpressVPN to keep your streaming actions concealed from prying eyes.
1 note
·
View note
Text
How to add Supreme Build Kodi Wizard on your Firestick device: Step-by-step guide
In this article, I will show you how you can add Supreme Build Kodi Wizard to your Firestick device. We have picked Firestick out of all devices, however, you can install the Wizard on devices such as Mac, Windows, Android, iOS, Mobiles, and Android TV.

Supreme Builds Wizard is one of the most useful Wizards out there, with a large number of beneficial builds such as Titanium Build, X5, X4, Supremium, and so on. Apart from that, the most appealing aspect of this wizard is the ease with which these builds may be installed, as well as its potential to resolve Kodi's buffering issues.
If you've been using Kodi for a while, you'll know that we install Wizards from their repository and then use the Wizard to install a build of your choice. As a result, while installing the Wizard on Firestick/Kodi, we'll need to keep this in mind.
If you're running Kodi 18, bear in mind that Supreme Build Wizard is only compatible with version 18 and not 19. Other Kodi 19 compatible Builds can be found on the internet, where you can download them from.
Steps to be taken before adding Supreme Wizard
The Supreme Repository includes the Supreme Builds Wizard. Unfortunately, despite its popularity, the wizard does not make it to the Kodi official repository, and one benefit of being on the official repository is that you won't have to adjust some settings first, and being there also ensures the user that the build or add-on is secure and safe to use.
When it comes to installing the Misfit Mods Lite build on Firestick, you'll need to go into the configuration settings and enable the apps from unknown sources option, and then you'll be ready to start the installation process.
Here is how you can enable or turn on the apps from unknown sources option
Select the gear symbol in the top left corner of your screen to go to the settings menu from the main screen of your Kodi interface.
Select 'System' now.
(Note that if you're using Kodi 17.6, this option is called 'System Settings.')
Select 'Add ons' from the menu on the left side of the screen.
There will be a list of features on the right side. Select 'Unknown Sources,' which is turned off by default.
It's now only a matter of selecting the option and turning it on.
Your screen will now display a prompt with a warning. To proceed, select 'Yes.'
With the undertaking of the above steps, the Supreme Build Kodi Wizard can finally be downloaded. Keep in mind that these steps are a must-take when you download any third-party build or wizard on Kodi.
Installing Supreme Build Kodi Wizard: The easy way
The entire process of downloading the Supreme Build Kodi Wizard can be downloaded into two steps.
Installing Supreme Build Repository via Zip file
Installing Supreme Build Wizard from the Supreme Build Repository
Installing Supreme Build Repository via ZIP file
Select the gear symbol in the top left corner of your screen to return to the settings menu from the main screen of your Kodi interface.
Select 'File Manager' from the settings now.
Select 'Add source' from the drop-down menu. This option will appear as a list of three choices, separated by two opposing arrows on either side of the screen.
Select a file source from the Add file source dialogue box. The source URL will be displayed in its place once you've selected it.
Now, in the next window, write the URL http://repo.supremebuilds.com/ and double-check that you typed it correctly since incorrectly typed URLs can obstruct the installation process.
Then press 'OK.'
The Add source file box will appear once more. The source name must now be typed in the text box underneath 'Enter a name for this media source.'
You can type any name that you like, and you'll be able to identify the source later.
To return to the settings menu, use the back button on the Fire TV remote.
Select 'Add ons' from the drop-down menu.
Then, from the drop-down menu, choose 'Install from zip file'.
Find the name of the source you previously added to the list that has appeared. If it were XXXX, for example, you should find XXXX on the list.
The screen you will now be directed to will have a zip file with the name repository.supremebuilds-x.x.x.zip
Now, wait until the Add-on installation is complete and you receive a success message. Depending on your internet speed, it could take a few seconds or longer.
Installing Supreme Build Wizard from the Supreme Build Repository
Select 'Install from repository from the same box.
After that, open the 'Supreme Builds Repository.'
Select 'Program add-ons' from the drop-down menu.
Then choose Supre Build Wizard from the drop-down menu.
You must now select 'Install' in the next box.
The Supreme Build Wizard will take a few minutes to install. The successful installation notification will appear in the top right corner of your screen.
You will now see a window. After that, pick 'Ignore' and then 'Continue.' If we select 'Ignore,' we will have to access the build from Kodi's home screen.
Select 'add-ons' from the home screen, then Program 'add-ons.'
After you have completed all of these steps, you will now be able to finally add Supreme Build Kodi Wizard on your Firestick device.
Source: https://stevejonesfirestickdb.blogspot.com/2022/07/how-to-add-supreme-build-kodi-wizard-on.html
Conclusion
When you use the Supreme Builds Wizard, you will notice that it has an aesthetic appeal. It surely has various builds that allow you to watch a variety of movies, TV series, sports, live TV, and other content for free and in excellent quality if you properly install the Wizard on Firestick/Kodi.
0 notes
Link
0 notes
Text
How To Install Openload Films on Kodi in 7 Steps
Openload is a long-standing file hosting service that has been offering its support to Kodi users. Together with popular kodi add-ons like Covenant and Exodus that offer Openload streams, it's very important to understand how to install Openload on Kodi.
How to Install Openload on Kodi Krypton Version 17
Launch Kodi on your system > Go to Settings (Gear-shaped icon) on top menu > Just click on Document Manager > Scroll down and double tap on add Source.

When the box appears on your screen, click on 'None' alternative > Type Dandy Media Repository URLhttp://www.dandymedia.club/repo/ > Click OK > Form the name of this repository i.e. Dandy Media> Click OK and close to the box.

Go back to Kodi Home by pressing on 'Backspace' key on your keyboard > Then go to Add-ons menu on your left > Select Package Installer (Box-shaped icon) onto top-left corner.

Click on Install from Zip File > Locate and click on Dandy Media > Repository.dandymedia.zip > It will take few minutes to install the repository.

Click on Install from Repository > Scroll down to find Dandy Media > Go to Video Add-ons > Select Openload from the listing > Click Install.

Once you set up Openload, go to Kodi Home > Click on Add-ons > Subsequently Video Add-ons > Openload > Enjoy Movies!

How to Install Openload on Kodi Jarvis Version 16
Launch Kodi Jarvis in your system > Click on System > Subsequently File Manager > Dual Click Add Source.
Now Return to Kodi Main Menu > Then select System menu again > Click on Add-ons > Install Zip File > Then Dandy Media > repository.dandymedia.zip
Visit Install from Repository > Click on Dandy Media Repository > Video Add-ons > Select Openload > Install > Love!
How to Disable Openload on Kodi
Disabling Openload on Kodi is pretty straightforward. Just follow these steps.
Launch Kodi in your system > Go to Settings > then System settings.
Go to Add-ons and choose 'Manage dependencies'.
Now select 'URL Resolver' > then Configure.
Look for Openload under one of the resolver list.
Once you located Openload, switch off the 'Enable' option.
Openload Kodi Not Working/Errors/Issues
When you begin to use Openload, you will run into many mistakes while configuring the add-on. Some of the most prevalent errors include:
Openload Stream Authorization on Kodi Firestick
For users using Openload on PC or Mac, pairing your apparatus is no problem. But, Openload stream authorization on Kodi Firestick has got many users perplexed. But you can easily solve this error.
Since Openload matches your IP address, all devices using the same speech should be paired. In case your Firestick is joined to exactly the exact same Wi-Fi system, it must have the same IP address. So, all you have to do is set to Openload with almost any other device, (PC, Mac, Android phone, etc.) and your Firestick will also receive paired through the process.
Openload Stream Authorization Kodi 17
This error usually occurs when you don't assess the captcha box. When pairing to Openload, be sure that you check the box that says 'I am not a robot'. This will solve the mistake of Openload Stream authorization for Kodi 17.
Final Words :
There you have it people, we've come to a end to our Openload guide. It is possible to use the method shown above to install Openload on Kodi 17 or even Kodi 16. If you run into any problem running the add-ons, have a look at the errors we've listed. If the problem persists, then drop us a comment below and we'll help you out.
#Openload Stream Authorization#Install Openload Movies#Openload on Kodi Krypton 17#Openload Kodi Not Working#Openload Kodi#Openload Kodi errors#Openload Kodi issues
1 note
·
View note
Text
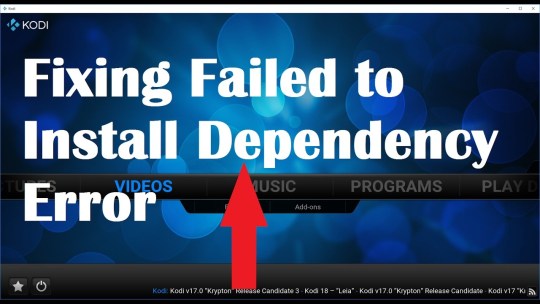
How to Solve "Failed to Install a Dependency" Error on Kodi in 2019?
Kodi is one of the best free media players especially made for large screens, and it is an open-source home theater software that works on various devices. Failed to Install a Dependency error can prevent installations of apps and add-ons. In this article, you are about to learn how to fix this error.
There are a few things that can cause the “Fail to install a Dependency” error such as cache data and more. There are three ways to solve this error and get your Kodi out of this kind of issue. So what’s the wait? Let’s begin.
Fix 1: Clear Kodi Cache
Clearing cache can solve a lot of problems on your Kodi. Many users have resolved this error by simply clearing their app cache. Let’s see how to do it:
If you are using an Android Box with your TV, then go to the Settings of your device, head to Apps, and Choose Kodi. Hit the button labeled as “Clear Cache.” This will clear the cache data which can solve your Kodi error.
If you are using Fire TV Stick to play Kodi on your TV, then go ahead into the Settings. Click on Application and after that, go to Manage Installed Applications. Then find and click on Kodi. There you have to navigate to the Clear cache button.
If you own an Nvidia Shield TV, then you have to navigate to Settings and then to Apps. After that, find and choose Kodi from the available apps. There you will be able to get to the clear cache option.
Windows / Mac / Linux: In these operating systems, you can easily clear the cache of the Kodi app. To do so, install the “Indigo” add-on to your device. You can Install the “Indigo” add-on from the web by simply searching for the “indigo add-on” on Google and by following the on-screen instructions.
Fix 2: Rebuilt Kodi’s Database
First of all, run your Kodi application as an administrator on your device. To do that on a Windows PC, right-click on the app, then choose the Run as administrator option from the list. If you own a Mac, then ensure that you got the admin privileges.
After the Kodi opens head to the Gear icon located on the upper-left corner of your screen.
Go to File managers.
Browse the “File Directory” option located on the left side, by double-clicking on it.
Now navigate to the Database folder.
Find and delete the “Addon27.db” file.
Now close the application and then keep it closed for a while and then open the Kodi app again on your device.
This will also delete your add-ons, and you must install them again.
It may solve the Dependency error from your Kodi app.
Fix 3: Manually Install the Dependencies
If you want to fix the ‘Fail to install a Dependency’ issue, then you have to install the dependencies manually on your Kodi app. here’s how to do it:
Go to the Kodi app and then head to the Gear icon located on the upper-left corner.
Head to File Manager.
Double-click on the Add Source option on your left side.
You will see a popup asking you for the address and there you need to click <None> to enter the address. You must enter “http://fusion.tvaddons.co” this URL to that field. Then give this source a name of your choice and hit OK.
Go back to the Home of your Kodi app and then navigate to the Add-ons following by the main menu.
There you have to get to the Open Package icon in the upper-left corner.
Click on the “Install from zip file.”
Head to recently added source and then go to the ‘TV Add-ons’ option.
Now click on the “Kodi-scripts” option.
There you will see several ZIP installation files. You have to install all of them because these all are essential files. So start by clicking the first one and install all of these ZIP files.
After following these tips, “Failed to Install a Dependency” error should be resolved on the Kodi app.
Emily Williams is a Microsoft Office expert and has been working in the technical industry since 2002. As a technical expert, she has written technical blogs, manuals, white papers, and reviews for many websites such as office.com/setup.
Source: https://ennegarciacom.wordpress.com/2019/08/28/how-to-solve-failed-to-install-a-dependency-error-on-kodi-in-2019/
0 notes
Text
User guide for IPTV with MAG Device

You need:
1. Make sure your MAC address was registered. If not, you can register for free IPTV subscription. Please make sure you enter your MAC address correctly in the MAC section. But if you already registered and forget to fill your MAC address in MAC section please let me know I will add MAC address for you. 2. 5 minutes to set up and get 9600 channels and more than 7200VOD If you wonder where to find your MAC address? In order to find the MAC address of your MAG box, simply turn the box around and you can find the MAC address on the backside of your device. And register with your MAC address
5 steps to install IPTV on your MAC device:
Step 1: Turn on your MAG device. Loading it up and click Settings

Step 2: Go to the Setting menu. Click on System settings and click on "Servers"

Step 3: Select "Portals"

Step 4: In the “Portal 1 name” line enter the name of severing. In the “Portal 1 URL” enter the postal address: http://iptv-line.com:6969/c This is a portal link for the server. Please double check all character

Step 5: When all the operations listed above is done, then press “OK”. When all the steps listed above are done press”EXIT” 2 times on the remote control and restart the portal. Now everything is ready to start watching Live TV...
IPTV MAG
If you have status "Your STB is blocked. Call the provider". Maybe your MAC address is not active. Please contact us. I will add a MAC address for you.

Youtube tutorial for MAG: https://youtu.be/x1Yq88ikVpg . As we have introduced, our IPTV service is suitable for many applications and devices such as VLC, Android, Smart TV, Roku, Apple TV, I Phone, Kodi, etc. Especially, we have installation instructions and detailed user guides for each device and application. If you want to use IPTV on Mag, please do not ignore this article. We believe this tutorial article will be helpful to you. Just do the right steps that we guide, you can install and use IPTV on Mag quickly and easily.
Some things you should know about Mag
In fact, it is true to say that Mag is known as one of the most powerful online media today. Some of the reasons why Mag is preferred by consumers are speed, ease of use and outstanding online playback performance. In addition, it is the same as a set-top box from Info more to transmit TV media to your TV. By dint of the USB port, customers can play offline media files from the storage device very easily. The first thing we want you to remember is that if you are using Mag application with a MAC address, you need to enter your MAC address into the registration box. MAC address is the standard syntax consisting of 6 pairs of digits and colons. This is really important because your device will not work if you enter the wrong MAC address.
How to install IPTV on Mag
We will provide you with the IPTV installation guide on Mag which includes the following steps: In the first step, you need to turn on your Mag device; at the main screen, click on the setting item. Then, the setup menu will appear, please click on system settings and select “Servers”. At the main screen, click on the setting item. After that, the screen will display 3 items including General, Portals and More; please click on Portals. After completing the above step, the screen will show 4 cell lines including Portal 1 name, Portal 1 URL, Portal 2 name, Portal 2 URL. In the “Portal 1 name” line, please enter ResellerIPTV that is the name of severing. In the “Portal 1 URL” line, you need to enter the correct postal address: http://premium-iptv.link:6969/c; you need to enter this address carefully and correctly because this is the portal link for ResellerIPTV server. After completing the above step, the screen will display 4 lines including Portal 1 name, Portal 1 URL, Portal 2 name, Portal 2 URL. In the “Portal 1 name” line. After you complete the steps outlined above, please click Ok. Finally, press Exit 2 times on the remote control and restart the port. So you have completed the IPTV installation on Mag. You can experience our IPTV service right now. Note: Our list is too big, if the device that you are using is Mag 250 or Mag 256, your device may not be able to handle it. If you still have difficulties and questions about the IPTV on Mag installation process, please contact us immediately, we will assist you to resolve as quickly as possible. Besides, you can refer to the instructions for installing IPTV service on other devices and applications such as VLC, Android, Smart TV, Roku, Apple TV, I Phone, Kodi, etc. You should note that you need to use M3U files if you use VLC, Android, Smart TV, Roku, Apple TV, I Phone, Kodi, etc. All in all, we hope this article can help you. We are sure that our service will bring you so much satisfied experience. Contact us for more information with ResellerIPTV.net Email: [email protected] Please create a trial account to view the full list of IPTV channels >> Get Trial Free You can read more: Become IPTV Reseller | IPTV Channels | IPTV Panel | IPTV Tutorial | IPTV Android Articles copied from Bestbuyiptv.com Read the full article
0 notes
Text
Cómo instalar Movie Theater Butter en Kodi
En este tutorial vamos a ver cómo instalar el addon Movie Theater Butter en Kodi. Movie Theater Butter es un addon que incluye una archivo de contenidos enorme, incluyendo películas, series documentales y mucho más. Este addon además dispone de soporte para Trakt y enlaces Positivo Debrid.
Acerca de Movie Theater Butter
Este addon viene en la forma de dos variantes. Una de ellas se pasión Link-Select y la otra se pasión Utilitario-Play. Con la cambio Link-Select se obtendrán múltiples enlaces para un mismo contenido, de modo que si quieres ver una películas, podrás decidir el enlace que quieres reproducir. En cambio, con la cambio Utilitario-Play no podrás decidir los enlaces, ya que los contenidos se comenzarán a reproducir ausencia más hacer clic en ellos. Es de esperar que el enlace que se selecciona automáticamente sea el mejor de entre todos los que están disponibles, aunque esto no siempre ocurre así.
La traducción que interesará a la mayoría de los usuarios es la cambio Link-Select, ya que podrás decidir la calidad de la película o del vídeo que quieres reproducir. Por el contrario, la cambio Utilitario-Play limita la resolución de los vídeos a 720p, que si aceptablemente ofrece un mejor rendimiento y dará menos problemas conveniente al beocio ufano de lado requerido, puede no ser lo que buscas. Tú decides.
Cómo Instalar Movie Theater Butter en Kodi en Kodi
En este apartado explicaremos cómo instalar Movie Theater Butter en Kodi. Antaño de instalar el addon es recomendable que realices un par de tareas. La primera es opcional y consiste en asegurarte de que tienes instalada la última traducción de Kodi. Si no estás usando la traducción más fresco, consulta la dirección de puesta al día de Kodi. La segunda tarea consiste en que actives la opción de orígenes desconocidos en Kodi. Para hacerlo, consulta la dirección para activar los orígenes desconocidos en Kodi.
Dicho esto, vamos a instalar Movie Theater Butter. Para ello, debes seguir estos pasos:
Abre Kodi y sitúate en la pantalla de inicio. Desde aquí, vete a la sección de Ajustes haciendo clic en el icono que tiene un engranaje.
Seguidamente, accede al administrador de archivos.
Haz clic en Añadir fuente.
En el nuevo panel que se abrirá, haz doble clic en <Ningún>.
Se mostrará una ventana en donde deberás introducir la URL de la fuente. Escribe https://ift.tt/2wMY8n7 y haz clic en OK.
En el campo inferior debes introducir el nombre de la fuente para así poder identificarla. Introduce RJ Wizard y haz clic en OK. Tras unos segundos verás un mensaje de confirmación indicando que la fuente está ya instalada.
Ahora vuelve a la pantalla de inicio de Kodi y haz clic en Addons.
Haz clic en el icono del explorador de addons, que es el que tiene una caja abierta. Podrás verlo en la parte superior del menú de la izquierda.
Selecciona la opción de instalar desde un archivo Zip.
Seguidamente se abrirá una ventana. Debes hacer clic en RJ Wizard, que es el nombre que le hemos regalado ayer a la fuente.
Haz clic en INSTALL_DIAMOND_REPO.
Luego selecciona el archivo ZIP cuyo nombre es parecido a repository.diamond-wizard-repo-X.X.X.zip, siendo x.x.x la traducción del archivo. Aplazamiento unos instantes y el repositorio estará ya instalado. Se mostrará un mensaje de confirmación.
Ahora vamos a instalar el addon. Para ello accede al explorador de addons y luego haz clic en la opción de instalar desde repositorio.
Haz clic en Diamond Build Repo, aunque además puede que el nombre sea Diamond Wizard Repo.
Haz clic en Addons de vídeo.
Selecciona el addon Movie Theater Butter, que es el que queremos instalar. De este modo accederás a la perspicacia previa del addon.
En la perspicacia previa del addon, haz clic en Instalar.
Puede que cuando hagas clic en Instalar se te indique que instales algunas dependencias adicionales que requiere el addon. Acepta su instalación. Tras unos instantes verás un mensaje de confirmación que indicará que el addon está ya instalado.
Movie Theater Butter estará ya instalado. Cuando termine la instalación haz clic en Aclarar para lograr al addon. Igualmente puedes aclarar Movie Theater Butter desde la sección de addons de Kodi.
Itinerario de inclusión a Movie Theater Butter
Puedes lograr a Movie Theater Butter desde la sección de addons de Kodi. Debería aparecer en la sección de Addons de vídeo. Con la instalación del addon se habrán instalado las dos variantes de las que hablábamos al principio de esta dirección. Funcionan exactamente igual, aparte que en una podrás escoger los enlaces y en otra no.
Este es un addon cuya temática principal son las películas y las series, por lo que estas categorías se encontrarán al principio de la letanía. Podrás ver además una letanía con las nuevas películas o los nuevos episodios de las diferentes series que se incluyen. Poco en lo que además destaca es en los documentales, siendo Movie Theater Butter uno de los mejores addons de Documentales que podrás encontrar en Kodi.
En la parte inferior podrás ver otras categorías especiales como una películas de terror señal Kings of Horror. Verás además una categoría King Fu Urbano y otra de ciencia ficción. Igualmente se incluye una categoría de Fitness, otra de música y otra centrada en los más pequeños, señal Kids Corner.
Movie Theater Butter además incluye una categoría de Podcasts, siendo así un addon muy completo. La decano parte de los enlaces funcionarán sin problemas, indicando esto que estamos en presencia de un addon harto cuidado. Poco que además te resultará útil es el formulario de búsqueda que se incluye. Igualmente se incluye una sección desde la que podrás configurar bastantes aspectos de este addon, como los subtítulos o los rudimentos que se mostrarán en el menú principal.
En lo referente a las versiones del addon, si quieres calidad usa la traducción Link-Select, paro de lo contrario es mejor que uses la traducción Utilitario-Play para no complicarte la vida.
Integración con Trakt
Este addon dispone de integración con Trakt. De este modo podrás hacer un seguimiento de los contenidos que ves. Para usar esta funcionalidad, haz clic en la opción TRAKT: Autorize. Si todavía no has configurado Trakt en Kodi, consulta la dirección de configuración de Trakt en Kodi.
Integración con Positivo Debrid
Movie Theater Butter además soporta enlaces Positivo Debrid. Para autorizar el comunicación del addon a Positivo Debrid, haz clic en la opción URL Resolver Settings. Si tienes dudas, consulta cómo configurar Positivo Debrid en Kodi.
Alternativas a Movie Theater Butter
Movie Theater Butter es un gran addon, pero nunca está de más tener otros addons instalados, ya que es complicado que un solo addon cumpla todas tus expectativas. Si buscas addons similares, estas son las mejores opciones:
Si lo que buscas son addons de películas, consulta la letanía con los mejores addons para ver películas en Kodi. Para un relación militar, consulta la letanía con los mejores addons de Kodi.
La entrada Cómo instalar Movie Theater Butter en Kodi se publicó primero en El rincon de diego.
Por El rincon de diego
0 notes
Text
Kodi crashes and reboots continuously
If you’re looking for a different maintenance option, TVAddons also provides an addon called Indigo that works similarly. You’ll find a cache-clearing tool there was well.
There are a few reasons why Kodi might get stuck in a crash/reboot loop. If you’ve installed any custom builds recently, they might be the culprit and should be removed using the Ares Wizard. If this doesn’t resolve your problem, try disconnecting your computer from the internet.
The reason we suggest this is because the URL Resolver dependency often causes problems and if Kodi does not have internet access, it can’t do its job. If this stops your crashing issue, try updating it by clicking the gear icon on Kodi’s main screen, then System settings. Next, scroll down to the Add-ons tab and click Manage dependencies. Click URL Resolver, and then click Update. If this doesn’t work, you can either uninstall add-ons until you find the one responsible for the crashes or just reinstall Kodi to start again with a clean slate.
If you are in a hurry and need quick solutions, Kodi Support Phone Number is the best choice to talk to a live human and get the issue resolved. Kodi TV is known in the world to provide Kodi tech support round the clock on toll free phone number. You can dial Kodi customer service number any time of the day to get in touch with a support executive for help and assistance.
0 notes
Text
How to Install 1Channel Primewire on Kodi 17.3
How to Install 1Channel Primewire on Kodi 17.3
1Channel is the most popular and entertaining Kodi Add-on so called 1Channel Fix or we may call it 1Channel Primewire. It has differrent categories like movies, TV Shows, Play List,URL resolver setting and Help. I was surprised to know that how a single addo contain bundle of features.
This addon comes from Smash Repository. Smash Repositoryalready contains popular addon Bucky Movies. It…
View On WordPress
0 notes