#installingCornice
Explore tagged Tumblr posts
Visit Tumblr Blog
Explore Tumblr blogs with no restrictions, modern design and the best experience.
Last Seen Tumblr Blogs


Fun Fact
If you dial 1-866-584-6757, you can leave an audio post for your followers.
Text
How to Install Cornices: Simple Steps for Beginners
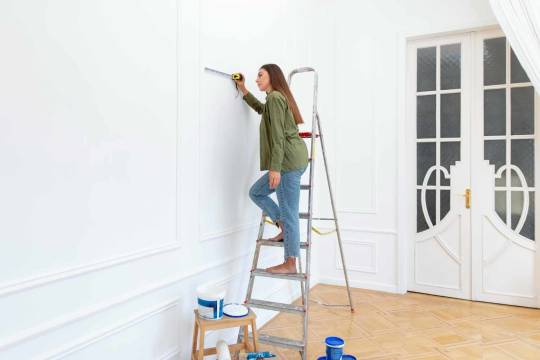
Adding cornices to your walls can make any room look polished and stylish. Cornices, called crown mouldings, create a smooth transition between the wall and ceiling, giving your space a finished look. Many people think you need a professional to install cornices, but this is a project you can do yourself! This guide will walk you through each step to make installing cornices easy and rewarding.
What Is a Cornice and Why Add It to Your Home?
A cornice is a decorative strip or moulding along the top of your walls, right where they meet the ceiling. They can make a room feel more elegant, hide gaps or flaws at the ceiling’s edge, and even increase your home’s value. Plus, they come in many styles and materials, so you can find one that suits your taste.
Step-By-Step Guide to Installing Cornices
Step 1: Measure and Plan
Measure the Wall Lengths: Use your measuring tape to check the length of each wall where you’ll install the cornice.
Buy a Little Extra: Having more cornice than you think you’ll need is always a good idea. Mistakes happen!
Mark the Placement: Use a pencil to lightly mark where the cornice will go along each wall.
Step 2: Cut the Cornice
Use the Miter Box: This tool helps you cut at an angle. You’ll want a 45-degree angle for corners so the cornices meet nicely.
Smooth the Edges: Use sandpaper to smooth out rough spots after cutting the cornice.
Tip: Double-check your measurements before cutting!
Step 3: Apply the Adhesive
Prepare the Adhesive or Cement: Follow the instructions on the adhesive. Most cornices can be installed with a cornice cement or adhesive.
Apply Along the Edge: Spread the adhesive along the back of the cornice, focusing on the edges for a stronghold.
Step 4: Place the Cornice on the Wall
Align with Your Marks: Press the cornice firmly along the lines you marked on the wall.
Hold in Place: Hold the cornice briefly to allow the adhesive to stick.
Use Supports if Necessary: For heavier cornices, you might need temporary supports to keep them in place while the adhesive dries.
Step 5: Fill Any Gaps
Apply Caulk Along the Edges: After securing the cornice, run a line along the top and bottom edges to fill gaps.
Smooth with a Putty Knife: Use a putty knife to spread the Caulk evenly for a clean look.
Let It Dry: Wait for the Caulk to dry completely before moving on to the next step.
Step 6: Paint the Cornice (Optional)
Prime the Surface: If your cornice material needs it, apply a coat of primer.
Apply Paint: Choose a colour that matches your ceiling or walls for a seamless look, or pick a contrasting shade to make the cornice stand out.
Add a Second Coat: Once the first coat is dry, apply a second coat for a durable finish.
Tips for a Smooth Installation
Practice Cutting: If you’re new to using a mitre box, practice on a spare piece before cutting your cornice.
Watch for Gaps: In older homes, walls or ceilings can be slightly uneven, leading to small gaps. Use extra Caulk to fill these.
Get Help with Heavy Pieces: If the cornices are heavy, ask a friend for help, especially during placement.
FAQs About Installing Cornice
Q1: Do I need a professional to install a cornice?
No! With some patience and the right tools, you can do it yourself.
Q2: Can I install cornices on uneven walls or ceilings?
Yes, just be prepared to use a bit more Caulk or filler to hide any gaps.
Q3: What type of cornice should I choose?
Consider your room’s style and size. Large rooms can handle wider, more ornate cornices, while small rooms look best with simpler designs.
Q4: Do I need to paint the cornice?
Painting is optional but recommended. It can protect the material and create a seamless look.
Q5: Can I install cornices independently, or do I need help?
Light cornices, like polystyrene, are easy to install solo. For heavier materials, a helping hand is useful.
Conclusion
Installing cornices can be a satisfying DIY project that adds style and value to your home. By following these steps, you’ll be able to install cornices with confidence. Whether you choose a sleek modern look or a classic design, a well-installed cornice will make any room look polished and complete. So gather your materials, take your time, and enjoy the results of your handiwork!
#installingCornice#corniceInstallation#installCornices#installCornicesService#installCornicesInPerth#installCornicesPerth
0 notes