#lead generation process flowchart
Explore tagged Tumblr posts
Visit Tumblr Blog
Explore Tumblr blogs with no restrictions, modern design and the best experience.
Last Seen Tumblr Blogs


Fun Fact
Tumblr has 16.74 million mobile monthly users in the US.
Text
youtube
I finally managed upload my recording of the "Emily Temple Cute's Pasta Kitchen" panel from Naka-kon this year. The guests from Emily Temple Cute and Melody BasKet, Ohashi-san and Abe-san, provided a behind the scenes look at the designing and manufacturing process for these brands. The presentation included a look at design sketches, rejected colorways, design mock-ups, and a video from the factory where their designs are produced.
There is a full English transcript of the recording below the cut. Unfortunately, I was unable to transcribe the guests' original Japanese responses due to my own lack of fluency in the language.
Suzanne: Hello and welcome everybody to Emily Temple Cute’s Pasta Kitchen. I was told to let everybody know, for those wanting to participate in the stamp rally, there’s stamps near the door that you can stamp on the way out…with a helpful guy back there and a lil fancy stamp rally sign — Look at his little stamp dance!
We are joined here by the CEO of Emily Temple Cute, Abe-san, as well as Emily Temple Cute’s lead designer, Ohashi-san, and I think everyone here is in for a special treat because we are going to get a peek behind the curtain and they are going to outline how the proverbial pasta is made. They are going to go into all the steps that they go in as far as conceptualizing, designing, planning, patterning, manufacturing – just all of the details, so I think that is a real special treat.
And here we have an overview of the steps of production and so we’ll allow our guests here to elaborate on that.
They’ve outlined seven steps in which all of the slides are going to be going over those: planning, designing, pattern-making, sample-making, preparation for the manufacturer, the actual manufacturing process, inspection/touch-up, and dispatch and marketing. So we’ll be going into detail on all of those.
And here is a general flowchart of all the steps involved in that process.
Ohashi-san: Hello! So, I’m not the designer, I’m the lead director. I consult with the designer about the direction we’re going in terms of the overall concept and how we decide to go forward with a design. The designer gives several concept proposals, several ideas, and, basically, the ideal design is picked out from several of those suggestions and we move forward from there.
I would like to go ahead and in this slide introduce something that is on display here at the con at the shop. This is the design concept for one of the pieces of clothing that’s sold there and I would like to go through the whole flow of how it was created.
So, for Emily Temple Cute designs, we always go with a strawberry motif. For this year, we kind-of had to think quite a bit about which sort of strawberry we were going to go with. For this year, we wanted to go with the shape of a dress as shown on the right-hand side of the presentation.
We had to think in-depth about how the pattern would appear on this dress. We decided to emphasize the sleeves and the hem of the dress, as you can see near the bottom of the dress and around the sleeve area. That’s where we decided to emphasize the pattern of the strawberries.
Basically, for this year, we got nine concepts presented as shown on the presentation. One, two, three, four, five, six, seven, eight, nine. We decided to go with the one with the star, with the blue [gingham check] and with strawberries on it.
As the designer and the illustrator were coming up with various sketch-ups and concepts, we had the designer go ahead and create these dress mock-ups for reference to choose out from. We had one dress style for the traditional dress style design on the left-hand side and also camisole dress styles which are on the right-hand side that came up as key choices.
The reason we chose concept number one, on the left-hand side, was because our previous dress [that] was shown back in May at the previous con and right after we had that May presentation we were immediately contracted — or, decided to participate again — and we decided to go with a strawberry motif again for this year’s Naka-kon.
We decided to go with a very flexible design that is designed to have an adjustable waist area so that people of various sizes could enjoy using this dress and also have an open front for ventilation.
We also chose design concepts number eight and twelve. Those are more casual, everyday, comfortable designs. Designs that aren’t just for formal occasions; they can be worn more on a daily basis. We chose those for that concept as well.
If you guys aren’t aware, Japanese summers are incredibly humid and hot. We decided to go with these dresses for something that could be worn even in those hot Japanese summers.
For concept number eight, a lot of lolita fashion dresses tend to be very tight around the neck area, which is not very good for ventilation, especially in hot environments, so we deliberately decided to go with a more open concept for better ventilation in the hot summers. We decided to go with something called [unintelligible], which translated means a cool under texture, which is a special kind of fabric that is better for ventilation and is supposed to feel cooler to the touch in a hot environment. [Transcriber’s note: I believe Ohashi-san was describing a moisture-wicking lining.]
Taking into account the time at which it will arrive at the customer and making sure that not only is it a pretty design, but it is also something that can be worn comfortably no matter what kind of hot or humid environment you are in. We took special care when selecting fabric since Japan tends to have a very distinct four seasons, you know, very hot summers and cold winters. We decided to be very thoughtful in terms of "What season will this arrive with the customer?", "When will the customer be wearing this?", making sure to choose the appropriate fabric for the season.
Emily Temple Cute — this particular style — isn’t necessarily lolita fashion, it’s more of the traditional cute dress fashion is what its positioning is in terms of styles. However, we went with this design so that it could be worn as a lolita style dress. Also, the accessories, the [headband] as well, were designed so that it would match that aesthetic.
The colors that we adopted for this year’s dress design are the top four [on the slideshow presentation]. Not even the Japanese customers have ever seen this slide before. This is the first time in our history that we have shown the concepts and patterns, the colors, that we did not go with on the bottom half of the slide, actually.
Now, the reason we chose these four colors. First of all, the first one, obviously, when you think of strawberries you think of the color red. Red was a no-brainer in terms of the first one that we chose. And, thinking of red, another cute color is absolutely is pink. We definitely thought that red and pink will be mandatory when designing this dress. Those are the first two.
In terms of the colors that we didn’t choose, the reason for that, if you look at the left-hand side, the dark crimson red and navy blue on the bottom-left. In terms of procurement date, the time at which these dresses would arrive for our customers in Japan, would have been around April. Basically, spring is the color of rejuvenation and brightness. We decided that the dark crimson and the dark navy color on the bottom-left didn’t match the season, which is why we decided to exclude those colors.
For the Emily Temple Cute [brand], we do not have an official or dedicated store. However, in Tokyo and Osaka we have branch stores where the designs are displayed and for sale. We chose the colors on the top because these are the ones that will stick out the most in the most aesthetically pleasing [way] when you see them lined up at the store with all the other dresses. We chose the colors to make sure that they’re complimentary with the color of the strawberry and make sure they don’t contrast or conflict a bit too much, especially in terms of looking at the pattern and compared to the dresses that would be displayed nearby or around it.
Next is pattern making. The professional pattern maker makes a mock-up or drawing diagram of the dress, how it’s kind-of laid out. We do something called a toiling process, where we don’t use the actual fabric that’s going to be used in the final dress but we use a temporary fabric to make a mock-up of the dress.
We create a mock-up of the actual dress, have them bring it back. Then we consult with the designer to make sure that this is what we’re looking for, make sure that the concept does look good when it’s in a 3D form. Once this check is done, making sure that everything looks good, we start using the actual fabric that will be used and then create the actual thing.
So, the camisole dress — talking about that on this occasion — we have a model come over and actually do the fitting process, make sure everything looks good on an actual person. Checking the mobility, making sure that the person wearing the dress can be fully mobile in all the joints. And checking the final design overall, seeing that it looks good.
One point that we wanted to correct when we entered this stage of the production…if you look at the very bottom photo there, the print-out of the strawberry ended up being cut in half at the seam. We corrected the pattern because having the strawberry cut in half wasn’t aesthetically optimal. We went ahead and redesigned it so that the pattern would not be interrupted.
If you look at the top-right photo, the shoulder frills there, the initial concept wasn’t aesthetically pleasing to be blunt. We went through some different ideas with the designer, the patterner, and I to come up with a slightly better design to make it more aesthetically pleasing.
After all of those design phases are done, we’ve created the concept, we’ve corrected the concept to look like we want it to look like, we enter the manufacturing preparation phase. We begin the manufacturing by first consulting with the factory that will be producing the dress.
Abe-san: For the manufacturing and sewing section, I will go ahead and proceed with the presentation from here on out. Emily Temple Cute, when designing this clothing style, not only is all the designing process in-house, the factory is also in-house within the company. From the design process at the very beginning all the way to delivering the product to the final customer, all of that is done under one company. We don’t outsource anything. Basically, the manufacturing process is as shown in the presentation. The design is received from the design team and the people on the factory floor go ahead and start the production process as shown.
At the very end, we do the inspection and touch-up process for the dress that’s manufactured. We do multiple thorough inspection checks to make sure that the dress is up to our standards. However, this clothing is all handmade so, obviously, it’s human hands sewing and doing all this work. Inevitably, approximately one out of one hundred clothes that we manufacture at the factory end up not being up to our personal quality standards. That’s why we do such thorough inspections, not only on the factory floor but at the store itself when the product does finally arrive, to make sure every single piece of clothing that does enter the customers’ hands is up to our standards.
I recorded a video of actually what it looks like on the factory floor. I’d like to go ahead and present that to everyone here.
Suzanne: We were having some issues with our audio earlier, so hopefully you guys can hear this okay.
Abe-san: We’ll go ahead and show the video while I explain. First, we print the design onto the fabric itself as shown. This is a collaboration item with RoseMarie seoir. This is an Evangelion-themed [pattern] that you’re seeing right here. Ok, so, initially the pattern is printed onto paper and then it’s transferred onto the fabric. Said fabric is rolled as shown. This machine unifies them into a certain length.
We use computer-assisted design in the next process. We start the cutting process after correcting the design to the factory’s specifications. This product is a CAM [?] brand, themed brand, I believe. An automatic cutter cuts all these individual parts.
This is the sewing process. The fabric that has been cut into the individual parts of the dress are all stitched as shown using human hands and this machine here. What you just saw there was an Emily Temple Cute fabric being sewn. Finally, an iron is used to get rid of any wrinkles on every single piece of dress.
English Translator: And the text says, before shipping out there’s a final thorough inspection done on every single piece of dress.
Abe-san: Finally, they are packed into the appropriate packing and shipped out to the stores.
Alright, next slide please.
Next we’ll talk about the dispatch, or shipping-out, and marketing portion of things. The packaging process involves folding up all of those completed dresses to prepare for shipping and to attach the appropriate product tag. And from there it ships out to the appropriate store or online storage. That’s the general process of how one of our dresses is delivered to the final destination. Sometimes there are additional processes, like extra stitching or decorations attached, accessories, etc.
Next slide.
We’re going to go ahead and present another video. This is an introduction video showing the Melody BasKet brand.
[Transcriber's note: A combined version of the 'Brand Story' and 'lettre de @m' videos from the Melody BasKet youtube channel was played. I have embedded the videos below for you convenience.]
youtube
youtube
Emily Temple Cute also has a separate brand called Melody BasKet, as you saw in that introduction video just now. The concept behind Melody BasKet is that it came out of a children’s artbook or storybook. The person who wrote the story for us was Novala-sensei who also wrote Shimotsuma Monogatari (Kamikaze Girls) as well.
Some of our clothes are not made necessarily in Japan. We would like to have full transparency into the locations where we manufacture our dresses. One of our factories is in Akita prefecture in Japan. Now, tragically, in the past 30 years the sewing and textile industry has declined 80% in Japan. The reason we chose this factory in Akita to manufacture the Emily Temple Cute brand is to preserve, to the best of our ability, the manufacturing of dresses like these in Japan.
So, the video that we showed previously only showed a handful of the steps involved in producing a single dress. There’s a lot more involved. Generally speaking, for the average dress there’s approximately 3,000 steps involved until the final product is created. However, for the Emily Temple Cute brand we go over 10,000 different steps until the final dress is complete.
One of the things we’re passionate about for the Emily Temple Cute brand is fostering the next generation of craftspeople who will be creating these dresses. We believe that it will ultimately be to the best benefit of the customer as well.
That is all.
[Applause]
Suzanne: Wow. That was really informative. We all have kind-of a general understanding of the difference between brand and off-brand or indie brands. Everyone who joins this fashions get it said over and over again how much work and detail goes into Japanese brand pieces that causes both the price and the quality to be elevated above what we might expect for regular clothing — certainly above fast fashion as well — and I think this really helps illustrate the amount of work that goes in to that and all of the processes and designs. I thought it was really interesting to see the colorways that they mock-up and consider. I think, overall, they made the best decision.
What I’m curious about — and I’ll field this to our guests here — is maybe, could you kinda drop like a little…just a theme or a motif of something that’s in the pipeline?
Ohashi-san: This is our second time ever participating in Naka-kon, since last year, and we have realized how much the American audience loves our designs. To give you a hint, we’ve really felt how much our American audience loves our products. We’re with something a little more pop-esque, a little more America-themed for our next idea.
Suzanne: Ooooo….Americana, maybe? I, for one, am always yearning for a pizza dress but I think they have already moved beyond Italian food.
Ohashi-san: I’ll take that into consideration.
Suzanne: Just pulling what few strings I can.
What really stuck out to me is, even a lot of other Japanese brands — like I know Angelic Pretty and, I think, Baby to a certain extent, have moved their production over to China. And a lot of them are really courting the Chinese market which has just exploded. I’m curious, is that also a market that you’re experiencing growth in and wanting to market towards? Or, like you mentioned before, with the Western perspective, are you just gearing more towards Europe and the West?
Ohashi-san: Yes, we are definitely aiming to expand into the Chinese market. But we are definitely also emphasizing creating a product that the American customer base would love, absolutely. And we are also targeting trying to get our foot into the European market as well. We’re still in the middle of analyzing the market and trying to reach our goal of getting our products internationally, making it available for our international audience.
One of our recent developments is that, for the American market, we’ve announced the plus size version of our dresses. And we are absolutely happy that so many people have been so positively receptive of that and very positive in terms of reaction. We would absolutely love to continue to improve our products with everyone’s — we are open to everyone’s feedback, suggestions, advice, comments, questions, etc. so that we can make our products and designs even better for everyone.
Suzanne: Yes! And a great way to do that is – Lolita Collective, for last year’s Naka-kon, put together a survey collecting general information — size, style, fit preferences — from the Western and plus size community. We’ve created a very similar survey to continue collecting and refining that information. We send that directly over to our friends at Emily Temple Cute. The first batch was really helpful to them. So, with Ohashi-san’s mention of feedback and information, if you have any of that to contribute, Lolita Collective has posted that survey, I believe, to all our social media. It should be the link in our bio on Instagram and other places. So, if you haven’t filled out that survey, go ahead and do so because getting just as much data as possible so they can get the idea of: "Ok, what is the average size of our market?", "Who should we get this to fit?", "What is working?”, “What isn’t working?" is super helpful to us.
And, hopefully, that first survey we sent for that first year was a help for them and we really want this second one to help more.
Ohashi-san: Yes. Please, we would greatly appreciate it.
Suzanne: After the fashion show, there will be a more general designer Q&A. But because we have wrapped up their main talking points for the most part, we could probably take one or two questions from the audience as long as it’s probably a little bit tighter to the topic of what we discussed. More general questions for our guests can go to that Q&A panel. Which, we will be collecting those ahead of time! If you want to drop off any kind of question, go to the Emily Temple Cute booth in the vendor hall and submit that ahead of time for that Q&A. For now, I suppose we’ll just take one or two questions right here. You can come up and talk into the mic or, y’know, just raise your hand and yell at me.
We have someone, yeah.
Audience Member 1: I’ll come up to the microphone.
Suzanne: Sure, sure!
Audience Member 1: You mentioned that you didn’t want the strawberries cut off in the design at the seam. Do you have to change the scale of the design for your straight sizes versus your plus sizes?
Suzanne: Excellent question. I wonder that myself.
Ohashi-san: It is true because you’re using different fabrics sizes there – or types there – that the overall pattern of the dress might end up being slightly different. But we do take into consideration all of those fine details when producing our dresses. Our Japanese customers, as well, are especially acute about attention to detail and they do pay very close attention to that. For example, we are extra careful if it’s an animal-style pattern to make sure that the animal isn’t, due to the stitching, looking decapitated or anything like that. We do our absolute best to make sure that they look as pretty as possible and make sure that the animals aren’t in an unfortunate dismembered state due to the seams.
Suzanne: We definitely appreciate that attention to detail! My favorite little detail that I’ve noticed on this little laundry print is the tiny, tiny little raccoon that’s on the laundry bottle. I’m not entirely — it’s a little small, so I’m not entirely sure — I think it’s more of a raccoon dog, like, a Japanese one rather than an American one. But either way, both of them, like, wash their food and wash their hands – so they’re clean! That’s just my new favorite thing I wanted to gush about!
Does anyone have any questions? Yeah!
Audience Member 2: Hi! I wanted to say thank you, first of all, for your time. I was curious about the process between you and your illustrators. I was wondering what sort of mediums your artists tend to work in to design the final designs, whether it be digital illustration or more traditional work like watercolor?
Suzanne: That is a good question.
Ohashi-san: In terms of our textile designers, recently more and more – especially now – we use fully digital illustrators. However, for the small touch-ups, we go to the textile and printing level to make micro adjustments. For example, watercolor aesthetic or oil pastel, oil painting aesthetics, we actually do use actual watercolor and oil painting to do the final touch-ups in terms of those small details — making it look more non-digital. We do pay attention to the details like that for each and every pattern. What is the optimal way to get the final details and the final touch-ups in, what sort of medium we’ll use, we always take into consideration stuff like that.
Suzanne: Fascinating! Something that I was wondering when I was listening so intently to this presentation — this might be something Abe-san can answer — I’m wondering if there’s a financial incentive to stay all Japanese manufacturing? Either provided by the Japanese government or otherwise? Because I know that they have a lot of protective tariffs when it comes to other industries, and I’m wondering if there’s anything to help offset the additional cost of having it small-scale, having it local, from the Japanese government or otherwise?
Abe-san: We would love to have financial incentives like that from the government, but the reality is, no, it’s very difficult.
Suzanne: Well, I think that makes that commitment that much more meaningful. Because a lot of countries will have programs, protective tariffs, incentives…I think that represents a great commitment to values! What do you guys think?
[Applause]
Suzanne: Does anyone have any other questions about the design and manufacturing — do I see a hand? No? Oh! There’s a hand. There’s hands over there. You, in the glasses. You, in the — oh, wait, both of you are wearing glasses! Yeah, yeah — she raised her hand first! [laughs] In the black haori-looking thing.
Audience Member 3: In curating the brand’s image, are there certain pieces of art or themes that you stick to or do you consult what is currently on the shelves to then evolve your design?
Suzanne: Ok, for the rest of us who may have not heard that, that attendee’s question was “Are there motifs that Emily Temple Cute sticks to? Do they follow larger trends?”. Probably a more general query about when do they introduce a totally new motif versus following, maybe, what someone else is putting out? We’ll see what they say.
Ohashi-san: In terms of the popular series that we have in our line-up, obviously, we update it on an annual basis. However, we always love introducing new concepts and ideas into the market. We always try to come up with an idea of, like, “Wow! You’re gonna make that a dress? You’re gonna make that the theme?”. Something very unique or special, we always try to come up with something like that on a frequent basis.
I imagine, for example, the lady in the front row wearing that cereal themed dress is something that I imagine is very unique, for example, that we’re proud of. The future Emily Temple Cute concept that we hinted at is something that no one here has probably ever seen made into a dress pattern before. So please look forward to that in the future!
[Transcriber's note: I was the person wearing the cereal dress!]
Suzanne: And then, that other — in the green cosplay. You had a question? You can come up here or you can just try to project.
Audience Member 4: [Asks question in Japanese]
English Translator: Good Japanese!
Ohashi-san: I’m quite a fan of blue, myself.
Suzanne: Yes. Our attendee asked what Ohashi-san’s favorite color for a dress was. And I think that does track — I think she was wearing a lot of the blue the last time I saw her, last year, and this is in the same line [referring to the dress Ohashi-san is currently wearing].
Audience Member 4: I’m all for blue superiority.
Ohashi-san: [gives a thumbs-up]
Suzanne: But yes, very good Japanese. [pause] You can come up! Come up here, Susie.
Audience Member 5: So, yesterday, I bought one of the Emily Temple Cute dresses with the adjustable waist ribbons. I really like that because it’s very comfortable and I also think if my size changes a little bit, I can still wear the dress. Is that something you were thinking about when you were designing that feature?
Ohashi-san: Yes, so obviously, there are various body types around the world. We’ve designed our clothing to be beautiful no matter what type of body you have. We’ve designed and machined our clothing so that you can tighten your waist to make it look cute and you can also have it looser and still be able to look cute.
We’re currently in the process of making even more designs where various body styles can be appreciated and look beautiful. I think everyone can agree that wearing these dresses and all sorts of various different styles of fashion is fun. We plan to continue to make different styles of clothing that everyone can have fun and enjoy dressing in in the future.
[Applause]
Suzanne: Yes, that’s wonderful! I, for one, am delighted to have a pasta dress that I can eat pasta in. I can go to Olive Garden and get those unlimited breadsticks.
Oh, it looks like we have another question! Since it’s 12:29, that’ll probably be our last question. Any other questions, stop by the Emily Temple Cute booth and submit those and we’ll read them out for the Q&A later! But, go ahead, sir, and you can come up if you would like, as well.
Audience Member 6: How do you gauge interest in your dresses and decide on production quantities?
Suzanne: For those who might not have heard that gentleman, he asked how do they gauge how many dresses to make, production quantity, of a release?
Ohashi-san: Currently, the Emily Temple Cute brand, we go with a reservation/preorder type system. The reason for that is that we want to avoid situations where our dresses are sold out and someone who really wanted our dress wasn’t able to get one. We’ve designed it in this way to avoid that as much as possible.
So, in manufacturing terminology, it’s a pull-type where the amount we manufacture is directly based on customer demands and orders. So that, for example, let’s say one color — in a traditional manufacturing system, if one color is particularly popular, that one gets always sold out. We wanted to avoid that as much as possible, which is why we went with the order system instead.
That’s the upside of that manufacturing system. However, the downside is that, obviously, there is a time delay between the customer ordering one of our dresses and it arriving at their doorstep. There is that time delay, which is the downside.
For the Naka-kon of this year, we decided to order products in a way that everyone can just immediately buy it on the spot to take home. However, in Japan, we do have that reservation system/preorder system where we do get feedback that the time between ordering one of our dresses and it arriving is like — y’know, you have to wait and that can be a bit frustrating.
In the future, we would like to adopt a system where we can also produce more dresses ahead of time. In terms of the exact number we’re going to produce, I myself am still in the process of mulling over that and thinking “Ok, how many are we going to make?”.
Abe-san: One thing that I would like to add — as mentioned, we do primarily take on a format of an order-based system in terms of manufacturing. Similar to Toyota’s “just in time” production, we create the necessary amount of clothing at the necessary timing, just enough to meet our customer demand.
Before we really worked on the Emily Temple Cute project and began this, the standard style for this industry was to create a certain amount of these dresses and anything that was left unsold would be put on sale. That would be the traditional style for the apparel industry. But, personally, we weren’t satisfied with the idea that some people pay X price, the full price, for our products while other people end up getting it for 50% off. That just didn’t feel right for me, personally. That’s why we went with the ordering system, so that certain people don’t end up with a massive bargain and other people do not. To avoid that, that’s why we chose this system.
Suzanne: Well, it seems they’ve successfully avoided the “bloodbath” model of releases that some other brands adhere to. I think all of the fans of Emily Temple Cute think that that system is worth the wait. What do you guys think?
[Applause]
Suzanne: And that wraps up this panel. Thank you so much Abe-san and Ohashi-san for joining us and giving us this unique look to see how the pasta is made. I have learned a lot and I hope you all have too!
As I’ve said before, if you have any sort of leftover questions for our designers, and I think Misako as well, there will be a Q&A after the fashion show today. So swing by the Emily Temple Cute booth to see the final result of this 10,000 step production process and also drop off those Q&A questions for us there. I look forward to seeing you at the booth and thank you all so much for attending and for your very thoughtful questions.
#Emily Temple Cute#Melody BasKet#Naka-kon#lolita fashion#girly fashion#kawaii fashion#jfashion#egl#egl community#behind the scenes#メロバス#melobas#エミリーテンプルキュート#エミキュ#emikyu#メロディバスケット#madeinjapan#fashion design#Youtube
45 notes
·
View notes
Text
I just read "The Art and Making of Arcane". And I wanted to share some bits about the relationship between Riot and Fortiche, and between the writers and animators. Because I feel like that's something that's often misunderstood by fans. Something that really stands out is just how collaborative the process of creating an episode is, and how storytelling decisions are made at multiple different levels, from writers, to directors, to editors, to storyboard artists, and how much back-and-forth there is.
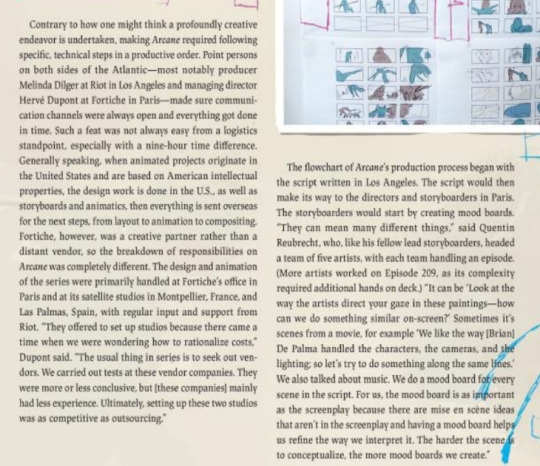
"Generally speaking, when animated projects originate in the United States and are based on American intellectual properties, the design work is done in the U.S., as well as storyboards and animatics, then everything is sent overseas for the next steps, from layout to animation to compositing. Fortiche, however, was a creative partner rather than a distant vendor, so the breakdown of responsibilities on Arcane was completly different. The design and animation of the series were primarily handled at Fortiche's office in Paris and its satellite studios" ...
"The flowchart of Arcane's production process began with the script written in Los Angeles. The script would then make its way to the directors and storyboarders in Paris. The storyboarders would start by creating mood boards. 'They can mean many different things,' said Quentin Reubrecht, who, like his fellow lead storyboarders, headed a team of five artists, with each team handling an episode. ... 'It can be "Look at the way the artists direct your gaze in these paintings - how can we do something similar on-screen?" Sometimes it's scenes from a movie, for example "We like the way [Brian] De Palma handled the characters, the cameras, and lighting; so let's try to do something along the same lines." We also talked about music. We do a mood board for every scene in the script. For us, the mood board is as important as the screenplay because there are mise en scene ideas that aren't in the screenplay and having a mood board helps us refine the way we interpret it. The harder the scene is to conceptualize, the more mood boards we create.'
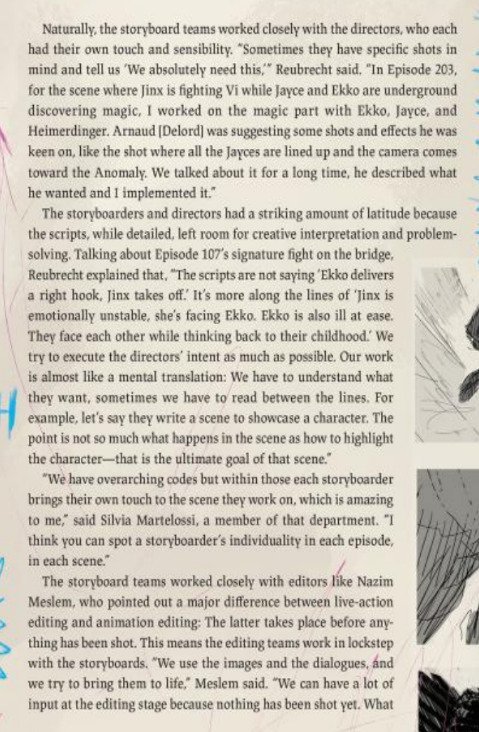
"Naturally, the storyboard teams worked closely with the directors, who each had their own touch and sensibility. 'Sometimes they have specific shots in mind and tell us "We absolutely need this,"' Reubrecht said. 'In Episode 203, for the scen where Jinx is fighting Vi while Jayce and Ekko are underground discovering magic, I worked on the magic part with Ekko, Jayce, and Heimerdinger. Arnaud [Delord] was suggesting some shots and effects he was keen on, like the shot wherre all the Jayces are lined up and the camera comes toward the Anomaly. We talked about it for a long time, he described what he wanted and I implemented it.'
"The storyboarders and directors had a striking amount of latitude because the scripts, while detailed, left room for creative interpretation and problem-solving. Talking about Episode 107's signature fight on the bridge, [lead storyboarder Quentin] Reubrecht explained that, 'The scripts are not saying "Ekko delivers a right hook, Jinx takes off." It's more along the lines of "Jinx is emotionally unstable, she's facing Ekko. Ekko is also ill at ease. They face each other while thinking back to their childhood." We try to execute the directors' intent as much as possible. Our work is almost like a mental translation: We have to understand what they want, sometimes we have to read between the lines. For example, let's say they write a scene to showcase a character. The point is not so much what happens in the scene as how to highlight the character - that is the ultimate goal of the scene.'
"'We have overarching codes but within those each storyboarder brings their own touch to the scene they work on, which is amazing to me,' said Silvia Marelossi, a member of that department. 'I think you can spot a storyboarder's individuality in each episode, in each scene.'
"The storyboard teams worked closely with editors like Nazim Meslem, who pointed out a major difference between live-action editing and animation editing: The latter takes place before anything has been shot. This means the editing teams work in lockstep with the storyboards. 'We use the images and the dialogues, and we try to bring them to life,' Meslem said. 'We can have a lot of input at the editing stage because nothing has been shot yet. What we bring is linked to mise en scene: We try to help with the storytelling only through visuals. I'd say that's when we come up with the final version of the script.'
"Animatics are another key stage, when the storyboard essentially begins to move and an episode's rhythm emerges. Amanda Overton pointed out that just because a script is sent to Paris, that doesn't mean it's set in stone. 'Another reason Arcane is so good is because we're able to do a lot of rewriting in the animatics,' she said. 'In Season 1, probably Episode 5 is the closest from the script to the animatic. There was a constant question of "How can we tell more story or the same amount of story in less time?" We came up with a lot of creative fixes and spent a lot of time in the animatic stage rewriting and crafting things to make sure it worked.'"
...
More under the cut

"Naturally, the Firelights have a distinct identity, strongly linked to street art, graffiti, and music. They also played a key part when it comes to one of Arcane's signatures: the punctuation of each episode with at least one music-video-like sequence that coalesced in 107, which is important in Ekko and Firelights lore. Fortiche came up with the idea of a music montage for more efficient storytelling and changed what was originally written. 'The beginning of that episode, where it has this sort of music video intro of the Firelight is totally different from what's in the script,' Yee said. 'I think it's one of the moments where it felt like Fortiche was beginning to say "We want to kind of depart from the script, we want to do something we've got a vision for."'"

"A perfect illustration is Ekko and Jinx's fight in Episode 107. Editor Nazim Meslem was very aware of the need to avoid repetitiveness in the action scenes, and he found unlikely inspiration in the Raymond Queneau book Exercises in Style. The book was published in France in 1947, and within its pages, the author tells the same anecdote in ninety-nine differrent ways. 'We could stage a fight like a musical, another with puppets, a funny one - we could do them in completely different registers,' Meslem thought to himself. 'So when we started brainstorming the big fight in 107, I said "Isn't this an opportunity to do it as a music video?"' There already was a slightly similar scene at the beginning of the episode, but Arndaud Delord gave the green light. The trick was to have a different approach. 'The first video in the episode was all mood, no plot, and we couldn't do that again,' Meslem said. 'So we thought we'd go back to Jinx and Ekko's childhood and their relationship. One thing just leads to another.'"

"What makes Arcane so idiosyncratically creative - or is that creatively idiosycratic? - is the trust-based partnership between Riot and Fortiche, which allowed them to be open to each other's suggestions and change direction when something wasn't working. An example members of both teams spontaneously mentioned was the slightly ghoulish dinner party in Episode 109, when Jix has captured Silco, Vi, and Caitlyn, and the tension between the sisters reaches an apex. Christian Linke and Alex Yee were struggling trying to write that scene, and they were getting frustrated. Julien Georgel recalls that there were several versions of the scene in the planning stage, all rather different from what ended up in the show. 'One of them involved a big fight, then there was one more in the middle ground with Jinx who, facetiously, was spinning her propeller blades,' Georgel said. 'It was getting to be expensive and also more cartoonish than emotional, so Arnaud Delord came up with the idea of a family dinner. It was more intimate, more human, and it felt emotionally rewarding rather than just another brawl.'"
...
"Arcane's success was achieved through teamwork across time zones and cultural differences, with every unit lifting the next. 'I think the beauty of Arcane on the macro level, for me, is that the scripts are always the worst part of the show,' the writer Amanda Overton said. 'As a writer, you work so hard to craft a scfript and make it a beautiful, complex, amazingly well-written story. Then you can say, "This is the worst part of the show because everybody else was able to add something to that script to make it better at every step of the process." The directors came in with their own ideas that made the story more cohesive over both seasons; the storyboard artists came in and found angles on each scene that just made it more of what you wanted; character designers, the art direction, every single person on this project made the show better. I love it as a writer when my words are the worst part of the process.'"
10 notes
·
View notes
Text
Design Patent Drawings vs. Utility Patent Drawings: Key Differences Explained
When protecting your invention, understanding the difference between design patents and utility patents is crucial, and so is knowing how their respective drawings differ. While both types of patents require visual representation, the purpose, style, and requirements of the drawings vary significantly.
This article will explain the key differences between design patent drawings and utility patent drawings, helping you determine which type you need and how to present your invention accurately for patent approval.
1. Purpose of the Patent
Design Patents
Design patents protect a product's ornamental appearance. This includes the shape, surface decoration, and configuration, essentially, how a product looks, not how it works.
The drawings for a design patent are the heart of the application, as the patent will only cover what is shown in the illustrations.
Utility Patents
Utility patents protect the functionality and structure of a new and useful process, machine, article of manufacture, or composition of matter. The drawings support the detailed written description and claims, showing how the invention works.
In this case, drawings play a supportive but critical role in clarifying the invention’s technical aspects.
2. Drawing Style and Detail
Design Patent Drawings
A high level of visual detail is required
Line drawings in black and white are standard, though grayscale shading is often used to show contours and depth
Must include all views of the object (front, rear, top, bottom, sides, perspective)
Broken lines may be used to indicate unclaimed portions of the design
These drawings are expected to be precise and clean, with consistent styling and proper shading to highlight form and structure.
Utility Patent Drawings
Focus is on functionality, so views are often simpler and more schematic
May include cross-sectional views, exploded views, flowcharts, and block diagrams
Labelling is important, each part is numbered and referred to in the written description
Shading is discouraged unless it improves clarity
The emphasis is on clarity of function, not visual appeal.
3. Legal Importance of Drawings
Design Patents
Drawings define the legal protection. If it’s not shown, it’s not protected.
The USPTO (United States Patent and Trademark Office) bases the entire scope of protection for a design patent on what is illustrated. Visual disclosure is everything; claims are minimal.
Utility Patents
Drawings are supplementary to the claims and specification. They help explain the invention but don’t define the boundaries of protection. Claims written in the text do that.
Still, incomplete or unclear drawings can lead to office actions or rejection for lack of sufficient disclosure.
4. Number of Views Required
Design Patents
A complete set of views is essential to show the entire design: Front, Rear, Left, Right, Top, Bottom, and Perspective (optional but highly recommended). Missing views can cause delays or outright rejection.
Utility Patents
Only the necessary views that help explain how the invention works are needed. These may include a general assembly view, a detailed internal view, cross-sectional diagrams, or flowcharts and schematics. The goal is functional understanding, not aesthetic completeness.
5. Use of Reference Numbers
Design Patents
Design patent drawings typically do not use reference numbers or labels. The focus is purely on visual form.
Utility Patents
Reference numbers are mandatory. Every component shown in the drawings must be numbered and clearly explained in the written description.
6. Tools and Professionals Involved
Creating design patent drawings often involves graphic illustrators skilled in shading, proportion, and perspective. Utility patent drawings require technical drafters with experience in mechanical or electrical components and schematics.
In both cases, using professional patent drawing services ensures compliance with USPTO and international standards, which is especially important for first-time inventors.
Final Thoughts
Both design and utility patent drawings are essential for securing strong intellectual property rights, but they serve different purposes and follow different rules.
Feature
Design Patent Drawings
Utility Patent Drawings
Purpose
Protect appearance
Protect function and structure
Drawing Detail
High visual detail, shading used
Functional clarity, minimal shading
Legal Scope
Defined solely by drawings
Defined by written claims
Views Required
All standard views of the product
Only the views necessary to show the function
Reference Numbers
Not used
Mandatory
Understanding these differences ensures you choose the right approach for your invention and prepare an application that meets legal and technical standards.
If you're unsure about the type of patent your invention needs or how to present it visually, consulting with a patent attorney and hiring a professional drawing service can greatly improve your chances of success.
0 notes
Text
Automate Anything with Ease: A Beginner’s Guide to n8n Workflows

Imagine sipping your coffee while tasks run themselves—emails get sorted, data gets transferred between apps, and reminders are sent out—all without lifting a finger. Sounds dreamy, right? That’s exactly what automation tools like n8n can help you achieve. Whether you're a solo entrepreneur, freelancer, content creator, or just someone who wants to do more with less effort, learning n8n for Beginners: Build Automations from Scratch!! is your ticket to unlocking that superpower.
But what is n8n? Why should you even care about it? And most importantly—how can you use it without needing to be a coding wizard?
Let’s break it down, the simple way.
What is n8n?
n8n (pronounced “n-eight-n”) stands for “nodemation”—basically, node-based automation. It’s a free, open-source workflow automation tool that helps you connect different apps and services together. It’s kind of like Zapier or Integromat, but with more control and flexibility.
Here’s what makes n8n stand out:
✅ Open-source (so it’s customizable and free)
✅ Self-hosted or cloud (your choice)
✅ Powerful workflow builder
✅ Connects to 200+ apps (and growing)
✅ No-code/low-code platform
In other words, it gives you a visual playground where you can build automations—without needing to be a tech genius.
Why Automations Matter (Especially in 2025)
Time is your most valuable currency. In 2025, with the explosion of digital tools and platforms, we’re constantly switching between emails, CRMs, spreadsheets, Slack, Discord, social media—and the list goes on.
Manual work slows you down.
Automation helps you:
✅ Eliminate repetitive tasks
✅ Boost productivity
✅ Reduce human error
✅ Scale your business or operations faster
Now imagine setting up workflows in minutes that save you hours every week. That’s what n8n delivers.
Getting Started: Is n8n Really for Beginners?
Short answer? Absolutely.
Even if you're new to the world of automation, the n8n for Beginners: Build Automations from Scratch!! course guides you step-by-step in a super friendly, visual way.
You’ll learn:
✔️ How to install and access n8n
✔️ How to design your first workflow
✔️ Real-world automation examples (not boring theory)
✔️ How to connect tools like Gmail, Notion, Slack, Trello, etc.
✔️ How to automate your business processes like a pro
No need to be a developer. Just follow along, and you’ll be creating time-saving automations in no time.
Real-Life Examples: Where n8n Shines
Still wondering what kind of things you can automate? Let’s look at some real-life use cases:
📧 1. Automate Emails Based on Triggers
For example:
When someone fills out your contact form, send them a personalized email.
Notify your team on Slack or WhatsApp.
📋 2. Sync Your Spreadsheets
Say you update a Google Sheet with new leads—n8n can automatically add those leads to your CRM or Mailchimp list.
🔁 3. Social Media & Content Scheduling
Automate content posting across platforms like Twitter, Instagram, or LinkedIn. Trigger a post every time a blog goes live.
🔔 4. Reminders & Notifications
Create workflows to remind you about pending tasks, renewals, or client meetings.
📊 5. Reporting & Dashboards
Pull data from multiple platforms and generate auto-reports at the end of every week or month.
And that’s just the beginning.
How Does n8n Work?
Picture a flowchart. You start with a trigger (e.g., new email received), then add a node (e.g., filter emails with a certain subject), then another node (e.g., send a message to Slack), and so on.
Each step is a node in your workflow, and you can drag, drop, and configure them with a few clicks.
Here’s the typical workflow logic:
Trigger (an event like form submission)
Actions (do something based on the trigger)
Conditions (set filters or logic)
End Result (email, message, file, update, etc.)
And voilà—your automation is ready!
Why Choose n8n Over Other Tools?
There are many automation tools out there. But here’s why n8n is increasingly becoming the go-to platform: Featuren8nZapierMake (Integromat)Open Source✅ Yes❌ No❌ NoFree Tier LimitVery GenerousLimitedLimitedSelf-Hosting Option✅ Yes❌ No❌ NoCustom LogicHighly FlexibleLimitedModerateVisual Editor✅ Yes✅ Yes✅ Yes
n8n gives you the best of both worlds—no-code friendliness with advanced customization if you ever need it.
The Power of Self-Hosting (Optional but Awesome)
Want total control over your data and infrastructure? Self-hosting n8n is a game-changer. You can deploy it on your own server (VPS, Raspberry Pi, etc.) and have:
🔒 Full privacy
🔄 Infinite workflows
💰 Zero subscription costs
Don’t want to deal with servers? No worries. You can also use n8n.cloud, the official hosted version.
Top Benefits You’ll Gain from Learning n8n
Still on the fence? Here’s why learning n8n is 100% worth it:
🚀 Save time and money by replacing expensive tools
🎯 Sharpen your productivity skills
🧠 Become automation-savvy—a must-have skill in 2025
💼 Boost your resume if you’re in tech, marketing, or operations
🧰 Use it across any industry (marketing, SaaS, eCommerce, HR, etc.)
💡 Unlock ideas for your own projects or side hustles
Who Should Take This Course?
If you’re asking yourself, “Is this course for me?”—here’s who it’s perfect for:
Entrepreneurs looking to automate and scale
Freelancers and solopreneurs
Digital marketers
Virtual assistants
Developers who want low-code tools
Students or beginners in tech
Anyone tired of manual tasks!
If that sounds like you, then n8n for Beginners: Build Automations from Scratch!! is your perfect match.
Learn by Doing (Not Just Watching)
This course isn't just about watching tutorials—it’s hands-on. You’ll build real workflows step-by-step and walk away with automation superpowers you can use immediately.
And it’s beginner-friendly, so no prior experience is required.
Future-Proof Your Skills
Automation is not just a buzzword. It’s a business essential.
Companies are actively seeking people who can automate tasks, optimize processes, and manage workflows. Knowing how to use n8n gives you:
💼 A competitive edge in the job market
🔧 Practical skills to improve operations
💰 Opportunities to offer automation as a freelance service
You’re not just learning a tool—you’re future-proofing your career.
Final Thoughts: Start Automating Today
You don’t need to be a developer. You don’t need fancy software. All you need is the right guidance.
n8n is powerful, flexible, and accessible. With the right training, you’ll go from beginner to automation master in no time.
So why wait? Start building your first automation today with n8n for Beginners: Build Automations from Scratch!! and unlock a whole new level of productivity.
Let your workflows do the work—while you focus on what truly matters.
0 notes
Text
Teaching AI models the broad strokes to sketch more like humans do
New Post has been published on https://sunalei.org/news/teaching-ai-models-the-broad-strokes-to-sketch-more-like-humans-do/
Teaching AI models the broad strokes to sketch more like humans do
When you’re trying to communicate or understand ideas, words don’t always do the trick. Sometimes the more efficient approach is to do a simple sketch of that concept — for example, diagramming a circuit might help make sense of how the system works.
But what if artificial intelligence could help us explore these visualizations? While these systems are typically proficient at creating realistic paintings and cartoonish drawings, many models fail to capture the essence of sketching: its stroke-by-stroke, iterative process, which helps humans brainstorm and edit how they want to represent their ideas.
A new drawing system from MIT’s Computer Science and Artificial Intelligence Laboratory (CSAIL) and Stanford University can sketch more like we do. Their method, called “SketchAgent,” uses a multimodal language model — AI systems that train on text and images, like Anthropic’s Claude 3.5 Sonnet — to turn natural language prompts into sketches in a few seconds. For example, it can doodle a house either on its own or through collaboration, drawing with a human or incorporating text-based input to sketch each part separately.
The researchers showed that SketchAgent can create abstract drawings of diverse concepts, like a robot, butterfly, DNA helix, flowchart, and even the Sydney Opera House. One day, the tool could be expanded into an interactive art game that helps teachers and researchers diagram complex concepts or give users a quick drawing lesson.
Play video
SketchAgent: a collaborative system that teaches AI models to sketch more like humans do. Video: MIT CSAIL
CSAIL postdoc Yael Vinker, who is the lead author of a paper introducing SketchAgent, notes that the system introduces a more natural way for humans to communicate with AI.
“Not everyone is aware of how much they draw in their daily life. We may draw our thoughts or workshop ideas with sketches,” she says. “Our tool aims to emulate that process, making multimodal language models more useful in helping us visually express ideas.”
SketchAgent teaches these models to draw stroke-by-stroke without training on any data — instead, the researchers developed a “sketching language” in which a sketch is translated into a numbered sequence of strokes on a grid. The system was given an example of how things like a house would be drawn, with each stroke labeled according to what it represented — such as the seventh stroke being a rectangle labeled as a “front door” — to help the model generalize to new concepts.
Vinker wrote the paper alongside three CSAIL affiliates — postdoc Tamar Rott Shaham, undergraduate researcher Alex Zhao, and MIT Professor Antonio Torralba — as well as Stanford University Research Fellow Kristine Zheng and Assistant Professor Judith Ellen Fan. They’ll present their work at the 2025 Conference on Computer Vision and Pattern Recognition (CVPR) this month.
Assessing AI’s sketching abilities
While text-to-image models such as DALL-E 3 can create intriguing drawings, they lack a crucial component of sketching: the spontaneous, creative process where each stroke can impact the overall design. On the other hand, SketchAgent’s drawings are modeled as a sequence of strokes, appearing more natural and fluid, like human sketches.
Prior works have mimicked this process, too, but they trained their models on human-drawn datasets, which are often limited in scale and diversity. SketchAgent uses pre-trained language models instead, which are knowledgeable about many concepts, but don’t know how to sketch. When the researchers taught language models this process, SketchAgent began to sketch diverse concepts it hadn’t explicitly trained on.
Still, Vinker and her colleagues wanted to see if SketchAgent was actively working with humans on the sketching process, or if it was working independently of its drawing partner. The team tested their system in collaboration mode, where a human and a language model work toward drawing a particular concept in tandem. Removing SketchAgent’s contributions revealed that their tool’s strokes were essential to the final drawing. In a drawing of a sailboat, for instance, removing the artificial strokes representing a mast made the overall sketch unrecognizable.
In another experiment, CSAIL and Stanford researchers plugged different multimodal language models into SketchAgent to see which could create the most recognizable sketches. Their default backbone model, Claude 3.5 Sonnet, generated the most human-like vector graphics (essentially text-based files that can be converted into high-resolution images). It outperformed models like GPT-4o and Claude 3 Opus.
“The fact that Claude 3.5 Sonnet outperformed other models like GPT-4o and Claude 3 Opus suggests that this model processes and generates visual-related information differently,” says co-author Tamar Rott Shaham.
She adds that SketchAgent could become a helpful interface for collaborating with AI models beyond standard, text-based communication. “As models advance in understanding and generating other modalities, like sketches, they open up new ways for users to express ideas and receive responses that feel more intuitive and human-like,” says Shaham. “This could significantly enrich interactions, making AI more accessible and versatile.”
While SketchAgent’s drawing prowess is promising, it can’t make professional sketches yet. It renders simple representations of concepts using stick figures and doodles, but struggles to doodle things like logos, sentences, complex creatures like unicorns and cows, and specific human figures.
At times, their model also misunderstood users’ intentions in collaborative drawings, like when SketchAgent drew a bunny with two heads. According to Vinker, this may be because the model breaks down each task into smaller steps (also called “Chain of Thought” reasoning). When working with humans, the model creates a drawing plan, potentially misinterpreting which part of that outline a human is contributing to. The researchers could possibly refine these drawing skills by training on synthetic data from diffusion models.
Additionally, SketchAgent often requires a few rounds of prompting to generate human-like doodles. In the future, the team aims to make it easier to interact and sketch with multimodal language models, including refining their interface.
Still, the tool suggests AI could draw diverse concepts the way humans do, with step-by-step human-AI collaboration that results in more aligned final designs.
This work was supported, in part, by the U.S. National Science Foundation, a Hoffman-Yee Grant from the Stanford Institute for Human-Centered AI, the Hyundai Motor Co., the U.S. Army Research Laboratory, the Zuckerman STEM Leadership Program, and a Viterbi Fellowship.
0 notes
Text
How long does it take to get HALAL certification in India?

HALAL Certification in India can be described as a procedure that ensures that the services and products offered by a company comply with the standards required by Islamic Law (Shariah). The word “Halal” means “permissible” in Arabic. HALAL certification in India is generally sought for beverages and food; however, it can also be applied to cosmetics, pharmaceutical packaging, healthcare products and even logistical services.
For companies that target Muslim customers or are seeking exports into Islamic countries, getting HALAL certification in india is proof of quality and business demand.
Why is HALAL Certification Important in India?
India as a country, with its vast Muslim population and strong export market, is experiencing a rising demand for HALAL-Certification in India goods. If you’re working in the food industry or pharmaceuticals, cosmetics or even cosmetics products, the HALAL Certification in India could bring several advantages:
Market Access to Islamic countries such as Indonesia, UAE, Malaysia and more
Consumer Trust among Muslim buyers in India and around the world
Improved Brand Image displaying ethical and high-quality standards
Conformity to Global Standards such as GCC regulations and OIC standards
Who Can Apply for HALAL Certification?
The following industries typically qualify for HALAL Certification in India accreditation in India:
Food processing units
Slaughterhouses
Catering and restaurant services
Companies for personal and cosmetic care
Manufacturers of pharmaceutical and nutraceuticals.
Providers of logistics and packaging
Steps to Get HALAL Certification in India
Applications Submission Businesses are required to submit an application that includes company and product information.
Examine Documents Send documents such as the list of ingredients in your product and manufacturing process information, quality assurance procedures, and hygiene guidelines.
Site Audit Certification bodies inspect the premises to ensure Halal Certification in India conformity.
Compliance Evaluation This audit report will assess Halal Certification in India standards.
Certification Issue: If the HTML0 certification complies with the HTML0 certification, it is issued. A halal Certification in India is issued and typically valid for a year.
Documents Required for HALAL Certification
Certificate of registration of a company
List of ingredients and the product’s list
Process flowchart for manufacturing
Hygiene and quality control practices
FSSAI license (for food businesses)
Labeling and packaging samples
Any existing certifications (ISO, GMP, etc.)
Recognized HALAL Certification Bodies in India
Various organizations in India can grant HALAL Certification in India. The most prominent ones are:
Jamiat Ulama-i-Hind Halal Trust
Halal India Pvt. Ltd.
Halal Certification Services India Pvt. Ltd.
Jamiat Ulama-e-Maharashtra
Always ensure that the certification agency can be recognized as an international Halal Certification in India authority to ensure seamless export procedures.
How to Acquire HALAL Certification in India?
Factocert is one of the Best Leading HALAL Certification in India consulting services in India for its aggressive advantage in business continuity management. Don’t hesitate to email [email protected] with your inquiries or use the pop-up form on www.Factocert.com the website to outline your main points. Our Multi Skilled Professionals can assist you and respond to your requirements and questions
For More Information Visit: HALAL Certification In India
0 notes
Text
Maximizing Efficiency with Top Business Intelligence Tools

What is Business Intelligence (BI)?
Business Intelligence (BI) encompasses a range of processes, tools, and methodologies that transform raw data into actionable insights. By leveraging BI, organizations can make informed decisions, optimize operations, and gain a competitive edge. BI platforms aggregate, analyze, and visualize data to support strategic decision-making across various business functions.
How Business Intelligence Works
BI solutions extract data from multiple sources, clean and process it, and present insights through dashboards, reports, and visualizations. The key components of a BI system include:
Data Warehousing – Centralized storage of structured and unstructured data.
Data Mining – Identification of patterns and trends within large datasets.
Analytics & Reporting – Generation of actionable insights using advanced analytics tools.
Data Visualization – Presentation of data through interactive dashboards and charts.
flowchart LR A[Raw Data] -->|Extract| B[Data Warehousing] B -->|Process| C[Data Mining] C -->|Analyze| D[Analytics & Reporting] D -->|Visualize| E[BI Dashboards]
Benefits of Business Intelligence for Organizations
1. Enhanced Decision-Making
BI enables data-driven decision-making by providing accurate and real-time insights. Leaders can analyze key metrics and trends to optimize business strategies.
2. Increased Operational Efficiency
BI automates data collection and reporting, reducing manual errors and saving time. It streamlines workflows and enhances productivity.
3. Improved Market Insights
By analyzing customer behavior and market trends, BI helps businesses tailor their products, pricing, and marketing strategies to meet demand effectively.
4. Competitive Advantage
Companies that leverage BI tools gain an edge over competitors by anticipating market shifts and making strategic adjustments proactively.
5. Revenue Growth and Cost Reduction
With predictive analytics, businesses can optimize pricing, reduce waste, and identify new revenue opportunities, leading to higher profitability.
Real-World Use Case of Business Intelligence
A multinational retail corporation implemented BI analytics to optimize supply chain operations. By leveraging real-time sales data, they:
Reduced stockouts by 30%.
Increased sales revenue by 15%.
Enhanced customer satisfaction with personalized product recommendations.
This example highlights how BI transforms raw data into impactful business strategies that drive growth and efficiency.
How to Implement BI in Your Organization
Define Business Objectives – Identify key goals such as revenue growth, cost reduction, or customer retention.
Select the Right BI Tools – Choose a BI platform that aligns with your needs and integrates with existing systems.
Data Collection & Preparation – Ensure high-quality, structured data for analysis.
Develop Interactive Dashboards – Create visual reports that provide actionable insights.
Train Employees on BI Usage – Equip teams with the skills to leverage BI effectively.
Monitor Performance & Optimize – Continuously refine BI strategies based on real-time analytics.
Conclusion: The Future of Business Intelligence
Business Intelligence is not just a tool; it is a necessity for modern enterprises looking to leverage data for strategic growth. Organizations that embrace BI gain superior decision-making capabilities, operational efficiency, and a competitive advantage. As technology advances, AI-powered BI tools will further revolutionize how businesses analyze and utilize data.
#data analytics consulting company#data analytics#data analytics consulting#data analytics consulting services#analytics consulting
0 notes
Text
The life cycle of a product starts when the raw materials are taken from the earth, then followed by manufacturing, transport and use, and ends with waste management including recycling and final disposal. To analyze the environmental impacts from the entire cycle of products, life cycle thinking is required. The key elements of life cycle assessment are as follows: Identifies and quantifies the environmental loads involved; e.g. the energy and raw materials consumed, the emissions and wastes generated; evaluates the potential environmental impacts of these loads; assesses the options available for reducing these environmental impacts. (UNEP 2001-2003). Life Cycle Assessment (LCA) is a tool for the systematic evaluation of the environmental aspects of a product or service system through all stages of its life cycle. The assessment provides an adequate instrument for environmental decision support. In this paper we will use the life cycle of a kettle as our reference. The study of a kettle has used a flexible life cycle assessment (LCA) and cost model. The model has been used to assess and compare the environmental impacts and associated economic costs. Based on the standards made by the International Standards Organization, the LCA consists of four phases: The goal and scope definition, inventory analysis, impact assessment and interpretation. The phases of LCA is an interactive process, in which subsequent interactions can achieve increasing levels of detail or lead to changes in the first phase prompted by the results of the last phase. The life cycle assessment has proven to be a valuable tool to document and analyze environmental considerations of product and service systems that need to be part of decision making toward sustainability. Phases of the Life Cycle Assessment Goal and Scope definition: the product or services to be assessed are defined a functional basis for comparison is chosen and the required level of detail is defined. The steps in identifying the goal and scope includes the defining of the purpose of the LCA study, ending with the definition of the functional unit, which is the quantitative reference for the study. Defining the scope of the study includes the drawing up of a flowchart of the unit processes that constitute the product system under study, taking into account a first estimation of their inputs from and outputs to the environment ( the elementary flows or burdens to the environment). Defining the data required, which includes a specification of the data required both for the inventory analysis and for the subsequent impact assessment phase. The Inventory analysis - the energy carriers and raw materials used, the emissions to atmosphere, water and soil, and different types of land use are quantified for each process, then combined in the process flow chart and related to the functional basis. In this phase the following steps must be taken: Data collection which includes the specification of all input and output flows of the processes of the product system, both product flows (i.e flows to other unit processes) and elementary flows (from and to the environment). Normalization to the functional unit, which means that all data collected are quantitatively related to one quantitative output of the product system under study, most typically 1 kg of the material is chosen, but often other units like car or 1 km of mobility are preferred. Allocation which means the distribution of the emissions and resource extractions of a given process over the different functions such a process. Data evaluation, which involves a quality assessment of the data by performing sensitivity analyses. The result of the Inventory Analysis, consisting of the elementary flows related to the functional unit, is called the Life Cycle Inventory Table. Impact assessment, in this phase the effects of the resource use and emissions generated are group and quantified into a limited number of impact categories which there maybe weighted for importance. This aim to make results from the Inventory Analysis more understandable and more manageable in relation to human health, the availability of resources, and the natural environment. Steps should be taken in order to accomplish this: Selection an definition of impact categories, which classes of a selected number of environmental such as global warming or acidification Read the full article
0 notes
Text
Why Patent Drawings Are Essential for Stronger IP Protection
Introduction
In the world of intellectual property, patent drawings play a crucial role in securing and protecting innovations. These visual representations provide detailed insights into an invention, making it easier for patent examiners to understand complex concepts. While written descriptions are necessary, patent drawings enhance the clarity and comprehensibility of an application.
In this article, we will explore the importance of patent drawings, their legal significance, best practices for creating them, and how they can impact the success of a patent application.
What are Patent Drawings?
Patent drawings are illustrations included in a patent application to visually describe an invention. These drawings serve as a supplement to the written description, ensuring that the invention is clearly depicted and leaving no room for ambiguity.
According to patent laws, patent drawings are required when a written description alone cannot fully explain the invention. They must be precise, detailed, and compliant with the official guidelines set by patent offices such as the United States Patent and Trademark Office (USPTO) or the European Patent Office (EPO).
Why are Patent Drawings Important?
The importance of patent drawings cannot be overstated. Here’s why they are crucial in a patent application:
Enhanced Clarity – Many inventions involve intricate mechanisms, and patent drawings provide a clear and visual representation, making it easier for examiners and stakeholders to understand the invention.
Legal Requirement – In many cases, patent drawings are mandatory for filing a patent. If an invention has a mechanical, technical, or structural component, omitting patent drawings can lead to rejection.
Stronger Patent Protection – Well-crafted patent drawings can help prevent competitors from copying or slightly modifying an invention to bypass patent claims. Detailed illustrations leave less room for interpretation or loopholes.
Improved Communication – Investors, manufacturers, and legal professionals rely on patent drawings to assess the feasibility and market potential of an invention.
Increased Patent Approval Chances – Clear and detailed patent drawings reduce the likelihood of objections or rejections from the patent office. They demonstrate professionalism and thoroughness in the application process.
Types of Patent Drawings
There are different types of patent drawings, each serving a specific purpose in an application:
Utility Patent Drawings – These illustrate the functional aspects of an invention, including mechanical parts, processes, or interactions.
Design Patent Drawings – Used for design patents, these emphasize the aesthetic or ornamental features of a product rather than its function.
Flowcharts and Diagrams – Essential for software patents, these represent data flow, algorithms, and processes.
Exploded Views and Sectional Drawings – Used to showcase the internal structure of an invention and how its components interact.
Best Practices for Creating Patent Drawings
To ensure that patent drawings meet legal requirements and improve the chances of patent approval, consider these best practices:
Follow Official Guidelines – Each patent office has specific rules for patent drawings, including size, format, labeling, and numbering. Ensure compliance to avoid rejection.
Use Clear and Precise Lines – Drawings should be clean, sharp, and free from unnecessary artistic details. Shading and color are generally not allowed in patent drawings unless specifically required.
Label Every Component – Every part of the invention should be clearly labeled and referenced in the description to maintain consistency.
Maintain Scale and Proportion – Drawings should accurately represent the dimensions and proportions of the invention without distortion.
Hire a Professional Illustrator – While inventors can create their own patent drawings, working with a professional patent illustrator ensures accuracy, compliance, and a higher-quality submission.
How Patent Drawings Affect the Patent Application Process
Poorly executed patent drawings can lead to delays or outright rejection of a patent application. Here’s how patent drawings impact the process:
Faster Examination – Clear patent drawings help examiners quickly grasp the invention, reducing back-and-forth queries.
Stronger Patent Claims – A well-illustrated invention leaves little room for competitors to work around claims.
Reduced Legal Disputes – High-quality patent drawings act as concrete evidence in case of infringement disputes, providing a solid foundation for legal action.
Common Mistakes to Avoid in Patent Drawings
Even minor mistakes in patent drawings can cause problems. Here are common errors to watch out for:
Insufficient Detail – Drawings that lack depth or necessary components can lead to misunderstandings.
Failure to Meet Format Requirements – Not adhering to official guidelines can result in rejection.
Inconsistent Labeling – Mismatched labels between drawings and written descriptions create confusion.
Unclear Views and Angles – Failing to show the invention from multiple perspectives can weaken the application.
The Future of Patent Drawings
With advancements in technology, patent drawings are evolving. Digital tools, 3D modeling, and AI-powered patent illustration software are making patent drawings more accurate and efficient. As the patent landscape becomes more competitive, high-quality patent drawings will remain a critical factor in securing intellectual property rights.
Conclusion
Patent drawings are an essential component of a successful patent application. They enhance clarity, meet legal requirements, strengthen patent claims, and improve communication with stakeholders. By following best practices and avoiding common mistakes, inventors can ensure their patent drawings contribute to a stronger and more enforceable patent.
Whether you choose to create patent drawings yourself or hire a professional illustrator, investing in high-quality illustrations is a crucial step toward securing your invention’s intellectual property rights.
0 notes
Text
Visily Brainstorming – AI-Powered Ideation & Collaboration Tool

Brainstorming is a crucial step in problem-solving, innovation, and project planning. However, traditional brainstorming methods often lead to scattered ideas, lack of structure, and difficulty in capturing valuable insights. With the advancement of AI, tools like Visily Brainstorming are revolutionizing the way teams generate, organize, and refine their ideas.
What is Visily Brainstorming?
Visily Brainstorming is an AI-powered platform designed to enhance creativity, improve collaboration, and streamline the brainstorming process. It helps individuals and teams organize thoughts, visualize ideas, and create structured mind maps effortlessly. Whether you're working on a product concept, marketing strategy, or business plan, Visily provides the perfect environment for structured ideation.
Key Features of Visily Brainstorming
AI-Powered Idea Generation Struggling to come up with new ideas? Visily’s AI assists by suggesting relevant concepts, expanding on existing ideas, and organizing them into a structured format.
Real-Time Collaboration Work seamlessly with your team, whether in the same room or across the globe. Visily allows multiple users to contribute ideas, comment, and refine concepts in real time.
Intelligent Mind Mapping Convert complex ideas into visually appealing mind maps. This helps in better organization, clear understanding, and efficient decision-making.
Customizable Templates Choose from various brainstorming templates to kickstart your sessions. Whether it’s a SWOT analysis, flowchart, or customer journey mapping, Visily has a template for every need.
Drag-and-Drop Simplicity No need for technical expertise—Visily’s intuitive interface allows users to create, move, and link ideas effortlessly.
AI-Powered Note-Taking Capture important discussions and let AI summarize key takeaways, ensuring that no valuable insight is lost.
Seamless Integration Visily integrates with popular tools like Slack, Notion, and Google Drive, making it easy to incorporate brainstorming results into existing workflows.
Why Use Visily for Brainstorming?
Boosts Creativity: AI-generated suggestions help overcome creative blocks.
Saves Time: Automated idea structuring and note-taking reduce manual effort.
Enhances Teamwork: Real-time collaboration ensures everyone’s input is captured.
Improves Decision-Making: Well-organized mind maps make it easier to evaluate ideas.
User-Friendly: Even non-designers can effortlessly create structured brainstorming sessions.
Who Can Benefit from Visily Brainstorming?
Businesses & Startups: Generate innovative ideas, strategize projects, and improve team alignment.
Marketing Teams: Plan campaigns, develop content strategies, and analyze customer insights.
Product Managers & UX Designers: Organize product roadmaps and create user journey maps.
Students & Educators: Structure study materials, research projects, and group discussions.
Conclusion
Visily Brainstorming is a game-changer for individuals and teams looking to enhance creativity and streamline collaboration. With AI-powered insights, real-time teamwork, and intelligent mind mapping, Visily makes brainstorming more effective and engaging. Ready to transform your ideation process? Try Visily Brainstorming today!
0 notes
Text

Choosing the right coaching institute is crucial for those aspiring to enter the National Defence Academy (NDA). Manasa Defence Academy stands out as a leading provider of NDA coaching.With experienced instructors and a comprehensive curriculum, this academy lays a solid foundation for success. Understanding NDA: What You Need to Know Before diving into strategies for success, it's essential to understand what the NDA entails.The NDA is a prestigious institute that trains cadets for the Indian Armed Forces.Admission is not just about academic excellence; it requires mental toughness, physical fitness, and exceptional skills. Key Components of the NDA Exam Written Examination: This includes Mathematics and General Ability Test (GAT).SSB Interview: A multi-day process that assesses candidates' psychology, group dynamics, and personal interview skills.Medical Examination: Ensures candidates meet the medical requirements of the armed forces.Understanding these components helps to tailor your preparation strategies effectively. Effective Study Strategies Preparation for the NDA requires more than just hard work; it needs smart strategies.Here are some that may not be as commonly known. Create a Study Schedule Structure and consistency are essential. A dedicated study timetable will help you allocate time for each subject efficiently.Daily Goals: Set small, achievable daily goals to keep you motivated. Weekly Reviews: Reserve weekends for revision. This solidifies what you’ve learned throughout the week. Focus on Conceptual Understanding Many students tend to memorize answers rather than understanding concepts, especially in subjects like Mathematics.Use Visual Aids: Diagrams and flowcharts can simplify complex topics, making them easier to grasp.Practical Applications: Try to relate theoretical knowledge to real-world scenarios. This approach will enhance retention. Practice Mock Tests Simulating the exam environment is crucial. Identify Weaknesses: Use the results to focus on areas needing improvement.Time Management: Practice completing sections within the allocated time to build speed. Mental and Physical Preparation Equal importance should be given to mental and physical conditioning. Develop Resilience Mindset plays a vital role in your examination journey.Mindfulness Techniques: Practices like meditation can reduce stress and enhance concentration.Positive Affirmations: Replacing negative thoughts with positive ones fosters a supportive inner dialogue. Stay Physically Fit Physical fitness is not just a requirement; it enhances your mental agility.Incorporate cardiovascular activities, strength training, and flexibility exercises into your regular fitness regimen.Healthy Diet: A balanced diet fuels your brain, helps focus, and maintains energy levels. Utilise Support Systems Don’t go through this journey alone. Engaging with Peers Form study groups with fellow aspirants. Sharing insights and studying together can make learning more enjoyable.
0 notes
Text
My Ideal Role as an Environmental Interpreter
Both nature and environmental interpreters play a significant role in connecting people with the natural environment, fostering environmental awareness, and inspiring environmental conservation. Thus my ideal role as an environmental interpreter involves authentic passion for both science and environmental conservation, education and integrative knowledge, keen observation skills, and the ability to connect such observations to broader ecological concepts or life lessons.
My ideal location as an environmental interpreter would be along the west coast, in Washington or Oregon, but preferably in British Columbia. The (north) Pacific Ocean provides these locations with rich marine habitats home to many fascinating aquatic species, and various ecosystem types such as estuaries, rocky shores, sandy beaches, and temperate, coastal rainforests. The diverse ecosystems within these locations in the Cascadia bioregion allows unlimited opportunity for various styles of both teaching and learning. In this role, I would aim to create a variety of engaging experiences suited for a variety of audiences, including (foreign) tourists, elders, elementary and high school classes, university students, youth groups, and (young) adults. This role would involve leading walks or hikes along the shoreline of British Columbia and through the various temperate rainforests located along the province’s west coast. Throughout these leaded scientific excursions, I would demonstrate my comprehensive understanding of the local ecosystems by sharing information about the surrounding flora and fauna species, in addition to the environmental concerns in which are relevant to the area, in aim to evoke my audiences’ interest and attention.
I am both a visual and sensing learner, I find that I retain concrete facts very easily due to genuine interest and the practical application of such. I also tend to remember what I see much better than what I hear, and often need to review (i.e., re-read) material more than once to fully understand the information presented. Thus, my guided walks and hikes would be as interactive, demonstrative, and hand-on as possible, ensuring the audience is learning both visually and verbally while actively participating. I would welcome any questions and offer to repeat information as many times as needed, while also allowing moments for both active discussion and quiet reflection. I would also provide a general information sheet for those in the audience who prefer to read (and re-read) material, in which would contain quick facts, information about environmental conservation and relevant local issues, and graphics (such as diagrams, flowcharts, etc.) for those that benefit from visual aids. As stated in the textbook, good nature interpretation goes far beyond stating facts as it involves fostering personal, emotional connections between people and the environment. Thus, my primary goal would be to lead compelling conversations that resonate with each audience member, and evoke unique, personal interest in which is further explored.
Several skills are required to excel in this role, such as strong communication skills, allowing for the ability to convey complex ecological and environmental concepts in a lucid, engaging and relatable way. In addition, genuine passion and enthusiasm for nature and environmental conservation will likely further inspire and engage audiences. Adaptability, or the ability to adjust presentations, discussions, and activities, based on the specific needs of the audience is required to ensure that a variety of learners are kept engaged. Creativity in developing engaging programs, games, and teaching methods that cater to every learner and captivate the entire audience is also crucial, as people learn or take in and process information in different ways.
0 notes
Text
Patent Drawings for Beginners: A Comprehensive Step-by-Step Guide
If you're preparing to file a patent for the first time, you're probably focused on the invention itself: the functionality, the uniqueness, the market opportunity. But there’s one critical component that can make or break your application — patent drawings.
Many beginners underestimate the importance of clear, accurate, and professionally prepared patent drawings. Yet, drawings are often required by patent offices (like the USPTO), and even when optional, they significantly strengthen your filing.
In this guide, we’ll walk you through everything you need to know about patent drawings, step-by-step — from what they are, to how to create them, to common mistakes to avoid.
What Are Patent Drawings?
Patent drawings are illustrations included in a patent application to help describe and explain the invention.
They can show:
How the invention looks (in design patents)
How it works or how it’s structured (in utility patents)
How components interact
How a process or method flows
Good patent drawings make it easier for a patent examiner to understand the invention quickly, helping your chances of getting your patent approved.
Types of Patents That Need Drawings
You’ll generally need drawings for two main types of patents:
Utility Patents (protect functionality and structure)
Mechanical devices
Electronic circuits
Chemical compositions
Software process flowcharts
Design Patents (protect appearance and ornamentation)
Consumer products
Furniture
Packaging
Apparel designs
In a utility patent, drawings support the technical description. In a design patent, drawings are the primary claim — they define exactly what the design looks like.
Why Patent Drawings Are Important
Patent drawings are more than just pretty pictures. They serve crucial purposes:
Clarify complex inventions: Visuals can explain better than text.
Strengthen your claims: Proper drawings show you’ve fully "possessed" the invention.
Speed up approval: Examiners spend less time guessing what you mean.
Avoid rejections: Missing drawings can lead to objections or extra costs later.
Defend your patent rights: Good drawings support enforcement if your patent is challenged.
Step-by-Step Guide to Creating Patent Drawings
Let’s dive into the process for beginners:
Step 1: Understand Drawing Requirements
Before you begin creating patent drawings, it’s important to know what the patent office expects. For the USPTO, the basic requirements include:
Black-and-white line drawings — Color is not allowed unless specifically authorized
Clear, dark, uniform lines — No smudging, shading (unless to show contours), or irregularities
Proper margins — Typically 1 inch on the top and left, 3/8 inch on the right and bottom.
Consistent labeling — Use reference numbers clearly and match them with the written description.
Multiple views — Include front, side, top, and perspective views to fully depict the invention.
No unnecessary shading — Only include shading to indicate surface contours or shape.
Pro Tip: Every element mentioned in the description must appear in the drawings—and every drawing feature should be covered in the description. Consistency prevents costly rejections.
Step 2: Gather Your Tools
For beginners, you have two basic options:
Hand drawings: Fine for concept sketches, but must be extremely clean and professional if submitted.
Computer-aided design (CAD): Software like AutoCAD, SolidWorks, or even Adobe Illustrator can create precise drawings.
Most professionals use CAD software because it ensures precision and easy edits.
Step 3: Choose the Right Views
To fully disclose your invention, you must include enough views to show every aspect. The required views differ between Utility Patents and Design Patents:
For Utility Patents, you should include:
Perspective view (optional but helpful to show 3D aspects)
Front view
Rear view
Right side view
Left side view
Top view
Bottom view
Sectional views (cutaways to show internal details)
Flowcharts (for process-related inventions)
For Design Patents, multiple views are mandatory to fully capture every visible part of the design:
Front, Rear, Left, Right, Top, and Bottom views
Perspective view (highly recommended for clarity)
Remember: If two sides (e.g., left and right) are identical, you can state this in the specification instead of including a separate drawing for each side.
Proper labeling is crucial for ensuring clarity and consistency between the drawings and the written specification. Here’s how to do it effectively:
Use reference numbers to label each part of the invention clearly.
Example:
101 = Handle
102 = Body
103 = Switch
Consistency is key. Ensure that the reference numbers are used consistently across all views and in the written description.
Label all important elements of the invention, including those that are essential for understanding the functionality and structure.
Why it’s important:
Reference numbers connect specific parts of the drawing to corresponding descriptions in the patent application, making it easier for examiners and others to understand your invention.
Step 5: Use Solid and Broken Lines Properly
Solid lines show what you’re claiming as part of the invention
Broken (dashed) lines show unclaimed parts or environment
This distinction is especially important in design patents to limit your claim to specific parts.
Step 6: Add Necessary Shading
Shading shows surface contours like curves or indentations. Without shading, your invention could appear flat and two-dimensional — which might weaken your claims.
Use shading:
To illustrate 3D aspects (e.g., domed vs flat surfaces)
To differentiate materials if necessary
But avoid overdoing it; too much shading can clutter the drawing.
Step 7: Format Properly
After drawing, make sure your figures are properly organized:
Each figure (view) should be numbered (e.g., FIG. 1, FIG. 2)
Consistent font size (usually simple block letters)
Match margins, line weights, and numbering standards
Each page should be neat, professional, and easy to read.
Step 8: Review and Correct
Before you submit, triple-check:
Are all views complete?
Are reference numbers consistent?
Is everything necessary included?
Is there anything that could confuse the examiner?
Do drawings comply with USPTO or PCT standards?
Mistakes cause delays, extra costs, and even possible rejection.
Consider having a patent professional or patent drawing expert review your work.
Common Beginner Mistakes to Avoid
When creating patent drawings, even small errors can lead to rejections or delays. Avoid these common mistakes:
Inconsistent views: Ensure all views (e.g., front, side, top) show consistent shapes and proportions.
Sloppy line work: Use clean, smooth lines. Avoid wavy, smudged, or pixelated lines that can hinder clarity.
Omitting critical parts: Double-check that every element described in the specification is included in the drawings.
Poor labeling or missing reference numbers: Label parts clearly and consistently, and ensure reference numbers are used throughout.
Improper scaling: Ensure the proportions are correct and consistent across all views. Elements should be in proper relation to each other.
Submitting low-resolution scans: Always submit high-quality, clear drawings. Low-resolution images can blur important details.
Forgetting shading for 3D features: Use appropriate shading to indicate the depth and surface contours of 3D elements.
Wrong file formats: Ensure you're submitting the correct file format (usually PDFs) as per USPTO requirements. Avoid using JPEGs.
When to Hire a Professional Patent Drawing Service
For simple inventions, you might create drawings yourself if you have the skills. However, for complex mechanical, electrical, biotech, or detailed designs, it’s highly recommended to use a professional patent drawing service.
Benefits of hiring professionals:
Full compliance with patent office standards
Faster production and revisions
Higher chance of first-round approval
Better presentation if you ever need to enforce your patent in court
The cost is minor compared to the potential losses from a rejected or unenforceable patent.
Conclusion
Patent drawings aren’t just an afterthought — they are a core part of a successful patent application. Done correctly, they can make the difference between a smooth approval and a frustrating, costly rejection.
By following this step-by-step guide, beginners can confidently approach the patent drawing process — and ensure that their invention is presented clearly, accurately, and professionally.
Remember: in patents, details matter — and your drawings are the language that brings your invention to life.
If you need help, don’t hesitate to consult with a professional patent drawing service to perfect your submission and boost your chances of success!
0 notes
Text
https://growmyfirmonline.com/social-security-disability-leads-for-lawyers/attorney-legal-lead-generation
Legal topics are often complex and filled with jargon that can overwhelm your audience. To capture their attention, infographics must be both informative and visually appealing. Start by breaking down complicated legal processes into easy-to-understand steps. Use clean lines, bold colors, and icons that align with your brand’s image. This approach not only simplifies the information but also makes it more digestible for those unfamiliar with legal terms. Moreover, consider the layout carefully. A well-structured infographic guides the viewer’s eye naturally from one section to another, ensuring that your message is clear. For instance, you might use a timeline to explain a legal process or a flowchart to illustrate the steps involved in filing a claim. These design choices help demystify the law, making it more approachable and engaging for your audience.
0 notes
Text
The IAS Journey Simplified: A Step-by-Step Guide with Insights from Coimbatore’s Premier Academy

Embarking on the journey to becoming an IAS officer can seem daunting. With countless topics to cover, intense competition, and multiple stages in the selection process, success requires a clear roadmap and the right guidance. At Coimbatore’s premier IAS academy, we specialize in simplifying this journey and providing aspirants with the tools they need to excel. Whether you are just starting or looking to refine your approach, this guide will walk you through the IAS preparation process step by step.
Step 1: Understand the UPSC Examination Structure
The first step in your IAS journey is to familiarize yourself with the UPSC exam’s structure. The exam is conducted in three stages:
Preliminary Exam (Prelims):
Objective-type questions.
Two papers: General Studies (GS) and Civil Services Aptitude Test (CSAT).
Focuses on basic knowledge and aptitude.
Main Examination (Mains):
Descriptive in nature.
Nine papers, including four GS papers, two optional subject papers, one essay, and two qualifying language papers.
Personality Test (Interview):
Conducted by a board to assess your personality, communication skills, and decision-making abilities.
Coimbatore’s best IAS academy ensures you grasp the nuances of each stage and prepare accordingly.
Step 2: Build a Solid Foundation
Success in the IAS exam starts with a strong foundation. Here’s how to get started:
Read NCERT Books: Cover subjects like history, geography, polity, and economics from NCERT textbooks to develop conceptual clarity.
Follow Current Affairs: Stay updated with national and international news by reading newspapers such as The Hindu or Indian Express and following reliable online sources.
Choose the Right Optional Subject: Opt for a subject that aligns with your interests and educational background. Our experienced faculty in Coimbatore can guide you in making this critical decision TNPSC coaching center in Coimbatore.
Expert Insight: “Aspirants must balance core knowledge with current events. The right mentorship ensures this balance,” says a senior faculty member from our academy, also recognized as a leading TNPSC coaching center in Coimbatore.
Step 3: Adopt a Smart Study Strategy
Efficient preparation requires not just hard work but also smart strategies. Here’s what we recommend:
Create a Study Plan: Divide your preparation into manageable chunks, focusing on one subject at a time. Allocate daily slots for revision and mock tests.
Practice Answer Writing: For the Mains, practice structuring your answers within the word limit. Include diagrams, flowcharts, and examples where relevant.
Take Regular Mock Tests: Mock tests help identify weaknesses and improve time management. Our academy’s test series, renowned across Coimbatore, simulates the real exam environment.
Step 4: Master the Interview Stage
The Personality Test can be a game-changer in your IAS journey. To ace this stage:
Enhance Communication Skills: Practice articulating your thoughts clearly and confidently.
Prepare for Common Questions: Focus on topics related to your background, hobbies, and current affairs.
Simulate the Interview: Participate in mock interviews conducted by seasoned mentors at Coimbatore’s premier IAS academy.
Our tailored interview training sessions provide personalized feedback, helping aspirants approach the board with confidence.
Step 5: Leverage the Expertise of a Leading Academy
Guidance from experienced faculty can make all the difference in your preparation. Our academy, also a trusted TNPSC coaching center in Coimbatore, offers:
Comprehensive study material.
Regular mock tests with detailed feedback.
One-on-one mentoring to address individual challenges.
By choosing a well-established coaching center, you ensure access to resources and insights that streamline your IAS journey TNPSC coaching center in Coimbatore.
Real-World Example: The Success Story of Priya S.
Priya S., a recent IAS topper from Coimbatore, attributes her success to disciplined preparation and the support she received at our academy. “The structured approach and consistent feedback helped me stay on track,” she says. Her journey exemplifies how personalized guidance can transform dreams into reality.
Conclusion: Take the First Step Today
Becoming an IAS officer is a challenging but rewarding journey. With a clear strategy, disciplined effort, and expert guidance, you can achieve your goal. At Coimbatore’s premier IAS academy, also recognized as a leading TNPSC coaching center in Coimbatore, we are committed to helping aspirants succeed.
Call to Action: Ready to start your IAS journey? Contact us today to learn more about our programs and take the first step toward your dream career!
0 notes
Text
Legal topics are often complex and filled with jargon that can overwhelm your audience. To capture their attention, infographics must be both informative and visually appealing. Start by breaking down complicated legal processes into easy-to-understand steps. Use clean lines, bold colors, and icons that align with your brand’s image. This approach not only simplifies the information but also makes it more digestible for those unfamiliar with legal terms. Moreover, consider the layout carefully. A well-structured infographic guides the viewer’s eye naturally from one section to another, ensuring that your message is clear. For instance, you might use a timeline to explain a legal process or a flowchart to illustrate the steps involved in filing a claim. These design choices help demystify the law, making it more approachable and engaging for your audience.
#social security disability leads for lawyers#best legal leads for attorneys#best legal leads for lawyers#motor vehicle accident leads for lawyers#law firm marketing strategies#mass action leads#best mass tort leads for law firms#motor vehicle accident leads for attorneys#legal leads for attorneys
0 notes