#let's not put any standard usb ports on these macbooks
Text
Me: Quick! I need an image to upload to Tumblr or Discord or to use in some Photoshop thing! Internet, help me!
Internet:

Also Internet:

#avif#webp#newfangled fuckery#from the makers of#let's not put any standard usb ports on these macbooks#because usb-c is the future#and no one has any use for all this pre-existing hardware that uses standard usb#comes:#loads of unsupported file types!#they're better except for all the times you can't even use them!
1 note
·
View note
Text
2010 macbook pro 13 ram

#2010 macbook pro 13 ram mac os x#
#2010 macbook pro 13 ram install#
#2010 macbook pro 13 ram upgrade#
#2010 macbook pro 13 ram portable#
#2010 macbook pro 13 ram pro#
Video out: Mini DisplayPort (VGA and DVI video supported with optional adapters).
VRAM, Intel HD: used 256 MB of system memory.
Graphics: Intel HD Graphics and Nvidia GeForce GT 330M with automatic graphics switching.
RAM: 4 GB, expandable to 8 GB using DDR3 SO-DIMMs.
Level 2 cache: 3 MB shared cache on i5 4 MB on i7.
#2010 macbook pro 13 ram upgrade#
CPU: 2.53 GHz i5 or 2.66 GHz i7, soldered in place, no upgrade options.
#2010 macbook pro 13 ram mac os x#
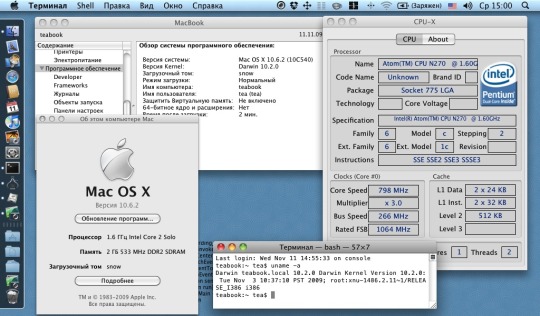
Mac OS X 10.6 Snow Leopard compatibility.
macOS 10.14 Mojave and later are not supported.
requires Mac OS X 10.6.3 Snow Leopard or later.
introduced 2010.04.13 at US$2,299 add $200 for 2.66 GHz i7 build-to-order option add $50 for anti-glare option replaced by Thunderbolt model 2011.02.24.
#2010 macbook pro 13 ram install#
PowerPC Macs won’t let you install OS X to a USB drive or choose it as your startup volume, although there is a work around for that. Power PC Macs running any version of the Mac OS prior to 10.4.2 cannot mount GPT volumes. Both PowerPC and Intel Macs can boot from APM (Apple’s old partitioning scheme) hard drives, which is the format you must use to create a universal boot drive in Leopard. Only Macintel models can boot from GPT hard drives. Intel-based Macs use a partitioning scheme known as GPT. This will wake up your ‘Book and restore use of the built-in display. To resume use of the internal display, you need to disconnect the external display, put the computer to sleep, and then open the lid. Since all video RAM is now dedicated to the external monitor, you may have more colors available at higher resolutions. The built-in display will remain off, and the external monitor will become your only display. Your ‘Book will go to sleep, but you can wake it by moving the mouse or using the keyboard. Power up your ‘Book until the desktop appears on the external display and then close the lid. To used closed lid mode, your ‘Book must be plugged into the AC adapter and connected to an external display and a USB or Bluetooth mouse and keyboard (you might also want to consider external speakers). If a second high-powered device is attached, it will behave like a normal bus-powered hub and only provide 100 mA per downstream port.Ĭlosed Lid Mode: All Intel ‘Books support “lid closed” (or clamshell) mode, which leaves the built-in display off and dedicates all video RAM to an external display. Unlike pre-2007 models, where every USB port could provide 500 mA of power, only a single high-powered device can be attached to the USB ports, and software will enable one of its downstream ports to supply 500 mA of power. At this time we do not know if it applies to the new model.
#2010 macbook pro 13 ram pro#
This is the oldest MacBook Pro to officially support macOS Sierra.Įditor’s note: The next paragraph is from the profile of the previous version of the MacBook Pro. This is the only current Mac notebook with ExpressCard/34.Īpple uses a true 24-bit display on all 17″ Unibody MBP models. Only the new 13″ MacBook Pro beats it.Īs before, 4 GB of RAM is standard, and it officially supports up to 8 GB of RAM. The new 17″ MacBook Pro retails at $200 less than the previous model, and you can get an antiglare display for an additional $50.Īpple has also improved overall field time – the 95 Watt-hour battery is rated at 8-9 hours of wireless productivity, a big improvement from 8 hours in the 2009 model. The Intel GPU uses 256 MB of system memory, while the Nvidia GPU has 512 MB of dedicated video memory. The other big change comes in the graphics department: These are the first Macs to use Intel HD Graphics – and the first to use Nvidia’s automatic switching GeForce GT 330M GPU. You can’t compare the new i5 and i7 models with previous ones by looking at clock speed, as they are not single clock speed chips. For instance, a 2.53 GHz i5 may outperform a 3.06 GHz Core 2 Duo.
#2010 macbook pro 13 ram portable#
These CPUs brings something new to Apple’s portable line, hyperthreading, which lets the dual-core CPU appear to the operating system as four cores.Ī further advantage of Intel’s “i” family of CPUs is that they can overclock themselves by 25% or more depending on the number of cores and processes in use. However, because they use the mobile Intel i5 and i7 CPUs instead of the older, less efficient Core 2 Duo chips, they are more powerful despite lower clock speeds. The 15″ and 17″ Mid 2010 MacBook Pro models have lower clock speeds than the models they replace.
0 notes
Text
You know what’s funny is whenever I make a tech post I get people going “this is blatantly untrue” and I get people going “this is really good information and everyone needs to know it” and the dividing line is how much time you spend with people who are tech literate.
Yep, I would tell my computer savvy friends where they could get keycaps and fix their keyboards; I don’t even have to bother telling my computer savvy friends how to run a fifteen year old laptop because we’re all pretty good at it.
But GODDAMN I just read a response to my “cheap computer season” post that claimed that it was totally reasonable to run a macbook from 2010 and
Look.
That’s not a reasonable thing to tell a student who needs a functional computer to do research and write papers. (have fun trying to find installation discs from when the OS was still named after cats and have fun trying to get a browser to get along with that OS)
You know why most people bring me laptops with missing keys? Because the key got ripped off by their two-year-old and damaged the soldering in the keyboard and I have no idea it’s going to be “oh, yeah, that’s a ten dollar fix” or “sorry, that’s going to be an hour and a half to disassemble and reassemble and we’ll have to order you a new keyboard specific to that model out of new old stock” and the thing is the second one is much, much, much more common in my experience than the first.
Do I think you need to replace a laptop when the bezel is cracked? No. I also don’t carry my laptop powered on in the bag with a flashdrive sticking out of the USB port. Customers do weird things that I don’t understand and when a customer tells me they want me to fix the bezel they think it’s a twenty-dollar snap-on repair because they have no idea how this works and then they get mad at me when I explain “no, you’ve gotta have this specific piece of plastic, these haven’t been made in five years, and you might be better off buying a used model online than trying to track down a new bezel.”
So here’s the thing: Can Macs get viruses?
There are three answers here.
“No, of course not, Macs are made to be virus-proof”
“Macs need antivirus protection because, while it is less common than infections for PCs, there are types of malware that can infect macs and it’s worthwhile to guard against that”
“tEcHnIcAlLy a virus has to be self-replicating and IOS’s file management system [or some other bullshit] prevents that so TECHNICALLY Macs can’t get viruses and what you need is anti-malware software if you need anything because you’re fairly likely to have security through obscurity”
I’m aware of the third position and voicing the second position to people who believe the first position.
YES TECHNICALLY YOU CAN KEEP A COMPUTER RUNNING INDEFINITELY AND YES IT’S TOTALLY POSSIBLE YOUR LAPTOP WILL LAST TEN YEARS.
“Well if you treat it right and run it well it’ll be in great shape for a long time”
YES THAT IS CORRECT DO YOU HAVE ANY IDEA HOW MANY PEOPLE WHO DON’T WORK ON THEIR OWN CARS DRIVE AROUND WITH THE OIL CHANGE LIGHT ON FOR MONTHS?!?
Tons of people in the world today use computers. They use computers every day, they use computers at home and at school and at work.
Tons of people drive every day. They use cars for fun and for commuting and for their jobs.
That doesn’t mean that all (or even most, or even half) of the people using these things is any good at keeping them running, or even has the barest idea of how to start tracking down a problem.
Someone in the notes of that post described a green line on their screen and thought that was a symptom of hard drive problems. I don’t have the hours in the day to catch this person up to speed on why a display issue on a laptop isn’t indicative of hard drive issues.
Do you know how much people think it’s going to cost to get data off of a broken drive? Not “won’t power up” not “won’t spin” but “I dropped this and part fell off and now it won’t power up or spin and also the platter is chipped”? I’m going to have to send that shit to a clean room and the customer is *staggered* that it might cost more than a hundred dollars to get their data. “Outrageous, what kind of blackmail operation are you trying to run here, just plug it in and get my pictures.”
A year or so ago I was at Jiffy Lube (ew). I’d been shooting the shit with the mechanic when a parent and child rolled in in a panic. And they should have been panicking! They’d thrown a fucking rod because they’d been driving with no oil in the car for god knows how long because neither of them had had the oil changed in the two years they’d owned the vehicle.
*I* can keep a 30-year-old car running. I can put a belt back on an engine in a dark parking lot with a wrench and a headlamp. I can drop a gas tank and replace my fuel filter and thumb my nose at the mechanics who tried to upsell me on “replacing your old, worn-out air filter” the day after I’d popped a new one into my truck.
These folks couldn’t keep a new car running with three alarms telling them what was wrong.
*I* can power up my 2005 macbook running Leopard and use garage band to record a song or do some design work on my copy of Adobe CS3; I can kludge its FF3.5 browser into playing nice with the internet and accept that it’s going to be a slow piece of shit.
The lady who called me confused by the fact that the password to her email was different than the login information for her grocery store rewards account will not be able to function if she gets a pop-up that says she’s using an outdated browser and will think it’s a virus if her bank won’t let her log in on that browser.
And you know what, I’m kind of sick of this attitude.
I would *fucking adore it* if computers were actually easy to repair; I’d love it if you could run new OSs on old hardware (especially on macs because I think apple are kind of shitheads about planned obsolescence).
But you know what, no, most people *CAN’T* reasonably expect to use a ten-year-old computer and have pleasant experience of it. It’s going to run slow. It’s going to shut down when they don’t want it to. The battery is going to swell slightly with the heat and your touchpad is going to go nuts. Your USB ports will stop working. Standard wear and tear that most people don’t know how to protect against and don’t know how to repair is going to make it harder to use AND software requirements will outstrip the hardware capabilities of the computer.
If your old computer sucks it’s not your fault. If you can’t happily use a 10-year-old laptop to do your homework that’s okay, it wasn’t designed for you to use it that way and YOU SHOULDN’T FEEL GUILTY ABOUT IT.
Because that’s kind of what a lot of these “well anybody should realistically be able to run a laptop from 2010″ responses comes down to: if you need new hardware you’re just not doing it right. If you have to replace your computer you didn’t make good choices when you bought it. If your battery dies it’s because you didn’t take care of it.
No. No. No. No.
This shit is A) designed to fail and B) actually really hard to keep running (hey how many blown capacitors do you think someone has to have on their motherboard before you say it’s not their fault for wanting to replace the laptop)
ALSO SOMEONE IN THE RESPONSES OF THAT POST LITERALLY SAID THAT IF YOUR BATTERY DIED AT THREE YEARS IT WAS BECAUSE YOU WEREN’T DOING THE DRAIN CHARGE CYCLE RIGHT AND FUCK YOU FUCK YOU FUCK YOU FUCK YOU. It’s discharge cycles and heat, motherfucker; they are going to fail at some point and people shouldn’t feel bad if their batteries stop working after a couple years.
UGH.
You shouldn’t have to be a mechanic. You shouldn’t have to be a computer technician. Yeah, your shit will last longer if you know how to take care of it but, fuck. Imagine you were still using internet speeds from 2010. Imagine all your devices still had USB 2.0. Imagine you couldn’t log onto your online bank because your hardware won’t run he software that your bank recognizes because the hardware manufacturer decided it won’t support the older hardware.
What I was trying to get across in that initial post was “computers fail, and they fail pretty frequently; your life will be better and you will save money if you plan on replacing them at a regular interval and have reasonable expectations in terms of cost and failure. So buy a cheap computer now because you’re probably going to need one at some point”
And now I’ve got to Do A Yell about how there’s no ethical consumption under capitalism and it’s unreasonable to expect tired, overworked, broke people to become experts in computer repair in order to do their homework or play the goose game.
FUCK THAT.
IT’S CHEAP COMPUTER SEASON MOTHERFUCKERS. LAPTOP FAILURE RATES INCREASE AT THREE TO FIVE YEARS AND DESKTOP FAILURE RATES INCREASE AT FIVE TO SEVEN YEARS. RIGHT NOW THERE ARE DISCOUNTS ON NEW COMPUTERS AND IT’S CHEAP TO GET AN EXTENDED WARRANTY.
LIVE LONG AND PROSPER AND WORK ON COMPUTERS IF YOU WANNA AND PLAN TO REPLACE REGULARLY IF YOU DON’T WANT TO WORK ON COMPUTERS.
ALSO CHANGE YOUR FUCKING OIL YOU’RE PROBABLY DUE.
9K notes
·
View notes
Text
Latex Software Free Download Mac Os X

The role of operating systems has a major role in the development of data and technology over the years and with a lot of advancement in the field it has been increasingly demanding. There is a lot of different types of operating systems that are used in the tech world.
Even with a lot of different versions of operating systems, the two major operating systems that we deal with are definitely the windows and the Mac OS. Even with the windows covering a wider range of audience, the Mac OS lineage is definitely a gold stone left unturned.
With a lot of features that make the system much more compatible and easier to use, it has definitely been a wonderful thing to work on and with increased stability and strength to the core of the system running a Mac OS, it is definitely something to be looked upon.
This procedure works for my machine with OS X 10.10.4. Step 1 Instal MacTex. Download the MACTEX. This is the LaTex working environment on Mac, including necessary compliers. Double click the downloaded “mactex-20150613.pkg” “mactex-20160603.pkg“, instal the MACTEX; Step 2 Instal Sublime Text 3. Download the SUBLIME TEXT3.
TeXworks is a free and simple working environment for authoring TeX (LaTeX, ConTeXt and XeTeX) documents. Inspired by Dick Koch's award-winning TeXShop program for Mac OS X, it makes entry into the TeX world easier for those using desktop operating systems other than OS X.
TeXworks is a free and simple working environment for authoring TeX (LaTeX, ConTeXt and XeTeX) documents.Inspired by Dick Koch's award-winning TeXShop program for Mac OS X, it makes entry into the TeX world easier for those using desktop operating systems other than OS X.
Overview of Mac OS X 10.0 cheetah
The Mac OS is definitely an operating system packed with a lot of features and with a continuous generation of developed operating systems, Apple definitely has a lot under its roof for the same. An interesting choice is that the Mac OS X 10.00 definitely has a good choice and a significant number of standard features that make the system much more compatible. The Mac OS X 10.00 stud-named the Cheetah is definitely a class apart from its ancestors.
Now there are some of the features that are included in the Mac OS X 10.00 that make the system worthwhile and a very much interesting operating system to use in a Macintosh environment.
The key highlights of development are definitely on the sides of the visual appearance and performance of the system. there are a lot of developments in the software framework of the system that makes it a worth-while deal to work with.
Also Read:-Download Movavi Video Editor 2020 full version for free
Why is Mac OS Cheetah 10.0 ISO Still Popular and Relevant?
While a large number of people are here to read more about Mac OS Cheetah 10.0 ISO, some may also have some questions regarding the same. Mac OS X 10.0 Cheetah came out a long time ago. After this, numerous popular and feature rich updates have come and gone. Then what’s the point of sticking on to Mac Cheetah OS ISO?
Well, Mac Cheetah OS’ compatibility is the answer.
Even though a large number of Mac operating systems have been launched, the Mac OS Cheetah continues to be popular because many of the latest macOS versions may not be popular with all the MacBooks and Mac computers running in the present day.
For example, if you have an old MacBook, it may not support the latest Mac OS, i.e., Mac OS Big Sur. In that case, installing Mac OS X 10.0 Cheetah iso will be a wise decision.
Apart from that, it’s an old version of the Mac OS. If you are into research around Mac OS and its sister technologies, a MacBook running OS X 10.0 Cheetah can give you a lot of insight into how the Mac OS works.
For more details about Mac OS X Cheetah 10.0, you can read below. The next section talks in detail about its top features.
Features of Mac OS X 10.0 cheetah
1. The freshened-up User Interface
The biggest and most anticipated feature of the Mac systems is definitely the new and improved User interface that has a significant effect on the way the operating system is used for. There are a lot of different aesthetic upgrades that make the system much compatible and strong enough. The biggest highlight of all is that the User Interface gladly correlates with the operating system making it a seamless system to work with.
The biggest idea behind the system is to make sure that there are no hindrances in operations as well. There are a lot of significant tool upgrades that make the system a delight to work with.
Latex software, free download Mac Os X Catalina
2. The detective is here

The much-awaited in-house search engine is definitely one of the most anticipated features of the operating system for a very long time. The search engine nicknamed the Sherlock was released with the Mac OS Cheetah. The biggest highlight is that when the search engine was released it had an overwhelming response with a lot of highlighted upgrades released into space. The users liked the software very much just because of one major fact, it made life much easier for them.
3. PDF can be created almost instantly
We all know the importance of using PDF in day to day documents. The biggest highlight with this feature is that you can almost instantaneously create PDF files to get the job done. there are also various other developments with regard to the creation of PDF. with the new feature, it is possible for you to create PDF with almost any type of document that you are working within the system.
4. Your data remains safe
The biggest ordeal that computer users go through is that they are on a constant verge of getting their data corrupted. On average there are a lot of different applications that are run using the system and the danger that lies within is also unbelievable. There are a lot of instances where people’s data gets mismanaged.
This is a common occurrence with regard to memory corruption of applications. The new feature in Mac OS cheetah makes sure that the data that you deal with is strictly taken care of and the corruption of memory of one application won’t affect the other. This greatly improved the reliance factor of the Mac-based operating system in the user interface.
Now even with all the features loaded, you can never get the full potential of the system without the right requirements to run the same. If the system requirements aren’t met, then the probability that the operating system is going to resort to failure is high.
Latex software, free download Mac Os X Os
Mac OS X Cheetah 10.0 ISO/DMG Installation | How to Install Mac OS X Cheetah?
While it’s easy to download Mac OS Cheetah, the installation process may be a bit tricky. In this section, we are sharing a complete guide to install Mac OS X 10.0 Cheetah. Enjoy!
Download the ISO file and don’t let it run automatically.
Make a copy of the Mac OS Cheetah ISO (10.0) on a disk or flash drive. Make sure the drive has enough capacity. (You can also use Dishmaker for this process).
Put the flash drive into your mac’s USB port and turn the mac on.
Immediately hold down the option key. You will see the screen where you can choose a startup disk
Click on the flash drive and continue.
A minimal work screen will pop up. From this screen click Disk Utility.
Choose the flash drive’s name, click partition on the right side.
Go to the drop-down saying “Current” and change it to the number of partition drives that you want to create.
This will unlock the options button at the bottom.
Now click options and choose the radio button for GUID.
At this point, click OK.
Click Apply.
After following this procedure your Mac Cheetah ISO will be ready for installation.
System requirements of Mac OS X 10.0 cheetah
120 MB minimum RAM requirement.
1.5 GB HDD space
Macintosh PowerBook, iMac supported.
Download the Mac OS cheetah for free
The download link to the ISO file image of the system can be accessed by clicking on the link below. Make sure that the minimum requirements of the system are met before you proceed with the download and installation.
On this page... (hide)
1. Source code
2. LyX installers (binary versions)
2.1 Windows binaries (Windows 7 and later)
2.2 Mac OS X binaries
2.3 Linux binaries
2.4 OS/2 binaries
2.5 Haiku binaries
3. Additional Software
4. Version numbers
5. Previous versions
6. Mirrors
7. Checksums & signing
8. Development versions
1. Source code
The source code of the current LyX release (version 2.3.6) can be found here in tar.gz format, with the signature file here. The package can also be downloaded in tar.xz format, with the signature here.
If you don't know what source code is, see thearticle in Wikipedia. Information on how to verify the downloaded packages using the signature can be found here.
2. LyX installers (binary versions)
Binary versions of LyX for installing in different operating systems can be found below or on the FTP site. The binaries are also gpg-signed.
2.1 Windows binaries (Windows 7 and later)
NOTE: Before you install LyX on Windows, you need to install a TeX distribution. For more information on how to do this, please see this page on the LyX wiki.
Windows Installer (64 bit): LyX-2361-Installer-3-x64.exe (~57 MB) (GPG signature)
Windows Installer (32 bit): LyX-2361-Installer-3-x32.exe (~54 MB) (GPG signature)
Binaries for Cygwin:lyx-2.3.6.1-cygwin.tar.gz (~58MB) (GPG signature)
In case one of the links above does not work, try this mirror. If the download is too slow try some other mirror closer to you.
2.2 Mac OS X binaries
LyX for Mac OS X is available here: LyX-2.3.6.2+qt5-12-x86_64-cocoa.dmg, and the GPG signature is here.
Binaries for older versions of Mac OS X are available here: LyX-2.3.6.2+qt5-legacy-x86_64-cocoa.dmg, and the GPG signature is here. Some functionality is not available with these (e.g., SyncTeX).
Before you install LyX you need to install a TeX system such as MacTeX.
In case the links above do not work, try this mirror. If the download is too slow try some other mirror closer to you.
On Mac OS X Mountain Lion you'll get the error message:'LyX' can't be opened because it is from an unidentified developer. See the explanation here for a work around.
See the LyX/Mac wiki page for further installation tips.
2.3 Linux binaries
Major Linux distributions take care of LyX binaries themselves and you will find LyX in their repositories. For more details about your distribution look in our wiki.
For Ubuntu users, Liviu Andronic maintains a stable PPA (Personal Package Archive). See the LyX on Ubuntu wiki page for information and instructions.
Latex software, free download Mac Os X Download
The versions of LyX on a variety of Linux distributions (as shipped with the vanilla distribution) can be seen on the snippet below. We usually choose testing/unstable repositories. For more detailed listing go here.
Latex software, free download Mac Os X High Sierra
Debian:Arch:Fedora:openSUSE:Mageia:Gentoo:PCLinuxOS:Slackbuilds:MacPorts:Haiku:OpenBSD:FreeBSD:
2.4 OS/2 binaries
LyX has unofficial ports to OS/2, binaries are here (LyX 2.0.7).
2.5 Haiku binaries
LyX has unofficial ports to Haiku, packages (2.1.x,2.0.0,2.2.3,2.3.4) can be found in Haiku package repositories.
3. Additional Software
If you're not using one of the installers or packages, you may need to install some additional software.
4. Version numbers
There are certain rules how the LyX version numbers are assigned. Read the following page for detailed information.
5. Previous versions
6. Mirrors
Please use one of the ftp mirrors below in case our default server (located in France) is slow or unavailable. Both ftp://ftp.lyx.org and https://ftp.lip6.fr/ point to the same primary server, but unless you actively check the signatures of downloaded files, you better use https protocol.
Note that we don't have any direct control over the content in the mirrors, so you are well advised to check signatures of the downloaded files to make sure they are identical to those on the primary site.
Εθνικό Μετσόβιο Πολυτεχνείο(ftp) (Greece)
GARR (Italy)
Uniwersytet Warszawski(ftp) (Poland)
Макомнет(ftp) (Russia)
دانشگاه صنعتی اصفهان (Iran)
Universiteit van die Vrystaat(ftp) (South Africa)
Universidade de Brasília(ftp) (Brazil)
Universidad de Chile (Chile)
CEDIA (Ecuador)
Universidad de la República (Uruguay)
清华大学开源软件镜像站 (China)
KDDI総合研究所(ftp) (Japan)
山形大学(ftp) (Japan)
한국과학기술원(ftp) (Korea)
AARnet (Australia)
MUUG(ftp) (Canada)
ibiblio(ftp) (USA)
University of Utah(ftp) (USA)
UCSD (USA)
7. Checksums & signing
We provide gpg-signed tarballs and binaries. That allows you to check integrity of downloaded package and provides guaranty that no one tampered with the binary on the ftp server or on the way to your computer. Our GPG key ID is 0xDE7A44FAC7FB382D (LyX Release Manager). The signatures are found next to the tarballs and binaries.
To initially import our key via GnuPG, do this:gpg --recv-keys FE66471B43559707AFDAD955DE7A44FAC7FB382D
Attention: Please be careful to use this full fingerprint, spoofed version of shortened fingerprint is already in the wild and it is easy to make new fake ones!
After that, each time you need to verify a tarball:gpg --verify lyx-2.3.6.tar.gz.sig
to check the signature (or any other signed file you want to verify). Watch out for the 'Good signature...' string.
8. Development versions
Please do not use these for any serious work! They are only provided for testing and development purposes.
1 note
·
View note
Text
Top 3 Best USB Cable Chargers For iPhone & Android 2018 Review
We’re beginning to see a shift toward USB Type-C cables, but for the occasion, Micro USB remains the standard go-to when it comes time to charge your cell phone and different contraptions. These ropes may not be the most energizing bits of tech in your home, but they’re fundamental for keeping your munitions stockpile charged. Not all Micro USB cables are made equivalent, however, so we’ve gathered together a rundown of the best. Regardless of whether you’re searching for additional elements, sturdiness, length, or essentially a solid cable, you’ll see it here. How we chose You will find hundreds of different Micro-USB cables for sale, and for good reason:
with the exception of Apple products (which use Lightning-USB cables), almost all modern portable devices are charged with a standard Type-A USB connector on one side and a USB connector 2.0 Micro-B on the other. Many portable hard drives also use such a cable to transfer power and data. (Some of the latest smartphones use USB-C, but they are a bit far from each other.Several devices still use USB 3.0 Micro-B connectors, but this connector almost disappeared from phones and tablets.
Do not know what plugs there are?
Here is an excellent illustrated reference. For the previous version of this manual, we sent over 30 cables to a former NASA engineer who tore them apart to examine their insides; We also tested the charging rate of each channel and the data rate. But in this testing and for months and years that we used these cables for long-term testing, we did not find any real differences in charging performance or data transfer between our best choices and other good models. While the cable was properly designed, and most models of well-known, respected suppliers – it works great. What we noticed was if the cables began to fall apart during a long period of use. And readers’ comments, as well as customer reviews on sites such as Amazon.com, show that the biggest complaint about cables is that they eventually break down, especially if you are not careful about how you connect and disconnect them from the network. Because of this experience and test results, we no longer test dozens of cables – as I mentioned above, good tests are tested equally, and even if they did not, we would never be able to test them enough.
Let’s say, finally, which one “best”. In addition, cables are a commodity product, and even well-known companies such as Monoprice and Amazon usually interrupt the cables and replace them with different models or silently change the design or components. Instead, for this update, we looked for cables that allow you to transfer data and charge devices as quickly as possible from a reliable company at a reasonable price and have proven their reliability in long-term testing. No cable will last forever, but we are confident that our choice will last as long as everything you can get at a reasonable price. In other words, these are cables that we would buy ourselves. If you find something that best suits your personal criteria, it’s awesome! Our choice is just a great option, which we do not hesitate to recommend.

Top 3 Best USB Cable Charger Android
1. Monoprice Premium Cable
We should begin with something shoddy, basic, and dependable. Monoprice offers less expensive cables than this, but the Monoprice Premium cable still just expenses $6. It highlights gold-plated connectors, with Micro USB toward one side and USB at the other. This is a USB 2.0 cable, and in that capacity, it charges and matches up information rapidly. The connector heads are made of a smooth, shiny polycarbonate, so they’re extreme regardless of the possibility that they’re not extraordinary with regards to holding. The cable comes in either dark or white, and there’s even a 3-foot form if the length isn’t an issue.
2. Scosche FlatOut LED Micro Cable
Scosche has truly put a great deal of thought into the humble Micro USB cable and the final product is a level, highlight stuffed advertising. The cable has a worked in LED on the Micro USB connector, which shines red while your gadget is charging and turns blue when it’s set. This empowers you to tell whether your telephone is charged or not initially. The cable additionally includes Scosche’s reversible EZtip, which implies you can connect the Micro USB end to your telephone with either course, which is truly handy. Tragically, the USB end is ordinary. A few people grumble that the cable doesn’t remain in the telephone’s port as safely as a standard cable, but we didn’t have any issues with it. It likewise underpins quick charging and experiences no difficulty with synchronizing information. It’s even accessible in 10-inch or 6-foot incarnations.
Here’s another component pressed cable with a level, without tangle outline. This TYLT cable has a reversible USB connector toward one side, and at the flip side, you have both standard Micro USB and Lightning connectors. The thought is that you’ll just need to bring one cable with you to charge the greater part of your gadgets. It could be appealing to families with a solid blend of Android and Apple gadgets. Charging is quick and effective and the cable can likewise handle document exchanges effortlessly. It has a rubbery, delicate touch complete and arrives in a scope of dynamic hues, also dark. There is additionally a 1-foot adaptation accessible.
One particularly conscientious Google engineer, Benson Leung, is currently on an unusual mission: he's slowly working his way through a bunch of USB Type-C cables and adaptors stocked by Amazon, to check whether they are actually up-to-spec and capable of charging his Chromebook Pixel.
First things first: of the ten USB Type-C products that Leung has reviewed, only three of them were fully specs-compliant and capable of charging his Pixel. The three good cables (Belkin, iOrange-E, Frieq) were invariably more expensive (about £15/$20) than the seven duff ones (£6/$10). Obviously there may be some cheap cables that do fulfil the full USB Type-C specification, but Leung hasn't found one yet.
One of the offending micro-USB-to-Type-C adaptors that lacks the necessary hardware to comply with the Type C 1.1 spec.
Enlarge / One of the offending micro-USB-to-Type-C adaptors that lacks the necessary hardware to comply with the Type C 1.1 spec.
The USB Type-C 1.1 specification allows for power delivery of up to 3A, which is enough juice to charge a laptop like the Chromebook Pixel. Previous USB specs, though, only allowed for power delivery of between 900mA and 1.5A. According to Leung, the problem is mostly related to how the cables deal with going from older Type-A or Micro/Mini connectors to the new Type-C connector.
MegaBots: Born to Smash Anything in Their Path
For example, take a look at Leung's review of the TechMatte Micro USB to Type C adaptor. The adaptor's product description specifically says that it's for the OnePlus 2, Nexus 5X, and Nexus 6P—three new products that all have the new Type-C connector. Leung, however, warns that the adaptor's internals are not capable of living up to the Type-C 1.1 specification:
I bought these two USB-C to Micro USB adapters from TechMatte and found they do not work properly with the Chromebook Pixel.
Upon closer inspection by our engineering team here, we have determined that this adapter is not correctly following the USB Type C specification...
Specifically, these adapters do not charge the Chromebook Pixel 2015 because the adapters leave the C-C lines floating, where the specification requires a Rp pullup to Vbus to identify the cable as a legacy adapter or cable... In other words, since you are creating a USB Type-C plug to a USB 2.0 Micro-B receptacle assembly, you must use a resistor of value 56k? as a pullup to Vbus. This cable does not do this.
In short, the cable doesn't fulfil the full Type-C 1.1 spec. Or, in Leung's own words, "If you are a consumer looking for a cable that is compatible with Pixel, do not use this one."
FURTHER READING
USB Type-C. Power Delivery. USB 3.0. Which ports are capable of what features?
Most of Leung's reviews follow a similar pattern. In his review of the CableCreation Micro-to-Type-C adaptor, he calls them out for using a 10k? resistor instead of a 56k?. "By using this cable, your phone, tablet, or laptop computer may attempt to draw 3A, which may be more than the micro-b to A cable you attach to this adapter may be able to handle. This may cause damage to whatever cable, hub, pc, or charger you plug into this," Leung concludes.
If you take a broader look at the reviews on Amazon, it seems most of these cheaper cables still work when charging a smartphone—but using them to charge a higher-power device such as the Chromebook Pixel (and perhaps the new MacBook) probably won't work, and may be quite dangerous.
For the time being, until cheap third-party USB Type-C cables and adaptors become a little more mature, it's probably a good idea to stick to official products from Apple, Google, or products created by reputable third parties. If you're a Chromebook Pixel user, Leung has helpfully provided instructions on how you can check whether a Type-C cable/adaptor is up-to-spec.
For more information on the (somewhat confusing) Type-C connector, and how it dovetails into other standards such as USB 3.0 and USB Power Delivery, read our full explainer.
USB-C: Everything you need to know
USB-C is finally beginning to pick up traction, with most smartphone manufacturers now adding the new digital connection. After all, it’s not just as a better way to charge a device, but it’s also a means of phasing out the headphone jack on handsets. Here’s a closer look at USB-Type C.
If you have an electronic device that plugs into something, the chances are it’ll make use of USB. From desktop computers to smartphones, USB memory sticks to laptops, USB is the standard when it comes to connectivity.
The last major update to the ever-evolving USB standard came in 2013 with USB 3.1, and that was accompanied by the introduction of the new USB-C connector. If anything, it could become the default connection standard for even more devices.
Apple helped kick off the trend with the 12-inch MacBook that used a single USB-C socket to not just connect to all its peripherals, but also to provide power. The rumoured upcoming MacBook Air 2018 is likely to do the same, relying heavily on the USB-C socket in order to keep its design as slim as possible.
Smartphones have since widely embraced the USB-C into their design, including all the latest Samsung Galaxy, OnePlus and Google Pixel handsets.
But just what makes USB-C better than its predecessors? Let’s take a closer look.
A nice and low monthly cost with a small upfront makes this a great option. You also get the Samsung Galaxy Buds for free and have the chance to win a £1,000 Currys PC World gift card.
VIEW DEAL£38/month|£175 upfront|Mobiles.co.uk
Trending: Samsung Galaxy S10 | Huawei Mate X
USB-C is not a new standard
The first thing to realise about USB-C is that it’s not a new USB standard in the same way as USB 1.1, USB 2.0, USB 3.0 or the very latest USB 3.1 are. Those upgrades focus on defining what the connection can do in terms of speed and feature improvements, whereas USB-C is all about the physical connection, like with microUSB and miniUSB.
The crucial difference here, though, is that unlike micro and miniUSB, USB-C is aimed at being a replacement for both ends of the cable. More on this later.
Related: Intel Core M: Everything you need to know
USB Type-C
Thunderbolt 3 will use the USB Type-C connector
USB Type-C received another big boost in the form of Thunderbolt 3. In June 2015, Intel revealed that its latest version of the port would piggyback on the new USB Type-C connector, giving it all the benefits and a new reversible look. It’s not all smooth sailing though – as Thunderbolt requires circuitry in the cable itself, it won’t be fully interoperable with Type-C.
Thunderbolt is a lot faster – well, four times – than the USB 3.1 standard which Type-C is built upon, which will obviously give plenty of benefit to those who need to transfer lots of big files very quickly.
Related: What is Quick Charge Smartphones have widely adopted USB-C
OnePlus, the exciting young Chinese smartphone manufacturer, went with USB-C for its second flagship phone, the OnePlus 2, back in mid-2015. Google then implemented it into its flagship phones, the Nexus 6P and Nexus 5X, towards the end of the year.
The latter is particularly telling, as Nexus phones typically act as reference designs for other Android manufacturers.
Sure enough, we’ve now seen a bevy of USB-C toting flagships to the extent that it’s now unusual to see a decent Android phone released without one.
Related: Snapdragon 820 vs 810 vs 808
USB-C is now used by most the majority of Android smartphones
It could mean the end of the headphone jack
‘Intel wants to kill the headphone jack,’ read a TrustedReviews news headline from April 27.
The story concerned PC giant Intel’s efforts to encourage the industry to abandon the trusty old 3.5mm connector we all use for our headphones. You’ve probably guessed what the suggested replacement would be. Yep, USB Type-C.
You might wonder what the problem is with the 3.5mm standard, and where it falls short of USB-C. In truth there are several issues.
For one thing, headphones jacks are bulky. Apple famously ditched the headphone jack in the iPhone 7, because it has long been seen as a key component that’s holding phones back from getting even thinner. USB-C, by contrast, is helpfully flat.
Related: Google I/O 2016 – What to expect
More importantly, the 3.5mm standard is one of the last remaining analogue connection standards still in use today. It dates back to the 1960s, and it’s only useful for doing one thing: transmitting sound. Even then, technology needs to be implemented to deal with the inevitable interference that accompanies it.
Not only is USB-C a digital connection, ensuring a base level of sound quality, but it can multitask too. So, for example, a pair of USB-C headphones could play high quality music whilst simultaneously measuring your heart rate and feeding that information back to your phone.
USB Versions
To better understand what we mean about Type C being a replacement for both ends of the cable, you first need to understand the differences between the existing versions of USB and the various Type-A and Type-B connections.
USB versions refer to the overall standard and they define the maximum speed of the connection, the maximum power and much more besides. They theoretically could be applied to any shape of connector so long as the computer and device are connected up correctly.
USB 1.1
Although USB 1.0 is technically the first version of USB it never really made it to market so USB 1.1 is the first standard we all used. It could deliver data at 12Mbps and maximum current draw of 100mA.
USB 2.0
The second version of USB arrived in April 2000 and it provided a massive boost in maximum data throughput, up to 480Mbps. Power draw was also increased to a maximum of 1.8A at 2.5V.
USB 3.0
USB 3.0 was a big change as it brought new connector types to allow for its extra speed and power draw, with them often coloured blue to denote their prowess. USB 3.0 can run at up to 5Gbps, delivering 5V at 1.8A. It arrived in November 2008.
USB 3.1
The latest and greatest version of USB was released in July 2013, though uptake is still almost non-existent. It can deliver 10Gbps of throughput while up to 2A can be drawn over 5V, and optionally either 5A over 12V (60W) or 20V (100W). This is the reason the new MacBook can be powered just by its USB connection.
USB Type-A
Type-A is the classic USB plug as we have long known it. The chunky rectangular plug was the original design and it remains the standard plug for use at the host end of the USB cable.
Now Type-A has gone through a number of changes to accommodate different versions of USB, with more pins added to allow for the faster speeds of USB 3.0 for instance. However the fundamental design of the plug has remained the same, with the new connections incorporated in such a way that all USB Type-A plugs and sockets are compatible no matter which version of USB they use.
It’s not always the case that whatever you plug in will work, as the newer standards of USB also deliver more power, which may be required by whatever device you’re plugging in, but for the most part they’re completely interchangeable.
There are also some variations of Type-A including Mini Type-A and Micro Type-A but these were never widely adopted due to the complicating nature of having different types of USB socket on host devices. They are now deprecated.
USB Type-B
Although there are some uses for Type-A to Type-A USB cables, typically the other end of a USB cable uses a Type-B connector. This denotes the device attached at this end as being the client and because these types of device can vary so much we see much more variation in plug/socket types used.
The original type-B plug is the odd tall plug with the sloping top corners that you typically find on printers. This was extended for the USB 3.0 standard to include an extra bump for some new connections.
The classic miniUSB and microUSB are also variations of Type-B, along with the clunky microUSB 3.0, which uses a normal microUSB connection with an extra plug that carries more power connections.
Variations on Type-B have been far more widely adopted due to the sheer necessity of having smaller plugs at the client device end. Indeed there are many devices that use entirely proprietary shape Type-B USB sockets, such as many of the odd shape plugs used on older mobile phones.
USB-C
This brings us to USB-C. Where Type-A and Type-B have had to work within the framework of being backwards compatible, Type-C is intended to replace both and is designed to be small enough to not need any mini or micro variants. The intention is that it will completely replace all types of USB on both host and client devices.
What’s more its headline feature is of course that it’s reversible. This means you no longer have to get the plug the right way round – or even the cable the right way round – but instead, like Apple’s Lightning connection, it’ll work whichever direction you try – no more USB superposition.
To enable this USB-C cables actually require circuitry to tell which way round they are and route power and data in the right way, just like on Apple’s Lightning connection. This is unlike all existing USB standards which are just ‘dumb’ cables.
USB-C also builds on the new USB 3.1 standard so to all intents and purposes is the connection type that brings in the new power and speed advantages of USB 3.1.
USB-C is still backwards compatible with existing USB variants, but that of course requires adapters.
Concerns and the future of USB-C
Concerns have been raised about the physical design of USB-C, as the connector seems a little fragile with a hollow plug and a delicate tab in the socket. In contrast, Apple’s Lightning uses a sturdy thick metal plug that is far more resilient.
More pressingly, there’s been a lot of worry about the unregulated state of the USB-C standard, which has led to a number of dodgy and just plain dangerous accessories hitting the market. Some, through the use of unsupported voltage levels, have fried the host device.
This has led to drastic measures such as Amazon banning certain USB-C cables from its store – specifically “Any USB-C (or USB Type-C) cable or adapter product that is not compliant with standard specifications issued by ‘USB Implementers Forum Inc.”
Google enginner Bensen Leung, meanwhile, has been on a one-man crusade to draw attention to the unregulated state of the fledgling USB-C accessory market.
Fortunately, the USB-IF (the body responsible for regulating the connection standard) has come up with a new protocol that will enable devices to authenticate a connected USB-C device or charger before accepting any charge or data. It remains to be seen how and when this protocol will be rolled out to existing devices, or how many early USB-C accessories will need to be replaced once the protocol becomes standard.
All told, though, USB-C is definitely a major step in the right direction, and we can’t wait for more companies to start adopting it. It will mean slimmer devices with fewer ports, more flexibility, better data transfer speeds, and even better sound.
We’d prefer to have more than one on the next MacBook, though, please Apple.
REVIEW: Type 2 Charging Cable with Built-in Chargeport Opener
EVCHARGEKING OUTFITS TYPE 2 CHARGING CABLES WITH BUILT-IN TESLA MODEL S CHARGEPORT OPENER
On January 24, 2013 the European Commission in Brussels agreed to make a common standard for charging EVs in the European Union. From that date the Mennekes “Type 2” Mode 3 should be the standard and used in all EVs and public charging stations within the Union.
At the same time the European Commission made a prediction saying that in the year 2020, France should have 97,000 public charging stations, Germany should get 150,000, Italy 125,000, and the UK 122,000. All with Type 2 connectors.
Type 2 supports up to 22kw charging rate – 32 Amp / 400V.
As this agreement in the European Commission was made in the beginning of 2013 and the first Teslas were delivered to Norway, Switzerland and Netherlands in August 2013, Tesla made a good choice by delivering all European Tesla Model S with Type 2 Connectors and also equipping the new Tesla Superchargers with Type 2 connectors only.
Besides being a smart choice for the European market, it also means that importing a Model S from US to Europe is going to be quite a hassle as you are not going to be able to charge at any public charging stations and/or Tesla Superchargers.
1 note
·
View note
Text
Aluminum Slim Full Size Bluetooth Keyboard For Mac

Are you in search of a top-notch wireless bluetooth keyboard to pair with your new iMac? We have just guessed that. Considering how pivotal it’s to have a more functional keyboard to breeze through the task, we’ve compiled some of the best wireless bluetooth keyboards for iMac Pro.
#1. Satechi Wireless Keyboard with Numeric Keypad
This offering ($74.99) from Satechi can give a long run to Apple’s expensive Magic Keyboard. The full-size keyboard is designed for your professional requirements. As the keys are very responsive, your time at writing articles or coding should be a pleasing experience.
Mac allay Full-Size USB Wired Mac Keyboard; Best Apple Keyboard. Apple Wired Keyboard with numeric keypad; Best Compact Keyboard For Mac. Anker® Ultra Compact Slim Profile Wireless Bluetooth Keyboard; A Mac keyboard with mechanical switches. Azio Mk-Mac Wired USB Backlit Keyboard with Brown K-Switch; Best Mac Keyboard With Modern Design. Macally Bluetooth Wireless Keyboard for Mac, iMac, Apple Mac Pro, Mac Mini, MacBook Pro/Air Laptop - Rechargeable Slim Full-Size Keyboard (BTWKEYMB) 4.1 out of 5 stars 12 $59.99 $ 59.
There is a handy numeric keypad to ensure you are able to manage your spreadsheet and even get on top of your accounting with ease. Plus, you will be able to connect this wireless keyboard with four devices. And you can instantly switch between them.
https://loadholiday383.tumblr.com/post/656877618002640896/canon-digital-ixus-80-is-drivers-for-mac. USP: Super handy numeric keypad
Check out on Amazon
#2. Arteck Wireless Bluetooth Keyboard
If you want to have a wireless keyboard not just for your Mac but also for your Windows PC, iOS and Android device, Arteck can be a safe bet. It is made of stainless steel material and sports pretty lightweight design.
The keys seem to have low-profile design and should be fine for typing. With the ability to last up to six months, it can be a good one for regular usage. Moreover, Arteck is backed by a solid 24-month warranty.
USP: Stainless steel construction
Check out on Amazon
#3. Slim Wireless Keyboard for iMac Pro from Macally
Macally’s full-size keyboard has you fully covered. 110 keys including 20 shortcuts can take care of your needs with aplomb. It also has a number pad so that you can manage spreadsheet with more flexibility.

Due mainly to the fast scissor flexors, it keeps your typing speedy and quiet. You will be able to connect Macally wireless keyboard with three devices at once. As for battery life, it can last up to three months after a full charge.
USP: Fast scissor flexors
Check out on Amazon
#4. Keychron K2 Bluetooth Mechanical Keyboard
Should you want to have a wireless keyboard that can fit into your both typing and gaming needs, Keychron K2 would be the right answer. The keyboard sports a compact form-factor and features responsive keys.

With the curved keycaps, you get much-improved tactile feedback. The inclusion of a white LED backlight makes sure typing in the dim environment remains easy-going.
On the connection front, K2 can pair with up to three devices including Mac and Windows PC simultaneously, allowing you to switch between them without any issue. Featuring a huge 4000mAh battery, the keyboard can last up to 7 days or 72 hours – which is yet another plus.
USP: Huge 4000mAh battery
Check out on Amazon
#5. Jelly Comb Multi-Device Wireless Keyboard
Featuring a full-size layout in a relatively slim-form factor, Jelly Comb’s wireless keyboard is a complete typing asset. Due largely to the space grey appearance, it makes a nice match with the iMac Pro.
Another notable feature is the lightweight design which makes it quite portable. Besides, the ability to connect with up to three devices at one go offers the required flexibility to use the keyboard with multiple devices.
The inclusion of the scissor mechanism under each key plays a vital role in boosting stability. And with the low profile design, the tactile keys ensure you have a smooth typing experience.
USP: Enhanced stability for smooth typing
Check out on Amazon
#6. Logitech K750 Wireless Solar Recharging Keyboard
Logitech’s K750 is a premium wireless keyboard for Mac in more ways than one. First and foremost, it showcases a modern sleek design that can get along perfectly in a professional environment.
The layout of the keyboard is in line with Mac’s, which can easily appeal to macOS users. With the addition of the launchpad hot-key and concave key cap design, you get a more comfortable typing experience.
But what stands K750 apart from many other counterparts is the solar charging. That means you won’t have to worry about charging the keyboard’s battery manually. With these notable specs, the $53.88 price tag makes it quite reasonable.
USP: Solar charging
Check out on Amazon
#7. Anker Ultra Slim Wireless Keyboard
Featuring small form-factor, Anker Ultra Compact looks really impressive and is over 30% smaller than a standard keyboard. The smooth keys with matte finish make typing a pleasing experience. 800mAh battery is good enough to last up to 6 months, which is quite decent.
The keyboard automatically connects to the last used device and supports all the major operating systems like macOS, Windows, and iOS. Compatibility aside, you have the 18-month warranty on Anker Ultra Compact.
USP: Small form-factor
Check out on Amazon
#8. Multi Device Bluetooth Keyboard from iClever
Putting simplicity and ease of use at the forefront, iClever has introduced a fairly good Bluetooth keyboard. It should appeal to those who want a low-profile keyboard at an affordable price point ($32.99). Made of stainless steel and ABS material, it has a durable construction that can take on some beating.
Aluminum Slim Full Size Bluetooth Keyboard For Mac Not Working
As the key set and fabric feature a matte finish, it can resist spill and also dust. Besides, the keys are easy to press due largely to the tactile response. Thus, you should expect your typing to remain smooth.
Moreover, iClever wireless keyboard for iMac can pair with three devices at once, which can come in handy if you want to use it with multiple devices. Even on the battery life front, it is up to the task with 90 hours of usage.
The Robotic Arm Edge, a Dr. Toy 2008 Best pick, gets a much-anticipated accessory with the introduction of the USB Interface Kit. Now robot lovers can connect the Robotic Arm Edge to a PC and have real time manual control of the robotic arm and program the arm to perform a sequence of movements – just like an actual robot on an assembly line. 535 USB INTERFACE - 64 Bit and Windows 7 Support Files. Updated program supporting 64-bit versions of Windows and Windows 7. Download Support Files OWIKIT-LAB (OWI-0762-USB) Updated Robotic Arm Trainer PC Interface Software. Features moving, programming, saving, editing, downloading capabilities via desktop or laptop USB port. Sep 07, 2012 notbrainsurgery: OWI Robotic Arm Edge USB protocol (and sampe code). OWI Robotic Arm Edge – You can use USB interface module to connect it to PC. Unfortunately official software works only under Windows and do not provide API. I have been able to reverse engineer their USB protocol and write sample code which allows to control the arm from Mac and Linux. This is USB device with vendor id 0x1267 and product id 0. https://loadholiday383.tumblr.com/post/656877697345159168/usb-interface-protocol-for-owi-robotic-arm-edge-for-mac. Jun 09, 2014 Today we are taking a look at the OWI Robotic Arm Edge and OWI-535/SOFT USB Interface with Programmable Software. To see the full review please visit: http:/. Jan 01, 2019 Add OWI USB Interface for Robotic Arm Edge and have real time manual control of the robotic arm and program the arm to perform a sequence of movements. Command the robotic arm gripper to open and close, radial wrist motion of 120°, an extensive elbow elbow of 300°, base rotation of 270°, base motion of 180°, vertical reach of 15 inches.
USP: Full-size keyboard at an affordable price point
Check out on Amazon
#9. iHome Full Size Wired Keyboard
What has attracted me to iHome is the nice compact design and the full-sized keyboard — the inclusion of 110 key along with full numeric keypad which can be very helpful for spreadsheets and finance applications. Keys have better click and play their role perfectly in expediting typing.
Anodized aluminum finish not only augments its design but also reinforces its durability. Furthermore, iHome supports macOS, iOS, and Windows and is available just in silver color.
USP: Full-sized keyboard
Check out on Amazon
Ultra Slim Wireless Bluetooth Keyboard
#10. Bluetooth Wireless Smart Keyboard from Satechi
Incorporated with a more pragmatic design, Satechi is primed for the folks who want to get the most out of their keyboard. The QWERTY keyboard with tactile keys accelerates your typing. You can quickly connect this wireless keyboard with up to four devices. It allows you to switch between your connected devices with ease.
Antigua winds serial number chart for age on z950r free. Antigua Winds was founded on the desire to give anyone the opportunity to play music, without sacrificing quality or affordability. Antigua Winds; Antiqua Serial Number Chart; Results 1 to 6 of 6 Thread: Antiqua Serial Number Chart. Thread Tools. Show Printable Version;. Hey all, I have a curved Antigua Winds soprano saxophone but I can't seem to be able to work out it's model number. It has no F# Key, and there is the number 5808 engraved under the right-hand thumb hook.
Auto-sleep function preserves energy, multimedia keys offer instant access to control video and audio content. Besides, the lightweight and slim profile allow you to carry it in your small bag easily.
USP: Connects up to 4 devices
Check out on Amazon

Aluminum Slim Full Size Bluetooth Keyboard For Mac Computer
That’s it!
Your favorite?
Now, let us know the name of the keyboard that you have liked. Have you selected a best wireless bluetooth keyboards for iMac Pro or the one with small form-factor?
You might want to refer these posts as well:
The founder of iGeeksBlog, Dhvanesh, is an Apple aficionado, who cannot stand even a slight innuendo about Apple products. He dons the cap of editor-in-chief to make sure that articles match the quality standard before they are published.
https://www.igeeksblog.com/author/dhvanesh/
https://www.igeeksblog.com/author/dhvanesh/
https://www.igeeksblog.com/author/dhvanesh/
https://www.igeeksblog.com/author/dhvanesh/
0 notes
Text
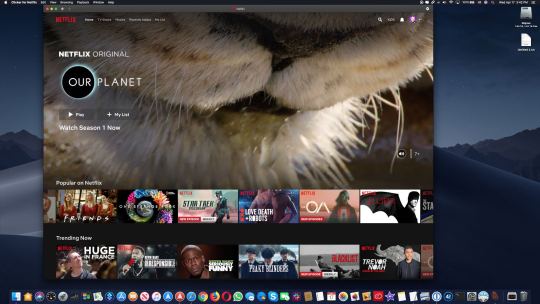
Macbook Offline Netflix

Macbook Offline Netflix Review
Netflix Offline On Macbook
Inspire your students with thousands of free teaching resources including videos, lesson plans, and games aligned to state and national standards. Netflix is a video on demand we site which was put up on August 29, 1997, by Marc Randolph and Reed Hastings in California. Netflix is pretty much the online version of a local theater. People go there to watch movies, anime all over again, without having any restrictions on snacks not being allowed and chill.
Macbook Offline Netflix Review
Best apps live in Setapp
Replace Mac defaults and discover new gems in one suite.
If you use a MacBook, MacBook Air, or MacBook Pro for work, you’ve certainly thought about getting an external monitor at some point. Which is a 100% correct idea. Spending eight-plus hours every day hunched over the laptop on your desk won’t do your health any good long term. So a high-quality monitor is a must.
Naturally, the first thing that comes to mind here is the iconic Apple Cinema Display, which embellished the desks of most creatives for nearly over a decade. This Mac monitor was, however, updated in 2011 with the now ubiquitous Apple Thunderbolt Display.
Apple’s first Thunderbolt monitor was a beautiful and sturdy 27-inch LED screen. But after a few weak updates, it too, unfortunately, got discontinued in 2016 without any immediate successor. Although it’s possible to buy an Apple Thunderbolt Display secondhand today, it’s not a really good idea, since its specifications are quite outdated. Finally, in 2019, Apple released its brand new Thunderbolt 3 monitor — Apple Pro Display XDR.
Enhance your design with Setapp
Installing PIP on Linux Operating system is a bit different as compared to Mac and Windows. You need to check first if the Python is already installed or not. But if your Linux distro came with Python already installed, you should be able to install PIP using your system’s package manager. Before we start with how to install pip for Python on macOS, let’s first go through the basic introduction to Python. Python is a widely-used general-purpose, high-level programming language. Python is a programming language that lets you work quickly and integrate systems more efficiently. Modern Mac systems come with Python and PIP already installed. However, this version of Python tends to be outdated and not the best choice for serious Python development. It's highly recommended that you install a more current version of Python and PIP. Follow the instructions on the page and then after successfully downloading Pip3, run python3 get-pip.py in your terminal This will install pip3 into your laptop and then you can check the. Install python and pip mac.
Install a bunch of best design apps — all in one. Setapp will help you create, edit, and share visuals at little cost.
What’s Good And Bad About Apple Pro Display XDR
Unlike all previous Apple monitors, Apple Pro Display XDR is positioned as the ultimate creative machine in the top price bracket, starting at $4,999 for the base model. Wow.
What do you get for that price? The specs are truly outstanding. Let’s start with the 32-inch Retina 6K display, delivering up to 1600 nits of brightness (compared to about 300 in regular monitors), a 1,000,000:1 contrast ratio, and close to a billion colors. The dynamic range of this Apple screen is so broad that it far surpasses HDR (high dynamic range) and reaches XDR (extreme dynamic range).
Overall, Apple Pro Display XDR is stunning and can not only be used for Mac Pro but also be a great companion MacBook Pro display or even an extra iMac external monitor. The only downside is, of course, the price. While, $4,999 is what you start with, you could pay $5,999 for a model with nano-textured glass and $999 more for a Pro stand.
The top-tier cost of the Apple monitor 2019 model makes sense for professionals who rely on accurate color representation in their daily work, but seems to be overkill for almost everyone else. Luckily, there are lots of non-Apple displays on the market today as well. Why not explore some more options?
Close competitor: Dell UltraSharp 32-inch 8K Monitor
Those who really like Apple Display Pro but wished for a higher resolution at just a bit of a lower price would really love Dell’s 8K monitor. The same 32 inches here deliver a breathtaking 7,680 x 4,320 resolution. Although the contrast ratio is only 1,300:1 compared to Mac display’s 1,000,000:1.
While MSRP on Dell’s monitor is set at $4,999, most retailers sell them for somewhere between $3,499 and $3,899. Thus the screen fits in the niche between Apple 5K monitor that iMac has and Apple Display Pro XDR, and is also targeted at creative professionals.
Ultrawide: LG 34-inch 5K Nano LED Monitor
Free tetris for mac downloads. If you don’t need an 8K monitor (there’s in fact not much content yet made for 8K) and really enjoy having lots of screen real estate, why not take a look at LG’s 34-inch UltraWide 5K display.
This Thunderbolt 3 monitor features two HDMI, two USB-As, and one DisplayPort ports, as well as a headphone jack to make a perfect MacBook Pro display. The screen has an impressive 60 Hz refresh rate and 600 nits of brightness. All in all, a good investment at $1,499 MSRP.
Workhorse: LG 24-inch UltraFine 4K Monitor
Download word 2019 cracked. When you just need a monitor that does its job really well, look no further than LG’s 24” UltraFine 4K.
Besides giving you a beautiful 4K picture, this screen features three USB-C ports for all your external devices and 85 W power supply to become the perfect Mac display for any need. The price is reasonable too, somewhere around $700–800.
On budget: BenQ 27-inch GW Series Monitor
Some of you will see the prices above and go into shock mode — after all, you just wanted something simple to get the job done, not spend a laptop-worthy sum on a Mac monitor.
In this case, what you need is a BenQ GW Series display. Its 27-inch LED screen has a 2560 x 1440 resolution that gives you 77% more working space than regular HD monitors — certainly good enough for all everyday needs. The most impressive part, however, is the price. BenQ GW Series is one of the most affordable Mac displays and retails for just about $280.
So, here you go, the choice is yours, whether you’re ready to go all in with the Apple screen, take it down a notch with Dell, embrace the UltraWide with 34-inch LG, get to work with UltraFine 24-inch LG, or save some money and settle for 27-inch BenQ.
But since you’re interested in great Apple displays intended mostly for designers and creative professionals, it might be that you could benefit from a few essential apps that any designer would go crazy about.

Essential creative apps for every designer
It’s no secret that all designers cherish the typography on their Macs. Sadly, the built-in Font Book utility comes up short a lot. The absence of a customizable display of fonts and live comparisons make it hard to choose the perfect font. That’s where designers should try Typeface.
Typeface is a simple app that does a lot — giving you full control over how your collection of fonts is displayed. Mix system and custom fonts together, write any phrase to test the one you need, and group the best ones to use in a client project, all with ease.
Netflix Offline On Macbook
Aquarelo is another tool every designer needs, but not every designer knows exist. When beginning work on any project, it’s not too hard to come up with two primary colors. What’s much more difficult is to create a full palette out of them. Aquarelo does exactly that, giving you an easy way to generate up to 15 gradations between any colors, which you can input directly with HEX codes or using a color picker.
Goldie App is a must for those obsessed with grids. This tiny menu bar utility lets you create designs that follow the most perfect golden ratio. You can use presets or calculate your own grids in seconds, and Goldie always remains just a click away.
Luminar Flex helps those who would like to spend less time fine-tuning every photo in Photoshop or Apple Photos. It’s an essential plugin that leverages the power of AI to make perfect edits, beautiful filters, and automated workflows. Just a few quick steps and your whole day of shooting is perfectly corrected for exposure, contrast, and color.
Finally, Folio is the cornerstone of every design process — offering detailed version control in one place. No more multiple files saved on different Macs across the whole team. With Folio, everyone knows the exact workflow, can resolve conflicts quickly, and save the precious files that would otherwise be lost.
Simply keeping these five apps on your Mac will considerably simplify your working life: fonts in one place, grid tools handy, colors made for you, photographs edited, and everything version controlled.
Best of all, you can try Typeface, Goldie App, Aquarelo, Luminar Flex, and Folio absolutely free for seven days via Setapp, a platform with more than 200 apps that every Mac user would find incredibly helpful, whether it’s related to design, writing, managing, or even optimizing your own Mac. Just visit Setapp’s website and see for yourself!
Setapp lives on Mac and iOS. Please come back from another device.
Meantime, prepare for all the awesome things you can do with Setapp.
Read on
Sign Up
Setapp uses cookies to personalize your experience on our website. By continuing to use this site, you agree to our cookie policy.
0 notes
Text
The Photo Stick On Amazon

1 December 2019 | Paul Butler
Lightning fast, one click software on a USB stick that finds and saves 3,500 average size photos and videos. Works on both Mac and Windows. ThePhotoStick 8 is a USB stick that contains the amazing software and storage that makes it easy to find all your photos and videos on your Mac or PC and easily save them to the USB stick. If your photos are already present on your pc or mac computer, this stick is the quickest and most efficient way to store some of your valuable photos for safekeeping. Apple MFi Certified 128GB Photo-Stick-for-iPhone-Storage iPhone-Memory iPhone USB for Photos iPhone USB Flash Drive Memory for iPad External iPhone Storage iPhone Thumb Drive for. The stick worked very well transfering the photos from my phone. But later putting the stick in my computer to check to make sure the photos were on the stick.
Summary: MemorySafeX is a small USB drive that instantly backs up all your video & photo files on your Computer, Smartphone or Tablet! It’s easy to use, and does all the hard, time-consuming work for you! External storage of MemorySafeX gives you 100% secure storage. You don’t have to pay a regular subscription as with most cloud storage plans. MemorySafeX works automatically, it connects directly to your device and backups all of your files.
People are storing more and more data of ever increasing importance on their smartphones. As the processing and storage capabilities of these devices increase, so does the need to protect that information. Do you need a solution to safeguard the photos, videos, and important documents you store on your device? Not convinced by cloud storage? There is a more simple and effective solution.
What Are We Talking About?
It’s a small flash drive called MemorySafeX. It automatically backups all of your photos and videos as soon as you plug it in your device. It has three different ports makingitcompatible with almost all devices PCs, Mac PCs, Android phones, Tablets, Iphones and Ipads.
How Does it Work?
Every person can use it easily and no technical skill required to backup your data in seconds. It doesn’t need any software or anything like that, it just connects and starts working. Instantly declutter photos, videos, screenshots, and documents with an automatic artificial intelligence system.
Just Plug your MemorySafeX device into your computer, smartphone or tablet.
Click “START BACKUP” and you are done.
Your important information and memories are protected and safe forever in this tiny device.
MemorySafeX uses advanced technology to scan all of your device valuable data (even hidden folders and files) and automatically backups all of your videos, photos, screenshots etc. When it finds a duplicate file it automatically keeps one copy of the duplucate to help you avoid scrolling the same exact photos over and over and also to save you space.
Watch this short video to see MemorySafeX in Action:
What Are the Main Benefits of MemorySafeX?
The easiest to use device for storing and organising multimedia files that connects directly to your device.
Compatible with numerous devices: iPhone 5, 5 S, 5 C, 6, 6 plus, 6 S, 6 S plus, 7, 7 Plus, 8, X. For iPad 4, Air, Mini, Mini 2.For Android: S3, Samsung, 4 and 5.For Note 2, 3 and 4. PCs and Mac PCs also supported.
Takes care of your and your family’s memories. Securely store the work files and documents you have on your phone.
The most simple and cheapest digital organising system on the market with huge 64GB storage capacity enough to store 65000 photos.
Our Conclusion – Buy It While it’s Still Available
We recommend ordering MemorySafeX while it is still available. It is the only safe solution available on the market to backup all of your precious photos and videos and keep these memories safe forever. After testing MemorySafeX with many devices (Macbooks, PCs, iPhones, iPads, Android phones and tablets) here are the Pros and Cons of this device:
Pros:
Easy to use – All backup process is automatic
Takes care of yours and your family’s memories and keeps them safe
64GB of Storage enough to store thousands of photos and videos
Compatible with most Devices: Android, iOS, Windows, macOS
Automatically detects and removes duplicates
How do I get MemorySafeX:
That’s easy, at the moment you can buy MemorySafeX 50% cheaper at the introductory price:
Order MemorySafeX from theofficial website.
Plug it in your device.
Click “START BACKUP”… and let the app do its magic – done!
ONE click does the trick! It doesn’t get any easier than that!
PROMOTION: Now 50% Off and with Free Worldwide Delivery!
Haxtun, 206 N. Colorado Ave, Colorado June 17 2020 (Wiredrelease), The Giddyup Group LLC, The Photo Stick Unbiased Review, Thephotostick Instantly Backup Your Photos Videos In One Click, PhotoStick offers a brilliant and convenient way of backing up photos and videos, quickly and efficiently. This Photostick Review will go over all the important facts about Thephotostick helping you to make a wise decision if this back device will be a good fit for your needs.
Conventional Oil Change; Semi-Synthetic Oil Change; Full Synthetic Oil Change; In approximately 20 minutes, Jiffy Lube’s ASE-accredited technicians perform the following: Oil with up to five quarts of quality motor oil; Oil filter; Front windshield Rain-X treatment. Groupon oil change jiffy lube. In approximately 20 minutes, Jiffy Lube’s ASE-accredited technicians perform the following: Oil Change: Oil with up to five quarts of quality motor oil; Oil filter; Inspect Key Components: Antifreeze/coolant reservoir levels; Engine air filtration system; Serpentine belts. Use a Jiffy Lube coupon from us to change your oil, fix your brakes, test your battery, and more. From discounted tire rotation to special deals on check-ups, you can rake in the savings as you drive off into the sunset with Jiffy Lube in the passenger seat. During this fast oil change, Jiffy Lube’s accredited technicians perform the following: Oil Change: Oil with up to five quarts of quality motor oil. Inspect Key Components: Antifreeze/coolant reservoir levels. Engine air filtration system. Serpentine belts. Brake fluid level (in transparent reservoirs).
What is The Photo Stick?
It wasnt long ago when we required a camera with us all the time to capture the precious moments in our life. Today, many of us have replaced traditional cameras with digital cameras or mobile phones. With films and reels to digitally photons, it is safe to say that cameras have come a long way. But there is one problem that we as consumers still face, misplacing, and losing our precious photos. So, isn’t it about time we change that? Photo Stick is a revolutionary device that helps you backup your photos, videos, and files with just a simple click. It is a small USB drive that you insert into your PC.
Photo Stick will protect your data from all the drive failures, PC Failures, Power outage and other unfortunate events. You don’t need to be tech-savvy to use Photo Stick. All you need to do is connect the device to your computer and then automatically Photo Stick will send the data into the cloud for backup.
Photo Stick is popular nowadays due to its compact size and fast backup speed, but it should be noted here that this review mentions the PC version. There is another one for the smartphone ones.
= CLICK HERE TO VISIT THE PHOTO STICK OFFICIAL WEBSITE GET 40% OFF =
How does The Photo Stick work?
Photo Stick is a really simple device, all you need to do is connect the device to your PC, and then it will automatically save all the data for backup. Photo Stick is programmed to immediately backup the images, videos and files as soon it is saved on the PC.
Photo Stick Pros Cons
Photo Stick is just like any other device that has its advantages and disadvantages. So lets see some pros and cons of the renowned device.
Pros
Compact and Handy The Photo Stick is a really small and handy tool, with a size of regular USB pen drive, you can use the device with your laptop while travelling.
Super fast Back-up Just plug the device to your laptop, and it will take the same amount of time for Photo Stick to back up your photos as it took you for reading this sentence.
Thousands of files that you can back-up Photo Stick comes in various variants of 8 GB, 64 GB and 128 GB where you can store more than 60,000 files.
Runs automatically Photo Stick doesnt ask for much attention, it’s a one time thing where it asks for setup and then it automatically does its job without any need of cross checking
Files just a click away In the sea of photos, videos and documents you can easily search for any file with just a click, thanks to the search option!
No twinning If by any mistake you back up the same file twice, Photo Stick will automatically delete one of the duplicated files.
User- Friendly Anyone can use the device as it is that easy to maneuver.
The Eclipse Foundation - home to a global community, the Eclipse IDE, Jakarta EE and over 375 open source projects, including runtimes, tools and frameworks. All downloads are provided under the terms and conditions of the Eclipse Foundation Software User Agreement unless otherwise specified. Eclipse Foundation About Us. Eclipse java 6. The part that needs to work in the the Java 6 version of your codebase, and; the other code that is specific to the Java 7 version. (This is likely to involve creating some Java interfaces with Java 6 and Java 7 specific implementation classes.) Put the Java 6 and Java 7 code into separate Eclipse Java projects. Java SE 6 Downloads Go to the Oracle Java Archive page. Thank you for downloading this release of the Java TM Platform, Standard Edition Development Kit (JDK TM). The JDK is a development environment for building applications, applets, and components using the Java programming language.
Worth the price If there is one thing that Photo Stick does absolute justice with is the price of it.
The Photo Stick On Amazon Tv
Click Here Get The Photo Stick For PC Mac At 40% Off From Official Site
Cons
With great features comes some bad reviews. Photo Stick is not a device like a perfect device like the wheel, but its still revolutionary. Here are some downfalls of the device
Difficult to get hands on Photo Stick is only available on the online platforms, and due to this reason it gets out of stock within a short period of time. Though the company is trying to increase production but this step will take a lot of time as the set up of factories and all other factors pitch in to hinder the production. At this moment getting a Photo Stick is a game of luck.
No 32 GB variant Photo Stick comes in three variants of 8 GB, 64 GB and 128 GB. These three variants are good but 16 GB variants are often the choice for many customers.
= Click here to visit THE PHOTO STICK Official Site GET 40% OFF =
The Benefits Photo Stick Offers
Photo Stick installation only requires inserting the drive into the computer, everything after that Photo Stick will handle. The whole process will take around 10-20 minutes, it actually depends on the amount of the files you have to transfer. There is no need of manually selecting the flies and saving it to the cloud, it will be done automatically by the device. With Photo Stick you can forget the command “ctrl+c” “ctrl+v”.
Photo Stick will also get rid of the duplicate files, so you dont have to search for the twin one and delete it manually. Once the file has been backed up, you can look into the file anywhere with any other PC.
Technical Specifications of The Photo Stick
The Photo Stick is compatible with all computer operating software systems. Photo Stick works in Windows 7, XP, as well as Windows ten and eight. Photo Stick will work in all these operative systems that feature a USB port.
= CLICK HERE TO VISIT THE PHOTO STICK OFFICIAL WEBSITE GET 40% OFF =
Reviews for the Photo Stick
The Photo Stick Mobile may be a tiny thumb drive that instantly backs up all of your videos images files from iPhone and most iOS devices. Its easy to use, and it will do all the lengthy and challenging work for you. After I connected the Photo Stick for my iPhone, all the photos automatically were picked and secured.
How To Use The Photo Stick
If you assume that Photo Stick works sort of like a regular flash drive would, you are mostly right. You will have to create positive that your pc is on and running before you inject the tool into one in all those pc ports. Itll mostly take many seconds before a window starts. This window can have a button within the centre with Go. Then it provides the tool permission to access your Winchester drive.
Photo Stick will take anyplace a moment or over 1 / 4 of the associate hour, and it will support whatever quantity of video and photos files youve on your pc, and therefore overall speed and power of your pc devices are standard as well.
= CLICK HERE to Get THEPHOTOSTICK Today At 40% OFF From Official Website =
How Much will The Photo Stick Cost?

The best place to get a Photo Stick on the net is either from the official manufacturer or on the Amazon platform. Each site has some benefits for shoppers nowadays. Youll be able to read all about the market products and compare them. You will find a link to the official website within the Resources and, therefore, the more Reading section below—free choices area unit all on the market from this website. Youll realize some particular rating on the market too. The location typically runs deals that permit you to urge product for fewer or get an agreement after you furnish bulk.
Click Here to VISIT The Photo Stick Official Website for the BEST Price
Buying on Amazon is a beautiful alternative for people who need to save lots of cash. Once we checked out The Photo Stick in Dec of 2018, it sold-out on Amazon for $24.99 and had a $39.99 price. The official website listed this retail worth, however, had the merchandise on sale for $34.99. Despite that website you get this product from, youll have to be required to pay further for shipping, too, particularly if you would like it by a selected date. Photo Stick may be a comprehensive vacation gift plan and might sell out on-line round the holidays. You would probably realize that you simply can purchase one, but you will not compass until Jan or later. The Photo Stick comes in 3 variants. The value of the Photo Stick depends on memory. Current costs on Amazon units are given below
Photo Stick 8 GB $34.99
Photo Stick 64 GB $49.99
Photo Stick 128 GB $79.99
= Click Here To Get Your 40% Discount With Free Shipping Worldwide =
Conclusion
If you are looking for that convenient and keen backup device, this is it. There are already plenty of Photo Stick reviews out there; however, I felt like I had to present my very own opinion and write my Photo Stick reviews. It provides it with a try; several the Photo Stick reviews are positive.
CLICK HERE TO GET THE PHOTO STICK AT 40% OFF From The Official Site =
FAQ
What Files will The Photo Stick we tend to find?
Have you ever uploaded photos from your phone to your pc and forgot to alter the file names before saving them? Most systems can assign a name to those photos that grasp numbers if you want to seek out a selected image later and cannot keep in mind the name connected or might have a tough time finding that image. Photo Stick reviews usually signify; however, well, this widget works on each picture and alternative styles of files. It completely works quickly. However, it will find any photos saved on your Winchester drive and make backups of these pictures.
The Photo Stick works best on JPEG files. As long as the pc saves those files during this format, youll be able to realize them. Itll work on data collected in MOV and MPEG4 formats. Youll be able to adapt the tool and appearance for alternative file varieties like PNG photos too. Many of the pictures you transfer from the net or those you take and edit might use this format. It will do an excellent job of memorizing those photos, too, that keeps it from making new backups of identical files.
How Many Photos are you able to Save?
The Photo Stick On Amazon Store
Many shoppers have a standard question concerning what number photos and alternative documents theyll keep a copy with the assistance of this device. The solution is that it depends on the model we tend to obtain. Amazon offers a very cheap model, which is a Photo Stick 8. This model provides 8 GB of storage that stores up to five hundred pictures. The Photo Stick 64 model has 64 GB of storage and should delay to 30,000 photos. We will know Photo Stick 128, which is the largest model on the market. It will hold 60,000 pictures and offers 128 GB of memory for storing.
= CLICK HERE TO VISIT THE PHOTO STICK OFFICIAL WEBSITE GET 40% OFF =
How to operate a Photo Stick?
The chances are good that even when reading regarding this coding tool that you simply still arent quite sure what to try to do with it. Once you take away the Stick from its packaging, youll see that its a tiny low cap on the highest. You would like to open this cover to reveal the USB stick that extends out from the tool. When finding a free port on your pc, merely insert the Stick into that port. Most computers can mechanically acknowledge the device and issue a window that allows you to run it.
If you do not see this window, you should open My pc and there you can use the USB icon. It ought to show that theres one thing within that port. Once you double-click thereon, the pc can authorize the Photo Stick code to run. If youve got a waterproof that wont run the Stick, youll seek for the USB possibility on your pc. You furthermore might have the choice of gaping your file manager and writing the extension name of the Stick into the box, which can force it to run. Once it finishes running, you can remove the Stick or transfer it prevented into you.
Why must you Get a PhotoStick?
Hard Drives mostly fails to identify. Mobile Phones fail all the time, one drop and youll lose all of your files. This tool doesnt need web affiliation further. It doesnt have something to try and do with the cloud, which makes it safe.
Money-Back Guarantee
The developers behind The Photo Stick know that some shoppers wont adore it as much as others do. If the product fails to satisfy your expectations, youll be able to request a refund from the corporate that produces it. If you provide a smart reason, then Photostick will grant refunds.
= Click here to visit THE PHOTO STICK Official Site Get 40% Discount =
Other Photostick Products
While Photo Stick 8 and other tools are excellent for users today, the company also makes some other gadgets and tools that you can use. One option is The Photo Stick mobile app. This is an app that works for your phone and with the associated gadget. Though this gadget looks similar to the classic Photostick, it does not come with the same USB end. The manufacturer knows that newer phones do not have space for a USB port and offers tools that will fit in the port that your phone has. It can backup thousands of pictures and gives you a safe place to store your files. You can download the Photo Stick for Android and iPhones.
The Photo Stick mobile reviews are quite positive and point out that it does an excellent job of backing up files found on most phones. You can pick from different sizes that include up to 64 GB of storage. All the Photo Stick mobile models are compatible with Android and Apple phones. There is also a device called The Photo Stick Plus, which looks like an external hard drive and comes with a USB plug. It has one terabyte of storage and can hold up to 100,000 photos or a great combination of videos and other files. The Plus model is more expensive than the standard model though and may have more space than you need.
Click Here To Get 40% Discount Available Only At ThePhotoStick Official Site
Alternatives for Photo Stick
If for a few reasons, you opt that either of that merchandise wont meet your desires, there are some excellent options out there. Whereas their square measure masses to decide on from, we tend to compile an inventory of the highest three, that well mention a lot of below. Youll even be ready to see a comparison chart that will allow you to see the options quickly and while not an excessive amount of reading.
SanDisk Cruzer 256GB USB 2.0 Flash Drive
The second variation is the SanDisk Cruzer 256GB USB 2.0 Flash Drive. This 256GB flash drive will hinder 14,400 photos, 640 minutes of video, 16,000 songs, and 64GB of files or documents. Its sufficiently small to hold anyplace, while not being therefore little that you simply act.
Its also encrypted with a 128-bit AES software system, that helps make sure that your files square measure safe. The coding conjointly comes with an additional layer of security, that could be a needed watchword to access data. SanDisk contains a two-year limited assurance that provides you lots of time to exchange if need be.
SanDisk iXpand Flash Drive 128GB
Alternative variety three is that the SanDisk iXpand Flash Drive 128GB. This USB flash drive could be a bit different than others as a result of its created specifically for iPhone and iPad devices. This implies you cant use it with golem phones or devices sort of a portable computer or PC. Additionally, the adapter contains a versatile half that produces it doable to figure with the bulk of iPhone cases. Best nation in war thunder.
With 128GB of cupboard space, youll expect to get 7,200 photos, 320 minutes of video, 8,000 songs, and 32GB of file area. If youve got an iPhone or iPad and want to transfer some files, this is often a fantastic choice
= VISIT PHOTOSTICK OFFICIAL WEBSITE GET 40% Discount With Free Shipping =
This content has been published by I. G Marketing company. The WiredRelease News Department was not involved in the creation of this content. For press release service enquiry, please reach us at [email protected].
0 notes
Quote
As we all work remotely now or are using online video apps like Webex, Zoom, or Teams, having a good headset for hours upon hours of talk and listen time is critical. If your headset is heavy, extended wearing time weighs down on you, literally. Or if you need to hear your surroundings, like while being at home or while driving, having earbuds can severely restrict your hearing. That’s why, when I got the opportunity to review the AfterShokz OpenComm bone conduction Bluetooth headset, I was intrigued by many of its innovative features. It’s truly not like any other headset you may have used in the past! (*Disclosure below.)
I have tested many different types of headsets and earbuds in the past. Some are fantastic for commuting, where they fully block out all of the ambient noise. Others have had ANC (Active Noise Cancelling), which drowns out other types of background noise. Others are great for gaming, and while they are light-weight (and actually quite good for extended video conference calls), they are big and bulky and don’t really look “professional.” Then I tried the AfterShokz OpenComm Bluetooth headset, and I suddenly have a new favorite headset for all of my video conferencing needs.
The AfterShokz OpenComm’s have a truly unique design and solve similarly unique use cases. Do note, these might not be perfect for you. You need to understand that using the OpenComm headset, your ears are NOT obstructed in any way. There is nothing that physically covers your ear or goes into your ear. Sound is transmitted by something called “bone conduction,” which I will go into later. So this headset might not be good for just jamming out to music (personally, I would prefer using earbuds or a headset). But for video conferencing or phone calls, I’m sold!
What is Bone Conduction?
The AfterShokz OpenComm uses a technology called Bone Conduction to transmit sounds. It is not a new technology. It’s been around for quite a while and is used by other types of headsets or earbuds. AfterShockz seems to have done a fairly good job incorporating it into their product line as other headsets use it as well.
According to AfterShokz, they are using 7-generation bone conduction technology, which, in my mind, means it is fairly mature. And, I should state, there are plenty of people who love as well as dislike this technology.
So how does it work? Essentially, these types of headsets have their “speakers” that rest on the wearer’s cheekbones. While traditional headsets transmit sound waves that cause the eardrum to vibrate, with bone conduction, those sound waves are instead transmitted through the cheekbone, effectively bypassing the eardrum and going directly to the cochlea.
The cochlea is “the spiral cavity of the inner ear containing the organ of Corti, which produces nerve impulses in response to sound vibrations.“
Here is where you can decide whether you love or don’t love bone conduction. As I mentioned before, it truly depends on your use case. After testing out the AfterShokz OpenComm headset, I can strongly say that I would NOT use it for listening to music. You do lose fidelity, and the lows (like the bass) are almost non-existent.
That being said, for spoken words, like listening to a podcast or participating in an audio or video conference call, I feel that the AfterShokz OpenComm are ideal, and not just because the bone conduction technique works great for that use case. It’s because of the other features and design of the OpenComm headset.
When you first use the AfterShokz OpenComm and experience the bone conduction in action, it may be a bit surprising. It actually does work, and, even though this is essentially an “open ear” headset, those around you cannot really hear the audio coming from the headset (unless you crank up the volume all the way to 11).
And a funny side note about high volume and bone conduction. To get high volume, the headset has to vibrate more intensely. When you put it at high volume, the “speakers” actually vibrate so much on the OpenComm, that they actually tickled my cheekbones where they rested. You will feel the vibrations (obviously) at lower levels, and sometimes it takes a little getting used to.
A Well Thought Out Design
Let’s talk a little bit about the design of the AfterShokz OpenComm Bluetooth headset. It’s my belief that AfterShokz wanted to create a headset that could be worn for extended periods of time. So that is how I actually tested it.
First, there is the USB magnetic charger, which can plug into your USB Type-A port. This (proprietary) cord has two magnets that connect to the headset itself and hold it in place while it charges. Don’t lose this cord as you will have to order one specifically from AfterShokz – they are non-standard.
I simply charged the headset over-night. But you can get a full charge quite quickly – about one hour. And how long does a battery charge last? According to AfterShokz, you can have up to 16 hours of talk time or 8 hours of listening time! That’s impressive.
So at the beginning of my work-from-home day, I put the headset on. Since it is Bluetooth, it is cord-free. The headset does rest over your ears, but not in them. And the “speaker” (the bone conduction part) presses lightly on your cheekbones. A band connects the two “speakers” behind your head.
I left the AfterShokz OpenComm headset on my head and connected to my MacBook Pro via Bluetooth all day. I conducted several video conference calls and left them on my head for the full 10-hour workday. I even wandered around my home to test the range of the Bluetooth.
Before I go into the usage and performance results, let me tell you a bit more about the design.
For starters, I need to highlight the weight of the AfterShokz OpenComm headset. It weighs only 33 grams! Let me translate that into what that really means. It is so light-weight, after time, you barely notice that you are wearing it. To me, this is an incredibly important spec. If a headset is too heavy, you will take it off. I literally left the OpenComm’s on my head the entire day and have been for several days for work hours.
Some other quick, yet important specs:
It uses Bluetooth 5.0It has a wireless range of about 33 feet (which I can attest to)It has a water-resistant rating (IPP55)Standby time is about 14 daysCharge time is about 1 hourThe mic is DSP Noise-Cancelling
But all specifications aside, how well does the headset work for working at home or in noisy environments?
Thoughts on using the AfterShokz OpenComm headset
I have now used the AfterShokz for a couple of weeks. I have done several video calls, even ones where I asked the other participants how well I sounded. It’s important to find headsets that both sound good to you (using the speakers) and sound good to those listening to you (because of the Mic).
The open-ear design might not be good for people who really want to focus and not be distracted by external sounds. However, I can think of plenty of use cases where hearing your surroundings is critical.
As we work from home, that also means that we may have kids or other family members that we need to listen out for. With earbuds or headsets, that can be a tricky thing to do. You might not hear everything that is happening. With the AfterShokz OpenComm’s, you CAN hear everything AND hear what is going on on your calls.
A similar use case is for those who drive for a living or frequently have to drive and be on the phone. In many states, it is actually illegal to have earbuds in both ears. And equally illegal is actually holding or using your smartphone. The OpenComm headset is perfect for both of these driving requirements. You physically have nothing in your ears obstructing you from hearing your surroundings, but you can also do hands-free calling. My understanding is that many truck drivers like using these (coupled with the long battery life).
But let’s talk about the microphone. There is nothing worse than having a headset that doesn’t have a good mic. Either the audio quality that is transmitted is bad, or it picks up all of the ambient noise around you.
The AfterShokz OpenComm has an adjustable Digital Signal Processing (DSP) boom microphone, which actually uses two built-in mics to eliminate background noise. My wife helped me test this out while I was on a video call with a work colleague. She stood about four feet away from me and had a regular (and then louder) conversation with me. My work colleague could not hear anything that she said and only heard my spoken voice. So, overall, very successful test.
Lots of Button Actions
The one thing that my old brain hasn’t gotten its head around yet are the multiple actions you can take with the three buttons. There are two volume buttons (which serve other purposes) and a multifunction button. To turn the AfterShokz on or off, you simply press and hold the plus volume button. You will get voice prompts when you do this action.
To pair on Bluetooth, once the OpenComm headset is turned on, you press and hold the plus button again to enter pairing mode. I was able to successfully pair to both my iPhone and my MacBook Pro (but I primarily use the MBP for all of my calls). The OpenComm’s remember that I last connected with the MBP, so it automatically tries to reconnect with that.
The Bluetooth range, as I mentioned, is actually quite good. I can wander around my home and still remain connected to my Mac. If I go out of range, I get a beep indicating the connection has been lost. Normally, when I get back within range, the OpenComm’s reconnect automatically. Sometimes, however, I do have to press the multifunction button to force a reconnect (if I have been disconnected for a long time but the headset is still powered on).
The multifunction button serves a variety of purposes, including answering and ending calls, play/pause (single click), next song (double-click), previous song (triple-click), and more. You can also do other standard call functions by holding the button. And, if you are on standby, you can activate the voice assistant by holding the multifunction button for 2 seconds.
Your hand simply has to get used to finding the buttons and pressing them appropriately.
The Price of Open Listening
Hopefully, this review gives you a good understanding of how the AfterShokz OpenComm Bluetooth headset works and performs. Again, it might not be a solution for everyone. Your ears are NOT covered, so you DO hear all of the sounds around you. But, the audio quality, particularly for spoken words (like conference calls and conversations), is quite good. Again, I probably wouldn’t use the OpenComm headset for pure music listening through.
So what will this technology set you back in terms of price? The AfterShokz OpenComm headset retails for $159.95 on the AfterShokz website. And you can pick it up on Amazon currently for the same price of $159.95.
You do also get a nice zippered carrying case to protect your investment!
Shop on HighTechDad
The product shown below (and related products that have been reviewed on HighTechDad) is available within the HighTechDad Shop. This review has all of the details about this particular product and you can order it directly by clicking on the Buy button or clicking on the image/title to view more. Be sure to review other products available in the HighTechDad Shop.
AfterShokz OpenComm Bluetooth Bone Conduction Headset
$159.95
Buy on Amazon
Overall, I was quite impressed with the comfort of the AfterShokz OpenComm headset. Being that it was extremely lightweight, you can wear them for hours. Also, with an impressive battery life of eight hours of listening time and 16 hours of talk time, this headset is ideal for your work-from-home environment. I often forget that I’m actually wearing the OpenComms.
Disclosure: I have a material connection because I received a sample of a product for consideration in preparing to review the product and write this content. I was/am not expected to return this item after my review period. All opinions within this article are my own and are typically not subject to the editorial review from any 3rd party. Also, some of the links in the post above may be “affiliate” or “advertising” links. These may be automatically created or placed by me manually. This means if you click on the link and purchase the item (sometimes but not necessarily the product or service being reviewed), I will receive a small affiliate or advertising commission. More information can be found on my About page.
HTD says: If you are looking for a Bluetooth headset for an environment where you must hear your surroundings (like driving), or you want a headset for video or conference calls that is extremely light-weight, the AfterShokz OpenComm Bluetooth Bone Conduction headset should be at the top of your list!
https://www.hightechdad.com/2021/02/08/headset-works-around-your-ears-not-in-them-aftershokz-opencomm-bluetooth-headset-review/
0 notes
Text
Mac Mini For Photoshop

The entry-level Mac mini offers a 3.6GHz quad-core i3 processor for £799/$799 which may not fulfil the needs of the typical designer, but the £1,099/$1,099 version offers a 3.0GHz 6-core i5. Apple FINALLY updated their Mac Mini product line late in 2018 (with a minor update in March 2020), making it a pretty good option for photographers to run Lightroom and Photoshop. This buying guide provides insight into which model and what configuration options photographers should consider. The best budget Mac for photo editing is the 2019 Mac Mini for about $900 and the best budget PC is the Dell Inspiron 3670 for about $650. Add the ViewSonic VA2719-2K-SMHD 27 Inch display for about $220 and a 4TB hard drive for another $100. So you are a photographer on a tight budget in need of a computer to run Lightroom and Photoshop. Hi John - The PA272W-BK-SV 27' 16:9 IPS Monitor with SpectraViewII from NEC comes equipped with the NEC SpectraViewII color calibration tool and features enhanced color accuracy covering 99.3% of the Adobe RGB color space, 94.8% of the NTSC color space, and 146.4% of the sRGB color space. With a variety of input connectors including DisplayPort, Mini DisplayPort, HDMI, and DVI-D Dual-Link, you.
Mac Mini For Photoshop Cs6
Mac Mini For Photoshop Software
What is Final Cut Pro X like running on a new Mac mini? We take a look at the new model, its features and how well FCPX performs. It even beats an iMac Pro in one of our tests!
Before we plug the new Mac mini up, it is important to understand that this version of the unit has changed. Changed a lot.
Back in 2005, the Mac mini was designed for switchers from PCs. It didn’t come with a screen, keyboard or mouse and keeping the price down helped make the transition to Mac OS 10.3 Panther and a PowerPC processor as painless as possible.
Times and technology have changed, no need now for the DVD slot or a spinning hard disk for storage.
The switchers of today are buying MacBook Airs and MacBook Pros as their first Macs, not the mini.
So this gives Apple a chance to change and retarget the use of the Mac mini. Consequently, that’s exactly what they have done with the new range of models.
But instead of offering (To quote Steve Jobs) a ‘stripped down Mac’ they’ve actually put the logic board on steroids!

The fourth generation Mac mini now has a choice of quad and 6-core processors, up to 64GB of Ram, up to 2TB of SSD storage and the option of a 10GigE port over the standard GigE.
There are also four USB-C Thunderbolt 3 ports fed from two controllers, an HDMI port that supports 4K and two USB 3 ports. So yes, you can plug your own keyboard and mouse in without having to buy any adaptors.
Can the user upgrade the RAM in the new machine? Yes, it is possible, but it is not a case of flipping up a slot and exchanging the cards out.
You have to remove the cooling fan and then slide out the logic board. Make a mess of it and you’ll invalidate the warranty, so it is best to stick to an Apple approved centre for the upgrade. Should you want to get your spudger out and see the insides of the new Mac mini, head over to the excellent iFixit site.
The machine on test is a 3.2GHz 6‑core 8th‑generation Intel Core i7, 32GB 2666MHz DDR4, Intel UHD Graphics 630, 1TB SSD storage and the 10 Gigabit Ethernet option.
If the colour of the Mac mini looks familiar, it is exactly the same as the iMac Pro and (after seeing them side by side) the Blackmagic external GPU. This also makes sense of the decision for Apple to sell the black keyboard and mouse and also probably hints at the new Mac Pro colour. (And possible footprint- a skyscraper sized oblong trashcan?)
Connecting it up
I’m lucky to have 2 10GigE connections on the back of my QNAP NAS. Final Cut Pro X needs fast drives to be able to build the ‘always live’ waveforms and thumbnails.
Plumbing the Mac mini into the edit system is easy and I’ve detailed how to do point to point 10Gig connection before if you haven't got a router/switch.
If you need the internet on the machine, a cheap USB to Ethernet adaptor from Amazon for $15 works as well as anything else. Run a speed test to make sure you are accessing the NAS via the higher speed route.
I powered a 4K monitor from the HDMI port; this works well and avoids any more dongles having to be bought.
After 25 years of Mac ownership, I have enough keyboards and a spare mouse to finish off the system!
Power On
The machine comes with Mojave installed and defaults to dark mode on the now silent boot. The machine is very quiet and can’t be heard over the fan of the nearby QNAP, which isn’t that loud either. This machine could easily sit on your desktop and not annoy you or your co-worker.
I read a recent review that the sound was pretty terrible out of the Mac mini. I’d disagree. It isn’t great, but it isn’t bad either. I’d say it was better than the old cylinder Mac Pro, but not in the league of the Mac notebooks. You wouldn’t want to use it as edit monitoring.
The Mac mini does have a headphone socket and I can see many editors sitting in offices with the machine on the desk and headphones on editing all day.
Although I worked the machine hard with rendering, the shell didn't get too hot. However I did feel the warm rush of air out of the back of the machine which caught me by surprise when the mini was angled away from me.
I wouldn't have it in this orientation for continuous use, ie situated under a central monitor post with cables pointing at you. Instead I suggest putting the cables and heat exhaust to the back. It will make plugging the headphones in a bit trickier, but I hate sitting in draught!
Final Cut Pro X Performance!
Let’s give it a real test and put it up against an iMac Pro!
I thought I’d dive straight in with a 4K Project and use a Library with a short minute and a half sequence with large still images, transitions, multiple title and adjustment layers.
It is in a Library that I duplicated to both machines with the media staying on the QNAP. The cache was set to both desktops respectively as the RAM in both runs at up to 3Gig speed.
Mac Mini For Photoshop Cs6
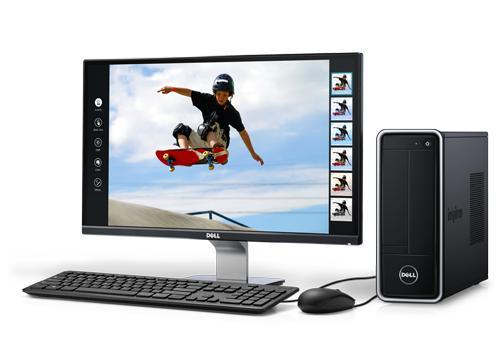
Although I didn’t time it, it felt like the thumbnails were taking a longer time to draw than I’m used to on the iMac Pro. All render files were deleted before all tests.
Unrendered, the Mac mini played the sequence back in Better Performance, but dropped frames on Better Quality. The iMac Pro played back in both settings without a problem.
Skimming seemed just as fast as the iMac Pro and it didn’t feel underpowered when navigating the timeline or browser.
The iMac is an 8 core machine with 64GB of RAM and more importantly a Radeon Pro Vega 64 GPU.
Both machines are connected to the same storage via 10GigE and renders and exports went to the respective desktops. (Ok I know it is NBase-T which supports 1Gb, 2.5Gb, 5Gb and 10Gb)
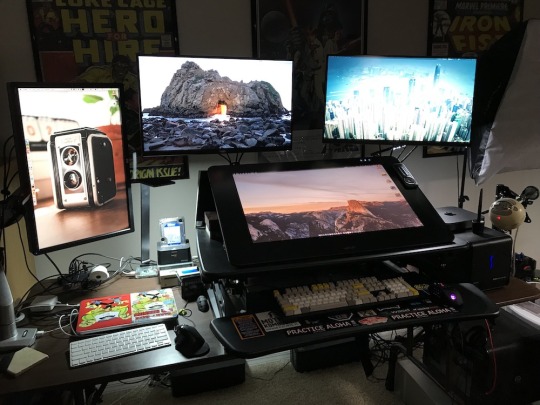
Render time
Mac mini 7’03”
iMac Pro 1’43”
Mac Mini For Photoshop Software
4K ProRes 422 Export
Mac mini 6’45
iMac Pro 1’40”
As expected here as FCPX uses the GPU for image processing, the much lower powered Mac mini takes a lot longer.
Compressor Convert to HEVC 4K 8Bit
Mac mini 54”
iMac Pro 55”
Well, the Mac mini beat the iMac Pro! This is because all of the conversion is done on the CPUs.
Not really worth testing for Motion as apart from a few things like particles, Motion almost lives on the GPU.
Compressor Clusters
No, not a new breakfast cereal, but Compressor allows you to share the work out over connected machines.
I didn’t realise that the ability to set up a cluster of machines running Compressor was easy to do. Well, when I say easy my first attempt failed, but that might be down to my slightly quirky network topology with the QNAP.
To build a cluster, on the machines you want to add, open up a copy of Compressor. In the preferences, turn the option on for other computers to process batches.
Then on the host machine, make a cluster from the available machines in the list. Here you can see we have got something very wrong! We will be revisiting this topic with the issue fixed when we have more time.
Then having named your cluster (or other single machine), you can then toggle the processing destination in the dropdown menu on the bottom of the host machine's Compressor GUI.
To work properly and fast, all the machines need to be connected with 10GigE via a 10GigE switch. The costs of this networking is now a lot cheaper, Netgear and QNAP make a suitable budget switch.
There is no limit to the amount of Mac minis you can have in a cluster. You'll probably run out of switch ports first!
One note here. For distributed processing, it has to be a self contained movie that gets automatically diced and sliced and sent off to the cluster machines.
Conclusions
Not what I expected. I guess I was in the state of mind thinking that the Mac mini wasn’t a serious machine for anything other than web browsing, Plex serving or basic Photoshop.
It’s a lot more than than. It is a component in building a modular system, which is a new thought considering that Apple has been criticised over the past few years for lack of upgradability in the Mac Pro and iMac Pro.
There are two reasons for this new direction. The first are Thunderbolt 3 connections giving the option of using an external GPU and therefore factoring out the limited onboard Intel offering.
The second is the option of a 10GigE port. Being able to connect to high speed shared storage without going through an adaptor is a huge plus.
Why? Take sever centres for example. Every App on the iOS App Store has been compiled on a Mac. Rack up rows of Mac minis connected with 10GigE and you have a facility that can get apps ready quickly. No need for costly large GPUs here, all the work will be done by the CPU cores. Once set up, the Mac mini is more than happy to run in a headless mode. I've worked with a few producers like that.
This is also true of building a small Mac mini cluster to do the hard work of making all the different deliverables of an FCPX exported finished movie - while you carry on editing something else with your main machine. It would make sense for a large production or facility house to have a rack of these that everybody could access when needed.
Put five or ten of these together in a rack and you have a very fast DIT tool for making proxies and dailies on set. The Mac mini above gets its first on set DIT experience tomorrow!
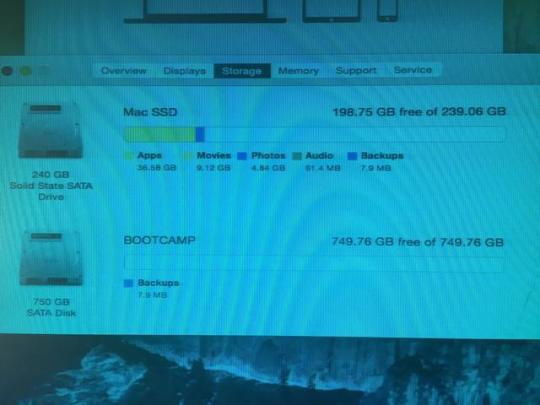
I’ll leave you with a final thought.
Spec up a 6-core Mac mini with 32GB of RAM, 1TB of SSD storage and the soon to ship Blackmagic RX Vega 56 eGPU and you have a machine that’s not too far from the base model iMac Pro, wait for it... with over £1,200 left spare.
Granted, you’ll have to supply your own monitor, keyboard and mouse, but if upgradability is important to you, this could be a very clever way of getting the power with the flexibility.
Hopefully we will have an eGPU to test soon :)
Peter Wiggins is a broadcast freelance editor based in the UK although his work takes him around the world. An early adopter of FCP setting up pioneering broadcasts workflows, his weapon of choice is now Final Cut Pro X.
You can follow him on Twitter as @peterwiggins or as he runs the majority of this site, you can contact him here.
0 notes
Text
Dell XPS 17 (9700) review: The 17-inch laptop is back, and it's spectacular
Dell's XPS lineup has been among the best for years, and the company has gradually refined whatever pain points it did have, such as when it used to put the webcam below the screen. But this year, the lineup underwent a major redesign, with Dell chopping down the bezels even more, something that I wouldn't have guessed was possible.
The firm has long touted how small the footprint is on its laptops, always saying that the XPS 15 fits in the footprint of a 13-inch laptop, and that the XPS 13 fits into the footprint of an 11-inch laptop. With the XPS 15 fitting into an even smaller footprint this year, there was room for something bigger.
Dell announced the new XPS 17 in May, and it's the first new XPS 17 in around a decade. If you read my review of the latest XPS 15, then there are pretty much two things to know. The screen is bigger, and it's more powerful with Nvidia RTX graphics. In fact, it's the first XPS laptop ever with RTX graphics.
Obviously, these specs are for the unit that Dell sent me. The base model starts at $1,399.99, although that one has integrated graphics, a Core i5-10300H, an FHD screen, and 8GB RAM.
Design
While the XPS 17 was introduced alongside the XPS 15 redesign in May, this design was actually first shown in January at CES with the XPS 13. This design consists of a 16:10 display, narrow bezels on all four sides, and no USB Type-C ports. Indeed, if you put the XPS 13, 15, and 17 next to each other, they look nearly identical except for being different sizes.
The Dell XPS 17 is indeed the 17-inch laptop that can fit into the footprint of a 15-inch laptop. The most important thing that that means to me is that it can fit into a regular-sized bag. That's not always the case with 17-inch laptops; in fact, it's pretty rare. It's a bit heavy at five and a half pounds, but that's the kind of laptop that this is. It's got a lot of power under the hood, and it also fits into a small footprint. That combination makes the XPS 17 unique.
The top-down view is the one thing that looks the same. The chassis is made out of aluminum, and the laptop comes in a silver color with a chrome-colored Dell logo stamped in the lid.
The sides are silver-colored as well. This was a big change with the redesign since the sides have more traditionally been black. I think this gives it a much cleaner look. But as I mentioned, there are no USB Type-C ports, even on the 17-incher.
Instead, there are four Thunderbolt 3 ports, two of which are on each side. The bad news is that they're not full Thunderbolt 3 ports, so if you're like me and you work from a Thunderbolt 3 dock that has two 4K monitors attached to it, you won't be able to use the full resolution. My workaround was to disconnect one of the monitors from the dock and connect it directly to the laptop. Still, it's disappointing, considering how premium and powerful this PC is.
The cool thing about having two Thunderbolt 3 ports on each side is that you can charge the PC from either side. I know that this sounds like a small thing, but it's really nice, and it's a rarity in laptops.
Also on the right side, you'll find an SD card reader and a 3.5mm audio jack. I'm kind of surprised that the SD card reader is there with everything else being cut, but I guess it's nice that it's there.
Display and audio
The screen on the Dell XPS 17 is a flat 17 inches, compared to 17.3 inches on a traditional 17-inch laptop. The reason for that is because this has a 16:10 display, and to be clear, being that it's measured diagonally, this display is larger than a 17.3-inch 16:9 screen. It comes in your choice of 3840x2400 or 1920x1200 resolutions. Dell sent me the former, and it is absolutely beautiful.
It comes in at 500-nit brightness, so it works great in bright sunlight, and indoors, I only found myself using it at about 25% brightness. It also has 100% Adobe RGB, 94% DCI-P3, and a 1600:1 contrast ratio.
The colors are also nearly perfect, and that actually goes for whatever angle you're viewing the display from. Dell promises a 178-degree viewing angle, and it delivers. You can look at this thing from any angle and not see any visible distortions.
Plus, it's big. I'm not always a fan when companies make taller screens like this because it means that it's also narrower. But at 17 inches, there's plenty of screen real estate for everything.
The company also has something called Dell Cinema, which includes CinemaColor, CinemaSound, and CinemaStream. CinemaColor includes HDR technologies and more, and there's actually an included app that lets you apply different display settings such as movie, evening, sports, and animation.
The bezels are small, but that doesn't mean Dell removed the webcam, or moved it. It's shrunken down to fit into that tiny top bezel, and there's an IR camera for facial recognition as well. You're not making any sacrifices in that department like you would have been in the old days.
CinemaSound has to do with the Waves MaxxAudio Pro speakers. There's an app for that too, but this one is called MaxxAudio Pro instead of CinemaSound. The XPS 17 has large speakers on either side of the keyboard, and they sound fantastic. The dead giveaway is that it has both woofers and tweeters, a rarity on laptops.
Indeed, this has four speakers, two of which are 2.5W and two of which are 1.5W. Obviously, they're used for different frequencies. If you're looking for sound quality and volume in a laptop, you definitely came to the right place.
Keyboard and trackpad
The keyboard found in the XPS 17 is the same as can be found in its other clamshell laptops. Dell does have a technology called MagLev that it uses in the XPS 13 2-in-1 and XPS 15 2-in-1, but perhaps surprisingly, the technology didn't make it into the smaller, redesigned clamshells.
Dell didn't add a numpad, which is a decision that I'm happy with. I'm not a fan of the numpad, and it's not even easy to ignore because it moves the regular keyboard to the left, leaving it off-centered. I'll take the quad-speaker setup instead.
Key depth is 1.3mm, which is pretty standard for a consumer laptop these days. It's quite comfortable to type on, and it's definitely one of the better keyboards in a consumer laptop. If we were talking about commercial laptops, that might be another story, but we're not talking about commercial laptops. I find that I make very few mistakes with this keyboard, something that I do appreciate after using some keyboards that I've had some issues with.
There's a power button in the keyboard, which doubles as a fingerprint sensor. Unfortunately, you do have to scan your fingerprint after the PC boots up, as opposed to how everyone else with a fingerprint sensor in the power button does it, scanning your finger before it boots up.
Dell considers this to be a security issue, assuming that you might walk away from your PC between when you press the button and when it boots up and someone might sit in front of it. I have a bit more faith in the user than Dell does, and I think you'd get to know your PC and whether or not you're safe to grab a cup of coffee while it's booting up.
My favorite feature of the XPS 15 is on the XPS 17, which is that the Precision trackpad is massive. Huge trackpads are something that Apple introduced on its MacBook Pro PCs a while back, and I've been waiting for a Windows OEM to follow suit. If the real estate on the keyboard deck is there, I say use it. The large, clickable trackpad feels great, and it makes drag-and-drop operations a breeze.
Performance and battery life
Both performance and battery life are excellent on the XPS 17. This thing is great for anything. I used it for things from gaming with Forza Horizon 4 and Halo: Reach to 4K video editing to general work. Sure, there was the occasional bump in the road, particularly when it came to gaming, but it absolutely handled anything that I threw at it.
After all, this thing has top-end hardware for its class. It has an Intel Core i7-10875H processor, which has eight cores, 16 threads, and a 45W TDP. It's the better Core i7 from the H-series, the other one being the hexa-core Core i7-10750H. It's only bested by the Core i9-10885H, which is available in the XPS 17.
For graphics, it comes with an Nvidia GeForce RTX 2060 Max-Q with 6GB GDDR6. With RTX graphics, it supports things like real-time ray tracing and deep learning super sampling (DLSS). RTX graphics was how I knew it would support some solid gaming. You can get it with integrated graphics if you don't want the power at all, or you can get it with an Nvidia GeForce GTX 1650 Ti.
Keep in mind that this is a creator laptop, not a gaming laptop. It uses a 130W charger, while most gaming laptops are closer to the 230W range, and it doesn't have the thermals for it. This is primarily a work machine, but I'm here to let you know that it does have the power to play as well.
Even more impressive is battery life. I often say that you have to choose between power and battery life, and with the UHD+ display, you can bet that this uses a lot of power. I used it with the power slider one notch above the battery saver, and with the screen at around 25% brightness. I can tell you that you can easily get six hours out of this, and in many cases, you can take it further than that. With general work, I was able to get up to eight hours.
Of course, the touchscreen model comes with a 97Whr battery. In other words, this has one of the biggest batteries that you'll find in any laptop (much larger and you can't take it on a plane). The non-touch model comes with a 56Whr battery.
For benchmarks, I used PCMark 8, PCMark 10, 3DMark, VRMark, Geekbench, and Cinebench.
If you're not the type to go through benchmark scores, all you need to know is that this is a powerful machine.
Conclusion
My biggest complaint about the Dell XPS 17 is that it doesn't have full Thunderbolt 3 ports, which would have been able to handle two 4K displays on a single port. If that bothers you too, just wait for the next one. Intel's next generation of CPUs is going to support Thunderbolt 4, which is really just the full Thunderbolt 3 that I'm describing. My other gripe is that there's no cellular model. I realize that it's something of a rare feature on more powerful laptops, probably because it uses battery, but I don't care. It's 2020 and I should be able to work from anywhere.
Let's be clear that this is an absolutely incredible laptop that's nearly perfect. It's an absolute pleasure to use, no matter what you're using it for. If you're playing games, it can do that. If you're streaming movies, it's got a killer HDR display and stunning speakers. If you want to edit video, it's got the power for that as well.
All of it comes in a beautiful chassis and yes, a small footprint. The fact that this thing has a 17-inch display and can fit in a regular bag is a feat of engineering. Honestly, the Dell XPS 17 is in a class all its own, and I can't think of anything like it. If you're looking for a laptop that can do everything, this is it.
0 notes
Text
Thanks to Seagate and LaCie, I Don’t Have to Purchase a New MacBook Pro
Back in 2016, when I purchased my MacBook, I thought that 1TB of storage would go far. At the time, I was using Dropbox to store larger files in an attempt to go all-in on cloud storage. Four years later, and I once again find value in having my crucial documents and files readily available without having to use a browser to get to them. And thanks to these LaCie and Seagate portable storage solutions, I’ve been able to do just that.
Over the past two months, I’ve been exclusively using LaCie’s Rugged SSD Pro and Backup Plus Portable hard drive. Both portable drives allow me to house all of those confidential and personal files and photos, but they are compact enough that all I have to do is toss one in my bag if I have to leave the house. LaCie was kind enough to allow me to pick not only the sizes but the colors that I wanted for each of these review units, but I tend to stick with black portable drives for no particular reason.
Lacie Rugged SSD Pro
The Rugged SSD Pro is available in Black only, with the Standard Rugged SSD model available in Orange. The Lacie Rugged SSD Pro is a secure and fast SSD system that allows you to not only have consistent performance but 256-bit hardware encryption for all of your personal information. This is typically my GO-TO hard drive for holding my work data, all of my backup GearDiary contacts, and personal photos.
Coming complete with a Thunderbolt 3 cable in the box, the Rugged SSD Pro can perform up to 2.8 Gbps, perfect for those more extensive libraries that you have taking up precious desktop space. Working from home, having this functionality allows me to quickly take large zip files, extract, and even combine them faster than I ever could using my alternatives of Dropbox or Google Drive — both of those require an internet connection and a monthly subscription. If I were to ever run out of space on the Rugged SSD Pro, I’d simply purchase another larger model for my stockpile.
The 1TB model that I have not only matches the 1TB of storage in my MacBook, but it manages storage like a champ. Being the first-ever SSD I’ve reviewed, coming from more traditional hard drives, this has been a delight to use. One caveat that I should mention, though, is that at ~5″, the included Thunderbolt 3 cable is pretty short. I found myself purchasing a separate cable for when I’m on the go until I had a friend show me how they attach their SSD to the back of their MacBook so they always have storage readily available and so they always know where the SSD is.
youtube
Just thinking that Apple would’ve charged me another $6-700 to add more storage to my MacBook was enough for me to consider SSD. What I enjoyed the most about it, though, is it has password protection, which allows me to secure my files properly. Family Photos, Passwords, and any other data that don’t want just sitting up in the cloud, in a service that could potentially end up hacked or canceled.
Thanks to LaCie’s ToolKit feature, not only can you sync with your computer and use it for Time Machine, but you can individually back up essential files, restore lost files, as well as continuously sync. But, of course, to do that, the drive would have to stay plugged into the laptop.
A lot of my friends use their SSDs for photo and video editing. But in my case, I use it for when we podcast weekly using Zoom. When I have the rugged SSD plugged into my MacBook, I can have our podcast shows automatically go into the SSD, which makes it easier to store without compromising any data speeds transfers or potentially losing the file. Before this, I had Zoom connected to Google Drive, which could be a potential disaster if Drive were to crash completely, or if my internet speeds caused the file not to upload correctly. I also can’t tell you how many times have attempted to download a large document or just a large file that could have been maybe 2-300 gigabytes, not realizing that my MacBook only had around 400 gigabytes left. Now with the Rugged SSD Pro, I never have these problems.
youtube
The Rugged SSD Pro by LaCie comes in 500GB, 1TB, and 2TB. My next goal is to get the 2TB or wait until LaCie eventually puts out more massive storage for the SSD Pro so I can use it to catalog my Plex Server with movies and TV shows on the go. The 1TB that I ve been using has a sequential read and write of 1000 MBps per second and a write of 950 MBps per second, which is pretty impressive.
Measuring 3.9″ long by 2.6″ wide by 0.7″ thick and weighing in at just under 100 grams, it is easy to see this is the “get up and go” SSD to beat. Not only is it able to survive drops, but its grippy design keeps it from sliding around on a desk or table. According to LaCie, it can handle drops up to three meters and even can be run over by a car, which is more than AppleCare covers on my relatively delicate MacBook Pro, so I’ll take it. The SSD is also waterproof, which I appreciate, especially when I’m working in a coffee shop. The waterproof USB-C port sits on the long end of the hard drive.
To test speeds, I copied my iPhone Pro Max Cloud backup folder from my desktop to the Lacie Rugged SSD Pro to see how long it would take. For the 8GB backup, it took a total of six minutes to download on standard internet. I’ve taken advantage of the workaround shown above to attach the SSD to my MacBook — using the cable and some 3M Adhesive tape that I stuck to the back of my MacBook case. So when I’m in a coffee shop, it’s not sitting on the table; it’s attached to the MacBook itself.
It’s worth mentioning that LaCie gives everyone who purchases the Rugged SSD Pro a one-month complimentary membership to Adobe’s Creative Cloud “All Apps” plan, which is fantastic. Adobe’s subscription model is overpriced, in my opinion, however. I haven’t used my complimentary membership yet, but I’m sure later down the line, I’ll check it out.
I like the fact that LaCie opted for putting the Thunderbolt 3 port at the top of the device versus on the side, because for some reason, I’ve had a habit of accidentally pulling the cables out while sitting at a desk, and that’s certainly not a good thing. On the side of the device, there’s a white power indicator that lets you know when it is connected to the computer and when it’s not, so that helps out a huge deal. The Lacie Rugged SSD is my go-to everyday SSD, and it travels with me in my tech bag everywhere I go. I used it while camped out in the hospital, and I found it to be durable and versatile. It got me through almost a week of horribly-postured typing sessions, including this article.
The Lacie Rugged SSD Pro retails for $401, and it is available from Amazon [affiliate link] and other retailers.
Source: Manufacturer supplied review sample
What I Like: Ultra-portable, and I can use interchangeably with my MacBook and iPad
What Needs Improvement: Thunderbolt 3 cable is a bit too short at 5 inches — Lacie should include a longer cable
Seagate Backup Plus Portable
When I’m using my standing desk at home, though, I tend to use my Seagate Backup Plus Portable. Available in a variety of sizes in terms of onboard storage, I opted for the 5TB model. I’ve been attempting to set up my very own Plex Server since I’ve been home, and over the past month, it’s been going relatively well. I’ve always had a love/hate relationship with portable hard drives because of their internal spinning, constant overheating, and the eventual death and loss of everything stored on them.
The Seagate Backup Plus Portable comes with a trial for Adobe CC Photography and a one-year Mylio “Create” plan, both of which I completely disregarded but might be of use to someone else. Aside from that, the 5TB hard drive has a smaller footprint than many other hard drives at 4.5″ long by 3.15″ wide by 0.8″ thick.
The Backup Plus Portable works with both macOS and Windows 7 or higher. I almost exclusively use this hard drive to house all of my media, including videos and shows for Plex. The Backup Plus Portable can house up to 500,000 high-resolution photos, which Jess and I will likely do within three years, at the rate we’ve been taking pictures of baby Skylar. If you are storing video media, you can expect it to hold about 165 hours worth. This is great if you’re beginning your cable-cutting journey, or you decide you want to go fully digital and get rid of that collection of DVDs sitting in your basement.
We all know that external hard drives are useful tools for housing all of your files and data, but I’ve been impressed by what I’ve seen out of Seagate and Lacie. Their ability to give you a mobile solution like the Rugged SSD or allow you to hoard all of your photos, playlists, and documents on the Backup Plus is truly remarkable considering their prices are modest these days, especially compared to cloud services. Instead of paying the reoccurring monthly or yearly fees on these services, either of these backup solutions would be a great choice.
The 5TB Seagate Backup Plus Portable retails for $104.99, and it is available from Amazon [affiliate link] and other retailers.
Source: Manufacturer supplied review sample
What I Like: 5TB is an insane amount of storage for the price; Small footprint, can easily slide into a back pocket or backpack
What Needs Improvement: Nothing
The post Thanks to Seagate and LaCie, I Don’t Have to Purchase a New MacBook Pro first appeared on GearDiary.
from Joseph Rushing https://geardiary.com/2020/09/16/thanks-to-seagate-and-lacie-i-dont-have-to-purchase-a-new-macbook-pro/
0 notes
Text
13-Inches MacBook Pro vs. MacBook Air vs. 16-Inches MacBook Pro: Which One Is Better?
We are providing you a simple guide that will help you in picking the ideal MacBook. Here are some tips that most of the individuals may consider while purchasing the new MacBook.

Hey You! Are you planning to purchase a brand new and specific MacBook for your school, for work, provide creative, productive, or just want to do something new? As everyone gets puzzled while choosing the appropriate MacBook and we think that you are also in that queue.
Well, we are here to help you out with this.
The previous year was considered as the most complicated line-up for MacBook. It is because the consumers may face difficulty in making a choice.
Usually, Apple updates its features timely, and that results in the finest line-up in the past decade.
If you need Mac, you can take it from anywhere, and that can do a lot of stuff. If your priorities are portability and affordable prices, then the new and the fresh MacBook Air is a great option.
If you wish to little more for the MacBook and have the capability to buy the product mix of the power and portability, then you should go for the 13-inches MacBook Pro.
If you love power more than anything and can pay even a little bit more, then you can go for the spanking new 16-inches MacBook Pro. The decision to choose this product may depend on how much power you may need.
You may need to know some crucial things before making your mind for purchasing any MacBook. Here are some of the essential information regarding the products:
Why MacBook Air?
If you are a student, jet setter, coffee-shopper, and just want to use the product for the web, documents, messaging, and photos, then we suggest you get the new MacBook Air.
If you think that it is the least expensive MacBook in the Line-up of the MacBook, then maybe you are wrong. MacBook Air is the simplest MacBook, and you can also consider it as a simple iPad. If you have made your mind for purchasing this product, then choose other things as well, like colour, storage, memory, and processor, as the price may vary according to these features.
Here are the different variants for the MacBook that you can choose.
The MacBook Air is available in Space Grey, silver, or gold colour. It also includes the intel’s 10th-generation available in Core i3, Core i7, and Core i5 variants and also available with an ice lake processor. You will also get the Intel Iris + Graphics or Intel fixed graphics in the MacBook.
How Simple is MacBook Air?
The MacBook Baseline Air got a 13.3-inches retina display that has high quality or high-resolution screen display that can reduce the strain on your eyes. Having this tech also means that the standard working distance can’t see pixels and see the texts and graphics.
Although at 400 nits and sRGB, it is dissimilar with the display of the other MacBook product like MacBook Pro.
At the beginning of the year, Apple has updated its product with the Truetone, which means it has installed sensors that can read the colour temperature in that room.
MacBook Air has also got 720 progressive scans webcam and three microphones that may support the voice-activated the new macOS Catalina voice control.
For the power, it contains two USB-c/thunderbolt three Ports and also got Apple’s T2 security chip that makes it difficult to hack or steal the stuff from the product, and besides, it gives an easier to way to access to Apple Pay.
Let’s talk about the price. The basic model of the MacBook Air begins at $999, and you can also purchase this product at $ 899 from the store of the Apple education.
Besides, you are getting a 1.1 Gigahertz dual-core with Intel Core i3 processor, 256 GIGABYTES SSD storage, and 8 GIGABYTES LPDDR4X RAM. By spending an extra penny, you can get extra breathing room of 16 GIGABYTES RAM. And by paying $100 or $250 more, you can choose the processor from 1.1 Gigahertz quad-core Intel Core i7 or 1.2 Gigahertz quad-core Intel Core i5.
If you just want to have MacBook for doing the regular and routine stuff, then MacBook Air is the new standard for you as you can also get Magic Keyboard version of the product.
Is 13-inches MacBook Pro good enough?
Hey! Are you a professional photographer, audio-video producer, videographer, designer/coder, or engineer? If power and money are essential for you, then you should go for the brand-new MacBook Pro.
Indeed, everyone has not required the mere power available to the 16-inches MacBook Pro, or you can also so that some individuals may need more affordable and portable than this product. In that case, you may require more power which is offered by the MacBook Air and need a product which is more cost-effective and affordable than the 16-inches MacBook Pro; then we recommend you to go for the 13-inches MacBook Pro.
Here are some reasons that may put you in the dilemma
You may be constrained while purchasing MacBook Pro due to its squared shape and is a quarter of a pound heavier than the MacBook Air. Besides, you are also going to get 10 hours of Internet browsing battery life instead of 12 hours.
What you will get in this product
You will the same screen size as MacBook Air i.e., a 13.3-inches screen, but it is more colourful, has 100 nits brighter, and is present with a broader P3 gamut. Plus, you can also need a modern iPad for getting the second display that will give you more screen real and best feel.
Let’s have a confabulation about the processor.
The base model of the Pro starts with the 1.4Gigahertz quad-core 8th generation Intel Core with Intel Iris Plus Graphics 645, which will be provided with the i5 Coffee Lake processor and Turbo Boost up to 3.9Gigahertz.
You can get this base model at $1299. By spending $300 extra on the amount, anyone can get 1.7Gigahertz quad-core 8th‑generation with Turbo Boost up to 4.5Gigahertz and Intel Core i7 Coffee Lake processor.
You will get two USB-c/thunderbolt with three ports with all the models that were mentioned above, but if you need a faster processor, then you should choose four-port models for completing all the requirements.
For getting the faster processor, you may need to spend $1799, and you will get 2.0Gigahertz quad-core 10th-generation Intel Core i5 processor with Turbo Boost up to 3.8Gigahertz. If you need more, spend $200 more.
If you spend 200 bucks more, then you can get 16GIGABYTES of DDR3 Ram on the 8th-generation model.
For upgrading the MacBook from 256GIGABYTES of SSD storage to 512GIGABYTES or 2 TB by spending extra bucks like 800 or 400. It is applicable for the 2-port model only.
For the four-port model, you may have to pay $200-$1200 bucks for upgrading storage from 512GIGABYTES to 2TB or 4 TB, according to your need.
Ultimately, the price of the MacBook pro ranges from $1299 – $3599.
If you are looking for a product that is more powerful than MacBook Air, and more comfortable than the 16-inches MacBook Pro, and just want to work on the photos, videos or coding, then 13-inches MacBook Pro is a good option.
16-inches MacBook Pro: Seems to be more interesting
If you are a photographer, videographer, or audio-video producer or a designer and your worth power and time, then you all need brand new 16-inches MacBook Pro.
Reasons that you leave wavering on MacBook Pro
The powerful 16-inches MacBook is just broader and taller with a pound heavy than the standard MacBook. But extra pound will give you extra battery life and may get 11 hours of wireless internet browsing life.
Plus, the points of the product.
Its screen brightness, the gamut, is the same as the 13-inches but has bigger and more pixels. The 16-inches MacBook Pro has 3072*1920 pixels, which is far better than the 13-inches MacBook.
If you love the sound, then for you, it supports the Dolby Atmos speaker. The sound of the speaker well-nigh as the Homepod.
They are too good at the Processor
The base model of the MacBook has 2.6 Gigahertz 6-core 9th- Generation, which is available with the Radeon Pro 5300M and Intel Core i7 Coffee Lake Refresh processor along with 4GIGABYTES of GDDR6 storage and Turbo Boost up to 4.5Gigahertz.
You have to spend $2399 to get the base model of 16-inches MacBook pro. If you want to upgrade your MacBook to the 8-core i9 processor along with Turbo Boost of 5.0Gigahertz, then you may need to spend $300 for upgrading your feature.
For buffing up the graphics from Radeon Pro 5500M with 4GIGABYTES or 8GIGABYTES of GDDR6 storage, you may need to pay an extra penny of around $100-$200.
Depending on your need, you need the processor, and in order to gain 2.3Gigahertz 9th‑generation 8‑core Intel Core i9 Coffee Lake processor along with the Turbo Boost up to 4.8Gigahertz, you may need to pay $2799.
If you need to get 32 GIGABYTES of 2666Megahertz DDR4 memory, then you may need to pay $400 and $800 Bucks for 64GIGABYTES.
The price also ranges according to the storage required by you, like you may need to pay from $200-$2400 to upgrade storage from 512 GB to 4 TB. This much storage can do such things.
In totality, for getting the 16-inches MacBook, you may need to pay $2399 to $6,099, according to your need. Which one is legit for you; it depends on you.
For better performance, pixel-pushing, code crushing, and your time are worth, and also you can pay the amount, then all you need is 16-Inches MacBook Pro.
Your cheat sheet assisting you in making the final decision
It seems like something is more complicated, worry not! We are here, and we will provide you the gist that may help you in choosing the product. They are:
MacBook Air is compatible with those who want to have a simple Mac that can be both portable and affordable.
If your priority is to get the excellent blend of the power and the portability and can pay little more, then we will recommend you to approach towards 13-inches MacBook Pro.
If you are fond of power and don’t need to take your Mac here and there and also can pay the cost, then you have the option to buy the new 16-inches MacBook Pro.
SOURCE: https://evablog782539272.wordpress.com/2020/07/08/13-inches-macbook-pro-vs-macbook-air-vs-16-inches-macbook-pro-which-one-is-better/
0 notes
Text
Dell XPS 15 9500 strikes a good balance for photo editing
New Post has been published on https://appradab.com/dell-xps-15-9500-strikes-a-good-balance-for-photo-editing/
Dell XPS 15 9500 strikes a good balance for photo editing


Lori Grunin/CNET
Dell’s XPS 15 laptops continue to be crowd-pleasers. With its eye-catching, slim new design and photo-editing-friendly performance, display and feature set, the latest 15-inch model can hold its own as a less powerful — much cheaper — alternative to a 16-inch MacBook Pro ($2,399 at Apple). It’s well worth a look if that’s how you roll, though you might want to consider the new 17-inch XPS 17 instead for the bigger screen. Both are still premium-priced, and likely not worth the money if all you need is a pretty work clamshell, not a serious workhorse.
Like
Impressive control over color management for a consumer laptop
Two USB-C/Thunderbolt 3 connections
Good performance and battery life, all things considered
Don’t Like
Can run hot
Only USB-C connectors
Soft, rubberized keyboard deck feels fine but scratches easily
The configuration we tested runs about $2,255. If you don’t need color accuracy, want better battery life and can live without the slightly-better-than 4K UHD resolution, you can save almost $300 by going for the lower-resolution option. The base configuration costs about $1,300 and comes with an Intel Core i5-10300H, 8GB RAM, a 256GB solid-state drive and the 1,900×1,200-pixel display. That’s a pretty big range for a single laptop model.
Something in me cringes at the idea of paying $1,300 for a system with only 8GB RAM and integrated graphics, though, so if you’re leaning towards that I suggest you consider something like the Lenovo C740. The processor is much less powerful, but it doesn’t make a lot of sense to pair a powerful CPU with so little memory. You can get an otherwise similar configuration of the C740, which is also sleek and about the same weight, for well under $1,000.
Dell XPS 15 9500
Price as reviewed $2,254 Display 3,840×2,400-pixel 15-inch touchscreen CPU 2.3GHz Intel Core i7-10875H Memory 16GB 3,733MHz LPDDR4x Graphics 4GB GDDR6 GeForce GTX 1650 Ti Storage 512GB SSD, SD card reader Ports 3x USB-C (2x Thunderbolt 3), headphone Networking Killer Wi-Fi 6 AX1650s (802.11ax), Bluetooth 5.1 Operating system Microsoft Windows 10 Home (1909) Weight 4.5 pounds (2.1 kg)
If you’re considering it for anything beyond casual photo editing, though, do yourself a favor and spring for 32GB RAM and an i7 CPU. My consistent experience is that if you need to multitask, then operations like mass thumbnail generation, which takes advantage of high core counts, can become bottlenecked by memory (at least on Windows). And applications like Adobe’s Lightroom Classic will use all the cores you can throw at it for some operations.
Dell redesigned the XPS 15 (and introduced a new 17-inch model) for 2020 to align more with the XPS 13, mostly. For one thing, that means the XPS 15 ditched its 4K OLED option. It gets a little complicated after that. The XPS 13’s display has a 16:10 aspect ratio, which means both the XPS 15 and 17 follow suit. The problem is that standard OLED panels only come in standard 4K UHD 16:9 aspect, so the XPS switched to a nonstandard 4K “UHD Plus” (3,840×2,160 pixels) and a base “FHD Plus” (1,980×1,200 pixels).
I like the UHD Plus screen more than the OLED, though, especially for photo editing, which is arguably the creative work that this system is optimized for. It has better color consistency and tonal range in the shadows, and as tested it covers 100% of Adobe RGB rather than P3, which is still a respectable 94%. (We test screens using using Portrait Displays’ Calman 5 Ultimate and an X-Rite i1Display Pro Plus.) If you don’t know what all this color gamut talk is about, this may not be the laptop for you.
The bigger touchpad is great, but I don’t like that the power button/fingerprint reader in the upper right corner is intentionally left a mystery. Plus, I like the soft, rubberized keyboard deck, but it seems prone to scratching (as you can see on the right speaker grille).
Lori Grunin/CNET
A wealth of pro photo-editing options
Oddly, Dell doesn’t promote accuracy as one of the virtues of the screen, and out of the box it wasn’t, despite the inclusion of PremierColor, Dell’s color management software. But with some easy tweaks to the brightness and gamma settings in PremierColor, I was able to get it to to standard target values of 2.2 gamma, delta E for grayscale and color less than or equal to 2 and white point of 6,500K. It can’t hit the effectively zero nits black (and therefore infinite contrast, since that puts zero in the denominator of the contrast calculation) but its roughly 1,560:1 contrast is good for an IPS (non-OLED) screen.
It also supports HDR, though with a maximum brightness of roughly 465 nits it won’t really wow you. And playback of 4K HDR content really taxes the integrated graphics; I couldn’t successfully force it to use the GTX 1650 Ti all the time.
More notably, unlike many consumer calibrated displays, Dell’s factory calibrated profiles actually clip the gamut boundaries to the color space; in other words, even though the display can produce colors well outside sRGB, it won’t if you’ve opted to use the sRGB color profile. That’s really helpful if you need to check out-of-gamut colors. You can create custom profiles with a calibrator using PremierColor as well, but only with the popular X-Rite i1Display Pro; it doesn’t even support the Plus yet, so I couldn’t test it. (If you want to calibrate it using your own software and a different calibrator, remember to turn PremierColor off.)
PremierColor gives you the standard set of color profiles, including Rec 709 (HD) and Rec 601 (SD), as well as settings for specific color temperatures and relative scales for gamma, contrast and black level. It also lets you choose from different viewing conditions, such as daylight or incandescent light.
A downside to the ever-shrinking screen bezels is you have to be careful when adjusting the display. For instance, while trying to find the perfect angle I accidentally touched the touchscreen and closed Chrome. I think a touchscreen is unnecessary here, anyway. And I’d gladly trade a millimeter more of top bezel for a better webcam.
Another trade-off of the new, thinner design is swapping USB-A and HDMI connections for all-USB-C/Thunderbolt 3. The XPS 15 has two Thunderbolt 3 connections, which is handy. But losing a display connection on the discrete GPU bus means you sacrifice some flexibility. It does (thankfully) retain the SD card slot, though. Dell grew the touchpad and moved the speakers to either side of the keyboard, both welcome changes. I don’t like the unlabeled, unilluminated power button: It has a fingerprint reader built in, but in the dark it’s just a blank spot and seems to scream, “Why do you want to turn me off?”

The Dell XPS 15 9500 (top) has roughly the same footprint as the Razer Blade 15, but it’s thinner. Plus, the sloping profile makes it seem thinner than it is.
Lori Grunin/CNET
One thing Dell didn’t sacrifice is speed, sort of. It stuck with the Intel H series processor where a lot of slim competitors use the lower-power (and therefore slower) U series. But it also tops out with the GeForce GTX 1650 Ti; bumping it up to a 6GB 1660 Ti GPU, like the Surface Book 3 has, might have given it the extra 2GB memory needed to let it better run some professional graphics applications or a little extra needed oomph for video editing. It does let Dell differentiate between the XPS 15 and the larger XPS 17 for something other than size, though.
The battery life is solid relative to the rest of its class at a little over eight hours, at least for streaming video. It also held up pretty well under my more punishing real-life workload, lasting about five hours of active use (though no imaging apps). That’s a pretty long time for me, though it ran too hot to keep it on my lap for that long.
The new design for the XPS 15 acquits itself well, and Dell didn’t make any major mistakes with it (along the lines of the now-retired XPS 13 bottom-dwelling webcam). But as a general-purpose work laptop, it’s not super light, doesn’t have a super long battery life, isn’t super thin, super fast or super cheap. It’s not a work laptop superhero, just a premium workhorse.
Geekbench 5 (multicore)
Microsoft Surface Book 3 (15-inch)
Lenovo Yoga C940 (15-inch)
Apple MacBook Pro (16-inch)
Note:
Longer bars indicate better performance
Geekbench 5 (single core)
Lenovo Yoga C940 (15-inch)
Apple MacBook Pro (16-inch)
Microsoft Surface Book 3 (15-inch)
Note:
Longer bars indicate better performance
Geekbench 5 (Vulkan)
Lenovo Yoga C940 (15-inch)
Microsoft Surface Book 3 (15-inch)
Note:
Longer bars indicate better performance
Cinebench R20 CPU (multicore)
Microsoft Surface Book 3 (15-inch)
Lenovo Yoga C940 (15-inch)
Apple MacBook Pro (16-inch)
Note:
Longer bars indicate better performance
Video playback battery drain test (streaming)
Apple MacBook Pro (16-inch)
Lenovo Yoga C940 (15-inch)
Microsoft Surface Book 3 (15-inch)
Note:
Longer bars indicate better performance (in minutes)
3DMark Fire Strike Ultra
Microsoft Surface Book 3 (15-inch)
Lenovo Yoga C940 (15-inch)
Note:
Longer bars indicate better performance
System configurations
Apple MacBook Pro (16-inch) Apple MacOS Catalina 10.15.1; 2.4GHz Intel Core i9-9980HK; 32GB DDR3 SDRAM 2,666MHz; 8GB Radeon Pro 5500M/1,536MB Intel HD Graphics 630; 2TB SSD Dell XPS 15 9500 Microsoft Windows 10 Home (1909); 2.3GHz Intel Core i7-10875H; 16GB DDR4 SDRAM 2,933MHz; 4GB Nvidia GeForce GTX 1650 Ti; 512GB SSD Lenovo Yoga C940 (15-inch) Microsoft Windows 10 Home (64-bit); 2.6GHz Intel Core i7-9750H; 16GB DDR4 RAM 2,667MHz; 4GB Nvidia GeForce GTX 1650 with Max-Q design; 512GB SSD Microsoft Surface Book 3 (15-inch) Microsoft Windows 10 Home (1909); 1.3GHz Intel Core i7-1065G7; 32GB DDR4 SDRAM 4,267MHz; Intel Iris Plus Graphics and 6GB Nvidia GeForce GTX 1660 Ti with Max-Q design; 512GB SSD MSI Prestige 15 Microsoft Windows 10 Pro (1909); 1.1Hz Intel Core i7-10710U; 32GB DDR4 SDRAM 2,667MHz; 4GB Nvidia GeForce GTX 1650 with Max-Q design; 1TB SSD
0 notes
Photo

New Post has been published on https://magzoso.com/tech/best-power-banks-with-type-c-output-you-can-buy-in-india/
Best Power Banks With Type-C Output You Can Buy in India
The Type-C port has been around for a while now, and most, if not all, Android flagship smartphones these days sport the modern USB port. In the last few months, we’ve seen it trickle down the price points, and it’s no longer uncommon to see phones under Rs. 15,000 ship with a Type-C port. However, most affordable phones ship with chargers that still have the Type-A (or as you probably know it, the “regular”/ “big” USB port). That means you use a Type-A to Type-C cable for charging, so you won’t need any extra cables if you are in the market for a power bank.
On the other hand, if you have a phone that ships with a Type-C charger — like most flagships do — and a cable that’s Type-C at both ends, or if you are someone who is trying to go all-in with the Type-C lifestyle — maybe using an iPad Pro or a MacBook Air — your choices in terms of accessories — and especially power banks — can be pretty limited.
Most power banks out there have regular Type-A USB ports for output and a Micro-USB port to charge the power bank itself, which means you will need to carry around two extra cables just to make the power bank work for you. Then there are others — such as the Mi Power Bank Pro — that feature a Type-C port, but it is only to charge the power bank itself, and it cannot be used for output.
Finding a power bank with Type-C output in India was a surprisingly difficult task, but we managed to find a few models. We then proceeded to use these in the real world over a few weeks as well as run them through a standard set of tests in our labs.
How we tested USB Type-C power banks
We wanted to test the power banks on two factors — if they live up to their rated capacities, and the speed at which they charge. The first test involved charging a series of fully drained smartphones (all with batteries that were at full health, meaning at or near their own rated capacities), and then seeing whether or not each power bank was able to charge as many smartphones as the rated capacity would indicate. The phones that we used all have relatively large batteries — the Xiaomi Mi Mix 2 (3400mAh), iPhone XS Max (3174mAh), Samsung Galaxy Note 8 (3300mAh), and Google Pixel 2 XL (3520mAh).
The second set of tests was designed to measure the amount of time it took to charge each smartphone. We first observed how much a phone could be topped up in thirty minutes, and then checked the time each power bank took to fully charge each smartphone.
Note that we restricted ourselves to charging the phones and the power banks themselves using their Type-C ports, since that’s the focus here. So power banks that do not support some kind of fast charging with their Type-C ports did not fare as well as they would if we had been using their Type-A ports.
Best Wireless Chargers You Can Buy in India Right Now
We also used the same cable to charge phones across different power banks, and put the phones in flight mode to eliminate any variables. Note that all of the power banks we tested support features like the ability to charge multiple devices at once, powering off automatically when you remove the cable, and automatically charging a device when you plug in a cable.
Also note that nearly all power banks advertise their battery capacities at 3.7V, while USB devices typically draw 5V, so the output capacity of the power banks for end-use is actually lower. In other words, a typical 10000mAh power bank will have an output capacity of around 7000mAh, though the exact value varies from one manufacturer to another, and is often buried in the products’ detailed specifications. This means that though your power bank is advertised a “10000mAh power bank”, it will have just about enough juice to charge a 3500mAh smartphone twice over, not accounting for normal electrical losses resulting from the various circuits involved.
With that out of the way, let’s take a closer look at the the Type-C power banks we tested.
1. Anker PowerCore Speed 20000 PD
Anker is considered by many as the most-trusted brand when it comes to power banks and chargers, and the company has a small but growing presence in India. Many of its accessories are officially sold via Amazon India, but the power bank that we tested is only available via offline stores at the time of filing this story.
Battery capacity: 20100mAh/3.7V (72.36Wh)
Rated output: NA
Output
5V/2A, 5V/3A, 9V/2.6A, 15V/1.6A
Input
5V/3A, 9V/3A, 15V/2A, 20V/1.5A
Though the offering from Stuffcool comes pretty close in terms of build quality, it would be safe to call the Anker PowerCore Speed 20000 PD the most premium power bank in our lineup. The retail packaging includes a Type-C cable and a carry pouch, but there’s no wall charger, something we’ve seen bundled with this power bank in other markets. There’s no Micro-USB cable either, despite what it says on the box.
This power bank was the only one in our list that could fully charge from empty all four of our test smartphones, and still have some — read tiniest — amount of juice left in the locker. In terms of charging speeds, the Anker power bank was, on average, the fastest when it came to topping up all three of our Android smartphones.
Surprisingly, though, it was the slowest to top up the iPhone XS Max, under the same conditions as the others. We repeated our tests one more time just to eliminate any one-off problems, and the result was still the same. However, the power bank managed to take an iPhone 11 Pro Max from empty to 52 percent in 30 minutes, which is more than what the bundled wired charger can manage. The power bank also has limited ports — just one Type-C port for input as well as output and a Type-A port for output.

The Anker PowerCore Speed 20000 PD supports up to 22.5W Power Delivery, so it was no surprise then that it was able to successfully top up a 2018 MacBook Air. We plugged in the laptop to the power bank with just 23 percent charge remaining, while using it outdoors at full brightness and an iPhone connected to the laptop via the other Type-C port. Not only was the power bank able to sustain the battery level on the laptop — which is what we expect from most power banks — but it was able to take it to 31 percent in around 34 minutes, which was more than what we expected, really.
The large capacity of the Anker PowerCore Speed 20000 PD makes it the heaviest power bank on this list, but all that extra weight is worth carrying around if you want something that will keep going and is a reliable performer. Despite the large-sized battery, the power bank can be topped up pretty quickly, taking a little over 3 hours when being charged using the Anker PowerPort+ 5 Ports using a Type-C to Type-C cable.
At Rs. 6,999, the power bank is certainly expensive, but if you want to want nothing but the best the Anker PowerCore Speed 20000 PD is the way to go.
What we liked
Quick to charge — and be charged
Can charge your MacBook Air without any problems
Premium design
Large capacity
Trusted brand
What we didn’t like
Slow to charge some devices
Limited ports
Expensive
Price: Rs. 6,999
Warranty: 18 months
2. Stuffcool 720PD 10000mAh Power Bank
The most versatile power bank that we tested, this one comes from Stuffcool, an Indian company that’s made its name selling phone accessories over the years. You get two full-sized Quick Charge 3.0 Type-A USB ports, one Type-C port (with fast charging and 18W USB-PD) that can be used for both input and output, and one Micro-USB port, which can obviously only be used for charging the power bank itself.

Battery capacity: 10000mAh/3.7V (37Wh)
Rated output: 6800mAh/5V (34Wh)
Output
Type-A (Quick Charge 3.0) x 2: 5V/3A, 9V/2A, 12V/1.5A
Type-C (including 18W Power Delivery): 5V/3A, 9V/2A, 12V/1.5A
Input
Micro-USB: 5V/2A, 9V/2A
Type-C: 5V/3A, 9V/2A
The Stuffcool 720PD was the second fastest power bank it came to charging the iPhone XS Max, and fastest in terms of getting charged itself. It was able to take a completely drained Xiaomi Mi Mix 2 to 45 percent in just 30 minutes, fully charging the phone in 97 minutes.
Then, it took a drained iPhone XS Max to 40 percent in 30 minutes, with the phone charging fully in a little over 2 hours. The power bank then had just enough power left to juice up a Samsung Galaxy Note 8 to 8 percent. All this was in line with its rated capacity of 6800mAh, which is lower than the others in this list.
That might seem disappointing, but the speed at which it charged all devices could make up for that depending on your priorities, and we certainly don’t mind trading off a little bit of capacity for fast charging on the move.

In another run, the Stuffcool power bank beat the Anker when it came to charging the Galaxy Note 8, which made it the fastest power bank in our tests on average.
The Stuffcool power bank is unsurprisingly the lightest and most compact in the group, and its build quality and overall feel are really premium. There are four LEDs that light up in white to indicate the current charge level of the power bank and also if it’s charging/ discharging. Another LED lights up in blue when Quick Charging is being used to charge a device or the power bank itself, or if you are in USB Power Delivery mode. The latter happened when we used this power bank to power our 13-inch MacBook Pro — skip to the end to read more about that.
Like the Anker PowerCore Speed 20000 PD, the Stuffcool power bank also supports fast charging over Type-C for input as well.
What we liked
Quick to charge — and be charged
Fast charging over Type-A and Type-C
Two USB Type-A ports
Quick Charge/ Power Delivery indicator
Compact
Can charge your MacBook (up to 13″ MacBook Pro)
What we didn’t like
Relatively low capacity
Price: Rs. 2,999
Warranty: 1 year
Update: The model we tested is out of stock but a newer variant is available via Amazon India at less than Rs. 2,700.
3. Lcare PN-983 S 10000mAh Power Bank
While Stuffcool is an established name in the accessories space, Lcare is a relatively new Indian brand that’s trying to make a mark in this segment. We were really impressed by this compact power bank, which is only a little bit larger than Stuffcool’s offering, though it makes up for that by offering a slightly higher output capacity as well.

Battery capacity: 10000mAh/3.7V (37Wh)
Rated output: 7000mAh/5V (35Wh)
Output
Type-A (Quick Charge 3.0): 5V/3A, 9V/2A, 12V/1.5A
Type-C: 5V/3A
Input
Micro-USB (Quick Charge 2.0): 5V/2A, 9V/2A
Type-C: 5V/3A
Note that the specifications that we have listed here are of the unit that we got, and the model listed on the Lcare website right now seems to have a lower rated output, so be sure to check with the company before you place your order. In our battery capacity test, our unit was able to fully charge the Galaxy Note 8 and the Mi Mix 2, and then even managed to charge the iPhone XS Max to 43 percent, more than living up to our expectations.
However, with no fast charging support on the Type-C port — the full-sized Type-A port is Quick Charge 3.0 compliant — this power bank was consistently slower than Stuffcool’s option when charging our phones, taking a full two hours and ten minutes to fully charge the Mi Mix 2, for example.

Our favourite feature is the useful display that shows the amount of power left in the power bank, and even indicates the rate at which your phone is being charged. Our only complaint with it is that the display is a bit too faint, and we had to really strain ourselves to see it at times.
With no fast charging over Type-C, it can take forever to charge the power bank over Type-C, and your best bet might be to leave it overnight. You should be able to do it quicker using the Micro-USB port paired with a Quick Charger.
What we liked
The display is really useful
Great capacity for the size
Quick Charge over Type-A
Compact
Excellent value for money
What we didn’t like
No fast charging input/ output over Type-C port
Price: Rs. 1,549
Warranty: 2 years
Update: The model we tested seems to be out of stock, but Lcare also sells a Type-C power bank without the display at less than Rs. 1,200, which seems even better bang for your buck, if you can live with just an LED indicator.
4. iVoomi PBP15K2 15000mAh Power Bank
iVoomi is a Chinese OEM/ ODM that entered India in March 2017 and has launched a host of budget smartphones in the market since then. The company sent us a 15000mAh Type-C power bank for testing, which makes it the second highest capacity offering that we tested. Obviously, that makes it the second bulkiest power bank, but, sadly, it feels the cheapest in terms of build quality.

What’s more, the front of the power bank has a pattern that lights up in different colours — green, blue, and red — when the power bank is being used, to indicate the current level of charge. While a good idea in theory, we found this implementation to be rather garish, and we would have preferred something a bit more subtle like standard LEDs.
Battery capacity: 15000mAh
Rated output: NA
Output
Type-A x 2: 5V/1A, 5V/2.1A
Type-C: 5V/3A
Input
Micro-USB: 5V/2A
Type-C: 5V/3A
While iVoomi doesn’t state the rated output capacity of the power bank, we were able to fully charge our Mi Mix 2, Galaxy Note 8, and iPhone XS Max, and still had enough juice left over to charge a Pixel 2 XL up to 42 percent. That indicates a capacity of a little over 11000mAh.
In terms of charging Android smartphones over USB Type-C, the iVoomi power bank was a little faster than the Lcare, but still slower than the Stuffcool and Anker power banks. It was also pretty fast in topping up the iPhone XS Max, finishing a little bit behind Stuffcool’s and Toreto’s offerings. However, in the absence of Quick Charging over Type-A, your experience using this power bank will be worse than what you’d get with the Lcare unit while topping up compatible smartphones.

Thanks to its high capacity and the lack of fast charging for input, you will really have to leave this power bank plugged in overnight when you are topping it up.
What we liked
Large capacity
Affordable
Two USB Type-A ports
What we didn’t like
Garish design and poor build quality
No fast charging on any of the ports
Price: Rs. 1,399 (MRP), available at Rs. 1,289 on Amazon India
Warranty: 1 year
5. Toreto Trilogy
Toreto is a Delhi-based accessories company whose offerings we’ve tested in the past and been reasonably satisfied with what they offer, especially for the price. The company’s latest offering is arguably the most interesting product is this list, as it’s a power bank with attached cables. If you are forgetful, you’ll be happy to have this one around as it’ll be one — or in this case three — less things for you to worry about.

That’s right, the Toreto Trilogy packs not one but three attached connectors — one Type-C cable and a combo Micro-USB/ Lightning connector, which means you don’t need to carry cables around with you. Combine these with the full-sized USB port on the power bank (and a cable, of course) and you can simultaneously charge three devices with this power bank.
The power bank also features Micro-USB and Type-C ports, but they are only for charging the power bank itself.
Battery capacity: 12000mAh
Rated output: NA
Output
Type-A: 5V/2.4A
Type-C (attached cable only): 5V/2.4A, 5V/3A
Micro-USB (attached cable only): 5V/2A
Lightning (attached cable): 5V/2A
Input
Micro-USB: 5V/2A
Type-C: 5V/2A, 5V/2.4A
Once again, Toreto doesn’t state the rated output capacity of the power bank, but we were able to fully charge our Mi Mix 2, Galaxy Note 8, and have just enough juice to charge the Pixel 2 XL up to 9 percent. That indicates a capacity of around 7000mAh, which is around 20 percent less than what we expected based on its advertised capacity.
At least there’s good news to report in terms of the charging sppeds. The Toreto Trilogy was the third fastest to charge the iPhone XS Max, only marginally slower than the Stuffcool power bank, which in turn was slower than Xech’s offering. However, when it came to charging the Type-C Android smartphones, it was comfortably in the second rung of phones alongside the iVoomi powerbank, behind the leaders Stuffcool and Anker, which we found to be acceptable for the price.

The power bank carries a one-year warranty, but there’s no warranty on the attached cables, which is understandable, but doesn’t inspire a lot of confidence.
What we liked
Fast charging
Affordable
The convenience of attached cables
What we didn’t like
Underwhelming capacity
No warranty on attached cables
Type-C port is only for input
Price: Rs. 1,999 (MOP)
Warranty: 1 year
6. STM Wireless Powerbank
The last two power banks in this article also feature in our list of best wireless chargers you can buy in India. Both of them feature tiny suction cups that make sure the power bank sticks to the phone while it’s being wirelessly charged. First up is the unimaginatively named Wireless Powerbank by STM, the popular Australian accessories company.

We’ve talked about the performance of this power bank as a wireless charger elsewhere (spoiler alert: it’s underwhelming), so in this article we will focus specifically on its performance as a Type-C power bank. Apart from the Type-C port (which can be used for both input and output), the power bank features two full-sized USB ports and a Micro-USB port, with the latter obviously reserved for input.
We really liked the design and build quality of this device, which is typical of STM’s offerings. However, at Rs. 4,799, it’s the second-most expensive power bank in this list and doesn’t offer the best value.
Battery capacity: 10000mAh
Rated output: NA
Output
Type-A: 5V/2.1A
Type-C: 5V/2.4A
Input
Micro-USB: 5V/2A
Type-C: 5V/3A
In terms of charging speeds, the STM wireless power bank was rather underwhelming, which wasn’t a surprise given its specifications. It was the second slowest to top up both the iPhone XS Max and Samsung Galaxy Note 8 using the Type-C port. Unlike most other power banks, there’s no support for Quick Charge on the full-sized USB ports. Thankfully, it’s pretty fast to charge the power bank via the Type-C port.

The STM wireless power bank carries a one-year warranty.
What we liked
Good design and build quality
Wireless charging support
Fast to get charged
What we didn’t like
Slow charging speeds
Expensive
Price: Rs. 4,799
Warranty: 1 year
7. Xech Satellite Pro 10000
Xech is a Mumbai-based accessories brand looking to make a name for itself in the crowded accessories market, and the Satellite Pro 10000 wireless power bank ticks a lot of right boxes. Though it looks a lot like the STM Wireless Powerbank, the Xech Satellite Pro 10000 promises — and delivers — better value.

In addition to being a competent wireless charger, this power bank features two full-sized USB ports, a Micro-USB port for input, and a Type-C port (for both input and output). Both full-sized USB ports are listed to support Quick Charge 3.0, while the Type-C port is said to support 18W Power Delivey.
Charging speeds using the Type-C port were equally impressive, with the Xech Satellite Pro 10000 being the fastest in our tests to charge the iPhone XS Max, and it wasn’t too far behind the fastest power banks when it come to topping up the other smartphones like the Samsung Galaxy Note 8. In our tests, it lived up to its rated capacity.
Battery capacity: 10000mAh
Rated output: NA
Output
Type-A: 5V/3A, Quick Charge 3.0
Type-C: 5V/3A, 18W PD
Input
Micro-USB: 5V/3A
Type-C: 5V/3A
Despite the suction cups on the Xech Satellite Pro 10000 not being as good as STM’s offering, we really liked the overall package thanks to its fast charging speeds and features like 18W PD and Quick Charge 3.0.

The Xech Satellite Pro 10000 power bank carries a one-year warranty and is available at Rs. 2,199 from the company’s website.
What we liked
Fast charging speeds
Wireless charging support
Excellent value for money
What we didn’t like
Nothing, really
Price: Rs. 2,199 (MOP)
Warranty: 1 year
Can I use these power banks to charge my MacBook Air or MacBook Pro?
Apple’s new MacBook Air and MacBook Pro models use the Type-C port for charging, so it’s logical to ask if you can use Type-C power banks for charging your laptop. If you have the 15-inch MacBook Pro, you can forget about trying to use it with any of these power banks, as it draws too much power. If you have the smaller MacBook Pro, the 12-inch MacBook, or the MacBook Air you might have better luck.
The Stuffcool, Anker, and Xech power banks are the only ones that officially supports USB Power Delivery, which makes it your best bet (out of the three) if you want to use your power bank to top up your laptop. We plugged a 13-inch MacBook Pro in to the Stuffcool power bank, and even while running some resource-intensive browser-based benchmarks, it slowly but surely topped up the laptop (4 percent in 15 minutes). Then, we stopped the benchmarks and left the machine idle with just the display on, and the charging was, as expected, much faster (7 percent in 15 minutes).
Note that the 13-inch MacBook Pro ships with a 61W charger, and the Stuffcool power bank supports 18W Power Delivery, so the results aren’t surprising. The 12-inch MacBook and new MacBook Air ship with a 30W charger, so your experience using the laptop while plugged into the power bank should be a lot better.
As we noted earlier, the Anker power bank was able to top up our laptop even while its display was at full brightness, which was no surprise given that it supports 22.5W Power Delivery, the highest in this list. You can expect slightly faster charging speeds with the Anker PowerCore Speed 20000 PD as compared to Stuffcool’s offering.
When plugged in to either of the other two power banks, the MacBook Pro actually lost power — though the laptop did indicate it was plugged in — while running the benchmarks. While idle, the Lcare unit could only top up the laptop by 1 percent in 15 minutes, while the iVoomi managed a healthier 5 percent. The only way you can realistically expect these power banks to charge your MacBook Pro is when the laptop is switched off.
Affiliate links may be automatically generated – see our ethics statement for details.
0 notes
Text
Living with a Dell Precision 5540 Mobile Workstation
Just when you think you’ve got a great mobile computing solution, something always comes along to upset the apple cart. In my case, it was mostly drones — more specifically, the 4K footage from my Mavic Pro drones. In addition to the added compute demands of rendering and encoding 4K video, consumer drone footage benefits mightily from substantial post-processing to reduce noise, correct artifacts, and perform color grading.
My two-year-old Dell XPS 15 9560 has been a great workhorse for photo and video editing but has been limited by its 4-core CPU and thermal issues (even after I hacked on it with various thermal fixes). Plus there is a whole new generation of GPUs since its 1050, for applications like Lightroom and Photoshop that take advantage of them. So I went shopping.
Shopping for a High-Powered Laptop
By default, I looked at the newest model XPS 15, the 7590, but early reviewers seemed to be having the same thermal issues as the earlier versions. I also looked closely at the HP and Lenovo mobile workstations,

but the components I wanted — latest generation i9, Turing GPU, and 4K touch display, all in one 4-pound chassis — weren’t all available at the time. They are starting to be, and I look forward to working with some of them over time. But I needed something sooner, so I took a chance and purchased one of the first Dell Precision 5540 units.
The Precision 5540 is very similar to an XPS model, with a few workstation twists, like the option for a Quadro GPU and some thermal tweaks, along with being certified for a lot of creative and engineering software. Early units even said XPS on the back flap, although now they say Precision. Physically the Precision 5540 looks nearly identical to my 9560, and in fact while I’ve had both of them in use I’ve found myself being frustrated at a missing file only to realize I’m on the wrong laptop.
Dell also provides about the same extensive set of ports it has for several years. There is a USB-C port that is now Thunderbolt 3 compatible, HDMI, 2 traditional USB ports, a mic/headphone jack, and a welcome SD card reader. Hard-wired Ethernet is long gone, but Dell does ship a USB-C Ethernet dongle along with the machine. Video callers will be thrilled that Dell has squeezed the webcam into the tiny bezel above the screen, instead of having it next to the keyboard.
If you’re looking for a fresh design, the Precision 5540 isn’t it. It’s nearly identical on the outside to my 2-year-old XPS 15, other than the new webcam placement.
You can get the Precision 5540 with Windows 10 Home, Pro, or Workstation (if you choose the 6-core Xeon). Linux is also available. RAM ranges from 8GB to 64GB, and hard drives from 256GB to 1TB. If you want either the T1000 or T2000 GPU, you’ll probably also want the large battery instead of an extra drive bay. The only screen option advertised to support 100 percent of Adobe RGB is the 4K IGZO4 Touch version. Selecting it will also require the large battery and configuring 2 RAM modules. After Dell’s online discounts, the 5540 is priced similarly to a high-end XPS 15.
The Precision 5540 Is a Performance Beast for a 4-pound Laptop
By the numbers, the Precision 5540 is a large upgrade over my last-gen XPS. The 8-core i9-9980HK has a lower base clock than the 9560’s i7 (2.4GHz versus 2.8GHz) but it boosts to a maximum of 5GHz and doesn’t throttle nearly as much. Running Cinebench R20 (CPU rendering) the 9560 crashed to a low of .8GHz, helping reduce its score to just over 1000. The 5540 never went below 2.9 GHz which, along with its 8 cores, allowed it to score over 3200. That performance ratio was more than matched in Intel’s XTU benchmark, at 2800 versus 850.
Similarly, the Quadro T2000 is a big upgrade. 3DMark’s TimeSpy jumped from 1800 to 3200, for example. The results for FireStrike were also good, jumping from 5000 to 7400. Following along with a monitor on the CPU temperature and clock speed, a small amount of thermal throttling occurred, but the CPU was always able to perform above its base clock.
Dell’s Precision 5540 4K LED display has a gamut covering 100 percent of sRGB and Adobe RGB, along with 95 percent of DCI-P3.
However, this is still a lot of processing power and heat crammed into a small package, so it isn’t immune from throttling. A combination of heavy CPU and Nvidia GPU load will cause the system power limit to come down, which in turn can reduce clock rates down to their base clock.
What? No RTX?
Having just covered Nvidia’s big push to roll out its RTX capabilities to “Creatives,” I was well aware that even though the T2000 GPU in the Precision 5540 is a beast by mobile standards, it doesn’t have any of the dedicated RTX functionality. In the end, I decided I’m okay with that. It isn’t clear how much true RTX capability is in applications Nvidia touts, so I don’t know what the performance gain would be.
In particular, while I do a lot of rendering, encoding, and image processing, I don’t game on my laptop (much) or use it for ray tracing very often. Similarly, serious AI work will still be the province of my desktop machines or the cloud, which have beefier GPUs and more GPU memory. Plus, the mobile workstations with real RTX GPUs are even heavier and more expensive. If Nvidia is successful in establishing RTX
as a permanent part of its architecture, I’m sure that will change over time.
“Kitbashing” to Save Some Bucks
A favorite term in our family comes from model railroading: Kitbashing to upgrade a pre-designed building model is one of our favorite activities. Doing your own computer upgrades can be just as rewarding, and even more profitable. Dell wanted an uplift of something like $700 to equip my machine with 32GB of RAM and a 1TB SSD. I found I could buy the equivalent or better components for about $250 (Crucial 2666 RAM and a top-rated Adata NVMe SSD) and install them myself.
I did find that the security settings in the BIOS had to be turned down a notch before it let me boot of my new drive — that I had cloned from the one that came with the Precision 5540. Then I used the excellent PC Mover utility from Laplink to get my apps, files, and settings across from my old machine. It’s not perfect, but having tried many tools that claim to do this over the years, it is the only one I’ve found that is actually worth using.
Using the Dell Precision 5540
Overall, the Precision 5540 is a joy to use. The screen is stunning and capable of being incredibly bright. Having the (optional) fingerprint reader in the power button makes returning to the machine simple and intuitive. And the machine is fast. It not only benchmarks fast, it feels fast and is responsive (which you’d certainly expect from all that power under the hood). You can order it with a spinning hard drive as the primary drive, but I find it hard to believe that would ever make sense.
Unfortunately, much like many other Windows computers, the Precision 5540 continues to struggle with sleep-related issues when running Windows 10. The first one I ran across was that the default “connected standby” or whatever the current term is for the default sleep mode is, would enable the machine to fire back up after I closed it and put it in my photo backpack. Forcing it to hibernate solved that problem, but it really shouldn’t be a problem at all in a state of the art high-end machine. The other issue I had with two different units is that after resuming from sleep the WiFi speed was crushed to less than 10% of what it had been before. Interestingly, I didn’t see this when the 5540 first shipped, but has been easily repeatable for the last couple weeks. Updating drivers (from either the Dell or Intel site) doesn’t seem to fix it, although turning WiFi off and on again does. I really hope Dell gets on top of this soon.
Conclusion
Overall, I’m satisfied with the Precision 5540. It performed perfectly on the road in Europe to process 360-degree panoramas and lots of 4K drone footage, and around the US on several different projects. While the 5540 pricing starts at $1,240, a fully-configured unit prices out at just over $3,000, so it isn’t for everyone. I’m pleased with my choice and wouldn’t hesitate to recommend it to those with similar needs and budgets, although both the Thinkpad X1 Extreme 2nd generation and the HP ZBook Studio G6 should be worthy competitors. I’m assuming that Dell can fix the annoying WiFi issue.
For Mac users, look for the rumored 16-inch MacBook Pro by the end of 2019. I do wonder if its screen will actually be larger than the 15.6-inch current standard for high-end 15-inch machines, or if the 16-inch moniker is just marketing. It’ll be interesting to see what Apple provides for GPU options for it, as that is one area where they have tended to lag behind Windows competitors.
Now Read:
At a Glance: Alienware M15 R2 Laptop Review
Hands On With the DJI Mavic Pro: A Serious Drone That Fits in Your Daypack
Lenovo X1 Carbon vs. Yoga: Which ThinkPad Model Is Right for You?
from ExtremeTechExtremeTech https://www.extremetech.com/computing/296737-living-with-a-dell-precision-5540-mobile-workstation
from Blogger http://componentplanet.blogspot.com/2019/10/living-with-dell-precision-5540-mobile.html
0 notes
Last Seen Blogs

tiendatanatos
T͓̽A͓̽N͓̽A͓̽T͓̽O͓̽S͓̽

nourhanhesham
Nourhan Hesham

theyellowroseofsodor
The Yellow Rose of Sodor

walker990
Anime land

heyelectraheart-blog
electra heart // personal thoughts