#and no one has any use for all this pre-existing hardware that uses standard usb
Text
Me: Quick! I need an image to upload to Tumblr or Discord or to use in some Photoshop thing! Internet, help me!
Internet:

Also Internet:

#avif#webp#newfangled fuckery#from the makers of#let's not put any standard usb ports on these macbooks#because usb-c is the future#and no one has any use for all this pre-existing hardware that uses standard usb#comes:#loads of unsupported file types!#they're better except for all the times you can't even use them!
1 note
·
View note
Text
Every once in a while, there comes an indie game for retired game consoles that does something really special to stand out from all games on that system, new and old. This is one of those times. Kai Magazine Software, who have developed a bunch of games for the Genesis/Mega-Drive before, have debuted their newest, most ambitious game to date: “The Secret of the Four Winds.”
The Secret of the Four Winds is an action RPG inspired by the likes of cyberpunk classics like Snatcher (1994) and Shadowrun (1994) on the Sega CD and Genesis respectively. The game centers around a trio of protagonists brought together after a mysterious army of shadowy ghosts is summoned that are only vulnerable to a special pistol found by main protagonist Gillian Seed Al. Once you meet your two cohorts, you’ll be able to command each of them in battle and outfit them for any role in battle, such as a tank or healer, for example. You’ll also make choices throughout the game that will affect the outcome of the story and your relationship with your two allies and other characters.
What makes this game really special, and unlike any Genesis game ever seen before, is its use of an all new audio chip developed by Kai Magazine Software, allowing the game to run fully arranged music, as if it were a Sega CD game. While it also gives you the option of regular FM sound, the arranged music is an incredible technical achievement. This has never been seen on Genesis outside of certain flash carts such as the Mega Everdrive Pro, which allowed you to add arranged music to existing Genesis classics through special game patches with its MSU-MD and MD+ technology. The downside is that this game will not function on certain Genesis systems, such as the Genesis 3 or most Genesis clone consoles. Any Model 1 or 2 Genesis should work, according to Kai Magazine Software. They also recommend disconnecting your 32X or Sega CD if music isn’t playing.
For more info, as well as a special video showcasing the game in action, have a look past the break below.
The Secret of the Four Winds is available for pre-order directly from Kai Magazine Software’s website as both a regular and collector’s edition. No matter which you go for, you can also get the game in four different covers. However, the website is a bit messy looking, so I’ve taken the liberty of providing helpful links to each version of the game below.
US Genesis Cover pre-order (Standard Edition) (Collector’s Edition)
EU Mega-Drive Stripes Cover pre-order (Standard Edition) (Collector’s Edition)
EU Mega-Drive Grid Cover pre-order (Standard Edition) (Collector’s Edition)
JPN Mega-Drive Cover pre-order (Standard Edition) (Collector’s Edition)
Regardless of which cover you get, the game is NTSC and PAL compliant, so any compatible Genesis/Mega-Drive console from around the world should support the game just fine. Standard editions also come with the following extras:
High quality Genesis/Mega Drive plastic box
Reversible cover with 2 different art styles
High quality, full color instructions manual
A set of postcards with game-art in them
A high quality, region free cartridge with label.
Collector’s editions come with everything in the standard edition, plus the following:
High quality Genesis/Mega Drive plastic box
Reversible cover with 2 different art styles
High quality, full color instructions manual
A set of postcards with game-art in them
A high quality, region free cartridge with label.
A BIG BOX (Neo-Geo size) with reversible cover with 2 different art styles
An art book including concepts, illustrations, in-game maps, enemy designs, etc.
An engraved wooden box containing an engraved wooden USB flash drive which contains the 2 soundtracks (enhanced music and FM music) and lots of digital extras such as concepts, illustrations, in-game maps, enemy designs, etc.
A black bag containing a secret, which should only be opened once you finish the game in order to understand its meaning and avoid spoilers.
YouTuber Retro Gamer Boy has been given the opportunity to showcase the game in action in a video of his own. You can watch it right below as well as download an official demo ROM to try for yourself in any Genesis emulator or flash cartridge from this MEGA link. It’s worth hearing that beautiful arranged music in action.
youtube
Are you looking forward to trying out The Secret of the Four Winds? Have you tried any other games from Kai Magazine Software? Let us know in the comments below.
#sega#the secret of the four winds#secret of the four winds#rpg#rpg game#cyberpunk#genesis#sega genesis#mega drive#sega mega drive#indie#kai magazine software#shadowrun#snatcher
1 note
·
View note
Text
Ssh Agent For Mac Os X

I'm running Mac OS X, and it appears that after SSHing to several machines, using identity files, my 'ssh-agent' builds up a lot of identity / keys and then sometimes offers too many to a remote machine, causing them to kick me off before connecting:
Ssh-agent Mac Os X Keychain
Mac Restart Ssh Agent
Ssh Agent Mac Os X
Ssh Agent For Mac Os X 10.10
Received disconnect from 10.12.10.16: 2: Too many authentication failures for cwd
It's pretty obvious what's happening, and this page talks about it in more detail:
SSH servers only allow you to attempt
to authenticate a certain number of
times. Each failed password attempt,
each failed pubkey/identity that is
offered, etc, take up one of these
attempts. If you have a lot of SSH
keys in your agent, you may find that
an SSH server may kick you out before
allowing you to attempt password
authentication at all. If this is the
case, there are a few different
workarounds.
Mac OS X includes a command-line SSH client as part of the operating system. To use it, goto Finder, and selext Go - Utilities from the top menu. Then look for Terminal. Terminal can be used to get a local terminal window, and also supports SSH connections to remote servers. Given all of the above, especially if SIP prevents you from disabling this directly, I would probably attack it a different way. The first idea that comes to mind would be to write my own launchd plist and have it run on load to have it run the commands to automatically stop ssh-agent, and then see if you can then get oh-my-zsh to restart / control it. It's an old question but I recently ran into the same issue on my Mac running 10.12.6. The DISPLAY variable is not set in the terminal and ssh -X doesn't work. This is what I did that solved the problem: Reinstall XQuartz using Homebrew: brew cask install xquartz (the option -forced may be necessary) Add the XQuartz launcher to the system default (following the solution in this Reddit post.
I'm running Mac OS X, and it appears that after SSHing to several machines, using identity files, my 'ssh-agent' builds up a lot of identity / keys and then sometimes offers too many to a remote machine, causing them to kick me off before connecting. Received disconnect from 10.12.10.16: 2: Too many authentication failures for cwd.
Rebooting clears the agent and then everything works OK again. I can also add this line to my .ssh/config file to force it to use password authentication:
Anyhow, I saw the note on the page I referenced talking about deleting keys from the agent, but I'm not sure if that applies on a Mac since they appear to be cleared after reboot anyhow.
Is there a simple way to clear out all keys in the 'ssh-agent' (the same thing that happens at reboot)?
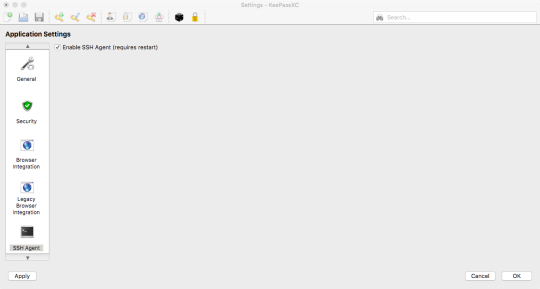
If you haven’t set up your YubiKey yet, this is a good place to start.
Evil Martians are growing. With more employees and more clients, there is a demand for stronger security. Our clients trust us with their source code and, even more importantly, with access to their production servers, and this trust cannot be broken. In a hostile environment of the modern web, though, it is easier said than done. A good old password, even coupled with a password manager, does not cut it anymore. The most obvious way to increase security is to opt for two-factor authentication (2FA) that is widely supported. Even without hardware keys, it makes an attacker’s job much harder than it used to be.
A sticky situation
We have enforced 2FA across all our staff for all the tools that we use daily: email, GitHub, task trackers, and others. By default, it involves requesting one-time access codes either by SMS/phone call or through a dedicated smartphone app. Cellular networks, however, are not the safest place: messages and calls can be intercepted. Opting for an app like Google Authenticator is more secure, but can also be compromised, at least in theory, if a smartphone that runs it is precisely targeted by an attacker.
So, can we do better? There exists an open authentication standard that aims to both strengthen and simplify 2FA.
Known as Universal 2nd Factor (U2F) and originally developed by Yubico and Google, it relies on physical devices (usually USB or NFC) that implement cryptographic algorithms on a chip, similar to smart cards that have been around for ages. You probably have at least few of those in your pockets: phone SIM, bank cards, various IDs and the like.
Now, instead of confirming your access with some code, you need to insert a USB stick into your computer, press the physical button on it, and the device will take care of the rest. Authenticating with U2F is already supported by major browsers (the only notable exception, sadly, is Safari) and you can use it with many online services that software professionals use daily: Google and Gmail, Dropbox, GitHub, GitLab, Bitbucket, Nextcloud, Facebook, and the list goes on.
The advantages of a hardware solution are obvious: a possibility of a remote attacker gaining access to one of your tools is pretty much eliminated. The attacker needs to physically get a hold of your USB key, which is still a security risk, but in an entirely different domain.
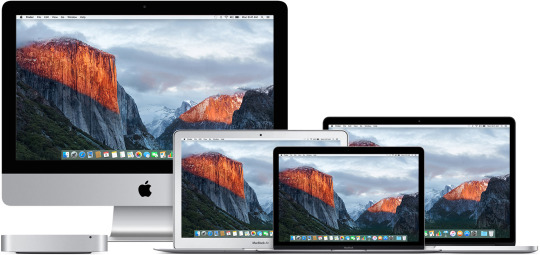
There is a number of vendors that sell USB keys, and we chose Yubico and their YubiKey 4 series. They are versatile, compact and can either be carried around on a keychain or, for smaller models, stay in the USB slot of your laptop all the time. There are also USB-C models for newer Macs, so you don’t need dongles. Besides implementing U2F, YubiKey 4 series supports various security standards:
Smart card PIV
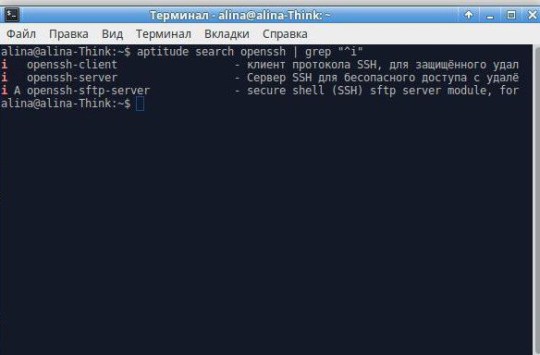
Authenticating online with U2F works out of the box on Linux, macOS, and Windows and in all major browsers. However, if you want to use your YubiKey for SSH connections, things quickly get less straightforward.
Sticks and Macs
We do have our fair share of Linux users, but the instructions we offer further are for macOS only, as replacing default ssh-agent with a gpg-agent on a system level is a Mac-specific problem.
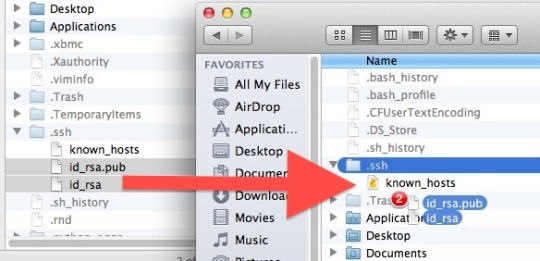
A Mac is a computer of choice for most of us at Evil Martians. We also use SSH all the time: while pushing code to GitHub or accessing remote servers. As all our employees work remotely from their private machines, contents of their ~/.ssh folders should never be allowed to leak. Common security measures, like the hard drive encryption, are always in order, but with YubiKeys already being used for U2F, would not it be better to store RSA keys for SSH on them too, and off the computer?
Ssh-agent Mac Os X Keychain
As YubiKey already supports OpenPGP, we can use it as the OpenPGP card with all the benefits:
Download Intensify for macOS 10.9 or later and enjoy it on your Mac. Intensify turns your everyday photos into stunning, dramatic masterpieces. Use simple controls to bring up the details, reveal the hidden beauty and enhance every pixel. 'Best of App Store' + over 20 other software awards. Intensify for apple mac. Intensify Pro is for Mac photo enthusiasts who want their photos to stand out. Intensify Pro gives you powerful new ways to create dramatic results. Professionally created presets make it 'one.
Once RSA keys are put on a card, they cannot be retrieved programmatically in any way.
Keys written to a card can only be used in combination with a PIN code, so even if a YubiKey is stolen, a thief would not be able to authenticate directly.
To set up YubiKey as a smart-card holding your PGP keys, you need first to replace your ssh-agent that comes pre-installed with macOS with a GnuPG solution. The easiest way to do it is directly from Terminal with Homebrew:
If you want to install a full GPG Suite that includes GUI applications, you can run another command (requires Homebrew Cask), or download it from the website:
At the time of this writing, the most recent version of gpg is 2.2.X. Let’s double-check, just to be sure:
Many guides out there tell you how to install YubiKey with gpg 2.0.X, and there has been a lot of significant changes since then. We recommend updating, and that should also be done with caution: backup your ~/.gnupg directory before making any changes!
Important!Now you need to either generate your PGP keys directly on the YubiKey or create them locally and copy over. There is an official guide for that, as well as a more evolved instruction on GitHub from the user drduh.
After all that is done, you need to enable your SSH client (the built-in Terminal app, for instance) to read PGP keys directly from YubiKey. It is time to say goodbye to a built-in ssh-agent that have served you well before.
Insert a YubiKey holding a PGP key in your computer and run the following commands; they will launch a gpg-agent and instruct your applications to use a new SSH authentication socket:
If everything went well, you should see that your private RSA key is now in fact located on a YubiKey (it has a unique cardno), the output of an ssh-add -l should resemble this:
Congratulations, you are done! This changes will not persist, however.
As soon as you reload your system, or even switch to a new console window, this setup will go away.
Let’s see how we can make it permanent.
Making things stick
The first thing that comes to mind when changing any shell-related setup is to change the local profile, be it ~/.bash_profile or ~/.zsh_profile (if you don’t know what type of shell you have, most likely you have bash, it comes by default with macOS). Open that file in an editor and add:
Now every time you launch a console, it will know how to SSH properly. If you live in a shell, use Vim or Emacs to write your code and were never tempted with GitHub’s visual features, you are all set.
However, if you use an IDE or one of those modern text editors with integrated GitHub functionality, such as Atom or Visual Studio Code? Those applications are not concerned with your shell setup and will still use system defaults for SSH, which is not what we want since we store all our keys securely on a YubiKey.
“But before we dealt with gpg, we did not need to set up anything, and everything worked!” you might say, and you would be right: macOS takes care of all that with a built-in service-management framework called launchd. You can read more about it by running man launchd, but you don’t have to.
You only need to know that launchd deals with so-called “property lists”. These are XML files with a .plist extension that define services to be launched and their launch options. They are located in the following directories:
~/Library/LaunchAgents for per-user agents provided by the user.
/Library/LaunchAgents for per-user agents provided by the administrator.
/Library/LaunchDaemons for system-wide daemons provided by the administrator.
/System/Library/LaunchAgents for per-user agents provided by macOS.
/System/Library/LaunchDaemons for system-wide daemons provided by macOS.
Let’s do some digging and look for anything SSH-related. Here it is, right in a /System/Library/LaunchAgents/com.openssh.ssh-agent.plist:
Without diving into much detail, we see that this is how macOS makes ssh-agent a default utility for SSH authentication.
Unfortunately, we cannot edit this file directly, as anything located in a /System folder is protected from tampering by a macOS feature called System Integrity Protection. There is a way to disable it, but you don’t want to do that. Apple folk came up with it for a reason.
A stickler for detail
Nothing prevents us from writing our own .plist though! All these XMLs will be treated as instructions for launchd, so this is our chance to circumvent ssh-agent once and for all!
First of all, let’s read man gpg-agent and learn what GnuPG agent for Mac is capable of:
Mac Restart Ssh Agent
It can become a daemon and live in the background with the --daemon option.
There is a --supervised option designed for systemd which makes the gpg-agent wait for a certain set of sockets and then access them through file descriptors.
A --server option allows our agent to hook onto the TTY and listen for text input, without opening any sockets.
Unfortunately, launchd only tracks processes that run in the foreground, and neither --supervised, nor --server will do us any good. So, the best way to launch an agent is by using the same command that we used before: gpgconf --launch gpg-agent. Let’s express it in launchd-compatible XML:
Now save it as homebrew.gpg.gpg-agent.plist and put it into ~/Library/LaunchAgents folder. To test that it all works (you won’t have to do it after restart), tell launchd to load a new plist:
Now let’s make sure that the agent is loaded:
A digit in the launchctl list output shows the exit status of a launched program, and 0 is what we want to see. pgrep confirms that we are in fact up and running.
Ssh Agent Mac Os X
However, we are not done yet. We still need to point SSH_AUTH_SOCK environment variable to $HOME/.gnupg/S.gpg-agent.ssh. The problem is that the variable is already set (user-wide) by the launchd default setting for ssh-agent.
At this moment, I have nothing better in mind than the following “hack”: forcibly symlink gpg-agent’s socket to the default one, stored in an SSH_AUTH_SOCK variable. The power of Unix allows us to do that, but that effectively messes up the default SSH configuration. However, as we are now using GnuPG for everything SSH-related, that should not be a problem. If you have better ideas, please contact me on Twitter.
We can create another plist that will do all necessary symlinking on login.
The only trick here is to call the shell directly, with /bin/sh (so we can reference shell variables), and pass a command to it. Now, save the file as ~/Library/LaunchAgents/link-ssh-auth-sock.plist and load it with launchd.
Let’s test the result:
Bingo! Our macOS is now effectively tricked into thinking that it deals with ssh-agent, even though it’s the gpg-agent doing authenticating and reading PGP keys directly from your YubiKey.
All you need to do know to authenticate over SSH in a true hardware fashion is to turn on your laptop, put a stick in the USB and push a button on it. Your Mac is now completely secure!
Still stuck?
There is another problem you may encounter when you start using YubiKey as an OpenGPG card. Our gpg-agent sometimes get stuck, and it looks like a YubiKey is not connected at all, replugging it also does nothing. It is a known problem, discussed here.
My observations show that it appears after I put my laptop to sleep. Let’s deal with that too.
First, we need a tool that keeps track when our laptop wakes up: sleepwatcher is made just for that. Install it with Homebrew:
By default, it expects two scripts: ~/.sleep to run before the computer goes to sleep, and ~/.wakeup to run after it wakes up. Let’s create them.
The minimal ~/.sleep script can look like this (we only need to be sure it passes as a shell script)
In ~/.wakeup we will forcibly restart our gpg-agent:
Now we need to add execution flags and enable sleepwatcher’s service:
Ssh Agent For Mac Os X 10.10
Thank you for reading! Download find my mac for mac. In this article, we showed how to set up your SSH authentication flow with YubiKey as an OpenPGP card and how to make your gpg-agent play nicely with macOS. Now all you need to do to access a server or push code to a remote repository is to insert a stick into your USB and enter a PIN code when requested. Passphrases no longer required!
0 notes
Text
10.11 Os X

Oct 16, 2020 • Filed to: Solve Mac Problems • Proven solutions
OS X 10.11: El Capitan (Gala) - 30 September 2015; macOS 10.12: Sierra (Fuji) - 20 September 2016; macOS 10.13: High Sierra (Lobo) - 25 September 2017; macOS 10.14: Mojave (Liberty) - 24 September.
Oct 15, 2016.
Mac OS X El Capitan 10.11.1 DMG Mac. Mac OS El Capitan was released to manufacturing on 20th September 2015, almost three and a half years ago. Its latest version 10.11.6 (15G22010) was released on 9th July 2018, almost 7 months ago. It runs on the platform including x86-64.
Mac users get new software updates and versions more frequently than the other operating systems. That's both the blessing and curse for the Mac users. The latest software makes your Mac device compatible with the new technological developments. Still, it also makes the existing OS obsolete. That's why most Mac users with old devices try to update their Mac to OS X El Capitan. However, you can't update your Mac to El Capitan 10.11 if your Mac runs on software later than Mac OS X 10.6 Snow Leopard.
10.11 Os X Update Download
Is OS X El Capitan Still Available for Your Mac?
OS X El Capitan (10.11) was launched on 25 September 2015, and it is an improved version of OS X Yosemite (10.10). Improved window management, quick and responsive interface, spotlight search, and enhanced graphics were the prerequisites of El Capitan OS. However, if you are planning to update your Mac to OS X El Capitan, your device must fulfill the following requirements.
Space Requirements
You can't install OS X El Capitan unless your Mac has a free space of 8.8 GB. However, that's the space you need to install El Capitan on your Mac. You might have to free more space to run your Mac more smoothly because low space slows down system performance.
Hardware Compatibility
Most of the Mac models can install and run OS X El Capitan, but in some devices, you can't use full features of this OS due to hardware limitations. For instance, you can't use AirDrop on your Mac if you don't have a WiFi network compatible with PAN. The followings are devices that are compatible with OS X El Capitan.
MacBook introduced in 2009 or later, plus MacBook (13-inch, Aluminum, Late 2008)
MacBook Air introduced in late 2008 or later
MacBook Pro introduced in mid-2007 or later
Mac mini introduced in early 2009 or later
iMac introduced in mid-2007 or later
Mac Pro introduced in early 2008 or later
Xserve models introduced in early 2009
RAM Compatibility
RAM is the temporary memory that supports the system to run apps and programs efficiently. Without enough RAM, trust me, you can't even run your native operating system smoothly. Similarly, you can't install El Capitan unless you have 2 GB RAM on your Mac.
Operating System Compatibility
Operating systems play a critical role in creating an operational environment for both the software and the hardware. If you have decided to update your Mac PC, you have to make sure that your device doesn't run the OS later than Mac OS X Snow Leopard 10. 6. 8.
People Also Search:
How to Update My Mac to OS X 10.11.6/10.11.4?
After you are done with checking the compatibility of your Mac device, it's time to follow some pre rituals to prepare your device for Mac OS X El Capitan 10.11. These steps are mandatory for the successful installation of El Capitan OS into your Mac, and Apple also suggests them.
Get Your Mac Ready for El Capitan Update
Unprepared installation of a new operating system can result in disappointment. Remember that you are going to get a relatively new OS for your older Mac. To increase the hardware compatibility of your Mac, you must go through a checklist for successful installation of OS X El Capitan.
Space in your Mac: This includes freeing space both on RAM and Disk drive. 2 GB RAM and 8.8 GB of disk space are mandatory because the installer would not proceed without the fulfillment of these hardware requirements.
Minimum battery requirement: During the OS update, a computer consumes battery quicker than the regular operations. Your Mac needs to have at least 45% battery to pass through the El Capitan installation.
Active Internet Connection: You can't proceed with any OS installation without an active internet connection. Along with the installation package, your Mac would also need some side installations throughout the update. Without the support of these plugins and drivers, you would be back to square one. So, an active connection is a must.
Update Apps: Outdated apps can halt the process of updating your Mac. As soon as the installation of Mac OS X El Capitan completes, you face a software crisis. Most of your apps would stop working, leaving you with a headache. That's why don't forget to update your apps before starting the update.
Backup Your Data: There's a high chance that you would lose your data during Mac OS X EI Capitan update because the new OS makes changes in every nook and corner of your PC. To prevent the possible data loss, make a double back up—one in the Time Machine and other in the external storage device. If there is any file missing after the El Capitan update, check how to recover files after OS X update.
Begin Update Process
Your device is ready to embrace Mac OS X El Capitan 10.11 after going through the steps mentioned earlier. Now it's time for some real action.
Step 1Visit the official Mac App Store and search for Mac OS X El Capitan. Your search result would Stake you to the El Capitan page. You can also download El Capitan without the App Store by the following links.
Step 2From the official El Capitan page, you can download your required version.
Step 3Once the download is done, the El Capitan installer will pop up on your screen.
Step 4Press the 'Continue' button and wait for the installation to begin. You can proceed with the installation by following the instructions of the installer.
Step 5The installation process does not take a long time. Once the installation is done, you can restore your data from Time Machine or external drive.
Recover Lost Files After OS X El Capitan Update
Do you remember those pre-installation steps? Those steps were taken to minimize the chances of data loss during the Mac OS X El Capitan installation. Despite these precautions, you are still at the risk of unprecedented data loss. You can lose data due to the following reasons.
Data loss due to corrupted files: If your Mac contains corrupted files, you will lose your data. During installation, the new OS tries to fix or delete corrupted files. These overwritten or deleted files would not appear after installation.
Nature of Mac OS X El Capitan's update: You will replace your older OS with a new version that is not tailor-made for your Mac. That's a significant shift in the environment of your Mac. Such kinds of major updates come with uncertainty, and you can't predict whether you are going to lose your data or not.
Hardware specifications: 2 GB RAM and 8.8 GB disk space is a standard requirement for El Capitan's update. But it takes a lot more from a Mac device to adapt to a newly enforced environment. A slight incompatibility can make you lose your data without any notice.
Lost Your Data After Mac OS X El Capitan: What's Next?
Data loss is one of the anticipated drawbacks of the installation of Mac OS X El Capitan. If you have lost your data after while updating your Mac and don't know what's next, it's time to get expert help.
10.11 Os X Update
Recoverit Data Recovery can be used for getting your documents, audio clips, videos, and photos back after Mac OS update. It uses high-tech codecs that are compatible with more than a thousand formats of files. Here are all the good reasons to trust Recoverit Data Recovery.
Junk free installation for the data security of their users;
High compatibility with Mac on different versions;
Works effectively with every storage device: hard drive, USB drive, SD card, etc.;
Deep scanning feature;
Straightforward interface and quick data recovery.
Mac users can retrieve their lost data after OS X El Capitan Update by following these steps.
Step 1Download Recoverit and tap on its icon to launch it on your Mac
(If you can't find the Recoverit icon on your desktop, you can use Finder to search it.)
Step 2After running Recoverit successfully on your Mac, now choose the following options.
Step 3Select the location of the drive you want to recover files.
Step 4Use the 'Start' button to scan it. Scan retrieves all the data of your selected drive.
Step 5Using the option to 'Preview and Recover,' you can choose the files that you want to recover, and you are done.
1011 Osceola St Myrtle Beach
Wrap Up
New updates always come with uncertainty for the old devices. However, you can reverse your loss of data by taking the precautionary steps. Despite these steps, you might lose a few of your files. But don't worry, an ace software like Recoverit can recover your data.
What's Wrong with Mac
Recover Your Mac
Fix Your Mac
Delete Your Mac
Learn Mac Hacks
Check compatibility
You can upgrade to OS X El Capitan from OS X Snow Leopard or later on any of the following Mac models. Your Mac also needs at least 2GB of memory and 8.8GB of available storage space.
MacBook introduced in 2009 or later, plus MacBook (13-inch, Aluminum, Late 2008)
MacBook Air introduced in late 2008 or later
MacBook Pro introduced in mid 2007 or later
Mac mini introduced in early 2009 or later
iMac introduced in mid 2007 or later
Mac Pro introduced in early 2008 or later
Xserve models introduced in early 2009
To find your Mac model, memory, storage space, and macOS version, choose About This Mac from the Apple menu . If your Mac isn't compatible with OS X El Capitan, the installer will let you know.
Make a backup
Before installing any upgrade, it’s a good idea to back up your Mac. Time Machine makes it simple, and other backup methods are also available. Learn how to back up your Mac.
Get connected
It takes time to download and install OS X, so make sure that you have a reliable Internet connection. If you're using a Mac notebook computer, plug it into AC power.
Download OS X El Capitan
For the strongest security and latest features, find out whether you can upgrade to macOS Catalina, the latest version of macOS.
If you still need OS X El Capitan, use this link: Download OS X El Capitan. A file named InstallMacOSX.dmg will download to your Mac.
Install the macOS installer
Double-click the downloaded file to open a window showing its contents. Then double-click the file within, named InstallMacOSX.pkg.
Follow the onscreen instructions, which will guide you through the steps necessary to install.
Version 10.11 Os X
Begin installation
After installation of the installer is complete, open the Applications folder on your Mac, then double-click the file named Install OS X El Capitan.
Click Continue and follow the onscreen instructions. You might find it easiest to begin installation in the evening so that it can complete overnight, if needed.
Allow installation to complete
Please allow installation to complete without putting your Mac to sleep or closing its lid. Your Mac might restart, show a progress bar, or show a blank screen several times as it installs both OS X and related updates to your Mac firmware.
Learn more
OS X El Capitan won't install on top of a later version of macOS, but you can erase your disk first or install on another disk.
You can use macOS Recovery to reinstall macOS.
0 notes
Text
Mac Games For 2013

Mac App Store is the simplest way to find and download apps for your Mac. To download apps from the Mac App Store, you need a Mac with OS X 10.6.6 or later. The Division 2 Mac OS X Tom Clancy’s The Division 2 for Mac is the sequel to the first title in the “The Division” series. Action, Shooter World War Z Mac OS X – 2019 TOP Zombie Game FREE. 60W Mini Charger for MacBook Pro 13 inch Retina Display, Compatible with Magsafe 2 T-Tip Power Adapter Mac(2012,2013,2014,2015) -One Extra USB Port 4.6 out of 5 stars 42 $26.99 $ 26. SimCity ' s sixth major release was announced on March 5, 2012, for Windows and Mac OS X by Maxis at the 'game changers' event. The game was released for Windows on March 5, 2013. A download-only Mac version was released in August 2013 available for digital download on Origin.
2013 Mac Pro For Sale
Used Mac Pro 2013
2013 Mac Pro For Sale
HomePC & Mac2,013 Card, Mahjongg & Solitaire Games
Platform:
PC & Mac
File size:
504 MB
Category:
Casual Games, Card & Casino
Club Masque GOLD
member price:
$6.99
Regular price:
$12.99
Not a Club Masque GOLD member?
Description
The most complete collection of Card, Mahjongg and Solitaire games -- bigger and better than ever!
Completely updated to work on the latest Windows and Mac operating systems!
All the popular card, mahjongg and solitaire games are included in this massive collection, plus modern and unique variants you won't find anywhere else. Now with over 2,000 classic games, there's something for everyone -- kids, teens and adults. But if 2,000 games aren't enough, then you can create your own solitaire game or design your own mahjongg layout by using the 'Game Builder' tool. The opportunities are endless…and so is the fun!
MASQUE CARD GAMESAll of your favorite card games are included in this collection:• Spades• Gin Rummy• Hearts• Rummy• Whist• Old Maid• Euchre• Crazy 8's• Canasta• Go Fish• Cribbage
MASQUE MAHJONGG — NOW WITH MORE LAYOUTS!
This ultimate collection contains more than 1,000 different tile layouts,
including over 100 brand new layouts never seen before. Plus, there's
these variant tile games:• Niagara• Three Lines• Recall• Lines of Five• Alignment
SOLITAIRE ANTICS ULTIMATE PLUS — PLUS MORE!
• Over 885 Solitaire games -- including over 125 unique solitaire games never seen before!• Individual statistics for each player• Unlimited undo and redo• Check for 'no more moves'• Highlight movable cards• 13 card decks and 50 backgrounds• Create your own game from millions of possibilities using the 'Game Builder'• 80 hilarious animations
Screenshots
Features
System Requirements
9 4 likes 106,116 views Last modified Sep 24, 2018 4:59 PM
Tips on 10.4 Tiger, 10.5 Leopard(last compatible operating system for G4 867 and above, and G5s), 10.6 Snow Leopard (end of the line for PowerPC applications), 10.7 Lion, 10.8 Mountain Lion, 10.9 Mavericks,
10.10 Yosemite, and 10.11 El Capitan to 10.14 Mojave.
Mac OS X Sierra was released on September 20, 2016. A few Macs which came with 10.6 can install Sierra.
Note this tip, and the series of tips from 10.2 (10.2, and 10.3 not mentioned in above links as people must have 10.4.4 or later on an Intel Mac to get to 10.6) to 10.11 I've written here all refer to Mac OS X Client. Server versions of Mac OS X may have different limitations, and the people visiting the appropriate Server forum may be able to answer your questions better about Mac OS X Server.
When determining your Mac model, see this tip to find its age:
I would not downgrade to Leopard without erasing your data first.
Be sure to backup your data first at least twice before installing any operating system. Shut down, and disconnect any peripherals before continuing with the installation. Read the info below to ensure you are compatible. Finally, you may need to use the Startup Manager to boot the operating system when the 'C' key doesn't work in order to get the installer to work or repair the disk before installation if the initial attempt to install fails. To determine if that repair is necessary, post to the forum, and someone will be able to help you to find out which repairs might be necessary.
Java is outdated in terms of security in Mac OS X 10.6. Backup your data and at least update to 10.6.8 if your Mac says it is Intel in Apple menu -> About this Mac. Read about updating to 10.7, and this tip about how to optimize your Java in 10.6 if you are stuck with 10.6.
10.6 retail is available from the Apple Store on http://store.apple.com/us/product/MC573/mac-os-x-106-snow-leopard (the /us/ in the link may be changed for the standard two letter country code matching the store link). Note: Macs newer than April 1, 2010 but older than July 20, 2011 must use the original 10.6 installer disc that shipped with them to boot 10.6 from CD. AppleCare may have those discs if you lost or misplaced it. To determine the age of a Mac, plug it in the support status search engine, and use the serial number lookup. Using the model name, find the release date of that model on Wikipedia or Everymac.com, and the followup date.
Leopard (10.5) is not to be confused with Snow Leopard (10.6) which are different paid operating systems.

If you are interested in upgrading to Lion you can read this tip, and Mountain Lion or Mavericks, this tip. Note: Mavericks you can update to
for free, whereas both Lion and Mountain Lionyou can not. Lion requires a minimum of 10.6.6 already be installed, unless you have the USB Flash drive for it, and Mountain Lion and Mavericks requires a minimum of 10.6.8. Lion and Mountain Lion have different hardware requirements, but the Apple hardware requirements for Mavericks are the same Mountain Lion.
If you got a machine that came with Lion or Mountain Lion and wonder if you can install Snow Leopard on it, read the bottom of this tip first.
Snow leopard is available free for a limited time from this link if you have Mobileme and need an upgrade path to Lion that doesn't require erasing your hard drive.
Flashback malware has a patch on 10.6.8. Users of 10.6.7 and earlier are recommended to disable Java. For more info read this tip.
Macs that were released new as of July 20, 2011 (the MacBook Pro for instance had no new release until October 24, 2011, and that model's earlier sold models all work with Snow Leopard) or later, will generally not run Snow Leopard unless you follow this tip for Snow Leopard Server virtualization. Other than that, the following statements are true:
All Mac Pros will work with Snow Leopard (10.6.x), and they look like:
The PowerMac G5 towers which look like:
will not work with Snow Leopard. Neither will the ones that are beige, blue, or graphite colored with plastic cases.
Used Mac Pro 2013
All Apple notebooks labelled MacBook with at least 1 GB of RAM, MacBook Pro, and MacBook Air below the screen or will work with Snow Leopard.
Apple notebooks labeled iBook, and Powerbook beneath the screen will not work with Snow Leopard. Note, many of the newer MacBook Airs and MacBook Pro no longer have the label on the bottom of the screen frame, and you have to shut down the Mac, and look under the Mac for its label. Those may only be able to use the aforementioned virtualized Snow Leopard Server.
Mac minis with at least 1 GB of RAM and 4 and 5 USB ports on the rear as shown in the image below:

will work with Snow Leopard.
Those with less than four USB ports will not work with Snow Leopard.
All iMacs that look like:
Will work with Snow Leopard.
From the iMacs which look like:
If they are iMac Intelthey can upgraded to Snow Leopard. To tell if they are Intel, they will have an EMC# on the base which is enumerated 2104, 2105, 2110, 2114, 2118, 2111, 2133, or 2134. All others were iMac G5 and can only be upgraded to 10.5.8. Another distinction is that iMac G5's had mini-VGA ports that looked like:

Whereas White iMac Intels had mini-DVI which looked like:
You can also tell if it is an iMac Intel by selecting Apple menu -> About This Mac. Core Duo and Core2Duo are Intel, whereas the G5 are not.
Notes: G5 refers to the CPU made by IBM for Apple before the migration to Intel CPU in 2006. It was found on iMacs, and PowerMacs. Powerbooks and iBooks maxed out using the Motorola G4 CPU, only to be replaced by MacBook Pros and MacBooks in 2006.. Intel made the CPU found in 2006 and newer Macs, and these are referred to as CoreSolo, CoreDuo, Core2Duo, i3, i5, i7, and Xeon. Don't confuse a G5 for an Intel CPU Mac. They are not the same except in exterior design when it comes to the iMac, and the means to tell them apart is stated above. In 2006, the Mac Mini changed from G4 to Intel CoreSolo CPU. In 2006 the iMac changed from G5 to Intel CoreDuo CPU.
All Intel Macs with sufficient RAM older than March 29, 2010 can take the retail 10.6.3 installer disc. All Intel Macs with sufficient RAM older than August 28, 2009 can take the 10.6.0 retail installer disc. This disc must look like and can't say Upgrade, Dropin, or OEM on it.
It is recommended those upgrading from PowerPC follow this tip:
It is recommended you backup your data at least twice before upgrading any software.
It is recommended you check these listings for compatible 10.6 software from:
C!Net, Snow Leopard Wiki,Macintouch, and Apple's listing of compatible printers and scanners
and Apple supplied updates for printers and scanners:
HP, Ricoh,Canon, Epson, Brother,Lexmark, Samsung, and Fuji/Xerox
Additionally, some Ricoh printers that do not have official drivers have been found to have the resolution documented by this thread:
And Apple's phone support with iSync:
For digital cameras, these RAW formats are supported on 10.6. Note the most recent Mac Mini, iMac, and MacBook Pros
have SD card slots for reading camera media. For all other camera media, Express/34 on 17' MacBook Pro and pre-June 8 2009 MacBook Pros, PCI for Mac Pro, USB, and Firewire card readers exist for all Intel Mac models. Additionally, many multifunction printers have card readers that will work on the Mac. JPEG, TIFF, PNG
are all common formats supported by cameras outside of RAW, though RAW enables you to post process many more features of digital images than the other formats.
To be compatible with the Mac App Store, the Lion updater from the USB Flash drive or App Store, and the Facetime video software in Standard Definition minimum, you'll need the 10.6.6 combo, 10.6.7 combo, 10.6.7 combo with the font update, or the 10.6.8 combo followed by the Thunderbolt update if applicable.
10.6.8 has the following security updates: 10.6.8 2013 Security Update 004, 2013-005 Java update (note Java is not current until Mac OS X 10.7.3 from Java.com)
Sometimes when 10.6 is installed, Rosetta, the application that allows PowerPC programs to run will not automatically install. In those situations, you can manually install Rosetta from the 10.6 installer disc. The following quote explains how to install it manually:
Insert the Mac OS 10.6 installation DVD When the DVD is mounted, select “Optional Installs” then “Optional Installs.mpkg”
Follow the onscreen instructions for agreeing to the software license and selecting the hard drive for installation.
In the “Installation Type” step, select the box next to Rosetta from the list of applications presented. Continue the installation process.
After successful installation, a confirmation message will appear.
These instructions appeared on http://forums.printable.com/showthread.php?t=1110 .
As 10.6 is the last operating system that shipped on prebundled discs that come with Macs, it also is the last one that shipped with a prebundled set of iLife applications. To learn which version of iLife may have come on your computer, see this tip. 10.7 and later prebundled Macs did not ship with iDVD, but will have shipped with iPhoto, iTunes, Garageband, and iMovie. If you still desire iDVD, consult with AppleCare.
10.6 has these updates available depending on what you have on your Mac (Combo updates can be applied to any of the preceding versions, where Delta can only be applied to the immediately preceding version):
10.6.110.6.3 v1.1 Delta and 10.6.3 v1.1 Combo10.6.4 Combo, 10.6.4 Delta, 10.6.4 Mac Mini Mid 201010.6.6 Delta, 10.6.6 Combo10.6.7 for early 2011 MacBook Pro, 10.6.7 Combo, 10.6.7 Delta, 10.6.7 font update to all previous updates10.6.8 delta v1.1 (7/25/2011) and Combo v1.1 (7/25/2011), and the followup Thunderbolt update for 2011 iMacs and MacBook Pros for installation after 10.6.8
Which Macs can have Snow Leopard installed, and which can only have Lion installed based on Machine ID (also known as Model Identifier)?
You can find out which gray installer disc came with Macs that can install Snow Leopard newer than March 15, 2010 by reading: http://support.apple.com/kb/ht1159. Machine ID is in Apple menu -> About This Mac -> More info (on 10.7 and later the About Window has System Information instead of More info to access the System Profiler) under the hardware section. The 'x' value below can be any number. Older Macs indicated below can use the 10.6.3 retail installer, if not the 10.6 retail installer, if they are older than August 28, 2009. Together with partitioning, the Core2Duo (not CoreDuo, not CoreSolo), Xeon, Core i3, i5, i7 Macs which are Snow Leopard compatible can run both Snow Leopard and Lion, provided they have at least 2 GB of RAM. Partitioning requires an erase of the hard drive. A second internal or external hard drive can boot into a separate operating system on the same Macs. The Macs below which can only run Lion and later, are also known as Lion prebundled Macs. Lion prebundled Macs thankfully can run Windows in virtualization, which would allow them to use the Windows version of software that may only run in Snow Leopard and earlier on Mac OS X. The Macs listed here that won't run Snow Leopard also are not able to use the retail Lion installer USB Flash drive, and must use the instructions onMacworld to create a specialty Flash drive or be cloned onto another hard drive before their prebundled hard drive dies, to be able to restore Lion. Macs below that can't install Snow Leopard directly may be able to do so via virtualization, as described by this tip.
Mac Mini 5,x and later only run Lion and later. Mac Mini 4,x and earlier can run Snow Leopard with at least 1 GB of RAM (that's greater than 768MB of RAM).
MacBook Pro 8,x with EMC#s 2355, 2563, 2564 can only run 10.7 or later, all other 8,x EMC#s can run 10.6.3 or later, and all 7,x can.
MacBook Pro 9,x and higher can only run 10.7 and later.
Mac Pro 5,1 that are not EMC 2629 and earlier can run Snow Leopard. EMC 2629, and Mac Pro 6,x and later can only 10.7 and later.
The 10.6.3 retail installer will only work on Mac Pro 4,x and earlier.
MacBook with no Air and no Pro on the screen as of 11/30/2011 can all run Snow Leopard with at least 1 GB of RAM.
MacBook Air 4,x and later can't run Snow Leopard, while 3,x and earlier with at least 1 GB of RAM can run Snow Leopard.
iMac 12,1 i3 (EMC 2496 on foot, MC978LL/A) can't run Snow Leopard, while the 12,x i5 and i7 can run Snow Leopard, and the iMac 1,1 through 11,x can run Snow Leopard with at least 1 GB of RAM. iMac 13,1 and later can't run Snow Leopard natively.
Lastly, here the Macs that are compatible with 10.6.3 retail avialable from the Apple Store based on Model Identifier:
iMac 11,1 and older
Mac Mini 3,x and older
MacBook 6,1 and older
MacBook Pro 5,x and older
MacPro 4,x and older
MacBook Air 2,x and older
Macs that fall between those criteria must use the 10.6 installer that shipped with them to install 10.6.
* The release names Early and Late can be gotten by plugging the serial number of the machine in
1 note
·
View note
Text
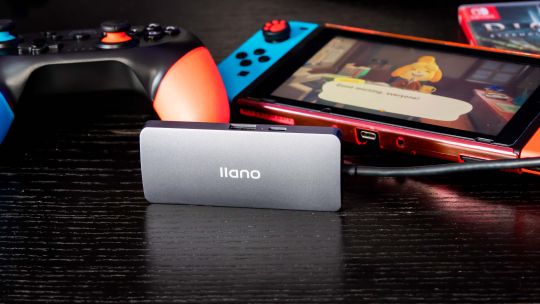
Looking to Stream Your Nintendo Switch Gameplay? Llano Microdock 3-in-1 Offers Charge, HDMI Out, and Capture
Llano MicroDock for Nintendo Switch
9.00 / 10
Read Reviews
Read More Reviews
Read More Reviews
Read More Reviews
Read More Reviews
Read More Reviews
Read More Reviews
Read More Reviews
Read More Reviews


Shop Now
The Llano MicroDock is a minuscule adaptor to replace the oversized plastic brick Dock, and let you record and stream your gameplay.
Specifications
Brand: Llano
Connection: USB-C
Ports: HDMI Out, USB-A capture interface, Audio Input/Output, USB-C Power
Pros
Plug'n'play, no drivers needed
Captures at full 1080p60
Direct audio input results in no lag when streaming
Cons
Only works with Switch, it's not a replacement for generic HDMI capture card
Buy This Product
Llano MicroDock for Nintendo Switch other
Shop
// Bottom var galleryThumbs1 = new Swiper('.gallery-thumbs-1', { spaceBetween: 10, slidesPerView: 10, freeMode: true, watchSlidesVisibility: true, watchSlidesProgress: true, centerInsufficientSlides: true, allowTouchMove: false, preventClicks: false, breakpoints: { 1024: { slidesPerView: 6, } }, }); // Top var galleryTop1 = new Swiper('.gallery-top-1', { spaceBetween: 10, allowTouchMove: false, loop: true, preventClicks: false, breakpoints: { 1024: { allowTouchMove: true, } }, navigation: { nextEl: '.swiper-button-next', prevEl: '.swiper-button-prev', }, thumbs: { swiper: galleryThumbs1 } });
The Llano MicroDock for Nintendo Switch is a pocket-sized replacement for your original Switch Dock—but with one fantastic additional feature: the ability to capture your gameplay, for recording and streaming. No drivers are needed, no additional cabling mess, and no costly separate capture cards. It's simple to use and does exactly what it says on the box with no fuss.
You can pre-order the Lanno MicrDock now for $99, but be quick, as the RRP rises to $150 when the campaign ends.
Is the Llano MicroDock the Switch streaming solution you've been looking for? Quite possibly, but read on to find out more about this minuscule Switch dock replacement.
youtube
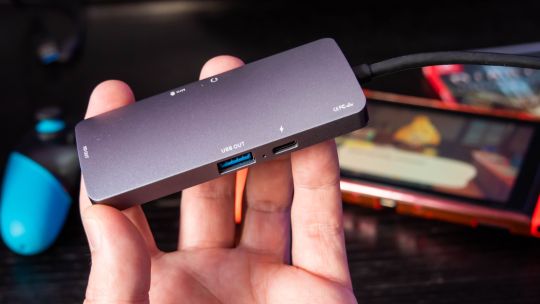
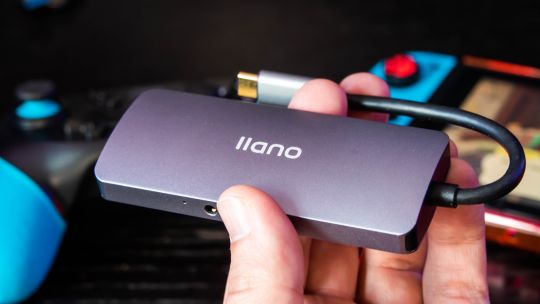
Llano MicroDock Design and Ports
Aesthetically, the MicroDock is nothing special. In fact, it looks like every other USB-C hub out there. Not entirely surprising given that's Llano's specialty. But open closer inspection, the selection of ports tells a different story–and the real magic is hidden away inside anyway.
On one end is a short USB-C cable. This plugs directly into your Nintendo Switch USB-C port on the bottom edge. At this point, it's worth noting that this is only compatible with the Switch, not the Switch Lite. The Switch Lite cannot be output to a TV, regardless of what adaptor you use—it simply doesn't have the hardware capable of doing that.
On the opposite end is a full-size HDMI port. No cable is supplied, but any cable should be sufficient since the Switch is only capable of outputting a maximum 1080pHD.
Before you can output anything though, you'll also need to plug your original Switch charger into the USB-C port on the side of the MicroDock. It's the only USB-C port on there, but also labeled on the underside with a lightning bolt. The MicroDock passes this through to the Switch, and presents itself as an original charger, so there should be no issues with under/overvoltage. Using third party adaptors with a Switch has always been a bit of a concern, with stories of devices being bricked thanks to unofficial chargers. Use the official Switch charger alongside the MicroDock and you'll be safe.
Lanno MicroDock TV Output
With the HDMI and USB-C charger plugged in, the MicroDock will act just as the original Dock does, allowing you to play on the big screen at the full HD 60FPS resolution.
In my experience, there was no discernible lag when using the Llano MicroDock for big screen play. I found plugging in the HDMI and charger to the MicroDock first, then plugging the USB-C cable into the Switch, worked most reliably, requiring only a few seconds for the TV input to activate.
It's worth noting that any limitations the Switch introduces with docked play are also present when using the MicroDock. Despite the fact that you could feasibly use the Switch handheld as is with the MicroDock attached, the Switch disables any attached joy-cons. So they will need to disconnected and slotted onto an external controller shell (or each used handheld).
Switch Game Streaming
The real magic comes from the additional USB-A port you'll find next to the USB-C charging port. A USB-A to USB-A cable was supplied in our package, along with a USB-C adaptor, though it's not clear if this will be in the final retail release. Regardless, it's a generic cable that's easy to source or replace.
Just plug this cable into your PC or Mac, and open up your favorite game capture and streaming software. Since the MicroDock presents as a standard USB video capture device, and doesn't require any additional drivers, it should work with any software. We tested with OBS, and there was nothing to configure–everything just worked after adding a new video and audio interface. Video is captured at the full HD resolution, at 60 frames-per-second. There's no loss in quality from what the Switch is capable of.
Of course, there is a lag of a second or so for the recorded footage. This is not unusual with any video capture device. The on-screen action on the TV remained perfectly in sync. You can then record or stream your gameplay to your favorite services. You can view samples of recorded gameplay in our review video.
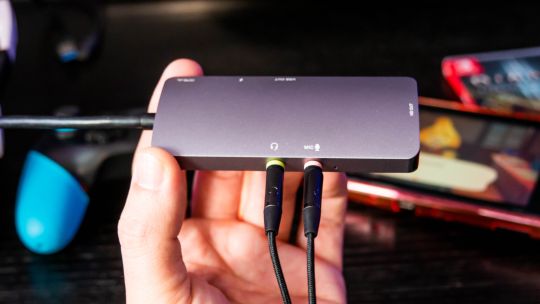
Direct Audio Capture and Output
One issue streamers face with any capture solution is the inherent lag between the game actions and your voice input on the PC software side. A second or two might not sound like much but can really sound awkward at critical moments.
The MicroDock avoids the audio input lag problem by shifting the microphone input onto the hardware side of things. On the side opposite to the USB ports, you'll find two 3.5mm stereo ports: one for your microphone, and one for headphones, so any analog gaming headset can be plugged directly into it. You don't need to configure additional audio inputs within your streaming system—it's automatically mixed into the game audio.
This approach might also be seen as a negative, though: you can't configure the audio level even if you wanted to. There are no additional drivers and no settings to adjust, so unless you have a very fancy gaming headset with inline mic level controls, you can't change it. But if you do find it's too loud, or too quiet in comparison to the game audio, you should plug the microphone into your PC instead to adjust there.
Thankfully, the microphone seemed acceptable in our testing–check out the recorded sample in the full review video.
In terms of audio quality, this will of course depend on the microphone you have plugged in. We used the EPOS | Sennheiser GSP601 gaming headset.
Be The Next Famous Switch Streamer with The Llano MicroDock
The Llano MicroDock is not a revolutionary device that contains never before seen electronics. It's a simple combination of existing technology in a neat package that does what it claims to do, and does it well.
For anyone looking to replace their original dock with a more portable solution, as well as record or stream gameplay, in one compact and convenient package: I can highly recommend the MicroDock. In my experience the connection was reliable, the recorded footage was at full quality, and it all just worked as intended without the need for complex drivers and configuration. The ability to plug your gaming headset directly into the adaptor is an added bonus that eliminates any awkward lag in your recordings.
The only downside to the Llano MicroDock is that it's very niche. It literally only works with the Switch (and curiously a few Samsung smartphones that can do DeX). Not the Switch Lite, not the Xbox, nor any other HDMI device. If you're an avid streamer, you might want a more future-proofed device or something that will work with the rest of your consoles. The MicroDock isn't for you. You'll need to invest in a more generic HDMI capture device, which alone will set you back upwards of $150, and can then be used in conjunction with your original Switch dock.
The MicroDock isn't worth it if you don't care about streaming or recording their gameplay at all, and just want a smaller dock adaptor to replace the plastic brick that Nintendo provides. You'll find cheaper devices in much the same form-factor as the MicroDock, for around half the cost, that don't have the ability to capture your gameplay.
Disclaimer: It's a Kickstarter
Kickstarters can fail, or suffer delays. There is no legal obligation on a company to actually deliver a product. I know this because I've personally lost thousands of dollars on undelivered products, as have our loyal readers who have lost money on projects we've featured in the past. For that reason, we've tightened the rules around which crowdfunding products we'll accept for review.
In this case, Llano is not a new company and has been making similar USB hub devices for many years. The product is as functional as it can be and appears to be ready for mass production. Delivery is slated for March 2021, and this seems reasonable. In this case, we don't think there's an undue risk in backing the MicroDock and are confident of the company's credentials. For transparency, our review sample was arranged through EarlyTechFinder, a PR agency that we've worked with before.
However, as with any crowdfunding campaign, never spend money you couldn't afford to lose if something were to go wrong; and never assume a product will be delivered on time.
Looking to Stream Your Nintendo Switch Gameplay? Llano Microdock 3-in-1 Offers Charge, HDMI Out, and Capture published first on http://droneseco.tumblr.com/
0 notes
Text
5 Tricks: How To Use Cinema Apk Live To Produce A Successful Company( Item)
The cinema apk live Relevance Of Cellular Phone In Modern Culture.
The Increase of Mobile Devices.
What are common IT devices?
For a long time - Yes. A laptop was the mobile version of your heavy, clunky desktop that sat on your office desk. Let us not forget that the 'mobile' laptop itself was a slightly less clunk, still heavy box that would make your arms sore if you went mobile too much!
Underdeveloped and also remote countries have some access to cellular phone modern technology as well as wireless services. Cellular phone reception has come to be reputable as well as of high quality because of advances in wireless innovation. Wireless company provide excellent bundles as well as promotions for cell phone customers.
Most recent Articles.

A mobile device is a digital device which its user can quickly carry with them. Generally, they have a battery to hold electrical power to work without electrical wires. A customer can transform, send out as well as move information by attaching to a modem or cable television, or more often wirelessly.
In order to deal with the high traffic, numerous towers can be arrangement in the exact same location(utilizing various frequencies). the 2018 James Clerk Maxwell medal for their contributions to the initial electronic mobile telephone requirement. Martin Cooper of Motorola made the initial advertised handheld mobile phone call on a model DynaTAC design on 3 April 1973. Smart device possession in America is fairly consistent across surveyed locations such as gender, ethnic background, and also regional advancement. One of the most considerable contrasts exist where income, education and age are examined.
Developing a Mobile Approach.
Typical keyboards make use of spring-based switches, though more recent variations employ virtual tricks, or perhaps projected keyboards. In computer, an input tool is a peripheral (piece of computer hardware tools) used to offer information as well as control signals to a details processing system such as a computer system or other details device. Instances of input gadgets include keyboards, mice, scanners, electronic cameras as well as joysticks. With Android applications entering volume over the following couple of versions of Chrome OS, the stage is set for the arrival of detachables and also tablet computers. "Samsung Chromebook Brings $332.12 Expense of Materials, IHS iSuppli Teardown Exposes".
The lithium-ion battery, an indispensable energy source for contemporary smart phones, was marketed by Sony as well as Asahi Kasei in 1991. In 2001, the third generation (3G) was launched in Japan by NTT DoCoMo on the WCDMA standard.
Number of Mobile Connections.

Partnering with Google, Samsung launched the Chromebook And also and Chromebook Pro in early 2017, the initial Chromebooks to find with the Play Store pre-installed. That complaint dissipated later on in evaluations of machines from Acer and also Samsung that were valued lower. Just bear in mind that mobile computers are devices of any type of dimension created to act like a mobile computer with barcode scanning capabilities, and also mobile phones are usually smaller tools created for the ordinary consumer and can be packed with barcoding abilities. A 2010 research study reviewed the occurrence of mobile phone use while cycling as well as its results on behaviour as well as safety and security. In 2013, a nationwide survey in the United States reported the variety of chauffeurs who reported using their cellular phones to access the Internet while driving had actually climbed to nearly among four.

These gadgets are fairly new and also play in somewhat of a particular niche market now in time. The primary benefits a smartwatch can offer us with are the capacity to obtain notices as well as necessary information on our wrist without needing to pick up one more device. With a few of the brand-new standalone versions, we can also take and obtain call much like our smart devices can.
Related Articles.
In one of the first consumer testimonials, the City of Orlando, Florida, reported on their first screening of 600 Chromebooks as component of a broader study pertaining to accessing digital desktop computers. End individuals have shown that the Chromebook is very easy to take a trip with as well as launches swiftly. One mentioned that "If I simply need to stay attached for emergencies, I take my Chrome," but when taking a trip for organisation she would still take her laptop. He also kept in mind that its data supervisor does not function, the need to utilize the undocumented crosh shell to complete basic tasks such as establishing a safe shell (SSH) network connection along with serious shortages in paperwork.
How many times does someone check their phone a day 2019?
Cell phones are the perfect way to stay connected with others and provide the user with a sense of security. Cell phone users can instantly send data to the home or office, check for important email, use their cell phone as a PDA or calendar, and store photos which can be easily transferred to a PC or laptop computer.
This separation allows us to obtain a concept of the complete variety of all cellular phone individuals in the world, and likewise the fostering of smartphones just. Initially called the Windows Mobile system and then Windows Phone, Microsoft's mobile OS is readily available on a range of devices from a selection of wireless operators. You will certainly find Windows Phone on Microsoft hardware tools along with Nokia, Dell, HP, Motorola, Palm as well as i-mate items.
How Many People in the United States Own a Smartphone?
In 1917, Finnish creator Eric Tigerstedt submitted a license for a "pocket-size folding telephone with an extremely slim carbon microphone". Early precursors of cellphones included analog radio interactions from ships and trains. The race to develop genuinely mobile telephone tools started after The second world war, with growths taking place in numerous nations.
When placed in the HDMI port of a display or a television, this tool transforms that screen into a personal computer. Chromebit allows adding a keyboard or mouse over Bluetooth or by means of the USB port.
What types of mobile devices are available?
A mobile device is a general term for any type of handheld computer. These devices are designed to be extremely portable, and they can often fit in your hand. Some mobile devices—like tablets, e-readers, and smartphones—are powerful enough to do many of the same things you can do with a desktop or laptop computer.
0 notes
Text
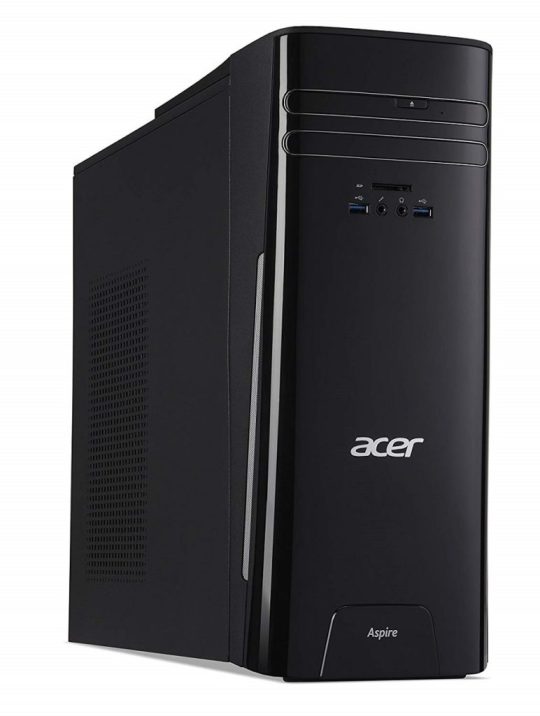
Acer aspire desktop computer: Advanced computer skills
Assembling the PC on the knee - our old national folk fun but, at the present time Acer aspire desktop computer is made the change. However, the times are changing, for the computer in a certain sense is still not "a car for lying under its hood, but a means of transportation."

Acer aspire desktop computer
Productive habit tracker
Habit is a great thing. Since the beginning of the emergence of a more or less civilized computer market in our country, there is still a persistent tradition of self-assembly of computers, especially if this is an Acer aspire desktop computer PC purchased by a user for the first time in his life. You can understand specialists and fans that, before buying each component of their computer, repeatedly examine the characteristics and test results of new products; you can understand the managers of the IT departments of enterprises who instruct their employees to purchase wholesale components for retrofitting existing systems. However, quite often no more than frank amazement is caused by the attempts of citizens, who do not understand this technique the best Acer aspire desktop computer, to contact their neighbors or work colleagues with a request to help “gather something on their knees” for the first acquaintance with a PC.
In this case Acer aspire desktop computer, of course, you want cheap and angry, and it does not matter that these concepts are often simply incompatible. It’s good if the computer master, turned up under the arm, is really an expert in his business, and there are cases when not only a competent hardware and software bundle is a misfortune, it happens that the “bad specialist” is not really friends with a screwdriver.
Best methods
The typical result of such methods of “first acquaintance with an Acer aspire desktop computer” is predictable: in the case, extra bolts that sooner or later fall on the contact tracks rollover, the monitor periodically “either goes out, goes out”. The mood because of the ineptly spent money was spoiled for months in advance, eventually the seller of incompatible iron (who, of course, didn’t have the slightest idea what they were going to combine with) ended up in the extreme, Uncle Liu, who collected at his Chinese factory it is insanely cheap (but fundamentally not working), or, at worst, Bill Gates. It is necessary to accuse Acer aspire desktop computer someone of their short-sightedness.
What is a desktop computer?
Do not think that in this material, using the example of Acer aspire desktop computer are ready-made system opposed to "self-assembly", the traditional in such cases ode to "trademarks" versus the domestic “screwdriver" assembly will be sung. There are many advantages and disadvantages in any case; moreover, there has been a new intermediate market for so-called barebones systems for several years in a row. However, really Acer aspire desktop computer is it not easier for an ordinary home or office user to buy a ready-made system and not to bother later on with the compatibility of components and legwork with warranty cards for a dozen of instances?
Let's be
realistic: cool gamers, scientists and other users who need
non-standard desktop devices are orders of magnitude smaller than modern an Acer aspire desktop computer PC users who put a
computer on a par with acquiring a vacuum cleaner, TV, bicycle and cell
phone. Worldwide, DIY markets (Do It
Yourself, that is, “does it yourself”) and ready-made systems for work, not for
experimentation, have long and firmly demarcated. Even in our country, along
with the supply of well-known foreign trademarks, over the past few years,
several domestic "brands" have established themselves, whose products
have long been unrelated to the "knee" assembly.
Advantages of such products abound: continuous factory assembly of pre-selected and tested components, pre-sale bench testing, and certification. The disadvantages of the best Acer aspire desktop computer approach have traditionally been called the insufficient choice of ready-made configurations and the high price of "branded" devices. However, the current realities are such that no self-respecting company will allow itself to market products without first examining the demand and finding out what the buyer really needs and how too much he is willing to pay for Acer aspire desktop computer. That is why, perhaps, the time has come to pay more attention to ready-made versions of computers. Fortunately, positive examples of the use of such systems have recently become more and more.
Acer aspire desktop computer
Buy Now
Acer computer manufacturer
The subject of our research today is the Acer ready-to-use desktop computer system Acer aspire desktop computer, first shown in spring 2004 and appearing in retail in the middle of summer. Acer products are known for a long time. Starting at one time as a manufacturer of various components, Acer Computers eventually became one of the well-known global brands, and the number of subsidiaries still supplying chips and various components under new brands is now difficult to account for. Who, if not to such a large industrial conglomerate, is engaged in the production of ready-made systems on their own (in most cases) components?
Acer aspire performance
The desktop system Acer aspire desktop computer is a ready-made solution "for the home" - at least, it is said on the Russian mirror of the company's website. About offices, as a target group, there is no mention. Indeed, the testing system based on the processor of the Intel Pentium 4 has a performance that exceeds the needs of the average office, but do not forget that the Acer aspire desktop computer contains solutions based on the Celeron processors, which have quite adequate prices at quite sufficient performance. In other words, the positioning of the best Aspire system line seems to me to be broader, in the form of a universal solution for the local market.
Brand quality
Choosing a chipset for the Acer aspire desktop computer does not happen: the chipset with integrated video allows you to create a fairly balanced and functional system at no extra cost. At the same time, support of all processor versions is guaranteed. Pentium 4 and Celeron for Socket 478, including FSB up to 800 MHz and support for Hyper-Threading technology, and the integrated graphics performance is enough to work with most office and "home" applications. However Acer aspire desktop computer, if the capabilities of the integrated graphics chip are not enough, the options of the system with already pre-installed discrete graphics are at your service. For example, in the case of the system being tested, there was a modest (in modern times), but quite modern, video card on the ATI Radeon 9600SE chip with 128 MB of its own graphics memory. In addition, Acer aspire desktop computer, the user is not limited to further expanding the functionality of the system due to the presence of PCI and AGP slots, there would be a desire.
Design and performance
The Acer aspire desktop computer is packaged in a tidy, mini tower form factor with stylish colors. The front panel is made in silver tone, the designers preferred to present the side and top panels in strict black. In full compliance with the overall style, the floppy drive, card reader, interface connector panel and the front panel of the optical drive are made in black. By the way, despite the fact that the CRT monitor is the typical choice of a display for the best Aspire computing system, the Acer LCD monitor in a black case (abundant in the company's model range) comes with a very elegant combination in a single finished style.
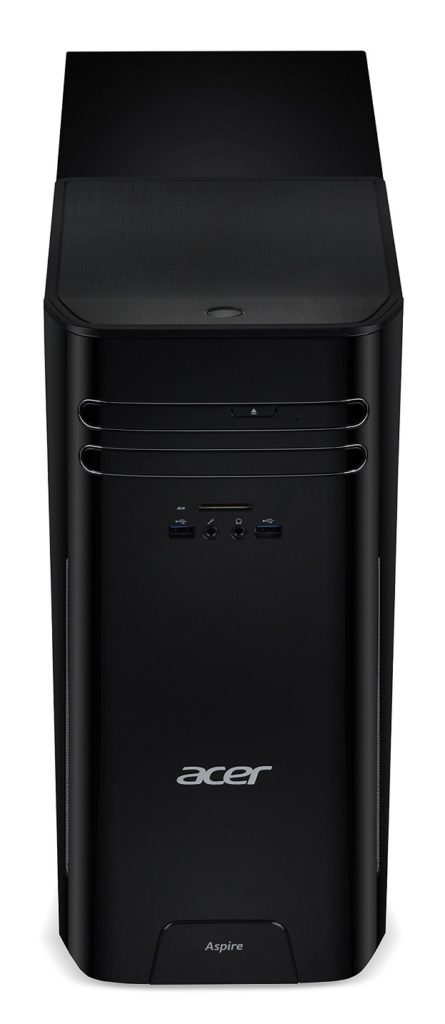
Acer aspire desktop computer
Retrofitting of structures
I don’t think that most home users will need to install another device in the 5.25-inch bay since the optical drive and universal flash card reader is already in the standard package. In the event of such a need, the user has one free compartment typical of Mini Tower enclosures. By the way, about the possibilities of retrofitting the system: in addition Acer aspire desktop computer installing a more efficient processor, a more capacious and/or additional hard drive, additional memory or a discrete video card, Acer also practices the optional delivery of a system with a TV tuner adapted to the Russian broadcast system SECAM. In the older models of the company's systems, for example, in the Aspire computer, the presence of such a tuner is standard.
Buy Now
Interfaces definition
Commenting on the usability of the Acer aspire desktop computer, I would like to note the presence of the main interfaces on the front panel. To connect headphones or a microphone, the user does not need to search for the corresponding connectors on the rear plane of the system; everything is displayed on the front panel. There are also a couple of USB connectors for quick connection of a scanner, printer, and camera.
It is also worth noting that when designing the front panel, Acer aspire desktop computer engineers thoughtfully approached the system configuration, which is why the front panel of the device for working with flashcards is equipped with a 4-pin version of the FireWire interface, which is usually the most popular for operational purposes.
The back part of the Acer aspire
desktop computer system is traditionally reserved for interface expanse.
It has everything that most home users need, including a LAN connector,
built-in modem, and audio interfaces. If there is a need or desire to connect a
built-in ADSL modem or other peripherals, you can always use free PCI slots or,
in the case of using external devices, use multiple USB ports.
Let us finish the visual inspection of the system by photographing a fragment of the upper left corner of the left side of the system, which has a sticker with the name of the computer and the components of this Acer aspire desktop computer particular system that is indicated in the required order. A kind of passport computer, which lists its main characteristics.
Layout components
The internal layout of the system does not cause any special
emotions: standard elements of the strapping are enough, An Acer aspire desktop computer motherboard with
passive cooling systems on the chipset bridges, a regular cooler on the
processor.
Standard flat cables are used in the system's strapping, which is tied together during installation into a single “communication hub”, due to which the internal space of the case looks quite spacious. In short, it is a typical layout for the Mini Tower case, made with the economical use of fasteners.
Inside knowledge
Finish the study of the inside of the PC with a photo of a regular power supply system. The rated power of this component is normalized at 200 W, which is quite enough to power the already installed Acer aspire desktop computer components available; however, it may not be enough when trying to seriously upgrade the system. We look at how the power of the channel, which is most critical for the system upgrade, is normalized. Indeed, +12 V is only 10 A, which confirms the above assumption: for a serious system update (for example, installing a top-end processor or video card) you will also have to say goodbye to a regular power supply unit, replacing it with something more substantial.
Keyboard and mouse converter
Just a few words about the supplied peripherals Acer aspire desktop computer - the keyboard and mouse. The keyboard has a set of keys of a standard Windows system. Its only differences from similar inexpensive twin brothers are in a pleasant design of the case and a color selected by the general style of the system. No special comments on ergonomics and convenience: the usual convenient tool for everyday work, without gadgets.
The mouse that came to us for testing complete with the Acer aspire desktop computer system was somewhat surprised by the fact that it was an archaic constructive with a ball, and no longer an optical manipulator corresponding to the current times. Not sure what it was worth saving on such a manipulator, because the price difference between these types of mice is now a few cents. For the sake of fairness, Acer aspire desktop computer body, I note that on the company's website, an optical mouse is indicated as a standard part of the delivery.
In conclusion, we present to your attention a photo of the Acer aspire desktop computer system in full set,
that is, with optional speakers and an Acer monitor.
To whom as, and the complete set LCD monitor with the black case like a little more. This option, by the way, is also available for delivery.
Framework solutions
It is clear that the performance of the budget Acer aspire desktop computer PC, positioned by the supplier as an "entry-level system focused on novice users," is unlikely to be its most powerful place. Rather, it is more appropriate to talk about the ratio of price and component compliance with modern requirements for solutions to this class. Therefore, within the framework of this material, we decided to refrain from publishing any figures. Fortunately, the performance of the Acer aspire desktop computer system are the best-reviewed in this review roughly fits into the standard framework for such solutions. I think that everyone, if they wish, can decide on the approximate performance of systems of similar configuration, referring, for example, to our detailed material on testing systems on chipsets for Socket 478 processors.
Performance of the Acer aspire desktop computer is quite typical for entry-level systems. To perform the daily tasks of such a configuration is more than enough, to achieve any breakthroughs you will have to think about improvements: the purchase of additional memory, graphics card or processor (along with the new power supply).
Summarize written text
Summing up our brief acquaintance with the entry-level
desktop system are Acer aspire desktop
computer manufactured by Acer Computers, I would like to note that if
you wish, you can, of course, independently assemble something similar on your
knee. True, you will have to run around looking for similar components, and if
you want to collect something in the same style, then run very hard, plus, take
care to search for an inexpensive, licensed OEM version of MS Windows XP Home,
the sale of which is, that is Acer aspire desktop
computer, without ready PC is prohibited.
The result will be a hill of dissimilar "hardware" that has yet to be made to make money with each other, plus a bundle of dissimilar checks and warranty cards from different places, with which you will have to run around different instances. Now it makes sense to arm yourself with a calculator, calculates how much it cost you to buy your iron slide with a licensed operating system, and then compare the result with the price of a similar configuration from the price list of the representative office of Acer aspire desktop computer.

Acer aspire desktop computer
Final conclusion
I do not argue, in some cases of the best Acer aspire desktop computer is the independent assembly of a PC is an independent and even intimate matter, not to mention all upgrades of the existing systems. However, consider whether the game is worth the trouble when it comes to buying a new PC, especially for a novice user who is familiar with a computer only from TV shows and magazines? Is it time in such cases to move on to the usual practice of buying ready-made systems, as is done in the case of purchasing the rest of electronic equipment "for the home, for the family" - a TV, laptop or mobile phone? It is hoped that the civilized market for the acquisition of ready-made by Acer aspire desktop computer class systems will eventually come to the computer market, for the number of newbies and users who want to use such systems for their intended purpose, and not engage in "tambourine dances"
Buy Now
Read the full article
0 notes
Text
Microsoft Surface Studio 2 review
OUR VERDICT
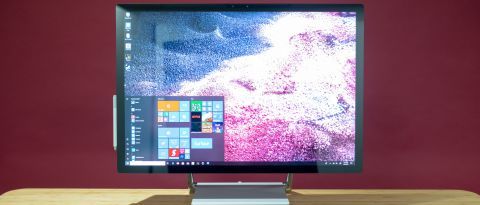
Still the most robust digital drafting table around, Surface Studio 2 wasn’t meant to compare well against most computers. For the digital artist or other visually-focused content creators, Surface Studio 2 will be the one to beat – dated parts and all.

The world has waited quite some time for this one: the Surface Studio 2 is here at last, and it’s improved in almost every way. Now, those improvements may not be on par with a lot of today’s professional all-in-one computers, but they do wonders for the Surface Studio 2’s core use case.
And that use case is the most robust digital drafting table to date.
If you already have the Surface Studio, the sequel is definitely worth considering. The components inside the original Surface Studio are getting older every day, and we see what’s inside this model lasting a much longer time. If you’re new to the Surface family, just be certain of whether this computer is right for your use case (digital media artists only need apply), before dropping this much cash.
Price and availability
The Surface Studio 2 calls for a kingly sum of $3,499 or AU$5,499 (about £2,680) – and that’s just to start. (Sadly, Surface Studio 2 isn’t yet available in the UK.)
This will get you a 7th-generation – nope, not a typo – Intel Core i7 processor designed for laptops and powered by Nvidia GeForce GTX 1060 (6GB GDDR5) graphics, 16GB of DDR4 memory and a 1TB NVMe SSD. Yes, the hybrid drives are gone.
This all sits beneath a 28-inch, 4,500 x 3,000 resolution PixelSense touch display that’s now 38% brighter (515 nits) and offers a 22% higher contrast ratio (1,200:1).
As for upgrades, the Surface Studio 2 can support GeForce GTX 1070 (8GB GDDR5) graphics, up to 32GB of DDR4 memory and as much as 2TB of SSD space. The processor option remains the same throughout.
The configuration you see listed here – one of only three available in the US – will cost you $4,199 (AU$6,599, about £3,319). This doubles the memory of the starting model and introduces the GTX 1070 graphics processor.
It’s difficult to compare this desktop against competing all-in-one PCs for creatives and otherwise, as it was designed for a very specific audience: digital artists and other creators.
However, we do know that Microsoft has upped the starting asking price by 500 bills (in the US at least) for parts that, while a major improvement over the first Surface Studio, are arguably dated by today’s standards.
All in all, it’s difficult to say what price should be put on such a niche product with such a specific use case, but this is an expensive piece of hardware no matter how you slice it.
Design and display
This may come as music to your ears or a total disappointment, but absolutely nothing has changed about the Surface Studio in its physical design over the previous model. Even the included wireless keyboard and mouse are identical to the original model.
That said, Microsoft took the opportunity to upgrade the Surface Studio display with this revision. The screen has been given quite a boost in the brightness and contrast departments by 38% (515 nits) and 22% (1,200:1), respectively.
The increased brightness and contrast ratio don’t do much for us personally, but we’re sure it should make content more visible and workable for creatives. The increased brightness can bring out enhanced detail, meanwhile, the boosted contrast will drive deeper blacks and lighter whites, and in turn produce more color depth.
Beyond these points – and USB-C in replace of a DisplayPort – there are no major design changes. This isn’t necessarily a bad thing, as the Surface Studio ‘Gravity Hinge’ doesn’t need any improvements.
However, we would have loved to see that starting price hike backed up with a full array of USB-C 3.1 ports or – even better – Thunderbolt 3, especially given this device’s potential to act as the hub of your desk. Not to mention its target audience: content creators.
Also, why couldn’t this product have received that jaw-dropping, all-black color scheme that adorns the Surface Laptop 2 and Surface Pro 6, release alongside the Studio 2? Imagine how that would bounce off the chrome accents and just disappear behind your work – a sorely missed opportunity.
The keyboard and mouse inputs included in the box work just fine. The keyboard feels almost identical to that of the Apple Mac desktop keyboards in terms of travel and feedback. The mouse, meanwhile, has a welcome curvature to it that’s comfortable to hold. Both inputs require AA batteries. Sadly, there are no rechargeable peripherals here.
The Surface Pen stylus that’s also included will feel identical to those found on Surface Pro tablets, as it’s the very same stylus. Now, you just have a massive canvas to draw on with it, and the stylus shines when used on that much surface (get it?) area.
Of course, the Surface Pen attaches to the left side of the display magnetically.
Honestly, we’re glad to see Microsoft’s design persist in the sequel, as it was already rather brilliant. The Gravity Hinge still works here effortlessly, with all of the computer’s major components hiding within its base.
Speaking of which, the base has received a bit of an upgrade with a USB-C 3.1 port in addition to its existing USB 3.0 ports, which replaces the old model’s mini DisplayPort.
Performance
The parts inside the Surface Studio 2, on paper, look like peanuts compared to the latest processors and graphics cards available in similarly-priced desktop computers. However, none of those computers double as a high-resolution drafting table.
BENCHMARKS
Here’s how the Microsoft Surface Studio 2 performed in our suite of benchmark tests:
3DMark Sky Diver: 29,418; Fire Strike: 12,956; Time Spy: 5,295
Cinebench CPU: 759 cb; Graphics: 111 fps
Geekbench 4 Single-Core: 4,767; Multi-Core: 16,112
PCMark 8 Home: 3,435 points
Total War: Warhammer II (1080p, Ultra): 52 fps; (1080p, Low): 111 fps
ME: Shadow of War (1080p, Ultra): 63 fps; (1080p, Low): 122 fps
Microsoft’s unique positioning for Surface Studio 2 put this computer into almost a whole category unto itself, however what’s inside will be capable of basically all modern computing tasks regardless. Just don’t expect to be able to quickly encode 4K video, or drive the latest games at native resolution, with this machine.
As you can see, this model is better than the previous in every way – and by a considerable margin. This model is better at rendering 3D graphics as well as multitasking and at processor-intensive tasks, like encoding video and rendering dense, complex spreadsheets.
However, for the content creator out there that doesn’t do much with digital art generation or illustration, there will be plenty of more powerful options out there that cost less – even all-in-one PCs, like Apple’s iMac Pro. Basically, if you don’t find yourself using this 28-inch computer as a digital drafting table, at least a double-digit percentage of the time, we wouldn’t recommend it.
Now, Microsoft may have included its Xbox Wireless connectivity protocol for its Xbox One controllers, and this PC may have the capability to play many of the latest games at decent settings, but this is not a gaming PC. We wouldn’t even remotely consider gaming to be a concern in purchasing this machine.
When it comes to gaming, you can simply do far better for far less.
Still, the Surface Studio 2 is perfectly capable for its primary use case – as well as a few others – so, don’t let the arguably dated specs turn you off if you’re a digital artist seeking new tools. For folks specifically in that crowd, the Surface Studio 2 could last you several years.
Software and features
Of course, the Surface Studio 2 comes with zero pre-installed software from third parties, coming directly from Microsoft. This is definitely part of the appeal of the product, with so many other products bloating up the operating system with software that wasn’t asked for.
However, that does leave the Surface Studio 2 with little to speak for in terms of unique software and features. What we can highlight is the Windows Hello camera.
This is a 5MP (1080p) webcam that includes infrared sensors for facial recognition, and it appears to be largely unchanged from the previous. However, we couldn’t help but notice just how fast the system is a registering your face and getting you into the desktop. Honestly, it takes less time than we can utter the words ‘one second.’
Super speedy logins that are also secure should make any user happy – digital artist or not.
Final verdict
The Surface Studio 2 absolutely does what it ultimately sets out to do: improve upon the previous model in every way necessary. This version is faster, brighter and with more vibrant color than before, changing nothing that didn’t need to be changed.
That said, this computer will absolutely look like an overpriced heap when stacked up against rivals, like the Apple iMac Pro, on paper. These spec-for-spec comparisons simply cannot capture the complete value found within Surface Studio 2 … because of its unique use case as one of the world’s best digital drafting tables.
For the digital artist out there looking to upgrade from the original model, this one is a no-brainer. For newcomers, this model seems far more prepared to weather the endless silicon improvements and upgrades, with even stronger support for 4K content creation and the latest accessories via USB-C.
Surface Studio 2 isn’t going to compare well against most computers simply because it wasn’t meant to. For the digital artist or other visually-focused content creator, it’s going to be tough to beat Surface Studio 2 – dated parts and all
0 notes
Text
The Fruitiest Pi Yet: Raspberry Pi 4 8GB Is As Smooth As Cream
Our verdict of the Raspberry Pi 4 8GB:
Representing the latest evolution of the tiny project board, the Raspberry Pi 4 8GB offers a desktop-like experience for under $100. All the usual hobby projects are compatible with the board, although some distros seem to be lagging in support.910
Since its first release in 2012 the Raspberry Pi has gone from strength to strength. An amazing 14 models have been released, with three form factors: 11 of them are still in production.
The most recent addition to the family is the Raspberry Pi 4 8GB model. It is the most powerful Raspberry Pi yet, with twice the RAM of its predecessor. It’s also the main feature of the Pimoroni Raspberry Pi 4 8GB Amazebundle.
A Slice of Pi
Whether you’re new to the Pi or you’re upgrading from an earlier device, this is a great stepping on point. The Raspberry Pi 4 8GB is the 2020 revision of the Raspberry Pi 4 Model B board, released in 2019. While the earlier Raspberry Pi 4 releases featured 1GB, 2GB, and 4GB models, this new release doubles the RAM.
And while the 1GB model is discontinued, we’re assured that the “Raspberry Pi 4 Model B will remain in production until at least January, 2026.”
But should you take a bite of this Pi?
What’s So Good About the Raspberry Pi 4 8GB?
Well, there’s a good chance you probably should. The Raspberry Pi 4 release was significant, but this is a game-changer. Everything is (unsurprisingly, given the additional RAM) just so fast.
From installing an operating system from the bundled NOOBS installer to adding Kodi add-ons, the speed that additional 4GB of RAM brings to the table is considerable.
Given early versions of the Raspberry Pi had just half a gig of RAM, it’s not a total surprise. For those of us who used the Raspberry Pi back in 2012/13, the evolution of the platform is evident. If you’re new to Raspberry Pi, however, 8GB will not seem particularly unusual. After all, it’s the baseline RAM for most laptops these days.
It’s what people expect from a computer. In some ways, the Raspberry Pi now feels more like a PC than a hobby device.
What You Get in Pimoroni’s Raspberry Pi 4 8GB Amazebundle
The compact Amazebundle box contains an impressive list of components.
Primarily there is the Raspberry Pi 4 8GB model itself, along with the official USB-C power supply adaptor. This has a 15.3W maximum power output and removes any worries about using a phone charger. You’ll find is a micro-HDMI to HDMI cable, and a 32GB microSD card with the NOOBs operating system installer, so you can get started right away.
Also included is the Fan Shim, an easily assembled fan component to help manage the Pi’s cooling and performance. Given that other Raspberry Pi 4 models have struggled with heat management, this is a smart inclusion.
Note that no case is included in this bundle. Fortunately, Raspberry Pi 4 cases for all purposes are easy to get hold of.
Raspberry Pi 4 Tech Specs
Three types of Raspberry Pi board have been used: A, B, and Zero. Of those, A and B models have had revisions designated “+”.
The Raspberry Pi 4 8GB is a B board using the standard “credit card-sized” form factor (85.6mm × 56.5mm). It features Gigabit Ethernet, two USB 2.0 ports, two USB 3.0 ports, a USB-C power supply, and two Micro HDMI ports, capable of supporting two 4K displays. There is also a combined stereo audio and composite video port.
Along with these standard hardware ports, the Pi 4 also features a two-lane MIPI DSI display port and two-lane MIPI CSI camera port. These ports accept ribbon cables only. The GPIO, meanwhile, is 40-pin and can accept connections from a range of devices, from fans to audio amplifiers.
The Pi’s SoC is a 64-bit Broadcom BCM2711 with a quad-core Cortex-A72 running at 1.5Ghz, and 8GB of SDRAM. Wireless internet is 802.11ac, capable of 2.4Ghz and 5Ghz networks, with Bluetooth 5.0 BLE.
This Raspberry Pi Needs a Cooling Fan
Earlier Raspberry Pi 4 models have been found to generate heat in ways the earlier devices did not. Linked to the enhanced overall speed and performance, various solutions have been suggested, from heatsinks and fans to standing the Pi 4 4GB model on its horizontal edge (no, really).
Offering a smarter, more complete solution, the Amazebundle features a Pimoroni Fan Shim.
Designed for “simple, effective Pi cooling” this is a fan that can be easily added to the Raspberry Pi’s GPIO. It features a button, RGB LED, and a cable to attach the fan to the shim’s body. This then sits on the GPIO using friction connectors, so it’s solder-free!
Setting Up the 8GB Raspberry Pi
Preparing a Raspberry Pi for use is straightforward. However, it makes sense to attach the Fan Shim before powering up the Pi.
This is thankfully straightforward. Simply attach the fan unit to the PCB using the nylon screws and bolts. Connect the wire to the socket on the PCB, then place the shim onto the Pi’s GPIO, over pins 1-12.
With this firmly in place, insert the microSD card, connect the HDMI cable, and hook up the USB Type-C power. A USB keyboard and mouse is handy at this stage, too. While you can remotely access the Pi later using SSH or VNC, initial setup requires direct input.
What Can You Do With 8GB of Raspberry Pi?
When the Pi boots for the first time the NOOBs menu appears. The version of NOOBs bundled with the Pi 4 8GB model features:
Raspberry Pi OS Full, Desktop, and Lite versions (all based of the 32-bit Debian OS)
Lakka
LibreElec
a 30-day trial of the TLXOS thin client from ThinLinX
As such, you have plenty of options for using this top-end Raspberry Pi. And that’s just the pre-installed options. Many more projects are available, from game streaming to managing amateur space programs. Or you might prefer to manage your greenhouse, set up a wildlife camera, or build a robot. (There’s also a 64-bit test version of Raspberry Pi OS available to install, although this is some way from being ready for all uses.)
The possibilities are endless.
But it’s important to check first that they will run with the Raspberry Pi 4 8GB model. For example, while LibreElec ran like a dream, Lakka wouldn’t boot, displaying this error:
Apparently, this is a common fault and seems to be due to the new Pi having more RAM than expected. For retro gamers there are workarounds, e.g. waiting for Lakka to release a Pi 4 8GB build, installing 32-bit builds
It’s not a massive issue, but one that you should be aware of. It seems booting from an older Pi 4 SD card with RetroPie already installed will work, however.
Comparing the Raspberry Pi 4 8GB With Other Models
With the Raspberry Pi 4 8GB model’s higher system spec and 64-bit architecture, comparison with the earliest models is tough. The Raspberry Pi 4 devices essentially represent a different generation—much like comparing the Xbox One with the Xbox 360.
In many ways, therefore, comparison is unfair.
There is little difference between the Raspberry Pi 4 8GB and older models. In terms of the Pi 4 range, this board is indistinguishable from the 2GB and 4GB versions aside from the RAM. It’s the power user board of the Raspberry Pi world, the equivalent of buying a top of the range phone. Running a basic benchmarking tool on the Pi 4 4GB and 8GB models, we found obvious advantages.
It is likely that that the Pi 4 8GB is a product of its time. A device that can double up as a competent desktop computer and thin client, as well as all of those other uses—media streamer, retro game hub, development device, robot brain, Twitter bot, the list goes on—is extremely valuable when events force people and students to work at home.
You probably don’t need it, but that 8GB is very nice to have.
Using the Raspberry Pi 4 8GB
To explore some of those possibilities, I spent a few days playing with the Pi 4. In that time, I used it mainly for desktop tasks, to explore the advantages of the 8GBs.
Everything performed well, leaving me with the strange sensation that I was using a desktop PC. For comparison, it felt a little like using a Pinebook, a budget ARM laptop not dissimilar to the Raspberry Pi. That extra RAM adds a dimension to the performance that is completely new to the Pi.
This is unparalleled with the Raspberry Pi. There has always been a trade-off between the device’s size and performance and the usual expectations of a computer. But with the addition of 8GB of RAM that trade-off is almost non-existent.
The implications of this are considerable. While a 16GB Raspberry Pi 4 is unlikely, when the next generation of boards comes along 16GB would not be out of place.
The Raspberry Pi 4 8GB: Basically, a Spare PC for Under $100
Retro gaming and media streaming is perhaps the most popular use for the Raspberry Pi, but there is so much more you can do with it. At a time when so many people are forced to work at home, this inexpensive computer makes an excellent desktop replacement. Alternatively, it can also work as a thin client to access a virtual desktop environment if that’s what your employer uses.
And then there is the endless list of enthusiast-developed projects. All of these, and more, work on this tiny budget British computer, available for under $100 without accessories.
The Raspberry Pi 4’s enhanced power represents a new stage in its evolution, and in the projects it can handle. To get you started, the Pimoroni Amazebundle Raspberry Pi 4 kit features everything you need.
Enter the Competition!
Raspberry Pi 4 Amaz Bundle from Pimoroni
Read the full article: The Fruitiest Pi Yet: Raspberry Pi 4 8GB Is As Smooth As Cream
The Fruitiest Pi Yet: Raspberry Pi 4 8GB Is As Smooth As Cream posted first on grassroutespage.blogspot.com
0 notes
Text
The Fruitiest Pi Yet: Raspberry Pi 4 8GB Is As Smooth As Cream
Our verdict of the Raspberry Pi 4 8GB:
Representing the latest evolution of the tiny project board, the Raspberry Pi 4 8GB offers a desktop-like experience for under $100. All the usual hobby projects are compatible with the board, although some distros seem to be lagging in support.910
Since its first release in 2012 the Raspberry Pi has gone from strength to strength. An amazing 14 models have been released, with three form factors: 11 of them are still in production.
The most recent addition to the family is the Raspberry Pi 4 8GB model. It is the most powerful Raspberry Pi yet, with twice the RAM of its predecessor. It’s also the main feature of the Pimoroni Raspberry Pi 4 8GB Amazebundle.
A Slice of Pi
Whether you’re new to the Pi or you’re upgrading from an earlier device, this is a great stepping on point. The Raspberry Pi 4 8GB is the 2020 revision of the Raspberry Pi 4 Model B board, released in 2019. While the earlier Raspberry Pi 4 releases featured 1GB, 2GB, and 4GB models, this new release doubles the RAM.
And while the 1GB model is discontinued, we’re assured that the “Raspberry Pi 4 Model B will remain in production until at least January, 2026.”
But should you take a bite of this Pi?
What’s So Good About the Raspberry Pi 4 8GB?
Well, there’s a good chance you probably should. The Raspberry Pi 4 release was significant, but this is a game-changer. Everything is (unsurprisingly, given the additional RAM) just so fast.
From installing an operating system from the bundled NOOBS installer to adding Kodi add-ons, the speed that additional 4GB of RAM brings to the table is considerable.
Given early versions of the Raspberry Pi had just half a gig of RAM, it’s not a total surprise. For those of us who used the Raspberry Pi back in 2012/13, the evolution of the platform is evident. If you’re new to Raspberry Pi, however, 8GB will not seem particularly unusual. After all, it’s the baseline RAM for most laptops these days.
It’s what people expect from a computer. In some ways, the Raspberry Pi now feels more like a PC than a hobby device.
What You Get in Pimoroni’s Raspberry Pi 4 8GB Amazebundle
The compact Amazebundle box contains an impressive list of components.
Primarily there is the Raspberry Pi 4 8GB model itself, along with the official USB-C power supply adaptor. This has a 15.3W maximum power output and removes any worries about using a phone charger. You’ll find is a micro-HDMI to HDMI cable, and a 32GB microSD card with the NOOBs operating system installer, so you can get started right away.
Also included is the Fan Shim, an easily assembled fan component to help manage the Pi’s cooling and performance. Given that other Raspberry Pi 4 models have struggled with heat management, this is a smart inclusion.
Note that no case is included in this bundle. Fortunately, Raspberry Pi 4 cases for all purposes are easy to get hold of.
Raspberry Pi 4 Tech Specs
Three types of Raspberry Pi board have been used: A, B, and Zero. Of those, A and B models have had revisions designated “+”.
The Raspberry Pi 4 8GB is a B board using the standard “credit card-sized” form factor (85.6mm × 56.5mm). It features Gigabit Ethernet, two USB 2.0 ports, two USB 3.0 ports, a USB-C power supply, and two Micro HDMI ports, capable of supporting two 4K displays. There is also a combined stereo audio and composite video port.
Along with these standard hardware ports, the Pi 4 also features a two-lane MIPI DSI display port and two-lane MIPI CSI camera port. These ports accept ribbon cables only. The GPIO, meanwhile, is 40-pin and can accept connections from a range of devices, from fans to audio amplifiers.
The Pi’s SoC is a 64-bit Broadcom BCM2711 with a quad-core Cortex-A72 running at 1.5Ghz, and 8GB of SDRAM. Wireless internet is 802.11ac, capable of 2.4Ghz and 5Ghz networks, with Bluetooth 5.0 BLE.
This Raspberry Pi Needs a Cooling Fan
Earlier Raspberry Pi 4 models have been found to generate heat in ways the earlier devices did not. Linked to the enhanced overall speed and performance, various solutions have been suggested, from heatsinks and fans to standing the Pi 4 4GB model on its horizontal edge (no, really).
Offering a smarter, more complete solution, the Amazebundle features a Pimoroni Fan Shim.
Designed for “simple, effective Pi cooling” this is a fan that can be easily added to the Raspberry Pi’s GPIO. It features a button, RGB LED, and a cable to attach the fan to the shim’s body. This then sits on the GPIO using friction connectors, so it’s solder-free!
Setting Up the 8GB Raspberry Pi
Preparing a Raspberry Pi for use is straightforward. However, it makes sense to attach the Fan Shim before powering up the Pi.
This is thankfully straightforward. Simply attach the fan unit to the PCB using the nylon screws and bolts. Connect the wire to the socket on the PCB, then place the shim onto the Pi’s GPIO, over pins 1-12.
With this firmly in place, insert the microSD card, connect the HDMI cable, and hook up the USB Type-C power. A USB keyboard and mouse is handy at this stage, too. While you can remotely access the Pi later using SSH or VNC, initial setup requires direct input.
What Can You Do With 8GB of Raspberry Pi?
When the Pi boots for the first time the NOOBs menu appears. The version of NOOBs bundled with the Pi 4 8GB model features:
Raspberry Pi OS Full, Desktop, and Lite versions (all based of the 32-bit Debian OS)
Lakka
LibreElec
a 30-day trial of the TLXOS thin client from ThinLinX
As such, you have plenty of options for using this top-end Raspberry Pi. And that’s just the pre-installed options. Many more projects are available, from game streaming to managing amateur space programs. Or you might prefer to manage your greenhouse, set up a wildlife camera, or build a robot. (There’s also a 64-bit test version of Raspberry Pi OS available to install, although this is some way from being ready for all uses.)
The possibilities are endless.
But it’s important to check first that they will run with the Raspberry Pi 4 8GB model. For example, while LibreElec ran like a dream, Lakka wouldn’t boot, displaying this error:
Apparently, this is a common fault and seems to be due to the new Pi having more RAM than expected. For retro gamers there are workarounds, e.g. waiting for Lakka to release a Pi 4 8GB build, installing 32-bit builds
It’s not a massive issue, but one that you should be aware of. It seems booting from an older Pi 4 SD card with RetroPie already installed will work, however.
Comparing the Raspberry Pi 4 8GB With Other Models
With the Raspberry Pi 4 8GB model’s higher system spec and 64-bit architecture, comparison with the earliest models is tough. The Raspberry Pi 4 devices essentially represent a different generation—much like comparing the Xbox One with the Xbox 360.
In many ways, therefore, comparison is unfair.
There is little difference between the Raspberry Pi 4 8GB and older models. In terms of the Pi 4 range, this board is indistinguishable from the 2GB and 4GB versions aside from the RAM. It’s the power user board of the Raspberry Pi world, the equivalent of buying a top of the range phone. Running a basic benchmarking tool on the Pi 4 4GB and 8GB models, we found obvious advantages.
It is likely that that the Pi 4 8GB is a product of its time. A device that can double up as a competent desktop computer and thin client, as well as all of those other uses—media streamer, retro game hub, development device, robot brain, Twitter bot, the list goes on—is extremely valuable when events force people and students to work at home.
You probably don’t need it, but that 8GB is very nice to have.
Using the Raspberry Pi 4 8GB
To explore some of those possibilities, I spent a few days playing with the Pi 4. In that time, I used it mainly for desktop tasks, to explore the advantages of the 8GBs.
Everything performed well, leaving me with the strange sensation that I was using a desktop PC. For comparison, it felt a little like using a Pinebook, a budget ARM laptop not dissimilar to the Raspberry Pi. That extra RAM adds a dimension to the performance that is completely new to the Pi.
This is unparalleled with the Raspberry Pi. There has always been a trade-off between the device’s size and performance and the usual expectations of a computer. But with the addition of 8GB of RAM that trade-off is almost non-existent.
The implications of this are considerable. While a 16GB Raspberry Pi 4 is unlikely, when the next generation of boards comes along 16GB would not be out of place.
The Raspberry Pi 4 8GB: Basically, a Spare PC for Under $100
Retro gaming and media streaming is perhaps the most popular use for the Raspberry Pi, but there is so much more you can do with it. At a time when so many people are forced to work at home, this inexpensive computer makes an excellent desktop replacement. Alternatively, it can also work as a thin client to access a virtual desktop environment if that’s what your employer uses.
And then there is the endless list of enthusiast-developed projects. All of these, and more, work on this tiny budget British computer, available for under $100 without accessories.
The Raspberry Pi 4’s enhanced power represents a new stage in its evolution, and in the projects it can handle. To get you started, the Pimoroni Amazebundle Raspberry Pi 4 kit features everything you need.
Enter the Competition!
Raspberry Pi 4 Amaz Bundle from Pimoroni
Read the full article: The Fruitiest Pi Yet: Raspberry Pi 4 8GB Is As Smooth As Cream
The Fruitiest Pi Yet: Raspberry Pi 4 8GB Is As Smooth As Cream published first on http://droneseco.tumblr.com/
0 notes
Text
How to root Android Smartphones, tablet? (Just for Educational purpose)
Android is a wonderfully open platform, with Marshmallow and Lollipop being excellent examples of how far the OS has developed. There's even more potential under the hood though, and our beginner's guide to rooting your phone or tablet shows you how to get the most from your Android device. To root Android you'll need to enable Developer Mode and USB debugging on your device, then connect it to your PC. Free third-party software such as OneClickRoot can simplify rooting your Android phone or tablet, but alternatives are available. You can also root your phone or tablet without a PC using Stump Root. We'll explain all this in our guide to rooting Android below.
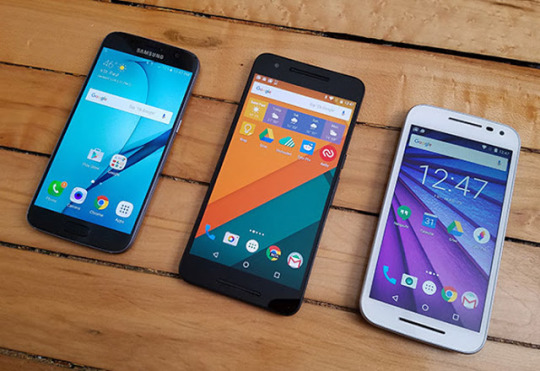
In-depth guide
One of the biggest advantages of the Android platform over its rivals is how users can customize devices to their personal tastes and requirements. The ultimate expression of this is rooting a phone. While Android is customizable, the layers of software that manufacturers often put on top of the OS can be limiting. Rooting is a way to get rid of this barrier, gain access to every aspect of the device, and take total control of your system. In this feature we’ll show you the basic principles of how to root a device running Marshmallow, Lollipop, or an older version of Android, and some of the pitfalls you need to avoid. This is a beginner’s guide, so you don’t need to be a seasoned technician to achieve a rooted phone. There are some risks involved though, including the potential to make your phone totally unusable, so we recommend you read through the article in full before you consider heading down this path, and if possible practice on an old phone first. That being said, rooting a phone is actually quite straightforward and the benefits easily outweigh the risks for careful users.
What does rooting mean?
Rooting an Android device is the process of gaining privileged or full control of the operating system, and even the software that runs the operating system. The idea is to get root access hence why it is known as 'rooting'. It's a bit like having a VIP pass at a gig, you can go anywhere you like and do anything you want (within reason). Rooting an Android smart phone or tablet is effectively the same as 'jail breaking' an iPhone.
Why should I root my Android phone or tablet?
Android is a mature platform now, and the arguments for rooting that made sense a couple of years ago hold a little less water these days. Google has worked hard to refine the user experience, and the current iteration – 6.0 Marshmallow – is a clutter-free work of art that feels a long way from the dark days of Froyo and Gingerbread.(We've largely blanked those from our collective memory.)
The problems occur when phone manufacturers lay their own interfaces on top of it. Far from improving Android, they often make things slower, uglier and more confusing. Then there’s the mortal sin of pre-loaded apps, often duplicating the functionality of stock Google versions, and being impossible to remove. Not only does this take valuable storage space away from the user, but it seems to suggest that this expensive device you’ve paid for doesn't actually belong to you. If you want that kind of experience then a trip to the Apple Store is probably a good idea, and at least you’ll be able to sell the device for a decent amount of money when you decide to upgrade. The good news is it doesn't have to be this way. If you want to control every aspect of your device, choosing the access apps have to the web and the very interface itself, then rooting remains a solid option. The process is free, shouldn't take too long, and in many cases is reversible. Of course if you don’t want cumbersome pre-loaded software suites, then there is the more capitalistic approach of not buying a phone from a manufacturer that employs such tactics. Instead you can pick up one of the Nexus range from Google, which includes the Nexus 5X and its larger brother the Nexus 6P, or a Moto G, Moto X Play, or Moto X Style from Motorola, all of which arrive with a minimum of bloat. But if you already have a different Android phone, or have your eye on one in particular, and just don’t aren't keen on the software, then rooting could let you build the device of your dreams.
Is rooting Android dangerous?
Rooting isn't a five-minute job. The decision needs a bit of thought. First, rooting your phone will absolutely void your warranty. Manufacturers don’t want you to do it, Google doesn't want you to do it, and you won’t get any customer support if you run into problems…and you are likely to run into problems. The worst case scenario is you will brick your phone. This doesn't mean you grow so frustrated that you'll throw it against the wall - it simply describes the technological abilities your phone will possess if rooting goes wrong. Which is nothing at all. Hence, a brick.Security becomes a more serious concern. Many of the reports you read about malicious attacks on Android users will most likely involve rooted devices, or certainly those running software not found on the Google Play Store. So it’s more risky than a standard setup. But, and this is very important, if you do your research, are not afraid to learn how things work, and don’t mind spending time fixing software problems, rooting can be hugely liberating and give you a device that is truly your own. Just remember, backup anything important before you begin, preferably to a PC or cloud service.
Can anyone root Android?
Considering the risks involved with rooting our advice is that you should only do it on your device if you can survive if something goes wrong. If you already have doubts then it's probably best to leave things well alone. We said this was a beginner's guide - which it is - but that doesn't mean rooting is suitable for everyone. If you're keen to learn about rooting, use - or buy - an old, cheap phone to practice on before moving up to your main device.
Rooting a device running Android 6.0 Marshmallow
Since its release in October 2015, the Android 6.0 Marshmallow update has been slowly making its way out into the Android community. As it remains a relatively new version of Android, the number of phones actually running the software is still quite small. At the time of writing only a handful of the major manufacturers have released the Marshmallow update for their handsets so far, although we expect to see this increase rapidly throughout the next few months.
This absence means that there are very few options available for those who want to root their brand new devices. Our investigations only found solutions for Google’s own Nexus range of handsets and the LG G4. All of these routes involve unlocking the bootloader, wiping devices, installing a new kernel, then installing a custom ROM, all of which is simpler than it sounds but would still be a challenge for many beginners. For the moment we’d recommend holding off for a few months, as the hacking community is bound to produce tools that automate parts of the process, which would make it a little less intimidating. As so much of rooting involves fixing issues by talking with others that have already worked through them, it’s a good idea to let more experienced hackers go before you and weed out any potential nasty bugs that could cause your phone problems. Remember, being one step ahead makes you a pioneer, being two steps ahead makes you a martyr.
How do I root Android? Step-by-step guide to rooting Android Lollipop or earlier versions
The first thing to know is that there isn't a ‘root my phone’ button on your device. It’s also not entirely clear whether your particular handset can be rooted easily. So before you begin thinking about custom ROMs or root-enabled apps, you’ll need to research your specific Android phone or tablet. A good search term is ‘[model name] how to root’. More often than not you’ll probably find a link to a website called XDA Developers, which is undoubtedly the best resource for this sort of thing. Here you may well discover that there are many variants of your handset, each with different identifying numbers and codes. European models tend to vary from their North American cousins, as do the ones from other parts of the world. To find your exact unit go to Settings on your phone and navigate through General>About Phone, then check the Model number. On some Android variants you might find this in the Hardware Information option on the About Phone menu. You’ll also want to know which flavor of Android you’re running, so visit Settings>General>About Phone, and check the Android version. Again some phone will have this under Software Information. Another thing you’ll need to do before you can root your phone, no matter which method you use, it to turn on Developer mode. To do this go to Settings>General>About Phone, then tap on the Build number several times until you see a message saying that you are now a developer. Then when you return to Settings>General you’ll see that Developer Options has appeared on your menu, tap this and ensure that USB debugging is turned on.
Armed with your handset model information you should be able to track down the method that exists to root your phone. While we were writing this guide we used an old LG G3 that we had in the office, and found a couple of different tools that were recommended. The most appealing was OneClickRoot, which is a website that promises a simple process for rooting a number of Android phones. You visit the site, find your phone, download the free software, then connect your phone to your PC and run the root process. There are a number of other downloadable Root tools to choose from, such as SuperOneClick, Unlock Root, Z4Root and Universal AndRoot, but you'll need to check if your device is supported.
The potential hazards of trying to root a phone showed up straight away for us, as the OneClickRoot method didn't actually work. Our phone appeared on the list, it matched the model number, but when we tried to root a message appeared saying our device wasn't eligible yet, but would hopefully be added in the future. There was a chat option, but we decided to carry on our search. We tried another piece of software that was recommended on several sites, but this time the program wouldn't actually run on our PC, even after several attempts and multiple copies being downloaded.
We mention this because the path to rootedness can be filled with this sort of frustration. It’s very much a community effort, run by enthusiasts, and therefore you can expect to spend lots of time on forums if things don’t turn out as you’d hoped. Of course, you might try any of the above and find it works first time, which would have been our experience if we’d started with Stump Root.
Is my phone rooted? How do I know if my phone is rooted?
When you first turn on a rooted phone there isn't much to differentiate it from an unrooted one. A quick way to make sure is to download the free Root Checker app from the Google Play Store. Just tap the Check button in the top right hand corner of the installed app, and it will do a short scan of your system and confirm whether you have Root Access or not.
Why do people root Android?
One of the first apps to download from the Google Play Store is SuperSU, which allows you to control the permissions that root apps have, alongside a variety of other settings. Depending on how you rooted your device, SuperSU might already have been installed, or you might find an alternative called KingRoot on your system which does many of the same things. There are some very useful apps that require root access, and now you can use any of these on your phone. If you really want to gain complete governance over your system then Device Control is an excellent app that has options for a whole manner of deep settings such as speed limits on your CPU, internal temperature controls, and the Tasker which allows you to create rules for how your phone behaves in different circumstances. This last one is incredibly useful, but can be intimidating to make sense of at first. We recommend searching for a few tutorials online, and before you know it you’ll be whizzing around the interface. Device Control requires another app, Busybox, to work properly, but you’ll be taken to the right place to install it when needed.
Backing up your phone is another very handy feature, and this can be achieved by downloading Titanium Backup app from the Google Play Store. Once installed you can use Titanium to make backups of your user data, applications, or both. To do your first full backup tap on the Backup/Restore tab at the top of the app, then tap Menu>Batch action>Backup all user apps + system data, then tap the green tick.
If you want to fine tune your system and customise its behaviour even further, but don’t fancy heading down the more nuclear Custom ROM route, then the Xposed Framework offers many of the advantages of custom ROMs, but without the hassle. It’s not a standard app you’ll find in the Google Play Store, so you’ll need to search for it online - just go to the XDA Developers site - then install it, and download some of the many tweak packs that actually do the adjusting. Popular options include Tweakbox, and the MoDaCo Toolkit.
0 notes
Text
Microsoft’s original Xbox Elite controller was a major step up for gamers, with customizable buttons, changeable physical controls and adjustable sensitivity for serious personalization. The new Xbox Elite Controller Series 2 has just landed, and it offers similar features, but with new and improved features that add even more customization options, along with key hardware improvements that take what was one of the best gaming controllers available and make it that much better.
USB-C
This might seem like a weird place to start, but the fact that the new Xbox Elite 2 comes with USB-C for charging and wired connections is actually a big deal, especially given that just about every other gadget in our lives has moved on to adapting this standard. Micro USB is looking decidedly long in the tooth, and if you’re like me, one of the only reasons you still have those cables around at all is to charge your game controllers.
In the box, you get a braided USB-A to USB-C charging cable, which at nine feet is plenty long enough to reach from your console to your couch. Of course, you also can use your phone, tablet, MacBook or any other USB-C charger and cable combo to power up the Elite 2, which is why it’s such a nice upgrade.
This is big for one other key reason: Apple recently added Xbox controller compatibility to its iPad lineup, which also charges via USB-C. That’s what makes this the perfect controller for anyone looking to turn their tablets into a portable gaming powerhouse, as it reduces the amount of kit you need to pack when you want to grab the controller and have a good option for digging into some iPad gaming.
Adjustable everything
Probably the main reason to own the Elite 2 is that it offers amazing customization options. New to this generation, you can even adjust the resistance of the thumbsticks, which is immensely useful if you’re a frequent player of first-person shooter (FPS) games, for instance. This lets you tune the sensitivity of the sticks to help ensure you’re able to find the right balance of sensitivity versus resistance for accurate aiming, and it should help pros and enthusiasts make the most of their own individual play style.
The shoulder triggers also now have even shorter hair-trigger locks, which means you can fire quicker with shorter squeezes in-game. And in the case, you’ll find other thumbsticks that you can swap out for the ones that are pre-installed, as well as a D-pad you can use to replace the multi-directional pad.
On top of the hardware customization, you also can tweak everything about the controller in software on Windows 10 and Xbox One, using Microsoft’s Accessories app. You can even assign a button to act as a “Shift” key to provide even more custom options, so that you can set up key combos to run even more inputs. Once you find a configuration you like, you can save it as a profile to the controller and switch quickly between them using a physical button on the controller’s front face.
Even if you’re not a hardcore multiplayer competitive gamer, these customization options can come in handy. I often use profiles that assign thumbstick clicks to the rear paddle buttons, for instance, which makes playing a lot of single-player games much more comfortable, especially during long sessions.
Dock and case included
The Xbox Elite 2 includes a travel case, just like the first generation, but this iteration is improved, too. It has a removable charging dock, which is a quality accessory in its own right. The dock offers pass-through charging even while the controller is inside the case, too, thanks to a USB-C cut-through that you can seal with a rubberized flap when it’s not in use.
In addition to housing the charger and controller, the case can hold the additional sticks and D-pad, as well as the paddles when those aren’t in use. It’s got a mesh pocket for holding charging cables and other small accessories, and the exterior is a molded hard plastic wrapped in fabric that feels super durable, and yet doesn’t take up much more room than the controller itself when packed in a bag.
The case is actually a huge help in justifying that $179.99 price tag, as all of this would be a significant premium as an after-market add-on accessory for a standard controller.
Bottom line
Microsoft took its time with a successor to the original Xbox Elite Wireless Controller, and while at first glance you might think that not much has changed, there are actually a lot of significant improvements here. The controller’s look and feel also feel better, with more satisfying button, pad and the stick response, and a better grip thanks to the new semi-textured finish on the front of the controller.
USB-C and more customization options might be good enough reason even for existing Elite Controller owners to upgrade, but anyone on the fence about getting an Elite to begin with should definitely find this a very worthwhile upgrade over a standard Xbox One controller.
Read more: https://techcrunch.com/2019/11/05/the-xbox-elite-wireless-controller-series-2-is-a-truly-great-game-controller/
The Xbox Elite Wireless Controller Series 2 is a truly great game controller Microsoft’s original Xbox Elite controller was a major step up for gamers, with customizable buttons, changeable physical controls and adjustable sensitivity for serious personalization.
0 notes
Text
Microsoft’s original Xbox Elite controller was a major step-up for gamers, with customizable buttons, changeable physical controls and adjustable sensitivity for serious personalization. The new Xbox Elite Controller Series 2 has just landed, and it offers similar features, but with new and improved features that add even more customization options, along with key hardware improvements that take what was one of the best gaming controllers available, and make it that much better.
USB-C
This might seem like a weird place to start, but the fact that the new Xbox Elite 2 comes with USB-C for charging and wired connections is actually a big deal, especially given that just about every other gadget in our lives has moved on to adapting this standard. Micro USB is looking decidedly long in the tooth, and if you’re like me, one of the only reasons you still have those cables around at all is to charging your game controllers.
In the box, you get a braided USB-A to USB-C charging cable, which is plenty long enough to reach from your console to your couch at nine feet. Of course, you can also use your phone, tablet, MacBook or any other USB-C charger and cable combo to power up the Elite 2, which is why it’s such a nice upgrade.
This is big for one other key reason: Apple recently added Xbox controller compatibility to its iPad lineup, which also charges via USB-C. That’s what makes this the perfect controller for anyone looking to turn their tablets into a portable gaming powerhouse, since it reduces the amount of kit you need to pack when you want to grab the controller and have a good option for digging into some iPad gaming.
Adjustable everything
Probably the main reason to own the Elite 2 is that it offers amazing customization options. New to this generation, you can even adjust the resistance of the thumbsticks, which is immensely useful if you’re a frequent player of first-person shooter (FPS) games, for instance. This lets you tune the sensitivity of the sticks to help ensure you’re able to find the right balance of sensitivity vs. resistance for accurate aiming, and it should help pros and enthusiasts make the most of their own individual play style.
The shoulder triggers also now have even shorter hair trigger locks, which mean you can fire quicker with shorter squeezes in-game. And in the case, you’ll find other thumbsticks that you can swap out for the ones that are pre-installed, as well as a d-pad you can use to place the multi-directional pad.
On top of the hardware customization, you can also tweak everything about the controller in software on Windows 10 and Xbox One, using Microsoft’s Accessories app. You can even assign a button to act as a ‘Shift’ key to provide even more custom options, so that you can set up key combos to run even more inputs. Once you find a configuration you like, you can save it as a profile to the controller and switch quickly between them using a physical button on the controller’s front face.
Even if you’re not a hardcore multiplayer competitive gamer, these customization options can come in handy. I often use profiles that assign thumbstick clicks to the rear paddle buttons, for instance, which makes playing a lot of single-player games much more comfortable, especially during long sessions.
Dock and case included
The Xbox Elite 2 includes a travel case, just like the first generation, but this iteration is improved, too. It has a removable charging dock, which is a quality accessory in its own right. The dock offers pass-through charging even while the controller is inside the case, too, thanks to a USB-C cut-through that you can also seal with a rubberized flap when it’s not in use.
In addition to housing the charger and controller, the case can hold the additional sticks and D-pad, as well as the paddles when those aren’t in use. It’s got a mesh pocket for holding charging cables and other small accessories, and the exterior is a molded hard plastic wrapped in fabric that feels super durable, and yet doesn’t take up much more room than the controller itself when packed in a bag.
The case is actually a huge help in justifying that $ 179.99 price tag, since all of this would be a significant premium as an after-market add-on accessory for a standard controller.
Bottom line
Microsoft took its time with a successor to the original Xbox Elite Wireless Controller, and while at first glance you might think that not much has changed, there’s actually a lot of significant improvements here. The controller’s look and feel also feel better, with more satisfying button, pad and the stick response, and a better grip thanks to the new semi-textured finish on the front of the controller.
USB-C and more customization options might be good enough reason even for existing Elite Controller owners to upgrade, but anyone on the fence about getting an Elite to begin with should definitely find this a very worthwhile upgrade over a standard Xbox One controller.
Gadgets – TechCrunch
The Xbox Elite Wireless Controller Series 2 is a truly great game controller Microsoft’s original Xbox Elite controller was a major step-up for gamers, with customizable buttons, changeable physical controls and adjustable sensitivity for serious personalization.
0 notes
Text
Microsoft’s original Xbox Elite controller was a major step-up for gamers, with customizable buttons, changeable physical controls and adjustable sensitivity for serious personalization. The new Xbox Elite Controller Series 2 has just landed, and it offers similar features, but with new and improved features that add even more customization options, along with key hardware improvements that take what was one of the best gaming controllers available, and make it that much better.
USB-C
This might seem like a weird place to start, but the fact that the new Xbox Elite 2 comes with USB-C for charging and wired connections is actually a big deal, especially given that just about every other gadget in our lives has moved on to adapting this standard. Micro USB is looking decidedly long in the tooth, and if you’re like me, one of the only reasons you still have those cables around at all is to charging your game controllers.
In the box, you get a braided USB-A to USB-C charging cable, which is plenty long enough to reach from your console to your couch at nine feet. Of course, you can also use your phone, tablet, MacBook or any other USB-C charger and cable combo to power up the Elite 2, which is why it’s such a nice upgrade.
This is big for one other key reason: Apple recently added Xbox controller compatibility to its iPad lineup, which also charges via USB-C. That’s what makes this the perfect controller for anyone looking to turn their tablets into a portable gaming powerhouse, since it reduces the amount of kit you need to pack when you want to grab the controller and have a good option for digging into some iPad gaming.
Adjustable everything
Probably the main reason to own the Elite 2 is that it offers amazing customization options. New to this generation, you can even adjust the resistance of the thumbsticks, which is immensely useful if you’re a frequent player of first-person shooter (FPS) games, for instance. This lets you tune the sensitivity of the sticks to help ensure you’re able to find the right balance of sensitivity vs. resistance for accurate aiming, and it should help pros and enthusiasts make the most of their own individual play style.
The shoulder triggers also now have even shorter hair trigger locks, which mean you can fire quicker with shorter squeezes in-game. And in the case, you’ll find other thumbsticks that you can swap out for the ones that are pre-installed, as well as a d-pad you can use to place the multi-directional pad.
On top of the hardware customization, you can also tweak everything about the controller in software on Windows 10 and Xbox One, using Microsoft’s Accessories app. You can even assign a button to act as a ‘Shift’ key to provide even more custom options, so that you can set up key combos to run even more inputs. Once you find a configuration you like, you can save it as a profile to the controller and switch quickly between them using a physical button on the controller’s front face.
Even if you’re not a hardcore multiplayer competitive gamer, these customization options can come in handy. I often use profiles that assign thumbstick clicks to the rear paddle buttons, for instance, which makes playing a lot of single-player games much more comfortable, especially during long sessions.
Dock and case included
The Xbox Elite 2 includes a travel case, just like the first generation, but this iteration is improved, too. It has a removable charging dock, which is a quality accessory in its own right. The dock offers pass-through charging even while the controller is inside the case, too, thanks to a USB-C cut-through that you can also seal with a rubberized flap when it’s not in use.
In addition to housing the charger and controller, the case can hold the additional sticks and D-pad, as well as the paddles when those aren’t in use. It’s got a mesh pocket for holding charging cables and other small accessories, and the exterior is a molded hard plastic wrapped in fabric that feels super durable, and yet doesn’t take up much more room than the controller itself when packed in a bag.
The case is actually a huge help in justifying that $179.99 price tag, since all of this would be a significant premium as an after-market add-on accessory for a standard controller.
Bottom line
Microsoft took its time with a successor to the original Xbox Elite Wireless Controller, and while at first glance you might think that not much has changed, there’s actually a lot of significant improvements here. The controller’s look and feel also feel better, with more satisfying button, pad and the stick response, and a better grip thanks to the new semi-textured finish on the front of the controller.
USB-C and more customization options might be good enough reason even for existing Elite Controller owners to upgrade, but anyone on the fence about getting an Elite to begin with should definitely find this a very worthwhile upgrade over a standard Xbox One controller.
The Xbox Elite Wireless Controller Series 2 is a truly great game controller Microsoft’s original Xbox Elite controller was a major step-up for gamers, with customizable buttons, changeable physical controls and adjustable sensitivity for serious personalization.
0 notes
Text
Acer aspire desktop computer: Advanced computer skills
Assembling the PC on the knee - our old national folk fun but, at the present time Acer aspire desktop computer is made the change. However, the times are changing, for the computer in a certain sense is still not "a car for lying under its hood, but a means of transportation."

Acer aspire desktop computer
Productive habit tracker
Habit is a great thing. Since the beginning of the emergence of a more or less civilized computer market in our country, there is still a persistent tradition of self-assembly of computers, especially if this is an Acer aspire desktop computer PC purchased by a user for the first time in his life. You can understand specialists and fans that, before buying each component of their computer, repeatedly examine the characteristics and test results of new products; you can understand the managers of the IT departments of enterprises who instruct their employees to purchase wholesale components for retrofitting existing systems. However, quite often no more than frank amazement is caused by the attempts of citizens, who do not understand this technique the best Acer aspire desktop computer, to contact their neighbors or work colleagues with a request to help “gather something on their knees” for the first acquaintance with a PC.
In this case Acer aspire desktop computer, of course, you want cheap and angry, and it does not matter that these concepts are often simply incompatible. It’s good if the computer master, turned up under the arm, is really an expert in his business, and there are cases when not only a competent hardware and software bundle is a misfortune, it happens that the “bad specialist” is not really friends with a screwdriver.
Best methods
The typical result of such methods of “first acquaintance with an Acer aspire desktop computer” is predictable: in the case, extra bolts that sooner or later fall on the contact tracks rollover, the monitor periodically “either goes out, goes out”. The mood because of the ineptly spent money was spoiled for months in advance, eventually the seller of incompatible iron (who, of course, didn’t have the slightest idea what they were going to combine with) ended up in the extreme, Uncle Liu, who collected at his Chinese factory it is insanely cheap (but fundamentally not working), or, at worst, Bill Gates. It is necessary to accuse Acer aspire desktop computer someone of their short-sightedness.
What is a desktop computer?
Do not think that in this material, using the example of Acer aspire desktop computer are ready-made system opposed to "self-assembly", the traditional in such cases ode to "trademarks" versus the domestic “screwdriver" assembly will be sung. There are many advantages and disadvantages in any case; moreover, there has been a new intermediate market for so-called barebones systems for several years in a row. However, really Acer aspire desktop computer is it not easier for an ordinary home or office user to buy a ready-made system and not to bother later on with the compatibility of components and legwork with warranty cards for a dozen of instances?
Let's be
realistic: cool gamers, scientists and other users who need
non-standard desktop devices are orders of magnitude smaller than modern an Acer aspire desktop computer PC users who put a
computer on a par with acquiring a vacuum cleaner, TV, bicycle and cell
phone. Worldwide, DIY markets (Do It
Yourself, that is, “does it yourself”) and ready-made systems for work, not for
experimentation, have long and firmly demarcated. Even in our country, along
with the supply of well-known foreign trademarks, over the past few years,
several domestic "brands" have established themselves, whose products
have long been unrelated to the "knee" assembly.
Advantages of such products abound: continuous factory assembly of pre-selected and tested components, pre-sale bench testing, and certification. The disadvantages of the best Acer aspire desktop computer approach have traditionally been called the insufficient choice of ready-made configurations and the high price of "branded" devices. However, the current realities are such that no self-respecting company will allow itself to market products without first examining the demand and finding out what the buyer really needs and how too much he is willing to pay for Acer aspire desktop computer. That is why, perhaps, the time has come to pay more attention to ready-made versions of computers. Fortunately, positive examples of the use of such systems have recently become more and more.

Acer aspire desktop computer
Buy Now
Acer computer manufacturer
The subject of our research today is the Acer ready-to-use desktop computer system Acer aspire desktop computer, first shown in spring 2004 and appearing in retail in the middle of summer. Acer products are known for a long time. Starting at one time as a manufacturer of various components, Acer Computers eventually became one of the well-known global brands, and the number of subsidiaries still supplying chips and various components under new brands is now difficult to account for. Who, if not to such a large industrial conglomerate, is engaged in the production of ready-made systems on their own (in most cases) components?
Acer aspire performance
The desktop system Acer aspire desktop computer is a ready-made solution "for the home" - at least, it is said on the Russian mirror of the company's website. About offices, as a target group, there is no mention. Indeed, the testing system based on the processor of the Intel Pentium 4 has a performance that exceeds the needs of the average office, but do not forget that the Acer aspire desktop computer contains solutions based on the Celeron processors, which have quite adequate prices at quite sufficient performance. In other words, the positioning of the best Aspire system line seems to me to be broader, in the form of a universal solution for the local market.
Brand quality
Choosing a chipset for the Acer aspire desktop computer does not happen: the chipset with integrated video allows you to create a fairly balanced and functional system at no extra cost. At the same time, support of all processor versions is guaranteed. Pentium 4 and Celeron for Socket 478, including FSB up to 800 MHz and support for Hyper-Threading technology, and the integrated graphics performance is enough to work with most office and "home" applications. However Acer aspire desktop computer, if the capabilities of the integrated graphics chip are not enough, the options of the system with already pre-installed discrete graphics are at your service. For example, in the case of the system being tested, there was a modest (in modern times), but quite modern, video card on the ATI Radeon 9600SE chip with 128 MB of its own graphics memory. In addition, Acer aspire desktop computer, the user is not limited to further expanding the functionality of the system due to the presence of PCI and AGP slots, there would be a desire.
Design and performance
The Acer aspire desktop computer is packaged in a tidy, mini tower form factor with stylish colors. The front panel is made in silver tone, the designers preferred to present the side and top panels in strict black. In full compliance with the overall style, the floppy drive, card reader, interface connector panel and the front panel of the optical drive are made in black. By the way, despite the fact that the CRT monitor is the typical choice of a display for the best Aspire computing system, the Acer LCD monitor in a black case (abundant in the company's model range) comes with a very elegant combination in a single finished style.

Acer aspire desktop computer
Retrofitting of structures
I don’t think that most home users will need to install another device in the 5.25-inch bay since the optical drive and universal flash card reader is already in the standard package. In the event of such a need, the user has one free compartment typical of Mini Tower enclosures. By the way, about the possibilities of retrofitting the system: in addition Acer aspire desktop computer installing a more efficient processor, a more capacious and/or additional hard drive, additional memory or a discrete video card, Acer also practices the optional delivery of a system with a TV tuner adapted to the Russian broadcast system SECAM. In the older models of the company's systems, for example, in the Aspire computer, the presence of such a tuner is standard.
Buy Now
Interfaces definition
Commenting on the usability of the Acer aspire desktop computer, I would like to note the presence of the main interfaces on the front panel. To connect headphones or a microphone, the user does not need to search for the corresponding connectors on the rear plane of the system; everything is displayed on the front panel. There are also a couple of USB connectors for quick connection of a scanner, printer, and camera.
It is also worth noting that when designing the front panel, Acer aspire desktop computer engineers thoughtfully approached the system configuration, which is why the front panel of the device for working with flashcards is equipped with a 4-pin version of the FireWire interface, which is usually the most popular for operational purposes.
The back part of the Acer aspire
desktop computer system is traditionally reserved for interface expanse.
It has everything that most home users need, including a LAN connector,
built-in modem, and audio interfaces. If there is a need or desire to connect a
built-in ADSL modem or other peripherals, you can always use free PCI slots or,
in the case of using external devices, use multiple USB ports.
Let us finish the visual inspection of the system by photographing a fragment of the upper left corner of the left side of the system, which has a sticker with the name of the computer and the components of this Acer aspire desktop computer particular system that is indicated in the required order. A kind of passport computer, which lists its main characteristics.
Layout components
The internal layout of the system does not cause any special
emotions: standard elements of the strapping are enough, An Acer aspire desktop computer motherboard with
passive cooling systems on the chipset bridges, a regular cooler on the
processor.
Standard flat cables are used in the system's strapping, which is tied together during installation into a single “communication hub”, due to which the internal space of the case looks quite spacious. In short, it is a typical layout for the Mini Tower case, made with the economical use of fasteners.
Inside knowledge
Finish the study of the inside of the PC with a photo of a regular power supply system. The rated power of this component is normalized at 200 W, which is quite enough to power the already installed Acer aspire desktop computer components available; however, it may not be enough when trying to seriously upgrade the system. We look at how the power of the channel, which is most critical for the system upgrade, is normalized. Indeed, +12 V is only 10 A, which confirms the above assumption: for a serious system update (for example, installing a top-end processor or video card) you will also have to say goodbye to a regular power supply unit, replacing it with something more substantial.
Keyboard and mouse converter
Just a few words about the supplied peripherals Acer aspire desktop computer - the keyboard and mouse. The keyboard has a set of keys of a standard Windows system. Its only differences from similar inexpensive twin brothers are in a pleasant design of the case and a color selected by the general style of the system. No special comments on ergonomics and convenience: the usual convenient tool for everyday work, without gadgets.
The mouse that came to us for testing complete with the Acer aspire desktop computer system was somewhat surprised by the fact that it was an archaic constructive with a ball, and no longer an optical manipulator corresponding to the current times. Not sure what it was worth saving on such a manipulator, because the price difference between these types of mice is now a few cents. For the sake of fairness, Acer aspire desktop computer body, I note that on the company's website, an optical mouse is indicated as a standard part of the delivery.
In conclusion, we present to your attention a photo of the Acer aspire desktop computer system in full set,
that is, with optional speakers and an Acer monitor.
To whom as, and the complete set LCD monitor with the black case like a little more. This option, by the way, is also available for delivery.
Framework solutions
It is clear that the performance of the budget Acer aspire desktop computer PC, positioned by the supplier as an "entry-level system focused on novice users," is unlikely to be its most powerful place. Rather, it is more appropriate to talk about the ratio of price and component compliance with modern requirements for solutions to this class. Therefore, within the framework of this material, we decided to refrain from publishing any figures. Fortunately, the performance of the Acer aspire desktop computer system are the best-reviewed in this review roughly fits into the standard framework for such solutions. I think that everyone, if they wish, can decide on the approximate performance of systems of similar configuration, referring, for example, to our detailed material on testing systems on chipsets for Socket 478 processors.
Performance of the Acer aspire desktop computer is quite typical for entry-level systems. To perform the daily tasks of such a configuration is more than enough, to achieve any breakthroughs you will have to think about improvements: the purchase of additional memory, graphics card or processor (along with the new power supply).
Summarize written text
Summing up our brief acquaintance with the entry-level
desktop system are Acer aspire desktop
computer manufactured by Acer Computers, I would like to note that if
you wish, you can, of course, independently assemble something similar on your
knee. True, you will have to run around looking for similar components, and if
you want to collect something in the same style, then run very hard, plus, take
care to search for an inexpensive, licensed OEM version of MS Windows XP Home,
the sale of which is, that is Acer aspire desktop
computer, without ready PC is prohibited.
The result will be a hill of dissimilar "hardware" that has yet to be made to make money with each other, plus a bundle of dissimilar checks and warranty cards from different places, with which you will have to run around different instances. Now it makes sense to arm yourself with a calculator, calculates how much it cost you to buy your iron slide with a licensed operating system, and then compare the result with the price of a similar configuration from the price list of the representative office of Acer aspire desktop computer.

Acer aspire desktop computer
Final conclusion
I do not argue, in some cases of the best Acer aspire desktop computer is the independent assembly of a PC is an independent and even intimate matter, not to mention all upgrades of the existing systems. However, consider whether the game is worth the trouble when it comes to buying a new PC, especially for a novice user who is familiar with a computer only from TV shows and magazines? Is it time in such cases to move on to the usual practice of buying ready-made systems, as is done in the case of purchasing the rest of electronic equipment "for the home, for the family" - a TV, laptop or mobile phone? It is hoped that the civilized market for the acquisition of ready-made by Acer aspire desktop computer class systems will eventually come to the computer market, for the number of newbies and users who want to use such systems for their intended purpose, and not engage in "tambourine dances"
Buy Now
Read the full article
0 notes
Last Seen Blogs

rose-milk21
T^T

anggilot
"Kotak Kisah"

angelnawartblog
Angelina Usenko

evasamtonu
Eva sâm tố nữ

heavyinlight
Wild Fires