#love a pullman's loaf pan
Text
my dad said offhandedly that he wants a pullman loaf pan like 6 months ago so i am trying to find one and i found some VINTAGE ones on ebay. he loves vintage shit. i might go for the vintage ones NGL.
0 notes
Text
She three weeks old now and just weighed in at 9 oz over her birth weight! We are still having a little bit of a struggle with her latch (it hurts) but we are getting there. My adivce is to talk to any lactation specialist you can get near. Whip your boobs out and let them take a look.. Honestly, at home skincare IS what makes the difference. There's no substitute for regular use of proven ingredients like retinoids, AHAs, BHA for clogged skin, Vitamin C, peptides, antioxidants and other skin identical ingredients, and hydration. Dermatologists don't even recommend most facials are extractions as it often irritates the skin, causes errythma, or results in hyperpigmention. The Emily Edit "The Wants" palette I know there have been some mixed reviews of this palette, but I really love it. As someone who usually sticks to neutral or no eyeshadow at all, 평창출장샵 this palette has inspired some new experimentation with color for me, which I really appreciate. It really versatile, and the combination of shades is great, imo.. A sling sounds okay to me as a temporary measure, just to be used when its really bad to give them a break. I feel like 3 days is the most I can wear a brace/sling before the muscles start to weaken and make things worse. I tend to tape a joint to support it extra if I feel it really needs it, but using it all the time will also weaken muscles.. Except it does get us somewhere. While I do agree that entirely unproblematic purchasing is impossible under the current system and that one individual purchaser isn going to magically change the system, I think you underestimating the value of media and media policies. Corporations aren people and capitalism relies on our attempts to ethically purchase in order to make company wide policies that increase their sales. Black squirrels are melanistic variants of grey squirrels. It's a genetic "defect", but they are the same species. It's basically the opposite of albino and occurs in a bunch of species (but not humans). Following treatment, the doctor will apply an antibacterial ointment and dressing to the area, which should be kept clean with continued application of ointment as directed by your doctor. A shower or bath the day after treatment is okay, but the treatment area should not be scrubbed. Your skin might feel slightly sunburned for a couple of days and the treated area may remain red for a few weeks. For sandwich bread. Add a T of dried milk, a bit of honey or sugar, and bake in a loaf pan. I tried to make a 평창출장샵 square pullman loaf, but t the recipe doesn fill the whole pan, so next time I will add another cup of flour, another half cup of water and up the yeast a bit.. Regular wehrmacht guys were just random German conscripts. There is little to no value in killing them. The resistance sabotages, attack military targets, assassinates viable targets, but doesn go around killing random regular soldiers just for the hell of it. A lot of times water doesn't sounds great to me when I'm high but I just make myself drink it for 10 seconds straight and it really does help the appetite a little. Also I like to eat a filling, healthy dinner right before I smoke and then I don't find myself to be continuously hungry (like I get if I were to smoke, then eat). That's what has helped me recently.
1 note
·
View note
Text
Using up leftovers: week of 12/14/20
Sourdough multigrain sandwich bread
Grade: B+
I’m still searching for the perfect seeded sourdough bread. This was a bit closer since it called for more seeds than a previous version, and I left out the milk so it wouldn’t have a coconut taste like yet another version, but...I’m still not happy with the result. Still not the right taste.
And of course the texture isn’t fluffy enough. I might not use chia and poppy seeds next time, and focus on the larger seeds that might blend into the dough more nicely.
Recipe: multigrain sourdough sandwich bread from Bread Experience
Sourdough milk bread
Grade: B+
The taste was great, but the grade is for the texture, which is still not fluffy enough.
This recipe called for egg whites instead of both yolks and whites, and I tried out evaporated milk (the thin part because I left the fat at the bottom, see the Hong Kong egg tarts section). The dough was very smooth and fragrant, not sure if it’s because of the egg whites. Lovely to work with even though it was very liquidity and maybe I would use it for flaked brioche.
I’ll try baking with Pullman lid on next time - size seems good for it and maybe I would no longer have the burnt rim.
Recipe: Hokkaido milk sandwich loaf from This Old Gal


Red bean mochi cake
Grade: A
I can’t say no to mochi. Especially not with red bean. I reduced the level of sugar slightly from the last time. It was amazing except I need to let cool in the oven - it deflated coming out of the oven and was also hard to remove without breaking.
Recipe: baked sweet nian gao from Du’s Doughs
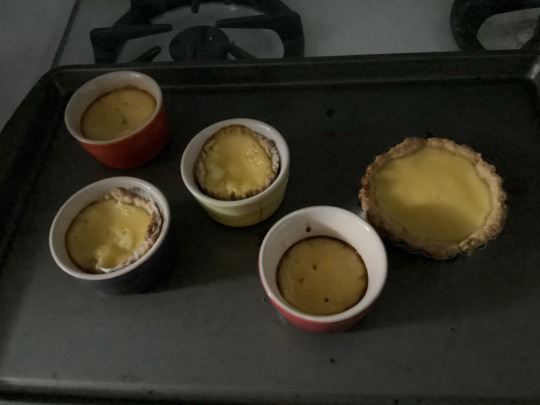
Hong Kong egg tarts
Grade: B+
I made these with leftover tart shells and leftover evaporated milk (from the milk bread). The consistency was really thin at first and I realized I left the milk fat from evaporated milk (is it even possible if it’s fat free evaporated milk?) at the bottom of the can because I forgot to shake. Then I had to adjust for the increased volume of milk with more egg and sugar.
Surprisingly the filling tasted authentic, if a bit sweet. I would make it again but use maybe reduced fat evaporated milk instead.
Recipes:
Pastry from sourdough pie crust from Baking Sense
Filling from Hong Kong egg tarts from the Woks of Life
Chocolate truffles
Grade: B+
This was a bit of a disaster. I scaled up the double cream with heavy cream to accommodate the larger quantity of chocolate, and broke the double cream bottle. The double boiler got stuck. The chocolate was way too liquid.
I have some chocolate-dipped strawberries and some chocolate ganache that I might need to re-purpose. The chocolate still tasted nice but it’s hard to say it’s the best use of double cream since I can’t taste the creaminess.
Recipe: chocolate truffles from Taste Australia

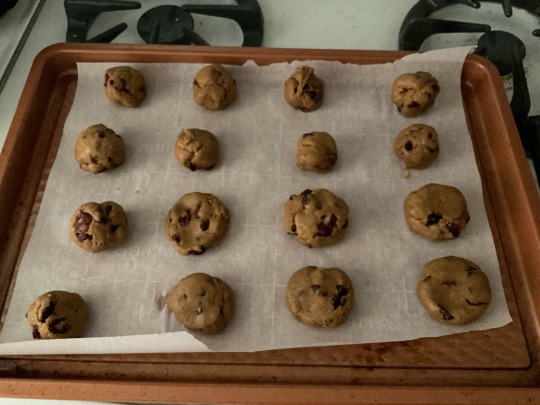
Sourdough gingerbread cookie with cranberry and chocolate chips
Grade: B
I had higher hopes for these given how much I liked the plain version. I even used dark brown sugar to heighten the molasses taste since I used golden syrup to make up for the small amount of molasses I had. I’m not sure the cranberries went with the ginger taste, and not sure that cranberries and chocolate chips went that well together. It’s not bad, but it means I want to get more molasses to make more gingerbread.
Recipe: soft sourdough molasses cookies from Homemade Food Junkie

Custard tofu rice
Grade: B+
I didn’t make the tofu, I bought it at the Japanese grocery store expecting it to be a dessert actually (because custard). But the sauce that I thought was sweet was actually dashi broth. It tasted good on its own and quite good with cooked white rice.
Recipe for combination: egg tofu by Just One Cookbook

Golden fried rice with salmon and cauliflowers
Grade: B+
I was kind of intrigued by the idea of coating rice in egg yolk and then stir frying. I didn’t want to waste the egg white, so threw that in as well as fresh salmon and baby cauliflowers. It was a bit oversalted and I can’t really say I notice the egg yolk coating the rice. I might try duck egg next time so there’s a higher quantity of egg yolk.
Recipe inspired by: golden fried rice with salmon and furikake from Bon Appetit

Matcha vanilla crème fraîche Bundt cake
Grade: A-
I bought Vermont Creamery crème fraîche on a whim. Apparently it’s used as a creamier sour cream alternative. Since I’ve also wanted to bake this cake for a while, I decided to use it here as it’s gonna expire on Christmas Day.
The cream itself was okay, too sour for my taste still (I guess I wouldn’t like sour cream either), but the cake was great, especially after I reduced sugar by almost half (still a bit too sweet, hence the grade). I didn’t oil the pan enough so the cake didn’t make it out in one piece, so there’s no picture. Still happy to share with the family.
Recipe: matcha-vanilla sour cream pound cake from Baking with Jess
#sourdough multigrain sandwich bread#sourdough milk bread#red bean mochi cake#hong kong egg tart#custard tofu rice#golden fried rice with salmon and cauliflowers#chocolate truffle#sourdough gingerbread cookie with cranberry and chocolate chips
0 notes
Text
Arplis - News: Cooking with Varlam Shalamov
In Valerie Stivers’s Eat Your Words series, she cooks up recipes drawn from the works of various writers.
The Kolyma Stories and my extended time indoors offered me the opportunity to use up some obscure items that have been languishing in my pantry.
The complete stories of Varlam Shalamov (1907–1982), published by NYRB Classics in two newly translated volumes, contain some of the bleakest and most powerful writing we have about the Soviet gulag. They’re also terrifyingly and indelibly about food—that is, about starving to death. Shalamov was first arrested in the twenties, when he was a student at Moscow University, and then again in 1937 for Trotskyist activity. He spent the next seventeen years in labor camps, including on the far northern island of Kolyma, where he mined for gold in some of the most horrific conditions in all the gulag. He found no redemption in the camps, writing that they were “a negative school of life in every possible way. Nobody can get anything useful or necessary out of the camps … Every minute of camp life is poisoned.” Yet in the decades after his release, he boiled the horrors he’d seen down to their pure essentials and shared them via this extraordinary body of work. Shalamov is plainspoken—“he knew his material perfectly, and wrote in a way that everyone can understand,” notes the translator Donald Rayfield—but prolonged immersion in the work reveals him as a better Solzhenitsyn; the stories are compulsively readable despite their subject matter, as compressed and brilliant as the Arctic snow. The temptation would be to compare them to “metal number one,” as gold was called by the Soviet authorities—if Shalamov had not so loathed it.
I was reading the first volume, Kolyma Stories, two weeks ago as New York City shut down due to the ongoing public health crisis. He was the only writer who didn’t feel frivolous—not because there can be any comparison between America’s sudden food insecurity and the Stalinist gulag’s conditions of prolonged starvation but because I have been depressed by the human behavior on display. To me, social distancing seemed to erupt spontaneously, and I found it heartbreaking. Even if it will later emerge as necessary and the best decision, I’m hopelessly stuck on the idea that distance is bad. I read a Leslie Jamison piece about being sick with the coronavirus and caring alone for her two-year-old, and on an emotional level, I’m outraged that I can’t bring her soup and human kindness.
The recipe called for a Pullman loaf pan, but I had to make do with what was on hand and baked my bread in a Dutch oven. Proper Russian rye bread is not round.
I don’t claim Shalamov’s moral authority for my opinions, but I think often of the first point on a list he wrote in Moscow in 1961, which Rayfield includes in his introduction to Kolyma Tales. The list is entitled “What I Saw and Understood in the Camps,” and the first point is: “The extreme fragility of human culture, civilization. A man becomes a beast in three weeks, given heavy labor, cold, hunger and beatings.” That’s too bleak for our times, but it bears keeping in mind. The third point is: “I realized that friendship, comradeship, would never arise in really difficult, life-threatening conditions. Friendship arises in difficult but bearable conditions (in the hospital, but not at the pit face.)” We have opportunities.
I find Shalamov consoling for his gravity, his sorrow, and his moral purity. Our times are grave and sad, though unfortunately for those of us not deemed essential workers, feelings of moral purity are hard to come by. I decided to bake from him in order to encourage others to read his stories, not because I think that baking bread and sharing it on the internet does much for humanity; baking is fun, but as a cook and sensualist, I consider virtual intimacy no intimacy at all. I’ve also had a long-running, long-failing personal project to correctly bake Russian rye bread from homemade sourdough starter, and testimony by all the novice quarantine bakers currently struggling with this implies that my experiences may be of some use. Moreover, while any attempt to faithfully reproduce the staff of life from a concentration camp would be ghoulish, Shalamov specifies that the bread was rye, and I had the medium rye flour, coarse rye meal, and red rye malt necessary for such bread already in my pandemic pantry, waiting to be thriftily used up.
Appropriately, it was snowing on Shalamov baking day. I weighed options for using this can of condensed milk.
Shalamov writes that bread was the “basic food” in the camps, and it appears in nearly every story. “We got half our calories from bread,” he explains. “The cooked food was something hard to define, its nutritional value depended on thousands of different things.” It was bread that kept him alive, specifically the ratio between its quantity and his labor. Men in his stories scheme for bread, fight for it, weep when they don’t get “a crusty piece.” There are loving descriptions of allowing crumbs to dissolve on the tongue. In the story “The Typhus Quarantine,” in which the Shalamov proxy Andreyev wakes up in the hospital and realizes he’s going to survive, he observes that “as little as half a kilo of rye bread, three spoonfuls of porridge, and a bowl of thin gruel were enough to resurrect a man: as long as he didn’t have to work.”
I considered making a second dish, oreshki, that I remember from my time living in Moscow: walnut-shaped cookies filled with a caramel made from condensed milk. The inspiration was “Condensed Milk,” a Shalamov story in which the narrator achieves one of his few victories over the forces trying to destroy him, tricking an enemy out of two cans of condensed milk. He consumes both instantly, after having “used the corner of an ax to pierce a hole” in the cans. I also had a can of condensed milk sitting in my pandemic pantry. Moreover, a Russian friend from Irkutsk—where the narrator arrives after his long exile, in the last story of the first volume—once told me that to make the caramel, you boil the sealed can for hours, stopping just before the point of explosion. This sounded like a cooking adventure of the type I am familiar with and enjoy, but for two factors: I’d have to order a cookie mold off the internet at a time when people need the transportation grid for more pressing matters, and it felt inappropriate to Shalamov and his work.
Thus, I made bread. It’s the title of a story, and it’s the ultimate human comfort food. There are many styles of Russian rye, but the one I’ve been trying to reproduce has a chewy, spongy, sour interior and a leathery black crust dusted with coriander seeds. I found a recipe that seemed close in a book called The Rye Baker, by Stanley Ginsberg. The first step was to develop a starter.
The recipe did not specify if I was supposed to grind the red rye malt, but it looked ground in the book’s photo, so I did.
The starter method outlined in The Rye Baker is fairly similar to all the others on the internet: You combine flour and water in about equal weights (half a cup of flour to a quarter cup of water, roughly), cover, and leave in a room-temperature place for twenty-four hours. Then you scoop out half the mixture, add another round of flour and water, stir, and repeat. After forty-eight hours, you should see gas bubbles, but even if you don’t, step up the discard-and-feed cycle to every twelve hours. Allegedly, within seven days you will have a puffy, sour mixture that can rise bread.
I wish I could report success with this, but instead I’ve had days and weeks of failure—and even, one night, tears, when my husband preheated the oven and accidentally cooked three carefully tended starters I’d placed there to soak up the warmth from the pilot light. Mishaps aside (oh, there were more), I suspect that my fundamental problem was the temperature: the Ginsberg book specifies that “room temperature” is between sixty-eight and seventy-two degrees. Up in Vermont, it’s been snowing, and starters left on my countertop have remained completely inert. Some sources suggest that a starter that looks flat might still be working, but I tried it and got a rocklike, unrisen loaf. Starters nourished in warmer places—the proofing drawer, the oven with the light on, the microwave with the light on—showed some growth and bubbling but either didn’t survive or did not raise bread. I suspect they may have been too warm, since too-warm conditions encourage bacteria (the sourness and bubbles) but not yeast (the growth). It’s also possible that wild yeast is a more mysterious beast than commonly admitted and that my starter just didn’t have enough of it. A last caveat: Ginsburg says the starter should be ready in five to seven days. I tried mine at day seven, and it did not work. However, other sources say you need up to twenty days to establish a culture powerful enough to bake with.
There is also the possibility that my starter was okay and the failure was somewhere in the bread recipe or my technique. Ginsberg’s Borodinsky rye bread asks for “a scald” and “a sponge.” For the former, you pour boiling water over rye meal and rye malt and allow it to soften overnight. For the latter, you make a slurry of starter, water, and flour and allow it to rise overnight. In the morning, you combine the two and let them sit for three to four hours “until doubled in volume.” I did so, and the doubling did not happen. I thought my starter was at fault. But then I added a packet of instant yeast (proofed), and though it bubbled, it also did not increase the volume. I would have stopped there, having been down this inedible-brick, wasted-flour road before, but for the sake of this story, I added the rest of the ingredients and followed the rest of the instructions, producing a pasty, bitter, concrete-like sludge, nowhere near the color of the bread promised in the cookbook photo. I had no faith in it at all.
When my starter did not raise the scald-sponge mixture, I added commercial yeast. Luckily, I had some on hand.
But the sludge rose, and I baked it, and the texture and crustiness were perfect. If I hadn’t made other mistakes, it may have even been good bread. Warm, with butter and jam, it wasn’t so bad. I’d like to say that having to provide a recipe for this failed loaf is a caution to me and that I’m going to give up on starter and stop wasting flour, but the truth is that I plan to make another starter tomorrow. There will never be such a time again (I hope, fervently) for sticking around the house tending to multiple long rises and watching the yeast grow.
And anyway, I’m sure they would have eaten my bread in Kolyma.
Borodinsky Bread
Adapted from The Rye Baker, by Stanley Ginsberg.
whole wheat flour
water
To make a starter:
Day 1: Using a quart-size mason jar or other roomy receptacle, combine half a cup of flour (I used King Arthur White Whole Wheat) with a quarter cup plus a tablespoon of water, and stir to make a starchy paste, making sure not to leave any pockets of flour sticking to the sides. Cover with saran wrap, and seal with a rubber band. If it’s hot where you are, you can probably leave the jar sitting out at room temperature. Otherwise, place it in an unheated oven with the door closed and the light on, and leave for twenty-four hours.
Day 2: Scoop out a quarter cup of the mixture, and refresh with half a cup of flour and an additional quarter cup plus a tablespoon of lukewarm water. Stir till completely combined, and let sit for another twenty-four hours.
Days 3–5: Begin feeding the starter at twelve-hour intervals, with the following change from the above: Scoop out half a cup (rather than a quarter cup) of the mixture, and discard; refresh with half a cup of flour and a quarter cup plus a tablespoon of lukewarm water. Stir, cover, and keep in the oven with the light on.
My recipe says you want five to seven days to build a powerful starter. I tried baking with mine on the seventh day, with inconclusive results.
To make the bread:
For the sponge:
2 cups medium rye flour
1 3/4 cups warm water
1/3 cup sourdough starter
For the scald:
3/4 cup coarse rye meal
1/4 cup red rye malt, ground
1 1/4 cup boiling water
For the final dough:
scald-sponge (use all)
1 2/3 cups medium rye flour
1 cup bread flour
1 2/3 tsp salt
2 tbs dark molasses
1 tbs red rye malt, ground
flavorless oil (for pan)
1–2 tbs coriander seeds
Day 1: The evening before you bake, make the sponge and the scald. To make the sponge, combine all the ingredients in a large bowl, cover with saran wrap, and leave overnight in your warm area of choice (“room temperature” if you’re someplace warm; the oven with the light on if you’re someplace cold, like a New York City apartment). Do the same for the scald in a separate bowl. Let rest for twelve hours.
Day 2, morning: Using the bowl of your stand mixer, combine the scald with the sponge. It’s essential that you allow the scald-sponge to rise in the mixer bowl because on the next step, you’ll add the rest of the ingredients and knead the dough, and you want to keep as much air in as possible. Cover the mixer bowl with saran wrap, put it in your warm place, and allow it to rest and rise for an additional three to four hours, or until doubled in bulk.
Day 2, afternoon: Add the flours, salt, molasses, and red rye malt to the risen mixture in the mixing bowl, then use the dough hook on low speed for eight to ten minutes to create a soft, smooth, deep-brown dough. Cover and ferment in your warm place until visibly expanded, sixty to seventy-five minutes.
Day 2, afternoon: Grease a nine-by-four-by-four-inch Pullman loaf pan with butter or flavorless oil (I baked mine in a Dutch oven because I didn’t have a loaf pan). Carefully spoon in the risen dough. Use wet hands to distribute it evenly, and smooth the top. Spoon a tablespoon of water over the top to keep the dough moist, then cover and set in your warm place to rise until the top of the loaf shows broken bubbles, an hour and a half to two hours.
Day 2, evening: Preheat the oven to 550, arranging one rack in the middle of the oven and one at the bottom. Place a shallow baking dish or roasting pan on the bottom shelf. Five minutes before you put the bread in, add two cups of boiling water to the pan. Bake with steam for ten minutes, then remove the pan, cover the loaf with aluminum foil, and reduce the temperature to 350. Bake for forty-five to fifty minutes, then remove the loaf from the pan and return it to the oven to firm up the sides and bottom crust. Bake until the loaf thumps when tapped with a finger, ten to fifteen more minutes. Transfer to a rack and cool thoroughly before slicing.
Valerie Stivers is a writer based in New York. Read earlier installments of Eat Your Words.
#EatYourWords

Arplis - News
source https://arplis.com/blogs/news/cooking-with-varlam-shalamov-1
0 notes
Text
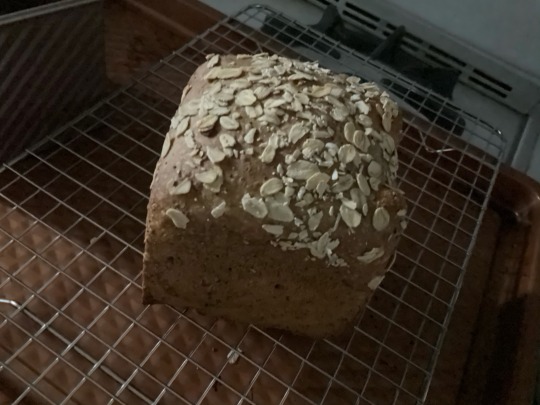
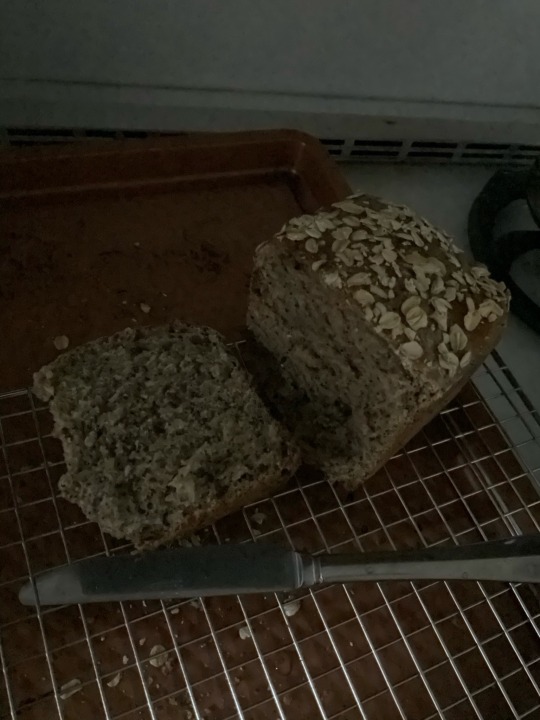
Shygryf’s Weird Bread
What I put in it
2 Cups King Arthur Bread Flour
2/3 Cup Instant Oatmeal (normally use rolled oats for baking but don’t have any)
3 Cups Skim Milk
~2 Tablespoons Unsalted Butter (store was out of salted)
3 Tablespoons Mesquite Honey
~2 teaspoons of salt (there was a clump in the canister and I didn’t feel like declumping or getting other salt so decided this was enough
3 cups whole wheat flour (no idea what kind, it’s been in a ziploc on my fridge far too long)
1 tablespoon raw sugar
2 tablespoons regular dark molasses (couldn’t find blackstrap)
Canola oil for bowl
Cooking spray for pans and measuring molasses
What I did
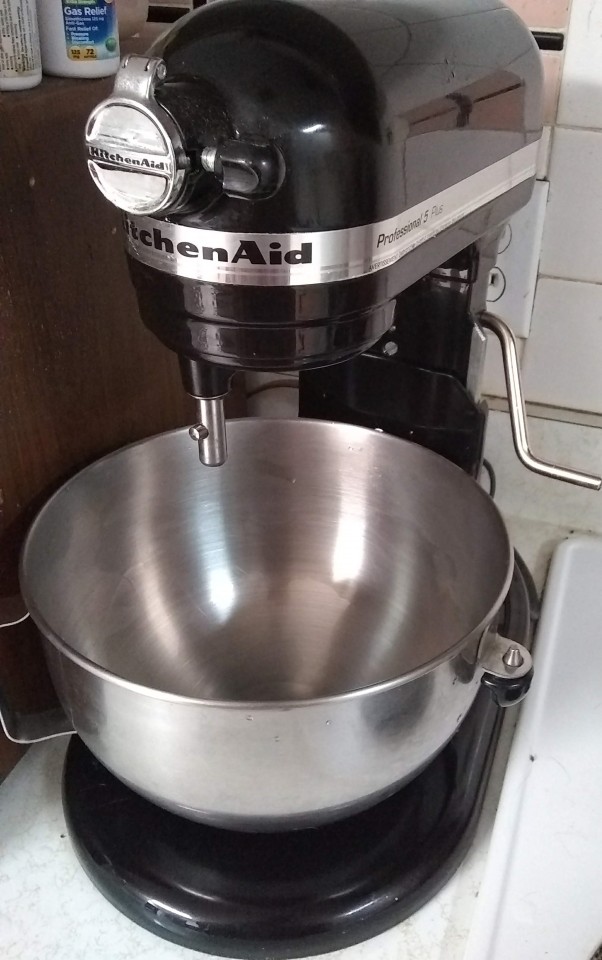
Add white flour straight from the freezer because I never remember to let it warm before using, oatmeal, and Honey that is thicker than I like but bad things happen when I microwave glass. to the bowl of the love of my life, my 6 quart kitchenaid mixer, Sir Mix A Lot:
Note to Self: If i ever find the guy who sells the pecan honey again i really need his card, that stuff is amazing
Scald milk and add butter
use dough hook to stir until mixed
add yeast and stir some more
let sit 15 minutes
add salt and about 1 cup of wheat flour
decide it isn’t sweet enough so add raw sugar because I don’t want to dirty another measuring spoon with honey
add another cup and a half ish of wheat flour
Turn out on to rolled baking sheed lined with foil and covered with flour (makes clean up so much easier)
not sure if wheat flour is starting to go off or is just being wheat flour so decide to knead in molasses,
put in greased bowl and silicone lid
put in bottom oven set to proof for 45 minutes
punch down
proof 30 minutes
notice it isn’t sticking together properly probably because I added too much flour
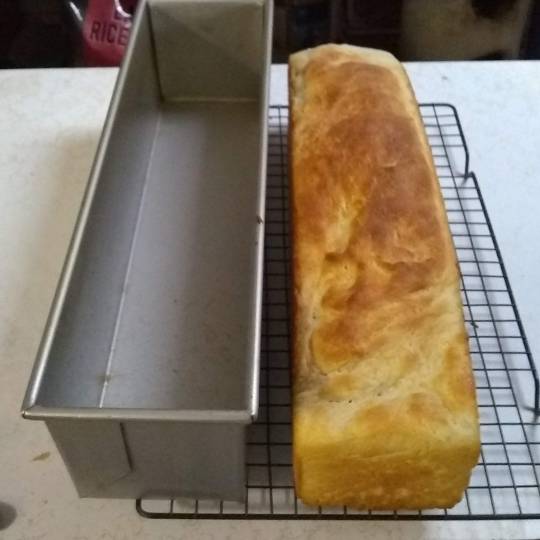
put most of it in pullman loaf pan (pictured below with white loaf in an old photo), turn the rest in to dinner rolls in 9 inch square pan
proof 30 minutes
turn bottom oven off and preheat top oven to 425
place both pans on bottom rack and bake 15 minutes
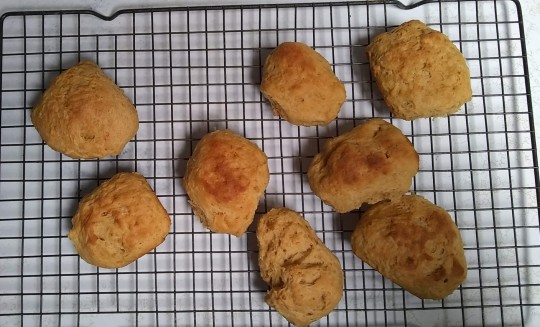
remove rolls and put on cooling rack, take picture for posterity
bake loaf another 10 minutes
turn out loaf then clear area so the ravening hoard that is my family can get rolls
take picture and eat two rolls

Get out laptop
find glasses
start typing post
try to upload picture of rolls then lose whole post because fucking internet went out and tumblr says when something won’t upload but doesn’t say when draft isn’t saved.
fix internet
decide to recreate post without background info on my history with bread
fix internet again when unable to post
cut and paste text in new window
re upload images
0 notes
Text
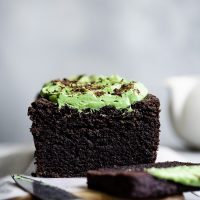
Gluten-Free Chocolate Black Sesame Cake with Matcha Mascarpone
This deep dark gluten-free chocolate black sesame cake is so moist that it’s almost gooey in texture – just on the very edge of lava cake – while still cake-like and tender. Nutty whipped matcha mascarpone cuts the inky black richness of the cake while pairing with the smoky notes of the ground black sesame seeds. A chocolate cake made for grown-ups adapted from A Common Table: 80 Recipes & Stories from My Shared Cultures.
Since she started helping me in the kitchen more regularly, I’ve been joking that the first time Zoella bakes at a friend’s house, she’s going to wonder why they only measure one flour. Baking with at least three different gluten-free flours is the norm for her, though I’m not sure she knows why yet. She does, however, know that I can’t eat gluten, whatever that means to her.
In the car yesterday, Zoella (3) said completely out of the blue, “you need to try gluten-free, mama.” She repeated slowly, “glue-TEN free.”
Impressed by her vocabulary and that she remembered that fact, I agreed, “Yes, you’re right. I can’t eat gluten.”
“NO, Mama, you have to try gluten-free before you say you don’t like it.” Ha! Look at her throwing my philosophy on new foods (ahem vegetables) back in my face.
I have tried it. For years, and for years I had chronic migraines. So, I can’t eat it. Like it? Sure, it’s delicious! Like, you’ve eaten cake before, right? I’ve never met a cake didn’t like (except for that one time my mom put shredded sweetened coconut “grass” all over my 5th birthday cake – I’m not going to let her forget).
When I saw this chocolate black sesame loaf cake in my friend Cynthia’s new book, I needed a slice. And I immediately got to work making a gluten-free version so I wouldn’t miss out.
A Common Table Cookbook
I’ve been a long fan of Cynthia’s work through her blog Two Red Bowls. The way she cooks, and weaves her stories and beautiful photographs through her cooking, moves me to want to make every single recipe she produces. Somehow, in my eyes, she does it all – a grown up lawyer, mother of two kids under 3(!!), award-winning food blogger, and now cookbook author. Goals.
When her cookbook A Common Table arrived on my doorstep, I leafed through it at least a dozen times, bookmarking all the recipes I couldn’t wait to try. In her debut cookbook, Cynthia chronicles the varied cultures that have influenced her family – her, Chinese girl from South Carolina, and her husband, a Korean Irish boy who grew up in Hawaii. All of that family history tied together with the foods from places they’ve lived and traveled in getting to where they are now. The result is a collection of recipes that bridge these cultural distances in a mash-up of American and Asian flavors.
A few recipe that I’ve got my eye on next:
Black Sesame-Stuffed French Toast
Buttermilk Mochi Pancakes
Sesame-Miso Potato Salad
Sweet Sesame Skillet Cornbread
Asian Pear & Jasmine Crumble
Honeydew Bubble Tea
While the book has many naturally gluten-free friendly recipes (like a peanut butter mochi cake!!), I couldn’t stop thinking about this black sesame chocolate loaf cake. I’ve taken her recipe and adapted it with gluten-free flours, a bit of salt to draw out the flavors of the gluten-free flours, and a matcha whipped mascarpone on top. This is my new favorite grown up chocolate cake.
How to make black sesame powder
This black sesame cake uses ground up toasted black sesame powder to infuse the chocolate notes with smoky nutty black sesame flavor. To make black sesame powder, you first need toasted black sesame seeds. Either buy them pre-toasted like me, or toast them yourself on the stove top. Then grind the toasted black sesame seeds in a food processor until it becomes a fine powder. If you don’t have a food processor, a coffee grinder will work too!
Black Sesame Chocolate Loaf Cake
Combining black sesame powder with melted bittersweet chocolate and molasses-laden brown sugar makes a cake that’s all at once rich in deep chocolate notes with an underlying nutty smokiness that makes you wonder what it is. Black sesame and dark chocolate both offer a pleasant bitterness that make them a surprisingly natural duo. In the version made with 1/2 cup of black sesame seeds, the cake it undeniably rich in chocolate flavor with a hint of black sesame’s savory super-nuttiness.
When you pour this cake batter into the pan, it’s liquid and runny. Almost like coffee. You’ll think you’ve done something wrong and wonder how it can possibly bake into a cake. Almost like magic, it does.
This chocolate black sesame cake is ultra-moist and, as Cynthia calls it, “squidgy” – on the verge gooey – with a dense jet black center. Yet still, it has cake-like structure and tender crumb. Almost like a brownie and a cake mash-up. Pillows of soft matcha whipped mascarpone offer a soft contrast to the chewy cake.
Gluten-Free Chocolate Cake Recipe
I have a classic chocolate cake recipe here on my blog – posted both as a layer cake and as cupcakes. It’s my go-to back pocket recipe that I make again and again and again.
This black sesame infused gluten-free chocolate loaf cake recipe offers something very different. Something luscious. Both in texture and flavor, this isn’t your like a birthday party chocolate sheet cake or a standard chocolate loaf. This is a grown up chocolate loaf cake with deep smoky chocolate flavor.
What if you don’t love black sesame dessert?
Rest assured, with 4 ounces of melted bittersweet chocolate folded into the batter, at its core with just 1/2 cup black sesame seeds, this is a chocolate-forward cake with black sesame in the offering subtle flavor notes. My husband, who is not a fan of black sesame dessert, actually loves this rendition of the cake.
For those who love black sesame desserts (me), increasing the black sesame seeds to 3/4 cup at Cynthia’s recommendation, will bring the black sesame notes forward. This is how *I* prefer the cake.
Charge ahead with your preference in mind!
Matcha March: Matcha Whipped Mascarpone
Because it’s still Matcha March, I’ve added matcha to the whipped mascarpone. Matcha’s sweet nuttiness is a natural partner for both black sesame and chocolate. As a trio, their flavors are harmonious together.
Here are a few of my favorite matcha black sesame combos:
Prep Time: 15 minutes
Cook Time: 1 hour
Total Time: 1 hour 15 minutes
This deep dark gluten-free chocolate black sesame cake is so moist that it's almost gooey in texture - just on the very edge of lava cake - while still cake-like and tender. Nutty whipped matcha mascarpone cuts the inky black richness of the cake while pairing with the smoky notes of the ground black sesame seeds. A chocolate cake made for grown-ups.
Ingredients
Matcha Whipped Mascarpone
Instructions
Gluten-Free Chocolate Black Sesame Loaf Cake
Preheat the oven to 375°F. Grease and line a tall, 9 × 5-inch Pullman-style loaf pan with parchment paper. A regular height loaf pan may overflow—if this is all you have, take care to fill the pan less than 1 inch from the rim, and save the excess for muffins or mini cakes. Note: I used a regular 9x5 loaf pan here and was able to still use all the batter)
If using untoasted black sesame seeds, toast the black sesame seeds over medium heat in a small dry skillet until a few seeds jump in the pan and they start to smell toasty (but not burnt!), 2 to 3 minutes. Place the toasted black sesame seeds in a food processor and blend until a finely ground powder forms, 1 to 2 minutes. Set aside.
In a medium bowl, whisk together, the sweet rice flour, oat flour, millet flour, salt, and baking soda. Set aside.
Melt the chocolate, either in the microwave in 15 to 30 second increments, stirring between each interval, until fully melted and smooth, or over a double broiler for about 5 minutes, stirring frequently. Once the chocolate is melted, set aside and let cool slightly.
In a large bowl, cream together the sugar, butter, and black sesame seed powder until fluffy, 2 to 3 minutes with an electric mixer on medium speed or 3 to 4 minutes by hand. Add the eggs and vanilla, beating well. Fold in the melted chocolate until just incorporated.
Alternate folding in the flour mixture and the hot water (or coffee), 1/4 of the flour/water at a time, until the batter becomes smooth and liquid.
Pour the batter into the lined loaf pan, taking care not to fill the pan higher than 1 inch from the rim.
Bake for 30 minutes, then reduce the heat to 325°F and continue to bake for about 30-40 minutes more minutes until it springs back when touched (Note: Cynthia's non gluten-free version bakes up in about 15-20 minutes less time on the second bake). The cake should still be relatively moist in the center, and a skewer or cake tester should not come out completely clean.
Remove from the oven and let cool completely before turning the cake out onto a plate. The cake may fall; this is normal, as it is so moist. Enjoy topped with matcha whipped mascarpone (below), whipped cream, or ice cream, if desired. The cake tastes even better on the second day.
Matcha Whipped Mascarpone
In the bowl of a stand mixer fitted with the paddle attachment or a medium mixing bowl with an electric mixer, combine the cream, mascarpone, salt. Whip on medium-high until the mixture begins to thicken.
Add the sifted sugar and matcha powder and continue whipping until soft thick peaks form.
Notes
*I used toasted black sesame seeds to skip the step of pan toasting them. For a stronger black sesame flavor, use ¾ cup black sesame seeds. I've made it both ways and love it equally as much. the 1/2 cup is great for a chocolate-forward cake with a hint of black sesame and perfect for folks who may not be big black sesame lovers. The 3/4 cup version has a stronger black sesame forward flavor that's great if you're a black sesame lover like me!
Adapted, with permission, from A Common Table: 80 Recipes & Stories from My Shared Cultures.
Source: https://www.snixykitchen.com/gluten-free-chocolate-black-sesame-cake/
0 notes
Link
If you love bread, you need to know how to make your own.
For those new to homemade bread, the Pullman loaf is the perfect introduction. It has a soft crust and a moist centre, and while it may look like the familiar processed sliced loaf, it is cheaper, has better flavour and, more importantly, it is better for your guts without the additives and preservatives of industrial bread.
The bread is baked in a Pullman loaf tin, which has straight sides and a slide-on lid. It yields a loaf that has perfectly flat sides and square corners. The lid prevents the bread from expanding freely and forming large bubbles, so there are no big holes in the crumb – since this bread shape is ideal for sandwiches, it helps that the condiments and sauces don’t drip out.
You can easily make bread by hand and do it without strenuous kneading, if that is a concern. The past decade or so has seen the rise of the “stretch and fold” method, in which the handling of the dough is gentle and minimal. The process takes a little longer, but the time is mostly spent with the dough resting. See the recipe for instructions.
Once you have your Pullman bread, put it to use in two of the best things since sliced bread: Bostock, a sweet nutty pastry; and dim sum favourite, prawn toasts.
You will also find an olive oil dough recipe here. It is used to make garlic knots, and is also perfect for pizza and focaccia.
Finally, there’s Peshwari naan, a flatbread filled with a fruit and nut mixture.
PULLMAN LOAF (SOFT SANDWICH BREAD)
Makes 1 loaf
430g bread flour, plus extra for dusting
30g unsalted butter, softened
30g milk powder
2 tsp fine salt
11/2 tsp instant yeast
220ml-250ml tepid water
30ml honey
The following instructions are for preparing the dough by hand. Use a stand mixer if you prefer.
Place the flour in a mixing bowl and rub in the butter. Stir in the milk powder, salt and yeast.
Start with the lesser amount of water. Combine it with the honey and add to the mixing bowl. Stir with a wooden spoon to bring all the ingredients together into a rough clump. Add the extra water if there are still dry bits in the bowl. Press the dough into a ball. Cover the bowl with a tea towel and set aside for 20 minutes for the flour to hydrate.
Press the dough in the bowl to flatten slightly. Take the edge furthest from you, stretch it without tearing and fold it into the centre. Give the bowl a clockwise quarter-turn and again stretch and fold (S&F) the furthest edge towards the centre. Do the S&F 8-10 times; you will end up with a smooth ball. This should take only about 10 seconds.
Cover the bowl and rest for 10 minutes. Repeat the S&F twice more at 10-minute intervals. Be gentle, there’s no need to punch all the air out of the dough. You will feel the dough getting smoother and more elastic each time. After the final S&F, cover the bowl and leave the dough to proof, 45 minutes.
Lightly grease a 20x10x10cm Pullman loaf tin. Transfer the risen dough to a lightly dusted work surface; pat it out into a rough 20cm square. Roll tightly into a log and place, seam side down, in the tin.
You can let it rise at room temperature, but to develop flavour, place the tin in a large plastic bag, ensuring that it does not touch the top of the dough, twist the ends of the bag to secure and place the tin in the fridge for 8 hours to rise slowly.
Remove the bread from the fridge 30 minutes before baking. If the dough has not risen to within 1cm of the top of the pan, leave it at room temperature to rise further.
Preheat the oven to 180ºC. Slide on the lid and bake the bread for 25 minutes. Remove the lid and bake for a further 5-10 minutes until golden brown.
Remove from the oven and turn the loaf out onto a rack to cool.
Tip: To store, slice the bread, put the slices into an air-tight freezer-safe bag and place in the freezer. Reheat from frozen in the oven at 180ºC for six to eight minutes.
BOSTOCK
Makes 4
4 slices (cut 2cm thick) from a Pullman loaf
100g flaked almonds
icing sugar
Orange syrup1 large orange
1/2 cup caster sugarAlmond cream40g unsalted butter, at room temperature
50g caster sugar
1 egg, whisked, at room temperature
50g almond meal
1 tsp orange zest
To make the orange syrup
Wash the orange and wipe dry. Use a vegetable peeler to pare strips of zest from the orange. Juice the orange. Place in a measuring jug and top up with water to 1/2 cup. Pour into a small saucepan with the zest and sugar. Bring to a boil and simmer until syrupy, 3-5 minutes. Leave to cool.
To make the almond cream
Cream the butter and sugar until fluffy. Keep beating and add the egg slowly. Add the almond meal and zest and mix into a smooth paste. Place in a container, cover and refrigerate for at least 2 hours. Makes enough for 8-10 slices of bostock. The leftover will keep in the fridge for a few days.
To make the bostock
Preheat the oven to 200ºC. Arrange the bread slices on a baking sheet. Brush the tops liberally with the orange syrup. Spread evenly with almond cream. Scatter flaked almonds over the top. Bake until golden brown, 10-12 minutes. Dust with icing sugar and serve immediately.
PESHWARI NAAN
Makes 4
Yoghurt dough
130g all-purpose flour
1/4 tsp bicarbonate of soda
1/2 tsp baking powder
1/4 tsp salt
1/4 tsp caster sugar
2 tbsp plain yoghurt
2-4 tbsp water
Filling
2 tbsp grated fresh coconut
2 tbsp dried cranberries or raisins
2 tbsp pistachios or almonds
To make the dough
Mix all the ingredients together into a soft, non-sticky dough. Cover and rest for 2 hours.
Place all the filling ingredients into a mini food processor and grind into a coarse powder, or finely chop by hand.
To make the naan
Divide the dough into four and form each one into a circle about 8cm wide. Divide the filling into four and place one portion in the centre of each dough circle. Fold the edge of the dough over the filling, enclosing it, and form into a ball. Roll out each ball into a 0.5cm-thick teardrop shape.
Heat a large frying pan over high heat until very hot. Brush or spray one side of the naans with water and place water side down in the pan. Put a lid on the pan and turn the heat down to medium. Cook until the bottom is brown in spots and bubbles appear on the top. Flip the naan over and brown the other side. Transfer to a plate and brush with ghee if you like. Serve with curry or chutney.
GARLIC KNOTS
Makes about 30
Olive oil dough
330g bread flour
1/4 tsp salt
1/4 tsp caster sugar
1/2 tbsp instant yeast
2 tbsp extra-virgin olive oil
200-225ml tepid water
The following instructions are for preparing the dough by hand. Use a stand mixer if you prefer.
Combine the flour, salt, sugar and yeast in a mixing bowl. Add the olive oil and the lesser amount of water to the mixing bowl and stir with a wooden spoon to bring all the ingredients together into a rough clump. Add the extra water if there are still dry bits in the bowl. Cover the bowl with a tea towel and set aside for 20 minutes for the flour to hydrate.
Remove the dough from the bowl onto a lightly oiled work surface and knead by hand until smooth and elastic, eight to ten minutes. Alternatively, knead the dough using the stretch-and-fold method as in the recipe for the Pullman loaf.
Form the dough into a ball and return to the bowl. If you cannot wait, cover the bowl and leave at room temperature until the dough is puffy, 60-90 minutes. However, the dough is easier to handle if chilled, so put the mixing bowl into a large plastic bag and refrigerate overnight.
Transfer the risen dough from the bowl to a clean work surface. Divide it into 3 or 4. Working with one portion at a time, gently pat the dough into a 1cm-thick rectangle. Using a sharp knife or bench scrapper, cut out 15cm lengths about the thickness of your little finger. Make a loose knot in the centre of each piece and place 2cm apart on baking sheets lined with baking paper. Cover each sheet with a tea towel and leave for 15 minutes.
Meanwhile, preheat the oven at 180ºC. Bake the knots until light brown and the surface is crisp, 10-12 minutes.
Remove from the oven and set aside while you make the garlic-parsley dressing.
Garlic-parsley dressing
4 tbsp butter
2 tbsp olive oil
4 tbsp minced garlic (5-6 large cloves)
4 tbsp minced fresh parsley
salt to taste
Heat the butter and olive oil over medium-low heat. Add the minced garlic. Stir occasionally until aromatic but don’t allow the garlic to brown.
Remove from heat and transfer mixture to a large mixing bowl. Stir in parsley and salt.
Add the baked bread knots to the bowl and toss until coated with the dressing. Leave knots in the bowl for 2 minutes to soak up the dressing. Serve warm.
PRAWN TOASTS
Makes 24 pieces
6 thin slices of Pullman loaf bread
4 tbsp sesame seeds
vegetable or canola oil for shallow frying
Prawn paste
250g shelled and deveined prawns
1 clove garlic
1 egg white
11/2 tsp soy sauce
1/2 tsp fish sauce
2 tsp cornstarch
1/2 tsp pepper
2 tsp sesame oil
1 large stalk spring onion, finely minced
1 large red chilli, finely minced
To make the prawn paste
Pat the prawns dry and place with garlic, egg white, soy sauce, fish sauce, cornstarch, pepper and sesame oil in a food processor. Pulse until it forms a sticky paste. Alternatively, chop the prawns and garlic together until fine and sticky and combine with the rest of the ingredients in a mixing bowl.
Stir in the spring onion and chilli. Cover and refrigerate for at least 30 minutes.
To make the toastsIf you like, cut off the crusts from the bread. Spread one side of each slice evenly with prawn paste right up to the edge. Sprinkle with sesame seeds and lightly press into the paste. Cut each slice on the diagonal into 4 triangles.
Heat 2cm of oil in a frying pan to 190ºC. Working in batches, fry the toasts paste side down until golden brown, 60-90 seconds.
Adjust heat if the toasts brown too quickly. Flip the toasts over and cook until brown, about 60 seconds.
Transfer to a plate lined with a paper towel and repeat with the remaining toasts. Serve immediately with your choice of sauce.
from Food – Star2.com https://ift.tt/30YXptO
0 notes
Photo

We had some neighbours over for brunch on Sunday, which was American Mother’s Day. It was happy chaos as our street is home to many, many small children. We hit the street jackpot landing here. The longer we stay the more I love it, this tiny Street Village of ours.
The house was totally trashed. I won’t remember that when I think back on it, but I WILL remember the French toast. As an English person, I was unconvinced by it until Sunday. I didn’t grow up eating it but I was haunted by the inherited memory of ‘eggy bread’, which is the impoverished English version: flaccid pieces of old bread who’d had the briefest of introductions to a bowl of egg and thrown in a frying pan. Was it supposed to be salty or sweet? Crunchy or chewy? Who knew? Thinking about it, it’s surprising the English don’t call this sorry thing French, as we seem to affix ‘French’ as an adjective to other things we believe to beneath the level English invention: ‘French Letters’ were otherwise-unmentionable prophylactics; ‘French Comb’ was a term for lazily running your fingers through your hair in place of a brush; ‘French Washes’ were what we called the optimistic spritz you gave your person standing at a sink in lieu of something more thorough and effective.
Poor old France. The Americans - lacking as they are in the long-standing and very subtle beef that exists between the cross-channel cousins - instead affix French to words as a synonym for fancy. I’ve never come across French toast in France, but to whomever is responsible for it we owe a resounding merci beaucoup. The result of the recipe below is the most joyful thing I’ve introduced to my mouth for a while. It’s generously thick and rich vanilla-custardy but with the perfect amount of fried crunch around the edges.
Please make it this weekend.
Bon Appétit’s French Toast
6 large eggs
¾ cup heavy cream
¾ cup whole milk
¼ cup sugar
Pinch of kosher salt
6 ¾-inch-thick slices challah, brioche, or Pullman loaf
2 tablespoons unsalted butter, divided, plus more for serving
2 tablespoons vegetable oil, divided
Pure maple syrup, jam, or powdered sugar (for serving)
Preheat oven to 250°. Lightly beat eggs, cream, milk, sugar, and salt in a large shallow baking dish (a lasagna pan is perfect). Add bread, turn to coat, then press down gently on bread until you feel it start to soak up custard mixture—this is key for a luscious, not dry, texture. Let soak, 10 minutes.
Flip bread and soak on second side, pressing down gently from time to time, until bread is saturated but not soggy, another 10 minutes or so.
Heat 1 Tbsp. butter and 1 Tbsp. oil in a large skillet over medium heat. When foaming subsides, carefully lift 3 slices of bread from custard, letting excess drip back into dish, and cook in skillet until golden brown and center of toast springs back when pressed, about 2 minutes per side. Transfer toast to a wire rack set inside a rimmed baking sheet and keep warm in oven while you cook remaining slices of bread with 1 Tbsp. butter and remaining 1 Tbsp. oil.
Serve French toast with butter, maple syrup, jam, and/or powdered sugar.
[Photo from here.]
0 notes
Text
The Best Gluten-Free Pantry Staples
A gluten-free products list of the best gluten-free pantry staples. With everything from the best gluten-free bread to the best gluten-free pasta, this guide is here to help you navigate filling your gluten-free pantry so you can eat deliciously without missing out!
When I first eliminated gluten-from my diet, I felt like I was missing out on all the things I loved most: bread, cookies, pasta, crackers. I felt defeated. I felt hungry. And I turned to gluten-free alternatives for the main pantry staples I missed the most. Over the last 6 years, I’ve purchased and tasted as many gluten-free pantry staples on the market as I’ve found. Many of them were flops that tasted nothing like what I wanted…or even much like food. Many had weird additives, lengthy lists of ingredients, and funky aftertastes.
This gluten-free products list represents the top contenders, the products I’ve purchased again and again. Here is my gluten-free guide to the best pantry staples. This post is not affiliated with any of these brands and is completely unsponsored. First, let me explain two caveats to this list.
From scratch versus store-bought pantry staples
For many gluten-free alternatives, I prefer to make my own from scratch – my own cakes, cookies, pie dough, and pastas. You’ll notice I don’t include these on my list, with the exception of pasta, which I’ll explain in a minute. Instead, this list includes the pantry staples that will allow you to make quick flavorful meals, snacks, cheese plates, and desserts, without feeling like you’re missing out. There is an enormous gluten-free products market right now and there’s no reason you shouldn’t be able to enjoy bread, pasta, crackers, bagels, etc. made with alternative whole grain flours.
While you can certainly make your own pasta – and I have and do sometimes – there are occasions where you just want to make a quick pasta bake. That’s what this list is here to help you with.
What are gluten-free pantry staples
This gluten-free products list only includes items that I consider “neutral” in flavor. There are definitely other gluten-free breads, cookies, pasta, crackers on the market that are worth trying, some of which I regularly buy. For this pantry staples list, I’ve tried to narrow the list to the most neutral items. The ones that taste the most like their gluten-filled counterparts. These items will let you cook a killer grilled cheese, serve up a saucy pasta dish, or build a cheese plate without overpowering the flavors.
I’ll also update this list as I try more gluten-free products if I think there’s a new contender that you need to know about.
With that, here is my list of the best gluten-free pantry staples.
The best gluten-free bread
Gluten-free sourdough boule and baguettes
Arise Bakery sourdough boules and baguettes. This bread is life-changing. I first tried a slice of the sourdough boule at our food styling workshop two years ago. Reah, the baker behind this magical gluten-free bread, showed up with a few loaves and someone sliced it up to add to our cheese platter. I grabbed a slice and one bite in, I thought I’d eaten a slice of gluten-filled sourdough. I nearly spit it out because I thought it was too good to be true.
I’ve since ordered boules online regularly to use for crusty sandwiches, grilled cheese, toast, you-name-it. I buy in bulk, then slice up the boules and keep just what I’m going to eat that week sealed in the fridge, while the rest goes in the freezer. Then I toast what I need straight from the freezer. Unless you get it fresh from the bakery in a day or two, I find it’s best lightly toasted before eating.
Here are three of my favorite recipes using Arise sourdough: Pancetta Spring Green Grilled Cheese, Avocado Green Goddess Sandwiches, and Loaded Smoked Gouda Garlic Bread.
Where to buy: Baked in Arcata up in Northern California, Arise Bakery loaves and baguettes are available at select Northern California Whole Foods or specialty markets in the freezer section. If you don’t live in Northern California, you can buy the bread online with flat-rate shipping. The prices are reasonable for gluten-free bread, so if you’re ordering multiples, the shipping is absolutely worth it (heck, the bread is so good, the shipping is always worth it).
Other notable sourdough bread brands
Bread SRSLY sourdough loaf and sandwich rolls. These sandwich rolls are my favorite sandwich rolls. I’ll update with a picture soon (they’re temporarily backordered but should be back by the end of February). I toast them up and use them as both sandwich rolls and burger buns. The sourdough loaf is also very good. It’s ever-so-slightly under-baked and requires a good toasting. My only complaint is the small size of the slices in the sourdough loaf, but I just noticed they’ve created a sourdough pullman which is in a new larger size. I’ll update once I try it! You can find it in the refrigerated section at specialty markets up and down the West Coast and even in Texas – check out their store locator or order it online – their online shop restocks on Wednesdays.
Young Kobras sourdough boules. These boules are very good. The crumb is a bit more moist than the Arise Bakery boules, making it absolutely necessary to toast and for a bit longer. Once toasted, it’s very delicious and makes a really good sandwich! If you live in SF, you can find it at many specialty shops. For everyone else, you can order it online!
Everyday sliced gluten-free sandwich bread
Canyon Bakehouse mountain white sliced bread. Think about the perfect soft bread for a peanut butter and jelly sandwich. This is that bread. I’ve tried nearly every gluten-free sliced bread on the market and this one stands out. Unlike many brands of gluten-free sliced bread, this loaf is soft, chewy, and moist. It doesn’t crumble nor taste dry. I’ve tried other bakes of their bread including the 7-grain and I like them all, but this mountain white sliced bread is what we keep on hand at all times for quick toddler PB&Js or grilled cheese. I also use this bread in my annual thanksgiving stuffing recipe. I store it in the refrigerator to prolong the shelf-life and save all the ends to toast and grind up for breadcrumbs, which I then store in the freezer.
Where to buy: I buy this Canyon Bakehouse at my local Whole Foods. This sliced white bread is widely distributed across the country at Whole Foods, Target, Sprouts, etc. Check their store locator to find a grocery chain near you that carries it.
Other notable sliced sandwich bread
La Brea Bakery gluten-free artisan sliced sandwich bread. This sliced bread is also chewy and moist just like sliced bread should be. It’s also widely distributed and available at most Safeways – check their store locator.
The best gluten-free bagels
Arise Bakery sourdough bagels. I’ve never been a big bagel eater and especially so after going gluten-free. That is, until I met these bagels. I’ll be the first to admit I was skeptical of the cinnamon raisin bagels, but they quickly won me over and I could eat one every day for breakfast if I could. I buy them in bulk with the sourdough boules, slice them in half, and store them in the freezer. They’re great toasted straight from the freezer with a little butter, ghee, or a slather of cream cheese.
The best gluten-free pasta
Dry gluten-free pasta
Bionaturae organic gluten-free pasta. For a sturdy everyday pasta that’s mild in flavor, while perfectly soaking up sauce, Bionaturae is your pasta workhorse. Whenever I come across a new brand of gluten-free pasta, I buy it. I’m pasta-obsessed and have tried more than I could possibly count. Some of them fall apart quickly, others are gummy and/or slimy, others have too strong of a flavor, and for some, the sauce slides right off. Not this pasta though. If ever I’m making a pan of mac and cheese or a pasta bake, I go for a bag of Bionaturae pasta. We always have a bag in our pantry.
From penne to fusilli to elbows to rigatoni, this pasta holds up well when stored as leftovers. My one caveat is that the spaghetti is best eaten the same day. After a day in the fridge, the noodles will start to break a bit, which is still deliciously edible, but doesn’t allow for slurping. If we’re making a big pot of sauce and want leftovers, I only cook up the amount of spaghetti I need for each night.
Here’s my favorite baked rigatoni recipe using bionaturae gluten-free pasta and Alanna’s creamy cardoon mac and cheese.
Where to buy: I buy Bionaturae at Whole Foods and locally at Berkeley Bowl, but it’s also widely distributed at many major grocery stores – check their store locator. Additionally, it’s available on Amazon (and Prime Now in some areas).
Other notable dry gluten-free pasta
Tinkyada organic gluten-free brown rice pasta. I buy this pasta brand at my local natural market and also at Whole Foods. I like using their fettuccine and spaghetti because they are sturdy and hold up even as leftovers. Their lasagna noodles are my favorite gluten-free lasagna noodles when I’m not making them homemade. They don’t seem to have a store locator, but if you can’t find it locally, it’s available on Amazon and a suitable, nearly identical substitute is sold at Trader Joes.
Fresh gluten-free pasta
Manini’s gluten-free fresh pasta. When you want the soft smooth texture of fresh pasta, this is where to turn. They make a range from spaghetti, linguini, fettuccine, and even cheese ravioli. I find it in the refrigerator near the cheese area in my local Whole Foods. It’s available at specialty groceries and Whole Foods across the country.
Other notable fresh gluten-free pasta
Cappellos gluten-free grain-free pasta. This pasta is also a great texture and super delicious. It’s available in the freezer section at most Whole Foods. My only complaint is that it’s quite a bit more expensive than other fresh or dry pasta brands, so it’s not what I choose regularly.
The best gluten-free crackers
Simple Mills fine ground sea salt crackers. There are so so so many gluten-free crackers on the market. Just like with pasta, I try them all no matter where I am when I find a new brand I’ve not tried before. The two I’ve listed here are the two I go for if I’m looking for a basic cracker for a cheese plate, for dipping, or snacking. These almond flour crackers are a very recent discovery and are my new favorite. They’re crunchy and flavorful – almost like a wheat thin – but neutral enough to be perfect for topping with cheese! They also don’t have weird after taste that makes you tire of eating them like many gluten-free crackers.
Absolutely Gluten-Free original crackers or flatbreads. These absolutely gluten-free crackers and flatbreads are essentially a gluten-free table water cracker, which is exactly what you need for a cheese plate. My only complaint is that they tend to go stale very quickly, so only open a bag if you can commit to eating it or store any leftovers in a sealed airtight bag.
The best gluten-free pretzels
Snyder’s of Hanover gluten-free pretzels. These pretzels come as both sticks and mini pretzel shapes. In a blind taste-test, you would not be able to tell these pretzels apart from their gluten-filled counterparts. They’re the perfect gluten-free pretzel – great for snacking, making into my mother-in-law’s white chocolate salties over the holidays, or using as a cheesecake crust (omgggg). These pretzels are widely available at most major grocery stores and even Target.
Quinn snacks gluten-free pretzels. These pretzels are the one wildcard on the list. They’re excellent – crunchy, salty, and super flavorful. Yet, they’re still quite different in flavor from the classic pretzel sticks you grew up eating. That being said, I keep these on hand for all my snacking needs.
Coming soon: The best gluten-free cookies for crusts
Questions or your favorite gluten-free pantry staples?
I hope this brief list is helpful in navigating filling your gluten-free pantry. I most certainly left things off this list – things I haven’t yet discovered or tried! If you have any questions about specific products that you’re curious about that aren’t on this list, leave them in the comments. If I’ve tried them, I’ll be sure to describe my experience with them.
I’d also love to hear from you what brands top your list of favorite gluten-free pantry staples. Is there another life-changing sourdough loaf I’m missing? Crackers I should be eating with my brie? Tell me!
Source: https://www.snixykitchen.com/the-best-gluten-free-pantry-staples/
0 notes
Text
Back in November we were in New York City and took stepson Dr.A and his beautiful partner to a special dinner at Aquavit. Funny story here. I admit to having a virtual crush on Marcus Samuelsson the chef behind it. So when Phil surprised me with the news of our upcoming dining adventure, I almost passed out. Would Mr. Samuelsson come to our table to say hello? Would I be able to survive that without making a complete fool of myself? Then, the shock. Marcus has left the restaurant many years ago. I must be living in a cave or something. Well, it’s quite clear that I don’t follow the restaurant scene that closely. The current chef is Emma Bengtsson, a 33 year Swedish chef who is one of only three women to run a restaurant with 2 Michelin stars. No wonder our meal was memorable! Seriously, the food was spectacular. Absolutely top-notch, one of those evenings to be remembered forever. I include at the end of this post a little slide show. One item I fell in love at the first bite was their Danish Rye bread. They brought it in a small basket, three types of bread, the Danish Rye definitely not a heavy contestant for its looks. With no high expectations, I tried a bite. Then I saw Phil’s expression when he took a bite of his little roll. Our eyes locked, and a symphony started to play in our minds… It was moist, it was dense, but not heavy. It had this incredibly sweet/savory complex taste, like nothing I ever had before. I simply had to try and make it at home. Once we flew back, I started obsessively searching for recipes, even wrote the restaurant (no reply, unfortunately), and finally settled on a recipe by Planet Earth’s Baking Goddess Extraordinaire, Karen.
RUGBRØD – DANISH RYE
(from Karen’s Kitchen Stories)
for the Rye Sour – (prepare 12 to 15 hours prior to the final dough)
300 g whole rye flour
245 g water
55 g sourdough starter at 100% hydration
Combine the ingredients in a medium bowl with a dough whisk or large spoon until you have a fully incorporated dough. Cover with plastic wrap and let sit for 12 to 15 hours.
for the Levain
103 g bread flour
103 g water
14 g sourdough starter
Combine the ingredients in a medium bowl and mix until smooth. Cover with plastic wrap and let ferment for 8 to 10 hours.
for the soaker
75 g rye chops
150 g water
Mix the ingredients in a small bowl and cover with plastic wrap. Let sit overnight at room temperature.
for the Final Dough
130 g bread flour
200 g whole rye flour
180 g water
2.5 g instant yeast
16 g salt
All of the soaker
All of the rye sour
All of the levain
15 g black strap molasses
4.5 g whole fennel seeds, coarsely ground
In the bowl of a stand mixer, mix all of the ingredients with the dough hook on slow for about 4 minutes, then increase the speed to medium, and mix for an additional 3 to 4 minutes. The dough will be very sticky.
Heat the oven to 475 F.
Spray a 13 inch Pullman pan with spray oil, and sprinkle it with rye flour. Scrape the dough into the pan and smooth the top. Sprinkle the top with whole rye flour. Cover the dough with the lid of the pan, and let rise for 45 to 60 minutes, until the dough reaches about 1 inch below the top of the pan.
Bake the loaf at 475 F with the lid on for 15 minutes. Reduce the oven temperature to 400 F and continue baking for 15 more minutes with the lid on.
Remove the lid and reduce the oven temperature to 325 F. Bake for an additional 45 minutes, until the bread reaches about 205 F internally (check with an instant thermometer).
Remove the bread from the pan and cool on a wire rack. Let the bread sit for 24 to 48 hours to cure before slicing (this is important to avoid a gummy crumb)
ENJOY!
to print the recipe, click here
Comments: Danish Rye is the most beloved bread in Denmark, consumed by everyone particularly at breakfast, but pretty much whenever the mood strikes. I suspect if I lived in Denmark I could survive on it alone. Ok, maybe some butter. A little cheese. Some smoked salmon, but the pièce de resistance would be the bread. I realize that it doesn’t look like much. A brownish, tight crumbed, dense-looking loaf of bread. Looks can be so deceiving! This is the kind of bread that speaks to your soul, each bite a little different, it plays with your taste buds in magical ways. Trust me, you need to bring it to your life if you’ve never tried it. Plus, it’s pretty straightforward to make. You do not need the special pan with the lid, actually. Many recipes will bake it in a regular loaf type pan, and the bread will end up with a little crack on top. Nothing wrong with that. Make sure to plan ahead, Danish Rye must sit for at least 24 hours before slicing. Rye is a temperamental flour, with a tendency to develop a gummy texture.
The important question is – did it match the Aquavit concoction? Let’s say it’s pretty close, close enough to make me thrilled about this baking project. I still would love to have their recipe, but so far, no cigar. So my plan is to continue assembling examples in books and blogs, and try a few more. The bread freezes beautifully in thin slices, by the way. Removing from the freezer, in a few minutes it can go into a low oven to bring it back to life. It is quite simply put, a fantastic loaf of bread. Phil went nuts for it, in fact he now insists that at any given time we must have at least 4 slices in the freezer. Just in case. And of course, I am more than happy to make sure he is happy!
One very tasty lunch!
For those interested, a little slide show of the great evening we spent at Aquavit, NYC
November 2016
This slideshow requires JavaScript.
ONE YEAR AGO: The Best Sourdough Recipe
TWO YEARS AGO: Mini-Quiches with Duxelles and Baby Broccoli
THREE YEARS AGO: Quinoa and Sweet Potato Cakes
FOUR YEARS AGO: Pumpkin Bolo de Fuba’ Cremoso
FIVE YEARS AGO: Citrus-crusted Tilapia Filets
SIX YEARS AGO: Bran Muffins, not just for Hippies
SEVEN YEARS AGO: Flourless Chocolate Cake
DANISH RYE BREAD Back in November we were in New York City and took stepson Dr.A and his beautiful partner to a special dinner at…
0 notes
Text
Arplis - News: Cooking with Varlam Shalamov
In Valerie Stivers’s Eat Your Words series, she cooks up recipes drawn from the works of various writers.
The Kolyma Stories and my extended time indoors offered me the opportunity to use up some obscure items that have been languishing in my pantry.
The complete stories of Varlam Shalamov (1907–1982), published by NYRB Classics in two newly translated volumes, contain some of the bleakest and most powerful writing we have about the Soviet gulag. They’re also terrifyingly and indelibly about food—that is, about starving to death. Shalamov was first arrested in the twenties, when he was a student at Moscow University, and then again in 1937 for Trotskyist activity. He spent the next seventeen years in labor camps, including on the far northern island of Kolyma, where he mined for gold in some of the most horrific conditions in all the gulag. He found no redemption in the camps, writing that they were “a negative school of life in every possible way. Nobody can get anything useful or necessary out of the camps … Every minute of camp life is poisoned.” Yet in the decades after his release, he boiled the horrors he’d seen down to their pure essentials and shared them via this extraordinary body of work. Shalamov is plainspoken—“he knew his material perfectly, and wrote in a way that everyone can understand,” notes the translator Donald Rayfield—but prolonged immersion in the work reveals him as a better Solzhenitsyn; the stories are compulsively readable despite their subject matter, as compressed and brilliant as the Arctic snow. The temptation would be to compare them to “metal number one,” as gold was called by the Soviet authorities—if Shalamov had not so loathed it.
I was reading the first volume, Kolyma Stories, two weeks ago as New York City shut down due to the ongoing public health crisis. He was the only writer who didn’t feel frivolous—not because there can be any comparison between America’s sudden food insecurity and the Stalinist gulag’s conditions of prolonged starvation but because I have been depressed by the human behavior on display. To me, social distancing seemed to erupt spontaneously, and I found it heartbreaking. Even if it will later emerge as necessary and the best decision, I’m hopelessly stuck on the idea that distance is bad. I read a Leslie Jamison piece about being sick with the coronavirus and caring alone for her two-year-old, and on an emotional level, I’m outraged that I can’t bring her soup and human kindness.
The recipe called for a Pullman loaf pan, but I had to make do with what was on hand and baked my bread in a Dutch oven. Proper Russian rye bread is not round.
I don’t claim Shalamov’s moral authority for my opinions, but I think often of the first point on a list he wrote in Moscow in 1961, which Rayfield includes in his introduction to Kolyma Tales. The list is entitled “What I Saw and Understood in the Camps,” and the first point is: “The extreme fragility of human culture, civilization. A man becomes a beast in three weeks, given heavy labor, cold, hunger and beatings.” That’s too bleak for our times, but it bears keeping in mind. The third point is: “I realized that friendship, comradeship, would never arise in really difficult, life-threatening conditions. Friendship arises in difficult but bearable conditions (in the hospital, but not at the pit face.)” We have opportunities.
I find Shalamov consoling for his gravity, his sorrow, and his moral purity. Our times are grave and sad, though unfortunately for those of us not deemed essential workers, feelings of moral purity are hard to come by. I decided to bake from him in order to encourage others to read his stories, not because I think that baking bread and sharing it on the internet does much for humanity; baking is fun, but as a cook and sensualist, I consider virtual intimacy no intimacy at all. I’ve also had a long-running, long-failing personal project to correctly bake Russian rye bread from homemade sourdough starter, and testimony by all the novice quarantine bakers currently struggling with this implies that my experiences may be of some use. Moreover, while any attempt to faithfully reproduce the staff of life from a concentration camp would be ghoulish, Shalamov specifies that the bread was rye, and I had the medium rye flour, coarse rye meal, and red rye malt necessary for such bread already in my pandemic pantry, waiting to be thriftily used up.
Appropriately, it was snowing on Shalamov baking day. I weighed options for using this can of condensed milk.
Shalamov writes that bread was the “basic food” in the camps, and it appears in nearly every story. “We got half our calories from bread,” he explains. “The cooked food was something hard to define, its nutritional value depended on thousands of different things.” It was bread that kept him alive, specifically the ratio between its quantity and his labor. Men in his stories scheme for bread, fight for it, weep when they don’t get “a crusty piece.” There are loving descriptions of allowing crumbs to dissolve on the tongue. In the story “The Typhus Quarantine,” in which the Shalamov proxy Andreyev wakes up in the hospital and realizes he’s going to survive, he observes that “as little as half a kilo of rye bread, three spoonfuls of porridge, and a bowl of thin gruel were enough to resurrect a man: as long as he didn’t have to work.”
I considered making a second dish, oreshki, that I remember from my time living in Moscow: walnut-shaped cookies filled with a caramel made from condensed milk. The inspiration was “Condensed Milk,” a Shalamov story in which the narrator achieves one of his few victories over the forces trying to destroy him, tricking an enemy out of two cans of condensed milk. He consumes both instantly, after having “used the corner of an ax to pierce a hole” in the cans. I also had a can of condensed milk sitting in my pandemic pantry. Moreover, a Russian friend from Irkutsk—where the narrator arrives after his long exile, in the last story of the first volume—once told me that to make the caramel, you boil the sealed can for hours, stopping just before the point of explosion. This sounded like a cooking adventure of the type I am familiar with and enjoy, but for two factors: I’d have to order a cookie mold off the internet at a time when people need the transportation grid for more pressing matters, and it felt inappropriate to Shalamov and his work.
Thus, I made bread. It’s the title of a story, and it’s the ultimate human comfort food. There are many styles of Russian rye, but the one I’ve been trying to reproduce has a chewy, spongy, sour interior and a leathery black crust dusted with coriander seeds. I found a recipe that seemed close in a book called The Rye Baker, by Stanley Ginsberg. The first step was to develop a starter.
The recipe did not specify if I was supposed to grind the red rye malt, but it looked ground in the book’s photo, so I did.
The starter method outlined in The Rye Baker is fairly similar to all the others on the internet: You combine flour and water in about equal weights (half a cup of flour to a quarter cup of water, roughly), cover, and leave in a room-temperature place for twenty-four hours. Then you scoop out half the mixture, add another round of flour and water, stir, and repeat. After forty-eight hours, you should see gas bubbles, but even if you don’t, step up the discard-and-feed cycle to every twelve hours. Allegedly, within seven days you will have a puffy, sour mixture that can rise bread.
I wish I could report success with this, but instead I’ve had days and weeks of failure—and even, one night, tears, when my husband preheated the oven and accidentally cooked three carefully tended starters I’d placed there to soak up the warmth from the pilot light. Mishaps aside (oh, there were more), I suspect that my fundamental problem was the temperature: the Ginsberg book specifies that “room temperature” is between sixty-eight and seventy-two degrees. Up in Vermont, it’s been snowing, and starters left on my countertop have remained completely inert. Some sources suggest that a starter that looks flat might still be working, but I tried it and got a rocklike, unrisen loaf. Starters nourished in warmer places—the proofing drawer, the oven with the light on, the microwave with the light on—showed some growth and bubbling but either didn’t survive or did not raise bread. I suspect they may have been too warm, since too-warm conditions encourage bacteria (the sourness and bubbles) but not yeast (the growth). It’s also possible that wild yeast is a more mysterious beast than commonly admitted and that my starter just didn’t have enough of it. A last caveat: Ginsburg says the starter should be ready in five to seven days. I tried mine at day seven, and it did not work. However, other sources say you need up to twenty days to establish a culture powerful enough to bake with.
There is also the possibility that my starter was okay and the failure was somewhere in the bread recipe or my technique. Ginsberg’s Borodinsky rye bread asks for “a scald” and “a sponge.” For the former, you pour boiling water over rye meal and rye malt and allow it to soften overnight. For the latter, you make a slurry of starter, water, and flour and allow it to rise overnight. In the morning, you combine the two and let them sit for three to four hours “until doubled in volume.” I did so, and the doubling did not happen. I thought my starter was at fault. But then I added a packet of instant yeast (proofed), and though it bubbled, it also did not increase the volume. I would have stopped there, having been down this inedible-brick, wasted-flour road before, but for the sake of this story, I added the rest of the ingredients and followed the rest of the instructions, producing a pasty, bitter, concrete-like sludge, nowhere near the color of the bread promised in the cookbook photo. I had no faith in it at all.
When my starter did not raise the scald-sponge mixture, I added commercial yeast. Luckily, I had some on hand.
But the sludge rose, and I baked it, and the texture and crustiness were perfect. If I hadn’t made other mistakes, it may have even been good bread. Warm, with butter and jam, it wasn’t so bad. I’d like to say that having to provide a recipe for this failed loaf is a caution to me and that I’m going to give up on starter and stop wasting flour, but the truth is that I plan to make another starter tomorrow. There will never be such a time again (I hope, fervently) for sticking around the house tending to multiple long rises and watching the yeast grow.
And anyway, I’m sure they would have eaten my bread in Kolyma.
Borodinsky Bread
Adapted from The Rye Baker, by Stanley Ginsberg.
whole wheat flour
water
To make a starter:
Day 1: Using a quart-size mason jar or other roomy receptacle, combine half a cup of flour (I used King Arthur White Whole Wheat) with a quarter cup plus a tablespoon of water, and stir to make a starchy paste, making sure not to leave any pockets of flour sticking to the sides. Cover with saran wrap, and seal with a rubber band. If it’s hot where you are, you can probably leave the jar sitting out at room temperature. Otherwise, place it in an unheated oven with the door closed and the light on, and leave for twenty-four hours.
Day 2: Scoop out a quarter cup of the mixture, and refresh with half a cup of flour and an additional quarter cup plus a tablespoon of lukewarm water. Stir till completely combined, and let sit for another twenty-four hours.
Days 3–5: Begin feeding the starter at twelve-hour intervals, with the following change from the above: Scoop out half a cup (rather than a quarter cup) of the mixture, and discard; refresh with half a cup of flour and a quarter cup plus a tablespoon of lukewarm water. Stir, cover, and keep in the oven with the light on.
My recipe says you want five to seven days to build a powerful starter. I tried baking with mine on the seventh day, with inconclusive results.
To make the bread:
For the sponge:
2 cups medium rye flour
1 3/4 cups warm water
1/3 cup sourdough starter
For the scald:
3/4 cup coarse rye meal
1/4 cup red rye malt, ground
1 1/4 cup boiling water
For the final dough:
scald-sponge (use all)
1 2/3 cups medium rye flour
1 cup bread flour
1 2/3 tsp salt
2 tbs dark molasses
1 tbs red rye malt, ground
flavorless oil (for pan)
1–2 tbs coriander seeds
Day 1: The evening before you bake, make the sponge and the scald. To make the sponge, combine all the ingredients in a large bowl, cover with saran wrap, and leave overnight in your warm area of choice (“room temperature” if you’re someplace warm; the oven with the light on if you’re someplace cold, like a New York City apartment). Do the same for the scald in a separate bowl. Let rest for twelve hours.
Day 2, morning: Using the bowl of your stand mixer, combine the scald with the sponge. It’s essential that you allow the scald-sponge to rise in the mixer bowl because on the next step, you’ll add the rest of the ingredients and knead the dough, and you want to keep as much air in as possible. Cover the mixer bowl with saran wrap, put it in your warm place, and allow it to rest and rise for an additional three to four hours, or until doubled in bulk.
Day 2, afternoon: Add the flours, salt, molasses, and red rye malt to the risen mixture in the mixing bowl, then use the dough hook on low speed for eight to ten minutes to create a soft, smooth, deep-brown dough. Cover and ferment in your warm place until visibly expanded, sixty to seventy-five minutes.
Day 2, afternoon: Grease a nine-by-four-by-four-inch Pullman loaf pan with butter or flavorless oil (I baked mine in a Dutch oven because I didn’t have a loaf pan). Carefully spoon in the risen dough. Use wet hands to distribute it evenly, and smooth the top. Spoon a tablespoon of water over the top to keep the dough moist, then cover and set in your warm place to rise until the top of the loaf shows broken bubbles, an hour and a half to two hours.
Day 2, evening: Preheat the oven to 550, arranging one rack in the middle of the oven and one at the bottom. Place a shallow baking dish or roasting pan on the bottom shelf. Five minutes before you put the bread in, add two cups of boiling water to the pan. Bake with steam for ten minutes, then remove the pan, cover the loaf with aluminum foil, and reduce the temperature to 350. Bake for forty-five to fifty minutes, then remove the loaf from the pan and return it to the oven to firm up the sides and bottom crust. Bake until the loaf thumps when tapped with a finger, ten to fifteen more minutes. Transfer to a rack and cool thoroughly before slicing.
Valerie Stivers is a writer based in New York. Read earlier installments of Eat Your Words.
Arplis - News
source https://arplis.com/blogs/news/cooking-with-varlam-shalamov
0 notes
Last Seen Blogs

chaoticsnowykiddo
baby boy cosmonaut

slimyturtles-cryptidcabin
🍄SlimyTurtle📼


bookloversreviewer
Untitled

keeppeoplearoundusmile
Story about Love