#netgear_ext
Explore tagged Tumblr posts
Visit Tumblr Blog
Explore Tumblr blogs with no restrictions, modern design and the best experience.
Last Seen Tumblr Blogs


Fun Fact
Tumblr has been providing a Korean-language service since 2013.
Text
Netgear WiFi range extender setup
A Netgear WiFi range extender is a device that can help you extend the reach of your home's WiFi network. If you have areas in your home where your WiFi signal is weak or nonexistent, a range extender can be a great solution.
Here are the steps on how to set up your Netgear WiFi extender via mywifiext:
Connect your extender to a power outlet.
Connect your computer or mobile device to the extender's WiFi network.
The extender's WiFi network will have a name that is similar to your home's WiFi network name, but with an "_EXT" at the end. For example, if your home's WiFi network is called "NETGEAR," the extender's WiFi network might be called "NETGEAR_EXT."
Open a web browser and enter mywifiext.net in the address bar.
Enter the extender's default password in the password field.
The default password is usually printed on a sticker on the extender. If you have lost the sticker, you can reset the extender to factory defaults by holding down the reset button on the extender for 5 seconds.
0 notes
Text
How To Fix Netgear_Ext Not Showing Up Issue | Easy Steps
Are you worried that your network list does not include your Netgear_Ext Not Showing Up ? If so, solve these problems by following our step-by-step instructions. There are many causes for this problem, including a poor wifi connection and slow speeds. Get in touch with our professionals for the best and quickest solutions. Our team of specialists is accessible around-the-clock so you can get help right away. We will offer immediate and troubleshooting solutions for netgear extender problems.
1 note
·
View note
Text
Best Methods To Fix Netgear_Ext Not Showing Up Error

Many enhanced features on Netgear's extender make it easy for users to use. You can use them properly and also add many devices with them. Sometimes users are facing the problem of netgear_ext not showing up error. It occurs because of incorrect configuration of the router, incorrect wireless settings, wireless interference, or outdated firmware. The major reason for the issue is Netgear_ext not showing up
A disabled network connection causes this error.
Place your extender too far from the router to avoid interference.
Installing the software improperly causes the current issue.
An outdated piece of software might be the problem.
After this, there is a need to solve the issue properly.
Ways To Solve Netgear_Ext Not Showing Up On Network List
You can use the below methods to fix the Netgear_Ext not showing up on the network list. There is a need to follow all the steps adequately.
Use a Reliable Wifi Connection
Slow or weak internet connections may prevent your extender from appearing on the network list. The Netgear WiFi range extender can be properly connected to your router in this way. It is possible to connect wireless devices using cables rather than wireless connections. Stability is ensured, and errors are automatically corrected, by using this method. This method is the most effective for ensuring internet stability, and it fixes errors automatically as well. It is then possible to check if the issue with Netgear_Ext not showing up has been resolved.
Update the firmware of the Netgear Extender
It is also imperative for users to regularly update the firmware of the Netgear extender. When you update it, it automatically fixes the technical glitches and bugs. Viruses can corrupt your laptop's or computer's firmware. Make sure your device is scanned before concluding. A firmware update prevents Netgear_ext from appearing on the network list. You can update the firmware of your Netgear extender by following the instructions on mywifiext.net.
To run the latest software, you must update your extender's firmware. The benefits of this include improved performance, security, and compatibility. You often get enhanced features when you update the firmware on your extender. This will allow you to check if Netgear_Ext not showing up or not.
Place Your Netgear Extender Near the Router
There is a distance between your devices that prevents your network list from showing the name of your extender. To maximize range, the range extender should be placed as close to the router as possible. WiFi signals from these devices clash, causing unwanted technical difficulties. There is a need to use the most suitable locations for routers and extenders, which is crucial to resolving errors quickly.
Range extenders are designed to amplify the signals from routers. In the case of too large a distance between the two devices, the signal may become weak and unreliable. To ensure that both devices can receive and transmit powerful signals, it is crucial to keep the router and extender close together. Here you can check whether the issue of Netgear_Ext not showing up is fixed or not.
Enable Network Connection
In the settings, you can also disable the network connection to cause the current error. There is a possibility that your WiFi network may malfunction, which is confusing. It is easy to enable the network connection.
You can enable an SSID in the network adapter settings by right-clicking on it and selecting Enable. By doing this, your network adapter will be able to detect the SSID and select it from your list of available networks. Your adapter may not be detecting all networks if the SSID isn't appearing. The list includes more than just those you've already connected with. There is a need to check whether the Netgear_Ext not showing up error is fixed or not.
Install the Netgear Extender Adequately
It is also possible to resolve the issue by installing a Netgear extender properly. You made a mistake during setup that resulted in your network name being incorrect. It is less likely that you will encounter this error if your extender is configured correctly. You can also resolve the Netgear extender issue by setting up the extender again.
You can also use this method to set up Netgear extenders. The setup of Netgear extenders is easy. The Netgear_ext not showing up issue needs to be checked as well.
Troubleshooting Steps For Netgear_Ext Not Showing Up Error
All connections should be tight. In the case of power cables and Ethernet cables, finger-tightness is the only way to go. Whenever possible, damaged cables are replaced. A current web browser is required for mywifiext to work. It is a good idea to keep Netgear extenders away from cordless phones, televisions, aluminum studs, washing machines, and baby monitors.
Sum Up
You can use the above methods to fix the Netgear_ext not showing up error. It is also crucial to read all the steps and follow them perfectly. You can use your extender efficiently and successfully if you follow all the instructions on-screen.
0 notes
Text
Netgear EX6150 Setup
Enhance your WiFi coverage with a Netgear EX6150 setup. This high-performance extender delivers faster internet speeds and extended range. To set up, connect to the Netgear_EXT network, visit mywifiext.net, and follow the installation steps. If the page doesn’t load, try 192.168.1.250. Troubleshoot login or connectivity issues by resetting your device. Enjoy uninterrupted streaming, gaming, and browsing. Need expert setup support? Contact us now for a seamless Netgear EX6150 setup!
1 note
·
View note
Text
How do I reset my Netgear Extender Login?
Use these procedures to reset your Netgear extender login:
First, find your Netgear extender's "Reset" button.
Usually located on the device's back or side, this is a tiny, inset button.
Press and hold the button with a paperclip or other pointed item until the power LED begins to blink.
This restores the extender to its factory default settings, erasing any previously saved login credentials.
Await the extender's reboot after the reset.
Then, connect to the extender's default Wi-Fi network.
The network name will typically be something like “NETGEAR_EXT,” and you won’t need a password initially.
Open a web browser and go to either www.mywifiext.net or 192.168.1.250. This will take you to the Netgear extender login page.
You will be asked to create a new admin username and password on the login page.
To configure the extender for your network, according to the setup wizard's instructions. For future reference, be sure you write down your updated login information.
Make sure your browser's cache is empty and that the device you are using is linked to the extender network if you are having trouble seeing the login page.
Your Netgear extender login should be successfully reset after completing this method. Go to our website to know more about it.
0 notes
Text
Can’t Find New Extender Setup Button After Connecting To Netgear_Ext? -
Netgear WiFi range extender can be set up and installed using various different ways. However, the most used way to install a Netgear extender is the manual method. Whether you want to perform the Netgear EX3700 setup or the latest Nighthawk model setup, the manual method requires you to connect to Netgear_Ext SSID and access mywifiext.net.
Once you have logged in to mywifiext, you will see the ‘New Extender Setup’ button. That’s where a majority of users often stuck! If you are also not able to find the New Extender Setup button, we have got your back. This post is all about to get rid of this issue. Scroll down to read more.
For More Info - https://streamingwords.com/cant-find-new-extender-setup-button-after-connecting-to-netgear_ext/
0 notes
Text
Netgear WiFi Extender: Maximizing Connectivity for Smart Homes
Plugging your Netgear extender into a power outlet close to your Wi-Fi network will enable you to set it up. Use WPS configuration or join the extender's Wi-Fi network. For configuration, use a web browser or the Netgear installation aid to follow the on-screen instructions. By visiting our website, you can simplify the configuration of your Netgear wifi extender. Should you require more assistance with the process execution, don't hesitate to reach out to our experts.
1 note
·
View note
Text
https://www.authortalking.com/netgear_ext-not-showing-up-reasons-and-quick-fixes/
Don’t you just hate it when the name of your Netgear extender isn’t showing on the network list? If the answer to the question is yes, then it’s time to ease out those worry lines on your forehead because our experts are here to help you out. In this blog post, we’ve mentioned the topmost reasons why your Netgear_ext isn’t showing on the network list along with the ways to resolve the issue. So, what are you waiting for? Let’s get started.
0 notes
Text
Netgear wireless extender login
The Netgear wireless extender login is a crucial step in enhancing and optimizing your home or office network. Designed to boost the existing Wi-Fi signal range, Netgear extenders require a seamless setup process, and the login interface serves as the gateway to configuration. To initiate this process, connect your extender to a power source and access its default network using a device like a computer or smartphone. Once connected, open a web browser and enter the default login web address or the extender's IP address. This prompts the Netgear extender login page, where users input their credentials, typically a username and password. After successful authentication, users gain access to the extender's settings, enabling them to customize network parameters, update firmware, and optimize performance. A user-friendly interface ensures a smooth Netgear wireless extender login experience, empowering individuals to tailor their network extension according to specific needs and preferences.
#Netgear wireless extender login#Netgear extender setup#netgear wifi extender setup#netgear extender set up#netgear extender setup wizard#netgear extender not working#wifi extender login netgear#netgear wireless extender login
1 note
·
View note
Text
How do I setup Netgear Ex6110?

The Netgear EX6110 setup is a fast procedure. First, connect it to a power source. Open a web browser and navigate to http://www.mywifiext.net/ after connecting your device to the extender’s WiFi network. To choose and establish a connection to your current WiFi network, adhere to the on-screen directions. After adjusting the extender’s parameters or leaving them as they are, click “Finish” to finish the configuration. Move the extender to a location with a strong WiFi signal for best coverage.
How to setup Netgear EX6110 setup manually?
When the Power LED on the Netgear EX6110 illuminates, it is ready to be used.
Make that your device is connected to the “NETGEAR_EXT” default WiFi network.
Type http://www.mywifiext.net/ or http://192.168.1.250/ into the address bar of an open web browser.
Select the WiFi network you already have and input its password by following the on-screen directions.
You may choose to use the default values or modify the extension settings.
In order to maximize WiFi coverage, move the extender and click “Finish” to finish the manual setup.
Read More:-
1 note
·
View note
Text
How to Set Up Your Netgear Extender
Step 1: Plug in Your Extender
The first step is to plug in your extender to an electrical outlet. The power LED should light up to indicate that the extender is on. If the power LED does not light up, check that the extender is plugged in correctly and that the outlet is working.
Step 2: Connect to the Extender's WiFi Network
Connect your computer or mobile device to the extender's WiFi network. The extender's default WiFi network name (SSID) is NETGEAR_EXT. The extender network either has no password or the default password is password.
Step 3: Launch a Web Browser and Enter mywifiext.net or 192.168.1.250
Open a web browser and enter mywifiext.net or 192.168.1.250 in the address bar. This will open the New Extender Setup page.
Step 4: Click or Tap NEW EXTENDER SETUP
Click or tap NEW EXTENDER SETUP to begin the setup process.
Step 5: If Prompted to Accept Terms and Conditions, Click or Tap YES or I AGREE
If you are prompted to accept the terms and conditions, click or tap YES or I AGREE to continue.
Step 6: Select Your WiFi Network
Select your home WiFi network from the list of available networks.
Step 7: Enter Your WiFi Password
Enter your home WiFi password in the Password field.
Step 8: Click or Tap NEXT
Click or tap NEXT to continue.
Step 9: Select an Extender Name
Enter a name for your extender. This name will be used to identify your extender on your network.
Step 10: Click or Tap FINISH
Click or tap FINISH to complete the setup process.
0 notes
Text
How To Fix Netgear_ext Not Showing Up | Get That Fixed!
Are you struggling with Netgear_Ext Not Showing Up? Then you are at the right place. Here, you'll discover easy and effective solutions to resolve the issue of Netgear_Ext not showing up.
Netgear WiFi extender is a wireless repeater, that optimizes the speed of the internet and WiFi performance. It also allows you to connect multiple computers and other devices in your home or office network.
And Netgear_ext is the default WiFi network name (SSID). But sometimes, due to numerous issues, it leads to many errors including Netgear_Ext Not Showing Up. No matter what are the issues, it is necessary to address and resolve the issue promptly.

If you are unable to fix this Netgear_Ext Not Showing Up issue on your own. Then simply go through the following instructions to do the same.
Why is Netgear_Ext Not Showing Up?
It becomes easy to find a straightforward and efficient solution when you know the causing root of the issue. So, below are some common causes for Netgear_Ext Not Showing Up.
Slow and weak internet connection.
Corrupt or outdated firmware.
Technical glitch.
The router is placed far away from the router.
Incorrect configuration of the extender.
Partial extender installation.
The device is not connected properly.
Methods to Resolve Netgear_Ext Not Showing Up
Hope you have understood why Netgear_Ext Not Showing Up, now it is time to fix it as soon as possible. Go through the following troubleshooting steps to get rid of Netgear_Ext Not Showing Up issue.
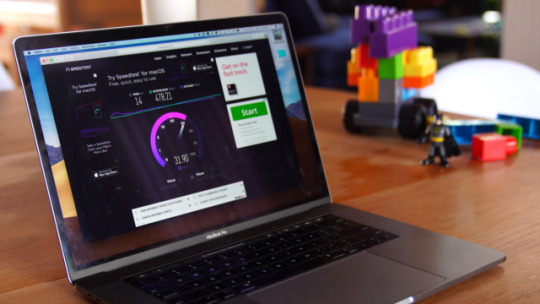
1. Check your Internet Connection
If your internet connection is slow or weak, then this can also lead to Netgear_Ext Not Showing Up. So, ensure that you are connected to a steady internet connection.
If you are using a wireless connection, then switch to the wired connection. This will provide you stable internet connection.
2. Place the Netgear Extender Near the Router
Netgear_Ext Not Showing Up issue can also occur, if the WiFi extender is placed far away from the router.
If you place both devices away from each other, then as a result WiFi signals will clash, and unwanted technical difficulties occurs. So, in this case, try to bring the WiFi extender and router closer.
3. Restart the Router and Extender
Restarting the device will help in fixing all the minor glitches, and it is a universal method yet. To do so, first, you have to disconnect the router and WiFi extender from the power outlet.
And then wait for at least 2-3 minutes, and re-connect both devices back to the power outlet. Now lastly, check the Netgear_Ext Not Showing Up issue is fixed or not.
4. Update the Firmware of the Netgear WiFi Extender
Outdated firmware could also be the reason for Netgear_Ext Not Showing Up. So, make sure that your Netgear WiFi extender firmware is updated to its latest version. If it is not, and you do not know how to, then simply go through the below-following methods to do the same.
Firstly, open the web browser, and search for mywifiext.net.
After this, the login page will appear, fill in your login credentials.
Then select firmware, and follow the on-screen instructions to complete the update.
And once it gets updated completely, then it reboots several times until the update is complete.
5. Factory Reset the WiFI Extender
If Netgear_Ext Not Showing Up, even after following the above troubleshooting methods. Then you need to factory reset your WiFi extender.
Doing this will erase all corrupted data which is stopping it from showing up on the available network list. The following are the instructions to factory reset.
Firstly, you need to find the reset button on the WiFi extender. The reset button seems like a small pin size hole.
Then press and hold it for 4-5 seconds, with the help of a paper clip or a pen. And wait until the LED blink twice.
Now release the button, and with for a few minutes, and also make sure that you do not unplug it while doing this.
6. Enable SSID & Change WiFi Channel
If your network is set to transmit only the 5Ghz network and if the receiver device does not support it, then Netgear_Ext will not appear in the list. Below are the steps to change the SSID, and WiFi channel.
Visit the WiFi extender settings, and click on the wireless option.
Then click on wireless setup, and choose to set up the 2.4 GHz network.
Now check the enable SSID broadcast box.
After this, below the security option, choose WPA2-PSK.
And then save all the settings and leave the control panel.
This time Netgear_Ext Not will show up in the available network list.
Sum up
Certainly, the above methods will help you with How to Fix Netgear_ext Not Showing Up? It is necessary to go through each method to resolve this issue. Follow the above troubleshooting techniques to rectify Netgear_ext Not Showing Up.
If these steps are also unable to help you out. Then try to get in touch with Netgear experts, they will provide you with problem-solving solutions. And also help you in resolving issues Related to Netgear, including Netgear_Ext Not Showing Up.
1 note
·
View note
Text
0 notes
Text
Netgear EX6400 Extender Setup
The Netgear EX6400 Extender Setup is a simple and efficient solution to extend your existing Wi-Fi network coverage. With its easy-to-use setup process, you can quickly enhance the range and strength of your wireless signal. The EX6400 supports dual-band Wi-Fi, allowing you to connect multiple devices simultaneously on both 2.4GHz and 5GHz frequencies. Its FastLane technology ensures high-speed connectivity for bandwidth-intensive activities like streaming and gaming. The extender also features an Ethernet port for wired connections and comes with LED indicators for signal strength monitoring. Whether you're at home or in the office, the Netgear EX6400 Extender Setup ensures a seamless and reliable Wi-Fi experience.
Here are the steps to set up your Netgear EX6400 extender:
Place the extender near your existing wireless router. Make sure it's within range of your router's signal.
Plug in the extender to a power outlet and turn it on.
Connect your computer or mobile device to the extender's WiFi network. The default network name (SSID) is "NETGEAR_EXT" and the default password is "password".
Open a web browser on your device and go to the Netgear extender setup page by entering "mywifiext.net" or "192.168.1.250" in the address bar.
Follow the on-screen instructions to complete the setup process. You may be prompted to create a new password for your extender's network.
Once the setup is complete, you can disconnect your device from the extender's network and connect to your home WiFi network.
Optionally, you can move the extender to a location where it can enhance your home WiFi signal. You can use the extender's LEDs to determine the best location for optimal signal strength.
That's it! Your Netgear EX6400 extender is now set up and ready to use.
0 notes
Text
How to login netgear wifi extender?
It is easy to modify and customize the settings of your Netgear WiFi extender by logging in.
Make that the extender is within range of your current WiFi network and that it is correctly connected to a power supply before starting.
After the extender has been turned on, link your PC or mobile device to the default network—usually called "NETGEAR_EXT."
Once connected, use a web browser and input 192.168.1.250 or http://mywifiext.net into the address bar.
This will launch the Netgear WiFi extender login page. When logging in for the first time, you'll be asked to either set up an account or configure the extender by providing the login credentials for your router.
If you’ve previously set it up, log in with the credentials you created during the first setup.
It's typically possible to reset the extender if you've forgotten your login information.
To accomplish this, press and hold the reset button for around ten seconds, which will reset the extender to its initial configuration. Resetting it will require you to set it up again.
Once signed in, you may adjust settings like the WiFi network name (SSID), password, or security options, and check the connection status between your router and the extender. You can keep an eye on performance, fix problems, and upgrade firmware for improved security and performance by logging in frequently.
For more details visit our website.
0 notes
Link
A Wi-Fi Range Extender from Mywifiext is a gadget that increases the range of a wireless network. The Mywifiext Wi-Fi Range Extender is a gadget that extends the range of your existing Wi-Fi network. Assume you have a router on the ground floor of a building with poor Wi-Fi service on the second floor. Using a Wi-Fi netgear_ext range extender, you may boost the Wi-Fi signal on the second floor.
#mywifiext#mywifiext.net#mywifiextnetlogin#mywifiextlocal#mywifiextsetup#mywifiextlocalsetup#mywifiextnet#netgear_ext#extendersetuphelp
2 notes
·
View notes