#no. emacs client + server is not a solution. it is more problems
Explore tagged Tumblr posts
Visit Tumblr Blog
Explore Tumblr blogs with no restrictions, modern design and the best experience.
Last Seen Tumblr Blogs


Fun Fact
The Tumblr app for Google Glass was released on May 16, 2013.
Text
Debating whether to manage emacs packages with nix home-manager or just be more careful with elpaca
#id rather it just start up fast like nvim but whatever#no. emacs client + server is not a solution. it is more problems#emacs#elpaca#nixos#home-manager#linux
0 notes
Text
Ssh Agent For Mac Os X

I'm running Mac OS X, and it appears that after SSHing to several machines, using identity files, my 'ssh-agent' builds up a lot of identity / keys and then sometimes offers too many to a remote machine, causing them to kick me off before connecting:
Ssh-agent Mac Os X Keychain
Mac Restart Ssh Agent
Ssh Agent Mac Os X
Ssh Agent For Mac Os X 10.10
Received disconnect from 10.12.10.16: 2: Too many authentication failures for cwd
It's pretty obvious what's happening, and this page talks about it in more detail:
SSH servers only allow you to attempt to authenticate a certain number of times. Each failed password attempt, each failed pubkey/identity that is offered, etc, take up one of these attempts. If you have a lot of SSH keys in your agent, you may find that an SSH server may kick you out before allowing you to attempt password authentication at all. If this is the case, there are a few different workarounds.
Mac OS X includes a command-line SSH client as part of the operating system. To use it, goto Finder, and selext Go - Utilities from the top menu. Then look for Terminal. Terminal can be used to get a local terminal window, and also supports SSH connections to remote servers. Given all of the above, especially if SIP prevents you from disabling this directly, I would probably attack it a different way. The first idea that comes to mind would be to write my own launchd plist and have it run on load to have it run the commands to automatically stop ssh-agent, and then see if you can then get oh-my-zsh to restart / control it. It's an old question but I recently ran into the same issue on my Mac running 10.12.6. The DISPLAY variable is not set in the terminal and ssh -X doesn't work. This is what I did that solved the problem: Reinstall XQuartz using Homebrew: brew cask install xquartz (the option -forced may be necessary) Add the XQuartz launcher to the system default (following the solution in this Reddit post.
I'm running Mac OS X, and it appears that after SSHing to several machines, using identity files, my 'ssh-agent' builds up a lot of identity / keys and then sometimes offers too many to a remote machine, causing them to kick me off before connecting. Received disconnect from 10.12.10.16: 2: Too many authentication failures for cwd.
Rebooting clears the agent and then everything works OK again. I can also add this line to my .ssh/config file to force it to use password authentication:
Anyhow, I saw the note on the page I referenced talking about deleting keys from the agent, but I'm not sure if that applies on a Mac since they appear to be cleared after reboot anyhow.
Is there a simple way to clear out all keys in the 'ssh-agent' (the same thing that happens at reboot)?
If you haven’t set up your YubiKey yet, this is a good place to start.
Evil Martians are growing. With more employees and more clients, there is a demand for stronger security. Our clients trust us with their source code and, even more importantly, with access to their production servers, and this trust cannot be broken. In a hostile environment of the modern web, though, it is easier said than done. A good old password, even coupled with a password manager, does not cut it anymore. The most obvious way to increase security is to opt for two-factor authentication (2FA) that is widely supported. Even without hardware keys, it makes an attacker’s job much harder than it used to be.
A sticky situation
We have enforced 2FA across all our staff for all the tools that we use daily: email, GitHub, task trackers, and others. By default, it involves requesting one-time access codes either by SMS/phone call or through a dedicated smartphone app. Cellular networks, however, are not the safest place: messages and calls can be intercepted. Opting for an app like Google Authenticator is more secure, but can also be compromised, at least in theory, if a smartphone that runs it is precisely targeted by an attacker.
So, can we do better? There exists an open authentication standard that aims to both strengthen and simplify 2FA.
Known as Universal 2nd Factor (U2F) and originally developed by Yubico and Google, it relies on physical devices (usually USB or NFC) that implement cryptographic algorithms on a chip, similar to smart cards that have been around for ages. You probably have at least few of those in your pockets: phone SIM, bank cards, various IDs and the like.
Now, instead of confirming your access with some code, you need to insert a USB stick into your computer, press the physical button on it, and the device will take care of the rest. Authenticating with U2F is already supported by major browsers (the only notable exception, sadly, is Safari) and you can use it with many online services that software professionals use daily: Google and Gmail, Dropbox, GitHub, GitLab, Bitbucket, Nextcloud, Facebook, and the list goes on.
The advantages of a hardware solution are obvious: a possibility of a remote attacker gaining access to one of your tools is pretty much eliminated. The attacker needs to physically get a hold of your USB key, which is still a security risk, but in an entirely different domain.
There is a number of vendors that sell USB keys, and we chose Yubico and their YubiKey 4 series. They are versatile, compact and can either be carried around on a keychain or, for smaller models, stay in the USB slot of your laptop all the time. There are also USB-C models for newer Macs, so you don’t need dongles. Besides implementing U2F, YubiKey 4 series supports various security standards:
Smart card PIV
Authenticating online with U2F works out of the box on Linux, macOS, and Windows and in all major browsers. However, if you want to use your YubiKey for SSH connections, things quickly get less straightforward.
Sticks and Macs
We do have our fair share of Linux users, but the instructions we offer further are for macOS only, as replacing default ssh-agent with a gpg-agent on a system level is a Mac-specific problem.
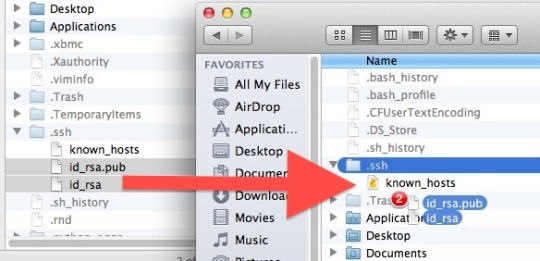
A Mac is a computer of choice for most of us at Evil Martians. We also use SSH all the time: while pushing code to GitHub or accessing remote servers. As all our employees work remotely from their private machines, contents of their ~/.ssh folders should never be allowed to leak. Common security measures, like the hard drive encryption, are always in order, but with YubiKeys already being used for U2F, would not it be better to store RSA keys for SSH on them too, and off the computer?
Ssh-agent Mac Os X Keychain
As YubiKey already supports OpenPGP, we can use it as the OpenPGP card with all the benefits:
Download Intensify for macOS 10.9 or later and enjoy it on your Mac. Intensify turns your everyday photos into stunning, dramatic masterpieces. Use simple controls to bring up the details, reveal the hidden beauty and enhance every pixel. 'Best of App Store' + over 20 other software awards. Intensify for apple mac. Intensify Pro is for Mac photo enthusiasts who want their photos to stand out. Intensify Pro gives you powerful new ways to create dramatic results. Professionally created presets make it 'one.
Once RSA keys are put on a card, they cannot be retrieved programmatically in any way.
Keys written to a card can only be used in combination with a PIN code, so even if a YubiKey is stolen, a thief would not be able to authenticate directly.
To set up YubiKey as a smart-card holding your PGP keys, you need first to replace your ssh-agent that comes pre-installed with macOS with a GnuPG solution. The easiest way to do it is directly from Terminal with Homebrew:
If you want to install a full GPG Suite that includes GUI applications, you can run another command (requires Homebrew Cask), or download it from the website:
At the time of this writing, the most recent version of gpg is 2.2.X. Let’s double-check, just to be sure:
Many guides out there tell you how to install YubiKey with gpg 2.0.X, and there has been a lot of significant changes since then. We recommend updating, and that should also be done with caution: backup your ~/.gnupg directory before making any changes!
Important!Now you need to either generate your PGP keys directly on the YubiKey or create them locally and copy over. There is an official guide for that, as well as a more evolved instruction on GitHub from the user drduh.
After all that is done, you need to enable your SSH client (the built-in Terminal app, for instance) to read PGP keys directly from YubiKey. It is time to say goodbye to a built-in ssh-agent that have served you well before.
Insert a YubiKey holding a PGP key in your computer and run the following commands; they will launch a gpg-agent and instruct your applications to use a new SSH authentication socket:
If everything went well, you should see that your private RSA key is now in fact located on a YubiKey (it has a unique cardno), the output of an ssh-add -l should resemble this:
Congratulations, you are done! This changes will not persist, however.
As soon as you reload your system, or even switch to a new console window, this setup will go away.
Let’s see how we can make it permanent.
Making things stick
The first thing that comes to mind when changing any shell-related setup is to change the local profile, be it ~/.bash_profile or ~/.zsh_profile (if you don’t know what type of shell you have, most likely you have bash, it comes by default with macOS). Open that file in an editor and add:
Now every time you launch a console, it will know how to SSH properly. If you live in a shell, use Vim or Emacs to write your code and were never tempted with GitHub’s visual features, you are all set.
However, if you use an IDE or one of those modern text editors with integrated GitHub functionality, such as Atom or Visual Studio Code? Those applications are not concerned with your shell setup and will still use system defaults for SSH, which is not what we want since we store all our keys securely on a YubiKey.
“But before we dealt with gpg, we did not need to set up anything, and everything worked!” you might say, and you would be right: macOS takes care of all that with a built-in service-management framework called launchd. You can read more about it by running man launchd, but you don’t have to.
You only need to know that launchd deals with so-called “property lists”. These are XML files with a .plist extension that define services to be launched and their launch options. They are located in the following directories:
~/Library/LaunchAgents for per-user agents provided by the user.
/Library/LaunchAgents for per-user agents provided by the administrator.
/Library/LaunchDaemons for system-wide daemons provided by the administrator.
/System/Library/LaunchAgents for per-user agents provided by macOS.
/System/Library/LaunchDaemons for system-wide daemons provided by macOS.
Let’s do some digging and look for anything SSH-related. Here it is, right in a /System/Library/LaunchAgents/com.openssh.ssh-agent.plist:
Without diving into much detail, we see that this is how macOS makes ssh-agent a default utility for SSH authentication.
Unfortunately, we cannot edit this file directly, as anything located in a /System folder is protected from tampering by a macOS feature called System Integrity Protection. There is a way to disable it, but you don’t want to do that. Apple folk came up with it for a reason.
A stickler for detail
Nothing prevents us from writing our own .plist though! All these XMLs will be treated as instructions for launchd, so this is our chance to circumvent ssh-agent once and for all!
First of all, let’s read man gpg-agent and learn what GnuPG agent for Mac is capable of:
Mac Restart Ssh Agent
It can become a daemon and live in the background with the --daemon option.
There is a --supervised option designed for systemd which makes the gpg-agent wait for a certain set of sockets and then access them through file descriptors.
A --server option allows our agent to hook onto the TTY and listen for text input, without opening any sockets.
Unfortunately, launchd only tracks processes that run in the foreground, and neither --supervised, nor --server will do us any good. So, the best way to launch an agent is by using the same command that we used before: gpgconf --launch gpg-agent. Let’s express it in launchd-compatible XML:
Now save it as homebrew.gpg.gpg-agent.plist and put it into ~/Library/LaunchAgents folder. To test that it all works (you won’t have to do it after restart), tell launchd to load a new plist:
Now let’s make sure that the agent is loaded:
A digit in the launchctl list output shows the exit status of a launched program, and 0 is what we want to see. pgrep confirms that we are in fact up and running.
Ssh Agent Mac Os X
However, we are not done yet. We still need to point SSH_AUTH_SOCK environment variable to $HOME/.gnupg/S.gpg-agent.ssh. The problem is that the variable is already set (user-wide) by the launchd default setting for ssh-agent.
At this moment, I have nothing better in mind than the following “hack”: forcibly symlink gpg-agent’s socket to the default one, stored in an SSH_AUTH_SOCK variable. The power of Unix allows us to do that, but that effectively messes up the default SSH configuration. However, as we are now using GnuPG for everything SSH-related, that should not be a problem. If you have better ideas, please contact me on Twitter.
We can create another plist that will do all necessary symlinking on login.
The only trick here is to call the shell directly, with /bin/sh (so we can reference shell variables), and pass a command to it. Now, save the file as ~/Library/LaunchAgents/link-ssh-auth-sock.plist and load it with launchd.
Let’s test the result:
Bingo! Our macOS is now effectively tricked into thinking that it deals with ssh-agent, even though it’s the gpg-agent doing authenticating and reading PGP keys directly from your YubiKey.
All you need to do know to authenticate over SSH in a true hardware fashion is to turn on your laptop, put a stick in the USB and push a button on it. Your Mac is now completely secure!
Still stuck?
There is another problem you may encounter when you start using YubiKey as an OpenGPG card. Our gpg-agent sometimes get stuck, and it looks like a YubiKey is not connected at all, replugging it also does nothing. It is a known problem, discussed here. My observations show that it appears after I put my laptop to sleep. Let’s deal with that too.
First, we need a tool that keeps track when our laptop wakes up: sleepwatcher is made just for that. Install it with Homebrew:
By default, it expects two scripts: ~/.sleep to run before the computer goes to sleep, and ~/.wakeup to run after it wakes up. Let’s create them.
The minimal ~/.sleep script can look like this (we only need to be sure it passes as a shell script)
In ~/.wakeup we will forcibly restart our gpg-agent:
Now we need to add execution flags and enable sleepwatcher’s service:
Ssh Agent For Mac Os X 10.10
Thank you for reading! Download find my mac for mac. In this article, we showed how to set up your SSH authentication flow with YubiKey as an OpenPGP card and how to make your gpg-agent play nicely with macOS. Now all you need to do to access a server or push code to a remote repository is to insert a stick into your USB and enter a PIN code when requested. Passphrases no longer required!
0 notes
Text
Option Button For Mac

Definition and Usage. The option tag defines an option in a select list. Option elements go inside a, or element. Note: The option tag can be used without any attributes, but you usually need the value attribute, which indicates what is sent to the server on form submission. Tip: If you have a long list of options, you can group related options within the. The Option key also enables you to enable the Save As option in Mac apps.Just press it when you click on the File menu and you'll see the new options. You may be wondering whether you can use the.
Alt key on Mac is indeed exist. And it’s called Option key.
Windows vs Mac—there are so many differences. A lot of our customers have used a PC before and then decide they want to switch to Mac for better performance, nicer design, or for better security. However, they were afraid they would have a hard time getting used to the macOS keyboard. We hear questions like, “How can I close a Window? The Mac keyboard doesn’t have the Alt + F4 shortcut.” We always give them two answers:

1. With Parallels Desktop for Mac you have the choice to use the same keyboard shortcuts you had on your PC.
2. If you want to use the Mac keyboard you will experience that the alt key is very different, as we explain in this blog post.

Where is the Alt key on a Mac keyboard?
The PC-keyboard equivalent of Alt on a Mac is called the Option key, and you’ll find the Option Key on your Mac if you go two keys to the left of the spacebar. However, the option key on a Mac keyboard is used in a different way than the alt key on a Windows PC. In terms of functionality, the alt key in Windows is often more comparable with the Command key than with the Option key on a Mac. You might be also familiar with the Ctrl and Alt keys from your PC. On your Mac keyboard, you have Command (⌘ cmd), Control (ctrl), and Option (⌥ alt) keys.
How do Windows shortcuts change on a Mac?
Check out some equivalents of popular Windows alt shortcuts on a Mac, which might be especially helpful for those users who are new to Mac:
Serial is a full-featured terminal emulator supporting Xterm, VT102, and ANSI terminal controls. This allows you to navigate the menu-driven interfaces found in many routers, firewalls and switches and use text based programs including emacs, vi, and nano as if you were connected over the network. Serial number or just Serial is some kind of a password to remove the limitation of unregistred version of your Max OS X software. How to use our site: just enter your Mac software name into the searck box located above and press search button then you can select the required software by clicking on it. Find mac model by serial.
WindowsMacClosing a windowAlt-F4Command-WRestartingControl-Alt-DeleteControl-Command-EjectShutting downControl-Alt-DeleteControl-Option-Command-EjectLogging outControl-Alt-DeleteShift-Command-QSwitch between open appsAlt + TabCommand-tabGo backAlt + Left arrowCommand + Left arrowGo forwardAlt + Right arrowCommand + Right arrowMove up one screenAlt + Page UpCommand + Page UpMove down one screenAlt + Page DownCommand + Page Down
When running Windows on a Mac with Parallels Desktop, is it possible to use Windows shortcuts on a Mac?
If you run Windows on your Mac with Parallels Desktop for Mac, you can configure your keyboard shortcuts the way you want to work, with either macOS or Windows shortcuts. Click here for more information on how to set the different shortcuts.
You can find even more useful Mac shortcuts in the infographic here.
Missing your Start Menu and familiar Windows look and feel? You can use Parallels Desktop and have Windows 10 along with your favorite Windows apps on your new Mac.
Partitioning a disk on a Mac is an effective way to organize your data into different categories. However, the main concern is that most external hard drives and USB keys come formatted for Windows, which is primarily for PCs. By default, a Mac runs a different file system, so it may bring issues while partitioning your disk on Disk Utility.
Hard drive partitioning is a common issue discussed in many tech forums. In a thread on Apple’s support forum, users complain that their Mac Disk Utility partition grayed-out while trying to partition their external hard drives.
Probably, you just bought your external hard drive and are eager to use it on your Mac. But somehow, you cannot access the Mac Disk Utility partition, so you can’t write data to the drive.
This article will let you know How to install Mac OS X Mavericks as a virtual machine on PC with VirtualBox. We can you FlashGet or bittorrent client to download the file, please go to this link to get 2. I’m using a laptop Win 7 Home, with Intel Core i7 and 6 GB RAM. Download Niresh Mac OS X Mavericks 10.9 ISO fileAs we will install OS X Mavericks in Virtualbox with Niresh so we need to download Niresh Mac OS X Mavericks 10.9 (ISO version). Mac os high sierra iso for virtualbox.
Fear not, we have a solution to this problem. In this post, we will guide you through a step-by-step process on how to restore a grayed-out Disk Utility partition. Many Apple users who have faced Partition grayed out in Mac issues eventually partitioned their external hard drives with the help of these fixes.
Why Partition Grayed Out in Mac (Plus Solution)
Problem 1: Sometimes, you cannot access the Mac Disk Utility partition because your hard drive doesn’t have sufficient space.
Solution: If you want to go ahead with the partitioning task, you need to create more space on your hard drive. In other words, you have to erase the data on your drive to create additional space. You can then format your hard drive using GUID Partition Table. After that, go ahead with your partitioning plans.
Important Note: Before formatting your hard drive, back up your most important files. Needless to say, the process will get rid of all the data on the disk, so you risk losing your files for good.
SSD Life is not available for Mac but there is one alternative that runs on macOS with similar functionality. The most popular Mac alternative is GSmartControl, which is both free and Open Source.If that doesn't work for you, our users have ranked 7 alternatives to SSD Life, but unfortunately only one is available for Mac. This is how to format an SSD on Mac OS X. Highlight your SSD and click the Partition tab.; Click Options and verify that it's set to GUID Partition Table.; Select Partition 1 if you want to use the entire SSD as a single partition (if you don’t know what a partition is, select this option).You’ll now have the opportunity to give your SSD a name. Verify that the selected format defaults to Mac OS Extended (Journaled). Life of ssd for mac os. Storage media of all kinds, SSDs included, is consumable. That mean, eventually, it fails. That’s one reason backups are so important. To keep ahead of the game, macOS offers tools that can check the disk health of your SSD and other attached disks.
Problem 2: As mentioned earlier, external drives are usually not compatible with macOS, which may bring issues when you want to partition. In most cases, users choose the wrong partitioning option, and as a result, the Partition option in Disk Utility remains grayed out.
Solution: The right way you should follow when selecting a partition option is to choose the drive name within the list provided under Internal or External (depending on the device you want to partition). Your hard drive will be available on the left side of the Disk Utility pane.
How to Restore Grayed Out Disk Utility Partition: Format Your Hard Drive to Work with Mac
Adobe photoshop free download cs6 for mac. To format your external disk to be compatible with macOS, connect your hard drive to the Mac and follow these steps:
Open Disk Utility by going to Applications, then select Utilities > Disk Utility.
Choose the drive name within the list provided under ‘External’. If your hard drive is connected, it will show in the left panel of the Disk Utility. Highlight the disk and click the Erase button in the top toolbar.
Wait for a window asking you to select the file system you want to use to format your external drive to pop up. For your case, you will select ‘Mac OS Extended (Journaled)’. But if you have plans to use your disk for both PC and Mac, then a better option is ‘ExFAT’. You can also rename your hard disk here to your desired name.
Wait for the formatting process to complete. The process usually takes less than a minute, but it depends on the size of your hard disk.
When done, confirm if the formatting was successful by right-clicking the icon for your disk on the desktop and then choosing Get Info. The information is available under Format.
If it reads “Mac OS Extended (Journaled)”, congratulations, you successfully restored the grayed-out Disk Utility and your hard disk is now compatible with macOS.
Partitioning Your Hard Drive on Mac
Now that you have prepared your hard drive to work with Mac, the next step is to partition it on your Mac by following these steps:
Option Button For Mac Catalina
Launch the Disk Utility app on your Mac and highlight the hard drive icon under ‘External’ (for external hard drives). If you choose any other drive, the partition option will become unclickable.
Now click Partition on the top toolbar. A window that has partition information will pop up. On the left side of the window, look for the name and the volume size of your hard drive. The next step is to click add(+) button on the bottom of the window to create partitions on your disk. Allocate the desired volume size to each partition.
Hit the Apply button and wait for a window asking you to verify your choices. Confirm the changes by clicking the Partition button.
Wait for the process to complete. You can confirm if the process was successful on your desktop. You will see additional disk icons show
Pro Tip: If the main reason for partitioning your hard drive is to install Windows, Apple recommends that you use Boot Camp Assistant instead of Disk Utility. You should, however, note that you cannot use Disk Utility to erase a partition generated using Boot Camp Assistant.
What Else Can You Do to Resolve Common Mac Issues
If you are like many users, partitioning a hard drive on Mac may not be the only challenge you have had with your computer. Mac users have also reported slow performance, random freezes, and space issues. The best way to guarantee the best performance for your Mac is to scan and clean the computer. Outbyte MacRepair helps you to optimize your Mac for peak performance by checking for and cleaning up junk files, unnecessary apps, and other space hogs that may affect your Mac’s memory.
We hope the above solutions helped you to restore the grayed-out Disk Utility partition. As always, we would love to hear your success story. Share it in the comment section. Also, let us know if you experienced challenges during the partitioning process.
Mac Stock Options
If you’re running into errors and your system is suspiciously slow, your computer needs some maintenance work. Download Outbyte PC Repair for Windows, Outbyte Antivirus for Windows, or Outbyte MacRepair for macOS to resolve common computer performance issues. Fix computer troubles by downloading the compatible tool for your device. See more information about Outbyte and uninstall instructions. Please review EULA and Privacy Policy.
0 notes