#pedalboard patch cables
Link
Girls can perform guitars with pedalboard patch cables too. TourGear Designs introduce Ruxandra, a promising young guitar player from Toronto, Canada. She write her own music and is also interested in collaborations with other artists and bands. Listen to their music by visiting our website!
0 notes
Text
Finding the Right Pedal Board Power Supply
Being a guitarist, you will always feel the impact of pedals across your guitar pedalboard cables. However, you may now reconsider staying away from the conventional battery-backed power supply and want to upgrade to a more robust form of electric power supply. We can explain options to get the right source of power supply.
Why Do People Need the Power Supply for Pedals?
Once you use a reliable power source for your guitar pedals, the sound quality of the instrument gets improved, and you can then use the pedals to their full capacity. The use of 9V battery support does not hold well when it comes to powering a host of pedals on the pedalboard. If you are a musician by profession, we advise you not to opt for battery power. An electrical power supply always allows you to maintain the right amount of voltage through the pedalboard, provided there is no interruption. Unlike 9v batteries, you can leave your instrument plugged in because it will not consume any power.

What is the Voltage Requirement?
These days, the majority of pedal linked guitars have the capacity of 9V. However, some of the pedalboards are compatible with a range of 12V, 18V, and even 24V voltage support. You should always check the voltage capacity before buying a pedal power supply source. Large numbers of pedals are best suited for the usual 9V power. In contrast, some may require an upgraded power supply, like the older versions of Electro Harmonix pedals. Generally, it’s up to the manufacturer to decide what voltage of power supply is admissible for a certain grade of pedals.
What About the Current Consumption?
Before assessing the voltage requirement, check the power consumption needed to power the pedal. The measuring unit, in this case, is mA (milliamps). However, some of the pedals with analog distortion will require low power consumption, which is somewhere around 20 mA or even less. The idea is to consult a checklist for your specific requirement. You don't need to worry about excessive current supply as too much flow of current will not damage the pedals. However, you must ensure that all pedals on the pedalboards are of professional-grade. As a result, all the pedals get a uniform amount of power supply irrespective of active pedals strewn on your instrument.
What is an Isolated Supply?
It’s primarily engaged to reduce unwanted noise that may occur due to low-quality voltage supply. It means each power output is fully isolated and also ensures that each pedal is getting an uninterrupted electricity supply. Otherwise, a daisy chain of pedalboard wiring may push the power flow through one lead into a solitary pedal. It may dilute the power along the way and degrade the sound quality in the process.
Which is the Perfect Power Supply?
As a musician, you may discover that you have a pedal that requires a voltage specification of 9V and 250mA to 300mA voltage output. Alternatively, you have scores of regular pedals that consume only a bit of electricity. Either way, you must monitor that each pedal is fed with the right amount of power supply. If it doesn’t happen, you will not get the right sound out of the flat pedal cables. You get 10 inputs with varying current consumption.
The Bottom Line
An ideal combination of pedal power supply is a must for professionals. Besides, musicians should always use the correct ones to ensure top quality sound.
0 notes
Text
Complete Guide to Guitar Patch Cables
If you want to extend your sound horizons and the amplifier tones make you feel limited, then pedalboard patch cables are right for you. When you are a beginner, you are unaware of a lot of things, for example- matching ohms, or cables, or the right kind of pedalboard wiring. There are many options in the market, but choosing the suitable patch cable depends upon a number of factors, and this article aims to make that process easier for you with the help of a thorough guide.
What Kind of a Pedalboard Should I Begin With?

There are many types of pedalboards used by seasoned players and even beginners. “Distortion pedals” are more flexible than the others as they will let you create your own tones and come with volume controls. “Overdrive pedals” are known for delivering a moderate-gain crunch. Next comes the “Wah Pedal”, which is known for providing a kind of crying sound that seems like it is animated. The use of the Wah pedal becomes more accented with the help of a distortion and overdrive pedal. But if you ask what kind of pedalboard should you begin with, then the answer is- “Tuner pedal”. A tuner pedal is the basic kind of pedal you should have because it keeps you in tune, and that is most important. The Boss TU-3 or the “polytune pedals” from TC Electronic are some of the best tuner pedals.
Importance of a Patch Cable and the Right Way to Connect Pedalboard?
Patch cables are used to connect one pedal with another, and it helps in shortening the total signal length. Needlessto say, if you think of it this way- your guitar, the amplifier, and the pedals are a circuit, and if your signal needs more cable, it will gradually become weaker. A pedalboard patch cable shortens this time. Instead of using a full-length cord of six feet size, patch cables, which are usually six to twelve inches long, do the job more efficiently. If you want to use a simple as well as small pedalboard, then a patch cable would be more useful. But if you wish to have an all-encompassing and larger pedalboard, then you will definitely need to customize the cable lengths according to the pedalboards. Modern patch cables are made in such a way so that the space between pedals is less.
How Should I Power the Pedalboard of My Guitar?
Power supplies are usually provided with the pedals, but you can easily buy one if you are not supplied with power supplies. You only have to make sure that the power supply you are buying matches the pedal’s power requirements. The power supplies convert the alternating current (AC) power from your switchboard to direct current (DC). Most pedals need a minimum voltage of 9V and an electrical current that is less than 100 mA. And you should make sure of the following three things:
Voltage: The most common pedals require a voltage of 9V, but pedals that are larger in size might require about 18V power because of their complex circuitry.
Current: Wah or overdrive pedals require much less current than the digital pedals. However, there is nothing to worry about if the current flow is more than what you need. It does not affect the pedal at all.
Polarity: Vintage pedals used to have positive polarity, but modern pedals have a negative polarity. The polarity is always marked on the pedals.
Concluding Words
A patch cable is extremely useful if you have pedalboards, and that is why we hope that with the help of this guide, you now have a much clearer idea about pedalboard wiring and what you should be looking for when you are purchasing a pedalboard patch cables . You may be a beginner or a professional, but if you are trying to figure out what kind of patch cables would suit your needs, then this guide is the best for you. With so many brands offering the best patch cables, you can now make an informed decision with the help of this guide. Once you get everything right, you are always good to go.
0 notes
Text
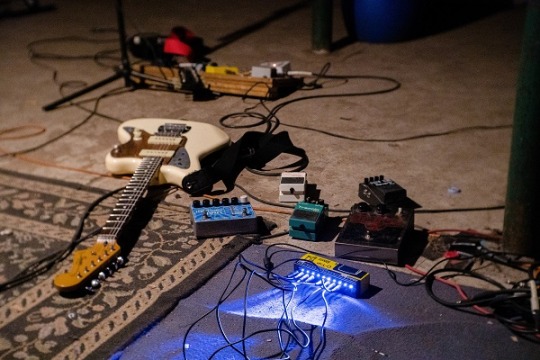
6 Best Methods To Wire A Pedalboard
Wondering how to set up the first pedalboard you just bought? Well, we understand your excitement and it is time that you know about the methods of wiring your pedalboard. Pedalboards come in numerous shapes and sizes and there is a vast range of methods to wire it.
It is quite normal to feel limited with those tones coming out from your amp and now you are up for a unique experience. TourGearDesigns has accumulated the best methods to wire your first ever pedalboard and rest assured this process is quite an easy one once you understand the processes.

Top 6 DIY methods to wire your pedalboard
Here a list that includes the best six pedalboard wiring practices which will let you set up your pedalboard in no time.
Cleaning and vacuuming
The primary step involves cleaning the entire board and getting rid of dust. Take a wiper or cloth and gently remove the dust particles from the surface. Now take out the pedalboard patch cables and clean them carefully. The aim is to make sure that there exists no dust inside the pedalboard goods. To clear off the hidden dust, dirt, and loose fabric pieces, it is recommended to use a vacuum cleaner. Lastly, remove all the pedals and wipe the board again for a complete finish.
Adding Velcro
Now that you have successfully cleaned the new pedalboard, it is time to add the Velcro. Unpack the new Velcro and add it to the backside of each pedal of the pedalboard. In simple words, you are adding Velcro and placing pedals individually. You will find Guitar Pedalboard Cables and flat patch cables along with the package of your pedalboard. Remember that all the cables and adapters that came with the package will get connected at the back of the pedalboard.
Tying in the 9V power cables
Those 9V power cables need to be attached to your pedalboard after you have completed the addition of the Velcro process. You need to attach the guitar pedalboard cables and Flat Patch Cables at the back of your pedalboard along with the other pedalboard patch cables. You can minimize the wire lengths by folding them in as you require. You can also use Velcro or tapes to keep the wires attached to the pedalboard.
Tying in the wah pedal adapter
You are almost in the midway of the process. After you have successfully attached the pedalboard wires to the backside of the pedalboard, it is time to tie in the wah pedal adapter to the pedalboard. After you have attached the pedal adapter, you can use the Velcro or tapes to tie up the wires together to maintain a low profile.
Tying in pedals along with other adapters
Your pedalboard might come with a built-in surge protector and in that case, you do not have to add one. If you do not have a surge protector with your pedalboard, it is recommended that you buy one to prevent any damage in the future. Attach the surge protector wires with the board at the backside and secure it using a Velcro. Make sure you check out all the wires and add Velcro wherever necessary.
Cabling up the remaining pedals
It is recommended to have wires of different lengths so that you have no confusion while setting up the pedalboard. TourGearDesigns recommends shorter cables in this case. If you need any extra Velcro, you are free to go ahead and add some extra Velcro for holding the cables together. You are almost done with your new pedalboard. Go ahead and enjoy the finished product.
This article sums up the best methods to wire your pedalboard. Make sure you follow the above-mentioned steps and you will see that wiring a pedalboard is an easy task. All you need to do is plug your wires properly and keep no loose ends. Embrace the new sound coming out from your pedalboard.
#Flat Pedalboard Cables#flat patch cables#guitar pedalboard cables#pedalboard wiring#pedalboard patch cables#guitar amplifier#guitar#acoustic guitar amplifier#guitar pedalboard cable
0 notes
Last Seen Blogs

efffys
wild / FLOWER

latexcouple33
Untitled

kieto
¿Eres comanche o navajo chaval?

azm0day
CARNAGE

abandoned-tormentor
fuck society