#phj 101
Text
Evil Robot Head.
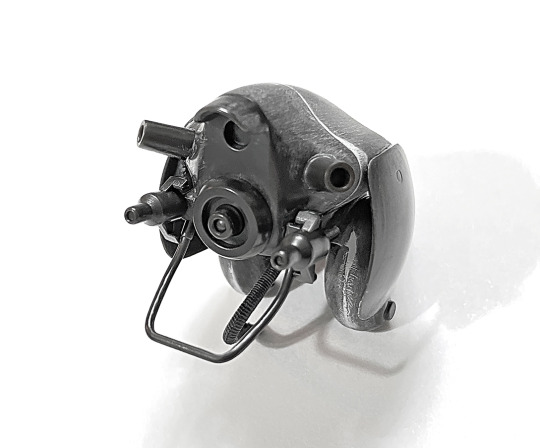
Little bit more progress on my evil robot model kit tonight, plus a photo. Sanded down the putty from yesterday, and glued on six little parts. Looks like the next section begins the assembly of the shoulders.
#wip#plamo#model kit#plamodel#grosser hund#sf3d#maschinen krieger#phj 101#hasegawa#scale model#plastic model#zbv 3000#1/20#mak#robot#humanoid unmanned interceptor#プラモ
5 notes
·
View notes
Text

Evil robot arms
Did a bit of work today on my long-neglected robot model kit. Finished one upper arm section, and so could assemble the arms for a quick pic like so. Started work on the head and have that about half-done. Trying to decide on parts options for the back of the head, and also waiting for putty to cure.
#sf3d#mak#maschinen krieger#grosser hund#phj 101#zbv 3000#hasegawa#yokoyama kow#humanoid unmanned interceptor#evil robot#plamo#model kit#plastic model#scale model#プラモ
5 notes
·
View notes
Text
Did a little work on my evil robot model kit today.
Boring photos below:
Decided to try to replace this antenna (below) with a scratchbuilt one made from aluminum wire and styrene tube.
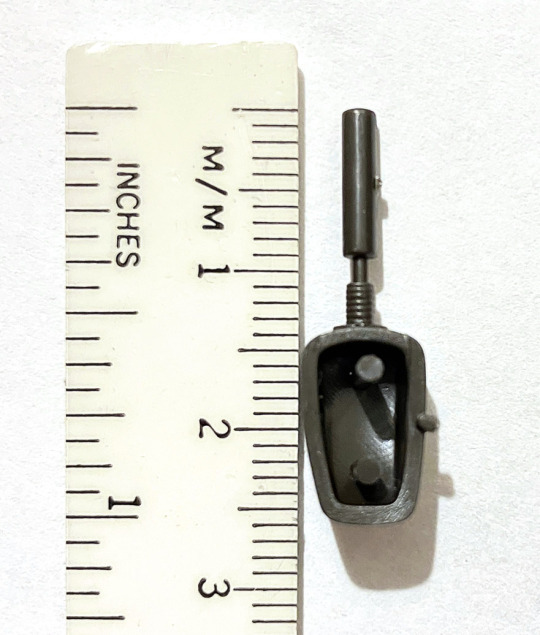
Took a pic for reference, before I cut off the antenna.
Had some thin aluminum wire handy, and twisted one piece around another for the base (very fiddly to get right). (In retrospect, I probably could have done this all with a single piece of wire. Might have been more durable). Drilled a hole with the point of my X-Acto, and threaded it through into the part (also fiddly):
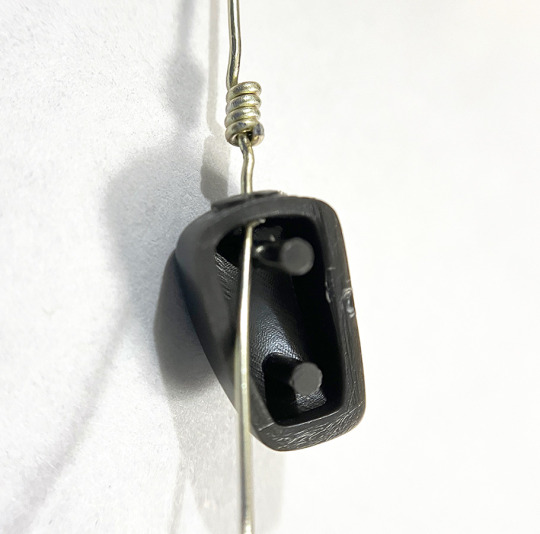
Wrapped the excess around the peg in the part for enhanced security:
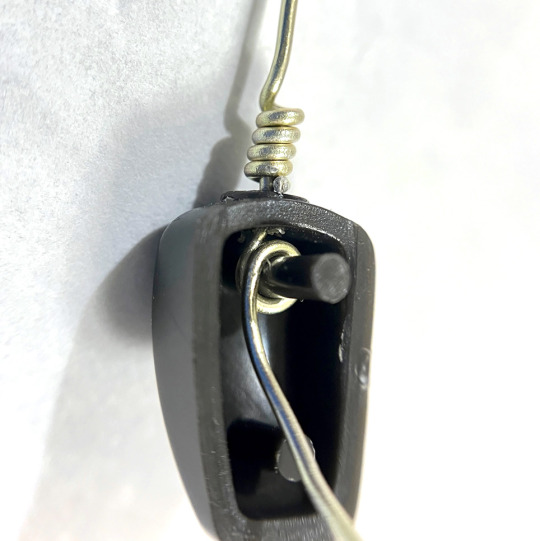
Secured the wire with generous amounts of super glue. Cut a good length of styrene tube, and threaded that on the other end. Secured with more super glue. New and improved part:
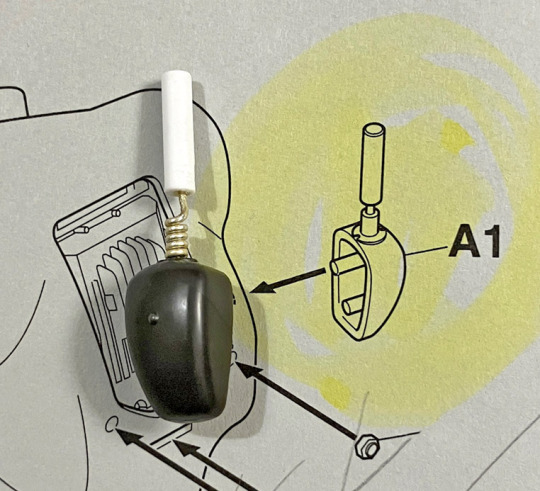
Hopefully not going to get broken while assembling, painting, etc.
Also assembled the hand:
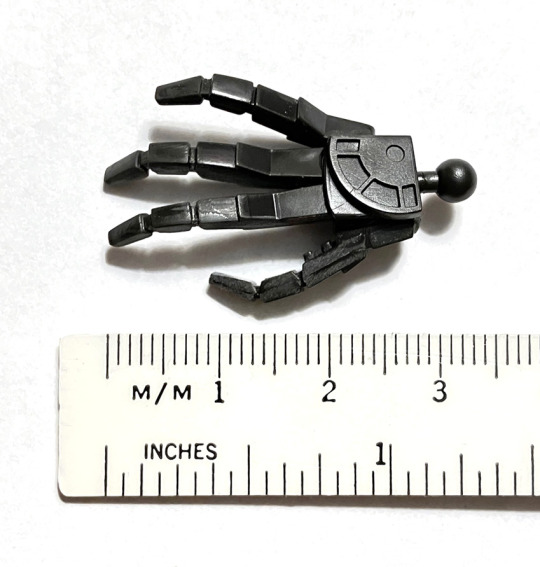
Somewhat fiddly, and very delicate. I hope this thing survives assembly and finishing, too.
#plamo#model kit#wip#grosserhund#sf3d#maschinen krieger#scale model#plastic model#プラモ#zbv 3000#mak#kow yokoyama#grosser hund#phj 101
3 notes
·
View notes
Text
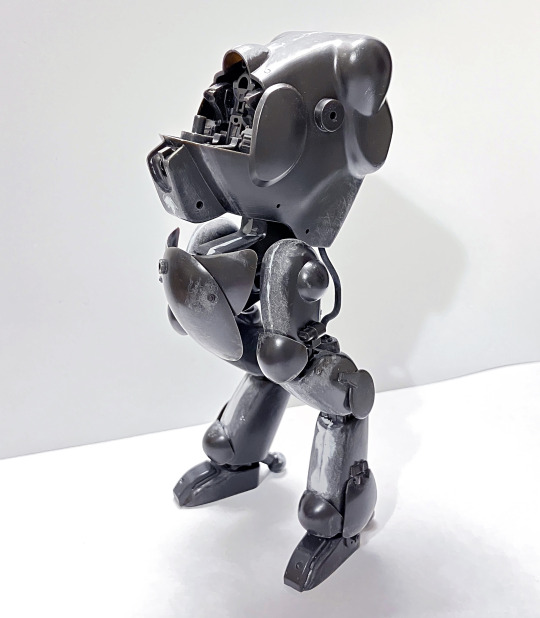
Made a little bit of progress on my Grosser Hund kit yesterday and today.
Assembled and sanded the top torso piece. Eight parts and lots of puttying and sanding the seam down the middle. The whole thing is now 15 cm / 6 inches tall, and will get a bit taller with the neck, shoulders and head on it. So far, I have completed 16 of 42 (?) steps on the instruction sheet. Trying to do it well takes a lot longer than I would guess.
#mak#sf3d#grosser hund#plamo#plastic model#scale modeling#kit#scale model#hobbies#kow yokoyama#プラモ#maschinen krieger#zbv 3000#phj 101#hasegawa#wip#robots#evil robots
3 notes
·
View notes
Text

Progress on my evil robot for today. Details below the jump:
Lower legs and feet puttied & sanded (Mr. Surfacer 500). Middle legs (8 parts each), upper legs (4 parts each, plus missing armor) and hips (4 parts) assembled & puttied (Mr. Surfacer 500 alternating with Tamiya Basic Putty). Needs more sanding. Held together with tape for this photo.
Tried to strengthen the legs & hips with additional internal reinforcements made from super glue & sprue bits. I'd like to reinforce the middle & upper legs more. Really paranoid about parts cracking, breaking off, etc. It's a constant battle between my desire to make this as strong as possible versus my impatience.
Haven't used the Mr. Surfacer before, and I'm pretty pleased with it. Doesn't seem to shrink like the Tamiya Basic Putty does. Seems to cure faster, too. As long as I'm careful applying it (no bubbles), seems to sand like a dream.
#plastic model#scale model#model kit#plamo#mecha#maschinen krieger#MaK#sf3d#zbv3000#grosserhund#hasegawa#kow yokoyama#phj 101#evil robot#putty and sand#wip#robots#scifi#プラモ
4 notes
·
View notes
Text

Spent a good amount of time getting this far in my long-untouched robot model kit. This is a 1/20 Grosser Hund from Maschinen Krieger / SF3D / MaK / ZbV3000, made by Hasegawa in 2011. Been sitting in the box unopened for months.
Shown above are the feet and lower legs. Eight parts per foot. Nine parts per lower leg. Agonizingly delicate armor plates & hinges, but the finished product looks & feels good so far. Very complicated beastie, lotta sprues. I put some steel BBs inside the feet, and glued some extra sprue inside the legs to add weight, and hopefully, stability.
Parts shown are about 2.25 inches / 60mm tall.
#grosserhund#phj 101#sf3d#mak#zbv3000#maschinen krieger#kow yokoyama#hasegawa#plamo#plastic model#model kit#scale model#evil robot#wip#プラモ
3 notes
·
View notes
Text


A little bit more progress on my evil robot model kit tonight.
Assembled the ... front hip armor thing. Three plates, each with a free-moving hinge. Ten pieces total. Also added the knee armor bits I'd left off last time.
Filed down all of the pegs for the joints, and did a test fit (not held together with tape this time). I really want to get some slow-curing epoxy and try to reinforce as much of the leg halves as I can. I'm afraid of those cracking apart over time, due to the stress of the polycaps & pegs.
Also shown in extreme close-up is one of the many, tiny, hex head bolts included with the kit. About 2 mm across. Four of those on the legs, plus two on the front of the crotch armor. I think I've gotten better at applying them.
#maschinen krieger#grosserhund#model kit#scale model#plastic model#plamo#sf3d#kow yokoyama#phj 101#evil robot#プラモ#zbv3000#wip
1 note
·
View note
Last Seen Blogs

leonhrtluvr
kai / riri / aki

eveningedging
Evening Edging


outlaw-ex
lay all your love on me

lene-yah
Lene-yah