#quentinsiruguet
Note
Hey, how do you make those beautiful gif ? Like with this quality, etc...
Thanks :)
hi!! thank you for asking, i’m gonna try to make a little tutorial on how i make my gifs :)
first of all i use hd versions of the episodes, either in 1080p or 720p. i use 1080p for later seasons but i only have 720p for seasons 1 to 7 and honestly i think the quality’s good enough, so don’t worry too much if you don’t have 1080p.
i use kmplayer to take caps from an episode and i capture every frame (so the gif will be smoother) in its original size (to keep the best quality possible).
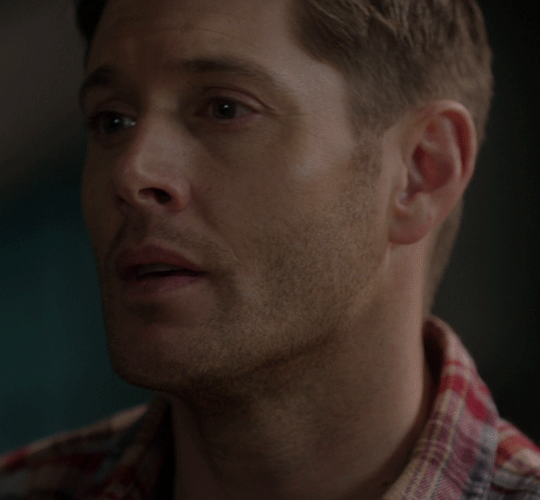
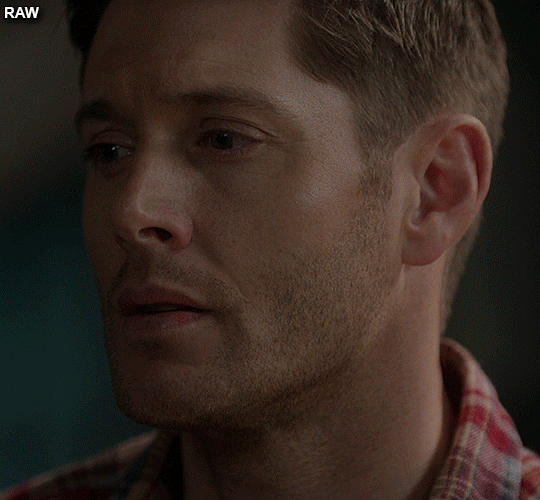
then i load them into photoshop, crop them with the ratio i want my gif to be and resize them to be the right tumblr size (540px wide for one column gifsets). at this point, this is what my raw gif looks like (i use a frame delay of 0.06 second):
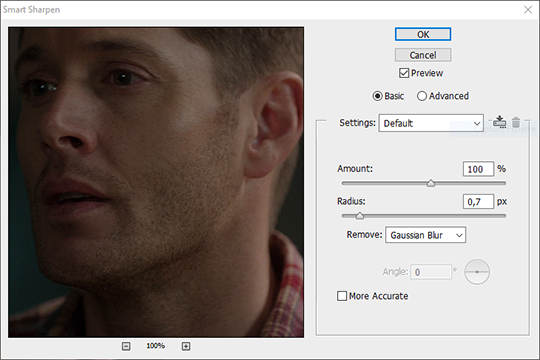
1) SHARPENING
to improve the gif quality i am now going to sharpen the gif.
my general sharpening settings that i use on all my gifs are the following:
amount: 100%
radius: 0.7px
remove: gaussian blur
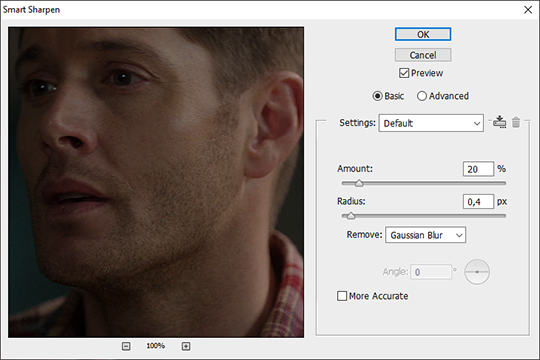
then i use a second sharpening but only for close up gifs like this one (otherwise you can’t really tell the difference so i don’t bother with it):
amount: 20%
radius: 0.4px
remove: gaussian blur
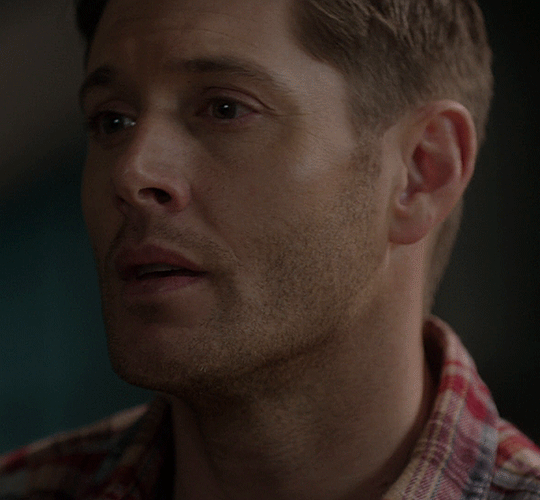
so now my sharpened gif looks like this:
2) COLORING
now on to coloring! i don’t really have a base coloring because i make a new coloring for every gif or gifset BUT i have a base ensemble of layers that i use and tweak to make all my colorings:
however, i rarely use all of them at the same time.
the important ones that i use every time are the following:
curves 1 (rgb)
vibrance 1
selective color 1
gradient map 1
brightness/contrast 1
then the others are optional and depend on the situation:
levels 1: i sometimes use it for very dark scenes
curves 2 (colors) or color balance 1: for color correction (for example bunker scenes to tone down the yellow)
color fills 1 & 2: i use these as an overlay with a very low opacity in order to get a more cohesive look between my gifs across a gifset, or just to get a warmer coloring in general
selective color 2: when i’m looking to enhance certain colors and a single selective color layer isn’t enough
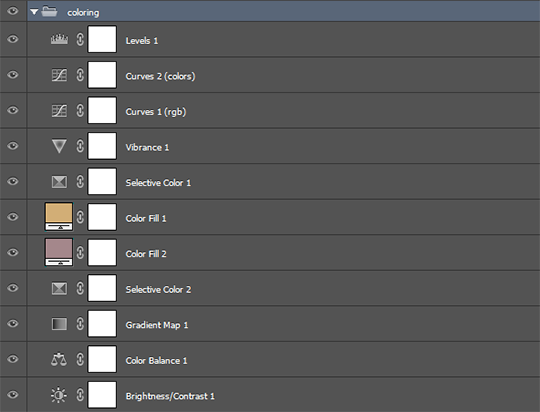
now for this particular gif, here’s the layers i used (only the ones that are checked):
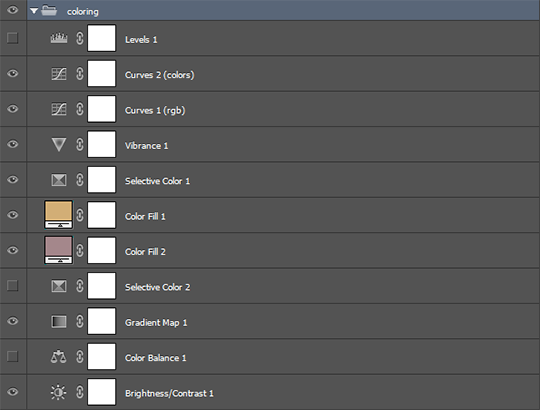
and to better understand how i use them, here’s how each of these layers affect the coloring:
and here’s the final product:

3) EXPORT SETTINGS
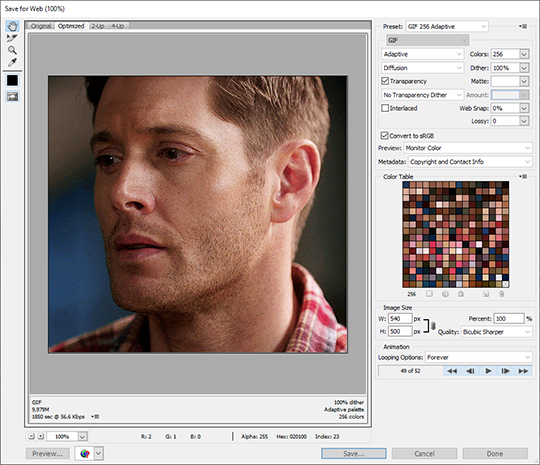
finally, the quality of the gif also depends on the export settings you use.
basically i always use either adaptive diffusion or selective diffusion. i always try both and compare them to pick the one that looks better for each gif but it really depends on the gif, sometimes adaptive will look better and sometimes you’ll wanna go with selective.
for the gif in this tutorial i used adaptive diffusion with these overall settings:
there you go!! i think i covered the important steps of my gifmaking process, i hope it was helpful and don’t hesitate to shoot me an ask if you’ve got any specific questions!
[i remade the gif from scratch for this tutorial but i originally posted it in this gifset]
#i'm sorry i took so long to answer your ask but i wanted to make a proper tutorial like this and i didn't have time to do it until now#i hope you find this helpful! :)#asks#quentinsiruguet#gifmaking#tutorials#photoshop stuff#cowboycoven#long post
295 notes
·
View notes
Last Seen Blogs

dallaswiinston
Let's Do It For Johnny

galahadry-archived-blog
UNDER CO.

your-highking
too gay to function

crimson-4-life
pameisshort

grayfoto
GrayFoto