#rät's art shenanigans
Text
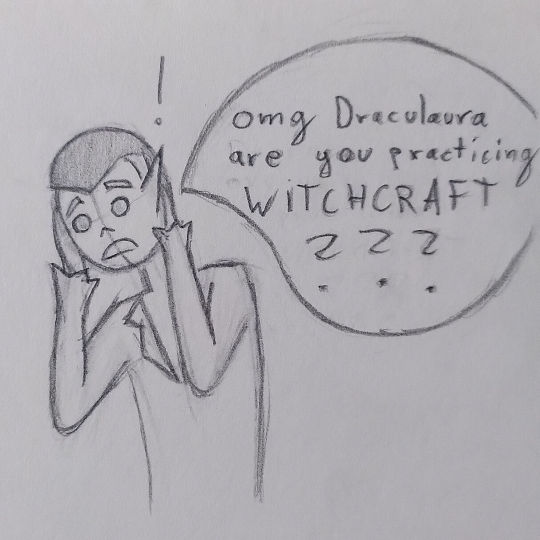
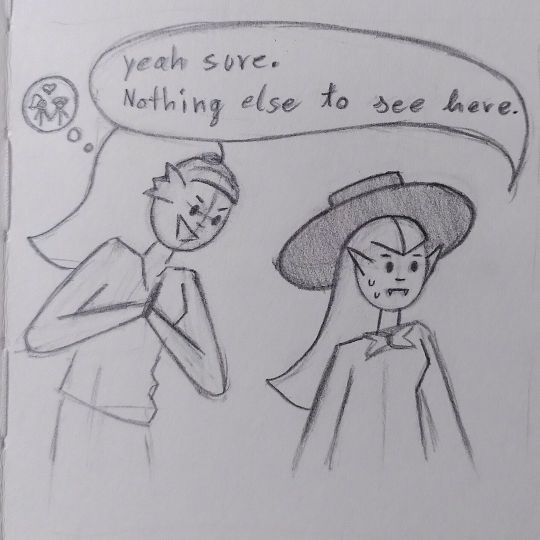
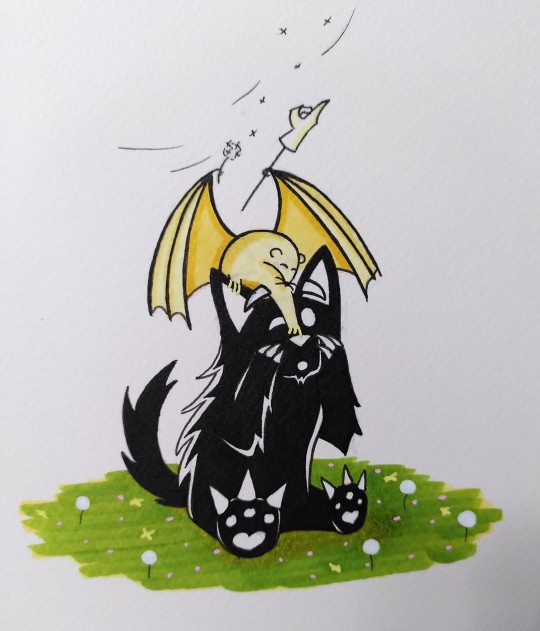
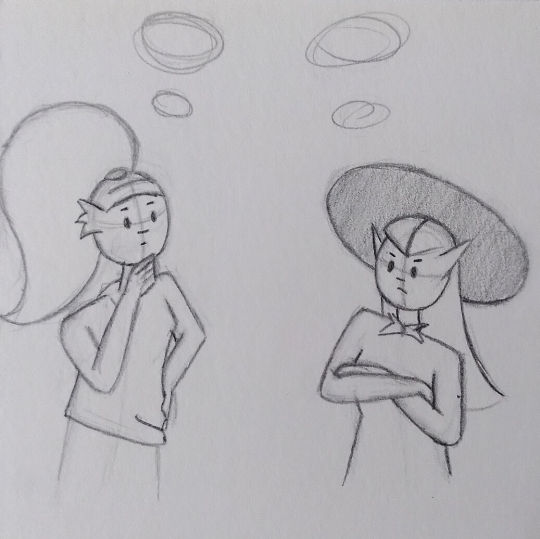
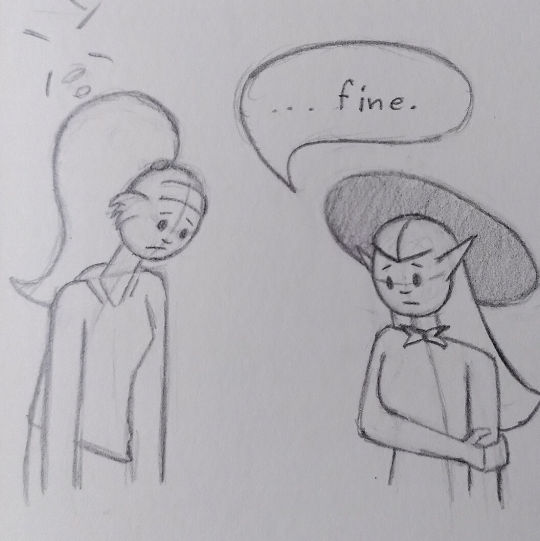
Take my crappy lil comic
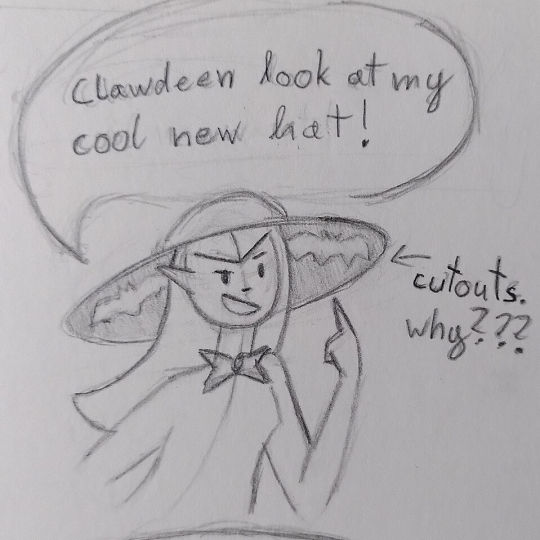
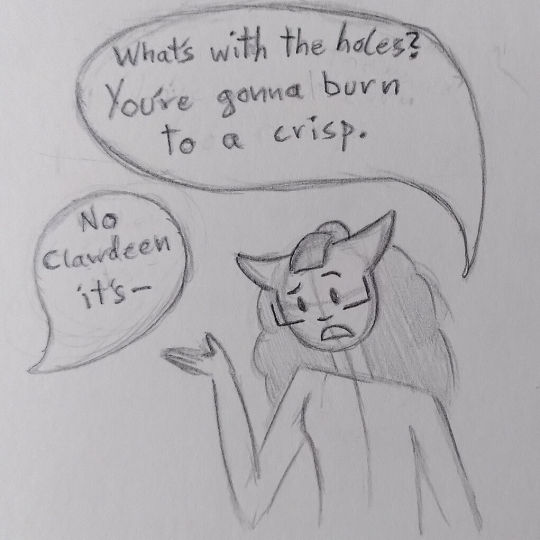
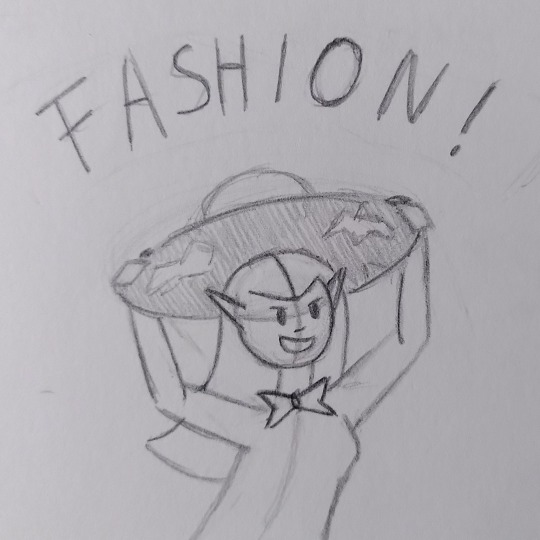

She's fine I promise.
#that hat is so funny to me#it's SO impractical#you know exactly which hat I'm talking about#monster high#monster high g3#draculaura#clawdeen wolf#rätposting#rät's art shenanigans
498 notes
·
View notes
Text

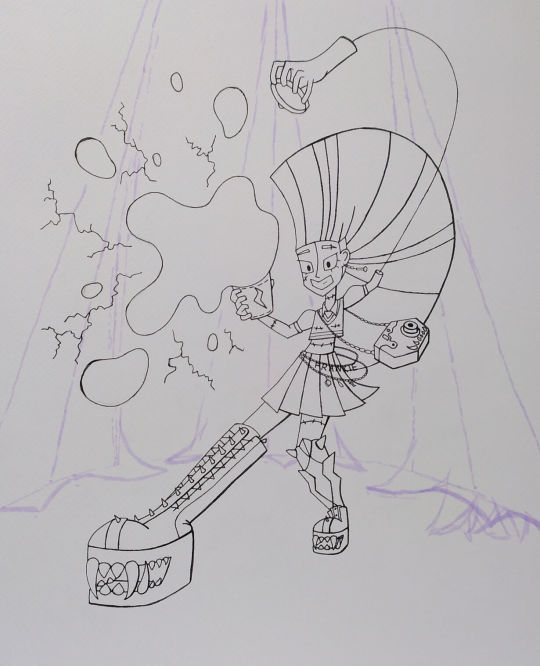
"Frankie, don't unleash the coffee ghosts!"
And there we have it, my first "proper" (and probably last, for now) time posting fan art. Rambles about the process under the cut, since I enjoy it when other people do that.
So why coffee? I've seen g3 Frankie as a bit too fond of caffeine since the beginning, mostly because of the coffee break two pack (they have a designated coffee buying outfit!) and their creepover doll, which comes with an energy drink. I mean, come on.
Here's basically the process:


The colours aren't quite accurate to the actual drawing (the background is lighter on the photo), but I tried.
The point of this was really just to make something less mellow (as I tend to do) and focus a bit more on shapes, and I thought Frankie would be perfect for that. I used alcohol markers (by Ohuhu) and acrylic paint for the sparks of electricity. Little fun fact, I had to take a reference picture for the separated hand, and the best lid adjacent thing to hold I could find was a tiny trash lid. I mean, if it fits ┐•_•┌
I don't draw humans (or humanesque characters) often, so this was good practice. Killed one of my favourite markers for the trees, but I had fun.
#I can get a refill it's fine#but I loved that marker#monster high#monster high g3#frankie stein#rätposting#rät's art shenanigans
240 notes
·
View notes
Text
Introducing you all to my endless well of joy, made possible thanks to the pattern by @itsthebeastpeddler (whose blog you should check out cause she makes some really lovely things ^-^)

It's a slug!!! Fully hand-sewn cause doing so seemed easier than learning how to use our sewing machine... I'll do so eventually XD But it was actually fairly therapeutic.

Oh! Looks like they're friends now.

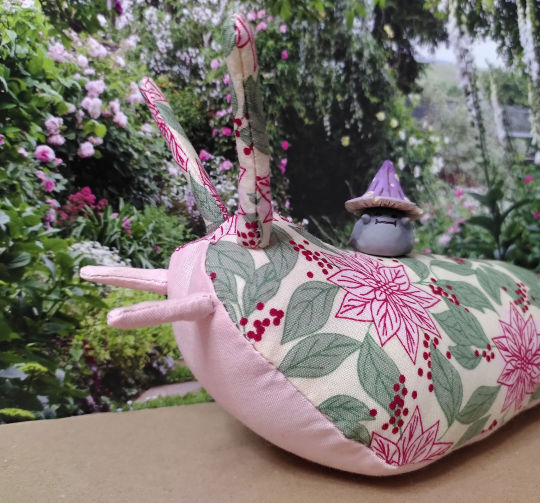
Camouflage slug... With a "snail" (he's in denial) friend I made some time ago >:) Dang she's making connections left and right :0
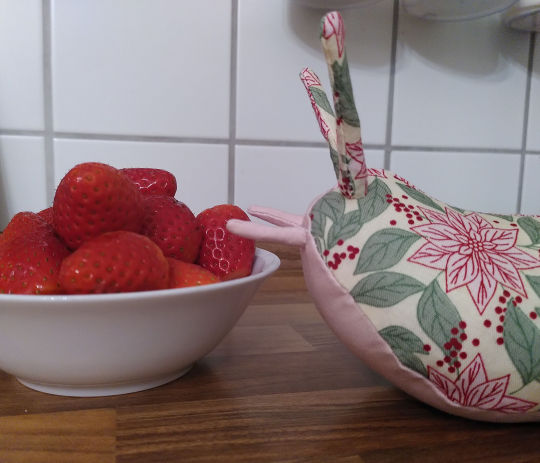
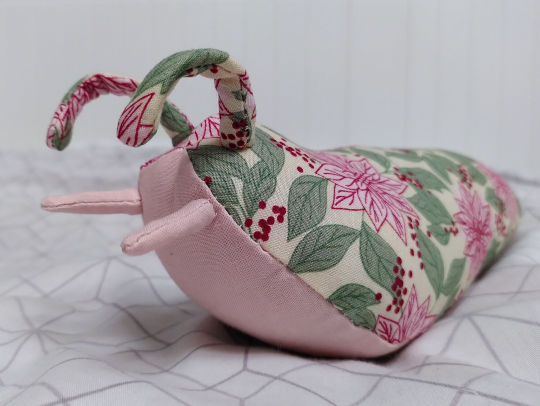
He's a big fan of strawberries, can't blame her. And as per the peddler's suggestion, I used a pipe cleaner for the eye stems! Now they're bendyyy
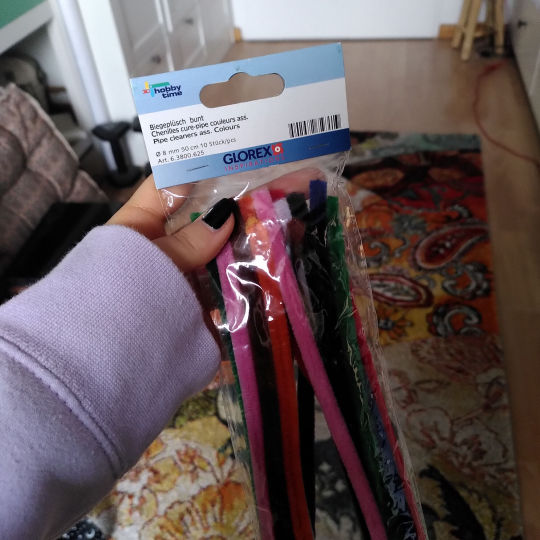

I knew keeping these suckers around for over a decade would be worth it... Also, the single progress photo I took.
This is my first time sewing a plushie, and I had a grand time. Learned a lot along the way, and the ladder stitch that always intimated me is actually super easy XD Wanna know what the best thing about making such a slug is though? The way the eye stalks wiggle about if you shake him sjshsj
A little slug kiss on your forehead for good luck <3
#can you tell I'm craving spring with my fabric choices here XD#the peddler asked to be tagged in snail debut photos so I'm obliging#wait I meant slug- it's all the same word in German so I keep getting them mixed up#you can find the pattern on her store#it's linked on her blog I'm pretty sure#rätposting#rät's art shenanigans#slugs#snails#also yes she/him pronouns for the slug cause that's just how I automatically started referring to him#pronouns assigned by indecisiveness#turning the fabric for the eye stems inside out was kind of a nightmare ngl#pliers to the rescue
114 notes
·
View notes
Text


I've been meaning to paint Frankie's polaroid camera for months now, and I finally got to it! I was absolutely in love with the sculpt, but the hot pink didn't do it for me. You'll notice I also replaced the bag strap with a chain, because why not.
If you're curious about that, here's an explanation of how I did it:
Basically, I just split the bag open like a walnut.

It's simple in theorie, but a little fiddly. As you can see, it consists of two parts, meaning if you separate them, the strap is very easily removable. The two halves aren't glued together either, they just fit together like a puzzle.
I used my favourite sculpting tool:
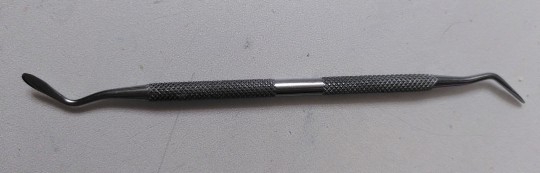
And stuck it inside the bag where the polaroids are supposed to go, kinda just wriggling it between the two pieces. I did it there so you wouldn't be able to see any minor damage.
The tool is thinner at the bottom and a little wider going upwards, so by cramming it in there, the two halves get forced apart just a bit.
That's where I had to use a scalpel, because it's thin enough to fit into the tiny gap that should show at the top of the bag. While there was no glue, the plastic was a little fused together at the top, so I cut the two pegs there through completely. That doesn't make it any less sturdy btw, but I was then finally able to wriggle the two pieces apart.

I put the chain into the empty spots the strap left, and it was the perfect size where I could just attach the other piece and it would stay perfectly in place. But with a smaller one, you'd have to glue it in.
I hope that wasn't too confusing. I painted the bag pieces separately and sealed them with Liquitex Matte Varnish. That way I could also paint the inside black. Then I just assembled everything. I think once I figured out how to split it open, I was done in about two hours.
#I've been gone a little while huh#life got in the way and I needed a break#honestly it hasn't even been a month yet it still feels weird#that aside#I should paint more of the accessories it's fun#monster high#monster high g3#frankie stein#and#frankie's awesome camera bag#I want one so bad#doll accessories#rätposting#rät's art shenanigans
379 notes
·
View notes
Text
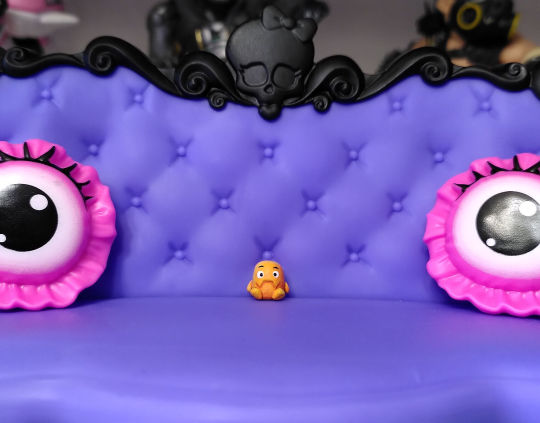
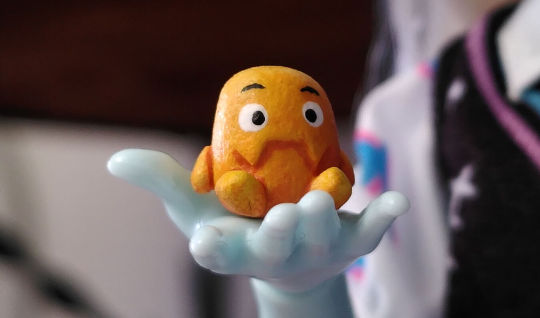
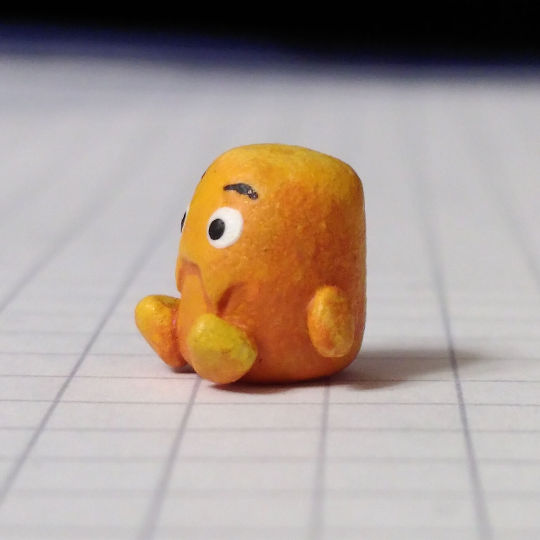
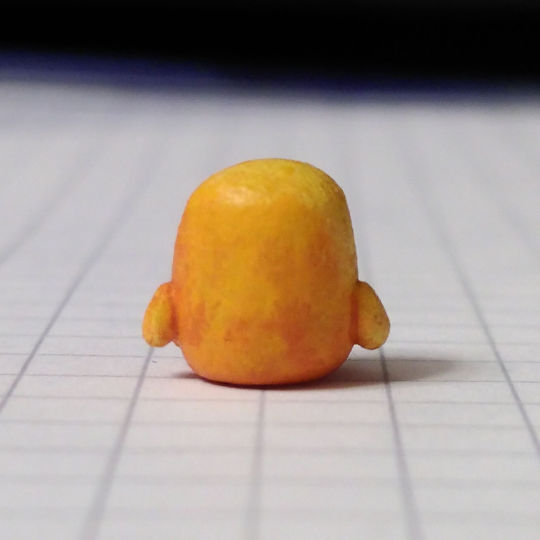
Introducing...
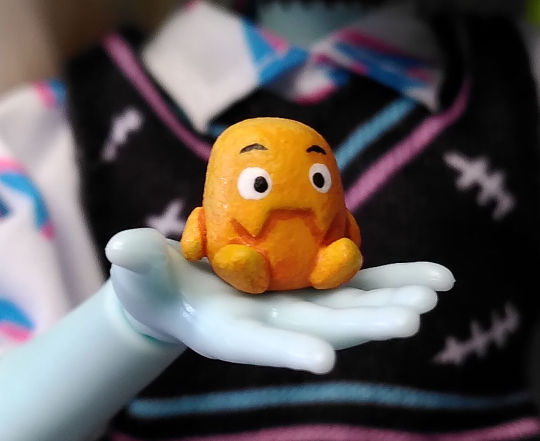
The living tater tyke.

I don't have Draculaura yet, so Frankie will be holding him for now. Might post more pictures once I do have her.
I made two because I could, and now I wish I had fifty to hide in the strangest places.
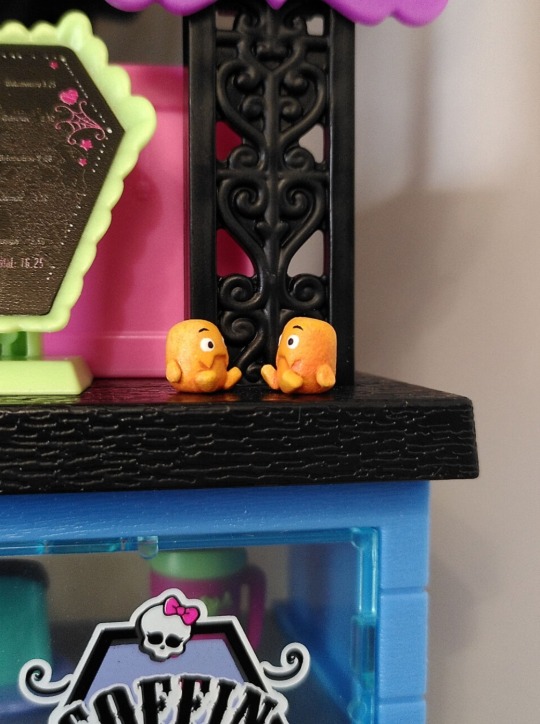

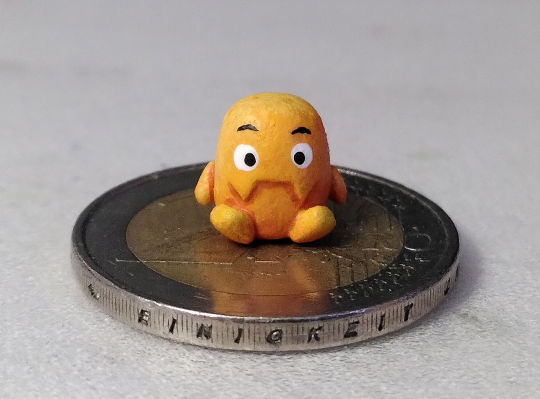
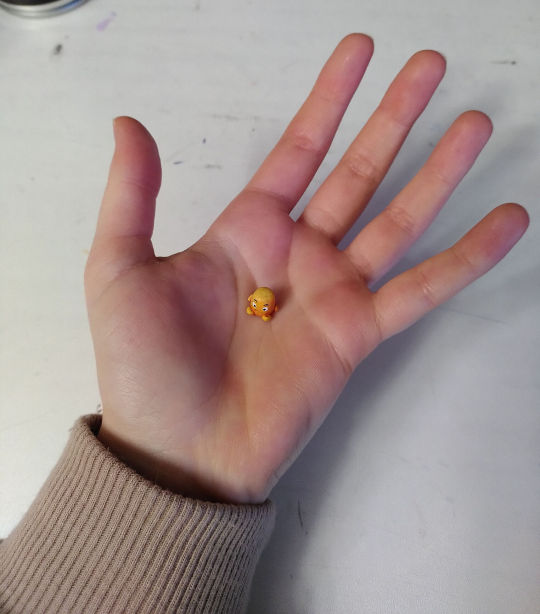
They are tiny, because I wanted them to be accurate to the show and to scale with the dolls, so they can hold them. Best decision I could have made.
These pictures don't do their smallness justice, but I tried.
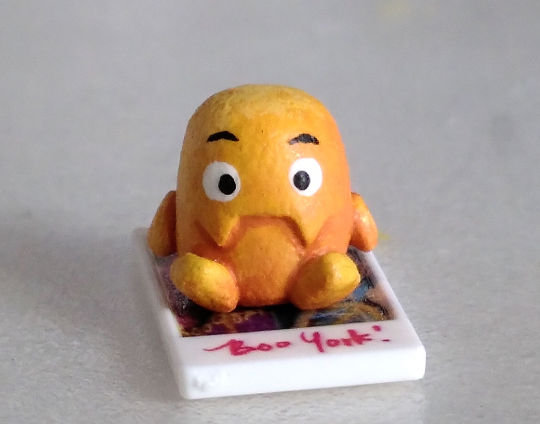
They are made out of polymer clay, and I'd be willing to make another post about how I made and painted them if anyone's interested. I think everyone's dolls deserve to have one of these to hold.
Update! I've added a link to the making of post for convenince ^-^
433 notes
·
View notes
Text
This is what's gonna happen in the new episode a rat told me so in my dreams
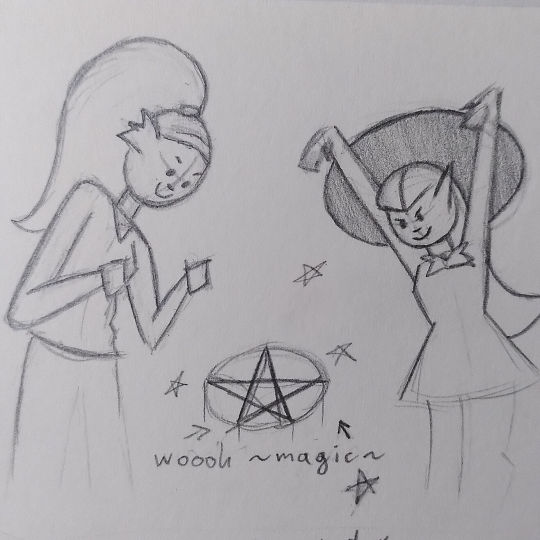


Yeah so they're all gay actually, Lagoona and Draculaura are going to hold hands and Dracula will have his own bi awakening in a few years.
#what do you mean that's not actually going to happen#idk what you're talking about#btw after this they totally go on a date; mhm#and Draculaura's parents got divorced because her mom is a lesbian. if you couldn't tell#you can rip dracugoona out of my cold; dead hands#tbh I don't really like making rushed things like this#but I don't have the time for something more detailed so crappy sketches are what you're getting#I used no references#whatever#gotta work past my own perfectionism yada yada#well at least I had fun#we amuse ourselves around here.#monster high#monster high g3#dracugoona#lagoona blue#draculaura#rätposting#rät's art shenanigans
141 notes
·
View notes
Text

Some quick sketches of Drac in her bat form, cuz I like bats.
#I wasn't even gonna try to make these show-accurate because I would not be able to make that work#monster high#monster high g3#draculaura#rätposting#rät's art shenanigans
125 notes
·
View notes
Text
Soo... I made Draculaura's hat.


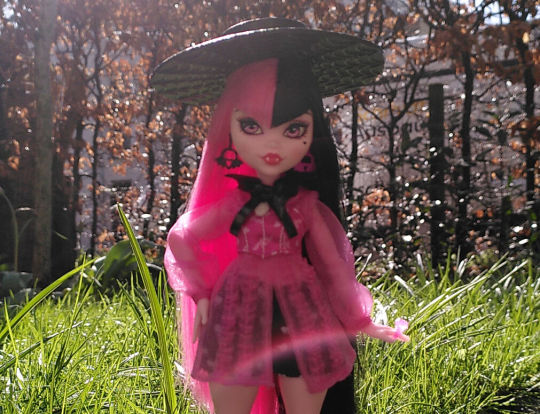

I always thought it was such a shame that it wasn't included, since her prototype had it, and it looked good!
That aside, it was actually fairly easy to do, and I'm pretty happy with the results.
I... Did actually make a video tutorial, but it's not entirely done yet, and I don't know if I want to share it? I'm not exactly very good at that kind of thing, and english isn't my first language.
#her not having the hat honestly really bugged me#she wears it constantly in the show why was it not included#monster high#monster high g3#draculaura#rätposting#rät's art shenanigans
65 notes
·
View notes
Text
I haven't had the time to do anything really halloweeny this year, but I've got some older projects I never shared so... Why not?

I present: my ring holder (plus bracelets).
I made the hand out of polymer clay instead of learning how to make a mold or something cause past me was into suffering apparently (jk I just felt like making a hand. Truth be told it was good practice). Standard procedure, inside is a wire skeleton surrounded by aluminium foil, and then I globbed clay on there and shaped it until it looked right. Which took forever.
This was several years ago now so I could do a better job these days, but I still like it. It's a fun spooky prop with that cauldron I made for it (that's just craft foam. Paint it black, throw metallic paint on top and you're golden).
I actually only started using it for jewelry after my cat threw it on the floor... It hides the cracks.
#have you guys made anything for halloween this year?#it's my favourite season but I didn't even carve a pumpkin#I'll buy some carving tools next year and do a proper job then#I'm not too hung up on the lack of vibes though#it might have taken far too long but I'm getting into the spirit of things now#cause the trees and everything finally got the memo and started being autumnal#I'll just keep celebrating until spring like every year#rätposting#polymer clay#clay sculpture#spooky season#rät's art shenanigans
29 notes
·
View notes
Note
there are many ways to boop~
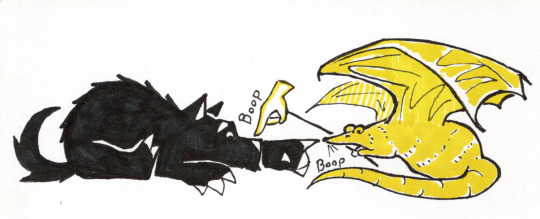
Oh so many >:)
#I've got the high ground ehehe#aaaa this was such a delightful thing to see#your drawing is so cute T-T#the boop stick so my rat can reach is everything hdjshdhh#that's amazing#the way they're both sitting there reminds me of guinea pigs#the shapes are similar here XD I love that so much#you've given my rat such an elegant snoot~#the wings look so graaand#so very shaped#and your wolf's paws are just so adorable#I can't it's the cutest thing I've seen all day#just -boop-boop-boop-boop- I can imagine that going on and on hehe#I'm in such a good mood#thank you Dauntless ^-^#rätposting#ask by:#a-dauntless-daffodil#art by dauntless#rät's art shenanigans#BOOP └( ^ω^)」#also I was desperately searching for my pens as I was drawing this and then. they were right next to me djshsj#if something isn't in its usual spot I just think it's gone 💀
10 notes
·
View notes
Text
All right, here's a Making Of/How To for the Tater Tyke, since it's been requested.
I will try to explain everything as best as I can.
I'm sure you could use any clay, but I went with Super Sculpey specifically. An oven bake clay just gives you more control and time to work with it than air dry.
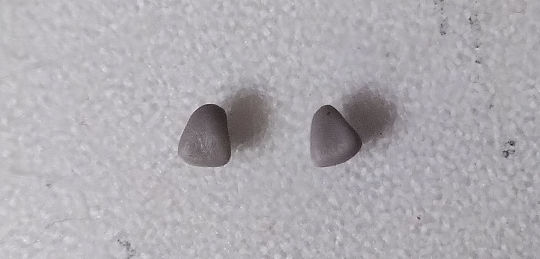
These are nine millimeters tall, so take a very small amount of clay, and form it into a smooth ball. If you want to make two, make one bigger ball and cut it in half, so you're left with about the same amount of clay for each Tater Tyke.

Now roll them, gently, against your work surface to shape them into a cylinder, but make sure the edges have a soft transition.
Don't forget to use a reference!

You'll see that he's a little thicker toward the bottom, important detail.
Next, I sculpted the mouth, for which I used this tool:

I do not what it's called, it just came with the set I have. You don't need this one specifically, the flat, somewhat pointed end is what matters. With it, I pressed the shape in to make the teeth a little 3d, and then smoothed out whatever areas lost their shape a little in the process.
Now the body is done! Onto the limbs.
Starting with the feet, take a tiny, and I do mean tiny, ball of clay. I used my fingernails to press them into triangles, where they will end up being a little bulky, so press them a bit flatter.
You should be left with something like this.
Repeat the same process for the hands, but make them slightly smaller, and rounder where the fingers would be, to form a teardrop-shape.
Now you can attach them. Apply a little liquid clay where they should go, which will function like glue. If you're using air dry clay, you can just attach them and glue them on more permanently after they've dried.

For the position, the angle is a bit difficult to explain. I put the base of the feet just slightly closer together than the tips of the teeth, and made them point outward, so they're just sitting comfortably. For the hands, I pressed them a little more firmly on where the arms would be, so that they look more natural going out from the body, and made the ends of them go outward a bit more.
And that's it for sculpting! Let them dry/ bake, and then you can move on to painting.
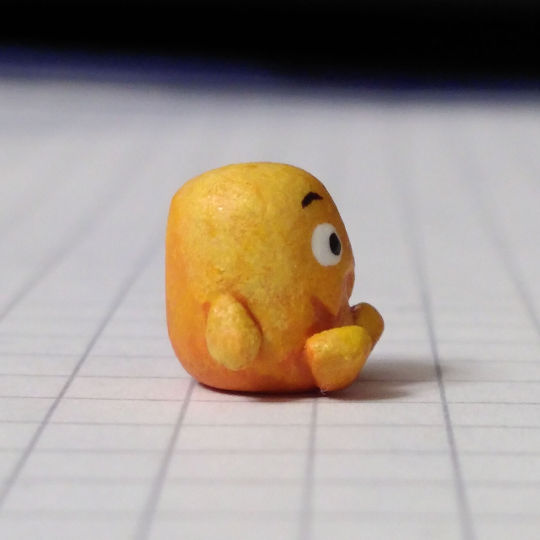
First, cover them in white paint as a base, because yellow is always rather translucent. But do so carefully, acrylic paint can leave texture, which would be quite noticeable at this scale.
Now, the paint colors I used are primary yellow, vermilion red, white, black, ivory and lavender.
I mixed yellow together with just a little red, to be left with a light orange. This, however, was too bright, so I added just a smidge of lavender to dull the color out a bit. This is the base color, which I fully painted the little guys in.
Then, I made a slightly lighter and darker version of this shade, by adding a little yellow or red respectively. I took my crappiest small brush and stippled these colors on somewhat randomly.
I made one even darker shade by adding just a little more red, and the lightest shade by adding ivory.
I used these colors to force/fake the lighting. Add the darkest shade on the bottom and right side of the Tater Tyke, and the lightest shade on the upper and left side. Again, stippling them on.
I also used the darker shade on the base of the feet, and then highlighted the edges of them and the hands with the lightest shade.
Like I said, yellow-ish colors like this are always rather translucent, so they blend together quite well. But if something looks too harsh, just brush some of it away with your finger, that should soften the transition.
Now, once again using the darkest shade, take your smallest detail brush and add a line right under the mouth, to make it pop more. You can also outline the limbs like this.
Here are more pictures to hopefully help you get a better idea of everything I'm trying to explain.

All that's missing now are the eyes and eyebrows.
For the eyes, I used a small dotting tool to archive that round shape more easily. I recommend trying this out on a different surface first, to get a feel for it.
If the eyes aren't perfect circles, you can push paint that juts out too far in with your fingernail, acrylic paint is pretty forgiving. Once they're dry, you can round out areas with your detail brush.
Use a smaller dotting tool for the pupils. I made them a bit cross eyed, because I noticed that in the show, and I think it looks cute. If you don't like the position of the pupils, wipe them off and let the remaining paint dry. Paint over with white again, and give it another shot.
Finally, the eyebrows. They're just a black line. Use your thin brush and reference the show. The eyebrows really influence the expression, so be careful. I recommend not placing them too high to avoid a spooked look.
That's it for painting! But we're not quite done. I covered them in a thin layer of Liquitex Matte Varnish, which really helps bring out the colors more. I painted most of them in a thin coat, let them dry for three hours, and then painted the areas I couldn't reach before.
But this varnish is never actually matte, so I also used a spray varnish (Molotov matte UV varnish). I bought it some time ago because it's the only one that seemed good that I could find for a decent price, and I like it a lot.
It dries fast and doesn't get moody depending on the temperature and humidity, and the results look great, in my experience. It leaves a very small amount of texture, which I like, because it makes my sculptures easier to photograph. My camera doesn't like to focus on anything too smooth. Im just mentioning the texture, because I'm not sure you'd want that for something like doll customisation. Especially because it can lighten colors if you add to many layers of it.
I was initially concerned about using spray varnish on something so small, but it wasn't an issue. i put the Tater Tykes on some aluminium foil outside, and put some rocks on it so it won't fly away.
Don't forget to wear protective glasses and a good mask! This stuff is toxic. That goes for any spray varnish, honestly.
And that's it! Really this time. Just let them fully dry and you've got yourself some adorable little fellas.
They took me around five hours to make, but that's mostly because I hadn't made something like them before. Figuring everything out eats up a lot of time. The process would go by quicker if I made them again.
I hope this helps if anyone is genuinely interested in making them, feel free to ask if you have questions. If you were just curious, I hope this was somewhat interesting.
On a final note, I'd just like to say that I'm really happy everyone likes them as much as I do, and I'm looking forward to making more doll accessories in the future.
Have a great day! And remember to drink some water, I seem to have forgotten to do so while writing this.
#monster high#monster high g3#tater tyke#tater tots#polymer clay#doll accessories#rätposting#rät's art shenanigans
89 notes
·
View notes
Text
I'm having too much fun with these silly scenarios


...They got banned after that second date :|
Inspired by these tags:

From this post:
By @curehibiscus. Thanks for the idea!
#do you guys remember that episode#where Drac kept agreeing to hide in the pipes because she couldn't say no to Lagoona?#this is also inspired by that#your honour I love them#monster high#monster high g3#draculaura#lagoona blue#dracugoona#rätposting#...please excuse my crappy handwriting I usually write in cursive :|#rät's art shenanigans
12 notes
·
View notes
Text
#<- prev I’m so glad you got through that and that you’re here with us now#the world deserves you#pretty sure the birds would stop singing if you left#and I’m glad you’re able to love yourself more#there’s so many things to love about yourself#I know I’ve said it before#but I’ll say it again#I’m so proud of you#sorry feeling extra sappy tonight#a little tree dripping with tree sap hehe#🌲#<- me in the flesh

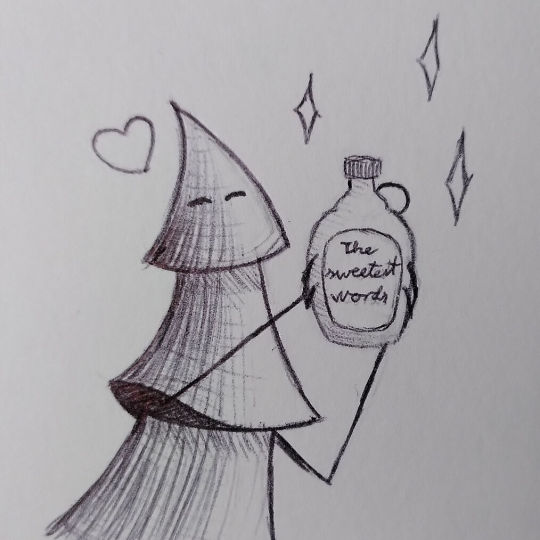
@bluebelleisabelle is this you?
No but seriously, I really appreciate you <3
#you're too kind#please don't feel like you need to do these things; but#thank you#this world is lucky to have you in it#tree you is supposed to be holding a bottle of sap I hope that's apparent haha#I hope you're taking care of yourself#rätposting#rät's art shenanigans
6 notes
·
View notes
Last Seen Blogs

bontensucker
Øne Minute For Heaven
hwangalleryy
LINA!

sophiasharp
Idk What I’m Doing But That Won’t Stop Me
pdmn
Stroll