#scroll view using xcode 8
Explore tagged Tumblr posts
Visit Tumblr Blog
Explore Tumblr blogs with no restrictions, modern design and the best experience.
Last Seen Tumblr Blogs


Fun Fact
Tumblr is used by 21% of adults online aged 18-29 years.
Video
youtube
How to use ScrollView with AutoLayout in iOS using Xcode8 ?
0 notes
Text
Volume scroll windows 10 disable

#Volume scroll windows 10 disable how to
#Volume scroll windows 10 disable windows 10
■From the displayed list, go to Preferences. ■Once opened, go to the Tools menu from the menu bar. ■Initialize the VLC Player by double-clicking its icon, or by opening any audio or video file in the application. Remember you need to have editors like Xcode to open plist file Go to Details and click on Extension options Click on the downward arrow located at the top-right corner of your Ubuntu desktop and then click the settings icon from the following view: The Settings utility opens in the Wi-Fi tab by default Yes the mouse click disabled with this software is. ■Log on to the computer using the account in which you are experiencing the problem while using the VLC Player. In such case, this tutorial will help you out to rectify the issue and get the default settings back.īy following the instructions given in this tutorial, you will be able to get the mouse wheel controlling the volume of the VLC Player feature work. This video could be useful for the people that don't have DPI button or the.
#Volume scroll windows 10 disable how to
After opening such document or web page, you can move the mouse wheel up or down to check if it is functioning properly and the document or the web page are scrolling up or down as expected.Īssuming that your mouse wheel is functioning properly, the next possibility is that your instance of VLC Player has been misconfigured either automatically or manually by any incompatible third-party application or by any other person respectively. In this video I will show you how to disable volume with the mouse scroll wheel. Look for this option: Show desktop overlay when. The volume slider itself will not pop-up and is. Check individual application settings Go to Menu Edit preferences. When you scroll the mouse wheel on its active areas, you will be able to increase/decrease the volume, as shown in the GIF below. You can do so by opening any document or web page that has vertical scrollbar. It’s a free Windows app that lets you increase or decrease the system volume by scrolling the mouse wheel over an active area. If your instance of VLC Player no long responds to the mouse wheel movements, your first step should be to check if the mouse wheel is working properly and is not faulty. Likewise, when the mouse wheel is moved down, the volume decreases.
#Volume scroll windows 10 disable windows 10
Similar: How to Restore Lost or Damaged Files in Windows 10, 8, 7, and Vista How to Reset or Reinstall Windows 10 Using the Cloud Enable, Disable, Manage, Delete or Create a System. Click on the dropdown box next to Service status. When the mouse wheel is moved up, the volume increases. Scroll down to Volume Shadow Copy, and double-click it. As per VLC Player’s default configuration, every time the program is used to play the audio or video file, its volume can be controlled by moving the mouse wheel up or down.
0 notes
Text
Instal gnu octave on mac

#Instal gnu octave on mac install#
#Instal gnu octave on mac full#
#Instal gnu octave on mac download#
You can do this via the Terminal.app ( Applications → Utilities → Terminal) with the following command (which you may copy and paste): Download command line toolsĭownload command line tools for Xcode.
#Instal gnu octave on mac download#
If you have been trying to dodge your way out of Apple’s enormous 2.6GB Xcode app, get ready to face the demon: almost nothing related to coding will work on your Mac without Xcode and its libraries, so head to the App store and download Xcode.
#Instal gnu octave on mac install#
Install gnuplot (remove the -with-name for terminals you do not need brew install gnuplot -with-aquaterm -with-qt4 -with-x11 Install aqua if you want AquaTerm brew install Caskroom/cask/aquaterm Install xquartz if you want X11 brew cask install xquartz Install homebrew via the Terminal with /usr/bin/ruby -e "$(curl -fsSL )" If all you are interested in doing is to install gnuplot save yourself the trouble of scrolling down and follow these instructions (tested on macOS High Sierra) to install both AquaTerm and X11, omitting commands as necessary if you only wish to use one and not the other. In view of public demand, below is a small update. This article has turned out to be more popular than I hoped, with several universities and academic institutions sending lots of traffic towards it, all the way from these interesting lecture notes from Stony Brook University, NY, to this Chinese (I think) forum. A couple of my views have also changed as a result of this: I think AquaTerm is good enough for gnuplot and the decision to use X11 should only be a matter of specific needs or taste. Update, 9 August 2017 Since this article was written about two years ago a new version of gnuplot has been released, as have two new versions of macOS. Specifically, the above two steps replace steps 7 and 8 in the main article below. sudo port install gnuplot +qt5 + x11 +aquaterm +wxwidgets will install gnuplot with QT5, x11, AquaTerm and WXT.Ĭlick here to skip older updates and go to the main (legacy) article which runs you through XCode, GCC etc.
Install gnuplot with required terminals e.g.
Check what terminals are available (optional) with sudo port variant gnuplot.
Install MacPorts by picking a suitable package on their installation page.
#Instal gnu octave on mac full#
Thankfully MacPorts still supports a robust full gnuplot installation which makes me change my recommendation from ‘always install Homebrew’ to ‘always install both Homebrew and MacPorts’. This makes this a little inconvenient, not to mention useless. Update, 6 December 2019 Since this article was written about five years ago Homebrew has changed its gnuplot installation system and does not allow picking terminals. At a time when installing games take a two clicks, it simply is not straightforward to install gnuplot.Īfter scratching my head over it for two days straight, I finally installed gcc, gnuplot, Octave and LaTeX on my new Mac (OS X 10.10.3, Yosemite) and decided to note some points/instructions down here for anyone else looking for a simple solution from start to finish contained in one place. However, it turns out that installing gnuplot (or Octave, for that matter - but let us leave that for another day) on a Mac is a pain in the neck. Hardly anyone has gone through a college mathematics or physics course without meeting the wonderful gnuplot.
0 notes
Text
Top Mobile App Development Frameworks
One common question that revolves in the thoughts of the app developers is ‘What is the right framework for mobile app development?’ Quite often, the app developers need to transform an iOS application into an Android application. So it becomes crucial to choose the right frameworks which enable them to convert an application in one ecosystem into another.
The purpose of choosing any of the cross-platform mobile app development frameworks is to make the work of an individual developer or a business intelligence solutions, easier and the experience much more flexible.
Which Frameworks Are Used For Mobile App Development?
1. React Native
React Native is one of the best frameworks for mobile app development and is giving competition to Xamarin and Native Scripts. It was developed by Facebook and is used by Airbnb, Instagram, Tesla, Walmart and many other Fortune 500 companies. It uses the same UI building blocks that Android and iOS development framework does. This is why it becomes difficult to differentiate between an app built using React Native and an app build using Objective-C.
2. Flutter
Flutter came unannounced and made its place as one of the best hybrid mobile app development frameworks. What makes Flutter app development software unique is that it uses 2D rendering engine known as Skia to create visuals. These visuals are made to look like Material Design and Cupertino style widgets but in reality, they are not. The framework allows ease of testing to developers without restarting the project if any error occurs.
3. Mobile Angular UI
Mobile Angular UI is a great hybrid mobile web app framework. It is especially good for those who prefer Bootstrap and Angular. Mobile Angular UI is a combination of Bootstrap and Angular framework that lets you build using HTML5. In one of our previous blogs on React vs Angular: Which is The Best JavaScript Framework we discussed why it better to use AngularJS over react native when it comes to performance boost. Angular gives a good server side support and supports complex apps with ease.
4. Native Scripts
Listed among the best Android framework, Native Scripts is backed by a Bulgarian software company, Telerik. It was originally created by Progress. The apps built with Native Scripts use the same APIs as if they were built using Xcode or Android studio.
The official website of Native Scripts continuously provides resources and tutorials for budding developers so that they can learn to work in this framework like a pro.
5. Xamarin
Xamarin is owned by Microsoft and is based in San Francisco. With the help of C# codebase, app developers can use Xamarin tools to develop for Android, iOS and Windows apps. These codes can be shared across multiple platforms including Windows and Mac OS.
6. Ionic
One of the Best Mobile Development Framework, Ionic is the best framework for mobile app development software and also it’s free. It is quite popular among the app development frameworks. Ionic is basically a front-end network, which helps to build native-like mobile apps with HTML, CSS3 and Javascript. It works in an optimized manner on the latest mobile devices available and provides the best possible environment for the app to hit the market in the desired way.
An Ionic market is an online place where templates and projects developed by other developers can be downloaded. The Ionic lab components make sure that you test your app in the most popular among the platforms, Android and iOS.
7. Framework7
This is a free framework for mobile app development which can be used to develop hybrid apps for Android and iOS. It uses HTML, CSS and JavaScript with ease during app development. It provides some extraordinary features such as supports multiple viewing, library agnostic, native scrolling, caching, browser history, etc.
8. Swiftic
Swiftic is one of the best mobile development framework is accessible in the iOS platform. It has a feature of an effectively navigable interface. Utilizing Swiftic is an advantageous alternative as you get a 30 days money-back promise option for every one of its plans. In addition, it has an additional half year of success scheme. In the event that you don’t get any outcome from it, then half year service is free.
Wrapping Up
If you wish to learn more about app development frameworks that mobile app development companies are using today then this app development guide will help you through the entire process.
0 notes
Text
Custom Controls For Ios Macos Tvos And Watchos Cocoa Controls

Custom Controls For Ios Macos Tvos And Watchos Cocoa Controls 1
Custom Controls For Ios Macos Tvos And Watchos Cocoa Controls 2
Custom Controls For Ios Macos Tvos And Watchos Cocoa Controls 8
iOS Design Themes
MacOS, iOS, tvOS, watchOS, Unix software development and consulting. Lead the engineering of an internal macOS / Cocoa retail store app based on an existing iOS app and shared data model. 1 day ago Xcode 8. This is a legacy document for Xcode 9 and migrating from Swift 3. Png files) or vectors (aka. 4 unbelievable provide quick and smooth while the editing large files. This version includes the SDKs for iOS 13, iPadOS 13, macOS Catalina, tvOS 13, and watchOS 6. Trusted Mac download Xcode 11. Com and create a new, free one. Official Sentry SDK for iOS / tvOS / macOS / watchOS (1). This SDK is written in Objective-C but also provides a nice Swift interface. Remember to call this as early in your application life cycle as possible Ideally in applicationDidFinishLaunching in AppDelegate. Import Sentry //. If you need to use a custom font, consider using it sparingly and be sure it's easy to read at a glance. It often works well to use a custom font for the large text in a widget and use SF Pro for the smaller text. For guidance, see Typography (iOS) and Typography (macOS). Always use text elements in a widget to ensure that your text scales well. It uses Objective-C and Swift for establishing watchOS, iOS, macOS, and tvOS. The exact development process has three stages: prototype, code, and deliver. (like CoCoa Controls and Cocoa Touch.
As an app designer, you have the opportunity to deliver an extraordinary product that rises to the top of the App Store charts. To do so, you'll need to meet high expectations for quality and functionality.
Three primary themes differentiate iOS from other platforms:
Clarity. Throughout the system, text is legible at every size, icons are precise and lucid, adornments are subtle and appropriate, and a sharpened focus on functionality motivates the design. Negative space, color, fonts, graphics, and interface elements subtly highlight important content and convey interactivity.
Deference. Fluid motion and a crisp, beautiful interface help people understand and interact with content while never competing with it. Content typically fills the entire screen, while translucency and blurring often hint at more. Minimal use of bezels, gradients, and drop shadows keep the interface light and airy, while ensuring that content is paramount.
Depth. Distinct visual layers and realistic motion convey hierarchy, impart vitality, and facilitate understanding. Touch and discoverability heighten delight and enable access to functionality and additional content without losing context. Transitions provide a sense of depth as you navigate through content.
Design Principles
To maximize impact and reach, keep the following principles in mind as you imagine your app’s identity.
Aesthetic Integrity
Aesthetic integrity represents how well an app’s appearance and behavior integrate with its function. For example, an app that helps people perform a serious task can keep them focused by using subtle, unobtrusive graphics, standard controls, and predictable behaviors. On the other hand, an immersive app, such as a game, can deliver a captivating appearance that promises fun and excitement, while encouraging discovery.
Consistency
A consistent app implements familiar standards and paradigms by using system-provided interface elements, well-known icons, standard text styles, and uniform terminology. The app incorporates features and behaviors in ways people expect.
Direct Manipulation
The direct manipulation of onscreen content engages people and facilitates understanding. Users experience direct manipulation when they rotate the device or use gestures to affect onscreen content. Through direct manipulation, they can see the immediate, visible results of their actions.
Feedback
Custom Controls For Ios Macos Tvos And Watchos Cocoa Controls 1
Feedback acknowledges actions and shows results to keep people informed. The built-in iOS apps provide perceptible feedback in response to every user action. Interactive elements are highlighted briefly when tapped, progress indicators communicate the status of long-running operations, and animation and sound help clarify the results of actions.
Metaphors

People learn more quickly when an app’s virtual objects and actions are metaphors for familiar experiences—whether rooted in the real or digital world. Metaphors work well in iOS because people physically interact with the screen. They move views out of the way to expose content beneath. They drag and swipe content. They toggle switches, move sliders, and scroll through picker values. They even flick through pages of books and magazines.
Custom Controls For Ios Macos Tvos And Watchos Cocoa Controls 2
User Control
Custom Controls For Ios Macos Tvos And Watchos Cocoa Controls 8
Throughout iOS, people—not apps—are in control. An app can suggest a course of action or warn about dangerous consequences, but it’s usually a mistake for the app to take over the decision-making. The best apps find the correct balance between enabling users and avoiding unwanted outcomes. An app can make people feel like they’re in control by keeping interactive elements familiar and predictable, confirming destructive actions, and making it easy to cancel operations, even when they’re already underway.
0 notes
Photo
15 Best Mobile App Templates on CodeCanyon
Are you tired of wasting time and money on creating your next mobile app? Does creating an app seem like a confusing and frustrating process?
Try using mobile app templates and tools to kick start your app idea—with no knowledge of coding required.
A mobile app template cuts down on the amount of time and money you spend creating your next app. Many beginners use CodeCanyon app templates as a learning tool to improve their coding skills, while professionals use them to jump start their next app project.
One of the many high-quality mobile apps and tools available on CodeCanyon
App developers are expensive and working on the development of your next app without any professional help can be daunting. CodeCanyon offers some of the highest quality mobile app templates and tools for you to download and implement into your app right now! The CodeCanyon marketplace features a diverse set of templates and tools that can be incredibly valuable to businesses of all different types.
The Best Mobile Apps and Tools on CodeCanyon
Discover over nine thousand of the best mobile app templates and tools ever created on CodeCanyon. With a low-cost one time payment, you can purchase these high-quality templates and tools and improve your app experience for your customers.
Here are some of the weekly best-selling mobile app templates and tools to download on CodeCanyon for 2020.
Best-Selling Mobile Apps and Tools Available on CodeCanyon
These feature-rich mobile app templates will help you offer your customers a modern and professional app experience. With the premium apps and templates offered on CodeCanyon, you will be able to create contemporary apps for the following businesses:
ride-sharing
food services
eCommerce
video games
and much more!
Head on over to CodeCanyon and find the perfect mobile app template now!
Top 15 Mobile App Templates (From CodeCanyon for 2020)
To help you with your search for the best mobile app templates for your business, I've collected fifteen of the most popular and best-selling templates from CodeCanyon:
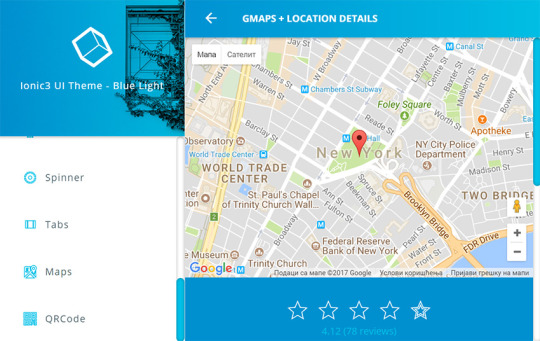
1. Ionic 3 UI Theme and Template App
First up on our list of top mobile apps & tools is a big one. This Ionic 3 template features over 100 screens and components, giving you the ultimate flexibility when it comes to creating your Android or iOS app template.
Here are a few notable features from Ionic 3:
100+ screens
100+ components
built with Ionic 3, Angular 6 and Sass
Firebase back-end
push notifications
2. SuperView
SuperView is an iOS template that allows you to bundle your website into a simple iOS app. The template is ideal for a single page web app with no navigation. The app was developed in Xcode and includes Firebase notifications as a free service.
Here is what you can expect from this app template:
in-app purchases
interstitial ads
social login
splash screen
geolocation
View the video preview of the SuperView to see if it is right for your next app project.
3. Android News App
This Android template has all the modern features of a news app. Coded in the Android-native Java language, the app runs smoothly and will provide a great user experience. The app comes with an admin panel for you to manage the news, categories, notifications, and much more.
Here is what users are saying about this News app:
"Perfect design, clean code, and super customer experience. I recommend!" — CosOleMollel
4. Karenderia Order Taking App
Karenderia is an order taking app for the Karenderia Multiple Restaurant System. You will need to purchase this restaurant system app in order to use the order taking app, but is absolutely worth it. The ordering app has many features that will make sending orders and taking orders a quick and easy process. Here are a few notable features for the Karenderia Order Taking app:
receive orders with android & iOS push notification
accept and decline orders
change order status
send SMS and email to customers about their order status
5. WoWonder Mobile Native Social Timeline Applications
WoWonder is a social timeline application for the WoWonder PHP Social Network. WoWonder Timeline allows users to post and interact with user feeds by liking and commenting.
Here are a few of this apps best features:
ability to add posts to your timeline
view user profiles
marketplace integration
create and view images and albums
Don't miss out on this powerful social timeline app!
6. MStore Pro
This best-selling eCommerce app template is a go-to template if you need a top-quality eCommerce template. MStore Pro converts your current WooCommerc store into a mobile app in no time. The app is compatible with iOS and Android and makes use of the popular payment platforms PayPal and Stripe for transactions on the app.
Here are just a few of the many features that this app comes with:
easy customization for your brand
shipping & coupon support
wishlists
order tracking and order support
pinch and zoom product galleries
Take a look at the live preview of this app to see just how it can fit your eCommerce app needs.
7. Ionic Material Design
Ionic Material Design is developed by Ionic framework. It features 6+ screens that can be such as pricing, news feed, online course, and slide view pages. The app comes with detailed documentation on how to set up the app, so the setup will be quick and easy.
Here is what users are saying about this app:
"The template is one of its kind and a good selling template!" — Spider87
8. Universal Android WebView App
This Android application uses web view content component for displaying content. This template allows you to turn your responsive website into a universal mobile app quickly and easily. The template requires no programming skills and uses just one config file to set up the entire app.
Here are a few of this app's features:
material design following Android design guidelines
super fast and powerful webview engine
Firebase cloud messaging
OneSignal push notifications
GDPR compliant
9. Store Finder iOS
Store Finder is an iOS application that enables you to find stores and shops around you. You can search by category, star your favorite places, and view all the stores on Google Maps.
Here are a few of this app's biggest features:
nearby radius adjustment
user ratings
user profiles
Offline Usage
Social Login
View the live preview of this app to see it in action!
10. AdForest: Classified iOS
Adforest: Classified iOS is a modern classified ads app that can help you grow your classifieds business. You can easily manage your product listing for your ad posting website on the app. Adforest features very handy tools such as a multi currency selector, radius search, Google Maps integration, and much more.
Here is what okeshrana88 has to say about this app:
"A very good application. Nice work on this. It has a lot of exciting features!"
Be sure to take a look at the Adforest Classified iOS live preview.
11. The City: Place App
The City is an Android app template that displays places from around a city with detailed descriptions and points of interest. This app is suitable for tourists and city guides. The City can even run offline making this a valuable app for travelers.
Here are a few valuable features that are implemented in this app template:
cached images
hide on scroll action bar
customizable interface colors
page transition animations
12. CiyaShop Native Android Application
CiyaShop is the ideal Android application for your online store. The app features a sharp design and 20+ demos for you to choose from when building the application. With your purchase, you will also receive 40+ screens and over 10 premium features, such as rewards points, scratch cards, in-app coupons, and multi-currency select.
Check out the live preview of CiyaShop now!
13. WebViewGold for iOS
This handy app lets you convert your website and web apps into apps for iOS. The app template supports all types of web apps and websites including HTML, PHP, WordPress, and much more. No coding and plugins are required to make transform your websites and apps into an iOS app.
View the live preview of WebViewGold to see some examples of the conversion into an iOS app.
14. Android Flat UI Template
Looking for a universal template that can work for a wide variety of different Android apps? The Android Flat UI template provides three different themed apps using a flat concept that makes the application look impeccable.
Here are a few notable features from this template:
7 predefined colors
6 custom UI controls
3 themed lists
3 template applications
custom effects for browsing master-detail data
15. Android Woocommerce
Android WooCommerce is a complete mobile app solution for the Android platform with WordPress WooCommerce as a back-end. This app will work for any eCommerce store and has all the features of a modern eCommerce app.
Here are a few notable features for this eCommerce app:
scratch cards
One Signal push notifications
multiple checkout options
compatible with any WooComerce theme
supports all major payment gateways
Now let's have a look at some of the best free mobile app templates and tools that you can download.
5 Free Mobile Apps and Tools for Download in 2020)
The premium mobile app templates available on CodeCanyon will undoubtedly give you the most advanced features and the best possible user experience. They are complete apps with full source code—in many cases you can customize them to create your own working app, without any coding. However, if you're on a tight budget, you might not want to use a paid template. The good news is that there are free alternatives to these premium mobile app templates.
Many mobile app design templates or UI kits have been created by designers and are free to download and use in your own project. To create an app from one of these free app design templates, you will need to do all the coding yourself, though. The UI kit or design template will only include the layout and graphics for your app—you'll have to figure out how to turn this design into a real app.
Below are a collection of the five best free mobile app design templates that you can download for free in 2020.
1. Cryptocurrency Wallet App
This cryptocurrency app UI design is modern and eye-catching. All the necessary pages needed for a cryptocurrency app are included with this UI kit such as profile pages, candlestick charts, and your crypto wallet screens.
2. Atom Design UI Kit
This free UI kit features over 60 screens that will work best for eCommerce apps. Each screen is fully customizable and layered and grouped in Sketch App. This UI kit can be used to fit either Android or iOS apps.
3. Android GUI template
The Android GUI template will give you a great starting point for your next Android app project. The template comes with 9 different screens for you to start from and customize.
4. Ecommerce Product Page
If you are in need of a well-designed product page then this eCommerce design template will work for you. Whatever product you are selling, you can use this template to highlight your product's best qualities.
5. Game App UI
If you will be charging for your game app, then this minimal game UI design template includes multiple screens for purchasing games. The UI kit features a black background with a trendy looking layout.
Discover More Great Mobile Apps & Tools for 2020
While the Mobile apps and tools mentioned above are some of the best available for 2020, they may not be what your app needs at this point.
If none of the apps and tools mentioned seem to work for your next app, then be sure to check out all our other articles that contain many more high-quality mobile apps and tools for you to download:
App Templates
20 Best Android App Templates of 2020
Franc Lucas
iOS SDK
19 Best iOS App Templates of 2020
Daniel Strongin
Mobile Development
How to Monetize an App: 15 Best Mobile Templates
Franc Lucas
Download a Premium Mobile App Template Now!
Don't waste any more time and money hiring expensive developers or trying to create a mobile app from scratch. CodeCanyon gives you access to a huge library of high-quality mobile apps and tools for all types of applications.
Whether you are looking to create an eCommerce app, food ordering app, or a gaming app, CodeCanyon has the tools necessary for you to start the app creation process with a professional template and UI kit.
If you creating an iOS or Android app, CodeCanyon will have an assortment of tools for you to choose from. Don't miss out on all the other premium products has to offer on CodeCanyon as well. You can find everything from web templates, PHP scripts, WordPress themes, and much more.
by Daniel Strongin via Envato Tuts+ Code https://ift.tt/2CIBJeR
0 notes
Link
Rebeloper Messages - the Ultimate iMessage App Template ##udemy ##UdemyFreeCourses #app #iMessage #Messages #Rebeloper #Template #Ultimate Rebeloper Messages - the Ultimate iMessage App Template The ONLY course with an iMessages App Template with In App Purchases! Update: Rebeloper Messages 12 is here with a brand new Swift 4.2 project and awesome new features: everything included in Rebeloper Messages X + written from scratch in Swift 4.2 iOS 12 ready works in Xcode 10 now has a Parent app Update: Rebeloper Messages X is here with a brand new Swift 4 project and awesome new features: new videos: What's new in Rebeloper Messages X written from scratch in Swift 4 iOS 11 ready works in Xcode 9 or later unlimited stickers unlimited categories unlimited in-app purchases (auto-renewable subscriptions, non-consumables) choose sticker count in a row let users download your iMessage app for free - this is how you will get tons of downloads free stickers / locked stickers custom Background custom theme color supports simple stickers (png, jpg) put Locked stickers anywhere in your category (at the beginning, at the end, mixed) the whole app supports Accessibility Voice frequently used stickers section locked stickers cannot be sent; instead an alert pops up asking for in-app purchase unique categories menu setup takes only 15 minutes due to newly added Plist files supports all Apple mobile devices including iPad Pro, iPhone 8, iPhone 8 Plus and iPhone X much more... Don't want to update to Swift 4 / iOS11 / Xcode 9? We have got your back. You can still have access to Rebeloper Messages 3 that works gorgeously with Swift 3/ iOS10 / Xcode 8! Just take a look at the features the lates version 3.0.5 has to offer. Update: Rebeloper Messages 3 is here with brand new features: new video: What’s new in Rebeloper Messages 3 3 categories 3 auto-renewable subscriptions 3 non-consumable in-app purchases the ability to choose sticker sizes much more UPDATE: Now Supports Auto-Renewable Subscriptions and Gifs (Gifs are no longer supported in v.10.0.0+)! The iMessage App Store Gold Rush has just begun! Be among the firsts who make a huge profit! Rebeloper Messages brings Free to Play to the iMessage App Store. Now you can let users download your app for free, let them try out some of your stickers and than pay for extra Stickers with In-app Purchases. You will get your hands on the Rebeloper Messages source code and hands on video tutorials how to put your own reskin of it on the App Store. How to Set up and Reskin To better understand how to create your very own version of Rebeloper Messages I'll be showing you how to do it step by step creating a brand new iMessage app called Black Cats Messages. Search for it on the App Store and try it out! Setting this source code up takes less than 5 minutes! It only takes 3 steps: Add your Free Stickers and app theme images Add your In-App Purchase IDs Publish on the App Store And if you need guidance than you’re in good company. You will get access to 2+ hours of hands on video documentation. A step by step video walk trough of everything you need to know from downloading Xcode to Submitting your app to the App Store! When you purchase a Rebeloper Source Code you purchase more than just a source code. You purchase the awesome documentation and constant support. Act now and catch the iMessage App Store Gold Rush! Be the first who unlocks the massive potential of Free to Play! Leverage the power of In-app Purchases. Enrich your app portfolio with this delightful, fun and money maker iMessage app Template! Buy now! Got a question? Ask it in the comments section. I answer each and every question in less than 24 hours, but mostly within 3 hours (if we're not asleep). Customer happiness is our #1 priority. Change Log 12.0.0 - (16.12.2018) • Brand new project rewritten from the ground up in Swift 4.2 10.3.0 - (13.07.2018) • Fixed Restore Purchases not working (files changed: StickersCollectionViewController.swift, MainTabBarController.swift, SwiftyStoreKit folder) 10.2.3 - (02.07.2018) • Fixed support for “Only One Category” version of the app. All you need to do is have only one category set up in the CategoriesData.swift file: Item 0 (files changed: StickersCollectionViewController.swift) 10.2.2 - (19.01.2018) • Added support for “Only One Category” version of the app. All you need to do is have only one category set up in the CategoriesData.swift file: Item 0 (files changed: MainTabBarController.swift) 10.2.1 - (18.10.2017) • Added support for Trial versions in Auto-renewable subscriptions (files changed: MainTabBarController.swift, SubscriptionsData.plist) 10.2.0 - (15.10.2017) • Fixed scrolling all stickers out of view in some cases when in compact mode (files changed: MessagesViewController.swift) • Added cool alert controller (files changed: MessagesViewController.swift, MainTabBarController.swift, StickersCollectionViewController.swift, Setup.swift; folder added: JHTAlertController) 10.1.2 - (13.10.2017) • Fixed number of stickers issue on iPad orientation change (files changed: MessagesViewController.swift, MainTabBarController.swift, StickersCollectionViewController.swift) • Made app compliant to Appstore Review Guideline “3.1.2 - Business - Payments - Subscriptions” to fully meet the terms and conditions for auto-renewing subscriptions, as specified in Schedule 2, section 3.8(b) of the Paid Applications agreement. (files changed: SubscriptionsData.plist, StickersCollectionViewController.swift, MainTabBarController.swift) 10.1.1 - (10.10.2017) • Added ability to set the number of stickers to be different on an iPhone and on an iPad. This way you will not get those gigantic stickers on an iPad or too small ones on an iPhone. (files changed: StickersCollectionViewController.swift, Setup.swift) 10.1.0 - (07.10.2017) • Added option to make app totally free (without any Locked Stickers). Just set “AppUsesInAppPurchases” to “false” in Setup.swift, remove all IAP IDs from the CategoriesData.plist file and set all Stickers to be unlocked (files changed: StickersCollectionViewController.swift, Setup.swift) • Added option to make the app behave as a sticker pack (file changed: StickersCollectionViewController.swift, Setup.swift, MainTabBarController.swift, StickerCell.swift, StickerCategory.swift; file added: AssetExtractor.swift, CustomMSSticker.swift) NOTE: if you select the Sticker Pack Mode than the ‘Frequently Used Stickers’ menu item will automatically be disabled because of the limitations of the native MSStickerView. • Cleaned up comments and code 10.0.4 - (06.10.2017) • Fixed issue of hiding the app and showing the keyboard on every sticker tap (file changed: MessagesViewController.swift, lines 111, 112, 265-269) 10.0.3 - (04.10.2017) • Fixed bug when an auto-renewable was bought but upon tapping on sticker it still asked to purchase with non-consumable (file changed: StickersCollectionViewController.swift, line 348) 10.0.2 - (03.10.2017) Removed unnecessary images Moved 1024x1024 icon into the AppIcon assets folder 10.0.1 - (01.10.2017) • Added new circular Categories Menu 10.0.0 - (28.09.2017) • Updated code to Swift4 / Xcode9 / iOS11 / iPhone8 / iPhone8 Plus / iPhone X. This is a brand new project! You will need to start from scratch 3.0.5 - (13.09.2017) If you have only one IAP than the Purchase All button should not be present in the shop (files changed: MessagesViewController.swift, Settings.swift) 3.0.3 - (30.08.2017) Fixed Locked Stickers remaining at the top when unlocked in case they are presented at the top at the first time (files changed: StickerBrowserViewController.swift) Added Selected Sate for the Category Buttons (files changed: MessagesViewController.swift; files added: ButtonCategory1Selected.png, ButtonCategory2Selected.png, ButtonCategory3Selected.png) Changed design for images ButtonBuy1.png, ButtonBuy2.png, ButtonBuy3.png to better inform the user 3.0.2 - (26.08.2017) New Feature: Added ability to chose to put the Locked Stickers at the top of the stickers list (files changed: StickerBrowserViewController.swift, Settings.swift) 3.0.1 - (26.07.2017) Fixed and improved support for removing the Shop or the Subscribe buttons/functionality (files changed: MessagesViewController.swift, MainInterface.storyboard) Fixed bug of Categories button not working after leaving and coming back to the app (files changed: StickerBrowserViewController.swift) 3.0.0 - (10.07.2017) - This is a BRAND NEW PROJECT; you’ll need to start a new project to update your pre 3.0.0 version apps Added option to choose sticker sizes Silenced a few Warnings Updated project to recommended settings Resized ButtonPurchaseAll.png, ButtonRestore.png and HeaderBackground.png Added new images for update Removed Store.swift Added new stickers to accommodate Categories Changed Setting.swift and MKStoreKitConfigs.plist to accommodate new in-app purchases 2.0.1 - (21.02.2017) Added support for gif Stickers (files changed: StickerBrowserViewController.swift - line 53, Settings.swift - line 27) Added more robust explanation for how to set up Auto-Renewable Subscriptions (files changed: Settings.swift - line 16) 2.0.0 - (18.02.2016) Supports Auto-renewable subscriptions (this is a brand new project; start with a fresh download) 1.0.1 - (20.12.2016) Added Progress Hud (files added: JGProgressHUD folder; RebeloperMessages-Bridging-Header.h; files changed: MessagesViewController.swift, Store.swift) 1.0.0 - (10.11.2016) Initial Release Who this course is for: This course is for anyone who wants to launch an iMessage App with In-App Purchases on the App Store for iMessages. 👉 Activate Udemy Coupon 👈 Free Tutorials Udemy Review Real Discount Udemy Free Courses Udemy Coupon Udemy Francais Coupon Udemy gratuit Coursera and Edx ELearningFree Course Free Online Training Udemy Udemy Free Coupons Udemy Free Discount Coupons Udemy Online Course Udemy Online Training 100% FREE Udemy Discount Coupons https://www.couponudemy.com/blog/rebeloper-messages-the-ultimate-imessage-app-template-2/
0 notes
Text
Apple WWDC 2021, Everything Announced: iOS 15, MacOS Monterey, Watch OS 8, and a whole bag of privacy updates

We are all hearing of several podcasts, updates and key features following Apple’s WWDC 2021. As a result, the users are losing their minds getting worked up over the changes they have not used yet. The new features have us all hyped about the changes we will witness and experience in the coming weeks. Apple has poured down a torrent of changes, security features, customizations, OS updates and whatnot!
With feature-rich content, let’s go eye in the sky and check out everything down the road!
On 7th June, as usual, the WWDC 2021 took place on Monday with a keynote address. Apple made use of this occasion to brag off a big bag of enhancements, security features, software updates, updates in tech development, and other services.
The whole Apple event emphasized all the new ways Apple applications will be able to interact with the other Apple devices, apps and a perpetual list of premium Apple services. Apple characterized itself as the app overload as all eyes (every eye) were on WWDC. Here is a list of key highlights from Monday’s event.
iOS Update
At the start of the show at WWDCs expected, iOS was the star of the show at WWDC. The operating system that powers the iPhone gets updated every fall, and on Monday, Apple gave its first look at the highly anticipated iOS enhancements coming to iOS 15.

FaceTime has saved us all from isolation last year and it is a vital feature and it is getting juiced up with some enhancements. The latest version will be a little bit more zoom-ey with the grid view for group calls. On top of that, this new update would highlight the person speaking and add voice isolation features rendering remote audio conversations feel more natural.
FaceTime is getting its wingman, SharePlay. This enhancement will synchronize the streaming content inside FaceTime and allow the users to watch real-time movies or listen to music while they talk. As usual, this ultimate combo works seamlessly with content from Apple Music and Apple TV+.
On top of that, there is good news for Android and Windows users. Finally, after years, non-iPhone users can join FaceTime calls now. Apple users can easily share a FaceTime link that can be opened in web browsers on Non-Apple devices. Furthermore, the Photos app is getting enhancements that use computer vision technology to recognize and effectively read the text within images.
AirPods Expands Its Usability
Although Apple did not provide any incentives to upgrade to the already expensive AirPods Pro or AirPods Max, these noise-cancelling headphones will witness significant enhancements in the new future. But as a current improvement, these headphones will serve as low-powered hearing aids.
People with mild-hearing losses will soon be able to use a ‘conversation boost’ mode. This mode uses audio processing in combination with the beamforming microphones on the headphones. With this new feature, people will be able to hear conversations more clearly and tune out the ambient background noises.
On top of that, both the pairs of noise-cancelling headphones support spatial audio via the Dolby Atmos. On a related note, TV os will also get spatial audio in the coming future. Users will be able to watch Apple TV in full surround sound with headphones plugged in. Other than that, both the premium headphones will benefit from Apple’s system-wide enhancements to the find-my network. There is now a proximity view that lets you
know when you are getting close. This exciting option shows a notification on your iPhone if you’ve left your headphones behind.
iPad Gets Even Better
For several years, the iPad has been a beloved device in the creative community. But for the data workers who spend half their day writing emails and working on the documents, the iPad has not been a very welcoming working environment. But the WWDC 2021 announced that Apple is working to eliminate every pitfall.

In the update, the iPadOS will get a multitasking menu that appears at the top of the screen. Using the small pop-up menu, users can take apps fulls creen, slide windows over to the side of the screen or create a split-view with multiple applications. With the new update, the users can now seamlessly switch between multiple apps in the split view just with a couple of swipes. These gestures will also work with keyboard shortcuts. The iPad can be a laptop replacement.
The Notes app gets more collaborative and with the ability to see the recent changes, the users can tag their colleagues in a shared document. Widgets also get updates in iPadOS and users can perform actions that make it easier to organize and manage the widgets on their home screen. Not least, the Translate app also gets juiced up with real-time spoken language translations across all the apps and web pages.
iWatch Gets Smarter,the Notes app gets more collaborative and with the ability to see the recent changes, the users can tag their colleagues in a shared document. Widgets also get updates in iPadOS and users can perform actions that make it easier to organize and manage the widgets on their home screen. Lastly, the Translate app also gets juiced up with real-time spoken language translations across all the apps and web pages.
iWatch Gets Smarter
WatchOS 8 gets the best out of the iWatch with the Breathe app. This app is quite an animation and the Reflect feature offers feel-good prompts. Your constant companion can now make you feel thankful for doping something great. The sleep-time tracking system helps you measure your respiratory rate.

The enhancement, Apple’s Fitness+ service includes a Tai Chi workout to reduce stress. Users can wave goodbye to stress with the introduction of a new trainer.
Lastly, the Photos app is getting an update on the Watch. This enhancement pulls out the images of your loved ones on your Watch. You can easily scroll through your memories, features highlights and share them with your friends without touching your iPhone. Get the best communication entirely from your wrist.
Monterey On Board
The new macOS update is Monterey and is aimed at device synergy. Users will be able to synchronize the apps more easily between different Apple devices. Universal Control is a highly anticipated feature and with it, the user can set the iPad near the Mac for double monitors. The trackpad and keyboard will work seamlessly across both screens.

Safari is also getting a facelift and would probably look like Chrome. Tabs will appear smaller and more compact and users will gain the ability to group the tabs together in the sidebar, maximizing the number to 250. Not only that but the tabs will also change colors to complement the visual theme of the page that is currently open.
Privacy Upgraded
Apple announced several security features for its products. One big enhancement coming to the Mail is the ability to block the tracking pixels in the emails that can expose the email activity. This feature veils your IP address from the email senders.
Privacy controls will be available to the Apple users who subscribe to the new premium version of iCloud. This new version is called iCloud+ and allows the users to complicate their location and destination in the browser.
The new update is an App Privacy Report that gives the users an overview of how often your downloaded apps are accessing other applications including camera, location, contacts, mic and other third-party apps.
Siri gets better with on-device speech recognition that lets the virtual assistant hear and execute several tasks such as setting alarms and switching to the Dark mode without you needing to send out the voice commands.
Lastly, the Wallet app will allow the users to store more sensitive cards.
tvOS 15 & HomeKit Updates
HomeKit and tvOS updates are two separate software platforms. These are more geared towards home. These new features can be fully deployed by smart home manufacturers as the voice assistant on their smart devices.
Users can also use Apple’s Home app on your Apple Watch as an intercom communication interface. This improves comfort and allows the users to unlock the door to the smart house. On the entertainment side, Apple’s HomePod Mini can be used as a part of a stereo setup if you are watching video content on Apple TV through a 4k box. Siri can pull up TV Shows and movies using HomePod Mini.
The spatial audio feature discussed above works well in this case too. The new SharePlay feature enables simultaneous video watching on multiple devices. In the case of FaceTime, the initial call takes place through FaceTime video but the ‘watch party’ happens through Apple TV.
Tech Enhancements For The Developer Community
As usual, Apple launched a plethora of features not just for its users, but also for the developers. Let’s witness the environment from a developer’s eye.
Swift
Updating Apps to Use Swift Concurrency: Swift also received a few updates. The developers can improve the application performance by refactoring the code. This can be advantageous for the asynchronous functions in Swift.
Concurrent Development:Developers can perform parallel development operations.
SwiftUI
Mac App Development With SwiftUI: With the updates in the language, developers can easily develop engaging and pixel-perfect Mac apps using SwiftUI. This new update brings along a variety of UI elements including toolbars, sidebars and tables and other easy-to-incorporate elements.
Breathe Pixel-Perfect Graphics Into Your Applications: Make the most out of the SwiftUI and add breathtaking background materials, customize graphics, animations, and vibrancy.
Xcode Cloud
Xcode helps the developer to configure the project to use Xcode CLoud. It makes it easy to refine your CI/CD. The IDE, Xcode also received tons of enhancements. Here is a glimpse!
Xcode Cloud For Data Encryption: This feature allows the developers to automatically build and test the applications with Xcode to verify the changes and create high-end applications.
CI/CD With Xcode Cloud: Xcode Cloud allows the developers to build apps and run automated tests in parallel. All this directly from the Xcode Cloud environment.
Review Your Xcode Cloud Workflows: Workflows are the configurations of Xcode Cloud to perform development operations. that defines when Xcode Cloud runs a workflow.
Xcode and macOS versions of the temporary build environment: You can configure several actions for a workflow. Developers can perform four different operations: build, analyze, test, and archive.
Great Time To Talk Business
With the WWDC 2021 creating a super buzz in the market, it is time to talk business. With Apple’s legacy going perpetual, businesses are strengthening their pillars with iOS development. iOS app development services are available in the marketplace, but getting the best tech development partner is not an easy job. On top of that, upskilling your employees is a time-consuming process.
With startups vying for better leads and enterprises plunging down their roots in the marketplace, it is extremely difficult to get a hold of the competition. This is where DRC Systems comes into the picture. With years of experience in iOS development, we have been assisting businesses that dominate several industries. Our talent pool of dedicated developers carries 8+ years of average experience in leveraging Swift for developing enterprise-grade iOS apps. Hire ios developers to get the most out of the Xcode platform. Call us right away and get a free consultation!With startups vying for better leads and enterprises plunging down their roots in the marketplace, it is extremely difficult to get a hold of the competition. This is where DRC Systems comes into the picture. With years of experience in iOS development, we have been assisting businesses that dominate several industries. Our talent pool of dedicated developers carries 8+ years of average experience in leveraging Swift for developing enterprise-grade iOS apps. Hire ios developers to get the most out of the Xcode platform. Call us right away and get a free consultation!
0 notes
Text
[Udemy] Rebeloper Messages - the Ultimate iMessage App Template
with In-App Purchases - Swift 4, iOS 11, Xcode 9 ready What Will I Learn? Set up and submit an iMessage App to the App Store for iMessage apps with In-App Purchases. Learn the basics of the iTunes Connect Developer Portal Requirements You should have a Mac. Description The ONLY course with an iMessages App Template with In App Purchases! Update: Rebeloper Messages X is here with a brand new Swift 4 project and awesome new features: new videos: What's new in Rebeloper Messages X written from scratch in Swift 4 iOS 11 ready works in Xcode 9 or later unlimited stickers unlimited categories unlimited in-app purchases (auto-renewable subscriptions, non-consumables) choose sticker count in a row let users download your iMessage app for free - this is how you will get tons of downloads free stickers / locked stickers custom Background custom theme color supports simple stickers (png, jpg) put Locked stickers anywhere in your category (at the beginning, at the end, mixed) the whole app supports Accessibility Voice frequently used stickers section locked stickers cannot be sent; instead an alert pops up asking for in-app purchase unique categories menu setup takes only 15 minutes due to newly added Plist files supports all Apple mobile devices including iPad Pro, iPhone 8, iPhone 8 Plus and iPhone X much more... Don't want to update to Swift 4 / iOS11 / Xcode 9? We have got your back. You can still have access to Rebeloper Messages 3 that works gorgeously with Swift 3/ iOS10 / Xcode 8! Just take a look at the features the lates version 3.0.5 has to offer. Update: Rebeloper Messages 3 is here with brand new features: new video: What’s new in Rebeloper Messages 3 3 categories 3 auto-renewable subscriptions 3 non-consumable in-app purchases the ability to choose sticker sizes much more UPDATE: Now Supports Auto-Renewable Subscriptions and Gifs (Gifs are no longer supported in v.10.0.0+)! The iMessage App Store Gold Rush has just begun! Be among the firsts who make a huge profit! Rebeloper Messages brings Free to Play to the iMessage App Store. Now you can let users download your app for free, let them try out some of your stickers and than pay for extra Stickers with In-app Purchases. You will get your hands on the Rebeloper Messages source code and hands on video tutorials how to put your own reskin of it on the App Store. How to Set up and Reskin To better understand how to create your very own version of Rebeloper Messages I'll be showing you how to do it step by step creating a brand new iMessage app called Black Cats Messages. Search for it on the App Store and try it out! Setting this source code up takes less than 5 minutes! It only takes 3 steps: Add your Free Stickers and app theme images Add your In-App Purchase IDs Publish on the App Store And if you need guidance than you’re in good company. You will get access to 2+ hours of hands on video documentation. A step by step video walk trough of everything you need to know from downloading Xcode to Submitting your app to the App Store! When you purchase a Rebeloper Source Code you purchase more than just a source code. You purchase the awesome documentation and constant support. Act now and catch the iMessage App Store Gold Rush! Be the first who unlocks the massive potential of Free to Play! Leverage the power of In-app Purchases. Enrich your app portfolio with this delightful, fun and money maker iMessage app Template! Buy now! Got a question? Ask it in the comments section. I answer each and every question in less than 24 hours, but mostly within 3 hours (if we're not asleep). Customer happiness is our #1 priority. Change Log 10.2.2 - (19.01.2018) • Added support for “Only One Category” version of the app. All you need to do is have only one category set up in the CategoriesData.swift file: Item 0 (files changed: MainTabBarController.swift) 10.2.1 - (18.10.2017) • Added support for Trial versions in Auto-renewable subscriptions (files changed: MainTabBarController.swift, SubscriptionsData.plist) 10.2.0 - (15.10.2017) • Fixed scrolling all stickers out of view in some cases when in compact mode (files changed: MessagesViewController.swift) • Added cool alert controller (files changed: MessagesViewController.swift, MainTabBarController.swift, StickersCollectionViewController.swift, Setup.swift; folder added: JHTAlertController) 10.1.2 - (13.10.2017) • Fixed number of stickers issue on iPad orientation change (files changed: MessagesViewController.swift, MainTabBarController.swift, StickersCollectionViewController.swift) • Made app compliant to Appstore Review Guideline “3.1.2 - Business - Payments - Subscriptions” to fully meet the terms and conditions for auto-renewing subscriptions, as specified in Schedule 2, section 3.8(b) of the Paid Applications agreement. (files changed: SubscriptionsData.plist, StickersCollectionViewController.swift, MainTabBarController.swift) 10.1.1 - (10.10.2017) • Added ability to set the number of stickers to be different on an iPhone and on an iPad. This way you will not get those gigantic stickers on an iPad or too small ones on an iPhone. (files changed: StickersCollectionViewController.swift, Setup.swift) 10.1.0 - (07.10.2017) • Added option to make app totally free (without any Locked Stickers). Just set “AppUsesInAppPurchases” to “false” in Setup.swift, remove all IAP IDs from the CategoriesData.plist file and set all Stickers to be unlocked (files changed: StickersCollectionViewController.swift, Setup.swift) • Added option to make the app behave as a sticker pack (file changed: StickersCollectionViewController.swift, Setup.swift, MainTabBarController.swift, StickerCell.swift, StickerCategory.swift; file added: AssetExtractor.swift, CustomMSSticker.swift) NOTE: if you select the Sticker Pack Mode than the ‘Frequently Used Stickers’ menu item will automatically be disabled because of the limitations of the native MSStickerView. • Cleaned up comments and code 10.0.4 - (06.10.2017) • Fixed issue of hiding the app and showing the keyboard on every sticker tap (file changed: MessagesViewController.swift, lines 111, 112, 265-269) 10.0.3 - (04.10.2017) • Fixed bug when an auto-renewable was bought but upon tapping on sticker it still asked to purchase with non-consumable (file changed: StickersCollectionViewController.swift, line 348) 10.0.2 - (03.10.2017) Removed unnecessary images Moved 1024x1024 icon into the AppIcon assets folder 10.0.1 - (01.10.2017) • Added new circular Categories Menu 10.0.0 - (28.09.2017) • Updated code to Swift4 / Xcode9 / iOS11 / iPhone8 / iPhone8 Plus / iPhone X. This is a brand new project! You will need to start from scratch 3.0.5 - (13.09.2017) If you have only one IAP than the Purchase All button should not be present in the shop (files changed: MessagesViewController.swift, Settings.swift) 3.0.3 - (30.08.2017) Fixed Locked Stickers remaining at the top when unlocked in case they are presented at the top at the first time (files changed: StickerBrowserViewController.swift) Added Selected Sate for the Category Buttons (files changed: MessagesViewController.swift; files added: ButtonCategory1Selected.png, ButtonCategory2Selected.png, ButtonCategory3Selected.png) Changed design for images ButtonBuy1.png, ButtonBuy2.png, ButtonBuy3.png to better inform the user 3.0.2 - (26.08.2017) New Feature: Added ability to chose to put the Locked Stickers at the top of the stickers list (files changed: StickerBrowserViewController.swift, Settings.swift) 3.0.1 - (26.07.2017) Fixed and improved support for removing the Shop or the Subscribe buttons/functionality (files changed: MessagesViewController.swift, MainInterface.storyboard) Fixed bug of Categories button not working after leaving and coming back to the app (files changed: StickerBrowserViewController.swift) 3.0.0 - (10.07.2017) - This is a BRAND NEW PROJECT; you’ll need to start a new project to update your pre 3.0.0 version apps Added option to choose sticker sizes Silenced a few Warnings Updated project to recommended settings Resized ButtonPurchaseAll.png, ButtonRestore.png and HeaderBackground.png Added new images for update Removed Store.swift Added new stickers to accommodate Categories Changed Setting.swift and MKStoreKitConfigs.plist to accommodate new in-app purchases 2.0.1 - (21.02.2017) Added support for gif Stickers (files changed: StickerBrowserViewController.swift - line 53, Settings.swift - line 27) Added more robust explanation for how to set up Auto-Renewable Subscriptions (files changed: Settings.swift - line 16) 2.0.0 - (18.02.2016) Supports Auto-renewable subscriptions (this is a brand new project; start with a fresh download) 1.0.1 - (20.12.2016) Added Progress Hud (files added: JGProgressHUD folder; RebeloperMessages-Bridging-Header.h; files changed: MessagesViewController.swift, Store.swift) 1.0.0 - (10.11.2016) Initial Release Who is the target audience? This course is for anyone who wants to launch an iMessage App with In-App Purchases on the App Store for iMessages. source https://ttorial.com/rebeloper-messages-ultimate-imessage-app-template
0 notes
Text
UISplitViewController Tutorial: Getting Started
Update note: This tutorial has been updated to iOS 11 and Swift 4 by Michael Katz. The original tutorial was written by Brad Johnson.
On an app running on the iPad, it rarely makes sense to have a full-screen table view like you do so often on iPhone – there’s just too much space. To better use that space, UISplitViewController comes to the rescue.
The split view lets you carve up the screen into two sections and display a view controller on each side. It’s typically used to display navigation on the left hand side, and a detail view on the right hand side. Since iOS 8, the split view controller works on both iPad and iPhone.
In this UISplitViewController tutorial, you’ll make a universal app from scratch that makes use of a split view controller to display a list of monsters from Math Ninja, one of the games developed by the team here at Razeware. You’ll use a split view controller to handle the navigation and display, which will adapt to work on both iPhone and iPad.
This UISplitViewController tutorial focuses on split view controllers; you should already be familiar with the basics of Auto Layout and storyboards before continuing.
Getting Started
Create a new Project in Xcode, and choose the iOS\Application\Single View App template.
Name the project MathMonsters. Leave language as Swift. Uncheck all the checkboxes. Then click on Next to finish creating the project.
Although you could use the Master-Detail App template as a starting point, you are going to start from scratch with the Single View App template. This is so you can get a better understanding of exactly how the UISplitViewController works. This knowledge will be helpful as you continue to use UISplitViewController in future projects.
Open Main.storyboard.
Delete the initial View Controller that is placed there by default in the storyboard. Delete ViewController.swift.
Drag a Split View Controller into the empty storyboard:
This will add several elements to your storyboard:
A Split View Controller. This is the root view of your application – the split view that will contain the entire rest of the app.
A Navigation Controller. This represents the UINavigationController that will be the root view of your master view controller (ie, the left pane of the split view when on iPad or Landscape iPhone 8 Plus). If you look in the split view controller, you’ll see the navigation controller has a relationship segue of master view controller. This allows you to create an entire navigation hierarchy in the master view controller without needing to affect the detail view controller at all.
A View Controller. This will eventually display all the details of the monsters. If you look in the split view controller, you will see the view controller has a relationship segue of detail view controller:
A Table View Controller. This is the root view controller of the master UINavigationController. This will eventually display the list of monsters.
Note: You will notice that Xcode raises a warning about the table view’s prototype cell missing a reuse identifier. Don’t worry about it for now; you will fix it shortly.
Since you deleted the default initial view controller from the storyboard, you need to tell the storyboard that you want your split view controller to be the initial view controller.
Select the Split View Controller and open the Attributes inspector. Check the Is Initial View Controller option.
You will see an arrow to the left of the split view controller, which tells you it is the initial view controller of this storyboard.
Build and run the app on an iPad simulator, and rotate your simulator to landscape.
You should see an empty split view controller:
Now run it on an iPhone simulator (any of them except a plus-sized phone, which is large enough that it will act just like the iPad version) and you will see that it starts off showing the detail view in full screen. It will also allows you to tap the back button on the navigation bar to pop back to the master view controller:
On iPhones other than an iPhone Plus in landscape, a split view controller will act just like a traditional master-detail app with a navigation controller pushing and popping back and forth. This functionality is built-in and requires very little extra configuration from you, the developer. Hooray!
You’re going to want to have your own view controllers shown instead of these default ones, so let’s get started creating those.
Creating Custom View Controllers
The storyboard has the view controller hierarchy set up – split view controller with its master and detail view controllers. Now you’ll need to implement the code side of things to get some data to show up.
Go to File\New\File… and choose the iOS\Source\Cocoa Touch Class template. Name the class MasterViewController, make it a subclass of UITableViewController, make sure the Also create XIB file checkbox is unchecked, and Language is set to Swift. Click Next and then Create.
Open MasterViewController.swift.
Scroll down to numberOfSections(in:). Delete this method. This method is not needed when only ever one section is returned.
Next, find tableView(_:numberOfRowsInSection:) and replace the implementation with the following:
override func tableView(_ tableView: UITableView, numberOfRowsInSection section: Int) -> Int { return 10 }
Finally, uncomment tableView(_:cellForRowAt:) and replace its implementation with the following:
override func tableView(_ tableView: UITableView, cellForRowAt indexPath: IndexPath) -> UITableViewCell { let cell = tableView.dequeueReusableCell(withIdentifier: "Cell", for: indexPath) return cell }
This way, you’ll just have 10 empty rows to look at when you test this thing out later.
Open Main.storyboard. Select the Root View Controller. Click on the Identity inspector. Change the class to MasterViewController.
In addition, you need to make sure the prototype cell in the table view is given a reuse identifier, or it will cause a crash when the storyboard tries to load.
Within the Master View Controller, select the Prototype Cell. Change the Identifier to Cell. Change the cell Style to Basic.
Now, you’ll create the view controller for the detail side.
Go to File\New\File… and choose the iOS\Source\Cocoa Touch Class template. Name the class DetailViewController, make it a subclass of UIViewController, and make sure the Also create XIB file checkbox is unchecked and the Language is set to Swift. Click Next and then Create.
Open Main.storyboard, and select the view controller in the View Controller Scene. Click on the Identity inspector. Change the Class to DetailViewController.
Then drag a label into the middle of the detail view controller. Pin the label to the horizontal and vertical centers of the container with Auto Layout.
Double-click the label to change its text to say Hello, World! so you will know it’s working when you test it out later.
Build and run. At this point you should see your custom view controllers.
On iPad:
On iPhone:
Making Your Model
The next thing you need to do is define a model for the data you want to display. You don’t want to complicate things while learning the basics of split view controllers, so you’re going with a simple model with no data persistence.
First, make a class representing the monsters you want to display. Go to File\New\File…, select the iOS\Source\Swift File template, and click Next. Name the file Monster and click Create.
You’re just going to create a simple class with some attribute properties about each monster you want to display, and a couple of methods for creating new monsters and accessing the image for the weapon each monster has.
Replace the contents of Monster.swift with the following:
import UIKit enum Weapon { case blowgun, ninjaStar, fire, sword, smoke } class Monster { let name: String let description: String let iconName: String let weapon: Weapon init(name: String, description: String, iconName: String, weapon: Weapon) { self.name = name self.description = description self.iconName = iconName self.weapon = weapon } var weaponImage: UIImage { switch weapon { case .blowgun: return UIImage(named: "blowgun.png")! case .fire: return UIImage(named: "fire.png")! case .ninjaStar: return UIImage(named: "ninjastar.png")! case .smoke: return UIImage(named: "smoke.png")! case .sword: return UIImage(named: "sword.png")! } } var icon: UIImage? { return UIImage(named: iconName) } }
This file defines an enumeration to track the different kinds of weapons, and then a class to hold the monster information. There’s a simple initializer to create Monster instances, and a convenience method to get an image corresponding to the monster’s weapon.
That’s it for defining the model – so next let’s hook it up to your master view!
Displaying the Monster List
Open up MasterViewController.swift and add a new property to the class:
let monsters = [ Monster(name: "Cat-Bot", description: "MEE-OW", iconName: "meetcatbot", weapon: .sword), Monster(name: "Dog-Bot", description: "BOW-WOW", iconName: "meetdogbot", weapon: .blowgun), Monster(name: "Explode-Bot", description: "BOOM!", iconName: "meetexplodebot", weapon: .smoke), Monster(name: "Fire-Bot", description: "Will Make You Steamed", iconName: "meetfirebot", weapon: .ninjaStar), Monster(name: "Ice-Bot", description: "Has A Chilling Effect", iconName: "meeticebot", weapon: .fire), Monster(name: "Mini-Tomato-Bot", description: "Extremely Handsome", iconName: "meetminitomatobot", weapon: .ninjaStar) ]
This holds the array of monsters to populate the table view.
Find tableView(_:numberOfRowsInSection:) and replace the return statement with the following:
return monsters.count
This will return the number of monsters based on the size of the array.
Next, find tableView(_:cellForRowAtIndexPath:) and add the following code before the final return statement:
let monster = monsters[indexPath.row] cell.textLabel?.text = monster.name
This will configure the cell based on the correct monster. That’s it for the table view, which will simply show each monster’s name.
Download and unzip this art pack. Drag the folder containing those images into Assets.xcassets in Xcode.
Build and run the app.
You should see the list of monster bots on the left hand side on landscape iPad:
On iPhone:
Remember that on a compact-width iPhone, you start one level deep already in the navigation stack on the detail screen. You can tap the back button to see the table view.
Displaying Bot Details
Now that the table view is showing the list of monsters, it’s time to get the detail view in order.
Open Main.storyboard, select Detail View Controller and delete the label you put down earlier.
Using the screenshot below as a guide, drag the following controls into the DetailViewController’s view:
A 95×95 image view for displaying the monster’s image in the upper left hand corner.
A label aligned with the top of the image view with font System Bold, size 30, and with the text “Monster Name”
Two labels underneath, with font System, size 24. One label should be bottom aligned with the image view; the other label should be below the first label. They should have their left edges aligned, and titles “Description” and “Preferred Way To Kill”
A 70×70 image view for displaying the weapon image, horizontally center aligned with the “Preferred way to Kill” label.
Need some more hints? Open the spoilers below for the set of constraints I used to make the layout.
Solution Inside SelectShow>
Constraints:
Top Left Corner Image View: Leading Space to Safe Area with 16 points, Top Space to Safe Area with 8 points, Width Equals 95, Height Equals 95
Monster Name Label: Top Aligned to Top Left Corner Image View’s top, Leading Space to Image View by 8 points
Description Label: Bottom Aligned to Top Left Corner Image View’s bottom, Leading Space to Image View by 8 points, Bottom Space to Preferred Way to Kill label by 8 points
Preferred Way To Kill Label: Align Leading Edge to Description Label, Top Space to Description Label by 8 points
Smaller Image View: Align Center X to Preferred Way to Kill Label, Top Space to Preferred Way to Kill Label by 8 points, Width Equals 70, Height Equals 70
Getting Auto Layout to use the proper constraints is especially important since this app is universal, and Auto Layout is what ensures the layout adapts well to both iPad and iPhone.
Note: Auto Layout can be a slippery devil! I highly recommend you check out our Beginning Auto Layout tutorial series if you run into any trouble.
That’s it for Auto Layout for now. Next, you will need to hook these views up to some outlets.
Open DetailViewController.swift and add the following properties to the top of the class:
@IBOutlet weak var nameLabel: UILabel! @IBOutlet weak var descriptionLabel: UILabel! @IBOutlet weak var iconImageView: UIImageView! @IBOutlet weak var weaponImageView: UIImageView! var monster: Monster? { didSet { refreshUI() } }
Here you added properties for the various UI elements you just added which need to dynamically change. You also added a property for the Monster object this view controller should display.
Next, add the following helper method to the class:
func refreshUI() { loadViewIfNeeded() nameLabel.text = monster?.name descriptionLabel.text = monster?.description iconImageView.image = monster?.icon weaponImageView.image = monster?.weaponImage }
Whenever you switch the monster, you’ll want the UI to refresh itself and update the details displayed in the outlets. It’s possible that you’ll change monster and trigger the method even before the view has loaded, so you call loadViewIfNeeded() to guarantee that the view is loaded and its outlets are connected.
Now, go open up Main.storyboard. Right-click the Detail View Controller object from the Document Outline to display the list of outlets. Drag from the circle at the right of each item to the view to hook up the outlets.
Remember, the icon image view is the big image view in the top left, while the weapon image view is the smaller one underneath the “Preferred Way To Kill” label.
Go to to AppDelegate.swift and replace the implementation of application(_:didFinishLaunchingWithOptions:) with the following:
guard let splitViewController = window?.rootViewController as? UISplitViewController, let leftNavController = splitViewController.viewControllers.first as? UINavigationController, let masterViewController = leftNavController.topViewController as? MasterViewController, let detailViewController = splitViewController.viewControllers.last as? DetailViewController else { fatalError() } let firstMonster = masterViewController.monsters.first detailViewController.monster = firstMonster return true
A split view controller has an array property viewControllers that has the master and detail view controllers inside. The master view controller in your case is actually a navigation controller, so you get the top view controller from that to get your MasterViewController instance. From there, you can set the current monster to the first one in the list.
Build and run the app, and if all goes well you should see some monster details on the right.
On iPad Landscape:
and iPhone:
Note that selecting a monster on the MasterViewController does nothing yet and you’re stuck with Cat-Bot forever. That’s what you’ll work on next!
Hooking Up The Master With the Detail
There are many different strategies for how to best communicate between these two view controllers. In the Master-Detail App template, the master view controller has a reference to the detail view controller. That means the master view controller can set a property on the detail view controller when a row gets selected.
That works fine for simple applications where you only ever have one view controller in the detail pane, but you’re going to follow the approach suggested in the UISplitViewController class reference for more complex apps and use a delegate.
Open MasterViewController.swift and add the following protocol definition above the MasterViewController class definition:
protocol MonsterSelectionDelegate: class { func monsterSelected(_ newMonster: Monster) }
This defines a protocol with a single method, monsterSelected(_:). The detail view controller will implement this method, and the master view controller will message it when a monster is selected.
Next, update MasterViewController to add a property for an object conforming to the delegate protocol:
weak var delegate: MonsterSelectionDelegate?
Basically, this means that the delegate property is required to be an object that has monsterSelected(_:) implemented. That object will be responsible for handling what needs to happen within its view after the monster was selected.
Note: You need to mark the delegate as weak to avoid a retain cycle. To learn more about retain cycles in Swift, check out the Memory Management video in our Intermediate Swift video tutorial series.
Since you want DetailViewController to update when the monster is selected, you need to implement the delegate.
Open up DetailViewController.swift and add a class extension to the very end of the file:
extension DetailViewController: MonsterSelectionDelegate { func monsterSelected(_ newMonster: Monster) { monster = newMonster } }
Class extensions are great for separating out delegate protocols and grouping the methods together. In this extension, you are saying DetailViewController conforms to MonsterSelectionDelegate and then you implement the one required method.
Now that the delegate method is ready, you need to call it from the master side.
Open MasterViewController.swift and add the following method:
override func tableView(_ tableView: UITableView, didSelectRowAt indexPath: IndexPath) { let selectedMonster = monsters[indexPath.row] delegate?.monsterSelected(selectedMonster) }
Implementing tableView(_:didSelectRowAt:) means you’ll be notified whenever the user selects a row in the table view. All you need to do is notify the monster selection delegate of the new monster.
Finally, open AppDelegate.swift. In application(_:didFinishLaunchingWithOptions:), add the following code just before the final return statement:
masterViewController.delegate = detailViewController
That’s the final connection between the two view controllers.
Build and run the app on iPad, and you should now be able to select between the monsters like the following:
So far so good with split views! Except there’s one problem left – if you run it on iPhone, selecting monsters from the master table view does not show the detail view controller. You now need to add make a small modification to make sure that the split view works on iPhone, in addition to iPad.
Open up MasterViewController.swift. Find tableView(_:didSelectRowAt:) and add the following to the end of the method:
if let detailViewController = delegate as? DetailViewController { splitViewController?.showDetailViewController(detailViewController, sender: nil) }
First, you need to make sure the delegate is set and that it is a DetailViewController instance as you expect. You then call showDetailViewController(_:sender:) on the split view controller and pass in the detail view controller. Every subclass of UIViewController has an inherited property splitViewController, which will refer to it’s containing view controller, if one exists.
This new code only changes the behavior of the app on iPhone, causing the navigation controller to push the detail controller onto the stack when you select a new monster. It does not alter the behavior of the iPad implementation, since on iPad the detail view controller is always visible.
After making this change, run it on iPhone and it should now behave properly. Adding just a few lines of code got you a fully functioning split view controller on both iPad and iPhone. Not bad!
Split View Controller in iPad Portrait
Run the app in iPad in portrait mode. At first it appears there is no way to get to the left menu, but try swiping from the left side of the screen. Pretty cool huh? Tap anywhere outside of the menu to hide it.
That built in swipe functionality is pretty cool, but what if you want to have a navigation bar up top with a button that will display the menu, similar to how it behaves on the iPhone? To do that, you will need to make a few more small modifications to the app.
First, open Main.storyboard and embed the Detail View Controller into a Navigation Controller. You can do this by selecting the Detail View Controller and then selecting Editor/Embed In/Navigation Controller.
Your storyboard will now look like this:
Now open MasterViewController.swift and find tableView(_:didSelectRowAt:). Change the if block with the call to showDetailViewController(_:sender:) to the following:
if let detailViewController = delegate as? DetailViewController, let detailNavigationController = detailViewController.navigationController { splitViewController?.showDetailViewController(detailNavigationController, sender: nil) }
Instead of showing the detail view controller, you’re now showing the detail view controller’s navigation controller. The navigation controller’s root is the detail view controller anyway, so you’ll still see the same content as before, just wrapped in a navigation controller.
There are two final changes to make before you run the app.
First, in AppDelegate.swift update application(_:didFinishLaunchingWithOptions:) by replacing the single line initializing detailViewController with the following two lines:
let rightNavController = splitViewController.viewControllers.last as? UINavigationController, let detailViewController = rightNavController.topViewController as? DetailViewController
Since the detail view controller is wrapped in a navigation controller, there are now two steps to access it.
Finally, add the following lines just before the final return statement:
detailViewController.navigationItem.leftItemsSupplementBackButton = true detailViewController.navigationItem.leftBarButtonItem = splitViewController.displayModeButtonItem
This tells the detail view controller to replace its left navigation item with a button that will toggle the display mode of the split view controller. It won’t change anything when running on iPhone, but on iPad you will get a button in the top left to toggle the table view display. Run the app on iPad portrait and check it out:
Where To Go From Here?
Here’s an archive of the final project with all of the code you’ve developed so far.
For new apps, you’re likely just to use the Master-Detail template to save time, which gives you a split view controller to start. But now you’ve seen how to use UISplitViewController from the ground up and have a much better idea of how it works. Since you’ve seen how easy it is to get the master-detail pattern into your universal apps, go forth and apply what you’ve learned!
Check out our short video tutorial series on split view controllers if you’re interested in some more details on split view controllers across devices.
If you have any questions or comments, please join the forum discussion below!
The post UISplitViewController Tutorial: Getting Started appeared first on Ray Wenderlich.
UISplitViewController Tutorial: Getting Started published first on http://ift.tt/2fA8nUr
0 notes
Text
95% off #Building iOS 10 Applications with Swift 3 and Xcode 8. – $10
The finest and latest course on iOS Development with Swift 3 – Learn to Build Real Applications.
All Levels, – 9.5 hours, 66 lectures
Average rating 4.7/5 (4.7 (10 ratings) Instead of using a simple lifetime average, Udemy calculates a course’s star rating by considering a number of different factors such as the number of ratings, the age of ratings, and the likelihood of fraudulent ratings.)
Course requirements:
Must have a computer with OSX or macOS on it
Course description:
Building iOS 10 Apps has just one GOAL – to make you the best iOS Developer so that you can get you DREAM Job or become a Freelance iOS Developer.
This course will teach you each and every aspect of iOS development both for iPhones and iPads.
Variables and Constants Conditionals, Functions, Loops Arrays and Dictionaries Optionals, Classes and Objects Web Views Autolayout Stack Views Segues Table Views Collection Views User’s Location Scroll Views and many more!
What this course contains?
Swift 3.0 Programming Language. iOS 10 concepts that every developer should know. Tip Calculator Application Fun Facts Application Tap Me Game Blog Reader Application Ratings Application
Where to get help?
I am ready to spend 2-3 hours daily for solving your problems. Feel free to ask anything in the discussion section.
Enroll this course to become a better Developer.
Full details Build iOS 10 & Swift 3 apps Submit iOS apps to the Apple App Store Apply to iOS Developer Jobs If you are an absolute beginner to coding, this is the course for you. If you want to learn how to build apps for iPhone and iPad. If you want to increase you iOS Knowledge.
Reviews:
“Have already sussed most of this out. Samarth got straight to the point and explained these first basic steps clearly.” (Chris j)
“Instructor’s pace is great – nice and slow – but he’s a little lacking in passion (sorry to say!)” (Jen Long)
“Knowledgeable Instructor and a very good course!” (Ayush Dusad)
About Instructor:
Samarth Paboowal
CODING is my Passion first, hobby second and job third! I am an iOS Developer from last two years and I love building applications and modern apps with new technologies.I started with my web development with PHP and then I moved on to FULL Stack JavaScript which basically includes MEAN STACK. MEAN => MongoDB as a database, ExpressJs as server framework, AngularJs as front-end framework and NodeJs for backend work. Now I am currently using Swift for building iOS applications. My aim is to teach each and everyone how to CODE!! I thus bring to Udemy my experience in Full Stack Development as well as iOS Development to teach you how to become a better developer to solve real world challenges.
Instructor Other Courses:
Building a Tap Me Game using iOS 10 and Swift 3 Samarth Paboowal, iOS Developer (1) $10 $20 Build an iOS 10 app using IMDB API and Swift 3 Ultimate Python Developer Course – Build Real Applications …………………………………………………………… Samarth Paboowal coupons Development course coupon Udemy Development course coupon Mobile Apps course coupon Udemy Mobile Apps course coupon Building iOS 10 Applications with Swift 3 and Xcode 8. Building iOS 10 Applications with Swift 3 and Xcode 8. course coupon Building iOS 10 Applications with Swift 3 and Xcode 8. coupon coupons
The post 95% off #Building iOS 10 Applications with Swift 3 and Xcode 8. – $10 appeared first on Course Tag.
from Course Tag http://coursetag.com/udemy/coupon/95-off-building-ios-10-applications-with-swift-3-and-xcode-8-10/ from Course Tag https://coursetagcom.tumblr.com/post/158626810578
0 notes
Photo

Getting Started with React Native
With the ever-increasing popularity of smartphones, developers are looking into solutions for building mobile applications. For developers with a web background, frameworks such as Cordova and Ionic, React Native, NativeScript, and Flutter allow us to create mobile apps with languages we’re already familiar with: HTML, XML, CSS, and JavaScript.
In this guide, we’ll take a closer look at React Native. You’ll learn the absolute basics of getting started with it. Specifically, we’ll cover the following:
what is React Native
what is Expo
how to set up an React Native development environment
how to create an app with React Native
Prerequisites
This tutorial assumes that you’re coming from a web development background. The minimum requirement for you to be able to confidently follow this tutorial is to know HTML, CSS, and JavaScript. You should also know how to install software on your operating system and work with the command line. We’ll also be using some ES6 syntax, so it would help if you know basic ES6 syntax as well. Knowledge of React is helpful but not required.
What is React Native?
React Native is a framework for building apps that work on both Android and iOS. It allows you to create real native apps using JavaScript and React. This differs from frameworks like Cordova, where you use HTML to build the UI and it will just be displayed within the device’s integrated mobile browser (WebView). React Native has built in components which are compiled to native UI components, while your JavaScript code is executed through a virtual machine. This makes React Native more performant than Cordova.
Another advantage of React Native is its ability to access native device features. There are many plugins which you can use to access native device features, such as the camera and various device sensors. If you’re in need of a platform-specific feature that hasn’t been implemented yet, you can also build your own native modules — although that will require you to have considerable knowledge of the native platform you want to support (Java or Kotlin for Android, and Objective C or Swift for iOS).
If you’re coming here and you’re new to React, you might be wondering what it is. React is a JavaScript library for the Web for building user interfaces. If you’re familiar with MVC, it’s basically the View in MVC. React’s main purpose is to allow developers to build reusable UI components. Examples of these components include buttons, sliders, and cards. React Native took the idea of building reusable UI components and brought it into mobile app development.
What is Expo?
Before coming here, you might have heard of Expo. It’s even recommended in the official React Native docs, so you might be wondering what it is.
In simple terms, Expo allows you to build React Native apps without the initial headache that comes with setting up your development environment. It only requires you to have Node installed on your machine, and the Expo client app on your device or emulator.
But that’s just how Expo is initially sold. In reality, it’s much more than that. Expo is actually a platform that gives you access to tools, libraries and services for building Android and iOS apps faster with React Native. Expo comes with an SDK which includes most of the APIs you can ask for in a mobile app development platform:
Camera
ImagePicker
Facebook
GoogleSignIn
Location
MapView
Permissions
Push Notifications
Video
Those are just few of the APIs you get access to out of the box if you start building React Native apps with Expo. Of course, these APIs are available to you as well via native modules if you develop your app using the standard React Native setup.
Plain React Native or Expo?
The real question is which one to pick up — React Native or Expo? There’s really no right or wrong answer. It all depends on the context and what your needs are at the moment. But I guess it’s safe to assume that you’re reading this tutorial because you want to quickly get started with React Native. So I’ll go ahead and recommend that you start out with Expo. It’s fast, simple, and easy to set up. You can dive right into tinkering with React Native code and get a feel of what it has to offer in just a couple of hours.
That said, I’ve still included the detailed setup instructions for standard React Native for those who want to do it the standard way. As you begin to grasp the different concepts, and as the need for different native features arises, you’ll actually find that Expo is kind of limiting. Yes, it has a lot of native features available, but not all the native modules that are available to standard React Native projects are supported.
Note: projects like unimodules are beginning to close the gap between standard React Native projects and Expo projects, as it allows developers to create native modules that works for both React Native and ExpoKit.
Setting Up the React Native Development Environment
In this section, we’ll set up the React Native development environment for all three major platforms: Windows, Linux, and macOS. We’ll also cover how to set up the Android and iOS simulators. Lastly, we’ll cover how to set up Expo. If you just want to quickly get started, I recommend that you scroll down to the “Setting up Expo” section.
Here are the general steps for setting up the environment. Be sure to match these general steps to the steps for each platform:
install JDK
install Android Studio or Xcode
install Watchman
update the environment variable
install the emulator
install Node
install React Native CLI
You can skip to the section relevant to your operating system. Some steps — like setting up Android Studio — are basically the same for each operating system, so I’ve put them in their own section:
setting up on Windows
setting up on Linux
setting up on macOS
setting up Android Studio
install Node
setting up Expo
setting up emulators
install React Native CLI
troubleshooting common errors
Setting Up on Windows
This section will show you how to install and configure the software needed to create React Native apps on Windows. Windows 10 was used in testing for this.
Install Chocolatey
Windows doesn’t really come with its own package manager that we can use to install the needed tools. So the first thing we’ll do is install one called Chocolatey. You can install it by executing the following command on the command line or Windows Powershell:
@"%SystemRoot%\System32\WindowsPowerShell\v1.0\powershell.exe" -NoProfile -InputFormat None -ExecutionPolicy Bypass -Command "iex ((New-Object System.Net.WebClient).DownloadString('https://chocolatey.org/install.ps1'))" && SET "PATH=%PATH%;%ALLUSERSPROFILE%\chocolatey\bin"
We can now install the other tools we need by simply using Chocolatey.
Install Python
Python comes with the command line tools required by React Native:
choco install -y python 2
Install JDK
The JDK allows your computer to understand and run Java code. Be sure to install JDK version 8 as that’s the one required by React Native:
choco install jdk8
Install NVM
Node has an installer for Windows. It’s better to use NVM for Windows, as that will enable you to install multiple versions of Node so that you can test new versions, or use a different version depending on the project you’re currently working on. For that, you can use NVM for Windows. Download nvm-setup.zip, extract it and execute nvm-setup.exe to install it.
Install Watchman
Watchman optimizes the compilation time of your React Native app. It’s an optional install if you’re not working on a large project. You can find the install instructions on their website.
Update the Environment Variables
This is the final step in setting up React Native on Windows. This is where we update the environment variables so the operating system is aware of all the tools required by React Native. Follow these steps right before you install the React Native CLI.
Go to Control Panel → System and Security → System. Once there, click the Advanced system settings menu on the left.
That will open the system properties window. Click on the Environment Variables button:
Under the User variables section, highlight the Path variable and click the edit button.
On the edit screen, click the New button and enter the path to the Android SDK and platform tools. For me, it’s on C:\users\myUsername\AppData\Local\Android\Sdk and C:\users\myUsername\AppData\Local\Android\Sdk\platform-tools. Note that this is also where you add the path to the JDK if it isn’t already added:
The post Getting Started with React Native appeared first on SitePoint.
by Wern Ancheta via SitePoint https://ift.tt/2Hj2jdX
0 notes
Link
Rebeloper Messages - the Ultimate iMessage App Template ##Coursera ##FreeOnlineTraining ##UdemyFreeDiscountCoupons #app #iMessage #Messages #Rebeloper #Template #Ultimate Description The ONLY course with an iMessages App Template with In App Purchases! Update: Rebeloper Messages X is right here with a model new Swift Four undertaking and superior new options: new movies: What's new in Rebeloper Messages X written from scratch in Swift 4 iOS 11 prepared works in Xcode 9 or later limitless stickers limitless classes limitless in-app purchases (auto-renewable subscriptions, non-consumables) select sticker depend in a row let customers obtain your iMessage app without cost - that is how you're going to get tons of downloads free stickers / locked stickers customized Background customized theme shade helps easy stickers (png, jpg) put Locked stickers wherever in your class (at the starting, at the finish, blended) the entire app helps Accessibility Voice continuously used stickers part locked stickers can't be despatched; as a substitute an alert pops up asking for in-app buy distinctive classes menu setup takes solely 15 minutes as a consequence of newly added Plist information helps all Apple cell units together with iPad Pro, iPhone 8, iPhone 8 Plus and iPhone X far more... Don't wish to replace to Swift 4 / iOS11 / Xcode 9? We have gotten your again. You can nonetheless have entry to Rebeloper Messages Three that works gorgeously with Swift 3/ iOS10 / Xcode 8! Just check out the options the lates model 3.0.5 has to supply. Update: Rebeloper Messages Three is right here with model new options: new video: What’s new in Rebeloper Messages 3 Three classes Three auto-renewable subscriptions Three non-consumable in-app purchases the means to decide on sticker sizes far more UPDATE: Now Supports Auto-Renewable Subscriptions and Gifs (Gifs are no longer supported in v.10.0.0+)! The iMessage App Store Gold Rush has simply begun! Be amongst the firsts who make an enormous revenue! Rebeloper Messages brings Free to Play to the iMessage App Store. Now you'll be able to let customers obtain your app without cost, allow them to check out a few of your stickers and than pay for additional Stickers with In-app Purchases. You will get your palms on the Rebeloper Messages supply code and palms on video tutorials tips on how to put your personal reskin of it on the App Store. How to Set up and Reskin To higher perceive tips on how to create your very personal model of Rebeloper Messages I'll be displaying you tips on how to do it step-by-step making a model new iMessage app known as Black Cats Messages. Search for it on the App Store and take a look at it out! Setting this supply code up takes lower than 5 minutes! It solely takes Three steps: Add your Free Stickers and app theme photographs Add your In-App Purchase IDs Publish on the App Store And should you want steerage than you’re in good firm. You will get entry to 2+ hours of palms on video documentation. A step-by-step video stroll trough of every little thing you have to know from downloading Xcode to Submitting your app to the App Store! When you buy a Rebeloper Source Code you buy greater than only a supply code. You buy the superior documentation and fixed assist. Act now and catch the iMessage App Store Gold Rush! Be the first who unlocks the huge potential of Free to Play! Leverage the energy of In-app Purchases. Enrich your app portfolio with this pleasant, enjoyable and cash maker iMessage app Template! Buy now! Got a query? Ask it in the feedback part. I reply every query in lower than 24 hours, however largely inside Three hours (if we're not asleep). Customer happiness is our #1 precedence. Change Log 10.2.2 - (19.01.2018) • Added assist for “Only One Category” model of the app. All you have to do is have just one class arrange in the CategoriesKnowledge.swift file: Item 0 (information modified: MainTabBarController.swift) 10.2.1 - (18.10.2017) • Added assist for Trial variations in Auto-renewable subscriptions (information modified: MainTabBarController.swift, SubscriptionsKnowledge.plist) 10.2.0 - (15.10.2017) • Fixed scrolling all stickers out of view in some circumstances when in compact mode (information modified: MessagesViewController.swift) • Added cool alert controller (information modified: MessagesViewController.swift, MainTabBarController.swift, StickersCollectionViewController.swift, Setup.swift; folder added: JHTAlertController) 10.1.2 - (13.10.2017) • Fixed variety of stickers difficulty on iPad orientation change (information modified: MessagesViewController.swift, MainTabBarController.swift, StickersCollectionViewController.swift) • Made app compliant to Appstore Review Guideline “3.1.2 - Business - Payments - Subscriptions” to totally meet the phrases and circumstances for auto-renewing subscriptions, as laid out in Schedule 2, part 3.8(b) of the Paid Applications settlement. (information modified: SubscriptionsKnowledge.plist, StickersCollectionViewController.swift, MainTabBarController.swift) 10.1.1 - (10.10.2017) • Added means to set the variety of stickers to be completely different on an iPhone and on an iPad. This method you'll not get these gigantic stickers on an iPad or too small ones on an iPhone. (information modified: StickersCollectionViewController.swift, Setup.swift) 10.1.0 - (07.10.2017) • Added choice to make app completely free (with none Locked Stickers). Just set “AppUsesInAppPurchases” to “false” in Setup.swift, take away all IAP IDs from the CategoriesKnowledge.plist file and set all Stickers to be unlocked (information modified: StickersCollectionViewController.swift, Setup.swift) • Added choice to make the app behave as a sticker pack (file modified: StickersCollectionViewController.swift, Setup.swift, MainTabBarController.swift, StickerCell.swift, StickerCategory.swift; file added: AssetExtractor.swift, CustomMSSticker.swift) NOTE: if you choose the Sticker Pack Mode than the ‘Frequently Used Stickers’ menu merchandise will mechanically be disabled due to the limitations of the native MSStickerView. • Cleaned up feedback and code 10.0.4 - (06.10.2017) • Fixed difficulty of hiding the app and displaying the keyboard on each sticker faucet (file modified: MessagesViewController.swift, traces 111, 112, 265-269) 10.0.3 - (04.10.2017) • Fixed bug when an auto-renewable was purchased however upon tapping on sticker it nonetheless requested to buy with non-consumable (file modified: StickersCollectionViewController.swift, line 348) 10.0.2 - (03.10.2017) Removed pointless photographs Moved 1024x1024 icon into the AppIcon belongings folder 10.0.1 - (01.10.2017) • Added new round Categories Menu 10.0.0 - (28.09.2017) • Updated code to Swift4 / Xcode9 / iOS11 / iPhone8 / iPhone8 Plus / iPhone X. This is a model new undertaking! You might want to begin from scratch 3.0.5 - (13.09.2017) If you may have just one IAP than the Purchase All button shouldn't be current in the store (information modified: MessagesViewController.swift, Settings.swift) 3.0.3 - (30.08.2017) Fixed Locked Stickers remaining at the high when unlocked in case they're introduced at the high at the first time (information modified: StickerBrowserViewController.swift) Added Selected Sate for the Category Buttons (information modified: MessagesViewController.swift; information added: ButtonCategory1Selected.png, ButtonCategory2Selected.png, ButtonCategory3Selected.png) Changed design for photographs ButtonBuy1.png, ButtonBuy2.png, ButtonBuy3.png to raised inform the person 3.0.2 - (26.08.2017) New Feature: Added means to selected to place the Locked Stickers at the high of the stickers checklist (information modified: StickerBrowserViewController.swift, Settings.swift) 3.0.1 - (26.07.2017) Fixed and improved assist for eradicating the Shop or the Subscribe buttons/performance (information modified: MessagesViewController.swift, PrimaryInterface.storyboard) Fixed bug of Categories button not working after leaving and coming again to the app (information modified: StickerBrowserViewController.swift) 3.0.0 - (10.07.2017) - This is a BRAND NEW PROJECT; you’ll want to start out a brand new undertaking to replace your pre 3.0.Zero model apps Added choice to decide on sticker sizes Silenced a couple of Warnings Updated undertaking to advisable settings Resized ButtonPurchaseAll.png, ButtonRestore.png and HeaderBackground.png Added new photographs for replace Removed Store.swift Added new stickers to accommodate Categories Changed Setting.swift and MKStoreKitConfigs.plist to accommodate new in-app purchases 2.0.1 - (21.02.2017) Added assist for gif Stickers (information modified: StickerBrowserViewController.swift - line 53, Settings.swift - line 27) Added extra strong rationalization for tips on how to arrange Auto-Renewable Subscriptions (information modified: Settings.swift - line 16) 2.0.0 - (18.02.2016) Supports Auto-renewable subscriptions (this can be a model new undertaking; begin with a recent obtain) 1.0.1 - (20.12.2016) Added Progress Hud (information added: JGProgressHUD folder; RebeloperMessages-Bridging-Header.h; information modified: MessagesViewController.swift, Store.swift) 1.0.0 - (10.11.2016) Initial Release Who is the audience? This course is for anybody who desires to launch an iMessage App with In-App Purchases on the App Store for iMessages. 👉 Activate Udemy Coupon 👈 Free Tutorials Udemy Review Real Discount Udemy Free Courses Udemy Coupon Udemy Francais Coupon Udemy gratuit Coursera and Edx ELearningFree Course Free Online Training Udemy Udemy Free Coupons Udemy Free Discount Coupons Udemy Online Course Udemy Online Training 100% FREE Udemy Discount Coupons https://www.couponudemy.com/blog/rebeloper-messages-the-ultimate-imessage-app-template/
0 notes
Text
Development Tutorial for iPhone X
Everyone’s excited about the iPhone X, the “iPhone that is entirely screen” — and what a screen! Plus Face ID, TrueDepth selfie/animoji camera, 12-megapixel wide-angle and telephoto rear cameras, A11 Bionic neural engine chip, and wireless charging. But the amazing new screen requires a few changes to your app design. In this tutorial, you’ll explore the new aspect ratio, and build an app with a search controller integrated into the navigation bar. Then you’ll explore how to fix an app that was created shortly before the iPhone X announcement: is it enough to just turn on safe area? Read on to find out.
What’s Different?
First, a quick rundown on what’s different about the iPhone X screen:
Screen size is 375 x 812 points, so the aspect ratio is 9:19.5 instead of 9:16. That’s 145 pts more than the iPhone 6/7/8’s 4.7″ screen but the status bar uses 44 pts, and the home indicator almost doubles the height of the toolbar.
Screen resolution is 3x: 1125 x 2436 pixels.
Screen design must take into account the sensor housing, home indicator and rounded corners.
In portrait, the navigation bar is 88 pts, or 140 pts for large titles. The toolbar is 83 pts instead of 44 pts. In landscape, the toolbar is 53 pts, and layout margins are 64 pts instead of 20 pts.
In portrait, the status bar is taller — 44 pts, not 20 pts — and uses space not used by the app, either side of the sensor housing. And it doesn’t change size to indicate phone, location-tracking, and other background tasks.
Geoff Hackworth’s Medium article has super-helpful diagrams of the new screen anatomy, courtesy of his Adaptivity app.
Getting Started
Download the starter package, and unzip it.
First, see for yourself what happens when you load a 9:16 image into an iPhone X screen. Open AspectRatioSample, then open Main.storyboard. Set View as to iPhone X, and select the image view. In the Attributes Inspector, switch Content Mode between Aspect Fit and Aspect Fill:
The 8Plus image were created by stacking two image views, building and running in the iPhone 8 Plus simulator, then taking a screenshot. So the image’s aspect ratio is 9:16.
The image view’s constraints are set to fill the safe area, so its aspect ratio is 9:19.5.
In Aspect Fit, the black view background shows above and below the image (letter-boxing). Aspect Fill covers the view, but crops the sides of the image.
In landscape orientation, Aspect Fit would pillar-box the image (show the background view on the sides), and Aspect Fill would crop the top and bottom.
Assuming you don’t want to create different images just for iPhone X, and you want to cover the view, then you’re going to get cropping.
Rule: Compose your images so you don’t lose important visual information when Aspect Fill crops them.
Designing a New App
Close AspectRatioSample, and open NewCandySearch. Build and run on the iPhone X simulator:
This is a master-detail app with a list of candies. The detail view shows an image of the selected candy.
I’ll wait while you get your favorite snack! ;]
Scroll the table view, to see that it makes no attempt to avoid the home indicator. This is perfectly OK for vertically scrollable views and background images.
Rules:
Avoid the sensor housing and home indicator, except for background image and vertically scrollable views.
Avoid placing controls where the home indicator overlaps, or corners crop.
Don’t hide or draw attention to sensor housing, corners or home indicator.
Use Auto Layout
Open Main.storyboard, select either view controller, and show the Identity Inspector:
New projects created in Xcode 9 default to using Auto Layout and Safe Area Layout Guides. This is the simplest way to reduce the work needed for iPhone X design.
Rules:
Use safe area layout guides.
Use margin layout guides.
Center content or inset it symmetrically.
Use Standard UI Elements
Now you’re going to add a search bar with scope bar. And you might as well opt for the new large title, too.
Select Master Scene/Navigation Bar, show the Attributes Inspector, and check the box for Prefers Large Titles:
While you’re here, select the table view’s cell, and set its background color to light gray:
Next, open MasterViewController.swift: it already has most of the search controller code. You just have to replace the TODO comment in setupSearchController() with this:
// In iOS 11, integrate search controller into navigation bar if #available(iOS 11.0, *) { self.navigationItem.searchController = searchController // Search bar is always visible self.navigationItem.hidesSearchBarWhenScrolling = false } else { tableView.tableHeaderView = searchController.searchBar }
If the device is running iOS 11, you set the navigation item’s searchController property; otherwise, you put the search bar in the table view’s table header view.
Build and run on the iPhone X simulator. Admire the large title, then rotate the simulator to landscape, and tap the search field to show the scope bar:
The search field, cancel button and scope bar are all nicely inset from the rounded corners and sensor housing. The cell background color extends all the way across, and the table view scrolls under the home indicator. You get all these behaviors free, just for using standard UI elements.
Recommendation: Use standard UI elements.
Note: If you rotate back to portrait while the scope bar is showing, it collapses messily onto the search field. Fortunately, you can still tap the cancel button to get rid of the scope bar. This seems to be an iOS 11 bug: the same thing happens when the search bar is in the table header view, but doesn’t happen in the same app running in iOS 10.
Build and run the app on the iPhone 8 simulator, to see that it looks fine there, too:
Note: The iPhone X is compact width in landscape orientation, so it behaves like the iPhone 8, not the 8 Plus.
Here are some other recommendations:
Status Bar
The iPhone X status bar is higher, so dynamically position content based on the device type, instead of assuming a fixed 20-pt height.
Always show the status bar unless hiding it adds real value to your app.
3x Screen Resolution
Use PDF for flat vector artwork; provide @3x and @2x of rasterized artwork.
An app doesn’t use 3x if it doesn’t have a LaunchScreen.storyboard.
Home Indicator Special Cases
If your app uses the swipe-up-from-bottom gesture, turn on edge protect with preferredScreenEdgesDeferringSystemGestures(): the user must swipe up twice to access the home indicator.
If your app includes passive viewing experiences, turn on auto-hiding with prefersHomeIndicatorAutoHidden(): the home indicator fades out if the user hasn’t touched the screen for a few seconds, and reappears when the user touches the screen.
iPhone X Simulator vs Device
Use the simulator to check portrait and landscape layout.
Use an iPhone X device to test wide color imagery, Metal, front-facing camera.
Other Stuff
Don’t reference Touch ID on iPhone X. Don’t reference Face ID on devices that support Touch ID.
Don’t duplicate system-provided keyboard features like Emoji/Globe and Dictation buttons.
Updating an Existing App
What if you want to update an existing app for iPhone X? First, update its assets, including background images, to PDF or add @3x images. Then make sure it has a LaunchScreen.storyboard, and turn on Safe Area. Safe area layout guides change top, bottom and edge constraints, so check these, and fix them if necessary.
Check for any layout that depends on a 20-pt status bar or 44-pt tool bar, and modify it to allow for different heights. Or, if your app hides the status bar, consider unhiding it for iPhone X.
Next, set View as to iPhone X, and check every layout configuration. Move controls away from the edges, corners, sensor housing and home indicator.
Consider integrating search view controllers into the navigation bar.
Build and run the app on the iPhone X simulator, and check every layout configuration. In landscape, check that table view cell and section header content is inset, but the background extends to the edges.
Here’s a simple example to work through. Download the (original) finished sample app from UISearchController Tutorial. This app was built with Xcode 9 beta, before Apple announced the iPhone X, so Tom Elliott couldn’t test it on the iPhone X simulator.
Build and run it on the iPhone X simulator. In portrait, it looks like NewCandySearch, plus the navigation bar has a candy-green background color and a fancy title image instead of a large title:
But there’s a line between the navigation bar and the search bar, because the search bar is in the table header view. It gets worse: tap in the search field to show the scope bar:
The search bar replaces the navigation bar, removing the background color from the status bar. The search bar is still candy-green, so it just doesn’t look right.
To see more problems, cancel the scope bar, then rotate to landscape:
The title image is slightly clipped, and the sensor housing cuts a bit off the lower left corner of the search bar. But the table view isn’t customized, so its cell contents are well clear of the sensor housing.
Again, tap in the search field to show the scope bar:
Now the rounded corners clip the search bar.
Note: You probably noticed that showing the scope bar hides the first table view cell Chocolate Bar. Although this didn’t happen in NewCandySearch, it’s not a reason to move the search bar into the navigation bar. This is an iOS 11 bug that Tom Elliott reported to Apple on August 2, 2017. At the time of writing this tutorial, its status was still Open.
Turning on Safe Area
Open Main.storyboard, select one of the view controllers, and show the File Inspector:
This app doesn’t use safe area layout guides! So check that checkbox, then check the constraints now refer to Safe Area:
Build and run, and see how it looks in landscape, with the scope bar:
It’s even worse! The table header view extends far beyond its superview, although the table footer view is fine. This is possibly another iOS 11 bug, which might be fixed by the time you read this tutorial.
Even if Safe Area prevented the corner clipping, it’s not a good look for the status bar to lose its background color when the search bar replaces the navigation bar. You can fix that by moving the search bar into the navigation bar, so that’s what you’ll do next.
Integrating the Search Bar
Well, this is easy — just copy the NewCandySearch code that sets the navigation bar’s searchController into CandySearch. Open MasterViewController.swift in both projects, and copy these lines from NewCandySearch:
// replace tableHeaderView assignment with this if #available(iOS 11.0, *) { self.navigationItem.searchController = searchController // Search bar is always visible self.navigationItem.hidesSearchBarWhenScrolling = false } else { tableView.tableHeaderView = searchController.searchBar }
In MasterViewController.swift of CandySearch, paste these lines in viewDidLoad(), and comment out this line:
tableView.tableHeaderView = searchController.searchBar
Now open AppDelegate.swift, and find these lines:
UISearchBar.appearance().barTintColor = .candyGreen UISearchBar.appearance().tintColor = .white UITextField.appearance(whenContainedInInstancesOf: [UISearchBar.self]).tintColor = .candyGreen
Delete or comment out the first line: the search bar will get its tint color from the navigation bar.
Build and run, and tap in the search field to show the scope bar:
So that’s fixed the status bar background color, but now the text field is also green, making it hard to see the search field prompt text and icon. The insertion bar is also green, but you can fix that — change the third appearance setting in AppDelegate.swift to:
UITextField.appearance(whenContainedInInstancesOf: [UISearchBar.self]).tintColor = .white
Below this, add the following line:
UITextField.appearance(whenContainedInInstancesOf: [UISearchBar.self]).backgroundColor = .white
This should make the text field background white but, at the time of writing this tutorial, it doesn’t work, which suggests another iOS 11 bug. As an interim fix, you could change the color of the search field prompt text and icons. For example, to make the prompt text white, add the following code to AppDelegate.swift in application(_:didFinishLaunchingWithOptions:):
let placeholderAttributes: [NSAttributedStringKey : Any] = [NSAttributedStringKey(rawValue: NSAttributedStringKey.foregroundColor.rawValue): UIColor.white, NSAttributedStringKey(rawValue: NSAttributedStringKey.font.rawValue): UIFont.systemFont(ofSize: UIFont.systemFontSize)] let attributedPlaceholder: NSAttributedString = NSAttributedString(string: "Search", attributes: placeholderAttributes) UITextField.appearance(whenContainedInInstancesOf: [UISearchBar.self]).attributedPlaceholder = attributedPlaceholder
To make the search icon and clear button white, add the following code to viewDidLoad() in MasterViewController.swift:
let textField = searchController.searchBar.value(forKey: "searchField") as! UITextField let glassIconView = textField.leftView as! UIImageView glassIconView.image = glassIconView.image?.withRenderingMode(.alwaysTemplate) glassIconView.tintColor = .white let clearButton = textField.value(forKey: "clearButton") as! UIButton clearButton.setImage(clearButton.imageView?.image?.withRenderingMode(.alwaysTemplate), for: .normal) clearButton.tintColor = .white
Again, this doesn’t work at the time of writing this tutorial, but it might be fixed by the time you read this.
Where To Go From Here?
You now have a good idea of how to design apps that look great on the iPhone X, as well as the other iPhones. Here is a bundle of the two sample projects, with all the code from this tutorial. If you want to dig deeper, check out these resources:
Apple
Designing for iPhone X: Mike Stern presents the iPhone X Human Interface Guidelines
Building Apps for iPhone X: Paul Marcos updates the WWDC app, fixing three issues by using safe area layout, setting background color for background view instead of content view, and moving search bars into the navigation bar.
iPhone X Design Resources: Templates for Photoshop, Sketch and Adobe XD.
raywenderlich.com
If you’re new to auto layout, or just need to brush up, check out our tutorial and video course:
Auto Layout Tutorial in iOS 11: Getting Started: Updated to iOS 11, Xcode 9 and Swift 4, but pre-iPhone X-announcement.
Beginning Auto Layout video course: At the time of writing this tutorial, this video course was up-to-date for iOS 10, Xcode 8 and Swift 3.
Adaptive Layout Tutorial in iOS 11: Getting Started: Updated to iOS 11, Xcode 9 and Swift 4, but pre-iPhone X-announcement. Create a single layout that works on all iOS devices, without platform-specific code. Adaptive layout will also look good on future devices that haven’t even been released yet.
I hope you’ll soon have your apps running beautifully on the iPhone X. If you have any questions or comments, please join the forum discussion below!
The post Development Tutorial for iPhone X appeared first on Ray Wenderlich.
Development Tutorial for iPhone X published first on http://ift.tt/2fA8nUr
0 notes