#sharedfolder
Explore tagged Tumblr posts
Visit Tumblr Blog
Explore Tumblr blogs with no restrictions, modern design and the best experience.
Last Seen Tumblr Blogs


Fun Fact
Tumblr was created by web developers David Karp and Marco Arment.
Text
Shared folder I google shared documents I pirate bays website

Flexible Storage Plans Icedrive Review
Discover the next generation of cloud storage with icedrive’s flexible storage plans. Tailor your storage needs and enjoy hassle-free access to your files anytime, anywhere. Say goodbye to storage limitations and experience the future of cloud storage today.
If you’re tired of running out of space on your current cloud storage platform, it’s time to check out icedrive’s flexible storage plans. Whether you’re a casual user or a heavy data hoarder, icedrive has a plan that suits your needs.Let’s take a closer look at the options available:
Free Plan With Generous Storage Capacity:
Offers 10gb of free storage: Set up an account with icedrive and enjoy a generous 10gb of free storage space.
Perfect for basic needs: The free plan is ideal for those who require cloud storage for personal files, documents, or small media collections.
Access anytime, anywhere: With icedrive’s free plan, you can securely access your files from any device with an internet connection.
#icedrive#nearbyshare#airdropandroid#shareddrive#googleshareddrive#peertopeerfilesharing#sharedfolder
0 notes
Text
youtube
Google Drive Masterclass: Beyond Basic Storage for Maximum Efficiency Google Drive offers secure cloud storage that lets you access your files from any device, making collaboration and file sharing seamless. Its powerful search capabilities help you find documents instantly, even when searching by content rather than filename. With built-in compatibility with Google's productivity suite, you can create, edit and share documents, spreadsheets and presentations without ever needing to download separate software. Get access to the full Gmail and Google Drive course here: https://ift.tt/rDotSj1 ✅ Important Links to Follow - Google Audit: https://ift.tt/4JlAvX1 - Google Ads Management: https://ift.tt/gwsdL3O - SEO Website Update: https://ift.tt/sPwWoQI - Visit for digital resources: https://ift.tt/Yjw3bGt - Join a free community: https://ift.tt/qevNEQO 🔔𝐃𝐨𝐧'𝐭 𝐟𝐨𝐫𝐠𝐞𝐭 𝐭𝐨 𝐬𝐮𝐛𝐬𝐜𝐫𝐢𝐛𝐞 𝐭𝐨 𝐦𝐲 𝐜𝐡𝐚𝐧𝐧𝐞𝐥 𝐟𝐨𝐫 𝐦𝐨𝐫𝐞 𝐮𝐩𝐝𝐚𝐭𝐞𝐬. https://www.youtube.com/@kaeraemarketing/?sub_confirmation=1 🔗 Stay Connected With Me. Facebook: https://ift.tt/jFMbCn9 Instagram: https://ift.tt/6nfWSVv Tiktok: https://ift.tt/AhneXF7 Linkedin: https://ift.tt/SHrmBbt Pinterest: https://ift.tt/wzstqfl Website: https://ift.tt/STiCjLm 📩 For business inquiries: [email protected] ============================= 🎬Suggested videos for you: ▶️ https://youtu.be/8ld3_DuQqXg ▶️ https://youtu.be/XOYPpbh3zaY ▶️ https://youtu.be/mQJoodRwM84 ▶️ https://youtu.be/xex_HqP0QWU ▶️ https://youtu.be/p_x_ubfygfM ▶️ https://youtu.be/pFkiL4fh6o0 ▶️ https://youtu.be/00tcBgRxjAI ▶️ https://youtu.be/Lc-F8HzoyFY ▶️ https://youtu.be/poLpFGWBvFM ▶️ https://youtu.be/E8mUUvMsUmU ▶️ https://youtu.be/d-o5pv-HDFw ▶️ https://youtu.be/NTdbrijJKyM ▶️ https://youtu.be/I5sxI9RaHXY ================================= ✅ About Kelsey Flannery (KaeRae Marketing). Welcome! I’m Kelsey Flannery, also known as KaeRae, a Google Ads expert helping business owners navigate Google tools with ease. Through simple, informative videos, I provide guidance on Google Analytics, Google Ads, Google Business, Search Console, Tag Manager, YouTube Ads, Local Services Ads, Merchant Center, and more. As the owner of KaeRae Marketing, Inc., I provide results-driven marketing for home service businesses and eCommerce. Certified in key Google tools, I specialize in lead generation, PPC advertising, and online growth strategies. Let’s maximize your business’s online reach and drive real results! For Business inquiries, please use the contact information below: 📩 Email: [email protected] 🔔 Struggling with Google Analytics, Ads, or SEO? Subscribe for expert tips, effective strategies, & the best tools on PPC, lead generation, and maximizing your online reach! https://www.youtube.com/@kaeraemarketing/?sub_confirmation=1 ================================= 🔎 Related Phrases: Google Drive, cloud storage, file sharing, online collaboration, document storage, Google Docs, document backup, cloud computing, secure storage, file management, team collaboration, remote work, Google Workspace, productivity tools, file sync, cloud backup, document editing, shared folders, Google Sheets, Google Slides, file organization, data storage, digital workspace, online storage, Google Suite Hashtags #GoogleDrive #CloudStorage #FileSharing #OnlineCollaboration #DocumentStorage #GoogleDocs #DocumentBackup #CloudComputing #SecureStorage #FileManagement #TeamCollaboration #RemoteWork #GoogleWorkspace #ProductivityTools #FileSync #CloudBackup #DocumentEditing #SharedFolders #GoogleSheets #GoogleSlides #FileOrganization #DataStorage #DigitalWorkspace #OnlineStorage #GoogleSuite via Kelsey Flannery (KaeRae Marketing) https://www.youtube.com/channel/UCji8NuY6sx7RVYD85k_XJlQ March 21, 2025 at 12:15AM
#googleads#googleadwords#digitalads#ppcadvertising#digitalmarketing#businessgrowth#keywordsresearch#googlebusiness#Youtube
0 notes
Text
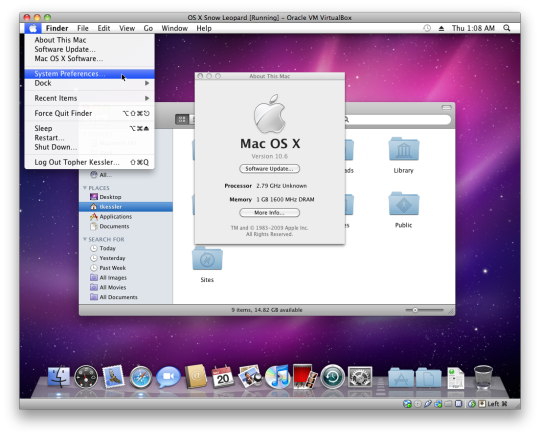
Virtualbox For Mac Os X

Download Photoshop CC 2018 Mac Full Version Free. Adobe Photoshop for Mac CC 2018 Full Version is part of Creative Cloud software from Adobe for mac. Photoshop was developed in 1988 by Thomas and John Knoll. Since then, it has become the most popular software in industry standard graphics editing. Download Adobe Photoshop 7.0 Full Version Free - ISORIVER The adobe photoshop 7.0 version is very versatile and practical compared to the previous versions and is one of the much sorts after version by windows and mac users. Download full version photoshop for mac free download.
1 First Steps
1.4 Supported Host Operating Systems
1.8 Running Your Virtual Machine
1.10 Snapshots
1.14 Importing and Exporting Virtual Machines
1.15 Integrating with Oracle Cloud Infrastructure
1.18 Soft Keyboard
2 Installation Details
2.1 Installing on Windows Hosts
2.2 Installing on Mac OS X Hosts
2.3 Installing on Linux Hosts
2.4 Installing on Oracle Solaris Hosts
3 Configuring Virtual Machines
3.1 Supported Guest Operating Systems
3.2 Unattended Guest Installation
3.4 General Settings
3.5 System Settings
3.6 Display Settings
3.11 USB Support
3.14 Alternative Firmware (EFI)
4 Guest Additions
4.2 Installing and Maintaining Guest Additions
4.3 Shared Folders
4.4 Drag and Drop
4.5 Hardware-Accelerated Graphics
4.7 Guest Properties
4.8 Guest Control File Manager
4.10 Memory Overcommitment
4.11 Controlling Virtual Monitor Topology
5 Virtual Storage
5.11 vboximg-mount: A Utility for FUSE Mounting a Virtual Disk Image
6 Virtual Networking
6.3 Network Address Translation (NAT)
7 VBoxManage
7.8 VBoxManage modifyvm
7.10 VBoxManage import
7.11 VBoxManage export
7.37 VBoxManage unattended
7.38 VBoxManage snapshot
7.39 VBoxManage clonevm
7.40 VBoxManage sharedfolder
7.41 VBoxManage extpack
7.42 VBoxManage dhcpserver
7.43 VBoxManage debugvm
7.44 VBoxManage cloudprofile
7.45 VBoxManage cloud
7.46 VBoxManage signova
7.47 VBoxManage updatecheck
7.48 vboximg-mount
Virtualbox For Mac 10 7
Virtualbox For Mac Os X El Capitan
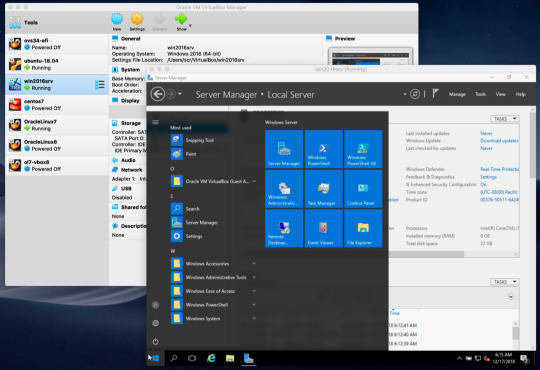
VirtualBox for Mac OS X12
VirtualBox for Mac OS X is an extremely popular virtualization application with an amazingly rich functionality. The tool is absolutely cross-platform and is available for Windows, Linux, Solaris and Mac OS systems. It can run everywhere from small embedded systems or desktop class machines to Cloud solutions. Cms client for mac. The tool has been popular for more than ten years and currently contains dozens of useful functions for the most efficient work. You can download Oracle VM VirtualBox for MacBook right here and get the most important virtualization tool in a couple of seconds.
On Mac OS X it isn't allowed to use libraries with relative paths for referencing to other libraries when the executable is setuid. You can display all linked libraries by the following command: otool -L /Applications/VirtualBox.app/Contents/MacOS/VirtualBox.dylib. VirtualBox for Mac OS X is an extremely popular virtualization application with an amazingly rich functionality. The tool is absolutely cross-platform and is available for Windows, Linux, Solaris and Mac OS systems. It can run everywhere from small embedded systems or desktop class machines to.
VirtualBox has a user-friendly interface and contains all the needed functions in its main menu. Both web developers and users with no additional knowledge can easily start using the app without any difficulties. The program runs smoothly on almost all machines with Mac OS X system, including your favorite MacBook. Moreover, the application is currently free to use and still does not contain any paid tools or trial period.
VirtualBox for Mac OS X has a range of benefits:
completely free to download and use
no trial period
no annoying ads or pop-up windows
a handy manual to help your on any stage of installation and running the app
top quality software with no bugs or malware
enormous possibilities for virtualization
designed for professionals, offering an advanced number of handy utilities
shared clipboard, as well as drag and drop technology: easy data sharing between the host and the virtual operating systems
snapshots: once you configured your VirtualBox, you can easily save the machine's state by creating a special snapshot
powerful functionality for developers and IT gurus
Manycam for mac os. You can start using VirtualBox for Mac OS X for free and get a full package of the needed option for effective virtualization!
VirtualBox for Mac OS X
Full Setup Size:
Mac OS X

Setup File Name:
32-bit (x86), 64-bit (x64)
License:
5.1.22
For devices:
Virtualbox For Mac 10 7
Oracle
Download VirtualBox
*VirtualBox for Mac OS X is available for free downloading without registration.
Virtualbox For Mac Os X El Capitan
Downloads VirtualBox for Mac OS X? Share the page on your site:
Free ares for mac download. With cost of digital cameras steadily dropping, and the quality of the images they produce continuing to increase, more and more of us are forgoing traditional film cameras for the new generation of digital. Simply insert your Digital Film into the reader, and run This program on the media, and then save the pictures off to another location. It was designed to be compatible with Memory Sticks, SmartMedia, CompactFlash I & II, Micro Drives, SD/XD Cards, Multimedia Chips, Floppy Disks and most other forms of Digital Film. There was no easier way to salvage those once in a lifetime moments you thought were lost forever! This program was developed as an easy to use application that was designed to recover images, movies, and sound files from all types of Digital Media.
0 notes
Photo

Vagrantインストール手順(VirtualBox環境) … macOS編 http://bit.ly/2WfXURU
Vagrantを導入し、VirtualBox環境で仮想マシンを動作させる手順を示す。 ホストOSはmacOS 10.14.4(Mojave)とする。
公式サイト
http://www.vagrantup.com/
インストール
Vagrantインストール
⦿ 以下からmacOS用のバイナリをダウンロード
https://www.vagrantup.com/downloads.html
⦿ 「vagrant_2.2.4_x86_64.dmg」をダブルクリック ⦿ 「Vagrant.pkg」をダブルクリックして [続ける] > [インストール] > パスワードを入力して[ソフトウェアをインストール]
% vagrant -v Vagrant 2.2.4
⦿ Guest Additionsのバージョンが正しくない時に自動でアップデートしてくれるためのプラグイン「vagrant-vbguest」をインストール
% vagrant plugin install vagrant-vbguest Installing the 'vagrant-vbguest' plugin. This can take a few minutes... Fetching: micromachine-2.0.0.gem (100%) Fetching: vagrant-vbguest-0.17.2.gem (100%) Installed the plugin 'vagrant-vbguest (0.17.2)'!
VirtualBoxインストール
⦿ 以下からmacOS用のバイナリをダウンロード
https://www.virtualbox.org/wiki/Downloads
⦿「VirtualBox-x.x.x-xxxxxx-OSX.dmg」をダブルクリック ⦿「VirtualBox.pkg」をダブルクリックして [続ける] > [続ける] > [インストール] > パスワードを入力して[ソフトウェアをインストール] ⦿ VirtualBoxを起動して「Extension Packが古いのでインストールするか」と表示されたら指示に従ってExtension Packをダウンロードしてインストール
BOX取得
次に仮想マシンのテンプレートとなるBOXを取得する。
以下のサイトでいろいろなBOXが配布されているが、ここではCentOS 7.2(64bit)を導入��る。
http://www.vagrantbox.es/
BOXの取得はvagrant box addコマンドを使い、引数として任意の仮想マシン名と取得元ファイルを指定する。
% vagrant box add centos72_64 https://github.com/CommanderK5/packer-centos-template/releases/download/0.7.2/vagrant-centos-7.2.box % vagrant box list centos72_64 (virtualbox, 0)
ここまでで~/.vagrant.d/boxes配下に仮想マシン名のディレクトリ、さらにその下に仮想マシンを動作させるハイパーバイザ名のディレクトリができてテンプレートが保存される。仮想マシンを削除してもこのテンプレートがあるので何度でも再作成できる。
% cd ~/.vagrant.d/boxes % tree . . └── centos72_64 └── 0 └── virtualbox ├── Vagrantfile ├── box.ovf ├── centos-vm-disk1.vmdk └── metadata.json
仮想マシン初期化、仮想マシン起動
BOXが取得できたら仮想マシンを初期化する。
まず仮想マシンの設定ファイルを作成する任意のディレクトリを作成し、以降はその場所で作業する。
% cd % mkdir -p vagrant/centos72 % cd vagrant/centos72
仮想マシンの初期化は以下のようにする。
% vagrant init centos72_64 % ls Vagrantfile
ここで作成されたVagrantfileに変更を加えることで仮想マシンの挙動を制御することができる。今はとりあえずそのままの状態で仮想マシンを起動する。
% vagrant up Bringing machine 'default' up with 'virtualbox' provider... ==> default: Importing base box 'centos72_64'... ==> default: Matching MAC address for NAT networking... ==> default: Setting the name of the VM: centos72_default_1556375501669_16376 Vagrant is currently configured to create VirtualBox synced folders with the `SharedFoldersEnableSymlinksCreate` option enabled. If the Vagrant guest is not trusted, you may want to disable this option. For more information on this option, please refer to the VirtualBox manual: https://www.virtualbox.org/manual/ch04.html#sharedfolders This option can be disabled globally with an environment variable: VAGRANT_DISABLE_VBOXSYMLINKCREATE=1 or on a per folder basis within the Vagrantfile: config.vm.synced_folder '/host/path', '/guest/path', SharedFoldersEnableSymlinksCreate: false ==> default: Clearing any previously set network interfaces... ==> default: Preparing network interfaces based on configuration... default: Adapter 1: nat ==> default: Forwarding ports... default: 22 (guest) => 2222 (host) (adapter 1) ==> default: Booting VM... ==> default: Waiting for machine to boot. This may take a few minutes... default: SSH address: 127.0.0.1:2222 default: SSH username: vagrant default: SSH auth method: private key default: Warning: Connection reset. Retrying... default: default: Vagrant insecure key detected. Vagrant will automatically replace default: this with a newly generated keypair for better security. default: default: Inserting generated public key within guest... default: Removing insecure key from the guest if it's present... default: Key inserted! Disconnecting and reconnecting using new SSH key... ==> default: Machine booted and ready! ==> default: Checking for guest additions in VM... default: The guest additions on this VM do not match the installed version of default: VirtualBox! In most cases this is fine, but in rare cases it can default: prevent things such as shared folders from working properly. If you see default: shared folder errors, please make sure the guest additions within the default: virtual machine match the version of VirtualBox you have installed on default: your host and reload your VM. default: default: Guest Additions Version: 4.3.30 default: VirtualBox Version: 6.0 ==> default: Mounting shared folders... default: /vagrant => /Users/xxx/vagrant/centos72
ここまで進むとVirtualBox上に仮想マシンが作成される。 ~/VirtualBox VMs配下には以下のファイルが作成されている。
% cd ~/VirtualBox\ VMs % tree . . └── centos72_default_1556291324827_95278 ├── Logs │ └── VBox.log ├── centos-vm-disk1.vmdk ├── centos72_default_1556291324827_95278.vbox └── centos72_default_1556291324827_95278.vbox-prev
仮想マシン操作
仮想マシンが作成されたら以下のような操作が可能になる。必要に応じて使用する。
状態表示
% cd ~/vagrant/centos72 % vagrant status Current machine states: default running (virtualbox) The VM is running. To stop this VM, you can run `vagrant halt` to shut it down forcefully, or you can run `vagrant suspend` to simply suspend the virtual machine. In either case, to restart it again, simply run `vagrant up`.
サスペンド
現在の状態を保存してスリープする。
% vagrant suspend ==> default: Saving VM state and suspending execution... % vagrant status Current machine states: default saved (virtualbox) To resume this VM, simply run `vagrant up`.
レジューム
スリープから復帰する。
% vagrant resume ==> default: Resuming suspended VM... ==> default: Booting VM... ==> default: Waiting for machine to boot. This may take a few minutes... default: SSH address: 127.0.0.1:2222 default: SSH username: vagrant default: SSH auth method: private key ==> default: Machine booted and ready! ==> default: Machine already provisioned. Run `vagrant provision` or use the `--provision` ==> default: flag to force provisioning. Provisioners marked to run always will still run.
シャットダウン
% vagrant halt ==> default: Attempting graceful shutdown of VM... % vagrant status Current machine states: default poweroff (virtualbox) The VM is powered off. To restart the VM, simply run `vagrant up`
再起動
仮想マシン起動中にVagrantfileを書き換えた場合は以下のようにして仮想マシンを再起動することで変更内容が有効になる。
% vagrant reload
仮想マシン削除
仮想マシンは簡単に削除することができる。削除してもVagrantfileは消えないので再度vagrant upを実行すれば仮想マシンを再作成できる。
% vagrant destroy default: Are you sure you want to destroy the 'default' VM? [y/N] default: Destroying VM and associated drives...
仮想マシン接続
vagrant sshコマンドにて仮想マシンに接続できる。ログインアカウントはvagrant専用ユーザとなる。
% vagrant up
仮想マシン内でのIPアドレスやルーティング等の設定は以下のようになっている。
⦿ IPアドレス 10.0.2.15 ⦿ デフォルトルータ 10.0.2.2 ⦿ DNSサーバ 10.0.2.3
[vagrant@localhost ~]$ ip a 1: lo: <LOOPBACK,UP,LOWER_UP> mtu 65536 qdisc noqueue state UNKNOWN link/loopback 00:00:00:00:00:00 brd 00:00:00:00:00:00 inet 127.0.0.1/8 scope host lo valid_lft forever preferred_lft forever inet6 ::1/128 scope host valid_lft forever preferred_lft forever 2: enp0s3: <BROADCAST,MULTICAST,UP,LOWER_UP> mtu 1500 qdisc pfifo_fast state UP qlen 1000 link/ether xx:xx:xx:xx:xx:xx brd ff:ff:ff:ff:ff:ff inet 10.0.2.15/24 brd 10.0.2.255 scope global dynamic enp0s3 valid_lft 86355sec preferred_lft 86355sec inet6 fe80::xxx:xxxx:xxxx:xxxx/64 scope link valid_lft forever preferred_lft forever [vagrant@localhost ~]$ ip r default via 10.0.2.2 dev enp0s3 proto static metric 100 10.0.2.0/24 dev enp0s3 proto kernel scope link src 10.0.2.15 metric 100 [vagrant@localhost ~]$ cat /etc/resolv.conf # Generated by NetworkManager search xxx.local nameserver 10.0.2.3
共有ディレクトリアクセス
ホストOS側で作成した~/vagrant/centos72ディレクトリが仮想マシン上の/vagrantにマウントされているのでここを使って両者でファイルのやり取りができる。
[vagrant@localhost ~]$ LANG=C df -h /vagrant Filesystem Size Used Avail Use% Mounted on none 234G 115G 120G 49% /vagrant [vagrant@localhost ~]$ mount | grep /vagrant none on /vagrant type vboxsf (rw,nodev,relatime)
プロビジョニング
先の共有ディレクトリを使って仮想マシン上でシェルスクリプトを実行させることができる。
例えば仮想マシンにApacheをインストールしたい場合、まずVagrantfileと同じディレクトリに以下のようなシェルスクリプトを作成する。
これはホストOS上で作業しても仮想マシン上で作業してもよい。
% vi startup.sh #!/bin/bash yum update yum -y install httpd
次に仮想マシンが起動した時にこのシェルスクリプトが実行されるようにVagrantfileを以下のように編集する。ファイルのパスはVagrantfileが配置されているディレクトリからの相対パスで指定する。
: Vagrant.configure(2) do |config| config.vm.box = "centos72_64" config.vm.provision "shell", path: "startup.sh" :
ここまで終わったら仮想マシンを起動する。
% vagrant up (既に仮想マシンが起動していたらvagrant reloadを実行)
起動したらApacheがインストールされていることを確認する。
% vagrant ssh [vagrant@localhost ~]$ yum list httpd : httpd.x86_64 2.4.6-40.el7.centos base
その他
ポートフォワーディング
ホストOSでhttp://127.0.0.1:8080/にアクセスした場合に仮想マシンの80番ポートに接続するにはVagrantfileを以下のように編集する。
: Vagrant.configure(2) do |config| config.vm.box = "centos72_64" config.vm.network "forwarded_port", guest: 80, host: 8080 :
ホストオンリーネットワーク
デフォルトではNAT接続による仮想マシンから外部へのアクセスしかできないため、ホストOSから仮想マシンにアクセスしたい場合はVagrantfileを以下のように編集する。
: Vagrant.configure(2) do |config| config.vm.box = "centos72_64" config.vm.network "private_network", ip: "192.168.33.10" :
こうすることで仮想マシン側で新たな仮想NICにIPアドレスが割り当てられ、ホストOS側のルーティングも自動的に設定される。
% vagrant ssh [vagrant@localhost ~]$ ip a : 3: enp0s8: <BROADCAST,MULTICAST,UP,LOWER_UP> mtu 1500 qdisc pfifo_fast state UP qlen 1000 link/ether xx:xx:xx:xx:xx:xx brd ff:ff:ff:ff:ff:ff inet 192.168.33.10/24 brd 192.168.33.255 scope global enp0s8 valid_lft forever preferred_lft forever inet6 fe80::xxx:xxxx:xxxx:xxxx/64 scope link valid_lft forever preferred_lft forever [vagrant@localhost ~]$ exit % ssh [email protected] [email protected]'s password: ***** <- アカウントと同じ [vagrant@localhost ~]$
ブリッジネットワークの作成��法は以下を参照のこと。
関連資料・記事 [Vagrant] ブリッジネットワークの作成方法
仮想マシンのエクスポート・インポート
仮想マシンの状態をまとめてエクスポートして他のBOX(テンプレート)として再利用することができる。
方法は簡単で、以下のコマンドを実行してできあがったファイルを移動先でインポートして初期化・起動するだけである。
⦿ エクスポート
% vagrant package ==> default: Attempting graceful shutdown of VM... ==> default: Clearing any previously set forwarded ports... ==> default: Exporting VM... ==> default: Compressing package to: /Users/xxx/vagrant/centos72/package.box % ls -l package.box -rw-r--r-- 1 xxx xxx 653633798 4 27 23:56 package.box
⦿ インポート、仮想マシン初期化 & 起動
% vagrant box add centos72_2 package.box % vagrant init centos72_2 % vagrant up
他にも様々な制御ができるがVagrantfileファイルそのものに詳しい説明が書かれているので割愛する。
参考サイト
Vagrant技術情報 (Qiita)
VirtualBox技術情報 (Qiita)
Vagrant入門 (ドットインストール)
開発環境の構築・共有を簡単にするVagrant入門 (Think IT)
Vagrant入門 (WEB ARCH LABO)
元記事はこちら
「Vagrantインストール手順(VirtualBox環境) … macOS編」
May 20, 2019 at 12:00PM
0 notes
Text
Migrated to proxmox hypervisor
Migrated to proxmox hypervisor
I completed migrating to a Proxmox base for my home infrastructure. Openmediavault it seems is not well suited as a virtualization and container platform. It’s good for a home NAS but I run into issues when I use the sharedfolder functionality for my VM and docker containers.
View On WordPress
0 notes
Text
Mt Sicapoo
Holy holy holy holy holy holy holy... ( HOWL A.Ginsberg ref.)
9/9 difficulty, yes you read it right. This is now my Favorite mountain

Mt Sicapoo was famous for The Penguin Rock at the summit
yess nman, ito ang pinakuna kong 9/9 at unang 3days sa bundok, totoong mahirap sya kumpara sa mgaprevious climb ko.
well it all started sa pagiging sabit ko. June 10-12 ung expedition namin, mga June 7 lng ako naka confirm, may nag backout sa group na inorganize ni kuya Randy Aguirre kaya ako yung pumalit.
kung matatandaan ko mga afterlunch na kami nagsimula, mga 1pm? or 12nn+ something.

ito yung picture namin mga pagod agad sa byahe mula manila.


unang river crossing ng GasGas River
at mga sumunod na trail sa GasGas River.


panalo tubig dito sa ilog, masarap mag swimming


Unang assault. papunta na sa campsite ng Mt Saulay. ginabi na kami dito, tangenang assault kase ito ubusan talaga ng lakas, full pack pa dala dala namin, mga around 7 or 8 nakarating kami ng campsite. Hindi na ako nakapag picture, mas nakakaubos ng lakas eh :(
May group meal kami na inorganize din ni kuya Randy at ate April, kung sino sino mag luluto, at kung anong ulam lulutuin, nakaasign lahat sa members. sobrang oraganize at nakikioperate nmn lahat kami kaya panalong panalo walang lamangan. Medyo maaga ako nakatulog nitong firstday, pagkakain plang nakatulog na ako pagkahiga, ang sakit ng katawan ko nito hahaha.
Second day, ang pag raratrat para makita ang summit.


Maaga ulit kami nag simula dito, mga 6am, hindi ko na natandaan kung sino nag ayos ng pagkain namin, pero idol kasi, may nakasaing na at ulam pagkagising ko. Hindi nmn ako palamunin, tumulong ako sa pag luluto sa 3rd day.


Eto yung mga picture na pahinga namen after assults, masarap pa sa pakiramdam dito, medyo okay ang lamig, lamig umaga at bundok.


Yun ito na nga, yung nag summit na kami, medyo iba ang pakiramdam, nawala lahat ng pagod ang sarap sa pakiramdam, sobrang iba, Je Ne Sais Quoi in french ika nga yung feeling, yung hindi ma explain.
Pag baba, pinauna na ako ni kuya Randy para mag saing ng kanin, medyo ratratan din ko binaba, medyo ma fog na at dumidilim.
After naming mag dinner non, nakisali na ako sa socials, at first time ko matikman yung Basil (Sugar Cane Wine) medyo lasang bulaklak, hindi ganon kaasim katulad ng lambanog, medyo smooth inumin. Sandaling socials din at maaga gising namin kinabukasan mga 3am at nakatoka ako mag luto para sa lunch namin.
Third Day, at ayaw parin paawat ng hirap, jusko, kung kahapon sobrang laki ng pag sisisi ko na nalimutan ko mag dala ng trailfood, dito badtrip na badtrip na ako dahil hindi ako nagdala. Nabuhay ako sa buraot ng trail food (sorry po at sobrang maraming salamat sa mga nahingan ko) . Pasalamat kami at maaga kami ang simula at hindi ganon kaniinit pero solid ang assault ng Mt Timarid. Aga agang parusa hahaha.


Medyo after namin mag lunch, saka nagpakita si haring araw, ayon papatay sa init at pagod, nahihilo na ako sa mga panahong ito, medyho may scarcity na din ng tubig, dahil ang lalayo ng water source, may 5hours ung layo ung iba 2hours tapos ang dala ko lang 1.5L na container kamusta naman ang pagtitipid ko.


After a long successful at nakakaiyak na expeditionm, eto kame nakangiti at akoy nag papasalamat sa malupit at panalong karanasan na sanay hindi ko makalimutan.

Issai, Ivy, Joan, Kuya Elmer, Kuya Mike, HikelikeMike, Kuya Randy, Ate April, Ej, James, Deesh, Rachel, at Drew. Maraming maraming salamat sa lahat. Alam kong tamihik akong tao pero sobrang naappreciate ko yung company nyo, medyo may pagsisi lng din ako dahil hindi ako ganon ka expressive pagdating sa pag sasalita pero hopefully till next climb, we can talk about life and how to live it fullest, lets inspire each other with the beauty of life and experiences and learn from each other. <3
“Ipababatid sa lahat ng minamahal na minamahal ko silang lahat. Mabubuhay ako ng nagmamahal sa pag ibig” - Segundo by Dong Abay
*Note - Halos lahat ng picture na ito ay galing at kuha ni James na binigay nya samin gamit ang sharedfolder, maraming maraming salamat kunhindi dahil sa picture at tyaga mo kumuha ng litrato kahit pagod na pagod sa pag akyat, wala akong milalagay sa journal ko na ito, libre kita beer pag nag kita tayo.
0 notes