#spent 3 hours cleaning the grout in the bathroom and kitchen
Text
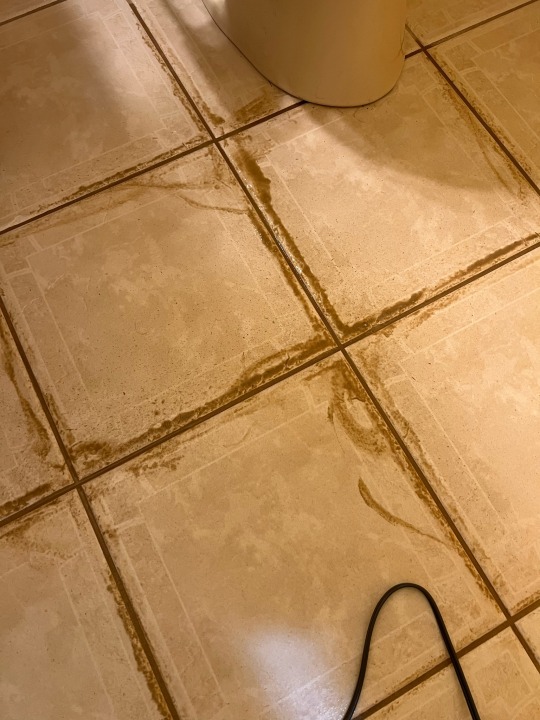
I got a steam cleaner and uh holy shit 🤢
#spent 3 hours cleaning the grout in the bathroom and kitchen#my body is going to hurt tomorrow#my mom is not a cleaner she’s a maybe once a month run a mop over the floor if that person#I on the other hand am a let’s vacuum daily and mop 1-2x a week girl
16 notes
·
View notes
Text
Living with these boys (not men, boys... I don’t care what their chronological age is, they are boys) is like living with children that I didn’t raise. Saturday I cleaned the bathroom (the sink, toilet, tub, I even scrubbed the grout of the tiles in the tub area and the floor), believe me it’s noticably more clean. This morning I went back and cleaned the ceiling, walls, and light fixture too because there were a lot of spider webs and dust that I could focus on now that the rest of the bathroom was clean. Now, do I expect them to sing my praises and thank me profusely? No, of course not. They were obviously all too happy living with it like it was, but the fact that they come behind me and manage to fuck it up in less than a day is like a slap to the face. Roomie #1 (the one with the dog and loves to mansplain) showered last night and left hair in the drain trap. This is something that I told him bothers me and he swore he always cleans up after himself... LIES! He has left hair in the drain on multiple occasions after I expressed how I feel about it. I don’t want to shower with your soggy hairball... but I will, because I refuse to touch it. He also shaved and got little hairs everywhere. Why?!
I also cleaned the kitchen a bit yesterday (wiped down the counters and stove) and after both roommates made dinner it was as if I’d done nothing. Grease and crumbs everywhere. There’s also been the same dishes in the sink for at least 4 days (I’ve lost track), when I was told upon touring the house that they don’t leave dishes in the sink for more than a day or two. This has not been the case in the almost 2 months I’ve been living here. It’s like they can’t handle washing more than a couple dishes at a time because they each have cleaned a couple things in the last few days and completely ignored the rest of the things in the sink. It’s like they can’t remember who they belong to anymore and just assume they belong to the other person. They sure as hell aren’t mine. I do my dishes at least once a day before I go to bed (or to work) and then put them away in the morning. I literally had to shove the sedentary dishes to the side of the sink so I’d have a place to wash.
I just don’t understand how they can stand it. They work from home and are here all the time. Wouldn’t you want the place that you spend a majority of your time to be clean? No? Just me? Roomie #1 literally spent over an hour cleaning his distillery equipment yesterday, but he can’t wipe down counters after he dirties them? Can’t do a couple dishes at night? Like, if you’re cleaning a pan, take 3 more minutes and clean the other dishes you’ve dirtied. Yes, we do have a dishwasher, but it’s only helpful if it gets run and then emptied regularly... which it does not.
We need to have a little house meeting soon before I lose my fucking mind.
#roommates#10 more months#we'll see if i make it#i like this house#but the people#the people that are living in it are driving me bonkers#i don't recall the last time i lived with two boys them being quite this bad about the kitchen#our shared bathroom was disgusting unless i cleaned it#but we did end up having a cleaning chore cycle#but they'd always wait until the end of the week#so then i'd have to wait until the end of the week#i'd prefer to just do my work and get it done#sometimes#i am a procrastinator#i'm too old for this#roommates... never again#at least if they were actually my children i could've brought them up better than this#hopefully#rants#just needed to get this out
14 notes
·
View notes
Text
Top Rated Steamers and Cleaners on Amazon
best steam mops 2019
Steam mops are a modern cleaning solution for busy people. They can be used on nearly any sealed floor material, including tiles, hardwoods, and laminates. Overall, these products are advertised as providing a deeper clean for flooring without the elbow grease or harsh chemicals required by mopping.
Do they live up to the hype? It’s hard to tell when you’re shopping online. As fellow shoppers, we know how confusing it can be to shop for a new product. When we read user reviews, hundreds of people raved or ranted about the same model. That made us wonder–what’s the difference between a great product and a waste of money?
We spent hours looking for the best models available. We looked for the best steam mops on the market, comparing dozens of models and keeping in mind different budget requirements, flooring types, and household messes (pets, kids, etc.) We compared features, specs, user reviews, and expert analysis from Consumer Reports, Good Housekeeping, and other publications.
In the end, we’re confident that we’ve found a few solid choices that really do live up to the hype! It’s all about finding the right one for your individual floors. We’ll guide you through which features are best for each flooring type, and help you narrow down your search.
Here’s a quick look at our top favorites:
BEST FOR WOOD
O-Cedar Microfiber Steam Mop O-Cedar
Our Rating: 4.7
Popularity: Medium
Click for Price on Amazon
BEST FOR TILE
Bissell Pet Bissell Lift-Off Pet
Our Rating: 4.6
Popularity: Medium
Click for Price on Amazon
best steam mops 2019
BEST HYBRID
Bissell Symphony Bissell Symphony
Our Rating: 4.3
Popularity: High
Click for Price on Amazon
We’ve selected a few top choices for wood floors and tile floors. A few of our choices are crossover mops, with attachments that let you use them as handheld cleaners all over your house. All of these options stand out for their smart design, powerful steam units, and durable materials.
On this page, we’ve provided some quick overviews of all our favorite products. We’ll talk you through the basic features, and give you a general sense of what each is good for. To read our full, in-depth reviews, just click on the Read More link after any model!
Below our steam mop reviews, we’ll introduce you to some of our other favorite cleaning machines which allow you to use steam on all sorts of surfaces, like kitchen countertops and bathroom fixtures! If you already know you want a more versatile steam cleaner that can handle projects above your floor, go ahead and skip to those reviews!
Best Steam Mop Reviews
For wood floors:
Steam mops for wood floors have to be powerful enough to do a good job of cleaning, but adaptive and gentle enough to protect hardwoods. These models have adjustable steam levels, cushioned mop pads, and simple designs that we love for mopping hardwood floors. As long as your flooring materials are sealed and finished, any one of these cleaning machines will suit you well!
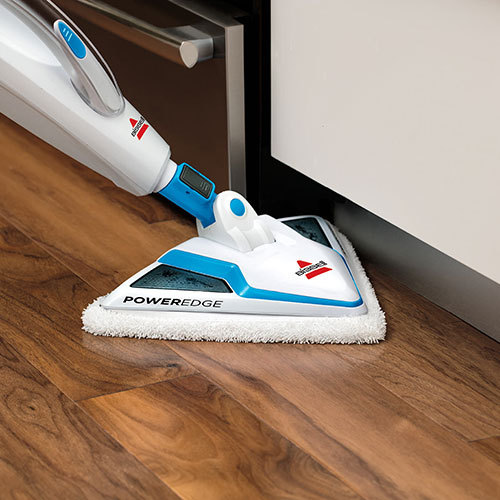
1. Bissell PowerFresh
BISSELL PowerFresh Steam Mop
Click for Price on Amazon
The Bissell PowerFresh is the top selling steam mop on Amazon. It’s very reasonably priced, and one of our least expensive recommendations. With a 3-setting control and two pads (scrubby and soft), it does a pretty good job on all flooring types.
Bissell also uses smartly designed mop pads, which wrap around the mop head with a clipless design. The microfiber fabric also uses integrated Microban technology, for additional antibacterial properties. The padded microfiber cloths are great for wood floors. They’re soft enough to protect your floor’s finish, while the microfiber actually polishes the wood as you go!
It’s a bit more versatile than the average offering, since it comes with a scrubber brush and special scrubbing mop pad for working on tiles. It’s a good choice if you have a variety of flooring types and want to clean them cheaply. The Bissell also ties with the Reliable for the longest power cord of any of our recommendations, at 23 feet long.
Since it’s so popular, there’s plenty of user feedback on the online marketplace. This has given Bissell time and incentive to address a few early issues with the PowerFresh. While early versions of this model had mixed reliability, recent reviews suggest that quality control has improved.
2. Shark Professional Pocket Mop (new!)
Shark Professional Dust, Mop, & Scrub Steam Electric Corded Pocket Mop
Click for Price on Amazon
The biggest selling point on this Shark is its versatility. Its mop head flips over, so you can use both sides of your pad! Plus, you can customize the steam settings to your specific flooring type and the mess at hand. It’s suitable for both hardwoods and tile.
We especially love the coverage you can get with this. The Shark’s mop head has a much larger footprint than the competition, at a full 12″. It also has a larger water tank to match. So, you can cover lots of ground quickly, without refills!
The mop head comes with two sets of pads, so you can cycle them through your laundry. The mop pads are also unique in that they’re double-sided. That means they’ll cover twice as much ground in a cleaning session. In short, you’re saving time and money!
This one is built to last, with a metal wand and sturdy construction. It’s not as rock-solid as the Reliable, but it’s a lot better than the Bissell! The steam is adjustable, so you can turn it down to protect your finishes and turn it up to remove tough stains. While it’s not as effective as the Bissell on tile, its rag-mop style cloths do a decent job of cleaning in between tiles.
3. Reliable Steamboy
Reliable Steamboy
Click for Price on Amazon
The Reliable Steamboy is our top quality choice for wood flooring. It’s perfectly equipped for cleaning hardwoods of all sorts. Its mop pads are highly cushioned, and wrap around the mop head to protect the molding around your floors, as well as the floors themselves. The mop head is also triangular, which helps you clean into corners much better than a traditional rectangle.
One of the best things about the Reliable is that it gets hotter than other steam mops. It comes from a company that also makes big canister systems, and they’ve clearly carried some of that expertise over! The super-hot steam ends up leaving less moisture behind, which is good news for your hardwoods! You won’t end up with streaks or puddles.
We can’t say enough about the Reliable. It’s very ergonomic, easy to use, and leaves very little moisture behind. It also comes with a glider attachment for refreshing and spot-cleaning carpets. It has an impeccable record for durability, and comes with a 1-year warranty.
Best Steam Mops for Tile Floors
If you have lots of tile floors in your house, you want a model with a bit more juice. You’ll need pressurized steam, and some decent scrubbing action from the mop pad. We also love features like grout brushes and spraying modes for working on the spaces in between tiles. Here are our favorite choices for tile floors:
4. Shark Genius Steam Pocket Mop System
Shark Genius Steam Pocket Mop System
Click for Price on Amazon
Shark’s new Genius mop is one of our absolute favorites right now. It’s particularly impressive when you realize how inexpensive it is! We’re currently recommending it as our most affordable solution for tile floors.
There are lots of reasons to love the Genius!
The first is the pads on this one, which are really stellar. For people like us, who geek out over the weave and texture of mop pads, they’re a dream! The Genius pads have lots of nap, which is what we look for to clean into the grout between tiles. They also have these grippy rows sewn in, which work like those Rubbermaid cleaning cloths. They scrub the surface as you move the head, so you don’t have to keep running back and forth over the same area.
We’re also massive fans of the new steam spray feature that Shark has built into the Genius. We hope it makes its way into the rest of their mops! Most other mops with “spray” features blast steam from the whole pad. It does help get into grout, but it also starts to get messy fast. This one targets a spray to one specific area, so you can tackle a problem spot without making puddles! Score!
5. Bissell Lift-Off Pet
Bissell Lift-Off Pet
Click for Price on Amazon
The Bissell Lift-Off Pet is our top quality recommendation for tile floors. We love it for its tile scrubbing abilities and long warranty. The mop head is equipped with a snap-on scrubber brush, which is perfect for reaching into grout, as well as scraping off tough spots like crusted food or gum.
It also comes with special scrubbing pads. All the mop pads stretch to fit over the head, so you don’t have to use any clips, catches, or brackets. These parts are often delicate and annoying, so that’s a plus for us!
It’s also very versatile. The Lift-Off features lets you make full use of a 13-piece attachment set, and provides plenty of power to back them up. It’s also one of the only options with a padded fabric attachment for upholstery and curtains. Because it has adjustable steam, it’s also suitable for wood floors!
The Bissell’s warranty is extra long, at 2 years. That’s at the high end of warranty coverage for this kind of product. Reviewers had very few complaints about this updated model. It’s more powerful and more durable than its predecessor. Plus, there are intelligent new features like stain removal, steam alert lights, and odor removal with Febreze scent discs!
6. Shark Blast and Scrub
Shark Blast & Scrub Steam Pocket Mop
Click for Price on Amazon
This Shark features both a normal mode, and a pressurized “Blast” mode. You can also combine the two for full-blast on tough tile and grout. Steam levels are controlled automatically, so you always have a base layer of moisture to help the mop glide easily along floors. Then, you can turn on the spray mode to amp up the cleaning.
The blasting mode is great for sanitizing areas with deeper grout, since it reaches deep into crevices to kill hidden bacteria that you can’t reach with other mops. This one also comes with a dedicated scrubbing cloth for tough messes. You can use it for the tricky bits, then swap out for the standard pocket to protect your hardwoods.
You can also sanitize and spot clean above floor level, using the attachment nozzle and extension hose. It’s hard to beat this thing for versatility!
The Shark Blast and Scrub uses the same wide, double-sided pocket mop design as the Professional model we’ve recommended for hardwoods. You can clean with both sides of the mop head, and cover lots of ground with the 12″ floor attachment.
Frequently Asked Questions about Steam Mops
How do these work?
To begin with, steam is a natural cleaning whiz. If you’ve ever seen a detective movie where the ace investigator uses steam to open envelopes, you can already see why! Instead of requiring chemical solvents, the mix of super-hot water and air dissolves sticky adhesives and other messy compounds in a jiffy. So, rather than having to use soaps or other nasty mopping chemicals, you just use water and heat! In most cases, steam does an even better job!
With a base layer of steam keeping the mop pad wet, these mops eliminate a lot of the friction you encounter with a traditional stick mop. The mop head glides along the floor, loosening dirt with steam and heat rather than relying on scrubbing. You can hover over a spot to give it more steam, and then gently scrub away the spot.
These also have cloth pads, like a normal mop. They’re generally a bit more sophisticated than the manual version, and are made from microfiber or chamois. Some pads also integrate anti-bacterial coatings to help trap and kill bacteria. You can wash and reuse mop pads for a variable amount of time, depending on the company.
What can they clean?
Basically, any sealed floor surface. These are an effective tool in your cleaning arsenal for laminates, tiles, hardwoods, and pretty much any other flooring you can think of. They’re not designed to clean whole carpets, although some models have attachments for spot treatment and “refreshing” small areas.
Some models include “lift-away” or “lift-off” features. This lets you use the unit without the wand or mop head. It gives you a basic handheld steam cleaner, which you can use with the included attachments for surfaces like countertops, plumbing, and kitchen appliances.
These attachment sets are generally pretty good, but they’re not as heavy-duty as a full-sized canister cleaner. Expect them to do a decent job for light cleaning and maintenance on most surfaces. Also, some aren’t as powerful in the handheld mode.
Why are they better than a traditional mop and bucket?
These use pressurized, high temperature steam to sanitize flooring surfaces, killing harmful bacteria and biological matter, and reducing residual bacteria and mold in cracks of tile floors. This type of soap-less cleaning saves you money, since you won’t have to buy cleaners. It’s also a safer, more eco-friendly way to clean your floors.
They’re a powerful tool for chemical-free cleaning. Because they don’t use any harmful chemical cleaners, eco-minded consumers can rest easy while still cleaning with maximum effectiveness. Steam also reduces exposure to allergens in cleaners, and eliminates the risk of your pet ingesting toxic chemicals.
These don’t rely on a bucket of water, which can get dirty as you clean and leave streaks and muddy spots on the floor. You won’t have to deal with your mop water cooling as you clean, and you’ll always have full heat for breaking down stains and dried spills. You’ll also be leaving a lot less moisture behind.
You won’t have to use nearly as much elbow grease. Steam dissolves or loosens pretty much any floor mess, so you’ll just have to keep moving the mop head back and forth to wipe things away.
How do I know if my floor is sealed?
If you’re not sure if your floor is sealed, there’s a good chance it isn’t.
Linoleum and laminates are usually a safe bet for steam mopping, as are new tile and hardwood flooring. Older tile can develop cracks along the grout, or pockmarks in the sealant. Older hardwoods frequently have cracks between boards, which can let moisture seep into the base of the flooring. Make sure you check your floor’s warranty, or get someone who knows what to look for to double check for you.
What can happen if my floors aren’t sealed?
Wood floors can warp and buckle. Without the proper sealant, these mops can also mar or destroy the finish of the wood. With tile floors, water can seep between tiles and create mold in the floor support beams and cushion.
Even if floors are sealed, they’re not necessarily designed to be cleaned with a steam mop. Some finishes can be destroyed or removed by this kind of cleaning, so please check your manual or call the installer first if you’re not sure.
Why are there so many mixed reviews for steam mops online?
We found that a good many of the negative reviews on our choices came from people who didn’t follow the user manuals, or had unrealistic expectations about what these products could actually do.
Often, complaints were due to people using tap water, or trying to mix soaps into the tank. Other problems were due to running the tank on empty, or treating it roughly, using it like a traditional stick mop.
Other issues mentioned in some reviews are from older incarnations of these models, and have since been recognized and addressed by the manufacturer. We’ve pointed out specific examples of those in our in-depth reviews.
We can’t stress enough how important it is to follow the provided instructions. Beyond that, it seems like a given that you’ll have to treat it with care. They’re not industrial, and are more finicky than a vacuum cleaner or other machine. Take your time, and let the steam do the work for you.
With that said, almost all steam mops are fairly temperamental. They’re a newer technology, and are still improving. Some of them have weak points, like mop cloth clips or poorly designed tank clasps. We’ve avoided those as much as possible, to minimize delicate breakage points. We also tried to find products with at least 1-2 years of warranty coverage.
We put in extra effort to find superior options that have minimal risks of breakage or faulty parts. We chose the models with the least negative reviews. And we put the extra time in to read all the user reviews to see if there are really serious issues with our recommendations. We’re confident that our choices are more reliable and more effective than their competition.
Important Tips for Using Your Steam Mop
Take your time, and let the steam do the work for you.
If a spot doesn’t come clean, just give it some more steam. Don’t apply too much pressure when you scrub. That puts stress on it, and defeats the purpose of the unit.
Follow the instructions
It’s really important to use filtered/distilled water. Even if you have great water filtration at home, the slightest mineral content can build up and clog delicate parts in the unit.
Also, make sure you follow the manufacturer’s guidelines for how to clean each surface. Each one has its own quirks, so it’s worth taking the time to get to know them before you start cleaning. Read more on what not to do with a floor steam mop.
Be realistic
These can do some pretty deep cleaning, but it’s not an industrial solution for really heavy, accumulated messes. If your floors have a lot more than just surface stains or spots, you might want to look at a heavier-duty canister cleaner. These have attachments for floors, and a lot more power.
Check your floors
You really do want to be sure that your floors can be steam mopped. Check the warranties, and test a small area of the floor to be extra safe.
Do the prep work
If there’s loose dirt on your floors when you’re mopping, that clogs up the mop cloth and means you’ll get less cleaning time out of it. Loose dirt and pet hair should be vacuumed first, so you’re just using a mop for the really tough stuff.
See Also:
Bissell Symphony
Bissell Symphony
Click for Price on Amazon
The Symphony vacuums and mops at the same time, so you don’t have to clean your floor twice! This combo machine is great for any smooth tile or wood floors. Both features are simple and easy to use. They’re also kept separate by design, so you won’t be vacuuming up moisture, and you won’t be mopping up any dirt. To see our full review of it, along with other combination and hybrid cleaners, click HERE.
Steam mops vs. steam cleaners vs. handhelds
Steam Canister Handheld Steam Mop
Cleans Tile Floors VG N/A VG
Cleans Wood Floors F N/A VG
Steams fabrics P VG N/A
Cleans Carpets N/A F F
Cleans kitchen fixtures VG F N/A
Cleans bathroom VG G N/A
Cleans windows VG G N/A
Sanitizes VG G VG
Cleans car interior VG G N/A
Cleans grills VG P N/A
Cleans grout VG F G
VG – Cleans very well
G – Cleans moderately well
F -Does a fair job but not great
P – Cleans, but not ideally suited
VP – Doesn’t do much
N/A – isn’t mean to clean
Buying Guide
How to choose between our top-rated steam mop recommendations:
Consider your flooring types
Think about your lifestyle and household
Decide on your budget
Read up on our picks:
Shark Genius Steam Pocket Mop System
top quality steam mop for all flooring types
Bissell Pet
Shark Steam and Spray
Bissell PowerFresh
O-Cedar
Shark Professional Pocket
So, which one is right for you?
1. For cleaning all flooring types on a budget: Shark Genius Steam Pocket Mop System
Shark Genius Steam Pocket Mop System
Click for Price on Amazon
2. For people with pets and/or messy households: Bissell Pet
Bissell Pet
Click for Price on Amazon
3. For the ultimate convenience and maneuverability: Shark Blast and Scrub
Shark Blast & Scrub Steam Pocket Mop
Click for Price on Amazon
4. For houses with all kinds of floors: Bissell PowerFresh
BISSELL PowerFresh Steam Mop
Click for Price on Amazon
5. For houses with mostly wood floors: O-Cedar
O-Cedar Microfiber Steam Mop
Click for Price on Amazon
Note: The best steam mop so far, considering the quality, price, and popularity, in our opinion, is the O-Cedar.
6. The Best Bargain: Shark Professional Pocket Mop
Shark Professional Dust, Mop, & Scrub Steam Electric Corded Pocket Mop
Click for Price on Amazon
Best Handheld Steam Cleaner
These are a convenient, portable option for tackling small jobs around the house. You can use handheld cleaners on pretty much everything you’d use a full size cleaner on. They have attachments for grout, windows, counters, grills, and more!
Some higher-end models have padded fabric attachments and upholstery tools, as well as large brush sets. The difference between handheld cleaners and canister systems is mainly a matter of scale. While they won’t work for deep cleaning jobs or whole rooms, handheld cleaners give you most of the same features as a full size system for a fraction of the price! They take less time to set up and take down, and take up far less space in the closet.
Our favorite handheld steam cleaner is the Reliable Pronto:
reliable white handheld steamer
Click for Price on Amazon
This high-end handheld steamer comes with heavier duty attachments than other brands, and is built much more sturdily overall. It comes with metal brushes, a stainless steel boiler, and a deluxe fabric attachment. The unit pumps out 48-bar steam pressure–as much as most canister systems!
We’re also super impressed with the warranty coverage from Reliable, who insures everything for 1 year, and covers the boiler for life! While the Pronto is certainly an investment, it’s a really impressive handheld cleaner.
Read our full review, and see our Best Handheld Steam Cleaner Reviews!
Best Canister Steam Cleaner
For tougher jobs, as well as larger projects, a canister cleaner system is your best bet. They can handle most floors, with extra-large attachments. They’ve also got more power and pressure than a mop, so they’re great for deep cleaning tile floors and grout. You can even use a canister system on concrete walks and garage floors!
In addition to the floor heads, canister systems sport larger, heavier-duty versions of the attachments sold with handheld systems. And unlike handheld systems, they really do have the power to clean grills, car parts, hard water deposits, and built-up kitchen grease.
One of our favorite full-size steam cleaners is the McCullough 1275:
Heavy-Duty Steam Cleaner
Click for Price on Amazon
This canister cleaner pumps out 48-psi, and has an extra-large tank capable of providing 45 minutes of cleaning time. The trigger has a lock function, so you can have constant steam without holding your finger down the whole time.
The attachment set includes extension wands, a mop head with microfiber cloths, and plenty of brushes and bristles to clean the rest of your house. The McCullough is a powerful solution for windows, floors, appliances, and pretty much everywhere else in your house or car. The best part is the price–it costs about the same as a steam mop, but covers a lot more ground!
Read more and check out the:
Best Steam Cleaner Reviews
Our special guide to canister-style steam cleaners takes you through everything you need to know about these all-purpose cleaning machines. We’ll talk about what they work well for, how they measure up to steam mops, and why we think you should own one. Check it out!
Best Carpet Steam Cleaner Reviews
Aside from spot-treatment, steam mops aren’t your best tool for addressing carpet issues. That’s where carpet cleaners come in! We’ve reviewed a few of our favorites in this dedicated guide. It answers all your questions about carpet cleaning machines, and shows you lots of options, from compact household units to heavy-duty machines that are ideal for homes with all-carpeted flooring. You’ll find it all here.
Best Steam Mop for Hardwood Floors
This special guide focuses on all the do’s and don’ts of shopping for a steam mop when you’ve got hardwood floors. We’ll discuss which types of hardwoods can handle steam, and which not to touch. We’ll also talk through the features that make a model better or worse for hardwoods, and talk about what to do when you’ve got a mixture of flooring. So, if you’ve got hardwoods to clean, read on!
Best Steam Mop for Tile Floors
Likewise, we’ve put together a guide specifically for tile and laminate flooring! In this guide, we talk about all the features you should look for to clean tiles of all sorts, and deal with grout too! There are lots of exciting options, so check it all out now!
Best Floor Steam Cleaner Reviews
When you need extra power for cleaning floors and a mop won’t cut it, you need a floor steam cleaner. We’ll talk about the differences between steam mops and floor steam cleaners in this guide. We’ve also reviewed a few of our favorites, so you can get a sense of which one would be the best for your home.
Best Robotic Window Cleaners
Looking for other products that help you keep your home or office clean with minimal work? Check out our review of the best robotic window cleaners on the market today. These great products have come a long way in the last decade or so since becoming mainstream, and one or two can make short work of even the dirtiest windows completely autonomously. We look at five of the best robot window cleaners and cover their pros and cons.
1 note
·
View note
Text
Best Steam Mop Reviews 2019:
Steam mops are a modern cleaning solution for busy people. They can be used on nearly any sealed floor material, including tiles, hardwoods, and laminates. Overall, these products are advertised as providing a deeper clean for flooring without the elbow grease or harsh chemicals required by mopping.
Do they live up to the hype? It’s hard to tell when you’re shopping online. As fellow shoppers, we know how confusing it can be to shop for a new product. When we read user reviews, hundreds of people raved or ranted about the same model. That made us wonder–what’s the difference between a great product and a waste of money?
We spent hours looking for the best models available. We looked for the best steam mops on the market, comparing dozens of models and keeping in mind different budget requirements, flooring types, and household messes (pets, kids, etc.) We compared features, specs, user reviews, and expert analysis from Consumer Reports, Good Housekeeping, and other publications.
In the end, we’re confident that we’ve found a few solid choices that really do live up to the hype! It’s all about finding the right one for your individual floors. We’ll guide you through which features are best for each flooring type, and help you narrow down your search.
Here’s a quick look at our top favorites:
BEST FOR WOOD
O-Cedar Microfiber Steam Mop O-Cedar
Our Rating: 4.7
Popularity: Medium
Click for Price
BEST FOR TILE
Bissell Pet Bissell Lift-Off Pet
Our Rating: 4.6
Popularity: Medium
Click for Price
BEST HYBRID
Bissell Symphony Bissell Symphony
Our Rating: 4.3
Popularity: High
Click for Price
We’ve selected a few top choices for wood floors and tile floors. A few of our choices are crossover mops, with attachments that let you use them as handheld cleaners all over your house. All of these options stand out for their smart design, powerful steam units, and durable materials.
On this page, we’ve provided some quick overviews of all our favorite products. We’ll talk you through the basic features, and give you a general sense of what each is good for. To read our full, in-depth reviews, just click on the Read More link after any model!
Below our steam mop reviews, we’ll introduce you to some of our other favorite cleaning machines which allow you to use steam on all sorts of surfaces, like kitchen countertops and bathroom fixtures! If you already know you want a more versatile steam cleaner that can handle projects above your floor, go ahead and skip to those reviews!
Best Steam Mop Reviews
For wood floors:
Steam mops for wood floors have to be powerful enough to do a good job of cleaning, but adaptive and gentle enough to protect hardwoods. These models have adjustable steam levels, cushioned mop pads, and simple designs that we love for mopping hardwood floors. As long as your flooring materials are sealed and finished, any one of these cleaning machines will suit you well!
1. Bissell PowerFresh
BISSELL PowerFresh Steam MopSave
Click for Price
The Bissell PowerFresh is the top selling steam mop on Amazon. It’s very reasonably priced, and one of our least expensive recommendations. With a 3-setting control and two pads (scrubby and soft), it does a pretty good job on all flooring types.
Bissell also uses smartly designed mop pads, which wrap around the mop head with a clipless design. The microfiber fabric also uses integrated Microban technology, for additional antibacterial properties. The padded microfiber cloths are great for wood floors. They’re soft enough to protect your floor’s finish, while the microfiber actually polishes the wood as you go!
It’s a bit more versatile than the average offering, since it comes with a scrubber brush and special scrubbing mop pad for working on tiles. It’s a good choice if you have a variety of flooring types and want to clean them cheaply. The Bissell also ties with the Reliable for the longest power cord of any of our recommendations, at 23 feet long.
Since it’s so popular, there’s plenty of user feedback on the online marketplace. This has given Bissell time and incentive to address a few early issues with the PowerFresh. While early versions of this model had mixed reliability, recent reviews suggest that quality control has improved.
2. Shark Professional Pocket Mop (new!)
Shark Professional Dust, Mop, & Scrub Steam Electric Corded Pocket MopSave
Click for Price
The biggest selling point on this Shark is its versatility. Its mop head flips over, so you can use both sides of your pad! Plus, you can customize the steam settings to your specific flooring type and the mess at hand. It’s suitable for both hardwoods and tile.
We especially love the coverage you can get with this. The Shark’s mop head has a much larger footprint than the competition, at a full 12″. It also has a larger water tank to match. So, you can cover lots of ground quickly, without refills!
The mop head comes with two sets of pads, so you can cycle them through your laundry. The mop pads are also unique in that they’re double-sided. That means they’ll cover twice as much ground in a cleaning session. In short, you’re saving time and money!
This one is built to last, with a metal wand and sturdy construction. It’s not as rock-solid as the Reliable, but it’s a lot better than the Bissell! The steam is adjustable, so you can turn it down to protect your finishes and turn it up to remove tough stains. While it’s not as effective as the Bissell on tile, its rag-mop style cloths do a decent job of cleaning in between tiles.
3. Reliable Steamboy
Reliable SteamboySave
Click for Price
The Reliable Steamboy is our top quality choice for wood flooring. It’s perfectly equipped for cleaning hardwoods of all sorts. Its mop pads are highly cushioned, and wrap around the mop head to protect the molding around your floors, as well as the floors themselves. The mop head is also triangular, which helps you clean into corners much better than a traditional rectangle.
One of the best things about the Reliable is that it gets hotter than other steam mops. It comes from a company that also makes big canister systems, and they’ve clearly carried some of that expertise over! The super-hot steam ends up leaving less moisture behind, which is good news for your hardwoods! You won’t end up with streaks or puddles.
We can’t say enough about the Reliable. It’s very ergonomic, easy to use, and leaves very little moisture behind. It also comes with a glider attachment for refreshing and spot-cleaning carpets. It has an impeccable record for durability, and comes with a 1-year warranty.
Best Steam Mops for Tile Floors
If you have lots of tile floors in your house, you want a model with a bit more juice. You’ll need pressurized steam, and some decent scrubbing action from the mop pad. We also love features like grout brushes and spraying modes for working on the spaces in between tiles. Here are our favorite choices for tile floors:
4. Shark Genius Steam Pocket Mop System
Shark Genius Steam Pocket Mop SystemSave
Click for Price
Shark’s new Genius mop is one of our absolute favorites right now. It’s particularly impressive when you realize how inexpensive it is! We’re currently recommending it as our most affordable solution for tile floors.
There are lots of reasons to love the Genius!
The first is the pads on this one, which are really stellar. For people like us, who geek out over the weave and texture of mop pads, they’re a dream! The Genius pads have lots of nap, which is what we look for to clean into the grout between tiles. They also have these grippy rows sewn in, which work like those Rubbermaid cleaning cloths. They scrub the surface as you move the head, so you don’t have to keep running back and forth over the same area.
We’re also massive fans of the new steam spray feature that Shark has built into the Genius. We hope it makes its way into the rest of their mops! Most other mops with “spray” features blast steam from the whole pad. It does help get into grout, but it also starts to get messy fast. This one targets a spray to one specific area, so you can tackle a problem spot without making puddles! Score!
5. Bissell Lift-Off Pet
Bissell Lift-Off PetSave
Click for Price
The Bissell Lift-Off Pet is our top quality recommendation for tile floors. We love it for its tile scrubbing abilities and long warranty. The mop head is equipped with a snap-on scrubber brush, which is perfect for reaching into grout, as well as scraping off tough spots like crusted food or gum.
It also comes with special scrubbing pads. All the mop pads stretch to fit over the head, so you don’t have to use any clips, catches, or brackets. These parts are often delicate and annoying, so that’s a plus for us!
It’s also very versatile. The Lift-Off features lets you make full use of a 13-piece attachment set, and provides plenty of power to back them up. It’s also one of the only options with a padded fabric attachment for upholstery and curtains. Because it has adjustable steam, it’s also suitable for wood floors!
The Bissell’s warranty is extra long, at 2 years. That’s at the high end of warranty coverage for this kind of product. Reviewers had very few complaints about this updated model. It’s more powerful and more durable than its predecessor. Plus, there are intelligent new features like stain removal, steam alert lights, and odor removal with Febreze scent discs!
6. Shark Blast and Scrub
Shark Blast & Scrub Steam Pocket Mop
Click for Price
This Shark features both a normal mode, and a pressurized “Blast” mode. You can also combine the two for full-blast on tough tile and grout. Steam levels are controlled automatically, so you always have a base layer of moisture to help the mop glide easily along floors. Then, you can turn on the spray mode to amp up the cleaning.
The blasting mode is great for sanitizing areas with deeper grout, since it reaches deep into crevices to kill hidden bacteria that you can’t reach with other mops. This one also comes with a dedicated scrubbing cloth for tough messes. You can use it for the tricky bits, then swap out for the standard pocket to protect your hardwoods.
You can also sanitize and spot clean above floor level, using the attachment nozzle and extension hose. It’s hard to beat this thing for versatility!
The Shark Blast and Scrub uses the same wide, double-sided pocket mop design as the Professional model we’ve recommended for hardwoods. You can clean with both sides of the mop head, and cover lots of ground with the 12″ floor attachment.
Frequently Asked Questions about Steam Mops
How do these work?
To begin with, steam is a natural cleaning whiz. If you’ve ever seen a detective movie where the ace investigator uses steam to open envelopes, you can already see why! Instead of requiring chemical solvents, the mix of super-hot water and air dissolves sticky adhesives and other messy compounds in a jiffy. So, rather than having to use soaps or other nasty mopping chemicals, you just use water and heat! In most cases, steam does an even better job!
With a base layer of steam keeping the mop pad wet, these mops eliminate a lot of the friction you encounter with a traditional stick mop. The mop head glides along the floor, loosening dirt with steam and heat rather than relying on scrubbing. You can hover over a spot to give it more steam, and then gently scrub away the spot.
These also have cloth pads, like a normal mop. They’re generally a bit more sophisticated than the manual version, and are made from microfiber or chamois. Some pads also integrate anti-bacterial coatings to help trap and kill bacteria. You can wash and reuse mop pads for a variable amount of time, depending on the company.
What can they clean?
Basically, any sealed floor surface. These are an effective tool in your cleaning arsenal for laminates, tiles, hardwoods, and pretty much any other flooring you can think of. They’re not designed to clean whole carpets, although some models have attachments for spot treatment and “refreshing” small areas.
Some models include “lift-away” or “lift-off” features. This lets you use the unit without the wand or mop head. It gives you a basic handheld steam cleaner, which you can use with the included attachments for surfaces like countertops, plumbing, and kitchen appliances.
These attachment sets are generally pretty good, but they’re not as heavy-duty as a full-sized canister cleaner. Expect them to do a decent job for light cleaning and maintenance on most surfaces. Also, some aren’t as powerful in the handheld mode.
Why are they better than a traditional mop and bucket?
These use pressurized, high temperature steam to sanitize flooring surfaces, killing harmful bacteria and biological matter, and reducing residual bacteria and mold in cracks of tile floors. This type of soap-less cleaning saves you money, since you won’t have to buy cleaners. It’s also a safer, more eco-friendly way to clean your floors.
They’re a powerful tool for chemical-free cleaning. Because they don’t use any harmful chemical cleaners, eco-minded consumers can rest easy while still cleaning with maximum effectiveness. Steam also reduces exposure to allergens in cleaners, and eliminates the risk of your pet ingesting toxic chemicals.
These don’t rely on a bucket of water, which can get dirty as you clean and leave streaks and muddy spots on the floor. You won’t have to deal with your mop water cooling as you clean, and you’ll always have full heat for breaking down stains and dried spills. You’ll also be leaving a lot less moisture behind.
You won’t have to use nearly as much elbow grease. Steam dissolves or loosens pretty much any floor mess, so you’ll just have to keep moving the mop head back and forth to wipe things away.
How do I know if my floor is sealed?
If you’re not sure if your floor is sealed, there’s a good chance it isn’t.
Linoleum and laminates are usually a safe bet for steam mopping, as are new tile and hardwood flooring. Older tile can develop cracks along the grout, or pockmarks in the sealant. Older hardwoods frequently have cracks between boards, which can let moisture seep into the base of the flooring. Make sure you check your floor’s warranty, or get someone who knows what to look for to double check for you.
What can happen if my floors aren’t sealed?
Wood floors can warp and buckle. Without the proper sealant, these mops can also mar or destroy the finish of the wood. With tile floors, water can seep between tiles and create mold in the floor support beams and cushion.
Even if floors are sealed, they’re not necessarily designed to be cleaned with a steam mop. Some finishes can be destroyed or removed by this kind of cleaning, so please check your manual or call the installer first if you’re not sure.
Why are there so many mixed reviews for steam mops online?
We found that a good many of the negative reviews on our choices came from people who didn’t follow the user manuals, or had unrealistic expectations about what these products could actually do.
Often, complaints were due to people using tap water, or trying to mix soaps into the tank. Other problems were due to running the tank on empty, or treating it roughly, using it like a traditional stick mop.
Other issues mentioned in some reviews are from older incarnations of these models, and have since been recognized and addressed by the manufacturer. We’ve pointed out specific examples of those in our in-depth reviews.
We can’t stress enough how important it is to follow the provided instructions. Beyond that, it seems like a given that you’ll have to treat it with care. They’re not industrial, and are more finicky than a vacuum cleaner or other machine. Take your time, and let the steam do the work for you.
With that said, almost all steam mops are fairly temperamental. They’re a newer technology, and are still improving. Some of them have weak points, like mop cloth clips or poorly designed tank clasps. We’ve avoided those as much as possible, to minimize delicate breakage points. We also tried to find products with at least 1-2 years of warranty coverage.
We put in extra effort to find superior options that have minimal risks of breakage or faulty parts. We chose the models with the least negative reviews. And we put the extra time in to read all the user reviews to see if there are really serious issues with our recommendations. We’re confident that our choices are more reliable and more effective than their competition.
1 note
·
View note
Text
10 Things in Your Home That You’re Cleaning Too Much (or Not Enough)
I’m slowly becoming the cleaning authority for this blog – and I love it! While most might recoil at the thought of cleaning in any capacity, it’s actually a way in which I de-stress. It’s never felt like a chore for me; in fact, I clean my house almost every day.
At first, I thought this was great. My home is perpetually tidy and organized, so I thought to myself, “I’ve got this whole adult thing down!” That is, until I learned there’s actually a thing as too clean (sounds fake, but okay).
After doing some digging, I found 10 common items in the home that are actually overcleaned. While, on the surface, this doesn’t sound like a bad thing, it may be causing some unwanted damage. Let’s take a look at what chores you need to scale back on and what you should be prioritizing instead. Some might even surprise you!
How Often Should I Clean My House?
The short answer is daily.
I know, I just contradicted my title, but in reality, there are tasks you need to do on a daily basis to keep your house neat and functional.
If your bed is unmade, don’t wait until it’s laundry day to get your sheets in order. If your kitchen floor is collecting crumbs, don’t wait until your designated cleaning day to sweep it up. Just do it!
Beyond that, it really varies from homeowner to homeowner. You’ll need to determine the purpose of the room and how frequently you use it.
If homeowners took time every day to do small but impactful chores around their house, it would cut down on the time spent on their actual chore day. Which brings me to my next point: time.
How Much Time Should I Spend Cleaning My House?
Realistically, if you’re tidying up your home on the daily, it should only take between 15 – 30 minutes to keep your house in order. According to Good Housekeeping, the two areas of your home that requiring daily cleaning are your kitchen and bathroom.
Keep in mind that this could vary according to the homeowner. Again, you’ll need to consider how frequently you use the area. If you find that you don’t cook a meal every day, you might not have to clean your kitchen as often.
If you clean your home only once a week or biweekly, you’ll find it will take longer to get the job done. Based on the size of your house and the severity of the mess, it could be 2 – 3 hours out of your day dedicated to cleaning.
That’s why most cleaning experts recommend at least 15 – 30 minutes spent cleaning and tidying your home every day. The more you get into this habit, the less time you’ll spend on a weekly or monthly basis.
10 Things You’re Cleaning Too Much
If you find that your cleaning tasks are taking longer than expected, there might be things in your home that you’re cleaning more often than necessary. While “too clean” is never a bad thing, you could be actually be causing damage from overcleaning or cleaning with the wrong product.
“In general, Americans have a perception of using a product on everything that needs to be cleaned, which oftentimes isn’t necessary,” explained Debra Johnson, home cleaning expert at Merry Maids.
Let’s break down the top offenders.
Wood Furniture
Wood polish, when used excessively, can cause damage to the finish. Additionally, wax-based wood polish can lead to an oily buildup that traps more dust and dirt.
Your wood furniture requires a good cleaning only once a month using a furniture polish that’s wax- and silicone-free; otherwise, it will just need a light dusting with a dry cloth every other week.
Windows
Windows need to be cleaned one – two times a year. You can spot-clean as needed, but beyond that, overcleaning your windows can lead to streaking and dirt buildup.
It may also be a sign of a larger issue. Instead of obsessively wiping down your windows indoors, take a power washer or a squeegee with hot water and clean the outside of them.
Upholstered Furniture
Upholstered furniture should be cleaned only by a professional just once a year. It requires a steam cleaning and proper cleaning products that are better off in the hands of a pro.
What you can do is take a vacuum accessory, like a tube or a brush attachment, and clean beneath and on top of the cushions for crumbs and other loose dirt and dust.
Don’t attempt a DIY cleaning with a product. If you use too much cleaner or overwet the surface of your furniture, it can cause mold and mildew growth in the cushions.
Large Kitchen Appliances
While it’s best practice to wipe down your kitchen surfaces on the daily, there are a few appliances that don’t need as much attention as others.
Unless there’s a smell or large spill, you need to deep-clean your refrigerator only once a month. Keeping up on expired food or spills can help minimize the bulk of the cleaning. Make sure to use disinfecting wipes to eliminate any bacteria that may be lurking in your vegetable or meat drawers.
Your oven or range will need deep cleaning just two – three times a year. If you keep up on spills, it should last pretty long between cleans. When you do one, use a deep-cleaning spray or cream. But don’t use a scraping tool or scouring brush, as it could damage the lining.
While overcleaning these two appliances won’t cause damage, creating an appropriate amount of space between cleanings will free up more time to address more pressing areas of your kitchen, like your floors or countertops.
Carpets and Rugs
Your carpet is another area that requires a professional cleaning with a steam cleaner at least once a year.
You can do it yourself, but avoid overwetting the carpet fibers, as it could cause mildew and mold growth beneath the surface.
Otherwise, vacuum the carpet and rugs once a week to collect crumbs and address stains and spots when they occur. Instead of chemicals, use soap, water and vinegar to clean stains, since they won’t damage the carpet fibers.
Fixtures
Ceiling fans, lighting fixtures and other hanging or mounted accessories need to be cleaned only once a month with a microfiber cloth.
For glass fixtures, you can use warm water to wipe off any caked-on dust or grime that might have accumulated, but if you’re staying on top of dusting once a month, it shouldn’t take too much elbow grease.
Tile Grout
While you should wipe down your bathroom and kitchen floor on a weekly basis, scrubbing your tile floors, backsplashes and walls to the grout can be pushed back to a monthly task.
You also don’t want to wash tile with too much water, as it can get into the cracks and grout lines, causing the floor to warp or grow mold. You can use a wet mop every month to do a deep clean, but don’t overwet the mop or floor.
On a weekly basis, you can sweep, dry-mop and spot-clean when necessary.
Baseboards
Your baseboards need a vacuum or duster cleaning once every three months to collect dirt, dust and buildup. You can also use a microfiber cloth to run along the side of your baseboards for tougher-to-reach areas.
Cast-Iron Pans
Never wash a cast-iron pan with soap or put it in the dishwasher. Dish soap will strip the “seasoning,” accumulated textures and flavor from cooking off the pan.
All it requires is a light rinse with warm water after every use, as well as an oil “seasoning” to keep it from drying out.
If you do need to scrub your cast-iron pan, use kosher salt and water.
Bedspreads
Larger bedspreads, like comforters and quilts, can go three months without a good wash. When it’s time to wash, you might need to take them to a cleaner, depending on their size and fabric care tag.
Your bedsheets and pillowcases should get washed every month, however. You should also wash your pillows at least twice a year. As for your mattress, mattress pads can be washed twice a year, while the actual mattress can be cleaned by sprinkling a light coating of baking soda on the surface. Let the baking soda absorb into the mattress fibers, then vacuum up the remaining baking soda.
10 Things You’re Not Cleaning Enough
Instead of focusing on the areas of your home that should be be cleaned on a biweekly or monthly basis, focus on those that need cleaning on a daily or at least weekly basis.
Debra Johnson suggested that your kitchen is the main priority when cleaning.
“This especially applies if you are cooking meals at home, as you want to ensure that nothing sticky is left on your countertops and that bacteria isn’t spread across the room,” Johnson said.
Let’s take a look at some areas you should be cleaning on a daily or weekly basis.
Microwave
You should wipe down your microwave at least once a week. Caked-on food particles can cause overheating and damage to your microwave if not addressed immediately.
Take a microfiber cloth and hot water and wipe it down, spot-cleaning spills and splashes in between. You can also use white vinegar to disinfect the microwave interior.
Bathroom Surfaces
Your bathroom surfaces, like your countertops, toilet, shower and floor, need to be wiped down every day to prevent bacteria growth.
You should also make it a habit to wipe down your shower after every use, because water left standing in your tub can cause mildew and mold growth if not cleaned regularly.
You can use white vinegar to disinfect the surfaces of your bathroom. It’s natural and safer than bleach cleaning products.
Electronics
Electronics, like your laptop or computer, remote control and home phone, can collect germs and bacteria and rarely get cleaned.
Dust, crumbs and dirt can lodge into the cracks of your keyboard, making it an underrated dirty surface in your home. Purchase a can of compressed air to dislodge any particles in the cracks of your keyboard, then wipe it down with a microfiber cloth lightly damped with rubbing alcohol at least once a week.
Your cell phone or home phone can be wiped down with antiseptic alcohol wipes. You don’t want to overly wet the surface of your phone and cause damage, so a light cleaning every week will do.
Lastly, your remote control should be cleaned at least once a week as well. You can also use antiseptic alcohol wipes for your remote.
Kitchen Countertops and Sink
Your kitchen countertops and sink need to be cleaned daily. Bacteria thrives in wet areas of your home, so places like your bathroom and kitchen should be wiped down and sanitized to prevent it from spreading to nearby surfaces of your home.
To make sure you address the bacteria in your kitchen, use white vinegar to sanitize and disinfect every surface.
Make it a habit to clean these surfaces daily, even if you don’t cook a meal in your home every day.
Trash Can
The most common odors in your kitchen come from your trash can. Food and liquids can easily ooze their way out of the trash bag and sit at the bottom of the bin. The smell will be there no matter how many times you change your trash bag, so make it a habit to clean your trash can once every week to get rid of any particles that may have found their way to the bottom.
When you go to take out your trash, use disinfecting wipes on the outer and inner walls of the can and sprinkle baking soda at the bottom of the bin, then spray an all-purpose cleaner on top. Use a microfiber cloth to wipe up the baking soda and spray.
Dishwasher
The inside of your dishwasher can collect food particles, grease and soap scum that may end up clogging your dishwasher drain. Not to mention, if you let the food sit in there long enough, it can become odorous or get lodged onto your clean dishes during a cycle.
Make it a habit to wipe down your dishwasher after every cycle, or at least once every week. Sprinkle a cup of baking soda onto the bottom of your empty dishwasher and let it sit overnight. The baking soda will deodorize the machine.
The next morning, add a cup of vinegar to the dishwasher and run the cycle on the hottest setting available.
Door Handles and Switches
Without even thinking about it, we’re constantly touching areas in our home, like doorknobs, drawer handles, light switches and other fixtures. Over time, these areas become hubs for germs and bacteria if they’re not cleaned on a regular basis.
Once a month, take a microfiber cloth and white vinegar and wipe down these places in your home. Go room by room, careful to not miss a switch plate.
Sponges
Any porous cleaning supplies you have, like sponges, can collect a ton of bacteria. Think about it – your sponge comes into contact with everything filthy in your home: your dishes, sink, countertops, toilet and shower.
Make sure once a week to disinfect your cleaning sponges with white vinegar. You can also throw your sponge in with your dishes in the dishwasher.
A more sustainable solution would be to swap your sponges with microfiber cloths. They’re just as effective as cleaners but don’t hold as much bacteria as sponges do.
Washing Machine
Once a month, you need to clean the inside of your washing machine. Dirt from clothes, soap scum and other bacteria can grow in the wet inside of a washing machine.
Add a cup of white vinegar to the detergent drawer and run an empty cycle on the hottest setting available. This will disinfect and deodorize the inside of your machine.
Additionally, you should clean out your dryer lint catcher after every cycle to prevent dryer fires.
Coffee Pot
Even as a coffee lover, I fall short when it comes to cleaning my coffee makers. Once a month, you need to clean your coffee maker to remove debris from the ground beans, hard water and lime deposits that can build up in the machine.
Most coffee makers will come with a cleaning system that you can run by pouring clean, hot water in the basin and letting it run on the hottest setting.
You can also add half white vinegar and half water to the mix to disinfect the inside. However, you’ll need to repeat the cleaning at least two times afterward to remove any remaining vinegar in the coffee maker. Then place the coffee filter basket into your dishwasher and run it on the hottest cycle.
Create a Realistic Schedule for Cleaning Your House
It might seem overwhelming to clean every week or even every day, but staying on top of the messes in your home will eliminate the hours from your weekend spent deep-cleaning your house.
The good news is you can save money on cleaning products by using natural cleaners found in your home. Johnson asserts that the most effective cleaners at your disposal are rubbing alcohol, white vinegar and water. You can even make a DIY all-purpose cleaning solution from mixing one quarter cup of vinegar and a gallon of water.
She also suggests stocking up on microfiber cloths, as they’re the most universal material for household cleaning.
“It’s best to color-code your microfiber cloths for different tasks – one color for dusting, another for cleaning floors, a third for glass surfaces and one cloth designated for bathrooms,” Johnson recommended.
Your next step is to create a realistic schedule for cleaning and maintaining your home. Good Housekeeping offers a helpful graphic for daily, weekly and monthly cleaning tasks.
Setting up a solid schedule will help you prioritize the areas in your home that you’re not cleaning enough and give you a break from the places you’re currently cleaning too much.
Do you have any cleaning tips for our readers? What’s one area of your home you found out you’re cleaning too much? Share your thoughts in the comments section below!
The post 10 Things in Your Home That You’re Cleaning Too Much (or Not Enough) appeared first on ZING Blog by Quicken Loans.
from Updates About Loans https://www.quickenloans.com/blog/10-things-home-youre-cleaning-much-not-enough
0 notes
Text
20+ Easy Ways To Clean Your House That Takes Little To No Effort
Cleaning your house always seems like a neverending task. No matter what, you feel as though it’s going to take up more time than you bargained for. Plus, it seems as though whenever you clean, it just gets dirty in .5 seconds anyway. So, all in all, what’s the point? Instead of getting on your hands and knees to scrub for hours on end, there are some brilliant hacks online that make cleaning your house easier than ever.
1. Sweeper slippers, so you can sweep your home whenever you walk to the freezer to get yourself more ice cream.
BuzzFeed
BuzzFeed
If you have hardwood or tile floors, you have gotta have at least five pairs of these houseshoes. I just toss them into the wash without tearing off the sole to wash separately. Reason: the soles on mine by far outlast the tops of the shoes. They help control dust and animal hair. I like them. // Edited after thought: Pairs of these shoes were handed to out-of-state traveler friends (a fella and his two grown daughters). They sounded so thankful to have these microfiber houseshoes to wear, and they expressed at how cushy they felt.
–Penny
Get them on Amazon for $10.40.
2. If you have pets that shed (or if you shed) you need this easy-to-pick-up-hair broom for your carpets. It traps all the hair, all the time.
Amazon
This broom is awesome! I have two large breed dogs (that she’d like crazy) and hard wood floors that have to be swept daily. I don’t know how well it would work on carpets, but it does an excellent job sweeping fur, hair, and dirt up. The best part… You don’t have to clean the bristles like a regular broom. I just rinsed the broom when I was done and the little dirt that was on the bristles washed away! I hate having to pull dust balls and hair out of normal broom bristles.
Just note: The rubber bristles are not fine enough to clean under moldings (the small gap between the molding and the floor) for those areas, I still use a vacuum.
I’m not sure why this broom has negative reviews.. I read a bunch of them and can not relate to any of the issues people complained about. I’m chalking them up to user error. As John Lydgate said “you can’t please all of the people all of the time”.
Get it on Amazon for $18.50.
3. If you tie two microfiber rags around a pair of tongs, you can clean those moldy refrigerator shelves that have been smelling like rotten chicken and spilled cold brew.
onecrazyhouse.com
onecrazyhouse.com
This brilliant idea comes from One Crazy House. You can use any tongs you have in the house, and can easily buy microfiber cloths on Amazon for only $9.99.
4. If you have a ceiling fan, quit tossing dust around your room and use an old pillowcase to clean it.
homemakerchic.com
This idea comes from Homemaker Chic. Not only is it way easier than using a duster, but the dust falls right into the pillowcase so you’re not sneezing your brains out.
5. Use this spot cleaner to get even the toughest stains out of your carpets without scrubbing like a madman. Just blot it right on.
Amazon
I had terrible rust and oil stains all over the seats of my car when I bought it. I tried other cleaners to get it out, but they actually made the stains darker. I took it to the dealership to see if they could get it out and they flat out told me no, so I gave up and lived with it for almost 5 years. I tried this after it was recommended by a friend. I sprayed it on and literally watched the stain run right off my seat. It was amazing! I thought I was going to have to pay hundreds of dollars to replace the seats in my car because nothing else would work. This stuff really is awesome!
Get a bottle of this easy-to-use cleaner on Amazon for only $10.50.
6. Put vinegar in a zip-lock bag and place it over your showerhead for 1-2 hours to get all that rusty, dusty mold-ish stuff off.
BuzzFeed
7. Get into the cracks of your tiles or bathroom floor/shower with an automatic scrubbing brush, which takes the time and effort out of cleaning.
Amazon
Ok, I feel stupid writing this, but I hope it encourages you to buy this….
I just spent 2 hours scrubbing the ceramic tile floor in my 2nd bathroom. This is a room where my elderly, incontinent cat lives so… use your imagination. I leave pee pads and towels down, but she still does her thing. I clean her room consistently, and every few months I do a heavy duty scrubbing by soaking the floor and grout in Nature’s Miracle and start scrubbing. It takes hours because I can’t get the corners well, and the grout is such a pain to clean.
Well, this product is amazing. I used this for the grout lines, and I used the corner attachment for… corners. It was amazing. It got gunk and grime off the grout that has been there for years (I haven’t resealed this floor since it will have to be taken out when the cat dies). I even used these to scrub the cabinet doors, around the toilet, etc. and they were really, really great. you have to put the right amount of pressure on the brush, but once you do- it’s *wonderful.*
See how stupid I feel, writing such a glowing review for this? I swear I wasn’t endorsed, I wish they would pay me to test products after this! Between my Rubbermaid Reveal power Scrubber and Nature’s Miracle my bathroom is cleaner than it has been in years, and in less time than it’s ever taken me to deep clean it.
Get it on Amazon for only $13.54.
8. Use your dishwashing wand for floors by putting vinegar in it to scrub your tiles/stone shower.
smartschoolhouse.com
You can also use it for the glass doors to get them perfectly clean, according to Smart School House. You can grab one of these on Amazon for only $9.38.
9. For those nasty, disgusting toilet rings, use a pumice stone to get the colors and stains out way easier and quicker (because who wants to spend time scrubbing a toilet, anyway?)
Amazon
The house I recently moved into had a hard water line in the toilet and it was no big deal for the first couple of months. I never really paid much attention to it. That is, until my mom said she would be coming over for a visit. Suddenly, the hard water line in the toilet was glaring at me, making me feel like a disgusting human being living in filth. I had to get rid of it. A kitchen sponge and a dish cloth were both ruined in my attempts. Finally, after countless hours of research and many sleepless nights, I had my answer: The Pumie. As soon as it arrived I was on my hands and knees scrubbin’ that bowl. After it was done I was stood over my toilet with the same posture as a successful climber reaching the summit of Mt. Everest. I had defeated the hard water line with The Pumie. The satisfaction I had by accomplishing this otherwise mundane task made me realize I had truly entered adulthood. But, I did not stop there. Hard water marks around the bathroom sink drain? Gone. Hard water lines around the kitchen faucet? GTFO. The Pumie is truly a marvel to behold and I will be eternally grateful for it’s help in vanquishing the hard water lines that would have made my mother disown me.
Get it on Amazon for $9.15.
10. After you clean your toilet rings, use these incredible toilet refreshers that help to prevent the ring from ever coming back again.
Amazon
These are the best in-bowl cleaners that I have found after trying many others. They keep the toilet bowl fresh especially on the toilets that are less frequently used in my house. I have found them to last a month or more. My father, a plumber, warned me years ago never to use those cleaners which you drop in the tank because the strong chemicals will eventually corrode the plumbing fixtures. Yes, I took his advice after some unwanted repairs.
Grab them on Amazon for only $1.98.
11. If you have a stainless steel fridge, Pledge will not only clean it but also polish it at the same damn time.
thediygirl.com
The DIY Girl, just spray the Pledge right onto the fridge and buff it off with a dry cloth. Grab a bottle of pledge on Amazon for only $4.19.
12. Clean your stove top in only 5 minutes by using some dish soap (like dawn) and hydrogen peroxide. Use a dish soap brush to scrub it off.
mythirtyspot.com
Hack from My Thirty Spot.
13. Clean any white sink easily and have it sparkling again by using baking soda and hydrogen peroxide.
lemonslavenderandlaundry.com
Hack from Lemons, Lavender, and Laundry.
14. Clean every inch of your keyboards by using this double sided brush.
Amazon
My laptop hasn’t been so clean since I bought it! Much better than compressed air cleaning. Using the rubbery end, you can even clean off the finger-tracker; and using the little brush, you get out all those annoying little crumbs and pieces of stuff that both impede your keyboard performance and make it look dirty. I wish I would have taken before and after pictures—the difference is astonishing! I was skeptical, but this little tool is worth the price.
Get it on Amazon for $4.95.
15. Use a lint roller on any lampshades that have a bunch of built-up hair and dust on them.
creeklinehouse.com
Hack from Creekline House.
16. Also, use a lint roller on any screens to capture all that pollen and dust.
handymanmagazine.co.nz
Hack from Handyman Magazine.
17. Mix baking powder and a flowery-smelling essential oil to spread all over your mattress. The scent will get soaked into it, and when you’re done, just vacuum it right up.
onegoodthingbyjillee.com
Hack from One Good Thing by Jillee.
18. Put your pillows in the washing machine while you let the baking soda sit in your bed so they smell brand new.
thehappierhomemaker.com
Hack from the Happier Homemaker.
19. Get rust stains out of your dishwasher by running a cycle of Kool-Aid.
wikihow.com
Hack from Wikihow.
20. Get weird scents out of your washing machine (like that horrible wet-dog smell) by running on an empty cycle with vinegar.
iheartnaptime.net
Hack from I Heart Naptime.
21. Clean your vacuum filters in the dishwasher to save time and get a better clean.
agirlandherneedle.blogspot.com
Hack from A Girl and Her Needle.
22. Also, clean your vent covers, filters, and anything else that’s easily removable in the dishwasher so you can let it run and do something better with your time while it’s cleaning.
onecrazyhouse.com
Hack from One Crazy House.
The post 20+ Easy Ways To Clean Your House That Takes Little To No Effort appeared first on .
https://postaddict.com/2018/03/09/20-easy-ways-to-clean-your-house-that-takes-little-to-no-effort/
0 notes
Text
The Long-Neglected Upstairs Bath
Three years ago I had a great idea. An idea that was mostly driven by my desire to have one bathroom in this house that contained a tub suitable for soaking.
Anyone remember this tub (with an effing fireplace?!) from my last house?
Yeah. Me too. With pain in my heart every time I think about it.
This house has three full bathrooms, and, for the first 3 years I lived here, zero working bathtubs. I mean, there was one, kinda, but if you put more than 6” of water in it it started to leak… and it also had iron stains that made it look like someone had previously been dismembered in there.
So, back to my great idea. Three years ago I decided to do a “quick” overhaul of the upstairs bathroom. In my mind that meant taking out the old tub (which meant the old tile had to come out too) then putting in a new tub, re-tiling the floor, and maybe a coat of paint. Voila! Done! Right?
Ha. Hahaha.
Yeah, no.
What actually happened was that I tore up the tile and realized the toilet had been leaking into the subfloor for the last twenty-ish years…
I mean. I could have picked any hobby in the world. I could have been a person who golfs. But no. I had to pick the one that means I’ve spent more hours of my life then I care to think about scraping up subfloor that has been rotted and soaked through with sewer water.
Sigh.
After the trauma with the subfloor and my desire not to spend any more time in that room, it took me a whole year to finally tile the shower surround (and only got it done because Sarah–from the Ugly Duckling House–came to visit and got my ass in gear)…
Then I had a failed attempt at leveling the floor, and finally just said “screw it” because you can, in fact, use a bathtub that only has a raw pipe as the faucet in a bathroom that has a plywood floor…
And then, guys, I just straight-up ignored this room for the last couple of years. I mean, literally every time I woke up in the middle of the night and had to pee, and then had to walk downstairs and to the opposite end of the house… at those times I was keenly aware of my failure to get the upstairs bath finished. But otherwise I mostly just avoided the idea of finishing this room.
I probably would have gone on that way for another year but when my mom was up at the house for Christmas and I was talking about my 2018 projects, she gently steered the conversation in the direction of the upstairs bath. Like, she might of mentioned how much my quality of life would be improved by having a working bathroom upstairs, and then didn’t say anything else about it until she showed up at the farm every weekend for the last 2 months with a bottle of wine and innocently asked what we’d be working on in the bathroom that day.
Moms. Amirite?
She gets all the credit for the progress I’ve made on this room so far.
First, I tore out my previous, unsuccessful attempt at leveling the floor. Then I cleaned and primed the subfloor (and drank some wine.)
I’d been very leery about using a pour-on self-lever for a lot of reasons, mostly involving prep, but I figured I couldn’t have made a worse mess than my first attempt, so used a spray foam insulation to seal any gaps between the old plaster walls and the framing, and rigged up a cardboard “seal” around the toilet plumbing.
Then we went for broke and poured the first coat of self-leveler. Mom was chief in charge of mixing…
While I poured the leveler and worked the float.
One of the many joys of a 170 year old house is that this bathroom floor was ¾” off-level over a 3-foot run of floor. Which is to say, it required a second coat of leveler the next weekend.
Because I let it sit for a week before putting the second coat on I needed to re-prime the surface (aka drink more wine)…
But after a second coat of leveler, we got there. (Or, close enough to there.)
Here’s the new floor, pre-tile:
Once the floor was mostly level I installed Schuler DITRA underlayment, and then started with the tile.
(Also, you can add “tile saw” to the list of tools my mom now knows how to use, since I conscripted her in to being the Chief Tile Cutter for this project.)
I bought this tile three years ago, when I thought this project was going to take a couple of weekends. (I know, I know, keep laughing.) At the time I thought I might try a herringbone pattern with these 8×24 tiles, but the day I was going to start laying tile both my mom and my grandma were up at the farm helping with some other projects, and when I mentioned the herringbone idea they both gave me a look that can best be translated as “are you out of your effing mind?”
And, you know, good point. It’s been three years. The last thing I need to do is make this more difficult.
So I just ran the tile straight, and they actually look great that way. It’s a lesson in 1.) don’t make things harder than they need to be, and 2.) always listen to your mom and grandma.
It’s actually been a solid seven years since I’ve had occasion to tile a floor. (Pretty sure this was the last one. [LINK]). In the intervening years there’s been an explosion of younger, awesome tradesmen who use instagram as a platform to share their work. I’ve been following @tilefreak for a couple of years, which is how I learned about the Perfect Levelmaster T-Lock system…
They aren’t cheap, but The idea made a lot of sense to me and I wanted to check them out. Because I follow the tile guys I know that you have to be very conscientious about backbuttering and having enough mud under the tiles. It didn’t make it easier to lay the tile, but I think the floor is probably the best one I’ve ever done because of it.
Once the tile was in, it was time to address one of the biggest issues in this bathroom… the plumbing.
(That’s the view looking up from the closet in my home gym, which already had the ceiling torn out from the previous leaking.)
The old toilet had been leaking because the flange for the toilet was set below the tile floor (I assume a product of needing to raise the floor so much to level it.). You can see in this picture, the wax ring was barely dented and wasn’t providing a great seal.
I cut out the old flange before leveling the floor, and now that the new tile was in I was set to replace the old soil pipe with a new one.
Here’s a thing I love about my life these days. I have a tool for everything. Need to cut a PVC pipe in a tiny space? I’ve got the saw for that. Need to drill a hole through tile? I’ve got a bit for that. Need to open cans of Oatey PVC primer and cement that I literally cannot untwist the lids from? I legit have a designated can opener FOR JUST THIS REASON.
(P.S. Oatey? If people have a designated can opener just to open your shit, maybe you’ve got a packaging problem? Just sayin.)
But, despite all the tools needed, at the end of the day I had a well-installed toilet flange.
And, even better, a few days later…
A WORKING TOILET.
I realize that shouldn’t be so exciting, but seriously, it’s been three years. And I have a working toilet.
Also, this is actually a toilet that Delta Faucet sent me 4 years ago to review, so… this is why I don’t do product reviews anymore.
I don’t think that after 4 years you can legitimately call this a “sponsored” product (I’m not sure they even make this model of toilet anymore, but they do make other ones.) I will say that one thing I consistently love about Delta faucets–AND this toilet–is the integrated plumbing. Their faucets hook right into the water valve and the same is true of the toilet, which made it a quick and easy install.
So, here’s the awesome thing…
My upstairs bath now has:
A working bathtub
Working sinks
A working toilet
It’s pretty much a working bathroom, you guys!
But, before we get ahead of ourselves, it’s still very much not-finished.
I’ve got an ugly fan/light to replace…
Some drywall to patch where I had the old awkwardly-placed outlets moved…
Plus a few spots above the shower…
Here’s the current to-do list, as it stands:
Tear out closet and patch drywall
Re-face cabinets
Level, tile, and grout floor
Tile tub surround
Patch ceiling
Move outlets and patch all drywall
Replace plumbing and install toilet
Caulk tub and toilet
Paint radiator
Paint ceiling and touch-up walls
Install baseboard
Install new light fixtures and switches
Add cabinet “feet”
Finish tub plumbing for working shower
Get and hang mirrors
Get hutch for storage
Install shelving, towel racks, etc.
And then getting the plumbing finalized so the tub has a faucet (and working shower), and putting baseboard in, plus replacing the light in the shower, and figuring out why the other one in the old closet area won’t turn on…
And then there’s a ceiling to paint, and walls to touch-up, mirrors to buy and hang, and a hutch to find to replace the bulky closet I tore out.
It’s not exactly “close” to being done, but it’s very close to being functional, which is really what counts around here.
Who knows… if my mom brings up enough wine I might even get the kitchen done this year?
I mean. Don’t hold your breath though.
The Long-Neglected Upstairs Bath syndicated from https://chaisesofassite.wordpress.com/
0 notes
Text
The Long-Neglected Upstairs Bath
Three years ago I had a great idea. An idea that was mostly driven by my desire to have one bathroom in this house that contained a tub suitable for soaking.
Anyone remember this tub (with an effing fireplace?!) from my last house?
Yeah. Me too. With pain in my heart every time I think about it.
This house has three full bathrooms, and, for the first 3 years I lived here, zero working bathtubs. I mean, there was one, kinda, but if you put more than 6” of water in it it started to leak… and it also had iron stains that made it look like someone had previously been dismembered in there.
So, back to my great idea. Three years ago I decided to do a “quick” overhaul of the upstairs bathroom. In my mind that meant taking out the old tub (which meant the old tile had to come out too) then putting in a new tub, re-tiling the floor, and maybe a coat of paint. Voila! Done! Right?
Ha. Hahaha.
Yeah, no.
What actually happened was that I tore up the tile and realized the toilet had been leaking into the subfloor for the last twenty-ish years…
I mean. I could have picked any hobby in the world. I could have been a person who golfs. But no. I had to pick the one that means I’ve spent more hours of my life then I care to think about scraping up subfloor that has been rotted and soaked through with sewer water.
Sigh.
After the trauma with the subfloor and my desire not to spend any more time in that room, it took me a whole year to finally tile the shower surround (and only got it done because Sarah–from the Ugly Duckling House–came to visit and got my ass in gear)…
Then I had a failed attempt at leveling the floor, and finally just said “screw it” because you can, in fact, use a bathtub that only has a raw pipe as the faucet in a bathroom that has a plywood floor…
And then, guys, I just straight-up ignored this room for the last couple of years. I mean, literally every time I woke up in the middle of the night and had to pee, and then had to walk downstairs and to the opposite end of the house… at those times I was keenly aware of my failure to get the upstairs bath finished. But otherwise I mostly just avoided the idea of finishing this room.
I probably would have gone on that way for another year but when my mom was up at the house for Christmas and I was talking about my 2018 projects, she gently steered the conversation in the direction of the upstairs bath. Like, she might of mentioned how much my quality of life would be improved by having a working bathroom upstairs, and then didn’t say anything else about it until she showed up at the farm every weekend for the last 2 months with a bottle of wine and innocently asked what we’d be working on in the bathroom that day.
Moms. Amirite?
She gets all the credit for the progress I’ve made on this room so far.
First, I tore out my previous, unsuccessful attempt at leveling the floor. Then I cleaned and primed the subfloor (and drank some wine.)
I’d been very leery about using a pour-on self-lever for a lot of reasons, mostly involving prep, but I figured I couldn’t have made a worse mess than my first attempt, so used a spray foam insulation to seal any gaps between the old plaster walls and the framing, and rigged up a cardboard “seal” around the toilet plumbing.
Then we went for broke and poured the first coat of self-leveler. Mom was chief in charge of mixing…
While I poured the leveler and worked the float.
One of the many joys of a 170 year old house is that this bathroom floor was ¾” off-level over a 3-foot run of floor. Which is to say, it required a second coat of leveler the next weekend.
Because I let it sit for a week before putting the second coat on I needed to re-prime the surface (aka drink more wine)…
But after a second coat of leveler, we got there. (Or, close enough to there.)
Here’s the new floor, pre-tile:
Once the floor was mostly level I installed Schuler DITRA underlayment, and then started with the tile.
(Also, you can add “tile saw” to the list of tools my mom now knows how to use, since I conscripted her in to being the Chief Tile Cutter for this project.)
I bought this tile three years ago, when I thought this project was going to take a couple of weekends. (I know, I know, keep laughing.) At the time I thought I might try a herringbone pattern with these 8×24 tiles, but the day I was going to start laying tile both my mom and my grandma were up at the farm helping with some other projects, and when I mentioned the herringbone idea they both gave me a look that can best be translated as “are you out of your effing mind?”
And, you know, good point. It’s been three years. The last thing I need to do is make this more difficult.
So I just ran the tile straight, and they actually look great that way. It’s a lesson in 1.) don’t make things harder than they need to be, and 2.) always listen to your mom and grandma.
It’s actually been a solid seven years since I’ve had occasion to tile a floor. (Pretty sure this was the last one. [LINK]). In the intervening years there’s been an explosion of younger, awesome tradesmen who use instagram as a platform to share their work. I’ve been following @tilefreak for a couple of years, which is how I learned about the Perfect Levelmaster T-Lock system…
They aren’t cheap, but The idea made a lot of sense to me and I wanted to check them out. Because I follow the tile guys I know that you have to be very conscientious about backbuttering and having enough mud under the tiles. It didn’t make it easier to lay the tile, but I think the floor is probably the best one I’ve ever done because of it.
Once the tile was in, it was time to address one of the biggest issues in this bathroom… the plumbing.
(That’s the view looking up from the closet in my home gym, which already had the ceiling torn out from the previous leaking.)
The old toilet had been leaking because the flange for the toilet was set below the tile floor (I assume a product of needing to raise the floor so much to level it.). You can see in this picture, the wax ring was barely dented and wasn’t providing a great seal.
I cut out the old flange before leveling the floor, and now that the new tile was in I was set to replace the old soil pipe with a new one.
Here’s a thing I love about my life these days. I have a tool for everything. Need to cut a PVC pipe in a tiny space? I’ve got the saw for that. Need to drill a hole through tile? I’ve got a bit for that. Need to open cans of Oatey PVC primer and cement that I literally cannot untwist the lids from? I legit have a designated can opener FOR JUST THIS REASON.
(P.S. Oatey? If people have a designated can opener just to open your shit, maybe you’ve got a packaging problem? Just sayin.)
But, despite all the tools needed, at the end of the day I had a well-installed toilet flange.
And, even better, a few days later…
A WORKING TOILET.
I realize that shouldn’t be so exciting, but seriously, it’s been three years. And I have a working toilet.
Also, this is actually a toilet that Delta Faucet sent me 4 years ago to review, so… this is why I don’t do product reviews anymore.
I don’t think that after 4 years you can legitimately call this a “sponsored” product (I’m not sure they even make this model of toilet anymore, but they do make other ones.) I will say that one thing I consistently love about Delta faucets–AND this toilet–is the integrated plumbing. Their faucets hook right into the water valve and the same is true of the toilet, which made it a quick and easy install.
So, here’s the awesome thing…
My upstairs bath now has:
A working bathtub
Working sinks
A working toilet
It’s pretty much a working bathroom, you guys!
But, before we get ahead of ourselves, it’s still very much not-finished.
I’ve got an ugly fan/light to replace…
Some drywall to patch where I had the old awkwardly-placed outlets moved…
Plus a few spots above the shower…
Here’s the current to-do list, as it stands:
Tear out closet and patch drywall
Re-face cabinets
Level, tile, and grout floor
Tile tub surround
Patch ceiling
Move outlets and patch all drywall
Replace plumbing and install toilet
Caulk tub and toilet
Paint radiator
Paint ceiling and touch-up walls
Install baseboard
Install new light fixtures and switches
Add cabinet “feet”
Finish tub plumbing for working shower
Get and hang mirrors
Get hutch for storage
Install shelving, towel racks, etc.
And then getting the plumbing finalized so the tub has a faucet (and working shower), and putting baseboard in, plus replacing the light in the shower, and figuring out why the other one in the old closet area won’t turn on…
And then there’s a ceiling to paint, and walls to touch-up, mirrors to buy and hang, and a hutch to find to replace the bulky closet I tore out.
It’s not exactly “close” to being done, but it’s very close to being functional, which is really what counts around here.
Who knows… if my mom brings up enough wine I might even get the kitchen done this year?
I mean. Don’t hold your breath though.
from Home Improvement http://diydiva.net/2018/02/the-long-neglected-upstairs-bath/
via http://www.rssmix.com/
0 notes
Text
The Long-Neglected Upstairs Bath
Three years ago I had a great idea. An idea that was mostly driven by my desire to have one bathroom in this house that contained a tub suitable for soaking.
Anyone remember this tub (with an effing fireplace?!) from my last house?
Yeah. Me too. With pain in my heart every time I think about it.
This house has three full bathrooms, and, for the first 3 years I lived here, zero working bathtubs. I mean, there was one, kinda, but if you put more than 6” of water in it it started to leak… and it also had iron stains that made it look like someone had previously been dismembered in there.
So, back to my great idea. Three years ago I decided to do a “quick” overhaul of the upstairs bathroom. In my mind that meant taking out the old tub (which meant the old tile had to come out too) then putting in a new tub, re-tiling the floor, and maybe a coat of paint. Voila! Done! Right?
Ha. Hahaha.
Yeah, no.
What actually happened was that I tore up the tile and realized the toilet had been leaking into the subfloor for the last twenty-ish years…
I mean. I could have picked any hobby in the world. I could have been a person who golfs. But no. I had to pick the one that means I’ve spent more hours of my life then I care to think about scraping up subfloor that has been rotted and soaked through with sewer water.
Sigh.
After the trauma with the subfloor and my desire not to spend any more time in that room, it took me a whole year to finally tile the shower surround (and only got it done because Sarah–from the Ugly Duckling House–came to visit and got my ass in gear)…
Then I had a failed attempt at leveling the floor, and finally just said “screw it” because you can, in fact, use a bathtub that only has a raw pipe as the faucet in a bathroom that has a plywood floor…
And then, guys, I just straight-up ignored this room for the last couple of years. I mean, literally every time I woke up in the middle of the night and had to pee, and then had to walk downstairs and to the opposite end of the house… at those times I was keenly aware of my failure to get the upstairs bath finished. But otherwise I mostly just avoided the idea of finishing this room.
I probably would have gone on that way for another year but when my mom was up at the house for Christmas and I was talking about my 2018 projects, she gently steered the conversation in the direction of the upstairs bath. Like, she might of mentioned how much my quality of life would be improved by having a working bathroom upstairs, and then didn’t say anything else about it until she showed up at the farm every weekend for the last 2 months with a bottle of wine and innocently asked what we’d be working on in the bathroom that day.
Moms. Amirite?
She gets all the credit for the progress I’ve made on this room so far.
First, I tore out my previous, unsuccessful attempt at leveling the floor. Then I cleaned and primed the subfloor (and drank some wine.)
I’d been very leery about using a pour-on self-lever for a lot of reasons, mostly involving prep, but I figured I couldn’t have made a worse mess than my first attempt, so used a spray foam insulation to seal any gaps between the old plaster walls and the framing, and rigged up a cardboard “seal” around the toilet plumbing.
Then we went for broke and poured the first coat of self-leveler. Mom was chief in charge of mixing…
While I poured the leveler and worked the float.
One of the many joys of a 170 year old house is that this bathroom floor was ¾” off-level over a 3-foot run of floor. Which is to say, it required a second coat of leveler the next weekend.
Because I let it sit for a week before putting the second coat on I needed to re-prime the surface (aka drink more wine)…
But after a second coat of leveler, we got there. (Or, close enough to there.)
Here’s the new floor, pre-tile:
Once the floor was mostly level I installed Schuler DITRA underlayment, and then started with the tile.
(Also, you can add “tile saw” to the list of tools my mom now knows how to use, since I conscripted her in to being the Chief Tile Cutter for this project.)
I bought this tile three years ago, when I thought this project was going to take a couple of weekends. (I know, I know, keep laughing.) At the time I thought I might try a herringbone pattern with these 8×24 tiles, but the day I was going to start laying tile both my mom and my grandma were up at the farm helping with some other projects, and when I mentioned the herringbone idea they both gave me a look that can best be translated as “are you out of your effing mind?”
And, you know, good point. It’s been three years. The last thing I need to do is make this more difficult.
So I just ran the tile straight, and they actually look great that way. It’s a lesson in 1.) don’t make things harder than they need to be, and 2.) always listen to your mom and grandma.
It’s actually been a solid seven years since I’ve had occasion to tile a floor. (Pretty sure this was the last one. [LINK]). In the intervening years there’s been an explosion of younger, awesome tradesmen who use instagram as a platform to share their work. I’ve been following @tilefreak for a couple of years, which is how I learned about the Perfect Levelmaster T-Lock system…
They aren’t cheap, but The idea made a lot of sense to me and I wanted to check them out. Because I follow the tile guys I know that you have to be very conscientious about backbuttering and having enough mud under the tiles. It didn’t make it easier to lay the tile, but I think the floor is probably the best one I’ve ever done because of it.
Once the tile was in, it was time to address one of the biggest issues in this bathroom… the plumbing.
(That’s the view looking up from the closet in my home gym, which already had the ceiling torn out from the previous leaking.)
The old toilet had been leaking because the flange for the toilet was set below the tile floor (I assume a product of needing to raise the floor so much to level it.). You can see in this picture, the wax ring was barely dented and wasn’t providing a great seal.
I cut out the old flange before leveling the floor, and now that the new tile was in I was set to replace the old soil pipe with a new one.
Here’s a thing I love about my life these days. I have a tool for everything. Need to cut a PVC pipe in a tiny space? I’ve got the saw for that. Need to drill a hole through tile? I’ve got a bit for that. Need to open cans of Oatey PVC primer and cement that I literally cannot untwist the lids from? I legit have a designated can opener FOR JUST THIS REASON.
(P.S. Oatey? If people have a designated can opener just to open your shit, maybe you’ve got a packaging problem? Just sayin.)
But, despite all the tools needed, at the end of the day I had a well-installed toilet flange.
And, even better, a few days later…
A WORKING TOILET.
I realize that shouldn’t be so exciting, but seriously, it’s been three years. And I have a working toilet.
Also, this is actually a toilet that Delta Faucet sent me 4 years ago to review, so… this is why I don’t do product reviews anymore.
I don’t think that after 4 years you can legitimately call this a “sponsored” product (I’m not sure they even make this model of toilet anymore, but they do make other ones.) I will say that one thing I consistently love about Delta faucets–AND this toilet–is the integrated plumbing. Their faucets hook right into the water valve and the same is true of the toilet, which made it a quick and easy install.
So, here’s the awesome thing…
My upstairs bath now has:
A working bathtub
Working sinks
A working toilet
It’s pretty much a working bathroom, you guys!
But, before we get ahead of ourselves, it’s still very much not-finished.
I’ve got an ugly fan/light to replace…
Some drywall to patch where I had the old awkwardly-placed outlets moved…
Plus a few spots above the shower…
Here’s the current to-do list, as it stands:
Tear out closet and patch drywall
Re-face cabinets
Level, tile, and grout floor
Tile tub surround
Patch ceiling
Move outlets and patch all drywall
Replace plumbing and install toilet
Caulk tub and toilet
Paint radiator
Paint ceiling and touch-up walls
Install baseboard
Install new light fixtures and switches
Add cabinet “feet”
Finish tub plumbing for working shower
Get and hang mirrors
Get hutch for storage
Install shelving, towel racks, etc.
And then getting the plumbing finalized so the tub has a faucet (and working shower), and putting baseboard in, plus replacing the light in the shower, and figuring out why the other one in the old closet area won’t turn on…
And then there’s a ceiling to paint, and walls to touch-up, mirrors to buy and hang, and a hutch to find to replace the bulky closet I tore out.
It’s not exactly “close” to being done, but it’s very close to being functional, which is really what counts around here.
Who knows… if my mom brings up enough wine I might even get the kitchen done this year?
I mean. Don’t hold your breath though.
from http://ift.tt/2ERRrnm
0 notes
Photo
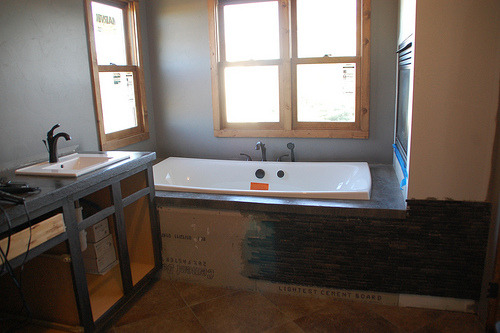
The Long-Neglected Upstairs Bath http://ift.tt/2ERRrnm
Three years ago I had a great idea. An idea that was mostly driven by my desire to have one bathroom in this house that contained a tub suitable for soaking.
Anyone remember this tub (with an effing fireplace?!) from my last house?
Yeah. Me too. With pain in my heart every time I think about it.
This house has three full bathrooms, and, for the first 3 years I lived here, zero working bathtubs. I mean, there was one, kinda, but if you put more than 6” of water in it it started to leak… and it also had iron stains that made it look like someone had previously been dismembered in there.
So, back to my great idea. Three years ago I decided to do a “quick” overhaul of the upstairs bathroom. In my mind that meant taking out the old tub (which meant the old tile had to come out too) then putting in a new tub, re-tiling the floor, and maybe a coat of paint. Voila! Done! Right?
Ha. Hahaha.
Yeah, no.
What actually happened was that I tore up the tile and realized the toilet had been leaking into the subfloor for the last twenty-ish years…
I mean. I could have picked any hobby in the world. I could have been a person who golfs. But no. I had to pick the one that means I’ve spent more hours of my life then I care to think about scraping up subfloor that has been rotted and soaked through with sewer water.
Sigh.
After the trauma with the subfloor and my desire not to spend any more time in that room, it took me a whole year to finally tile the shower surround (and only got it done because Sarah–from the Ugly Duckling House–came to visit and got my ass in gear)…
Then I had a failed attempt at leveling the floor, and finally just said “screw it” because you can, in fact, use a bathtub that only has a raw pipe as the faucet in a bathroom that has a plywood floor…
And then, guys, I just straight-up ignored this room for the last couple of years. I mean, literally every time I woke up in the middle of the night and had to pee, and then had to walk downstairs and to the opposite end of the house… at those times I was keenly aware of my failure to get the upstairs bath finished. But otherwise I mostly just avoided the idea of finishing this room.
I probably would have gone on that way for another year but when my mom was up at the house for Christmas and I was talking about my 2018 projects, she gently steered the conversation in the direction of the upstairs bath. Like, she might of mentioned how much my quality of life would be improved by having a working bathroom upstairs, and then didn’t say anything else about it until she showed up at the farm every weekend for the last 2 months with a bottle of wine and innocently asked what we’d be working on in the bathroom that day.
Moms. Amirite?
She gets all the credit for the progress I’ve made on this room so far.
First, I tore out my previous, unsuccessful attempt at leveling the floor. Then I cleaned and primed the subfloor (and drank some wine.)
I’d been very leery about using a pour-on self-lever for a lot of reasons, mostly involving prep, but I figured I couldn’t have made a worse mess than my first attempt, so used a spray foam insulation to seal any gaps between the old plaster walls and the framing, and rigged up a cardboard “seal” around the toilet plumbing.
Then we went for broke and poured the first coat of self-leveler. Mom was chief in charge of mixing…
While I poured the leveler and worked the float.
One of the many joys of a 170 year old house is that this bathroom floor was ¾” off-level over a 3-foot run of floor. Which is to say, it required a second coat of leveler the next weekend.
Because I let it sit for a week before putting the second coat on I needed to re-prime the surface (aka drink more wine)…
But after a second coat of leveler, we got there. (Or, close enough to there.)
Here’s the new floor, pre-tile:
Once the floor was mostly level I installed Schuler DITRA underlayment, and then started with the tile.
(Also, you can add “tile saw” to the list of tools my mom now knows how to use, since I conscripted her in to being the Chief Tile Cutter for this project.)
I bought this tile three years ago, when I thought this project was going to take a couple of weekends. (I know, I know, keep laughing.) At the time I thought I might try a herringbone pattern with these 8×24 tiles, but the day I was going to start laying tile both my mom and my grandma were up at the farm helping with some other projects, and when I mentioned the herringbone idea they both gave me a look that can best be translated as “are you out of your effing mind?”
And, you know, good point. It’s been three years. The last thing I need to do is make this more difficult.
So I just ran the tile straight, and they actually look great that way. It’s a lesson in 1.) don’t make things harder than they need to be, and 2.) always listen to your mom and grandma.
It’s actually been a solid seven years since I’ve had occasion to tile a floor. (Pretty sure this was the last one. [LINK]). In the intervening years there’s been an explosion of younger, awesome tradesmen who use instagram as a platform to share their work. I’ve been following @tilefreak for a couple of years, which is how I learned about the Perfect Levelmaster T-Lock system…
They aren’t cheap, but The idea made a lot of sense to me and I wanted to check them out. Because I follow the tile guys I know that you have to be very conscientious about backbuttering and having enough mud under the tiles. It didn’t make it easier to lay the tile, but I think the floor is probably the best one I’ve ever done because of it.
Once the tile was in, it was time to address one of the biggest issues in this bathroom… the plumbing.
(That’s the view looking up from the closet in my home gym, which already had the ceiling torn out from the previous leaking.)
The old toilet had been leaking because the flange for the toilet was set below the tile floor (I assume a product of needing to raise the floor so much to level it.). You can see in this picture, the wax ring was barely dented and wasn’t providing a great seal.
I cut out the old flange before leveling the floor, and now that the new tile was in I was set to replace the old soil pipe with a new one.
Here’s a thing I love about my life these days. I have a tool for everything. Need to cut a PVC pipe in a tiny space? I’ve got the saw for that. Need to drill a hole through tile? I’ve got a bit for that. Need to open cans of Oatey PVC primer and cement that I literally cannot untwist the lids from? I legit have a designated can opener FOR JUST THIS REASON.
(P.S. Oatey? If people have a designated can opener just to open your shit, maybe you’ve got a packaging problem? Just sayin.)
But, despite all the tools needed, at the end of the day I had a well-installed toilet flange.
And, even better, a few days later…
A WORKING TOILET.
I realize that shouldn’t be so exciting, but seriously, it’s been three years. And I have a working toilet.
Also, this is actually a toilet that Delta Faucet sent me 4 years ago to review, so… this is why I don’t do product reviews anymore.
I don’t think that after 4 years you can legitimately call this a “sponsored” product (I’m not sure they even make this model of toilet anymore, but they do make other ones.) I will say that one thing I consistently love about Delta faucets–AND this toilet–is the integrated plumbing. Their faucets hook right into the water valve and the same is true of the toilet, which made it a quick and easy install.
So, here’s the awesome thing…
My upstairs bath now has:
A working bathtub
Working sinks
A working toilet
It’s pretty much a working bathroom, you guys!
But, before we get ahead of ourselves, it’s still very much not-finished.
I’ve got an ugly fan/light to replace…
Some drywall to patch where I had the old awkwardly-placed outlets moved…
Plus a few spots above the shower…
Here’s the current to-do list, as it stands:
Tear out closet and patch drywall
Re-face cabinets
Level, tile, and grout floor
Tile tub surround
Patch ceiling
Move outlets and patch all drywall
Replace plumbing and install toilet
Caulk tub and toilet
Paint radiator
Paint ceiling and touch-up walls
Install baseboard
Install new light fixtures and switches
Add cabinet “feet”
Finish tub plumbing for working shower
Get and hang mirrors
Get hutch for storage
Install shelving, towel racks, etc.
And then getting the plumbing finalized so the tub has a faucet (and working shower), and putting baseboard in, plus replacing the light in the shower, and figuring out why the other one in the old closet area won’t turn on…
And then there’s a ceiling to paint, and walls to touch-up, mirrors to buy and hang, and a hutch to find to replace the bulky closet I tore out.
It’s not exactly “close” to being done, but it’s very close to being functional, which is really what counts around here.
Who knows… if my mom brings up enough wine I might even get the kitchen done this year?
I mean. Don’t hold your breath though.
Kit
0 notes
Text
The Long-Neglected Upstairs Bath
Three years ago I had a great idea. An idea that was mostly driven by my desire to have one bathroom in this house that contained a tub suitable for soaking.
Anyone remember this tub (with an effing fireplace?!) from my last house?
Yeah. Me too. With pain in my heart every time I think about it.
This house has three full bathrooms, and, for the first 3 years I lived here, zero working bathtubs. I mean, there was one, kinda, but if you put more than 6” of water in it it started to leak… and it also had iron stains that made it look like someone had previously been dismembered in there.
So, back to my great idea. Three years ago I decided to do a “quick” overhaul of the upstairs bathroom. In my mind that meant taking out the old tub (which meant the old tile had to come out too) then putting in a new tub, re-tiling the floor, and maybe a coat of paint. Voila! Done! Right?
Ha. Hahaha.
Yeah, no.
What actually happened was that I tore up the tile and realized the toilet had been leaking into the subfloor for the last twenty-ish years…
I mean. I could have picked any hobby in the world. I could have been a person who golfs. But no. I had to pick the one that means I’ve spent more hours of my life then I care to think about scraping up subfloor that has been rotted and soaked through with sewer water.
Sigh.
After the trauma with the subfloor and my desire not to spend any more time in that room, it took me a whole year to finally tile the shower surround (and only got it done because Sarah–from the Ugly Duckling House–came to visit and got my ass in gear)…
Then I had a failed attempt at leveling the floor, and finally just said “screw it” because you can, in fact, use a bathtub that only has a raw pipe as the faucet in a bathroom that has a plywood floor…
And then, guys, I just straight-up ignored this room for the last couple of years. I mean, literally every time I woke up in the middle of the night and had to pee, and then had to walk downstairs and to the opposite end of the house… at those times I was keenly aware of my failure to get the upstairs bath finished. But otherwise I mostly just avoided the idea of finishing this room.
I probably would have gone on that way for another year but when my mom was up at the house for Christmas and I was talking about my 2018 projects, she gently steered the conversation in the direction of the upstairs bath. Like, she might of mentioned how much my quality of life would be improved by having a working bathroom upstairs, and then didn’t say anything else about it until she showed up at the farm every weekend for the last 2 months with a bottle of wine and innocently asked what we’d be working on in the bathroom that day.
Moms. Amirite?
She gets all the credit for the progress I’ve made on this room so far.
First, I tore out my previous, unsuccessful attempt at leveling the floor. Then I cleaned and primed the subfloor (and drank some wine.)
I’d been very leery about using a pour-on self-lever for a lot of reasons, mostly involving prep, but I figured I couldn’t have made a worse mess than my first attempt, so used a spray foam insulation to seal any gaps between the old plaster walls and the framing, and rigged up a cardboard “seal” around the toilet plumbing.
Then we went for broke and poured the first coat of self-leveler. Mom was chief in charge of mixing…
While I poured the leveler and worked the float.
One of the many joys of a 170 year old house is that this bathroom floor was ¾” off-level over a 3-foot run of floor. Which is to say, it required a second coat of leveler the next weekend.
Because I let it sit for a week before putting the second coat on I needed to re-prime the surface (aka drink more wine)…
But after a second coat of leveler, we got there. (Or, close enough to there.)
Here’s the new floor, pre-tile:
Once the floor was mostly level I installed Schuler DITRA underlayment, and then started with the tile.
(Also, you can add “tile saw” to the list of tools my mom now knows how to use, since I conscripted her in to being the Chief Tile Cutter for this project.)
I bought this tile three years ago, when I thought this project was going to take a couple of weekends. (I know, I know, keep laughing.) At the time I thought I might try a herringbone pattern with these 8×24 tiles, but the day I was going to start laying tile both my mom and my grandma were up at the farm helping with some other projects, and when I mentioned the herringbone idea they both gave me a look that can best be translated as “are you out of your effing mind?”
And, you know, good point. It’s been three years. The last thing I need to do is make this more difficult.
So I just ran the tile straight, and they actually look great that way. It’s a lesson in 1.) don’t make things harder than they need to be, and 2.) always listen to your mom and grandma.
It’s actually been a solid seven years since I’ve had occasion to tile a floor. (Pretty sure this was the last one. [LINK]). In the intervening years there’s been an explosion of younger, awesome tradesmen who use instagram as a platform to share their work. I’ve been following @tilefreak for a couple of years, which is how I learned about the Perfect Levelmaster T-Lock system…
They aren’t cheap, but The idea made a lot of sense to me and I wanted to check them out. Because I follow the tile guys I know that you have to be very conscientious about backbuttering and having enough mud under the tiles. It didn’t make it easier to lay the tile, but I think the floor is probably the best one I’ve ever done because of it.
Once the tile was in, it was time to address one of the biggest issues in this bathroom… the plumbing.
(That’s the view looking up from the closet in my home gym, which already had the ceiling torn out from the previous leaking.)
The old toilet had been leaking because the flange for the toilet was set below the tile floor (I assume a product of needing to raise the floor so much to level it.). You can see in this picture, the wax ring was barely dented and wasn’t providing a great seal.
I cut out the old flange before leveling the floor, and now that the new tile was in I was set to replace the old soil pipe with a new one.
Here’s a thing I love about my life these days. I have a tool for everything. Need to cut a PVC pipe in a tiny space? I’ve got the saw for that. Need to drill a hole through tile? I’ve got a bit for that. Need to open cans of Oatey PVC primer and cement that I literally cannot untwist the lids from? I legit have a designated can opener FOR JUST THIS REASON.
(P.S. Oatey? If people have a designated can opener just to open your shit, maybe you’ve got a packaging problem? Just sayin.)
But, despite all the tools needed, at the end of the day I had a well-installed toilet flange.
And, even better, a few days later…
A WORKING TOILET.
I realize that shouldn’t be so exciting, but seriously, it’s been three years. And I have a working toilet.
Also, this is actually a toilet that Delta Faucet sent me 4 years ago to review, so… this is why I don’t do product reviews anymore.
I don’t think that after 4 years you can legitimately call this a “sponsored” product (I’m not sure they even make this model of toilet anymore, but they do make other ones.) I will say that one thing I consistently love about Delta faucets–AND this toilet–is the integrated plumbing. Their faucets hook right into the water valve and the same is true of the toilet, which made it a quick and easy install.
So, here’s the awesome thing…
My upstairs bath now has:
A working bathtub
Working sinks
A working toilet
It’s pretty much a working bathroom, you guys!
But, before we get ahead of ourselves, it’s still very much not-finished.
I’ve got an ugly fan/light to replace…
Some drywall to patch where I had the old awkwardly-placed outlets moved…
Plus a few spots above the shower…
Here’s the current to-do list, as it stands:
Tear out closet and patch drywall
Re-face cabinets
Level, tile, and grout floor
Tile tub surround
Patch ceiling
Move outlets and patch all drywall
Replace plumbing and install toilet
Caulk tub and toilet
Paint radiator
Paint ceiling and touch-up walls
Install baseboard
Install new light fixtures and switches
Add cabinet “feet”
Finish tub plumbing for working shower
Get and hang mirrors
Get hutch for storage
Install shelving, towel racks, etc.
And then getting the plumbing finalized so the tub has a faucet (and working shower), and putting baseboard in, plus replacing the light in the shower, and figuring out why the other one in the old closet area won’t turn on…
And then there’s a ceiling to paint, and walls to touch-up, mirrors to buy and hang, and a hutch to find to replace the bulky closet I tore out.
It’s not exactly “close” to being done, but it’s very close to being functional, which is really what counts around here.
Who knows… if my mom brings up enough wine I might even get the kitchen done this year?
I mean. Don’t hold your breath though.
0 notes
Text
Installing A Subway Tile Backsplash For $200
One regret Sherry and I have about our first house is not doing a tiled backsplash as part of our kitchen makeover. Best I can remember, we wanted an easily changeable “pop of color” in the form of good ol’ fashioned paint instead (and we spent a lot on that makeover, so it was a cost saving measure as well). If only we had known how cheap and easy a backsplash could be if you install it yourself! Now having several tiling projects under our belts – including the backsplashes in our current kitchen and our last kitchen – it feels like a no-brainer.
We even added a backsplash to our laundry room (here’s how, and here’s the full room reveal), which made a gigantic difference with just 13 tiles. So when my aunt asked if we’d help her by installing a subway tile backsplash in her kitchen, we were game. It took us just two half-days to complete, and rung in right at $200. See what I mean? No brainer.
My Aunt Liz (also known as Great Liz to our kids) moved to Richmond a few years ago, but didn’t have a backsplash put in when her new home was built. Luckily, she had chosen some nice black cabinets and a gray & back granite counter that was well suited for the addition of some classic white subway tile down the line, which she has always loved and pictured in there. These iPhone pictures aren’t doing the space much justice, but they give you a sense of where we started. And yes, when it comes to adding a backsplash, you can put it right over the drywall (even if it’s painted!) and use ready-mixed adhesive and grout to make it even easier. So let’s break down how we got it done.
Prep
Liz had already cleared off her counters when we arrived the first morning, so we jumped right into protecting everything using painter’s tape and red rosin-paper (this is a more waterproof version of your standard brown paper, both of which you can get at the home improvement store). We also removed all of the switch and outlet covers (and later, with the power off, we loosened any switches or outlets from their junction boxes). Note: if you have old tile to remove first, here’s how we’ve done that in the past.
Since a kitchen backsplash isn’t a heavy-duty super-wet tile scenario (like a shower wall or bathroom floor) you really can apply the tile directly to your painted drywall without having to tear anything down and install cement board. All it takes is just roughing up your paint job with a high-grit sanding block or sandpaper (we used 80-grit).
Hat-related side note: in taking all of these photos, Sherry failed to notice that the back of my hat was TOTALLY JACKED UP the whole time. Who has TWO tags sticking out of their hat ever, let alone for an entire series of photos and a video?? I’d encourage you to avert your eyes, but you’d miss all the pertinent visuals in this post – so just avoid staring directly at the hat if you can help it.
Once our sanding was done, we started planning the placement of our pattern. Rather than a standard 3 x 6″ subway tile, the three of us decided this smaller 2 x 4″ tile that came in a sheet was a better scale for the space (if you’re not near a Lowe’s, Wayfair’s got the same look for almost half the price). We also picked up some white bullnose tile for the ends that wouldn’t terminate into a wall. Laying everything out beforehand helped us ensure we weren’t leaving slivers on either end, and that the pattern would look centered on the wall. I’ll show you in a minute how this all turned out.
We had measured Liz’s backsplash area on a previous visit and then purchased enough square footage PLUS about 10-15% extra just in case. It’s always important to have that around to account for breakage, miscuts, and other hiccups.
Hanging The Tile
For the next parts of this process, we made a quick video so you can see the basic steps in action. But you can keep reading below if you’re not in a place where you can watch it at the moment (or if you really hate jamming out to dope beats. Yup, I said it). Note: If you’re viewing this post from a feed reader, you may have to click through to the post to see the video.
To hang the tile, we used a premixed mastic to adhere it to the wall. I used a small trowel to apply it to the wall in small sections at a time (I found the small trowel easier to maneuver in the tight space under the cabinets). Here are some screen grabs from the video. Again, try not to only stare at my hat issues.
Once we had a thin layer of mastic applied, we used a V-notched trowel to scrape off the excess – holding the trowel at a 45-degree angle the whole time. This not only removes extra mastic, but also creates grooves that will help the tile adhere to the wall better. Sherry and I are highly competitive about who makes the best grooves.
Once you get your groove on (ha!) you can apply your tile. The area shown here was large enough for full sheets, and as you saw in the video, we used some 1/8″ tile spacers to help keep the lines of the pattern straight and even. You’ll have several minutes of literal wiggle room before the mastic sets, but we never try to work too far in advance without taking a step back to see if anything has slipped or isn’t straight.
Cutting The Tile
Laying the tile is super easy. The only place it gets slightly complicated is when cutting is involved, so I’ll give you a few examples of the tools and tricks you might need to have up your sleeve. For instance, when a partial sheet was needed – like when these walls called for an extra row on top of each sheet – Sherry discovered that some pruning sheers worked great for snipping the glue dots that held our sheets together (the same would work on mesh tile sheets – as would a normal kitchen scissors). We just cut a few full sheets into rows so we had them at the ready.
When a partial tile is in order (like when you bump into a light switch, outlet, or the end of the wall) we relied on a wet saw. For simple tiles like subway you can also use a ceramic tile cutter, but it will only cut along one line – so it wouldn’t work in cases like the one shown below, where I had to make that puppy look like Oklahoma. I used a pencil to mark the notch I’d need to cut out, and then took it outside to my wet saw to trim. For any first timers, a wet saw is faaar less scary than it looks. It’s actually one of my favorite saws to use because you can cut very slowly and be pretty precise.
Don’t worry about making it crazy perfect around an outlet because the outlet cover will hide a lot. In fact, if you scroll back to the top pic in this post you’ll see that the outlet cover goes all the way to the grout crack, so all of that special cutting is hidden under it anyway.
The wet saw was also helpful for cutting full sheets faster, like when we got to the end of a wall. And unlike some experiences I’ve had with cutting tile sheets on a wet saw, these were super fast and easy to do.
My saw came with an adjustable guide that also made cutting angles really easy. This would be super important if you were installing subway in a herringbone pattern, for example, and needed to cut the edge pieces (believe me, we’ve done it without one!). But in this case, we just needed it for the bullnose border pieces that we used whenever the tile didn’t terminate into a wall corner.
Ends & Borders
Speaking of those bullnose pieces, you do have to think about where and how your backsplash is going to end. If you’re lucky, it will just run right into a corner like Liz’s did on the stove side of her kitchen, in which case there’s no border necessary (since the unfinished sides of the tile aren’t visible thanks to them butting up against the side wall).
Speaking of that side wall, we could’ve opted to turn the tile and continue it along the side wall but there wasn’t a natural stopping point (the counters stick out much further than the upper cabinets, so it could look awkward to stop at one but not the other). Just going wall-to-wall along the back always makes for a nice clean look.
On the opposite wall, however, we didn’t have any walls to terminate into – which is where that bullnose edge detail came into play. You can see how we used a 45-degree angled cut at the top corners to make sure each exposed edge had a finished bullnose (as opposed to seeing the unfinished side of a regular tile).
Along this stretch of wall, we chose to install the tile wherever the existing granite backsplash ran, which seemed to look the most intentional (like they had always been there, installed together at the same time). In the past we have removed that short piece of granite so the tile can go right to the counter, but in this case they worked so well together that it felt better to leave it there – especially since it wasn’t worth the risk of damaging someone else’s granite counters in an attempt to get it off.
Grouting & Caulking
We finished all of the tile cutting and installing in about 5 hours (it was mostly all of the outlets and switches on that one wall that ate up a lot of our time). We let the mastic set overnight and came back the next morning to remove our spacers, lay down fresh paper, and begin grouting. We used premixed grout (for the first time!) in a light gray for the slightest bit of contrast… and I’m undecided on it. Maybe I’ve just been mixing my grout too watery all of these years, but I found this to be a little on the dry side, which made it harder to spread quickly and without it crumbling off the wall and falling onto the counter. But it certainly was nice to skip the mixing step, so I’d happily give it another try to get more practice.
You can see grouting in action in the video, but it basically involves using the float to smoosh it (technical term, I promise) into all of the gaps between tiles. It takes a bit of pressure and some back-and-forth, up-and-down motions to make sure it catches in every seam – but it’s a relatively easy, albeit tedious process. Once you’ve got it in every seam, drag your float over the tile at a sharp angle to wipe off excess from the tile surfaces.
After you’ve let your grout set for around ten minutes or so, use a barely damp sponge to wipe along the surface of the tile. This will help remove any leftover grout on the tiles and also smooth the grout within the seams. It doesn’t take much pressure or water at all. You may find you want to go back for a second pass a little while later, once it’s set even more within the seams (this helps to take the haze off the tile itself).
You’ll also want to caulk the edges where the tile meets your counter, your cabinets, and/or the walls. We bought a caulk that’s color-matched to the light gray grout we used (both were “Silverado”), so it wouldn’t stick out like a big white border. We like to tape off the areas that are about to be caulked, leaving just a thin gap for where the caulk will go. Then just squeeze a small line of caulk along the seam, and use a wet finger (dipped in a cup of warm water) to smooth it. Be sure to pull your tape off as soon as you’ve got it smoothed to your liking. Do NOT wait for the caulk to fully dry before removing your tape. Note: this caulk went on lighter than the grout and scared us for a second, but it darkened to be a perfect match when it dried.
Finishing
Often the finishing touches are buffing and sealing. You may find a grout haze appearing on your tile over the next 24 hours. Once the grout has had a full day or so to set, use a non-shedding cloth (like microfiber or cheesecloth) to buff the surface of the tile. It may take some elbow grease in certain places, just be carefull not to press into any grout lines – especially if they show any signs of not being fully cured. Some tiles or grouts may require sealing also, but neither of ours did in this case. You can read more about that in this post if yours do.
After that – you’re ready to enjoy your new backsplash! Which, without tooting our own horns too much, Liz was very excited to do. She’s been in this house for about three years and has always known the kitchen needed something like this. So it was fun to be able to help her make it happen… and for just $200! Note: we did three walls of Liz’s kitchen, so for anyone who might just need one or two areas of tile, it should be even cheaper – especially if you order the Wayfair tile we later found, which is almost half the price.
The only downside to this project is that we may have opened up a can of worms for Liz (we all agreed that extending the Revere Pewter wall color from her nearby living room would look awesome in here). But that’s a project for another day! And maybe another nephew? Just kidding. Well, maybe not. Love you, Liz!
And if this is just the nudge you needed to do what we should’ve done in our first kitchen (#backsplashregrets), here are some tile options we hunted down that would work really well for a backsplash update:
1 / 2 / 3 / 4 / 5 / 6 / 7 / 8 / 9 / 10
If you guys want more info, tutorials, and photos of other tile projects in our house – here are some other installs we’ve documented:
Installing A Small-Scale Herringbone In Our Laundry Room
Installing Marble Herringbone Around A Fireplace
Installing Porcelain Floor Tile In Our Laundry Room
Installing Large Stone Tile In An Outdoor Area
Installing A Penny Tile Backsplash In Our Last Kitchen (Getting Started, Cutting Tiles, Grouting, Removing Haze)
Removing An Old Shower Tile Border and Installing A New One
Installing A Subway Shower Surround & Marble Floor (And Grouting It)
Speaking of installing tile, we’re bound to have a lot more of it coming up in our beach house soon. I can’t tell if I’m excited or intimidated. Three showers, three bathroom floors, a backsplash… *gulp*
Psst- We’ve heard from a bunch of people that Facebook and Instagram algorithms aren’t showing as many of our posts as they used to, so people are missing when we say “there’s a new blog post about ___” and later they see something that has changed in our house and ask “wait, when did you do that?!” So it seems that the best way to stay on top of posts is just to swing by our blog, where we typically post once or twice a week. Maybe just dropping by on Mon and Thurs is a good way to keep from missing new things? You can always go right to http://ift.tt/1Or03h8 to see the latest thing at the top of the page. Wish IG and FB were less maniacal in their ever-changing algorithms!
*This post contains affiliate links*
The post Installing A Subway Tile Backsplash For $200 appeared first on Young House Love.
Installing A Subway Tile Backsplash For $200 published first on your-t1-blog-url
0 notes
Photo

Installing A Subway Tile Backsplash For $200 http://ift.tt/2rRqBSb
One regret Sherry and I have about our first house is not doing a tiled backsplash as part of our kitchen makeover. Best I can remember, we wanted an easily changeable “pop of color” in the form of good ol’ fashioned paint instead (and we spent a lot on that makeover, so it was a cost saving measure as well). If only we had known how cheap and easy a backsplash could be if you install it yourself! Now having several tiling projects under our belts – including the backsplashes in our current kitchen and our last kitchen – it feels like a no-brainer.
We even added a backsplash to our laundry room (here’s how, and here’s the full room reveal), which made a gigantic difference with just 13 tiles. So when my aunt asked if we’d help her by installing a subway tile backsplash in her kitchen, we were game. It took us just two mornings to complete, and rung in right at $200. See what I mean? No brainer.
My Aunt Liz (also known as Great Liz to our kids) moved to Richmond a few years ago, but didn’t have a backsplash put in when her new home was built. Luckily, she had chosen some nice black cabinets and a gray & back granite counter that was well suited for the addition of some classic white subway tile down the line, which she has always loved and pictured in there. These iPhone pictures aren’t doing the space much justice, but they give you a sense of where we started. And yes, when it comes to adding a backsplash, you can put it right over the drywall (even if it’s painted!) and use ready-mixed adhesive and grout to make it even easier. So let’s break down how we got it done.
Prep
Liz had already cleared off her counters when we arrived the first morning, so we jumped right into protecting everything using painter’s tape and red rosin-paper (this is a more waterproof version of your standard brown paper, both of which you can get at the home improvement store). We also removed all of the switch and outlet covers (and later, with the power off, we loosened any switches or outlets from their junction boxes).
Since a kitchen backsplash isn’t a heavy-duty super-wet tile scenario (like a shower wall or bathroom floor) you really can apply the tile directly to your painted drywall without having to tear anything down and install cement board. All it takes is just roughing up your paint job with a high-grit sanding block or sandpaper (we used 80-grit).
Hat-related side note: in taking all of these photos, Sherry failed to notice that the back of my hat was TOTALLY JACKED UP the whole time. Who has TWO tags sticking out of their hat ever, let alone for an entire series of photos and a video?? I’d encourage you to avert your eyes, but you’d miss all the pertinent visuals in this post – so just avoid staring directly at the hat if you can help it.
Once our sanding was done, we started planning the placement of our pattern. Rather than a standard 3 x 6″ subway tile, the three of us decided this smaller 2 x 4″ tile that came in a sheet was a better scale for the space (if you’re not near a Lowe’s, Wayfair’s got the same look for almost half the price). We also picked up some white bullnose tile for the ends that wouldn’t terminate into a wall. Laying everything out beforehand helped us ensure we weren’t leaving slivers on either end, and that the pattern would look centered on the wall. I’ll show you in a minute how this all turned out.
We had measured Liz’s backsplash area on a previous visit and then purchased enough square footage PLUS about 10-15% extra just in case. It’s always important to have that around to account for breakage, miscuts, and other hiccups (plus you want to keep some extra tile afterwards, just in case you ever have to replace a tile that cracks or something down the line).
Hanging The Tile
For the next parts of this process, we made a quick video so you can see the basic steps in action. But you can keep reading below if you’re not in a place where you can watch it at the moment (or if you really hate jamming out to dope beats. Yup, I said it). Note: If you’re viewing this post from a feed reader, you may have to click through to the post to see the video.
To hang the tile, we used a premixed mastic to adhere it to the wall. I used a small trowel to apply it to the wall in small sections at a time (I found the small trowel easier to maneuver in the tight space under the cabinets). Here are some screen grabs from the video. Again, try not to only stare at my hat issues.
Once we had a thin layer of mastic applied, we used a V-notched trowel to scrape off the excess – holding the trowel at a 45-degree angle the whole time. This not only removes extra mastic, but also creates grooves that will help the tile adhere to the wall better. Sherry and I are highly competitive about who makes the best grooves.
Once you get your groove on (ha!) you can apply your tile. The area shown here was large enough for full sheets, and as you saw in the video, we used some 1/8″ tile spacers to help keep the lines of the pattern straight and even. You’ll have several minutes of literal wiggle room before the mastic sets, but we never try to work too far in advance without taking a step back to see if anything has slipped or isn’t straight.
Cutting The Tile
Laying the tile is super easy. The only place it gets slightly complicated is when cutting is involved, so I’ll give you a few examples of the tools and tricks you might need to have up your sleeve. For instance, when a partial sheet was needed – like in our case we needed one extra row on top of each sheet – Sherry discovered that some pruning sheers worked great for snipping the glue dots that held our sheets together (the same would work on mesh tile sheets – as would a normal kitchen scissors). We just cut a few full sheets into rows so we had them at the ready.
When a partial tile is in order (like when you bump into a light switch, outlet, or the end of the wall) we relied on a wet saw. For simple tiles like subway you can also use a ceramic tile cutter, but it will only cut along one line – so it wouldn’t work in cases like the one shown below, where I had to make that puppy look like Oklahoma. I used a pencil to mark the notch I’d need to cut out, and then took it outside to my wet saw to trim. For any first timers, a wet saw is faaar less scary than it looks. It’s actually one of my favorite saws to use because you can cut very slowly and be pretty precise.
Don’t worry about making it crazy perfect around an outlet because the outlet cover will hide a lot. In fact, if you scroll back to the top pic in this post you’ll see that the outlet cover goes all the way to the grout crack, so all of that special cutting is hidden under it anyway.
The wet saw was also helpful for cutting full sheets faster, like when we got to the end of a wall. And unlike some experiences I’ve had with cutting tile sheets on a wet saw, these were super fast and easy to do.
My saw came with an adjustable guide that also made cutting angles really easy. This would be super important if you were installing subway in a herringbone pattern for example (believe me, we’ve done it without one!). But in this case, we just needed it for the bullnose border pieces for where the tile didn’t terminate into a wall corner.
Ends & Borders
Speaking of those bullnose pieces, you do have to think about where and how your backsplash is going to end. If you’re lucky, it will just run right into a corner like Liz’s did on the stove side of her kitchen, in which case there’s no border necessary (since the raw cut sides of the tile aren’t visible thanks to them butting up against the side wall).
Speaking of that side wall, we could’ve opted to turn the tile and continue it along the side wall but there wasn’t a natural stopping point (the counters stick out much further than the upper cabinets, so it could look awkward to stop at one but not the other). Just going wall-to-wall along the back always makes for a nice clean look.
On the opposite wall, however, we didn’t have any walls to terminate into – which is where that bullnose edge detail came into play. You can see how we used a 45-degree angled cut at the top corners to make sure each exposed edge had a finished bullnose, not the unfinished side of a regular tile.
Along this stretch of wall, we chose to install the tile wherever the existing granite backsplash ran, which seemed to look the most intentional (like they had always been there, installed together at the same time). In the past we have removed that short piece of granite so the tile can go right to the counter, but in this case they worked so well together it felt better to leave it there – especially since it wasn’t worth damaging someone else’s granite counters in an attempt to get it off.
Grouting & Caulking
We finished all of the tile cutting and installing in about 5 hours (it was mostly all of the outlets and switches on that one wall that ate up a lot of our time). We let the mastic set overnight and came back the next morning to remove our spacers, lay down fresh paper, and begin grouting. We used premixed grout (for the first time!) in a light gray for the slightest bit of contrast… and I’m undecided on it. Maybe I’ve just been mixing my grout too watery all of these years, but I found this to be a little on the dry side, which made it harder to spread quickly and without it crumbling off the wall and falling onto the counter. But it certainly was nice to skip the mixing step, so I’d happily give it another try to get more practice.
You can see grouting in action in the video, but it basically involves using the float to smoosh it (technical term, I promise) into all of the gaps between tiles. It takes a bit of pressure and some back-and-forth, up-and-down motion to make sure it catches in every seam – but it’s a relatively easy, albeit tedious process. Once you’ve got it in every seam, drag your float over the tile at a sharp angle to wipe off excess from the tile surfaces.
Once you’ve let your grout set for a few minutes, use a barely damp sponge to wipe along the surface of the tile. This will help remove any leftover grout on the tiles and also smooth the grout within the seams. It doesn’t take much pressure or water at all. You may find you want to go back for a second pass a little while later, once it’s set even more within the seams (this helps to take the haze off the tile itself).
You’ll also want to caulk the edges where the tile meets your counter, your cabinets, and/or the walls. We bought a caulk that’s color-matched to the light gray grout we used (both were “Silverado”), so it wouldn’t stick out like a big white border. We like to tape off the areas that are about to be caulked, leaving just a thin gap for where the caulk will go. Then just squeeze a small line of caulk along the seam, and use a wet finger (dipped in a cup of warm water) to smooth it. Be sure to pull your tape off as soon as you’ve got it smoothed to your liking. Do NOT wait for the caulk to fully dry before removing your tape. Note: this caulk went on lighter than the grout and scared us for a second, but it darkened to be a perfect match when it dried.
Finishing
Often the finishing touches are buffing and sealing. You may find a grout haze appearing on your tile over the next 24 hours. Once the grout has had a full day or so to set, use a non-shedding cloth (like microfiber or cheesecloth) to buff the surface of the tile. It may take some elbow grease in certain places, just be carefull not to press into any grout lines – especially if they show any signs of not being fully cured. Some tiles or grouts may require sealing also, but neither of ours did in this case. You can read more about that in this post if yours do.
After that – you’re ready to enjoy your new backsplash! Which, without tooting our own horns too much, Liz was very excited to do. She’s been in this house for about three years and has always known the kitchen needed something like this. So it was fun to be able to help her make it happen… and for just $200! Note: we did three walls of Liz’s kitchen, so for anyone who might just need one or two areas of tile, it should be even cheaper – especially if you order the Wayfair tile we later found, which is almost half the price.
The only downside to this project is that we may have opened up a can of worms for Liz (we all agreed she should extend the Revere Pewter wall color from her nearby living room into here). But that’s a project for another day! And maybe another nephew? Just kidding. Well, maybe not. Love you, Liz!
And if this is just the nudge you needed to do what we should’ve done in our first kitchen (#backsplashregrets), here are some tile options we hunted down that would work really well for a backsplash update:
1 / 2 / 3 / 4 / 5 / 6 / 7 / 8 / 9 / 10
If you guys want more info, tutorials, and photos of other tile projects in our house – here are some other installs we’ve documented:
Installing A Small-Scale Herringbone In Our Laundry Room
Installing Marble Herringbone Around A Fireplace
Installing Porcelain Floor Tile In Our Laundry Room
Installing Large Stone Tile In An Outdoor Area
Installing A Penny Tile Backsplash In Our Last Kitchen (Getting Started, Cutting Tiles, Grouting, Removing Haze)
Removing An Old Shower Tile Border and Installing A New One
Installing A Subway Shower Surround & Marble Floor (And Grouting It)
Speaking of installing tile, we’re bound to have a lot more of it coming up in our beach house soon. I can’t tell if I’m excited or intimidated. Three showers, three bathroom floors, a backsplash… *gulp*
Psst- We’ve heard from a bunch of people that Facebook and Instagram algorithms aren’t showing as many of our posts as they used to, so people are missing when we say “there’s a new blog post about ___” and later they see something that has changed in our house and ask “wait, when did you do that?!” So it seems that the best way to stay on top of posts is just to swing by our blog, where we typically post once or twice a week. Maybe just dropping by on Mon and Thurs is a good way to keep from missing new things? You can always go right to http://ift.tt/1Or03h8 to see the latest thing at the top of the page. Wish IG and FB were less maniacal in their ever-changing algorithms!
*This post contains affiliate links*
The post Installing A Subway Tile Backsplash For $200 appeared first on Young House Love.
0 notes
Text
Installing A Subway Tile Backsplash For $200
One regret Sherry and I have about our first house is not doing a tiled backsplash as part of our kitchen makeover. Best I can remember, we wanted an easily changeable “pop of color” in the form of good ol’ fashioned paint instead (and we spent a lot on that makeover, so it was a cost saving measure as well). If only we had known how cheap and easy a backsplash could be if you install it yourself! Now having several tiling projects under our belts – including the backsplashes in our current kitchen and our last kitchen – it feels like a no-brainer.
We even added a backsplash to our laundry room (here’s how, and here’s the full room reveal), which made a gigantic difference with just 13 tiles. So when my aunt asked if we’d help her by installing a subway tile backsplash in her kitchen, we were game. It took us just two mornings to complete, and rung in right at $200. See what I mean? No brainer.
My Aunt Liz (also known as Great Liz to our kids) moved to Richmond a few years ago, but didn’t have a backsplash put in when her new home was built. Luckily, she had chosen some nice black cabinets and a gray & back granite counter that was well suited for the addition of some classic white subway tile down the line, which she has always loved and pictured in there. These iPhone pictures aren’t doing the space much justice, but they give you a sense of where we started. And yes, when it comes to adding a backsplash, you can put it right over the drywall (even if it’s painted!) and use ready-mixed adhesive and grout to make it even easier. So let’s break down how we got it done.
Prep
Liz had already cleared off her counters when we arrived the first morning, so we jumped right into protecting everything using painter’s tape and red rosin-paper (this is a more waterproof version of your standard brown paper, both of which you can get at the home improvement store). We also removed all of the switch and outlet covers (and later, with the power off, we loosened any switches or outlets from their junction boxes).
Since a kitchen backsplash isn’t a heavy-duty super-wet tile scenario (like a shower wall or bathroom floor) you really can apply the tile directly to your painted drywall without having to tear anything down and install cement board. All it takes is just roughing up your paint job with a high-grit sanding block or sandpaper (we used 80-grit).
Hat-related side note: in taking all of these photos, Sherry failed to notice that the back of my hat was TOTALLY JACKED UP the whole time. Who has TWO tags sticking out of their hat ever, let alone for an entire series of photos and a video?? I’d encourage you to avert your eyes, but you’d miss all the pertinent visuals in this post – so just avoid staring directly at the hat if you can help it.
Once our sanding was done, we started planning the placement of our pattern. Rather than a standard 3 x 6″ subway tile, the three of us decided this smaller 2 x 4″ tile that came in a sheet was a better scale for the space (if you’re not near a Lowe’s, Wayfair’s got the same look for almost half the price). We also picked up some white bullnose tile for the ends that wouldn’t terminate into a wall. Laying everything out beforehand helped us ensure we weren’t leaving slivers on either end, and that the pattern would look centered on the wall. I’ll show you in a minute how this all turned out.
We had measured Liz’s backsplash area on a previous visit and then purchased enough square footage PLUS about 10-15% extra just in case. It’s always important to have that around to account for breakage, miscuts, and other hiccups.
Hanging The Tile
For the next parts of this process, we made a quick video so you can see the basic steps in action. But you can keep reading below if you’re not in a place where you can watch it at the moment (or if you really hate jamming out to dope beats. Yup, I said it). Note: If you’re viewing this post from a feed reader, you may have to click through to the post to see the video.
To hang the tile, we used a premixed mastic to adhere it to the wall. I used a small trowel to apply it to the wall in small sections at a time (I found the small trowel easier to maneuver in the tight space under the cabinets). Here are some screen grabs from the video. Again, try not to only stare at my hat issues.
Once we had a thin layer of mastic applied, we used a V-notched trowel to scrape off the excess – holding the trowel at a 45-degree angle the whole time. This not only removes extra mastic, but also creates grooves that will help the tile adhere to the wall better. Sherry and I are highly competitive about who makes the best grooves.
Once you get your groove on (ha!) you can apply your tile. The area shown here was large enough for full sheets, and as you saw in the video, we used some 1/8″ tile spacers to help keep the lines of the pattern straight and even. You’ll have several minutes of literal wiggle room before the mastic sets, but we never try to work too far in advance without taking a step back to see if anything has slipped or isn’t straight.
Cutting The Tile
Laying the tile is super easy. The only place it gets slightly complicated is when cutting is involved, so I’ll give you a few examples of the tools and tricks you might need to have up your sleeve. For instance, when a partial sheet was needed – like when these walls called for an extra row on top of each sheet – Sherry discovered that some pruning sheers worked great for snipping the glue dots that held our sheets together (the same would work on mesh tile sheets – as would a normal kitchen scissors). We just cut a few full sheets into rows so we had them at the ready.
When a partial tile is in order (like when you bump into a light switch, outlet, or the end of the wall) we relied on a wet saw. For simple tiles like subway you can also use a ceramic tile cutter, but it will only cut along one line – so it wouldn’t work in cases like the one shown below, where I had to make that puppy look like Oklahoma. I used a pencil to mark the notch I’d need to cut out, and then took it outside to my wet saw to trim. For any first timers, a wet saw is faaar less scary than it looks. It’s actually one of my favorite saws to use because you can cut very slowly and be pretty precise.
Don’t worry about making it crazy perfect around an outlet because the outlet cover will hide a lot. In fact, if you scroll back to the top pic in this post you’ll see that the outlet cover goes all the way to the grout crack, so all of that special cutting is hidden under it anyway.
The wet saw was also helpful for cutting full sheets faster, like when we got to the end of a wall. And unlike some experiences I’ve had with cutting tile sheets on a wet saw, these were super fast and easy to do.
My saw came with an adjustable guide that also made cutting angles really easy. This would be super important if you were installing subway in a herringbone pattern, for example, and needed to cut the edge pieces (believe me, we’ve done it without one!). But in this case, we just needed it for the bullnose border pieces that we used whenever the tile didn’t terminate into a wall corner.
Ends & Borders
Speaking of those bullnose pieces, you do have to think about where and how your backsplash is going to end. If you’re lucky, it will just run right into a corner like Liz’s did on the stove side of her kitchen, in which case there’s no border necessary (since the raw cut sides of the tile aren’t visible thanks to them butting up against the side wall).
Speaking of that side wall, we could’ve opted to turn the tile and continue it along the side wall but there wasn’t a natural stopping point (the counters stick out much further than the upper cabinets, so it could look awkward to stop at one but not the other). Just going wall-to-wall along the back always makes for a nice clean look.
On the opposite wall, however, we didn’t have any walls to terminate into – which is where that bullnose edge detail came into play. You can see how we used a 45-degree angled cut at the top corners to make sure each exposed edge had a finished bullnose, not the unfinished side of a regular tile.
Along this stretch of wall, we chose to install the tile wherever the existing granite backsplash ran, which seemed to look the most intentional (like they had always been there, installed together at the same time). In the past we have removed that short piece of granite so the tile can go right to the counter, but in this case they worked so well together it felt better to leave it there – especially since it wasn’t worth damaging someone else’s granite counters in an attempt to get it off.
Grouting & Caulking
We finished all of the tile cutting and installing in about 5 hours (it was mostly all of the outlets and switches on that one wall that ate up a lot of our time). We let the mastic set overnight and came back the next morning to remove our spacers, lay down fresh paper, and begin grouting. We used premixed grout (for the first time!) in a light gray for the slightest bit of contrast… and I’m undecided on it. Maybe I’ve just been mixing my grout too watery all of these years, but I found this to be a little on the dry side, which made it harder to spread quickly and without it crumbling off the wall and falling onto the counter. But it certainly was nice to skip the mixing step, so I’d happily give it another try to get more practice.
You can see grouting in action in the video, but it basically involves using the float to smoosh it (technical term, I promise) into all of the gaps between tiles. It takes a bit of pressure and some back-and-forth, up-and-down motion to make sure it catches in every seam – but it’s a relatively easy, albeit tedious process. Once you’ve got it in every seam, drag your float over the tile at a sharp angle to wipe off excess from the tile surfaces.
Once you’ve let your grout set for a few minutes, use a barely damp sponge to wipe along the surface of the tile. This will help remove any leftover grout on the tiles and also smooth the grout within the seams. It doesn’t take much pressure or water at all. You may find you want to go back for a second pass a little while later, once it’s set even more within the seams (this helps to take the haze off the tile itself).
You’ll also want to caulk the edges where the tile meets your counter, your cabinets, and/or the walls. We bought a caulk that’s color-matched to the light gray grout we used (both were “Silverado”), so it wouldn’t stick out like a big white border. We like to tape off the areas that are about to be caulked, leaving just a thin gap for where the caulk will go. Then just squeeze a small line of caulk along the seam, and use a wet finger (dipped in a cup of warm water) to smooth it. Be sure to pull your tape off as soon as you’ve got it smoothed to your liking. Do NOT wait for the caulk to fully dry before removing your tape. Note: this caulk went on lighter than the grout and scared us for a second, but it darkened to be a perfect match when it dried.
Finishing
Often the finishing touches are buffing and sealing. You may find a grout haze appearing on your tile over the next 24 hours. Once the grout has had a full day or so to set, use a non-shedding cloth (like microfiber or cheesecloth) to buff the surface of the tile. It may take some elbow grease in certain places, just be carefull not to press into any grout lines – especially if they show any signs of not being fully cured. Some tiles or grouts may require sealing also, but neither of ours did in this case. You can read more about that in this post if yours do.
After that – you’re ready to enjoy your new backsplash! Which, without tooting our own horns too much, Liz was very excited to do. She’s been in this house for about three years and has always known the kitchen needed something like this. So it was fun to be able to help her make it happen… and for just $200! Note: we did three walls of Liz’s kitchen, so for anyone who might just need one or two areas of tile, it should be even cheaper – especially if you order the Wayfair tile we later found, which is almost half the price.
The only downside to this project is that we may have opened up a can of worms for Liz (we all agreed she should extend the Revere Pewter wall color from her nearby living room into here). But that’s a project for another day! And maybe another nephew? Just kidding. Well, maybe not. Love you, Liz!
And if this is just the nudge you needed to do what we should’ve done in our first kitchen (#backsplashregrets), here are some tile options we hunted down that would work really well for a backsplash update:
1 / 2 / 3 / 4 / 5 / 6 / 7 / 8 / 9 / 10
If you guys want more info, tutorials, and photos of other tile projects in our house – here are some other installs we’ve documented:
Installing A Small-Scale Herringbone In Our Laundry Room
Installing Marble Herringbone Around A Fireplace
Installing Porcelain Floor Tile In Our Laundry Room
Installing Large Stone Tile In An Outdoor Area
Installing A Penny Tile Backsplash In Our Last Kitchen (Getting Started, Cutting Tiles, Grouting, Removing Haze)
Removing An Old Shower Tile Border and Installing A New One
Installing A Subway Shower Surround & Marble Floor (And Grouting It)
Speaking of installing tile, we’re bound to have a lot more of it coming up in our beach house soon. I can’t tell if I’m excited or intimidated. Three showers, three bathroom floors, a backsplash… *gulp*
Psst- We’ve heard from a bunch of people that Facebook and Instagram algorithms aren’t showing as many of our posts as they used to, so people are missing when we say “there’s a new blog post about ___” and later they see something that has changed in our house and ask “wait, when did you do that?!” So it seems that the best way to stay on top of posts is just to swing by our blog, where we typically post once or twice a week. Maybe just dropping by on Mon and Thurs is a good way to keep from missing new things? You can always go right to http://ift.tt/1Or03h8 to see the latest thing at the top of the page. Wish IG and FB were less maniacal in their ever-changing algorithms!
*This post contains affiliate links*
The post Installing A Subway Tile Backsplash For $200 appeared first on Young House Love.
Installing A Subway Tile Backsplash For $200 published first on http://ift.tt/2qxZz2j
0 notes
Last Seen Blogs

saiyanserenityv
There is a Raptor in my office.

superliftcanada
Superlift Material Handling Inc

akhilmeena-blog
Untitled

jacobryuu
Ohai.

turboonthecrazy
ARTE Y MÚSICA