#the only good windows is linux made to look like a 30 year old version of windows
Explore tagged Tumblr posts
Visit Tumblr Blog
Explore Tumblr blogs with no restrictions, modern design and the best experience.
Last Seen Tumblr Blogs


Fun Fact
In 2020, Tumblr had 29.4 million users in the US.
Text
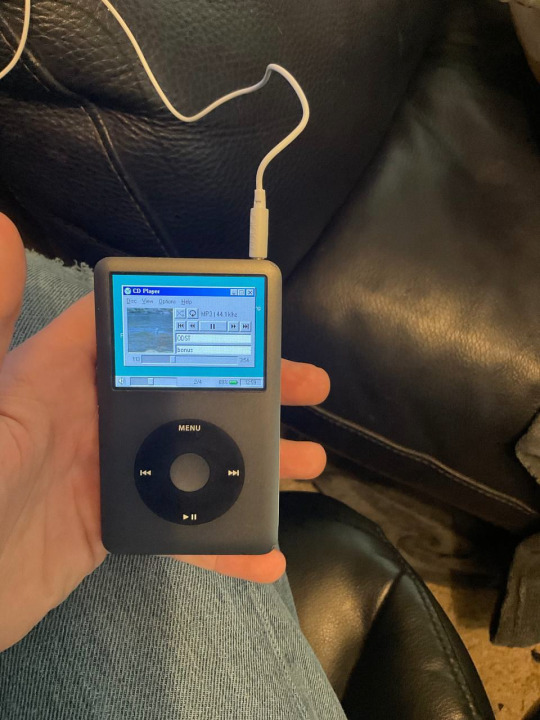
made my ipod gayer
#the only good windows is linux made to look like a 30 year old version of windows#linuxposting#linux#ipod classic#gay#i love men#i use yiffos btw
45 notes
·
View notes
Text
Version 311
youtube
windows
zip
exe
os x
app
tar.gz
linux
tar.gz
source
tar.gz
I had a great couple of weeks. E3 was fun to watch, and then I got back to proper work, mostly fixes and improvements to the new download systems.
pixiv fixed and other downloader stuff
I have made a new parser for the new dynamic pixiv layout. It was not simple, but it seems to work ok, including for manga. It only gets unnamespace tags in romaji/kanji (fetching just romaji/translations was a bit of a pain), but Pixiv's unnamespace tags have never been high quality, so unless you have a particularly important need for them, I recommend you not parse them. You should be updated to be using this new parser as soon as you update. My understanding is that everyone has been updated to the new layout, but if you are still on the old one, please check out network->manage url class links to roll back and let me know if you need any more help. Also, pixiv now lists a 'page' namespace in its downloader/subscription tag import options, if you want to parse page:1, 2, 3 for manga downloads.
In a similar way, I have fixed the new inkbunny parser, which was fetching and tagging additional unwanted files. It now visits each page of multi-page Post URLs independently to get the correct File URLs. Let me know if you still have trouble with it, including any example links that break!
The multiple watcher also has some bells and whistles--it now remembers its highlight, displays the URL of the current highlight, provides ways to set checker/file import/tag import options, and presents 'added' time in its watcher list. This added time is new, so for any existing watchers it will be set as the next 'load time', but it will remember thereafter.
Tag import options now has a 'get all tags' checkbox that advanced users may wish to use to override some missing-namespace weirdness related to the new downloader stuff currently being half-complete. I expect to do some more here in the coming weeks.
misc
Some kinds of regular file search are now much faster. Ratings searches, in particular, should now be pretty snappy.
Importing and exporting serialised .png objects through the new url class/parser dialogs is now easier--the little export panel now fills in better defaults and remembers the last location used, and the respective lists should now support .png drag-and-drop import. So, if I or anyone else gives you a new parser .png to try out, you can just drag it right onto the network->manage parsers dialog and it should import no prob.
Illustration2Vec project for advanced users
A user has done some really neat work integrating the machine learning Illustration2Vec project into hydrus. If you are interested in playing around with auto-tagging using ML systems, please check out the conversation starting here: https://8ch.net/hydrus/res/9115.html#9142
Although I am up to my neck in downloader overhaul at the moment, I am still enthusiastic and increasingly optimistic about integrating ML into hydrus in a variety of ways over the coming years. I am particularly interested in us generating our own models using our own CPU/GPU cycles. This is all extremely new tech, and my chief concern is how to make flexible and reasonable and productive workflows around it, so if you check this out, please let me know how it works well--and less well--for different situations, what you think is ultimately practical to achieve, and how you might like to integrate it into a future workflow.
full list
wrote a new parser that muddles its way through pixiv's new dynamic javascript layout. it seems to get everything working again. it gets tags in kanji, although the unnamespaced pixiv tags remain low quality, and you may wish to just not parse them at all anyway
fixed some misc parser text handling, unicode conversion etc...
the new pixiv parser has a 'page' tag stub that should inform tag import options in the old downloader
the multiple watcher now remembers the highlighted watcher through a session restart
the multiple watcher now shows the highlighted watcher's url up top
the multiple watcher now has checker, file import, and tag import options, which it will assign to all new watchers it creates
the multiple watcher now has a 'set options to watchers' button that will force-set the current options to all the selected watchers
the multiple watcher now has an 'added' column with watcher creation time listed. storing this creation time is new, so any existing watchers will get a new creation time of their next load time, but it is remembered henceforth. the listctrl here is now pretty crushed for width, so maybe we'll rejigger some stuff here
watchers added to a multiple watcher will now have a status of 'just added' for five seconds
watchers that are added to a multiple watcher that is already watching them will now have the status of 'already watching' for five seconds
the multiple watcher list now has a much taller minimum height--layout here is another work in progress
fixed the inkbunny parser (and a related tweak to the inkbunny url class)--it now uses the new 'multiple-file-per-post' import object generation to actually walk through the pages of the mini-gallery (which for inkbunny have -p2- suffixes on the url) to fetch only the correct files and url-associate them neatly
tag import options now has a 'get all tags' checkbox, which can override the normal namespace checkboxes. it gets all tags, even those with namespaces not listed, which happens for several reasons in the new download system. (eventually, the namespace list may be replaced with a slightly different system)
watcher tag import options no longer list 'filename' under their namespace checkboxes--they just have this 'get all tags', which works for everything (so watching yiff.party pages should now get tags)
simplified and sped up similar files search at the db level
sped up some ratings search code
generalised some common file search optimisations, meaning they now apply in more situations and can take advantage of some other speed-ups:
similar files system predicate is now faster
inclusive ratings searches are now faster
duplicate relationship count searches with non-zero-inclusive count are now faster
removed some clumsy old ratings search optimisation code
exporting serialised objects as pngs is a bit easier--now, it displays current export path better, will remember the last export location used, and for single png exports will pre-fill the filename and 'title' value with a reasonable default
the content parser, page parser, and url class listctrls now accept serialised png files when drag and dropped!
the simple downloader should recover and continue better from malformed urls during a page parse
the url downloader should now recover better from various situations where it cannot not derive some tag import options (including urls with a 'file' url class, such as 4ch/8ch direct file links)
parse test results will now state the priority value of urls
gave the 'updating' section of help a pass and wrote a little more on how to do a big-version-gap update
when a new multi-file import object inserts its child file import objects while being looked at in the ui, the listctrl should now correctly refresh the displayed indices
subscriptions will now wait up to 90s for bandwidth (was 30s before, I think) before quitting, which should avoid a few more early-quit events
cleaned up some server decompression bomb testing
users with admin-level accounts can now upload decompression bombs to file repositories, better options on this will be avaliable in future
the manage urls dialog will now OK on the same 'manage_file_urls' shortcut action that can open it (like manage tags and ratings already do)
fixed the string converter for new file lookup parsing scripts
started work on some in-the-background mass file reparsing, but I want to get some nicer ui going before I pull the trigger on any of it
file reparsing now repopulates the table for md5, sha1, and sha512 hashes if they are missing
improved some ffmpeg error parsing
moved from basic list to a pop-faster collections.deque for importable path parsing and duplicate search branch regen
added a BUGFIX option to options->gui that forces minimum width for popup messages in the continuing attempt to deal with some funny fit/layout calculation in certain Linux WMs
fixed how some 'unrepairable db' error messages are displayed in Linux systems
cleaned up a ton of old tuple-stripping code from the db
updated to new sqlite for windows build
misc improvements
next week
I was getting a bit too tired before the break, so I gave myself a bit more sleep every day this week (and spent a bit more time keeping up with messages, my ongoing battle), and it worked well. It felt good to get back to it. I now want to hammer out the last outstanding parsers and get into the meat of the gallery parsing overhaul.
1 note
·
View note
Text
Best Browser For Os X Tiger

Classilla and TenFourFox – ports of the current Firefox web browser, optimized for Mac OS 9 (Classilla) and PowerPC Macs running OS X Tiger (TenFourFox). Get online with your vintage Mac! PrintToPDF – a free utility to create PDF files on classic Macs running System 7 through Mac OS. Jan 26, 2014 Support Communities / Mac OS & System Software / Mac OS X v10.4 Tiger Looks like no one’s replied in a while. To start the conversation again, simply ask a new question. Online shopping from a great selection at Software Store. Mac OS X Tiger (version 10.4) is the fifth major release of Mac OS X, Apple's desktop and server operating system for Mac computers. Tiger was released to the public on April 29, 2005 for US$129.95 as the successor to Mac OS X 10.3 Panther.Some of the new features included a fast searching system called Spotlight, a new version of the Safari web browser. Apr 07, 2016 The typical reason that many users stay on Tiger (or Leopard) is that they have a PPC processor, which can't go beyond 10.5.8 (Leopard), where TenFourFox would be a good choice - and close to up-to-date for many uses. However, TenFourFox can't run on Intel processors, which is what you have. But, you CAN update the OS X system.
Best Browser For Mac
Best Browser For Os X Tiger Download
Best Browser For Os X Tiger V10 4 11
X Browser For Pc
Best Browser For Mac Os X Tiger
Back when Ars Senior Products Editor Andrew Cunningham was forced to work in Mac OS 9 by his colleagues in September 2014, he quickly hit a productivity wall. He couldn't log in to his Ars e-mail or do much of anything online, which meant—as someone who writes about new technology for an online-only publication—he couldn't do his work. All Cunningham could do was play old games and marvel at the difference 15 years makes in operating system design.

But as hard as it may be to believe in light of yet another OS X macOS update, there are some who still use Apple's long-abandoned system. OS 9 diehards may hold on due to one important task they just can't replicate on a newer computer, or perhaps they simply prefer it as a daily driver. It only takes a quick trip to the world of subreddits and Facebook groups to verify these users exist.
Certain that they can't all be maniacs, I went searching for these people. I trawled forums and asked around, and I even spent more time with my own classic Macs. And to my surprise, I found that most of the people who cling staunchly to Mac OS 9 (or earlier) as a key component of their daily—or at least regular—workflow actually have good reason for doing so.
Best Browser For Mac
Why? Whhhhyyyyyy???
The reasons some Mac lovers stick with OS 9 are practically as numerous as Apple operating systems themselves. There are some OS 9 subscribers who hold out for cost reasons. Computers are prohibitively expensive where they live, and these people would also need to spend thousands on new software licenses and updated hardware (on top of the cost of a new Mac). But many more speak of a genuine preference for OS 9. These users stick around purely because they can and because they think classic Mac OS offers a more pleasant experience than OS X. Creatives in particular speak about some of OS 9's biggest technical shortcomings in favorable terms. They aren't in love with the way one app crashing would bring down an entire system, but rather the design elements that can unfortunately lead to that scenario often better suit creative work.
I'm alluding here specifically to the way OS 9 handles multitasking. Starting at System 5, classic Mac OS used cooperative multitasking, which differs from the preemptive multitasking of modern Windows and OS X and Linux. With classic Mac OS multitasking, when you want to change apps it's up to the active program to relinquish control. This focuses the CPU on just one or two things, which means it's terrible for today's typical litany of active processes. As I write this sentence I have 16 apps open on my iMac, some of which are running multiple processes and threads, and that's in addition to background syncing on four cloud services.
By only allowing a couple of active programs, classic Mac OS streamlines your workflow to closer resemble the way people think (until endless notifications and frequent app switching cause our brains to rewire). In this sense, OS 9 is a kind of middle ground between modern distraction-heavy computing and going analog with pen and paper or typewriter.
These justifications represent just a few large Mac OS 9 user archetypes. What follows is the testimony of several classic Mac holdouts on how and why they—along with hundreds, perhaps thousands of people around the world—continue to burn the candle for the classic Macintosh operating system. And given some of the community-led developments this devotion has inspired, OS 9 might just tempt a few more would-be users back from the future.
Programmatic hangers-on
Remembering how the comments on Cunningham's article were littered with stories of people who still make (or made, until only a short time beforehand) regular use of OS 9 for getting things done, I first posed the question on the Ars forums. Who regularly uses Mac OS 9 or earlier for work purposes? Reader Kefkafloyd said it's been rare among his customers over the past several years, but a few of them keep an OS 9 machine around because they need it for various bits of aging prepress software. Old versions of the better-known programs of this sort—Quark, PageMaker, FrameMaker—usually run in OS X's Classic mode (which itself was removed after 10.4 Tiger), though, so that slims down the pack of OS 9 holdouts in the publishing business even further.
Wudbaer's story of his workplace's dedication to an even older Mac OS version suggests there could be more classic Mac holdouts around the world than even the OS 9ers. These users are incentivized to stick with a preferred OS as long as possible so they can use an obscure but expensive program that's useful enough (to them) to justify the effort. In Wudbaer's case, it's the very specific needs of custom DNA synthesis standing in the way of an upgrade.
'The geniuses who wrote the software we have to use to interface the machines with our lab management software used a network library that only supports 16-bit machines,' he wrote. This means Wudbaer and colleagues need to control certain DNA synthesizers in the lab with a 68k Mac via the 30-year-old LocalTalk technology. The last 68k Macintosh models, the Performa 580CD and the PowerBook 190, were introduced in mid-1995. (They ran System 7.5.)
This DNA synthesis lab has two LC III Macs and one Quadra 950 running continuously—24 hours a day, seven days a week—plus lots of spare parts and a few standby machines that are ready to go as and when needed. The synthesizers cost around 30,000-40,000 Euros each back in 2002 (equivalent to roughly $35-50k in 2015 terms), so they want to get their money's worth. The lab also has newer DNA synthesizers that interface with newer computers and can chemically generate many more oligonucleotides (short synthetic DNA molecules) at once. This higher throughput comes with a tradeoff, however. Whereas the old synthesizers can synthesize oligonucleotides independently of each other (thereby allowing easy modifications and additional couplings), the new ones do them all in one bulk parallel process, meaning the extra stuff has to wait until afterward. More work means more time, and as Wudbaer says, 'time is money.'
Lutra's package does not use the bash script and launches QGIS directly. Qgis for mac os sierra. If anybody is interested i could supplement giovanni's feedback with a homebrew install + new profile + no plugins on mojave 10.14.1 mbp 13' with intel iris graphics 550. Author Name: Peter Petrik I am not able to replicate the issue on my computer, but I made some research on QFileDialog issues.For the launch from terminal vs launch from Launch Services: Homebrew QGIS package uses the bash script to launch QGIS.app.
Let us start to see iBoot Windows from the beginning. Yes, iBoot Windows is the leading software app with Windows PC users. Os x simulator for windows. Microsoft cooperation is the producer of Windows operating system to the globe with a very large number of functionalities. If you need to go through this smart app, we are going to talk about the iBoot Windows from this content. Hence, if you wish to use other Operating Systems such as Mac OS systems in your Windows PCs as your virtual machine, iBoot Windows most utility app to do that very easily.
On the Facebook group Mac OS 9 - it's still alive!, people trade more of these OS 9 endurance stories. Some prefer it for writing environment. Others keep it around for bits and pieces of work that require expensive software such as Adobe's creative suite or a CAD package or Pro Tools or specifically to open old files created with this software. Most use it for old Mac games, of which there are far more than the Mac's game-shy reputation would suggest—but that's a story for another day. A scant, brave few not only struggle through OS 9 for these sorts of offline tasks, but they also rely on it as a Web browsing platform.
Best Browser For Os X Tiger Download

Mozilla Firefox is a graphical web browser developed by the Mozilla Corporation and a large community of external contributors. Firefox started as a fork of the Navigator browser component of the Mozilla Application Suite. Firefox has replaced the Mozilla Suite as the flagship product of the Mozilla project, under the direction of the Mozilla Foundation.
To display web pages, Firefox uses the Gecko layout engine, which implements most current web standards in addition to several features which are intended to anticipate likely additions to the standards. Latest Firefox features include tabbed browsing, spell checking, incremental find, live bookmarking, a download manager, private browsing, location-aware browsing (also known as 'geolocation') based exclusively on a Google service and an integrated search system that uses Google by default in most localizations. Functions can be added through add-ons, created by third-party developers, of which there is a wide selection, a feature that has attracted many of Firefox's users. Mozilla Firefox is a cross-platform browser, providing support for various versions of Microsoft Windows, Mac OS X, and Linux.
Best Browser For Os X Tiger V10 4 11
Firefox Features
X Browser For Pc
Improved Tabbed Browsing
Spell Checking
Search Suggestions
Session Restore
Web Feeds (RSS)
Live Titles
Pop-up Blocker
Best Browser For Mac Os X Tiger
Updates : Firefox for Mac Updates
0 notes
Text
Download Xiaomi Mi Flash Tool Latest Version {2019}

Mi Flash Tool Latest Version For Redmi Devices
Mi flash tool is Available and Now Redmi and Mi users can Download Mi Flash tool :Are you crazy about your Android customization? Flashed custom ROM or modules and facing bootloop issues? Bricked your device by rooting or by performing any unusual activity? Well, the solution is Mi Flash Tool. Read this entire guide to know all about Mi flash tool and learn how to download and install the Mi Flash Tool on your PC. Xiaomi is of the biggest smartphone producer and seller worldwide. These devices are well known for their affordability and price to performance considerations. The company has sold more than 6 million smartphones in India last year. Additionally, the company has also sold more than 9 million products. Looking at those numbers we could already understand how popular the company is. In India, one among twenty people uses Xiaomi Android smartphones. Xiaomi calls themselves ‘The No.1 Smartphone Brand’. Love it or hate it, but that is the truth. Xiaomi releases at least eight phones a year. Considering the affordable price and the use of excellent SoC’s, most of the developers show interest in buying Xiaomi devices. The development of all the Xiaomi devices is excellent with plenty of ROMs and other developments. For instance, let us consider Redmi Note 7. The Redmi Note 7 is powered by Snapdragon 660 SoC. The device is being sold starting at Ten thousand. Try to find a phone at that price which uses non-under clocked Snapdragon 660.
Mi Firmware Flash tool The idea behind the Mi Flash tool So considering the popularity among developers and users, there are tons of ROMs available for users to try. Well, Xiaomi own proprietary skin which is based on Android is good. It is known as MIUI. The current version is MIUI 10 and the successor is under development. MIUI is one of the finest Android skins available out there. MIUI comes with many features and ads too. Users who might get bored to the interface might migrate to custom ROMs. Also Read: Download Qulaocmm Hs-usb Qdloader 9008 Driver Ever since MIUI started pushing ads in system apps and settings, most of the users lost hope and did not find MIUI to be suitable for them. So users started migrating to custom ROMs. But, whenever users face problems like bootloop, hangs or lags and bricked boards, they end up landing in home, aka MIUI. To fix all the issues, Xiaomi users need to flash stock ROM. To flash stock ROM, Xiaomi made a tool which can be downloaded and used by all the users. The name of the tool is Mi Flash Tool. Related: Download Mi Account Unlock tool
What is Mi Flash Tool
Mi Flash tool, previously referred to as XiaoMiFlash, is an efficacy software technologically advanced and retained by Xiaomi. The tool functions from the Fastboot mode connection with the device in order to erase or modify or even flash the original software. Xiaomi Flash Tool or XiaoMiFlash could benefit you bring back the stock MIUI firmware on your Xiaomi devices. You can also manually update to the latest software. The tool also comes handy in fixing issues like bootloop or hard brick. So some users who are into custom ROMs and custom development side of things, can go and flash some great custom ROMs available out there. If you have already done that, well, custom ROMs are annoying sometimes. Flashing different custom ROMs, Kernels and recoveries is a lot of fun. But, one or other day you will run into severe problems by doing that. The major problems, in this case, are, Bootloop and hard-brick. Hard brick is normally a small issue and can be fixed but changing the ROM or wiping the stuff. But boot loop is the major thing which can be only solved by flashing or reverting back to Stock ROM. You May also Like : Download Huawei HiSuite For Windows & Mac If you have bricked your Xiaomi smartphone or if your phone ran into a boot loop and doesn’t boot at all, then you are in the right place. In this post, we will explain how you can install Mi Flash tool or XiaoMiFlash on your PC. By installing the Mi Flash tools and flashing the stock ROM, you can get your device back to the way it used to be. Enough introduction, let us dive in and know how to download Mi Flash Tool, shall we? Features of Mi Flash Tool or XiaoMiFlash Quick Installation No extra drivers, everything is in-built Supports all the devices Different ways and methods of Flashing Multiple devices at once These are some of the unique features of the Mi Flash Tool. If you really understood what are you going to deal with, then you can jump into later part of the guide. If you are not clear about the features, well, continue reading the next part of the guide without skipping a beat. Quick Installation

Mi Flash tool The tool comes in a familiar installation process. The file outrages in .msi format. If you are not sure what .msi is, well, it is the default windows installation process. It is just like .exe file format, which includes all same process in installation. Just click on next few times and the Mi Flash Tool or XiaoMiFlash can be installed in your PC within seconds. The process is as simple as that. No extra drivers required

Miui Flash tool Once you download the zip file from the download section, you need not to download any applications or drivers additionally. The zip includes all the required drivers placed within and can be installed one by one. Supports all the devices

Mi Flash tool Download This is the sole tool which can fix any Xiaomi devices. You can use this tool with all the 86 Xiaomi devices which the company has ever made. This tool only supports Qualcomm powered Xiaomi devices. Almost all the Indian Xiaomi devices are powered by Qualcomm, so no need to worry about that. Different ways and methods By default, the Mi Flash tool gives you three different flashing modes. The first mode is Clean all. The second method is to save user data and final method should be Clean all and lock. If you choose clean all, the entire user data will be wiped. But the device will remain unlocked if the bootloader of certain Xiaomi device is unlocked previously. If you go with save user data method, the user data will be saved whereas in clean all and lock, the user data is wiped and device bootloader gets locked. The third method is basically the process including the steps of both one and two.
Pre-Requisites:
Make sure you uninstall the previous version of the Mi Flash Tool or XiaoMiFlash if you have installed the application in your PC any time before. Make sure you use a Windows PC. Mac, Linux, and Ubuntu are not compatible with the software. The application does not work with the old version of Windows, like Windows XP, Windows Vista. The minimum version should be Windows 7 or plus. We personally recommend you to perform the process in Windows 10 PC. A fully functional Xiaomi device. As mentioned earlier only Qualcomm Xiaomi devices are supported with this application, Do not try this with MediaTek ones. The devices need to be charge minimum of 30%. We recommend you to use the original cable which was provided in the box.
Mi Flash tool Download
Latest Xiaomi Flash Tool
Installation of Mi Flash Tool:
Now that you have downloaded the Mi Flash Tool or XiaoMiFlash from the download section above, let us proceed with the installation part. Before installing the application it is recommended to install the drivers which are available within the zip. Install Mi USB Drivers Now run the Mi-USB-Drivers.exe file by double-clicking it. Once the application is opened, you will get a pop-up prompt. Click on ‘Yes’ to proceed. It doesn’t harm your PC or smartphone. You can now click on ‘Next’. Select your desired language and your country, then hit ‘Next’ again. It will choose the installation location automatically. If you would like to change the installation location, you can definitely do that. This is the final step of the installation process. Click on ‘Install’ to install the Xiaomi USB Drivers. In moments you will be notified with Installation Complete. Now Click on Finish. Now that we are done with the installation process of the Xiaomi USB drivers, let us quickly dive into the installation of the tool? Related: Download Android Multi Tools Latest Version Install Mi Flash tool On Windows And Mac Once you download the zip file from the link above, Find the downloaded zip file of the Mi Flash Tool. Select the zip file and right click on it. Now select the extract option. To extract the zip file you need to have WinRAR or 7-Zip tool. Once extracted you can find the drivers, adb and other DLL files inside the folder. Install the drivers if you haven’t done that yet. Follow the above-mentioned guide to do that. Now you can find Mi Flash.msi in the folder. To be much clear, that is the only file which you can install on your Windows PC. Once you find the Mi Flash application, double click on it to run the installation process.

Miui Flash tool Click on next. Now you choose where you can install the application. The default is set to C drive. If you want to change the installation location, you can browse and change that as well.

XiaoMiflash tool Keep clicking on Next, till the installation is done. Do not worry, there are no malware or add-on files which you might install accidentally. Once done, you will be greeted with Installation Finished

Xiaomi Firmware Flash tool Now click finish. That is it. You have successfully installed the Mi Flash Tool in your Windows PC. Now all you need to do is flash a Fastboot ROM and get your device back to rocking position.
Flashing Fastboot ROM using Mi Tool
Download the latest Fastboot ROM for your Xiaomi device. The link will be provided in the download section above. Choose Fastboot ROM while downloading instead of recovery ROM. Find the downloaded ROM. Once you find the zip file, right click on it and click on extract. To perform this action you will need to have WinRAR or 7-Zip installed in your PC. Now take your device. If it is stuck in bootloop, hold volume down + power button simultaneously. By performing that action, you will be successfully booted into Fastboot mode. If you are not sure what Fastboot mode looks like, A Mi bunny appears and the image mentions Fastboot under the bunny. Now take the original USB cable preferably and connect it down to your PC You will be able to see a pop up in your PC when connected successfully. Or the notification light turns up, that’s another indication. Now run the installed Mi Flash tool as administrator. Now copy the extracted Fastboot ROM file and paste it in the Mi Flash tool’s root folder. In Mi Flash tool application, click on refresh and it shows a fill if the device is connected. Once connected, click on the select option and choose the Fastboot ROM from the root folder of Mi Flash Tool. Select the flashing method of your choice. If you choose clean all, the entire user data will be wiped. But the device will remain unlocked if the bootloader of certain Xiaomi device is unlocked previously. If you go with save user data method, the user data will be saved whereas in clean all and lock, the user data is wiped and device bootloader gets locked. The third method is basically the process including the steps of both one and two. Now click on Flash and wait for some time. The process might take anywhere between 15 minutes to 30 minutes. Once the flashing is done, you will be greeted with Success in green color. Now unplug your device from PC. Hold the power button for 10 seconds and you will be greeted with Mi Logo. The first boot might take longer than expected. It usually boots between 10-15 minutes. That is it. You have successfully booted your Xiaomi Device.
Conclusion:
If you face any issues while flashing, make sure you have followed the previously mentioned steps carefully. Sometimes it even extends more than 30 minutes. Typically it doesn’t take that long to do. Make sure you wait at least 40 minutes and unplug device and reboot. The device will definitely boot. That is just a bug which doesn’t occur quite often, but it is worth mentioning that this issue exists. Now that you have successfully installed the Xiaomi Mi Flash Tool and flashed the Stock ROM, it’s time for me to bid you adieu. Before you leave, show us some love by sharing this post with your friends or family. Comment down if you have any doubts or queries on the same. Stay tuned for more posts like this. Till then, stay techy! Read the full article
0 notes
Text
Gaming on Windows is just better.
Reasons windows is better I'll, save you guys the trouble there aren't any actually yeah. I agree. Are you guys kidding me? The vast majority of the world runs Windows on the desktop and believe it or not. There are some pretty darn good reasons for it, so guys we compiled the top 10 of them from our community to share with you in this video thanks LastPass for sponsoring a portion of this video. They relieve the burden of trying to remember all your passwords for every website. Let LastPass fill in your passwords, for you learn more at the end of the video or at the link below [, Music ]. First up and this one's a shocker gaming, our community spoke, and we agree. Gaming on Windows is just better.
Not only are there tons of current games for the Windows PC platform like literally thousands of them, but accessing them and keeping them up to date is much simpler than it used to be thanks to online marketplaces like Steam, origin, you play, and yes, even the epic Game store and Windows gaming has far more going for it than just the current library. Recent progress towards integration with Microsoft's Xbox ecosystem has brought cross-platform play to some titles and even cross-platform purchases, and on the subject of compatibility. Well, there's the back catalog of games, which numbers in the tens of thousands with a shocking number of old games still being playable on modern hardware. I fired up 1602 80, a game from almost 1602 80 on my Windows, 10 PC with a Titan RT X on it with minimal tinkering required.
That'S crazy! So we're actually working on a collab with good old games. Right now to show this off make sure your sub, so you don't miss it on the subject of tinkering Windows games, particularly the older ones, allow for a ton of it with large communities that have built everything from their own servers from multiplayer to mods that alter Visuals or gameplay elements and even mods that change the genre of the original title fun fact for you, young kids out there dota used to be a custom map in Warcraft 3. Finally, there's the advantage that comes naturally with being the incumbent gaming platform support wan na try out the hottest new peripherals like brand new graphics cards, VR headsets, haptic feedback, vests odds are excellent, that the Windows software is going to be much more polished than what's available. For other platforms, that is, if anything exists, for them at all, RTX real-time ray tracing on Mac.
Please is actually a common one for users of every platform and it's that it just works or because I don't feel like something new like Apple Microsoft has made it OS that, for the most part, works as intended. Out-Of-The-Box, no real extra effort is needed. Thanks to Auto magical third-party driver installs through Windows Update when you get into the weeds with obscure devices, hardware compatibility on the platform does have its issues, but for the average user it is much better than it used to be, and so is the general intuitiveness of Using it I mean I still remember when they introduced the documents and pictures folder. Comm 4 is the toolbox. The registry editor, if used responsibly, is just the tip of the iceberg when it comes to optimizing. The windows experience task manager got some big upgrades with Windows 8 and now makes it so simple to monitor CPU RAM network and even GPU usage.
So anyone can do it, but if you want to go even further, this rabbit hole. 2 has pretty much no bottom resource monitor, gives you a much more granular. Look the information from cast manager, making it easy to identify processes that are sending large amounts of network data out or causing your disk to churn and slow down the rest of your system. Task scheduler is a crazy, powerful utility that lets. You have Windows, automate tasks for you. It can open and close programs for you when you log in and out it can send emails when tasks complete and you can even post to Twitter and Facebook using the window. Scheduler and power toys are back, so these are actually Microsoft provided tools that enthusiasts can use to add or enhance features.
I was a huge fan of sync TOI back in the day and this new window management one for Windows, 10 looks sick. 5. Is the support base want to learn how to do some of the stuff? You'Ve talked about well, with 78 % of the worldwide desktop OS market share. If it exists, someone has probably done it so, like you want to become the new macro king. Well, there are tutorials on how to do that, need to troubleshoot a weird error between the official support from Microsoft, for both current and legacy windows and the thousands of enthusiasts on forums around the world. The odds of finding someone to help. You are pretty good. One. Great resource is actually our forum linked below, where our community is ready, willing and able to help feel free to check that out after the video 6 is productivity. Even Apple had to acknowledge.
Windows is strength when it comes to buckling down and just getting some work done, whether you're trading stocks, writing reports, tracking financials, making super cool, PowerPoint, slides or making YouTube videos like us windows probably supports the software and the hardware that you need to get it done. Microsoft'S Office suite is incredibly powerful and works best on Windows if you want to do 3d or CAD work. Most of the industry-standard software is on Windows and, let's not forget the plethora of one-off and highly specialized programs needed for scientific study, engineering and many other industries. Now I wasn't sure where to put this little bit so we're gon na chuck it in productivity, shortcut keys, so many shortcut keys, classic control-alt-delete for when things go wrong windows and one two three and four to launch the corresponding app on your taskbar go ahead and
Try it it's really cool and if you like bad one, you can grab the other new power toy that lets. You hold the Windows key to see all the shortcut keys for your active programs. Oh productivity bliss awaits my friends. Seven is OS unity with some notable exceptions. Windows hasn't changed too drastically over the years. So if you went straight from Windows, XP to Windows, 10 you'd probably find your way around it sooner rather than later, and if you're a technician. This can be really nice because it's not uncommon to find yourself working on a different version from one hour to the next. It'S a totally different experience compared to Linux, which has I don't know, I stopped counting after 30, let's just say a lot of different distros or versions that are designed for a multitude of different tasks or specialized use cases.
There are mainstream optimized distros out there, but if you don't consult the internet beforehand as a newcomer, it can get really confusing and thing is even if you do consult the internet. People might not agree on which flavor of the month is vastly women do bunt to stop being cool. Eight was a bit of a surprise to me, but it came up a lot. So maybe I just take the taskbar and file explorer for granted. The modern taskbar is a great tool for maintaining a clean and organized desktop, giving you quick access to frequently used programs and offering up a quick preview of all of your active windows as for File Explorer. Well, it's got its issues. The search is pretty slow. The up, folder navigation is done. Sometimes, documents should go to sequel and slash users, slash your username, not this PC etc.
But it's got wide support for thumbnail, previews lots of useful information readily available, and it requires no keyboard shortcut to cut paste. Sometimes you don't have to be great just better than your competitor. 9 is reliability with good Hardware. The days of daily blue screens are long. Gone crashes do still exist, but for years now I've experienced long periods of smooth and stable performance. Microsoft does have some work cut out for them to make their automatic updates mover in the regarde, but they at least seem to be aware of the problem. At this point, bringing us to ten finally sort of related to gaming to compatibility, got an old program from the Windows XP days. Well, there's a decent chance that, with some trial and error, you will be able to get it to run even in the latest. Builds of Windows 10.
There are just so many specific use programs that have been written over the last couple of decades and losing access to them because of an OS update could be devastating for some people. Compatibility mode actually works more often than you'd think and when it doesn't, some quick googling will often bring up a solution, and the cool thing is that goes. Both ways got a computer that mom bought 10 years ago, but still wants to use. Well, there's a solid chance that Windows and most programs that run on it will still work on that, even if not very well. Our Skull trail system from 2008 was actually a great example of this no driver issues and, aside from a couple of games that refused to launch because of missing CPU instructions, our issues were related to performance rather than to compatibility, so guys go check out that video.
If you haven't already now one of the tools we love using on Windows comes, of course, from our sponsor for this portion of today's video LastPass LastPass relieves the troubles of remembering your passwords and reduces the anxiety about getting locked out of your accounts and then waiting For reset password emails, you won't need to write down, remember or reset passwords anymore with LastPass LastPass allows you to keep track of an unlimited number of passwords and not just passwords. Even just things like you know, Wi-Fi codes or just things you want to remember and store somewhere safe, and it doesn't only work for desktop it even works on mobile sites and apps for both iOS and Android. When you open an app or a site, LastPass will fill in your username and password making logging in easy, so click the link below to find out more about LastPass. So, thanks for watching guys hope you enjoyed this video see you
0 notes
Text
Probox2 EX+ and Remote+
Introduction
Hello everyone!
Here is the first in a new series of reviews about Kodi TV Boxes.
What are Kodi/TV Boxes?
TV Boxes are small computers running Google Android OS, Linux or even Microsoft Windows (on x86 CPU variants), mostly based on ARM processors – from different and varied manufacturers, such as AMLogic, RockChip, Intel, and others. Most of these are identical or quite similar to those found in modern Smartphones and tablets.
That’s no coincidence. Modern smartphones are powerful computers that can run many tasks that required room size industrial computers only a few decades ago. And the task which TV Boxes take on is not a small one.
Modern TV Boxes aim to replace the need for cable or satellite TV subscription, with content from the World Wide Web. This is what streaming is all about.
However, these days, it’s not just about displaying the content from sources such as YouTube, Netflix, Hulu and others, but doing so smoothly and being able to handle multiple audio and video formats and codecs.
These days, the evolution of mobile hardware is much faster than that of the personal computer. Because of that, the newer chipsets can handle these heavy duty codecs and decode them in hardware.
From Black & White, low-res digital reproductions of old films and TV programs, to this year’s 4K highly compressed, 3D feature films – these boxes can do it all – whether it’s video or audio. All you need is a fast (preferably fiber) internet connection and a good TV with an available HDMI input. After an hour or less of fiddling, you’ll enjoy the world of (mostly) free unlimited content off the World Wide Web.
And this time, I am proud to present: The Probox2 EX+ Extreme Media Player!
This review unit was sent to me courtesy of the good people at Probox2, so thank you all, and especially Will, for the swift and great communication.
What’s in the Box?
youtube
PROBOX2 EX+ is a new iteration on the previous generation from PROBOX2, which was simply named EX. The main difference between the two is the hardware. The new EX+ is based on the newer AMLogic S812 chipset while its predecessor was based on the older AMLogic S802-H.
Both boxes are running Google Android, but the new EX+ comes with the new Android 5.1.1 Lollipop out of the box as well as a fast 1000M (Gigabit) LAN wired connection, while the EX comes with the older Android 4.4 Kitkat version and a slower 10M/100M LAN wired connection.
So what do we get? the player – PROBOX2 EX+, Power Adapter, Infrared Remote, Dual-Band Antenna, AV Cable, HDMI v1.4b Cable, USB Cable, User Manual. Oh, and the PROBOX2 Remote+, which is a Air mouse bonus that will be discussed more at the end of the post.
Why is better hardware important? Simply put: more powerful hardware equals better performance – and especially when it comes to the new HEVC/H.265 video codec. However, a newer OS version doesn’t only come with a slicker look, but also with its own growing pains.
Looks
The EX+ is a slick looking small black box with a matte finish on top and bottom, and reflective coating on all four sides. It’s light at around 200 grams, and can be easily mounted on the back of a TV or other HDMI capable digital screen, using two sided tape. (Better to check first and make sure the remote controls the box when mounted that way)
[easy-image-collage id=886]
This design is similar to most TV Boxes, but I would like to mention, that the top indented On/Off button is great idea as it makes it easier to find over those which include it on the side of the box which is more inconspicuous, especially at night. This On/off button also gets a little illumination from the Active incorporated led light.
Specifications
CPU Amlogic S812 Quad Core Cortex A9 CPU, up to 2Ghz GPU Octo Core Mali-450 GPU, up to 600Mhz Memory / Storage 2GB DDR3 / 16GB* eMMC LAN RJ-45 Ethernet jack (10/100/1000Mbps) Wireless Built-in 802.11 b/g/n/ac Dual Band (2.4Ghz / 5.8Ghz) WIFI Bluetooth Built-in Bluetooth v4.0 OS Android 5.1 Lollipop Video Output HDMI 1.4b, up to 4K** @ 30fps, Support HDMI-CEC Audio Output Via HDMI 1.4b, optical SPDIF Power DC 5V 2A adapter (CE, FCC, CCC Certified) Peripheral Interface USB 2.0 Port x 2, OTG Port, TF Card Reader, AV Port, IR Sensor (Remote included) Packing Included PROBOX2 EX+, PROBOX2 Remote+, Power Adapter, Backup IR Remote, Dual-Band Antenna, AV Cable, HDMI v1.4b Cable, USB Cable, User Manual
Benchmarks and Testing
All benchmarks have been repeated 3 times and results have been averaged to give a more accurate reading:
Antutu Benchmark
Average Antutu Benchmark
The Antutu benchmark tests single core performance over multi-core as it is a better indication of the performance of one device over others in most situations. Here it shows a distinct advantage to the AMLogic S812 chipset over the other two.
GPU Mark Benchmark
GPU Mark tests 3d gaming performance and also provides a normalized score according to the used screen resolution (for a more accurate result). The test is quite short and should be taken as a supporting result to that of the more serious 3D Mark benchmark.
A1 SD Benchmark
A1 SD Benchmark tests RAM and flash memory speeds. As can be seen in the provided graphs, RAM is much faster (by a factor of about 40) than flash memory – that is why it’s in smaller amount and is also volatile (does not keep its contents after a reboot). The RAM performance is similar between the Minix and the Probox2, as both are using a similar chipset. But in both Internal and External SD card tests, the Probox2 seems to take a backseat to the Minix, probably due to a better implementation of a memory reader/controller.
* PC Mark Benchmark
PC Mark Scores check video, web browsing, writing and photo editing performance
* The PC Mark benchmark tests are lacking, because out of the three boxes tested, only the Minix X8-H was able to complete the video test portion of the test fully. It seems that both the EX+ and the Gecko require the use of specialized codecs in order to play some encoded video files. However, video testing with the included Kodi media center seems to produce great results, and the other parts of the benchmark show an obvious lead.
3D Mark Benchmark
3D Mark is a labor intensive 3D animation and gaming Benchmark
Video Playback testing (Using KODI)
Resolution Video Format Local Playback Network (Wi-Fi/LAN) Playback 720p (1280*720) AVC ([email protected]) Playing correctly Playing correctly 1080P (1920*1080) AVC (High@L4) Playing correctly Playing correctly 2160P (3840*2160) HEVC (H.265) – 10Bit Playing correctly Buffering and stutter 4K (4096*2304) AVC ([email protected]) Playing correctly Buffering and stutter 4K TS HEVC files HEVC (H.265) Does not play / play with artifacts and stutter Does not play / play with artifacts and stutter
Two things: playback testing was done in both 2.4GHz and 5Ghz wireless connections (802AC), and my LAN connection is using power-line AV500 adapters to reach the router. That may skew the results somewhat, but not by much.
As can be witnessed, the playback suffers when not using local storage (Micro-SD card, or attached USB drive). This is not good news as it may affect streaming generally. Always make sure you are connecting your box to the router in the shortest and optimal route possible.
The benchmarks and video tests stand witness to show that the EX+ is a powerful machine. It can play (almost) any current video file you’ll throw at it, and does it well.
It will also handle itself quite well with most android games and/or applications.
I do have reservations regarding the included (basic) remote and its loud clicking sounds. But Probox2 made up for it by including the (much better) Remote+ air mouse.
The box I received came fully updated with the latest firmware, but a System OTA (Over the air) application is included to allow for future updates. I did experience some video sync issues with my TV at first as the box started with a higher refresh rate than my TV supports. However, disconnecting and reconnecting the HDMI cable, and changing the settings in the display options to match my display set it right.
For the time being, no android app (that I could find) is available to allow remote control of the EX+ from your phone or tablet. That is regrettable, even though most actions are quite easy with the Air mouse. Probox2 did promise that they are working on a remote app that will accommodate the newer EX+. Android TV remote (or as previously known, Google TV remote) which works well with Minix boxes is currently not supported on the EX+.
The EX+ comes pre-rooted from the manufacturer. That is an important point to make, as most TV Boxes either do not formally support rooting, or even block the option all together. Probox2 made a bold move, and from my point of view, a great one. Rooting allows more freedom, and as a result a better advanced user experience. It also means that (unlike) other boxes, there won’t be a need to re-root the box after each and every firmware update, and that the warranty will not be affected by rooting.
Gaming performance
Frames Per Second Minix Neo X8-H (Amlogic S802) Probox2 EX+ (Amlogic S812) OpenHour Gecko (HiSilicon 3798M) Asphalt 8 Airborne 23 33 N/A Angry Birds 2 30 31 N/A Walking War Robots 25 29 N/A
Resource Usage Minix Neo X8-H (Amlogic S802) Probox2 EX+ (Amlogic S812) OpenHour Gecko (HiSilicon 3798M) Asphalt 8 Airborne 8%, 169MB 12%, 326MB N/A Angry Birds 2 9%, 201MB 13%, 315MB N/A Walking War Robots 10%, 99MB 13%, 275MB N/A
The Gecko could not run Gamebench app, and was also having trouble running some of the games.
I have tested the EX+ with three games, using GameBench app which allowed me to measure frame rate, as well as resources used in each of these games:
Asphalt 8 Airborne – a 3d graphic intensive racing game
Angry Birds 2 – a popular 2d action game
Walking War Robots – an online robot warfare game that requires a game-pad
[easy-image-collage id=937]
Ex+ held its own quite nicely. It performed well, and as you can see did not consume too many resources…
However, I can say that the box sadly runs quite hot when put under the strain of heavy gaming tasks. Even though CPU temperature monitoring apps show a steady and cool 30 Celsius, the unit feels much warmer to the touch, and the overheating causes freezes that forced me to pull out the power plug in order to restart the EX+.
I do believe that adding a active (a fan, or a laptop cooler) cooling solution to the passive cooling of the EX+ would make a difference. But without it, I would not recommend risking any heavy duty gaming on the EX+ for more than 10-15 minutes at a time.
Price comparison
* Price for Minix was taken from Geekbuying website, Price for Probox2 was taken from W2Comp website, and Open Hour Gecko price was taken from product website. Prices are as found, without any current discounts.
Conclusions
The Probox2 EX+ TV Box is a powerful machine. It holds its own, even though I could not test it against another S812 based box, I am sure its performance would stand.
Video and gaming performance are quite good, and unlike the previous chipset (S802), it can handle HEVC (H.265) encoded video up to and including 4K/2160p content.
There are issues with TS HEVC encoded files, but Probox2 promised me they will address them in a future update.
Network performance with heavy bandwidth video files was not encouraging. Since I tested it both with high speed wireless and wired connections, I think there are improvements to be made with a software and/or hardware update.
I also encountered a few freezes that forced me to power off the EX+ and restart it. I suspect it may have to do with overheating, as the device was quite hot to the touch.
Pros
Cons
Can play almost anything you’ll throw at it Noisy clicking standard remote Slick look thanks to Android 5.1.1 Lacking basic launcher Kodi 15.2 (RC1) Pre-installed Issues playing 4K TS files Future-proof thanks to hardware HEVC 4K decoding Lags in 4K AVC content playback over network 1GBit LAN Freezes occur (infrequently) Good Air Mouse included Starts set to high refresh rate out of the box (may cause flickering on some TVs)
In conclusion, I would recommend buying this box. It has a few issues, but it’s a solid performer and I believe those problems are more teething pains than serious malfunctions.
I give it… 3/5 Stars – Good, but can get better with time and updates.
The Probox2 Remote+ Air mouse
When you buy the Ex+, you get as a part of the package, a great Air Mouse called “Remote+”.
Why is it so great? In a nutshell, it has four work modes: Remote control mode, Air mouse mode, Vertical gaming mode, and Horizontal gaming mode. There is a dedicated button for switching between the different modes.
On top of that, it incorporates a microphone which allows you to use google voice search functions without having to connect a microphone or Bluetooth set to your TV box.
It is compatible with Android, Windows, Mac OS X, and Linux.
It takes 2 standard (or rechargeable) AAA batteries.
However, the gaming and power buttons are only compatible with Probox2 series devices.
I have tried and used it with two other android TV boxes, and all it took was plugging the USB receiver in, and the air mouse and remote was working.
Accuracy is great, but it does lag a little bit at times with accepting a click, or moving around. It does not happen often, but it does.
When I compare it to another air mouse I have (the Minix Neo M1), it wins on all fronts.
I used the game-pad function to play Asphalt 8 Airborne on the EX+, and the experience is much better than fiddling with a standard remote. In fact, I would say that the inclusion of the Remote+ in the package upgrades the whole experience.
The built-in microphone works well with Google search, but the recording quality is not the best. Microphone gain should be used, and the quality is comparable to FM radio.
Since the EX+ does not offer a virtual keyboard/mouse app for your phone or tablet, the Remote+ provides an interim solution to typing and moving around the screen.
Did I like it? Yes.
Would I recommend it? Yes, but more so for Probox2 device owners. It works great as a air mouse on other devices, but the great game-pad functionality only comes into play with Probox2.
I give it… 4/5 Stars – Good, but increased functionality is reserved for the Probox2 line.
So you like the EX+ and Remote+ and want to buy them? For online purchase, there is only one place to go for this slick combo: W2Comp (click on the name to get to the product page)
And as a bonus, I got you a 5% discount code, and it is: DropsOfWisdom
“Where to buy” – http://probox2.com/become-a-distributor/
Israeli distributor: “Benda Magnetic Ltd”: (no discount code)
http://www.benda.co.il/catalog/companies.aspx?cid=46
I hope you like the review, and you can expect more to come soon!
Join shareasale.com, Earn Cash!
Review | Probox2 EX+ TV Box and Probox2 Remote+ Introduction Hello everyone! Here is the first in a new series of reviews about Kodi TV Boxes.
0 notes
Text
Content Workflow Using Github And Markdown
Content Workflow Using Github And Markdown
Table of Contents
Intro: The problem The Four Rules Of Content Workflow Setting Up Your Tools Getting Ready To Write Writing Committing (Saving) Your Work Publishing Repurposing Resources
TL;DR We publish digital content. We write and create for the internet and screens. But our content workflow dates back to the days of desktop publishing. This post suggests a better way that uses Github and Markdown. It gets away from word processors and folders, helping you create content that’s ready for reuse. It uses readily available tools that won’t bloat your work or lock you into proprietary formats. Read on for a step-by-step walkthru. With a few stops for ranting and raving.
A couple years ago I measured how I spend time when writing. I wanted to see where/if I could tweak my content workflow. The result was so depressing I wore the same pair of cycling socks for a week:
It takes me about 90 minutes to write a 750-word blog post. In that time, I spend:
45 minutes writing
15 minutes editing
30 minutes doing… what exactly?
Wait. What? That can’t be right. I spend a third of my time on a writing project not writing.
What. The. Actual. Fucklebucket.*
So I checked my notes.
33% of writing time is sucked out of me by time-wasting stupidity:
Flailing around, trying to clean up a formatting problem in a blog post
Troubleshooting software problems
Digging up the second version of my intro, which I think I liked better than the fifth and sixth, but I honestly can’t remember because I usually just delete and type over stuff
Trying to figure out how the hell I create a smart quote
Reformatting a whole Word doc because the editor wants it in Google Docs format
Recapturing images because they’re all embedded in the document, and they look like poo
All these examples fall into two groups: Formatting and version management. Both are our jobs. Even if we have our own editorial and design team
HAHAHAHA DID I JUST SAY THAT BECAUSE YEAH SURE I HAVE 3 PEOPLE AT MY BECK AND CALL JUST TO MAKE SURE MY STUFF LOOKS GOOD HAHAHAHAHAAAAAAA cough sniff
we’re responsible for the first pass. Formatting and version management is part of our job.
And we suck at them.
We worry about flinging the next blog post over the wall, instead of creating versatile content that we can publish anywhere and reuse anytime.
We’ve Got Problems
We think about decoration first, structure second.
We worry about flinging the next blog post over the wall, instead of creating versatile content that we can publish anywhere and reuse anytime.
We save five minutes now and cost ourselves hours later.
We spend our time on writing, editing, and publishing. But we ignore the stuff that moves content between those steps: Workflow. So our workflow is riddled with potholes and broken glass. We still have to move from writing to editing to publishing. But instead of helping, the workflow slows us down.
An Outdated Workflow For Outdated Tools
We’re working on the internet, but we use tools created for desktop publishing in the 1980s. Yes, even you fresh-faced youngsters with healthy backs and no ear hair are using the software equivalent of antiques.
I’m talking about Word Processors. Word processors weren’t designed for writing. They were designed for typing and decorating. Word, Google Docs, and their devil-spawn relatives were designed to bring bold type and Comic Sans to the masses. They are not designed to help writers create, manage, and publish structured content.
I’m also talking about storage. Files saved in folders—online or off—are a metaphor for paper and filing cabinets. They’re about as useful as the corded phone I now use as a doorstop. They were created so that one person (maybe two) could work on one piece of content at a time.
Sure, there are tools out there that claim to update all of this, streamline workflow, etc. They all become bloated, expensive versions of the word processors and dated storage metaphors they try to replace. Fancier potholes. Prettier broken glass.
So poof. A third of my time gone because I’m spending my time in Dropbox and plinking away in Microsoft Word and Google Docs.
We need a better way to do this.
Find A Better Way
This is what I’ve worked out: A workflow that creates structured, reusable content. It lets me manage versions across devices and multiple writers. And it works well for 750-word blog posts as well as chapter books.
Most important, it lets me spend more time writing.
There’s a nice benefit to all this, too: Your writing looks better on the web. Let’s face it: Most of us write for the web. We’re publishing blog posts day in, day out. Use this workflow and your writing is web-ready (I hate that phrase, but it works here). It looks better, loads faster, and gets view source-ing HTML geeks like me nodding with approval.
Feel free to try all or some of it.
Also feel free to hunt me down on LinkedIn or Twitter: @portentint and https://www.linkedin.com/in/ianlurie/
The Four Rules Of Content Workflow
First, a successful workflow has to follow these four rules:
Structure > Format And Design
Structure matters more than format or design: The fact that you have say, a level one heading is more important than exactly how that level one heading looks, because it may look different on various platforms.
You can pour well-structured content into lots of different formats, from Microsoft Word to HTML. You can easily change the design of well-structured content using CSS or any other templates, including Microsoft Word and Google Docs.
You can also easily repurpose well-structured content, adapting it from prose to presentation to script.
So a good content workflow has to support structure first, format and design second.
Proprietary Tools Are Traps
Tools—word processors, for example—trap us with proprietary formats. They also trap us on specific devices.
Yes, I can open a Google Doc or Word file on my phone. Yes, I could edit it. But I won’t, because it’s awful.
I need a cross-platform process that’s as tool-independent as possible.
Repurposing Is Inevitable
Smart content creators re-use their work.
E-books become blog series
Blog posts become slide decks
Transcripts become blog posts
Word documents become Google Docs become HTML
I’m going to repurpose content. My workflow has to support that.
Good Writers Are Orderly Hoarders
I always seem to delete an old file moments before I need it. Or I forget why I made an edit. Or I edit in circles, ending up back where I started.
We need to keep everything for every project:
All revisions and drafts
All image files
All other supporting files
The full change history for all of the above
And we need to keep it in an organized format.
Setting Up Your Tools
You only have to do this work once. If you’ve never used these tools, there’s a learning curve that feels pretty short if you’ve been using desktop software.
Still, it takes a little patience to install new stuff. Take the extra time now, and you’ll save hours later.
Install Markdown Tools
First, you’re going to work in Markdown. I’ve already written about why, so I won’t waste too many words on it here. Markdown is a super-simple markup language that’s perfect for writers. Everything you’re reading right now started as Markdown.
There’s also a great tutorial here and a syntax cheatsheet here.
You can write Markdown using a plain text editor, then preview and export it to other formats, like HTML.
But there are a few Markdown-focused editors that make it easier. They still use plain text—no proprietary formatting—but they flatten the learning curve. My favorite is Typora.
Typora
Typora runs on OS X, Windows and Linux. Type in Markdown and Typora gives you an instant preview. So if I type:
# Typora
It instantly turns that into a level one heading “Typora.”
Download it here: typora.io.
Note: When you install Typora, go to Preferences or Settings (depending on the operating system). Find the Markdown tab/settings. Make sure you uncheck “Smart Quotes:”

Turn off smart quotes in Typora
Typora is filled with all sorts of other niftiness, like key combos to add links and set headings. Be sure to explore it.
Other Options
I also really like:
Dillinger.io
iaWriter
Ulysses
And my longtime favorite, atom.io. Atom is a pure text editor, so it’s not as friendly, but it’s fast as heck and easy to customize. If you want to get nerdier, that’s your best choice.
You can use a standalone preview and export tool like Marked 2, or automate advanced templating and batching with Pandoc (very steep learning curve, very powerful). But for 99% of your work, Typora’s export features will work just fine.
Set Up Version Control With Github
Rule of Content Workflow Number Four: We need to be orderly hoarders. To do that, use Github.
Developers built it to support developers. But what do developers do? They type stuff into files. They save the files. They manage versions of those files while lots of other developers edit and contribute.
So this tool they built is perfect for writers, too. And while it looks scary, it isn’t that hard to learn.
Install Git on your computer. You can get the Windows installer here and the OS X installer here. If you’re on Linux, I’ll assume you know what you’re doing.
Go to github.com
Set up an account
Download the Github desktop client
You’re all set.
Git will let you track changes with far more detail than Microsoft Word, and pass your work around for simultaneous revisions or contributions by lots of other people.
It’s also close to bulletproof, which you’ll really appreciate if you’ve ever used the revision tracking in Word, Google Docs and other tools.
One Last Gadget
Go get TextExpander. Yes, it costs a little money. It’s worth it.
After you install it, subscribe to this snippet group:
HTML Entities
It’s where I keep the shortcuts I use to create smart quotes and such. They’re handy if you’re in a hurry or can’t remember the HTML entity for a smart right quote (like me).
What You’ve Got
You’re ready to follow all four rules of content workflow:
Markdown and Typora help you create structure
You’re not using any proprietary formats
The resulting content will be easily repurposed from one format to another
Thanks to Github, you’ll be an orderly hoarder
Hopefully, this whole process didn’t take more than fifteen minutes. If it did, I apologize. Please throw empty beverage cans at me the next time you see me. Empty ones. It’s not like I stole your car or something.
Getting Ready To Write
I’ve got lots of steps here, but this takes about five minutes, start to finish:
Step 1: Create Your Work Folder And File
Your work needs a home. Create one in advance. I’m writing this to prep for Learn Inbound. I’m going to have images and some supporting files.
Now, create your markdown file.
Create a folder where your work will live. I’m writing this to prep for Learn Inbound. I’m going to have images and some supporting files. I create folders accordingly
Open Typora
Click File >> New
Save the file in your work folder. You can name it whatever you want. I’m not feeling all that creative, so I’ll name it “post.”
You’ll end up with this:

For bonus points, in Typora, click View >> Outline and you’ll see a nice heading-based outline of your work as you write. It’s a structural view of your content. And structure is what we’re all about, right?

Outline View In Typora
Step 2: Create Your Github Repository
Git is pretty intimidating until you break it down into steps:
Open Github Desktop
Click File >> Add Local Repository
Choose your work folder
If Github Desktop asks, click create a repository here

Create a new repository in Github Desktop
Click Create Repository or Add Repository as relevant
Github does its thing. If you look in your folder and can see hidden files, you may see some stuff like this. They belong there. Let them go on with their lives:

Ignore these
You’ll also see the repository appear on the left, much like this:

Git repository, added to Github Desktop
It won’t have the lock until you push the repository to Github.com.
Now that you did all that, here’s a tip: You can also create a repository by dragging a folder into Github Desktop. But if you do, I deny all responsibility. I’ve had very odd results with drag and drop. Which is reasonable from a tool built by folks who probably haven’t used a mouse in 20 years. I say that with the utmost respect and awe.
Step 3: Put Your Repository On Github.com
So far, you’ve got a Github repository on your local computer. That’s not all that helpful. Now you need to “push” all of this up to Github. That way, your files are backed up, you can retrieve them anywhere, and you can have other folks work on your writing.
In Github Desktop, click the Publish Repository button. Here’s what it looks like on OS X:

Publish repository from Github Desktop
Check Keep this code private
Unless you’ve set up a Github organization or have an enterprise account (you’ll know if you do), don’t change any other settings
Click Publish Repository
If you’re not logged into Github, you’ll get a login prompt.
Github desktop pushes files up to the cloud and creates a repository on your Github account
Done. If you want to geek out, log into github.com. You’ll see that your new repository is all comfy and cozy:

Your content project, on Github
Large Projects
Github kicks buttocks if you’re creating something large and complicated. If you’re working on a big project, you’ll want to do a couple other things:
Add a readme.md. it’s a special file that Github will show as part of your project’s “home page.” It’s an excellent place to make notes for the rest of the team
Invite others to the repository. Sharing is caring (the kind of thing I write on a Sunday when I’ve rewritten this post five times)
Learn how branches work. I wrote a very short bit about that below. Someday I’ll write a separate post
What You’ve Got
You should now have:
A home for your work, both on your desktop and on Github.com
Your first files
Between that and a few bathroom breaks, you’ve spent about ten minutes.
Now you can write!
Writing
You know what to do. Write stuff. Add images and whatever else you need. A few time- and sanity savers:
Structure
Remember Rule Number One: Structure is more important than format.
Use the handy outline on the left side of Typora for an at-a-glance structural view of your content:

Outline view shows me where I'm at in the content structure
If you’re working on a large, multi-file project, you can change the outline to a file tree. Then you can see all text and Markdown files. I’m an outline fan myself.
Syntax
This isn’t a guide to Markdown. You can find that here.
But follow these guidelines:
Headings
Headings are the core of good structure. Web browsers, search engines, word processors, presentation software and most other content tools convert headings into content blocks and outline elements. You must use them.
When you create a heading, use this syntax:
# Heading 1
## Heading 2
### Heading 3
And so on. That creates real, structural headlines.
In HTML, that markup becomes proper markup for each..
https://ift.tt/2x7TFds
0 notes
Text
Version 376
youtube
windows
zip
exe
macOS
app
linux
tar.gz
source
tar.gz
I had an ok to good week. Subscriptions run better and there are more UI fixes and basic theming for Qt.
subscriptions
Subscriptions have always been resource heavy. As last year's downloader overhaul extended their capabilities, we saw increased CPU lag with many subscription operations. I had hoped to completely fix this this week, even permitting subs with >250,000 items cached, but the surgery needed to figure this out was more complicated than I expected. While I otherwise prepped for this next step, I also tightened up subscription timing code and wrote a new scheduler that reduces overall subscription resource needs.
Subscriptions will now try to load when they are due, and only then. So, if a query in your sub is due to check in 45 minutes, or if it has file to download but has run out bandwidth for 45 minutes, it should now run, typically, in 45-60 minutes. They will also respond better to cancelling and pause events, and if only 30 of 100 queries are due for a check in this run, or have outstanding files to download, you will now see x/30 on the popup progress text and gauge, just as better indication of how much work remains.
Previously, subs checked every four hours. It meant a bunch of wasted CPU for subs that were not due, late checks for subs that were due just moments after the check time, and also a delayed 'clumping up' of work. Today's change is subtle but significant, so I am interested in feedback from all users of subs--if you notice anything odd, bad, or great, please let me know. Ideally, subs will be quieter for you, running more often when you are not looking.
Although the data overhaul was too much work to do in one week, I now have a good plan and am in better position to get it done. I really want subs to load and save their metadata in milliseconds so the manage subs dialog can launch equally quickly and the client api can start talking to them. The year is fading, so I am not sure when this will get done, but hopefully this week's scheduling will at least relieve some of the work involved.
Qt
Hydrus now has very simple support for Qt styles. Please check the new options->style page. All users are encouraged to try out the 'style' option, which should have one or more flavours for your OS and also 'Fusion'. These will change how buttons and other widgets are drawn across the program.
Advanced users may wish to play with 'stylesheet' support, which uses css/qss files to change colours and layouts using portable files. This is still prototype, just rough importing of stylesheets from a barebones folder in the install dir, and is likely to be replaced with something more user-friendly and technically sensible in the coming weeks. If you play with this, I am interested in areas where hydrus's old colour system conflicts foolishly with a qss stylesheet (such as some panel backgrounds and the green/red yes/no buttons on many dialogs), and also recommendations for stylesheets you would like bundled as future hydrus defaults.
The macOS build can now do page tab drag and drop again! Media drag and drops between tabs should also work. Everything should line up right and work like the Windows and Linux builds, but please let me know if it does not. A tip here, if you still have trouble with a centered page tab bar, is just to set the Fusion style as above, which will make hydrus look more like a standard PC application. You may prefer the macOS look, but if not, you now have the option.
Beyond a bunch of general bugfixes, I also improved the stability of some review bandwidth panels and some bad 'should I close/exit?' dialogs that were either not respecting 'no' answers or causing unusual behaviour as 'yes' closes were going on.
the rest
Pixiv tag search and twitter username lookup get updated default downloaders this week. Pixiv should be fixed, and twitter should work more efficiently, only getting 'media' tweets.
Client shutdown should now be faster and snappier for most users.
File export filename phrases now support a new '{file_id}' term that substitutes a unique permanent numerical identifier. If you need to create guaranteed-unique filenames, this is easier than using the '{hash}' term.
full list
subscriptions:
wrote a new subscription manager to better look after subscription scheduling
rather than checking every four hours or after manage subs dialog close, subscriptions now record an indication of when they are next due for work, whether that is the estimated next check time or when bandwidth is free on remaining file downloads, and launch in a fifteen-minute window around that time. delays due to previous errors or user cancels are also taken into account. this reduces background cpu and i/o greatly for clients with large subs
if a sub is paused, or all its queries are paused, it will now never be reloaded after first load until a change via the manage subs dialog
furthermore, if a single sub takes a very long time to work, the whole sublist can re-cycle if they come up due for more work before it is finished
if a sub query is DEAD but still has outstanding files to download, it will no longer automatically pause
subs now clean up more tidily if they are running on a program exit
the subscription popup now shows check/file progress based on the number of queries that appear to have pending work. instead of 'query 300/450' with 420 that aren't due, you'll get 'query 12/30'. if a query becomes due during a round of checking, another round of checking will run
if a subscription fails to load from the db, the error is handled better and no more subs will run in that boot
improved subscription startup checking logic, tightening up various paused/dead/cansync tests
improved subscription interrupt checking logic, tightening checks on global network pause and various shutdown scenarios
cleaned up some more subscription code in prep for data storage breakup
.
qt:
added experimental Qt style settings to the new options->style page! all users should now be able to set Fusion style, and perhaps some alternate OS styles. advanced users are invited to play around with QSS stylesheets (although be warned that some of hydrus's custom colour system overrides QSS, so more work is needed here), which will be extended and made user-friendly in coming weeks
fixed tab position calculations for all tab/media drag and drops for tab bars that are centered or otherwise positioned far off top-left alignment
fixed tab drag and drop event object handling for macOS. tab and media DnD is now enabled for macOS
the popup toaster can now unhide if an on-top-of-parent non-modal frame (like review services) is focused (so hitting 'process now' should show you the work)
fixed a variety of old hacky wx close-window veto tests. the 'close client?' confirmation dialog will now reliably veto a close requent on 'no'/cancel, dialog close events that are vetoed (such as closing the manage tags dialog with pending tags) will now veto more than just the first time, and several bad media viewer archive/dupe filtering cancel and end-of-window events should now work more cleanly and correctly. users who had crashes at the end of filtering may find they are stable again
as a quick patch against some multiline notes and statuses, list controls now force single-line text in all cells
list controls now tooltip all cells
fixed the shutdown splash not updating after the daemons shut down (lmao)
'modal' message dialogs, which are created by blocking maintenance tasks such as vacuum, will no longer raise the program to the foreground on creation
should have fixed the taglist vertical positioning jank that could occur in the row after a tag with a tall emoji unicode character (and also sometimes kanji/hangul)
fixed a typo bug that was throwing an error for the upnp port widget in the local client server management panel when 'allow non local connections' was checked
improved stability of bandwidth review panel bandwidth rules refresh
improved stability of review services bandwidth rules refresh
improved some dialog cleanup code
reverted a bad environment-setting change put in last week that was causing some running-from-source users trouble
misc qt code cleanup
.
the rest:
updated the default pixiv tag search downloader to one submitted by a user. it now uses their api
updated the default twitter username lookup to a downloader submitted by a user. it fetches just the media tweet feed, making it more efficient. also added (but not linked by default) is a new tweet parser that can fetch most videos using a third-party site, advanced users may wish to play with this
added a {file_id} term for file export phrases that substitutes a unique and permanent numerical file identifier
fixed an issue where idle maintenance jobs could sometimes sneak in a few milliseconds of work during certain long shut down pauses, such as while waiting for a 'should I do shutdown work?' dialog to return. program shutdown should be snappier for many users as forced startup delays in these calls will no longer trigger
added a date 'encode' string transformation rule, which takes an integer timestamp and converts it to a pretty date string. the date rules are now renamed to the clearer 'datestring to timestamp' and vice versa
fixed page parser edit panel's 'test parse' when string transformations perform pre-parsing conversion. the handling and passing of test data for all the panels here is cleaned up throughout
system:limit predicate edit panel now has a small label describing its sampling behaviour
updated the various 8chan links in the client and help to 8kun, let me know if I missed any, and added Endchan bunker link to help menu
improved some misc status text handling across the program
refactored cache and manager code into different, simpler files
updated sqlite on windows build to 3.30.1
next week
It is already December! For me, and I know for many of you, 2019 has just disappeared. Christmas is exactly three weeks away, so I am afraid some of my hopes for significant tag overhaul like tag siblings or processing filters may have to be delayed a little. I have a bit more Qt work to do, but also plenty of regular small jobs and bugfixes, so for next week I will take a simple bit of misc work, nothing huge, just to catch up on some things. I also have messages to catch up on.
If you were an 8chan user and missed the news, the /hydrus/ board is back on 8kun.top. The site is still unstable, and reception from the community is mixed, but against all odds they are back up and improving. I will keep posting release posts on Endchan and 8kun simultaneously for the time being, so please use whichever you feel better about, or just hit me on discord/tumblr/email if you prefer.
0 notes
Text
13 hours debugging a segmentation fault in .NET Core on Raspberry Pi and the solution was...
Debugging is a satisfying and special kind of hell. You really have to live it to understand it. When you're deep into it you never know when it'll be done. When you do finally escape it's almost always a DOH! moment.
I spent an entire day debugging an issue and the solution ended up being a checkbox.
NOTE: If you get a third of the way through this blog post and already figured it out, well, poop on you. Where were you after lunch WHEN I NEEDED YOU?
I wanted to use a Raspberry Pi in a tech talk I'm doing tomorrow at a conference. I was going to show .NET Core 2.0 and ASP.NET running on a Raspberry Pi so I figured I'd start with Hello World. How hard could it be?
You'll write and build a .NET app on Windows or Mac, then publish it to the Raspberry Pi. I'm using a preview build of the .NET Core 2.0 command line and SDK (CLI) I got from here.
C:\raspberrypi> dotnet new console C:\raspberrypi> dotnet run Hello World! C:\raspberrypi> dotnet publish -r linux-arm Microsoft Build Engine version for .NET Core raspberrypi1 -> C:\raspberrypi\bin\Debug\netcoreapp2.0\linux-arm\raspberrypi.dll raspberrypi1 -> C:\raspberrypi\bin\Debug\netcoreapp2.0\linux-arm\publish\
Notice the simplified publish. You'll get a folder for linux-arm in this example, but could also publish osx-x64, etc. You'll want to take the files from the publish folder (not the folder above it) and move them to the Raspberry Pi. This is a self-contained application that targets ARM on Linux so after the prerequisites that's all you need.
I grabbed a mini-SD card, headed over to https://www.raspberrypi.org/downloads/ and downloaded the latest Raspbian image. I used etcher.io - a lovely image burner for Windows, Mac, or Linux - and wrote the image to the SD Card. I booted up and got ready to install some prereqs. I'm only 15 min in at this point. Setting up a Raspberry Pi 2 or Raspberry Pi 3 is VERY smooth these days.
Here's the prereqs for .NET Core 2 on Ubuntu or Debian/Raspbian. Install them from the terminal, natch.
sudo apt-get install libc6 libcurl3 libgcc1 libgssapi-krb5-2 libicu-dev liblttng-ust0 libssl-dev libstdc++6 libunwind8 libuuid1 zlib1g
I also added an FTP server and ran vncserver, so I'd have a few ways to talk to the Raspberry Pi. Yes, I could also SSH in but I have a spare monitor, and with that monitor plus VNC I didn't see a need.
sudo apt-get pure-ftpd vncserver
Then I fire up Filezilla - my preferred FTP client - and FTP the publish output folder from my dotnet publish above. I put the files in a folder off my ~\Desktop.
Then from a terminal I
pi@raspberrypi:~/Desktop/helloworld $ chmod +x raspberrypi
(or whatever the name of your published "exe" is. It'll be the name of your source folder/project with no extension. As this is a self-contained published app, again, all the .NET Core runtime stuff is in the same folder with the app.
pi@raspberrypi:~/Desktop/helloworld $ ./raspberrypi Segmentation fault
The crash was instant...not a pause and a crash, but it showed up as soon as I pressed enter. Shoot.
I ran "strace ./raspberrypi" and got this output. I figured maybe I missed one of the prerequisite libraries, and I just needed to see which one and apt-get it. I can see the ld.so.nohwcap error, but that's a historical Debian-ism and more of a warning than a fatal.
I used to be able to read straces 20 years ago but much like my Spanish, my skills are only good at Chipotle. I can see it just getting started loading libraries, seeking around in them, checking file status, mapping files to memory, setting memory protection, then it all falls apart. Perhaps we tried to do something inappropriate with some memory that just got protected? We are dereferencing a null pointer.
Maybe you can read this and you already know what is going to happen! I did not.
I run it under gdb:
pi@raspberrypi:~/Desktop/WTFISTHISCRAP $ gdb ./raspberrypi GNU gdb (Raspbian 7.7.1+dfsg-5+rpi1) 7.7.1 Copyright (C) 2014 Free Software Foundation, Inc. This GDB was configured as "arm-linux-gnueabihf". "/home/pi/Desktop/helloworldWRONG/./raspberrypi1": not in executable format: File truncated (gdb)
Ok, sick files?
I called Peter Marcu from the .NET team and we chatted about how he got it working and compared notes.
I was using a Raspberry Pi 2, he a Pi 3. Ok, I'll try a 3. 30 minutes later, new SD card, new burn, new boot, pre-reqs, build, FTP, run, SAME RESULT - segfault.
Weird.
Maybe corruption? Here's a thread about Corrupted Files on Raspbian Jesse 2017-07-05! That's the version I have. OK, I'll try the build of Raspbian from a week before.
30 minutes later, burn another SD card, new boot, pre-reqs, build, FTP, run, SAME RESULT - segfault.
BUT IT WORKS ON PETER'S MACHINE.
Weird.
Maybe a bad nuget.config? No.
Bad daily .NET build? No.
BUT IT WORKS ON PETER'S MACHINE.
Ok, I'll try Ubuntu Mate for Raspberry Pi. TOTALLY different OS.
30 minutes later, burn another SD card, new boot, pre-reqs, build, FTP, run, SAME RESULT - segfault.
What's the common thread here? Ok, I'll try from another Windows machine.
SAME RESULT - segfault.
I call Peter back and we figure it's gotta be prereqs...but the strace doesn't show we're even trying to load any interesting libraries. We fail FAST.
Ok, let's get serious.
We both have Raspberry Pi 3s. Check.
What kind of SD card does he have? Sandisk? Ok, I'll use Sandisk. But disk corruption makes no sense at that level...because the OS booted!
What did he burn with? He used Win32diskimager and I used Etcher. Fine, I'll bite.
30 minutes later, burn another SD card, new boot, pre-reqs, build, FTP, run, SAME RESULT - segfault.
He sends me HIS build of a HelloWorld and I FTP it over to the Pi. SAME RESULT - segfault.
Peter is freaking out. I'm deeply unhappy and considering quitting my job. My kids are going to sleep because it's late.
I ask him what he's FTPing with, and he says WinSCP. I use FileZilla, ok, I'll try WinSCP.
WinSCP's New Session dialog starts here:
I say, WAIT. Are you using SFTP or FTP? Peter says he's using SFTP so I turn on SSH on the Raspberry Pi and SFTP into it with WinSCP and copy over my Hello World.
IT FREAKING WORKS. IMMEDIATELY.
BUT WHY.
I make a folder called Good and a folder called BAD. I copy with FileZilla to BAD and with WinSCP to GOOD. Then I run a compare. Maybe some part of .NET Core got corrupted? Maybe a supporting native library?
pi@raspberrypi:~/Desktop $ diff --brief -r helloworld/ helloworldWRONG/ Files helloworld/raspberrypi1 and helloworldWRONG/raspberrypi1 differ
Wait, WHAT? The executable are different? One is 67,684 bytes and the bad one is 69,632 bytes.
Time for a visual compare.
At this point I saw it IMMEDIATELY.
0D is CR (13) and 0A is LF (10). I know this because I'm old and I've written printer drivers for printers that had both carriages and lines to feed. Why do YOU know this? Likely because you've transferred files between Unix and Windows once or thrice, perhaps with FTP or Git.
All the CRs are gone. From my binary file.
Why?
I went straight to settings in FileZilla:
See it?
Treat files without extensions as ASCII files
That's the default in FileZilla. To change files that are just chilling, minding their own business, as ASCII, and then just randomly strip out carriage returns. What could go wrong? And it doesn't even look for CR LF pairs! No, it just looks for CRs and strips them. Classy.
In retrospect I should have used known this, but it wasn't even the switch to SFTP, it was the switch to an FTP program with different defaults.
This bug/issue whatever burned my whole Monday. But, it'll never burn another Monday, Dear Reader, because I've seen it before now.
FAIL FAST FAIL OFTEN my friends!
Why does experience matter? It means I've failed a lot in the past and it's super useful if I remember those bugs because then next time this happens it'll only burn a few minutes rather than a day.
Go forth and fail a lot, my loves.
Oh, and FTP sucks.
Sponsor: Thanks to Redgate! A third of teams don’t version control their database. Connect your database to your version control system with SQL Source Control and find out who made changes, what they did, and why. Learn more
© 2017 Scott Hanselman. All rights reserved.
0 notes
Text
What I’ve Learned From Tinkering With the Raspberry Pi for Five Years
Today is Pi Day and what better way to celebrate everyone’s favorite mathematical constant than by taking a look back at everyone’s favorite $35 hobbyist computer, the Raspberry Pi. Since the launch of the Raspberry Pi, I’ve written an absurd number of guides, blogs, and an already outdated book on the variety of projects you can do with it. I’ve learned a lot it that time.
Troubleshooting Is a Life Skill You Have to Practice
The joy I get from finding a solution to some dumb problem is one of the main things that drew me to the Raspberry Pi to begin with. Thankfully, Raspberry Pi projects have gotten easier over the years. Where it was once a complicated process to build an SD card, it’s now pretty much automatic. Still, the Raspberry Pi is far, far away from being as user friendly as a PC or Mac. That’s a feature, not a bug. The Raspberry Pi is built to force you to learn troubleshooting, and that’s still one of my favorite things about it.
Before hobbyists latched onto the Raspberry Pi, it was a computer for learning how to code targeted mainly at kids. Since then, the appeal has broadened, but it’s still impossible for a project to “just work” out of the box. You will have to tweak something, dig into the command line, or spend a few hours buried in an obscure internet forum to find solutions to problems that only you seem to be having. You will slam your head against the wall, yell a little, and throw your Raspberry Pi at least once for every project you attempt to make.
For every project you complete, for every bug you squash, and for every typo you correct, comes a small, glowing feeling inside your stomach that is well worth the trouble of it all. Troubleshooting is a way of processing the world at large, but if you’re not putting those if-then skills to the test repeatedly, you will lose them.
So, you finally picked up a Raspberry Pi and it’s sitting on your desk, waiting for you to do… Read more Read more
Linux is a Pain, but It’s Worth Learning How to Use It
Before the Raspberry Pi, my experience with Linux included one failed attempt to set up a music server. Now, while I still have no interest in using it on a daily basis, I’m comfortable with it as a whole. It’s still a pain to use though.
When I first started working on the Raspberry Pi, my biggest hurdle besides just using the command line at all was trying to learn when and when not to use the sudo command. If I learned anything in my formative years on Windows PCs and my later years on Mac, it’s that messing with system level files, folders, and permission settings is a sure-fire way to destroy your computer. I had to break that thought process because a lot of Raspberry Pi projects require super user access. The good news is it’s near impossible to break the Raspberry Pi itself, though I’ve borked more than a handful of SD cards.
I am still astounded at how much you can do with Linux. You can bend it to your will and force it to do anything you want. That includes turning a Raspberry Pi into weird, tiny jukebox, network-wide ad blocker, or a portable hacking device. It also means you can often reproduce a lot of commercial products. The Amazon Echo is the most notable example here, but security cameras, weather displays, and DIY security systems work too. Heck, we’ve even seen the creation of new products, like the sci-fi inspired smart mirror. You will need to know at least a little bit about Linux, Python, or both to complete most complicated Raspberry Pi projects. Learning the quirks of Linux might seem like a pointless pursuit in the age of modern computers, but I promise you that it’s worth it in the end.
For me, the extensibility of Linux has always been useless from a daily-driver perspective, but useful in the case of the Raspberry Pi. Linux makes it so I can take my stupidest ideas from an idiotic plan to a semi-working project, like an animated GIF photo frame. That dumb photo frame is still my favorite Pi project, for whatever that’s worth.
The Raspberry Pi is great for all kinds of interesting and complex projects. It's also great… Read more Read more
The Raspberry Pi Makes a Great Game Console, but It’s When It Doesn’t Work That Feels Nostalgic
While we all love the home automation system, DIY voice controlled computers, or clever portable computer design the most popular reason to buy a Raspberry Pi is to turn it into retro video game console.
The first time I attempted to build a Pi-powered emulation machine was back in May of 2013. As most of my Pi projects went at the time, my first attempt failed after about 13 hours of waiting for a bunch of emulator tools that didn’t work to download and then break my SD card.
Once that failed, I dug deeper until I found Super Nintendo Pi, which linked to brand new project called RetroPie. It was still early in development at the time. I built on those two sets of instructions for Lifehacker’s first version of our Raspberry Pi video game console guide. RetroPie was the easiest tool I’d found for building an emulation machine with the Raspberry Pi, but even that required you to manually edit a text file if you wanted to use a controller. Now, the process is so easy that it takes less than five minutes to get the whole thing up and running.
Since its release, the $35 Raspberry Pi mini-computer has been hailed as the perfect all-in-one… Read more Read more
The simplicity of RetroPie coupled with the open source, cheap nature of the Raspberry Pi means that people have done cool things with both, like build handheld devices, consoles crammed inside controllers, and of course, full-size arcade cabinets.
Game emulation has been around for a long time before the Raspberry Pi. If you’re a 30-something, it’s almost guaranteed you downloaded some SNES emulator and an illegal copy of Super Mario World for a nostalgia filled game session at some point in your life. For geeks of all ages, trying out emulation at least once is akin to the rite of passage of building your own computer. Yet, while emulation has always been accessible on PC and Mac, the Pi made it all somehow seem better.
There are likely logistical, obvious reasons for this. The Raspberry Pi is $35, and even with a good controller and everything else you need, you can build your game console for less than $80. You can even buy a kit for a small tabletop cabinet for $330.
It’s no secret that turning a Raspberry Pi into a retro game console is hands-down the most… Read more Read more
I don’t think low cost is the only appeal though. It’s one thing to be nostalgic for old games, it’s another to be nostalgic for the experience of playing those games. The Raspberry Pi not only emulates the games themselves, but the clunky set up process is more in line with my memory of what it was like to set up a game console in the ’80s and ’90s. To child-Thorin, a console takes what seems likes thousands of cables to hook up to the TV. Even after consoles were set up they didn’t always work. Blowing on cartridges might not have done anything, but it was the first troubleshooting tip most of us learned. Even after leaving the cartridge era, I remember having to turn my PlayStation upside down in order for it to read discs. It seemed like with every console iteration, there was a ridiculous fix for some common problem. This persists through this day, but it’s not the same as it used to be.
Everything about old consoles seems unwieldy and weird to a child brain, and while the Raspberry Pi doesn’t recreate any of those troubleshooting moments, it does a good job of creating its own. It still feels like a small triumph every time RetroPie works. That triumph when you load up a game is as powerful a feeling as flipping over a PlayStation to get Final Fantasy VII to load.
0 notes