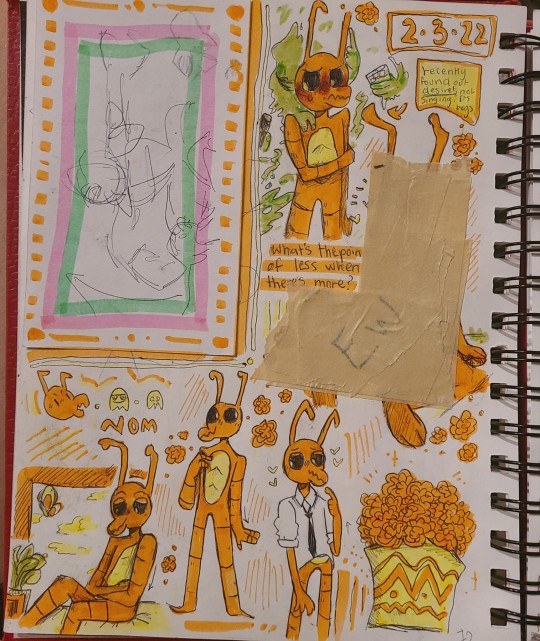
#the third page with a bunch of tape over a drawing is........... well its something
Text


a bunch of old starship doodles from the beginning of the year. Bet you can't tell who my favorite is. 🤡
#starship#art#my art#starship bug#starship pincer#starship the musical#starkid#fanart#starkid fanart#musicals#the third page with a bunch of tape over a drawing is........... well its something#old doodles#starkid starship#♠︎bug.t
109 notes
·
View notes
Text
If you’re looking for a film scanner that can deliver a high-resolution images without seriously hurting your bank account, the Canon CanoScan 9000F Mark II is one of the best options out there. However, in order to use it to its full potential, you need to endure a complicated software installation process, and then learn how to use it. But for many people, the quality of the scans is worth the effort.
Why did I get a film scanner?
I have several boxes of old photographs, negatives, and slides that I finally decided to scan into the digital realm. On top of that, I recently started shooting 35mm film cameras again, and even though I’m using reputable labs like The Darkroom and Mpix to develop and print, I still want to do my own high-resolution scans at home. I just want the control.
After conducting hours of research on the available options, I decided the Canon CanoScan 9000F Mark II was the one for me. However, shortly after unboxing it and trying to get it running, I wondered if I had made the wrong choice. Even though I was aware of the software headaches associated with this machine before I bought it, they proved to be a significant nuisance.
But once I figured the software thing out, the 9000F Mark II did a nice job of scanning my film and prints. I truly appreciate how it scans several negatives or slides at a time, and then automatically saves them all as individual files.
Before I get into the nitty-gritty details, let’s do the basics…
Unboxing
Taking this thing out of the box is pretty routine. You get:
The scanner itself
A USB cable (USB A-type to USB B-type)
A power cord
A CD-ROM (a CD what?)
A box that contains film guides (the things you place negatives inside of)
A Quick Start Guide
A paper warranty
A sheet of paper with info about computer operating systems
The only thing you need to look out for during unboxing is properly unlocking the cover before you open it. This is explained on Page 4 of the Quick Start Guide (which you surely won’t read), and is more explicitly brought to your attention by blue piece of paper that’s taped to the side of the device:
The lock is there so that if you move the scanner, its lid won’t wildly swing open, strike something, and break. When you first take the scanner out of the box, you can easily open its lid enough to unlock it (you just slide a switch to the right). What’s odd is that I tried locking the lid afterward, and it didn’t seem to do anything. Like, it didn’t work. At all. Oh well. I wouldn’t likely use the lock anyways.
After leafing through the paperwork and plugging everything in, I ran into trouble with the software. The 9000F Mark II comes with a CD-ROM in the box, but my computer (a 2013 MacBook Pro) doesn’t have built-in CD drive. Plus, I don’t own an external CD drive, even though they’re only $25 on Amazon.
But this is okay. Even if my computer had a CD drive, it’s still not advisable to use the software that comes in the box. I explain why in a dedicated post that I wrote that covers how to start using the Canon 9000F Mark II. I highly recommend reading that post if you buy this scanner, as it will save you a lot of trouble.
A 35mm color negative scan. I shot this with a Leica MiniLux in 2005.
One thing I’ve learned throughout this process is: Holy crap! Software is important, even when you’re doing something as luddite-related like scanning old 35mm film negatives.
I mean, I work at a software company. I am well aware of the importance of software. But going through this process has been a great reminder.
What’s wrong with the software? Well, it’s not clear what you’re supposed to download and install. Canon points you toward using their My Image Garden software, which isn’t what you should use at all. Canon’s website, where you download this stuff, is awkward to navigate and use. Once you finally download and install the correct software, which is called IJ Scan Utility, there are no instructions that explain how to use it, and it isn’t intuitive.
Again, I provide instructions for how to locate, download, install, and use the IJ Scan Utility software in my how to start using the Canon 9000F Mark II post.
A prime example of what’s wrong with the software for the 9000F Mark II is the “Large image scans” option in the settings of the IJ Scan Utility software. This is a checkbox that must be selected in order for you to use the machine at its maximum resolution of 9600 dpi. By default, it’s unselected. Many people don’t realize this and just assume that Canon’s claim that this product can scan at 9600 dpi is false.
I’ve actually read reviews where people lamented that the 9000F Mark II isn’t actually capable of scanning above 4800 dpi. Why Canon would not have this option selected by default is just completely strange. Why this is even an option in settings is strange.
Software complaints out of the way, once you get up and running with the CanoScan 9000F Mark II, it’s a nice experience. I was able to make high-resolution scans of 35mm film, mounted 35mm slides, photographic prints, and drawings.
As nice as the scans look, I did notice when editing them with my Affinity Photo software that there isn’t nearly as much latitude to make adjustments as there is with the RAW files from my Canon 7D Mark II. Perhaps this is obvious, but I am accustomed to tweaking RAW files of my photos, and you certainly can’t get under the hood as much with these scans.
You can get deeper into the manipulation of these scans with third-party software. There is a software product called Silverfast that has a version specifically for the 9000F Mark II. There’s another one called VueScan Pro that people also recommend. I did not try these options out, but who knows… maybe someday I’ll give them a shot.
In addition to third-party software, some people go the extra mile in regards to how they place their film on the “platen.” The complaint here is that the film isn’t flush with the glass when it’s inside the included film guides. What some people will do is put mineral oil on the glass and place the film on top of it, then put mineral oil on the opposite side of the film and cover that with Clear .005 Dura Lar film. It’s a complex process, it delivers the best results for those willing to go to those lengths.
What else is there to say about this thing… It has a feature called FARE that removes scratches and dust from old negatives, and helps colors of faded photographs. I scanned a bunch of old, scratchy slides, and I used this feature many times. It has low, medium, and high levels, depending on the condition of the media you’re scanning. You can turn it off, too, of course. You control this with the IJ Scan Utility software.
There are “easy” buttons on top of this scanner. One button is for scanning, another is for email, etc. They’re strange. Seeing a physical, plastic button to email something just feels wrong. Anyhow, the buttons are there, and they worked when I pushed them. They just seem like a feature that ever scanner has, so they are there.
Closing thoughts…
Once you get over the software hurdles of the CanoScan 9000F Mark II, it’s a pretty nice film scanning solution. It would be a far greater experience if the software was carefully made and executed perfectly. Oh well!
There isn’t nearly as much flexibility when you’re editing these film scans, compared to what you can do with RAW files from a DSLR. But, it’s nice to know that if I wanted to, I could put more effort into geeking out with third-party software and mineral oil. It’s cool that you can push this thing further if you want higher quality scans.
All in all, even though the software is lackluster, the Canon CanoScan 9000F Mark II is an excellent option for scanning film, photos, and documents. I give it a thumbs up!
If this post was helpful, you can help me by simply clicking the following links before you buy something from Amazon, B&H Photo, or eBay. I get a tiny commission when you do, even if you’re just buying a Giottos Air Blaster and an anti-static cloth (which you totally need to get to clean your film before you scan it). Thanks!
Hands-on review of the Canon CanoScan 9000F Mark II film scanner If you're looking for a film scanner that can deliver a high-resolution images without seriously hurting your bank account, the…
0 notes