#when i try to brighten the image it ruins the color palette.........
Text

wish you were here
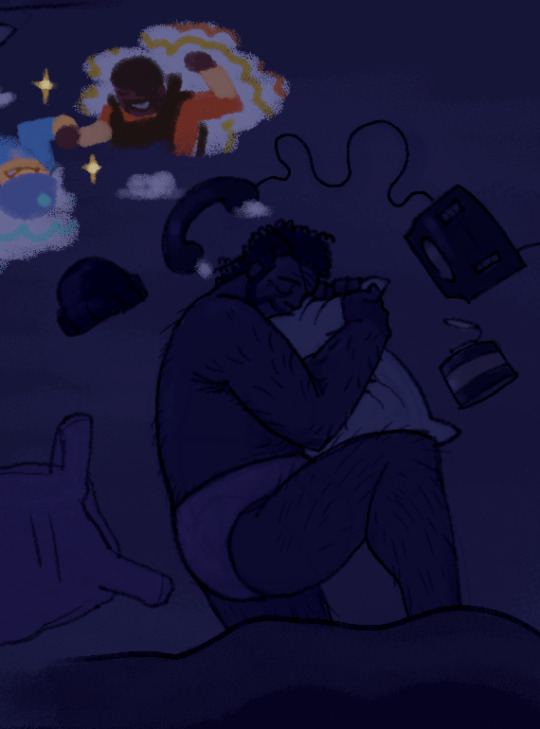
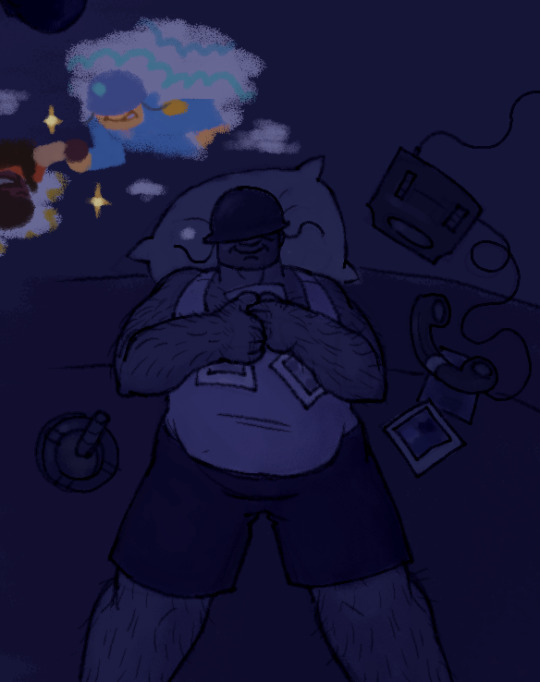
#tf2#team fortress 2#sollydemo#boots n bombs#emmet arty#so so so sorry if you have to really crank up your screen brightness to see shit#when i try to brighten the image it ruins the color palette.........
268 notes
·
View notes
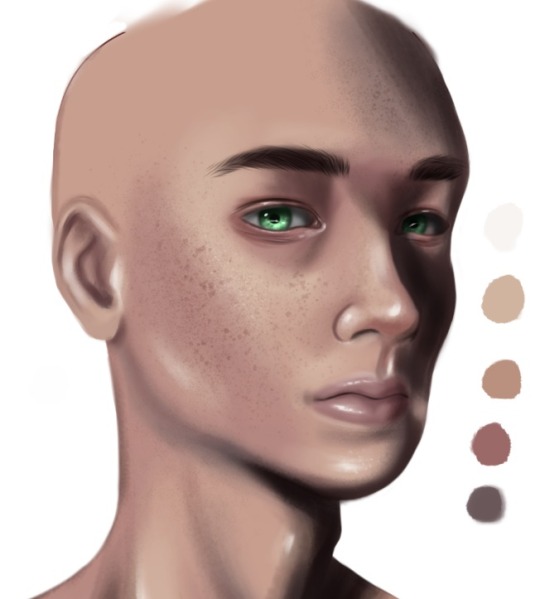
Photo
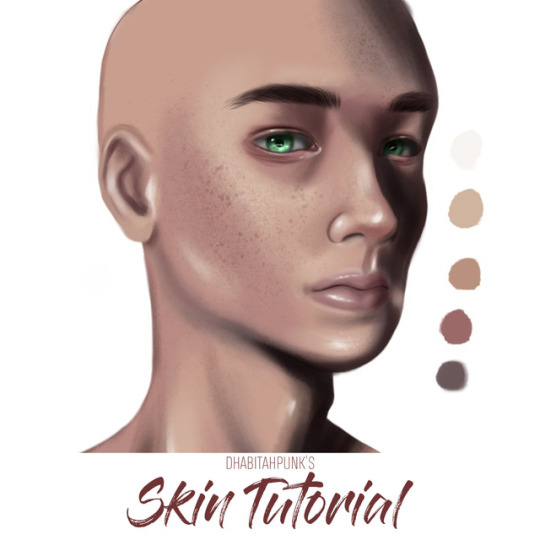
Hey guys! I’ve decided to make a “how I paint skin” tutorial. It is quite a detailed step by step tutorial so strap yourselves in for this one! Also, it’s step by step because I want to teach you how to pick your own skin color palettes and shading, and take no shortcuts!! This will go a long way, guys!
Just a disclaimer: I am no expert in painting skin realistically but these are just different things I’ve picked up from my fav artists and tweaked them to suit my style.
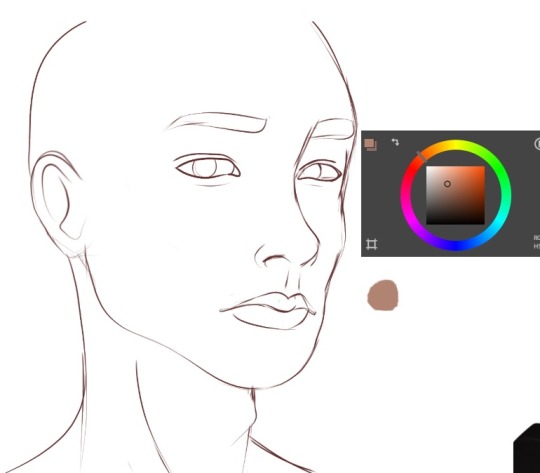
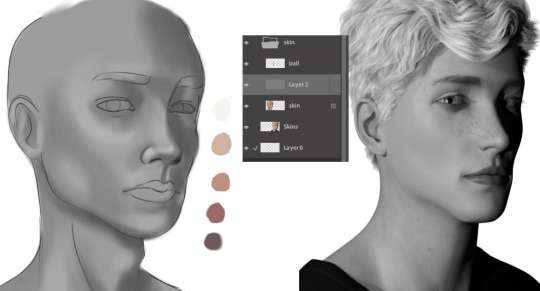
1. First step is to make your sketch. I suggest that you also use a reference of a real person for this practice. References help a lot! Don’t be afraid to also use the eyedropper tool as this will teach you a lot about skin color palettes!
(I know my ref image is not a real person, shush. XD He still looks realistic enough. Haha.)
2. Now, usually, I will duplicate the sketch layer and paint it dark red. I will turn off the original sketch layer and use it for back up later just in case we need it.
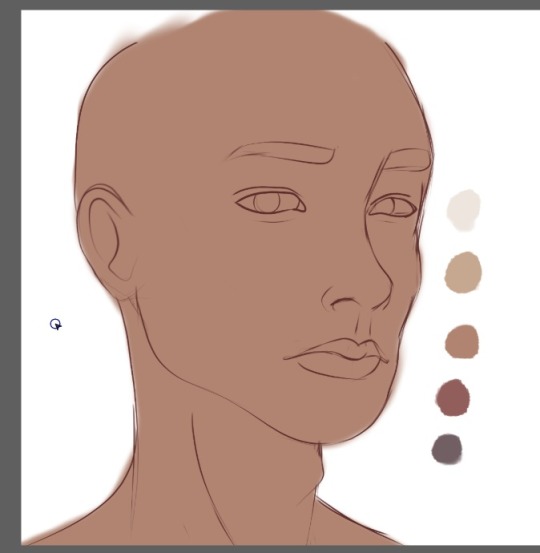
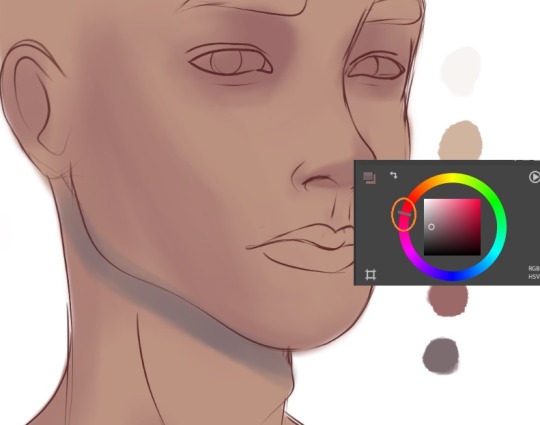
Okay! Let’s get started with picking your color palette! I pretty much don’t have a standard skin palette as I’m someone who likes to do things from scratch and then just go with the flow. I’ll go through more on that later on in this tutorial.
I usually start with this kinda desaturated orange. This will be our base for now.
3. Now, this next color will be, I would say the slightly lighter parts of the skin (but not quite the highlights). This color will slightly be even less saturated compared to the previous color.
Also, it will be more towards yellow.
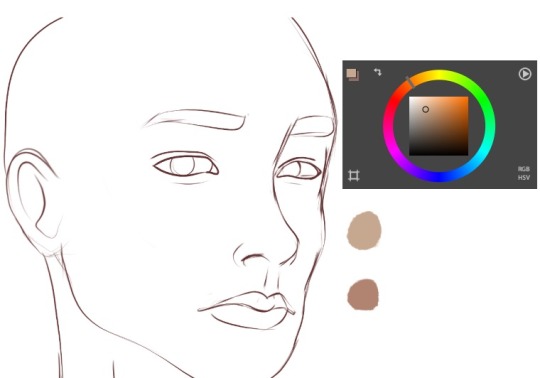
4. Next color is the highlight. This is pretty much close to white and ever so slightly to yellow.

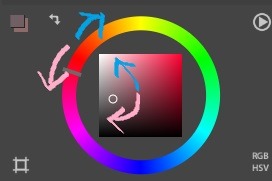
5. For the dark shadows of the skin, there’s two types: The more reddish tones and the more ‘bluish’ tones.
For the red ones, I would put my color wheel closer to red and darker than the base color.
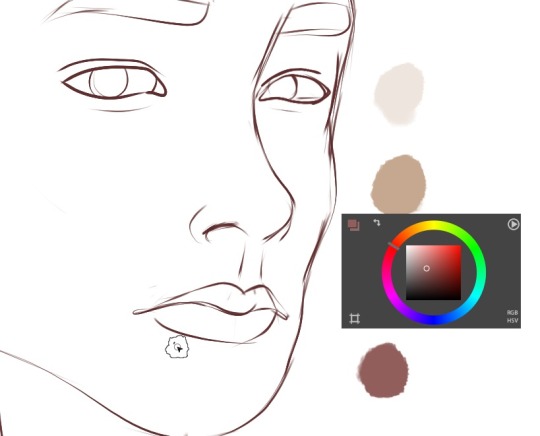
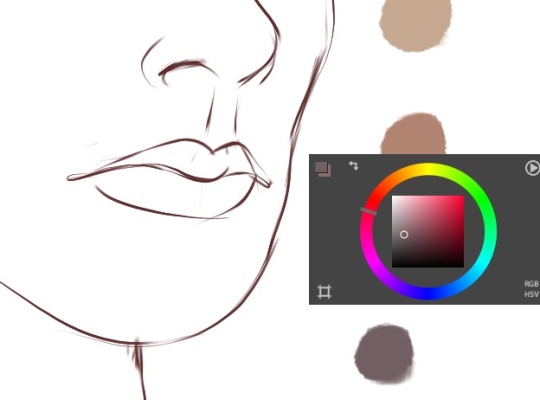
6. For the dark cold shadows, I will move the color wheel even more closer to magenta and then make it very desaturated, almost like a gray.
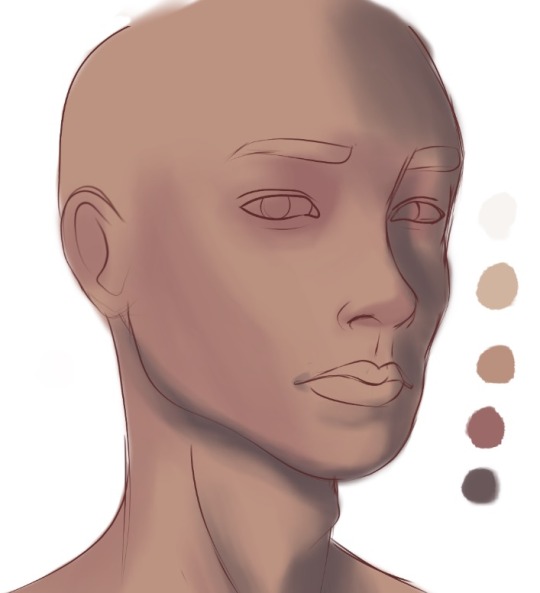
Quick Summary:
Here’s a simple annotation of what my color picking looks like most of the time for a normal portrait with normal lighting.
As a rule of thumb, the dark shadows and highlights will be almost desaturated, and the base color is the most saturated.
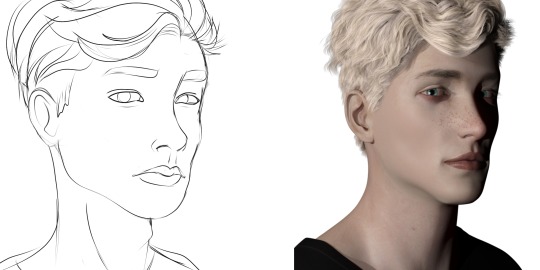
7. Alright. Now, let’s make a new layer below the sketch layer. Paint in the base color.
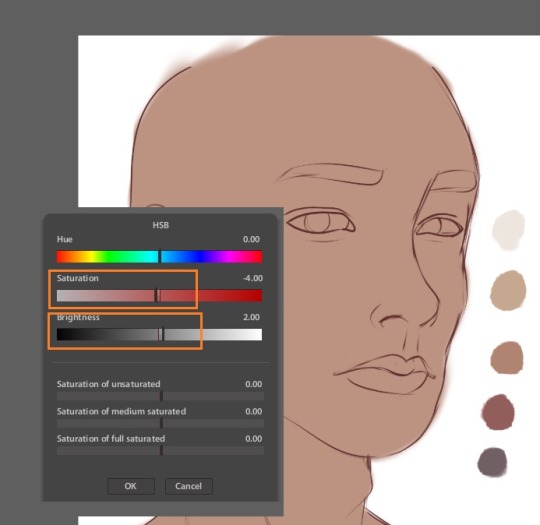
8. Now, personally, since I want my character to have a fairer skin, I think my base color is a bit too ‘tanned’. This is why I say, I tend to just go with the flow and not always use a fixed skin palette.
But anyways, I will just desaturate it a bit (remember, the lighter the skin color, the more desaturated it will be).
Then, I just increase the brightness a bit.
9. Let’s start with painting the dark red parts. These are the parts where you can see the blood underneath the skin more visibly. So, around the eyes, below the cheeks and at the tip of the nose. Not the cast shadow of the nose, though!!
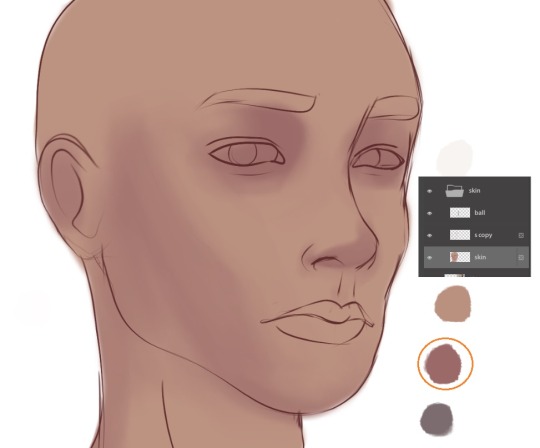
10. Now, let’s paint the cast shadows. Cast shadows tend to have that cold bluish shadow we picked out just now. So like below the neck, below the nose (or any cast shadow from the nose).
Over here, I feel like the tone is a bit too bluish and almost too light (since we did increase the brightness just now).
After adjusting the tone:
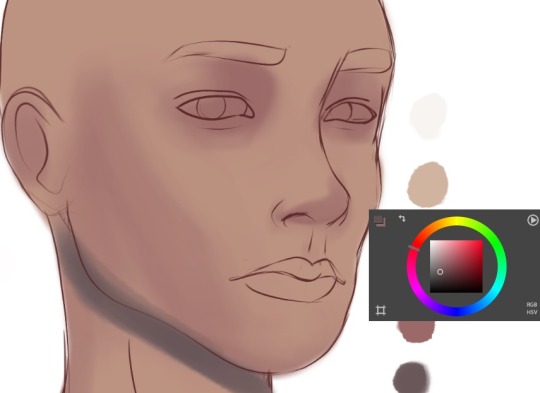
So, I will just adjust is a bit to be darker and maybe slightly a bit more red. Isn’t it weird how it looks cold but if you use the color picker, it’s actually in the reds? Skin colors be crazy, y’all. Our eyes like to play tricks with us. -.-
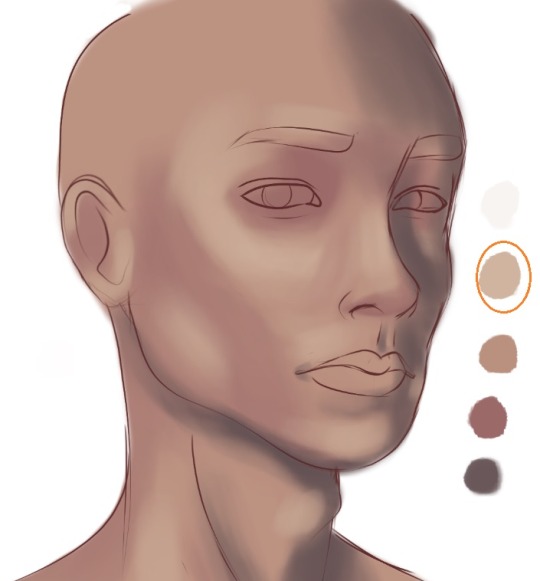
11. Now, that I’ve adjusted the cast shadow color, let’s start painting over the shadows.
12. Now, paint in the lighter color from the base color over the cheekbones, the bridge of the nose, chin, and above the eyebrows. Please refer to your reference for this!
13. Let’s start blending. Now, I have made my own blending brush here. It kinda creates a textured skin look. You can play around with ‘jitter’ or ‘spacing’ in your program to get this kinda texture.
As I go along, I will add in more shadows where I see fit. For example, my character is a male, so he has more cast shadows below his eyebrow (around his eye socket). I also use a gray to paint in the eyes.
14. This next step is gonna be a bit scary for some of you especially if you’re a beginner! And that is merging your sketch layer with the colored skin.
But don’t be afraid and just try! Remember, we still have the original sketch layer that we kept. So in case you want to revert, you have that layer to copy again.
Anyways, here, I will use a softer round blending brush (not one with jitter) and just blend in the sketch layer softly.
Again, adding more shadows and form as I go along. Like over here, I’ve used a darker red for the bottom of the tip of the nose (remember, the tip of the nose is red!)
I’ve also used the highlight color to add in the very bright highlights (sorry it’s a bit hard to see in the pic cuz it’s almost white like the canvas!) but at this point, we still want to keep it very soft and blended. We will add in the details later. There’s highlights at the tip of the nose and the side of the nostrils, for eg.
QUICK TIP: Make a new layer with a medium gray color and put the layer mode on “Color” or “Hue”. This will allow you to check the values quickly.
As you can see, I still have a lot more dark parts missing.
When I’m going to add darker tones, I tend to put them on a new layer and change it to “Multiply”. Making these type of changes on a new layer will allow more flexibility without you ruining the base painting.
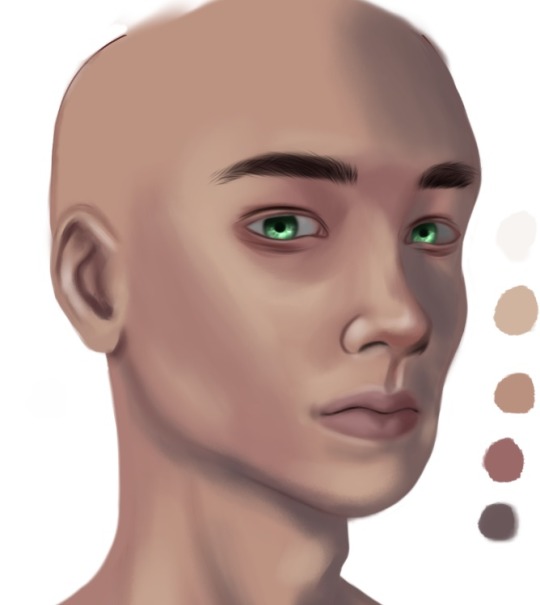
This is what my drawing looks like now after all the touching up. I’ve colored the iris and brows too (on a new layer).
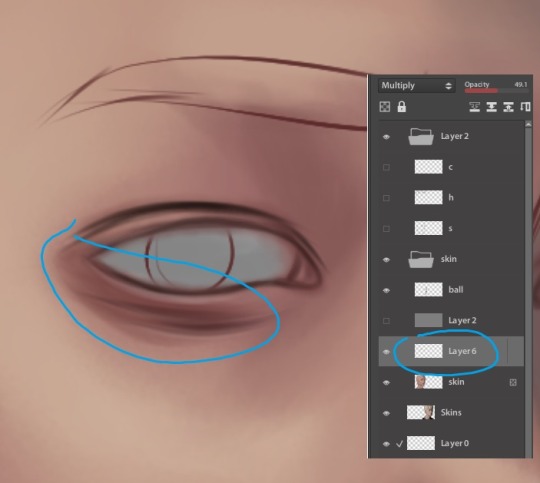
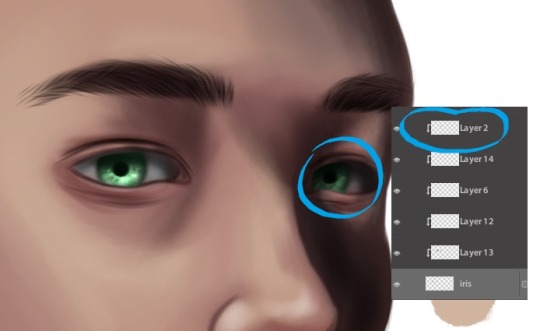
15. This is where I will add in the shadow. Do it on a new layer and use a clipping mask so it won’t go outside your base. I’m also using the base color but put the layer mode to “Multiply” to really darken it.
16. Remember to do it for the iris as well, if need be!
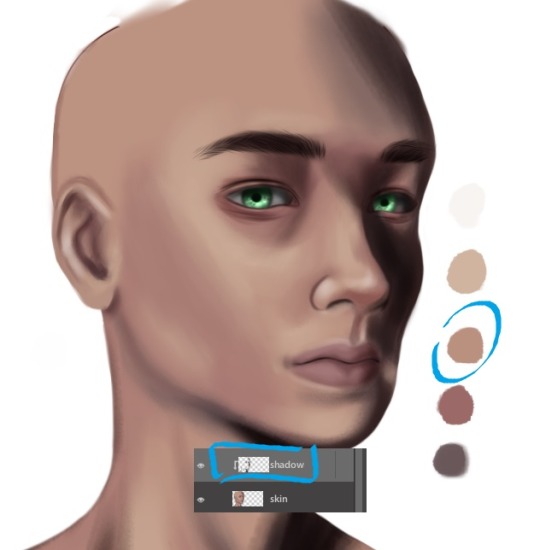
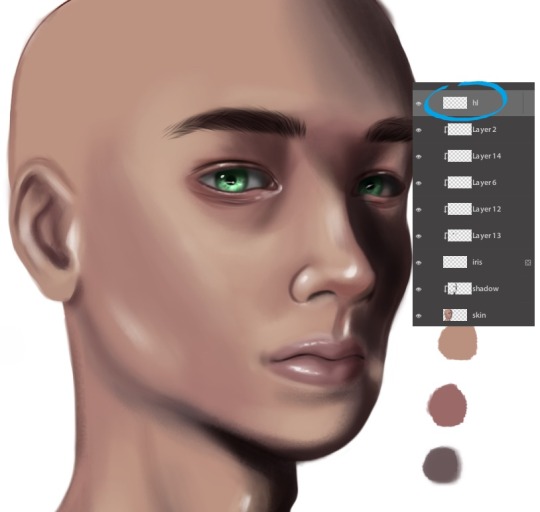
17. Now, time to put in the sharper highlights! These highlights are usually around the eye lids and eye corners (near the tear ducts), nose tip, cupid’s bow, lips, chin.
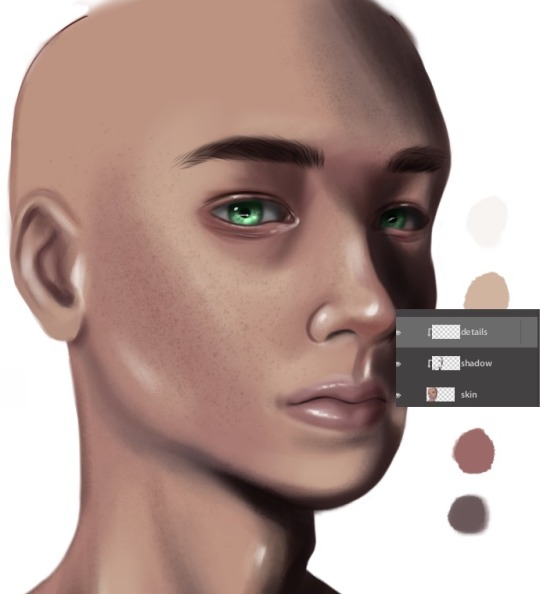
18. Next, let’s add some details. Do this on a new layer and put the layer mode to “Multiply”. You can also use this as a clipping mask onto your base layer.
The brush I use has a spotted tip. And then just use jitter or huge spacing to really spread out these dots. I mainly paint these over the cheeks and the forehead.
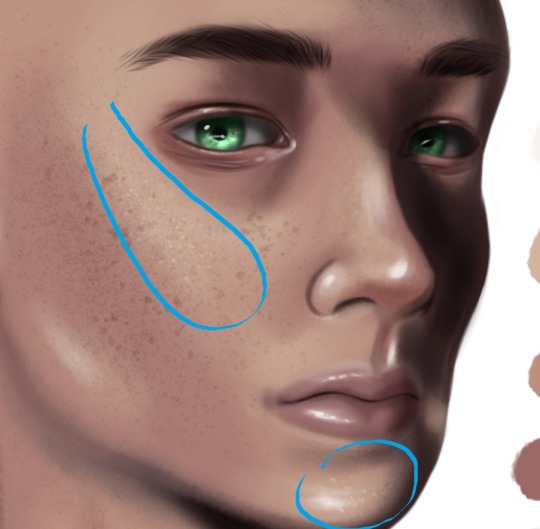
19. Make another layer and using the same brush, just make it bigger so the spots look bigger. Use a soft eraser to erase some of the freckles/blemishes.

20. Lastly, go back to your highlight layer and using that same brush, just brush over the cheeks and chin where the light hits.
21. Do some final adjustments. Like, again, I feel like my character needs to be a tad bit more pale. So what should I do?
(Correct answer: Desaturate the color and brighten it overall.)
Remember, the lighter you go, the less saturated the color should look! Also, remember that shadows are also desaturated!
And that’s it! I hope you learn something new today in terms of coloring and shading. :)
28 notes
·
View notes
Last Seen Blogs

krazyglue473566
🧏🤫🧏🤫🧏🤫🧏🤫🧏🤫🧏🤫

tinymakerwagonlover
題名未設定
tinymakerwagonlover
題名未設定

ifuntoca
IFunToca

hope-doesnt-wear-pants
No Pants Are The Best Pants