#woocommercecheckout
Explore tagged Tumblr posts
Visit Tumblr Blog
Explore Tumblr blogs with no restrictions, modern design and the best experience.
Last Seen Tumblr Blogs


Fun Fact
China blocked Tumblr because of pornography and censorship problems in 2013.
Photo
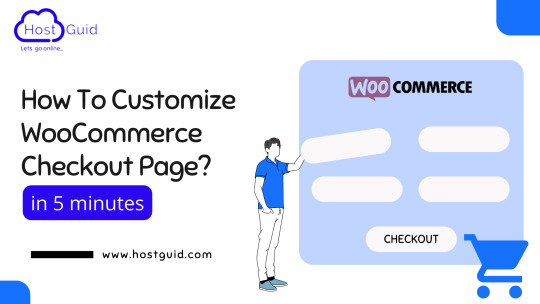
How To Customize Woocommerce Checkout Page?
If you want to customize the woocommerce checkout page that is the best decision for your online store. The checkout page is an important page of your online store, After all, your customer completes their order and you made a sale on this page. Due to this, it is really important to ensure that the design of the WooCommerce checkout page increases your conversions and boosts your sales.
This post will show how to change the WooCommerce checkout page to provide customers with the best experience possible.
Also Read:- https://www.hostguid.com/how-to-customize-woocommerce-checkout-page/
0 notes
Link
By default, billing and shipping addresses are displayed as formatted by WooCommerce, which is different for each country and includes only default address fields. In addition to these default address fields, you can also display your custom fields which were created using WooCommerce Checkout Field Editor Pro plugin. Please follow below steps to include custom address fields in address display,
0 notes
Video
youtube
Topic: How to build a WooCommerce Checkout like Shopify or Shopify Style Checkout to WooCommerce using the WooLentor plugin. If you are running an online store, then you must know that the checkout page is the most crucial part of an online store because this is the place where visitors complete their orders and become customers. In terms of user-friendliness and functionality, the Shopify checkout page always stands out. WooLentor Woocommerce Checkout Plugin: ✅ More Details: https://hasthemes.com/blog/woolentor-yt
Are you a WooCommerce user and have been wondering how to implement Shopify like Checkout Page for WooCommerce store completely free of cost? If so, this video is for you. Here you will learn how to make woocommerce checkout like the one in Shopify using a special WooCommerce Elementor page builder named WooLentor.
In this video, you will learn step-by-step how to customize WooCommerce checkout page layout and make it look like the one in Shopify stores. Follow along and learn to design a stunning Checkout page like Shopify using the newly implemented module of our WooLentor plugin.
First of all, download and install the WooLentor plugin from your WordPress dashboard. Once you are done downloading and installing the plugin, it will take you to the settings page of “WooLentor”.
From there, click on the "Shopify Style Checkout" module. A popup will appear right away and let’s go to the popup settings to enable the “Shopify Style Checkout” option.
✅ More Details: https://hasthemes.com/blog/woolentor-yt
By using the Shopify Style Checkout Page for WooCommerce feature, you can do multiple things that include setting shipping address, setting payment gateway, etc. You will also be able to configure it so that your visitors are redirected to a page in which they can see an order confirmation message including the order details whenever they place an order.
From the module settings, you will be able to personalize a few more things including uploading a logo to display it on the Shopify Style Checkout page, changing this bottom menu as per your needs, etc.
So, that’s how it is. You will see how easy it is to create a Shopify Style Checkout page using the WooLentor plugin by following this video. Thus you will learn how you can customize the Woocommerce checkout page layout just like the one in Shopify stores.
If you found this video helpful, give it a thumbs-up, and don’t forget to subscribe to this channel.
🔥 260+ Bootstrap Templates Bundle 🔥 If you are running a web agency or freelancing business, you can check our Bootstrap Templates Bundle, which includes 260 items and costs only $99. Grab the deal: https://hasthemes.com/blog/html-bundle-yt
🔥 React Templates Bundle 🔥 If you want to build your website with React, you can try our amazing, well-coded and modern React JS templates. They are available both as a single template or in a bundle. Grab the deal: https://hasthemes.com/blog/react-templates-yt
We are available on other social media platforms, so don't hesitate to connect with us there.
❤️ Check us out on Facebook: https://facebook.com/hasthemes/
❤️ Check us out on Twitter: https://twitter.com/hasthemes
❤️ Check us out on LinkedIn: https://bd.linkedin.com/company/hasthemes/
❤️ Subscribe and hit the bell to see new videos: https://www.youtube.com/c/hasthemes?sub_confirmation=1
#WooCommerceCheckout #CheckoutPage #ShopifyCheckout #HasThemes
0 notes
Link
#woocommerce#wordpress#woocommercecheckout#woocheckoutmanager#woocommerceextraproductoptions#extraproductoptions
0 notes
Link
0 notes
Link
MultiStep Checkout for WooCommerce Split up your WooCommerce Checkout form easily into simpler steps.
Combine the plugin with the top-rated Checkout Field Editor for WooCommerce and create an entirely new checkout form bringing more happy customers and more conversions.
#woocommerce#wordpress#woocommerceplugins#woocommercecheckout#woocommercecheckouteditor#woocommercemultistepcheckout#multistepcheckout#multi-stepcheckouteditor
0 notes
Link
0 notes
Link
0 notes
Link
The WooCommerce Product Variation Swatches allows you to configure & display product variations visually. The plugin gives the following swatch types
Radio
Color
Image/Icon
Label/Button
You can access the WooCommerce Product Variation Swatches settings from Dashboard → Products → Swatches options after installing & activating the plugin.
0 notes
Link
#woocommerce#woocheckout#wordpress#woocommercecheckout#addingcheckout#addingtimepicker#addingdatepicker
0 notes
Link
When you add a custom field in checkout page it gets created either as Order Field (order meta data) or as User Field (user meta data) based on the settings.
Order Fields (Order Meta Data)
Order fields will be saved in wp_postmeta table as Order Meta data and will be displayed in multiple places. To create Order fields you must select the checkbox “Order Meta Data”
0 notes
Link
This article explains the steps to add a Date Picker in WooCommerce Checkout page by correctly configuring WooCommerce Checkout Field Editor plugin.
Using this plugin you can customize WooCommerce checkout fields. In this article we will focus on adding a custom Date Picker. You can learn more about the plugin and purchase it from
here
. For installation of the plugin please follow
this article
OnceWooCommerce Checkout Field Editor is installed, you can access plugin settings page via
WooCommerce > Checkout Form
. Always click on the ‘Save Changes’ button to save your changes.
0 notes
Link
0 notes
Link
MultiStep Checkout for WooCommerce Split up your WooCommerce Checkout form easily into simpler steps.
Combine the plugin with the top-rated Checkout Field Editor for WooCommerce and create an entirely new checkout form bringing more happy customers and more conversions.
Using the Multi-Step Checkout plugin, you can split the checkout form into the following steps (optional):
0 notes
Link
0 notes
Link
WooCommerce Email Customizer plugin lets customize the WooCommerce Emails using a visual template editor. With WooCommerce Email Customizer, display the emails in different styles and layouts, with images, GIF, buttons and social media icons. Access the WooCommerce Email Customizer settings from Dashboard → WooCommerce → Email Customizer.
0 notes