#www.mywifiext.net admin
Text
Guide on Mywifiext | www.mywifiext.net Login / Setup
By asking you questions, Guided Assistance assists you in resolving the problem you are experiencing with your NETGEAR equipment.
You can log into your netgear WiFi range extender after installation to examine and modify the settings.
Visit NETGEAR Support and obtain the quick start guide for your model if you haven't installed and connected your WiFi range extender to your current WiFi network before continuing.
Check to see whether your model is listed under "This article pertains to:" If you own a Nighthawk Mesh or Mesh WiFi Extender, check How can I access my Nighthawk Mesh Extender or WiFi Mesh Extender?
To access your WiFi extender, log in as follows:
From a computer or mobile device linked to your extender's network, open a web browser.
It's possible that the names of your router and extender's WiFi networks differ (SSIDs). Check to see if you are linked to the network of your extension.
In the URL bar of your web browser, write www.mywifiext.net if your extender and router have distinct WiFi network names (SSIDs).
Enter http://extender's IP address> (for instance, http://192.168.1.3) into your browser's address bar if your extender and router share the same WiFi network name (SSID).
See How can I find the IP address of a device connected to my router? for additional details.
Hit the Enter key or press.
A login screen appears.
Enter your admin password and user name.
Note: An email address could be part of your user name.
Click the Username & Password Help link if you can't remember your user name or password.
To change your login information, see How can I reset my NETGEAR range extender to factory settings?
Tap or click LOG IN.
It shows the Status page.
Click or press the Menu symbol if your browser displays it.
A menu for the extender appears.
To view and modify the extender's settings, select Settings.
1 note
·
View note
Text
What to Do When 'mywifiext.net' Refuses to Connect?
If mywifiext.net refused to connect then, this happens when there is a power outage, wrong admin credentials, browser issues, network interruptions, and more. To fix this, ensure to have an adequate power supply, enter the correct login details, fix the browser issues, and remove the network obstacles. To know more troubleshooting steps regarding the same, reach us here freely!
0 notes
Text
Ultimate Guide on Netgear WiFi Extender Login

Netgear WiFi Extenders are devices that help to extend the range of your existing WiFi network. To Netgear wifi extender login to your extender, you will need to enter the IP address of the device into a web browser. Once you have done that, you will be prompted to enter the username and password associated with the device to gain access. This is necessary because the device provides an additional layer of security to ensure that only authorized users can access your WiFi network. By entering your username and password, you are confirming your identity and giving yourself access to the extended network.
With the Netgear extender login page at www.mywifiext.net or the Netgear wifi extender IP address 192.168.1.250, you can manage your extender settings. It is necessary to connect to the Netgear extender network to log in to the mywifiext extender. Netgear extender settings can be accessed by entering the username and password. By clicking on the "forget password" button and answering the security question, you can retrieve your Netgear extender login credentials.
Steps For Netgear Wifi Extender Login with 192.168.1.250
You can also complete the login process with the IP address. Here we can discuss the basic steps for Netgear Wifi Extender Login with 192.168.1.250. It's important to follow all the steps as instructed.
A Netgear Wi-Fi extender can be connected with an Ethernet cable.
Using your PC or laptop, you can now access your favorite browser.
To enter the IP address of your Netgear wifi extender, enter 192.168.1.250 in the address bar of your browser.
To complete the Netgear WiFi extender login process, entering the correct IP address is essential.
This is the login page for Netgear extenders.
You will then be prompted to enter your default login credentials.
You can now use the Netgear extender quickly after you see the pop-up message telling you your login process is completed.
Netgear WIFI Extender Login With 192.168.1.250 by Using Android Device
You can also use your Android device for Netgear Wifi Extender Login with 192.168.1.250. Check out the below steps and follow them.
Here you can open your favorite browser.
Enter 192.168.1.250 as the IP address of your Netgear wifi extender here.
Log-in credentials, such as usernames and passwords, are now available.
You can then click on the "Login" button. Now that you have successfully logged into your Netgear WiFi extender, the process is complete.
Netgear WIFI Extender Login With 192.168.1.250 by Using Mac OS
There is also an option for you to use your Mac OS for Netgear wifi extender login with 192.168.1.250. Here, you can check out the following steps.
Your router must be configured to disable Mac address filtering or Access Control Lists. Turn on the router's LED lights.
When you connect your devices to your extender network, your extender will be active.
To access mywifiext.net, enter www.mywifiext.net in your web browser.
Passwords and usernames such as "admin" and "password" can be entered here.
To check the attached Netgear wifi extender devices, tap on "Network Devices".
Under MAC Address Filtering or Access Control Lists, all Mac addresses that start with 02:0F: B5 need to be listed.
Your wireless device now has access to the internet.
Causes Of Netgear WIFI Extender IP Address 192.168.1.250 Not Connect
You can easily use the Netgear wifi extender login with 192.168.1.250. As part of their login process, Netgear WiFi range extenders connect to 192.168.1.250 as a private network. It is sometimes difficult to log in to the Netgear WiFi extender using its IP address, 192.168.1.250. Here you can check its primary reasons.
You are unable to connect to WiFi because your wifi connection is disabled.
It is common for users to forget to turn on the Netgear Extender.
Your Wi-Fi connection is experiencing connectivity issues.
There is outdated firmware on Netgear Extenders being used by users.
It appears you are using the wrong IP address.
Netgear extenders have not been configured properly by users.
There are sometimes technical problems with DNS.
The above are the primary reasons for using the Netgear wifi extender login with 192.168.1.250. The power supply for your router and extender should be adequate. The Netgear extender must be connected properly to the electrical outlet. The Netgear wifi extender IP address 192.168.1.250 can't accessible if your computer has cache memory, cookies, and junk files.
Wrapping Up
You can use the above-mentioned steps for Netgear Wifi Extender Login with 192.168.1.250. It is also vital for users to follow all the steps perfectly so they can complete the login process quickly.
0 notes
Text
Ultimate Guide on Netgear Wifi Extender IP Address
The Netgear WiFi Extender IP address is the IP address used for connecting to the Netgear WiFi Extender. It is typically a 192.168.1.250 IP address. You can find this IP address at the bottom of the WiFi extender or in the extender settings. The default Netgear WiFi Extender IP address is 192.168.1.250 or 192.168.0.250, depending on the model. You can also find it by logging into your router and looking for the extender's IP address in the list of connected devices.
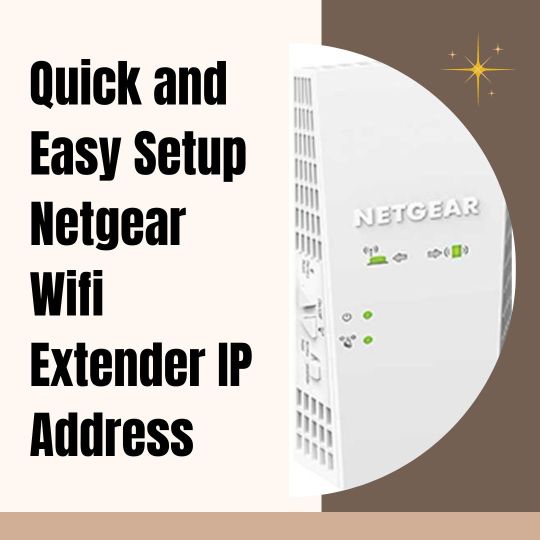
Some extenders come with a label that lists the IP address, but if the label has been removed or is not visible, you can still find it by logging into your router and looking for the extender's IP address in the list of connected devices. This allows you to easily access the extender's settings and make any necessary changes. You can use the IP address for the Netgear wifi extender login.
Method To Access Netgear Wi-Fi Extender IP Address
You can quickly access the Netgear wifi extender IP address, so you need to follow the below steps. It is imperative to follow all steps correctly.
To begin, open a web browser on your device.
In the address bar, enter the IP address 192.168.1.250 of your Netgear wifi extender.
You can now proceed to the mywifiext login page by pressing enter.
You need to enter your username and password correctly.
Whenever you install a new Wi-Fi router or extender, you need to input the latest values.
Pressing Enter will bring up a panel.
Netgear extenders can be set up at www.mywifiext.net.
You can log in with your username.
After these steps, you can quickly access the Netgear wifi extender's IP address. It is now easier for you to log in to your Netgear wifi extender.
Steps For Netgear Wifi Extender Login by Using Netgear Wifi Extender IP Address
Users can follow the below steps for Netgear wifi extender login, and you can use the Netgear wifi extender IP address.
You need to turn on your Netgear extender.
Your favorite device's web browser can be launched here.
It is now possible for users to search for http://192.168.1.250.
To sign in, you must provide your username and password.
It is also possible to enter the Netgear wifi extender's IP address, 192.168.1.250.
Users can now access the admin panel. The smart setup process for your extender can be accessed and settings can be changed through this page. Logging into the 192.168.1.250 admin page will also give you access to advanced settings for your WiFi extender. The default password can now be changed and you can create a stronger password.
When you create a new password, you can also save it. Another device can also track the device you track on your network. There is also an option to update the firmware using the Netgear wifi extender's IP address.
Common Problems with Netgear Wifi Extender Login by Using IP address 192.168.1.250
Many problems may arise when setting up an extender using the Netgear wifi extender IP address of 192.168.1.250. In this way, you can minimize inconveniences and difficulties. Users can encounter various problems when logging in to their Netgear wifi extender using their IP address. Here we can discuss the primary issues that users face while Netgear wifi extender login using the Netgear wifi extender IP address. It helps you figure out the problem and solve it quickly.
You cannot set up your new Mywifiext extender by connecting to the Netgear wifi extender's IP address of 192.168.1.250 or by going to Mywifiext.net. The majority of users encounter these issues regularly.
There are no steps to create an account when you enter 192.168.1.250 or Mywifiext.net.
On the setup page for 192.168.1.250 or the login page for Mywifiext, users may overlook the registration instructions.
Netgear extenders are sometimes unable to log in because users don't understand how to install and set them up.
The WPS setup process for Netgear extenders is often confusing to users.
There is a need to read all the instructions and follow them accurately so you can quickly solve the issue related to the Netgear wifi extender login.
Wrap Up
Users need to use the Netgear wifi extender IP address for the Netgear wifi extender login. It is a quick way to log in to the extender and use it properly. You can also access the settings and update the firmware and other settings with the help of an IP address.
1 note
·
View note
Link
Setting up Netgear range extender is very simple and can be carried out with some simple steps. Steps for Netgear range extender setup differs a bit from device to device. Here is this article we will discuss the step by step procedure to set up the WN3000RPv3 – N300 Wireless Range Extender as an access point.
0 notes
Link
Setting up Netgear range extender is very simple and can be carried out with some simple steps. Steps for Netgear range extender setup differs a bit from device to device. Here is this article we will discuss the step by… Continue Reading →
0 notes
Photo

Its an IP page from where one can log in and register their extender or router their Wifi Extenders.But sometimes it becomes difficult to access to this 192.168.1.250 setup page and www.mywifiext.net. So it can also be assessed by following means:
www.mywifiext.local– for IOS users
192.168.1.250
Mywifiext.net
http://mywifiext.net New Extender Setup
www.mywifiext.net
Visit here: http://192.168.1.250
#http://192.168.1.250#mywifiext.net username and password#login to netgear wifi extender#mywifiext.net admin#mywifiext.net netgear setup#mywifiext.net new extender setup#Netgear new extender setup page#www.mywifiext.net setup/newextendersetup#configure my wifi extender#192.168.1.250#mywifiext.local#mywifiext.net new extender setup
2 notes
·
View notes
Photo

How to connect Netgear n300 wifi Extender
Mywifiext.net webpage provides support services and also provides you with all the instructions on how to connect Netear n300 wifi extender. Here you will also find required information for the setup of your wifi extender device.
#mywifiext.net admin#login to netgear wifi extenderlogin to netgear wifi extender#Netgear setup Page 192.168.1.250#Netgear wifi extender EX2700 setup#mywifiext.net ex2700#www.Mywifiext.net Netgear Ex2700 Setup#www.Mywifiext.net EX2700 Setup#Mywifiext.net EX2700 Setup#Steps to setup Netgear Ex2700 extender setup#How to configure Netgear EX2700 wifi Extender#Steps to setup Netgear Ex6200 extender setup#How to connect Netgear EX6200 wifi Extender#How to install Netgear EX6200 wifi Extender#Netgear plug in wifi extender setup#mywifiext net setup#mywifiext net new extender setup#New Netgear wifi extender setup#mywifiext.local#netgear extender login#www.mywifiext.net n300#Unable to setup Netgear n300 extender setup#netgear n300 wifi extender setup#Netgear wireless Extender helpline number#Netgear Extender service center toll free number#Netgear Extender customer service toll free number#192.168.1.250#www.mywifiext.net setup/newextendersetup#configure my wifi extender
6 notes
·
View notes
Text
Netgear Extender Login Process
Are you having trouble logging in to the Netgear Extender Login page? Have you tried every available approach to acquire the Netgear WiFi Extender Login results? Then relax; you've arrived at the perfect location. We've provided instructions on how to go to the Netgear Extender Login page in this blog.
Steps For Netgear WiFi Extender Login
To begin, open a browser on a computer or mobile device that is connected to your extender networks, such as Mozilla Firefox, Safari, or Internet Explorer.
NOTE: Your router and Netgear extender may have distinct WiFi network names in some circumstances (SSIDs). As a result, it is recommended that you check whether or not you are connected to your extended network.
Navigate to your wifi device's settings option now.
Connect the gadget to Netgear Ext after that.
If your Netgear WiFi extender and router have distinct WiFi network names (SSIDs), type www.mywifiext.net into your web browser's address bar.
Enter the code.
The netgear extender login page will appear on your device's screen after that.
Then, in the provided forms, type the default "Admin" login and password.
NOTE: You may forget your username and password at any time. In this instance, either click the Username and Password support link or factory reset your Netgear WiFi extender to reset your credentials.
To log in, click the Login button.
You've arrived at the mywifiext setup page.
Finally, to log into the Netgear wifi extender, follow the on-screen prompts.
2 notes
·
View notes
Text
How to change mywifiext.net login password?
To secure your network, use the mywifiext.net login password change method. For this, open the web address, type mywifiext.net web address in the browser bar, and enter the admin credentials. You land on the smart Home dashboard of the router, visit the WiFi/Wireless Settings, edit the Passphrase Key/Password field, and follow instructions or visit us!
#mywifiext.net login password change#Netgear extender refused to connect#mywifiext.net not working#www.mywifiext.net#mywifiext.net login
0 notes
Text
HOW YOU CAN DO WIRELESS PROTECTION SETUP OF THE NIGHTHAWK AC1200 DUAL- BAND EXTENDER
NIGHTHAWK AC1200 DUAL- BAND EXTENDER
Nighthawk AC1200 Dual-band extender comes with a speed of 1200 Mbps. The 700mW high-power design provides the ultimate range, while the quad-core processor enables maximum WiFi performance. It easily connected any standard WiFi router and is ideal for very large homes and frustration-free HD video streaming and gaming. The user can also get the best security features. Now the user can also use the parental control feature and guest access feature. Here the user can now add the many smart devices with the extender, and you can also use Fastlane technology. You can use the Nighthawk app to manage all devices. Now the user can also print wirelessly from anyplace. It also supports Apple Products. If you need any help check.

MANUALLY SETUP OF THE NIGHTHAWK AC1200 DUAL- BAND EXTENDER
First, you can locate the place for the Nighthawk AC1200 Dual-band extender.
Now you'll open the box of the extender
Now place it near the router.
Check home internet signals.
Unplug the modem.
Now the user also can add the power supply with the extender.
Here the user also can check the power of the extender and router is on.
If the power of the extender is off, then the user can hold the power button for 2 seconds.
Now the user uses the ethernet port to connect the extender, modem, and laptop.
Open the Chrome browser.
Here you'll write www.mywifiext.net or the IP address is 192.168.1.3.
The user can now also type the username and therefore the password.
You can now apply the username as admin and the password as a password.
Here the user can scan the wifi.
In case it doesn't detect the wifi, then the user can enter the wifi.
You can see the welcome note screen.
Here you can see the setup wizard on the screen.
You can also enter the time, place, and language
WIRELESS PROTECTION SETUP OF THE NIGHTHAWK AC1200 DUAL -BAND EXTENDER
Open the box of the new Nighthawk AC1200 Dual-band extender.
Now you can always place an extender near the router.
You can now check your home internet signals.
If they are low, then you can fix the internet signals.
Attach the power supply with the extender.
Check the power of the extender is on.
If it is off, then press the power button of the extender.
You can also check the WPS button on the extender and the router.
Press the WPS button on the extender and the router.
It also starts blinking the light.
It shows us both devices are connected.
Now it starts taking the settings.
In case the light does not blink, then you can repeat the same process.
The user now uses the extender with the existing router.
LOG INTO THE NIGHTHAWK AC1200 DUAL-BAND EXTENDER
First, you can launch any web browser.
Here the user can now type www.mywifiext.net or the IP address is 192.168.1.3
You can also apply the username and password, the username is admin and password is password here.
The user can easily log into the settings.
1 note
·
View note
Link

Netgear is the most famous brand that captures the attention of many people. It is a brand that is well-known for its remarkable Netgear WiFi Range Extenders. The extender has become a personal choice for many people due to its excellent efficiency. It helps to boost the WiFi Signal. You must update the Netgear Regularly. If you want any information related to the Netgear Router Update, then visit www.mywifiext.net website for better information. The professionals will provide you the best guiding steps to resolve the issue.
Steps to update a Netgear Router
The company is provided with new security features or any other enhancement in order to help the customers. Here are the simple steps to update a Netgear Router as follows:
At the bottom of the Router, you can see the label of default access site & credentials.
Open the new web browser on your computers such as Google Chrome, Internet Explorer or Firefox.
Now navigate to the official website of the Router Login.
After that, you need to enter the Router username and password.
You can use the default Login credentials that include Username as admin and Password as password.
To update, move to the ‘ADVANCED’ tab.
Choose the ‘Administration’ option.
Then choose the Router Update.
In case there is any update available, a prompt will ask you if you wish to download and install it. Now click on the ‘Yes’ button.
As soon as the update process will start, do not interrupt.
The Netgear Router will get updated.
If you are looking for better assistance, then visit mywifiext.net website. We have a well-experienced team of professionals who put all their efforts to help the customers. They are available 24/7 hours; feel free to contact us anytime. We have the best technicians using the best possible techniques to resolve all the issues related to the Netgear Router. Get a one-end solution from us today!
1 note
·
View note
Text
Mywifiext.net Issues of Netgear Wifi Range Extender
When you get the Netgear wifi range extender, you first unbox it and set it up on mywifiext.net. The Netgear wifi range extender is a device that is used when you are not getting enough wifi range in the whole house or you are not getting wifi signal in some areas at all. In such cases your wifi router doesn’t work even when kept at different positions and for this, you can go and get the Netgear wifi range extender. When you configure it you can move it around and place it at a position where you get the maximum wifi signals. But sometimes you might face some issues while setting up your Netgear wifi range extender on mywifiext local.
Issues Faced on Mywifiext.net
The site Mywifiext is a local web address designed specially to configure the extender. It is not an ordinary web site which is why when you try to open it without connecting the extender, it will show errors. Some of the errors that you might face when accessing the Mywifiext.net site can be –
· The internet connection is slow
· The web address you have entered is incorrect
· The web browser is not up to date
· Server not found
· Network not connected
· Connection not found
These are some of the issues you might face and the errors that may be shown on your screen when you try to access mywifiext.net. In order to eradicate these errors you need to follow the pre-requisites to setup extender. These pre-requisites can be like this –
1. Place the extender close to the main router
2. Connect it well, all the wires should be tightly fit
3. The web browser should be fully updated to the latest version
4. The internet should be working well
5. The green power LED should be lit on the extender if it is not lit up switch off the extender and switch it on again
6. You must have two browsers, in case one isn’t compatible
7. Try entering the extender’s default IP address 192.168.1.250 in case the site doesn’t open
Mywifiext Extender Setup
You can set up your wifi range extender in two ways. One is the manual way and the other is via WPS (Wifi Protected Setup). The WPS method is very easy and simple, it doesn’t require you to do anything because the extender sets up itself. For the manual setup, you can follow these steps given below –
1. Plug your extender and connect it
2. Open your device
3. Launch a web browser
4. Type the web address www.mywifiext.net
5. Login with the default credentials that is username – admin and password – password
6. Create an account if you haven’t created one already and then login
7. After you log in, you will be redirected to the setup page
8. Follow the instructions on the setup page
9. Update the firmware of the extender if needed
10. Register your device by filling up the required fields
11. Finish the setup after saving the settings by clicking on finish
Customer Support
While accessing the mywifiext.net site, you can go through the solutions given above for the many errors you might face. You can also try resetting the extender by pressing and holding the reset button. Else call the customer support team on the toll-free number 1-855-394-0444 and get expert guidance from professional tech personals.
#Mywifiext#mywifiext net#netgear support#netgear router setup#netgear extender setup#wifi#wifi range extender
1 note
·
View note
Link
Setting up Netgear range extender is very simple and can be carried out with some simple steps. Steps for Netgear range extender setup differs a bit from device to device. Here is this article we will discuss the step by… Continue Reading →
0 notes
Photo

It’s an IP page from where the router and the wifi extender can be accessed and the setup of the Netgear Extender can be done. It’s basically an admin page or a login page where one can log in and register their extender or router.
Visit here: 192.168.1.250
#192.168.1.250#mywifiext.net username and password#login to netgear wifi extender#http://192.168.1.250#mywifiext.net admin#mywifiext.net netgear setup#mywifiext.net new extender setup#Netgear new extender setup page#www.mywifiext.net setup/newextendersetup#configure my wifi extender
2 notes
·
View notes
Last Seen Blogs

putrid-sentiments
Your Most Recent Sigh

locksmithhelotestx-blog
Locksmith Helotes TX

miccmiccbungeee
ALIXE

pinoypress
Pinoy Press

ask-t3d
Slug Guy