Don't wanna be here? Send us removal request.
Text
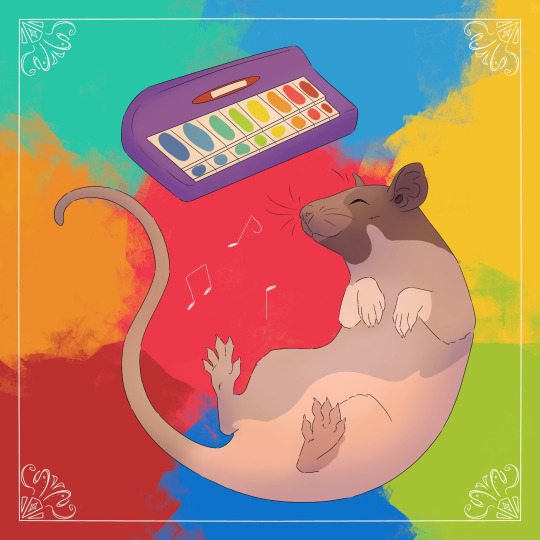

BABES WAKE UP TODAY’S A NATIONAL HOLIDAY 🌈🐀
🎶NEIL IS BANGING OUT THE TUNES🎶
My (old) contribution to the beautiful day that is april 13th
Keep at it with the tunes.
58K notes
·
View notes
Text


• Dress.
Designer/Maker: Norman Norell
Date: 1952
6K notes
·
View notes
Text
Custom Bins with CaDoodle
This tutorial assumes a basic familiarity with Zack Freedman's Gridfinity system and no familiarity with CAD software. Here's what you'll need:
Inkscape is a Free And Open Source vector illustration program. Vectors aren't really images themselves so much as a running list of defined points and lines on a coordinate plane that a computer can then display as an image. Because these are simply points on a plane, digital vector images can scale infinitely. These points also map to physical
CaDoodle is a Free And Open Source CAD program loosely based on Autodesk's tinkerCAD. Using boolean operations, you can build out basic shapes. CaDoodle can also use OpenSCAD plugins, and has the Gridfinity plugin available to use out of the box.
Start by tracing the objects you want in the orientation you want onto a piece of paper, keeping your pencil as straight as possible (I've used a pen for this entire process so that you can actually see it, but you really should use a pencil). If you have a flat bed scanner, simply put your object on the scanner. This will give you a far more accurate shape to work with and skip the scaling process.
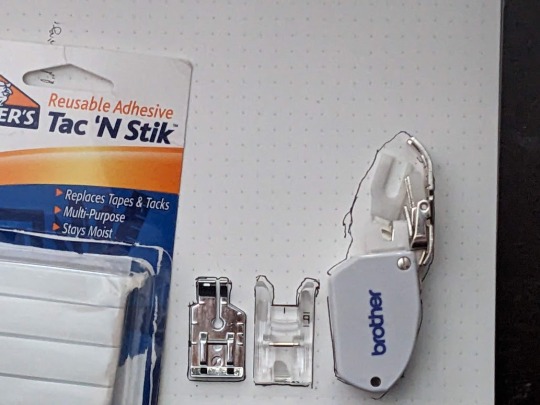
You may find that a little sticky tack to hold each object in place will help. For the two smaller presser feet, I've tried to get as close as possible to the edges. The walking foot, however, has a moving arm that feels so delicate and I don't want to mess it up so I just got the general shape.
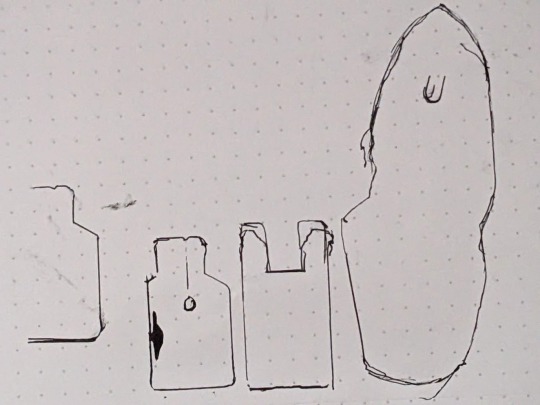
I also marked the hole in the center of the small foot on the far left, and I marked where that arm sits on the presser foot. I then removed the feet from the paper and went over the messier lines, refining them a bit into something neater. After that, I held my phone as level as I could and photographed the tracings. The dots on my paper are 5mm apart, so I can use that to scale the photo later.
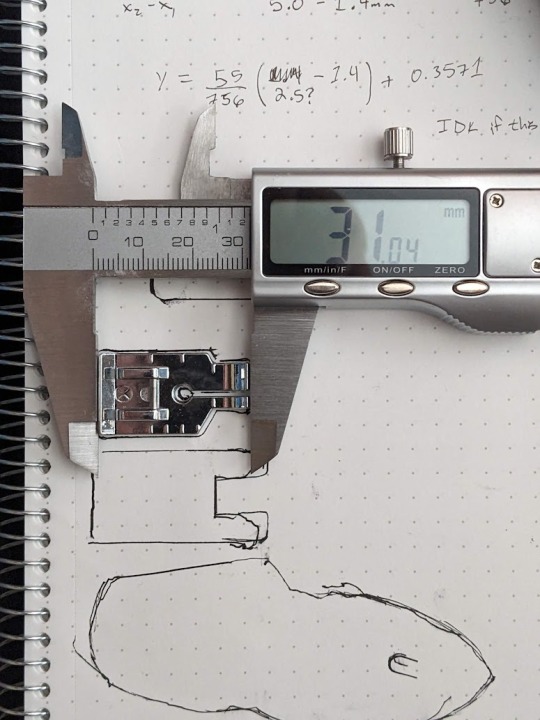
I also made sure to take a BUNCH of reference photos with calipers for every object.
Next, it's time to load up Inkscape. I paste my photo of my traced lines into inkscape and use the Measure tool (M) to check on those dots

They're about 15mm apart, so the photo needs to be shrunk to 33.33% of its original size to get them down to 5mm apart. Use the Selection tool (S) and click on the photo. Then, at the top of the screen, you'll have some controls for altering the size of this object.

Changing the units from "mm" to "%" will have you working in percentages. Making sure the padlock icon between the W and the H numbers is closed will ensure that the whole picture scales evenly at the same time. Then enter 33.33%, and press enter. After this, I'm able to check the distance between dots both horizontally and vertically at all four corners of the image and confirm that it's scaled properly. If you used a flatbed scanner, you'll be able to skip this step. Next, select the Pen tool (B) on your keyboard and begin tracing one object.

Click on corners to pivot. Cut off rounded edges with a straight line, as we're going to go back and curve them after the shape is closed. Once you're done, you can select the Node tool (N) to refine the shape. Dragging individual nodes moves them, while clicking and dragging on lines will cause them to curve.
After your tracing looks the way you want it, go to Edit>Preferences>Behavior>Steps and change the "Inset/Outset by" setting to 0.5mm:

Close this window and select your shape. Then, go Path>Outset. This expands the entire path by half a millimeter so your object has some wiggle room. This step is optional, of course, and some people prefer the aesthetic look of a perfect fit, but for your first bins this will increase the chances of your finished product being usable.

At this point you can continue tracing other shapes on the same document if you wish. MAKE SURE YOU SAVE your file as an .SVG as you go.
Next, open CaDoodle. At this point I recommend that you create a fresh CaDoodle document by clicking on the CaDoodle logo in the upper left corner and selecting "New Doodle." Next, click the "Import" button in the upper right corner and select your .svg file that you made in Inkscape. CaDoodle will then load up all your shapes for you, each of which can be moved around independently. They'll even keep whatever colors you were using in Inkscape!

The objects we're working with represent holes. You don't want the recess your object sits in to encompass it completely, because you won't be able to get it out again easily. Set each object's thickness to match the thickness of the object you're storing, minus about 5 to 10 millimeters, by clicking on the height node at the center of the object and either dragging, or manually entering a number.

Then, generate a Gridfinity bin. In the right-hand pane, choose "OpenSCAD_Plugins" from the drop-down, and click on the Gridfinity bin to drop one into your document. A default bin will then generate.

You have tons of options here but we're just going to use the default bin for simplicity-- 42x42x42mm, with no dividers.
Next, select your shape. Right now this shape is a solid that will be printed as-is, and that's useless to us. Click on the "hole" property to turn it into a negative we can cut out of the bin.

Next, either press C on the keyboard or click the magnet icon in the upper right to activate Cruise. This will let you place your shape directly on top of the surface of the bin.
Next, select the black cone icon above the Z axis node. This value should be equal to the height of your gridfinity bin (so 42mm for 6 z-axis units, or in my case 14mm for 2 z-axis units).

Subtract the thickness of your object from this number to sink it into the bin. Mine was 5mm thick, so I want this value to be 37

Finally, with your object still selected, hold down shift and click on the bin. Then, click on the "GROUP" button in the upper right corner, or simply press "G" on the keyboard.

And that's it. This bin is ready to export as an .stl

You can also use the basic shapes in CaDoodle to add finger holes or create recesses for less specific objects. For example, a short cylinder on its side is all I need for a spool of thread, and will serve my purposes better than a custom shape.
0 notes
Text
Preparing a Freesewing pattern for laser cutting using Inkscape
I don't really know the best place to put this but i figured a tumblr post would at least be mobile-friendly and easier to move once I do know lmao.
Other vector editors will work, but Inkscape is free and open source, and even if the software updates and changes, you will still be able to download version 1.4, which I wrote this tutorial using, so you can still follow along. It will also work on Windows, Mac, and most Linux distributions.
This tutorial assumes a basic familiarity with your specific laser. I have a very cheap Creality Falcon 5w laser with no safety features at all, so I always cut in a ventilated space that pets and people cannot access easily and wear a respirator and eye protection.
This was written with LightBurn as the intended output program for your laser. I strongly recommend at least giving the Lightburn trial a shot. It's expensive at $99 but you only pay for it once-- Linux support will be dropped after version 1.7, but even that version is still very robust. The Perforation Mode setting is what I use to mark where seams go, so if you don't need this, you can skip almost everything that mentions the seam line.
Those who already have familiarity with generating FreeSewing patterns can skip to step 4.
Dial in your FreeSewing measurements. Before you start a full project in FreeSewing, you should always make sure your measurements are correct. Think of FreeSewing less like a pattern website and more like a giant calculator. You're drafting from scratch every time, not using well-tested ready-to-wear patterns, so you need to approach this like drafting (just without all the math and specialty rulers). Generate something quick and fitted-- titan for checking pants, a very basic sven for your torso and sleeves, bella or noble for tight fits to the torso. Use paperless mode to cut them out of butcher paper or print them out for a quick tape up, and adjust if necessary. Then do a draft cut out of old sheets, clearance bin fabric, or whatever you can find at the thrift store, using pins as closures. I also strongly, strongly recommend asking in the FreeSewing discord's #need-help channel if you have any questions at all, even if it's just for a quick sanity check, BEFORE you get frustrated. The community is extremely helpful and kind and the original designers of patterns tend to be active members. Once your measurements are right, you'll be able to do a tape-up and then a cheap-fabric-draft of the design you want.
Pick a design and adjust Core Settings. For this project, I'm going to be using yuri since it's got a lot going on. As a laser user, the very first thing you'll want to do is make sure that your User Experience option is set to "Give Me All Powers, But Keep Me Safe". Once that's done, you'll be able to open up the Core Settings options.

Change the "Include Seam Allowance" option to "Yes." This will cause the "Seam Allowance Size" option to appear. Change this to your desired seam allowance. Since I am sewing for dolls, I use a 6mm (roughly 1/4") seam allowance. If you prefer imperial, there's a "Units" option a little further down. Selecting the "Paperless" option will display key measurements in your selected units. Checking your physical body against these measurements will help make sure the pattern you're about to cut will fit correctly. Disabling the "Details" option can be useful for laser cutting later, but for now leave it set to "Yes." The "Expand" option is only used in a few patterns, but if you're doing 100% of your cutting on the laser, you'll need it set to "yes." Since I am sewing for dolls, I also need the "Scale" setting to be lowered. This does not affect the pattern pieces, but it makes the text smaller so that it's easier to read.
3. Adjust your style choices. Increasing the Ease on a pattern will make it looser-- FreeSewing tends to skew towards a very custom fit, but if you're used to Ready-To-Wear clothing you may prefer things to be looser. If you ever feel like the pattern looks weird, you can use the cloud button on the left to save all your adjustments, and then generate a new pattern using one of FreeSewing's curated measurement sets.
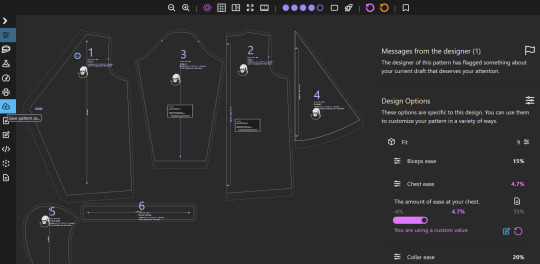
People tend to be shaped very differently so things might not be as strange as you think.
4. Export to Inkscape. Once you're done and checked everything, use the Download button on the left to Export the pattern. You'll get a list of options. Under "Export for Editing," click the "SVG" button.
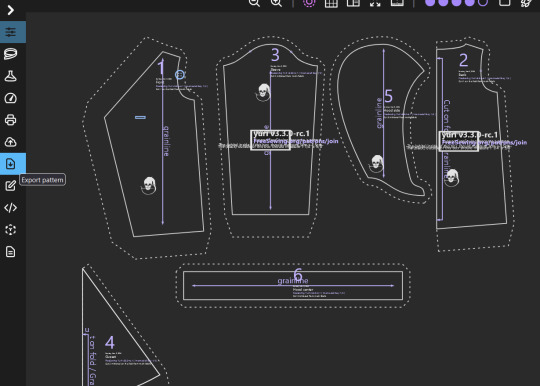
An .svg file will download. If you're making a yuri, the file will just be called "Freesewing-yuri.svg" so take the time right now to rename this file to something more descriptive, then open the file in Inkscape.
5. Set up your inkscape work area.

Once in Inkscape, you can use your scroll wheel or use a pinch gesture on your track pad to zoom in and out. We're mostly going to be making use of the right-hand panel. Use the two dots on the outer edge of this panel to expand it out a bit, then use the down arrow in the upper right-hand corner of the panel to make sure you have tabs for "Layers and Objects," "Fill and Stroke," and "Path Effects" visible. Then, go to Edit>Preferences>Behavior>Steps.
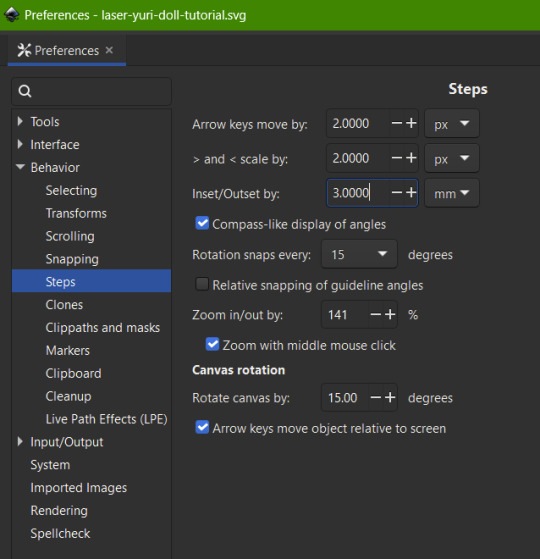
Set the "Inset/Outset by:" setting to half of your FreeSewing seam allowance. My seam allowance is 6mm, so I set this to 3mm.
6. Orient pieces with the grain line going the same way. Don't worry yet about whether pieces will fit on your laser bed-- this step simply eliminates the need for the grain line marker and will make that step easier when we get to it. For yuri, the only piece with a grainline that isn't vertical by default is the hoodCenter part. Select the "Layers and Objects" tab and expand the "fs-container" Group. Then, from the list, click on "fs-stack-yuri.hoodCenter" part-- this will select the part, popping up arrows that will allow you to stretch the part. We don't want to stretch it, so click on the part itself-- any of the lines or text will do-- which will change the selection box to have curved arrows at the corners.
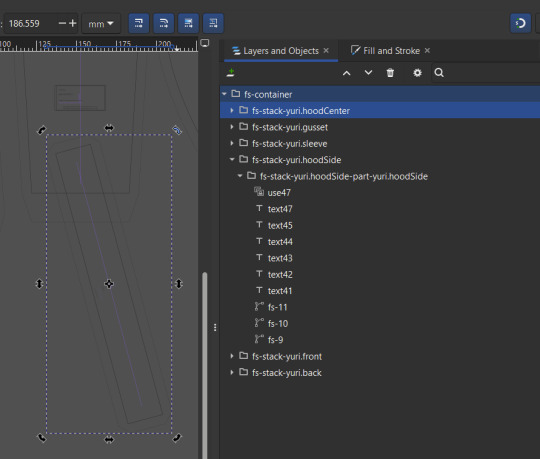
We want to make sure we're rotating at clean angles, so hold down the ALT key while clicking and holding one of the curved arrows and dragging it until the piece is fully rotated. By default, the ALT key will snap to 15 degree angles, unless you changed this in step 5.
7. Clean up each pattern piece. Select the "Layers and Objects" tab and expand all the Groups in this window. Decide on a piece to start with and click on its Group. This will select the object and make it easy to find so you can zoom in. Select each object inside the group to find them and determine what they are

7a. Delete the grain line by selecting it either in the document or in the Layers and Objects window and pressing the Delete key. This is usually but not always the first Line object in the group (in the above screenshot, it's "fs-11"). Select it first to find it and make sure you're deleting the right thing.
7b. Next, we need to delete all the text, but there's sometimes important information there. Zoom in on the text to read the cut instructions.

You can then double-click on the part's Group name to rename it, and add the cut instructions into the group name. The Group name is only for your benefit, so you can also clean up the "fs-stack-yuri." prefix if you like. Once that's done, select all the text layers and delete them.
7c. Delete the FreeSewing logo and the two boxes for checking scale that appear on some larger pieces. Save your document after cleaning each piece!
8. Prep your cut and perforation lines. Doing this now instead of at the end will make transferring marks easier and more accurate. The purpose of this step is to get your file ready for transfer into LightBurn. By default, LightBurn will try to honor any Layers set in your svg document, but FreeSewing has these nicely laid out Groups that are already well-organized, and we want to be able to keep each seam line attached to its cut line, so we're going to fall back to LightBurn's backup method of determining layer, which is by line color.
8a. Pick a piece to start with that you'll base all your other pieces off of. Select the dashed line. This is the line we're going to want to cut along. LightBurn has thirty different colors it can use as layers and store different cut settings in. I tend to leave Layer 00 black open for testing materials, so I store my perforation data for fabric on Layer 01 blue and my cut data for fabric on Layer 02 red. These are arbitrary and you can pick any of the thirty layers you want for this by using a close enough color.
8b. Select your cut line. This will be the outermost line, and by default FreeSewing makes this a dotted line. Then, click on the "Fill and Stroke" tab. There will now be three sub-tabs underneath this. You shouldn't need the Fill sub-tab as it will already be set to "no fill." The "Stroke Paint" sub-tab should be set to "flat color" in the upper left corner. Below, you'll have a robust color picker with options to switch into cmyk or rgb mode, as well as an option to open a color wheel if you prefer. You just need to get it close enough to the layer color you're using in LightBurn. The HSL values in this screenshot will always map to Layer 02 red.
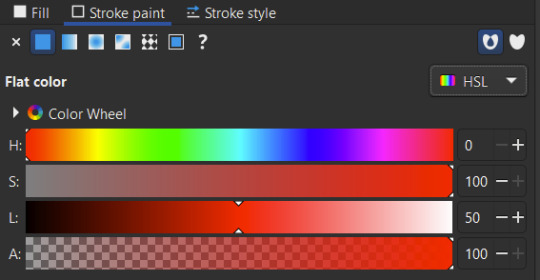
Optionally, select the "Stroke style" sub-tab and change the "dashes" drop-down to a solid line. LightBurn cannot differentiate between solid and dotted lines and discards that data, so this is purely a personal choice.
8c. Repeat step 8b with a different color for the seam line. This will be the inner line on a part, and by default FreeSewing makes this a solid line. Choose a strong blue color (such as HSL value 240,100,50,100) to map to Layer 01 blue.
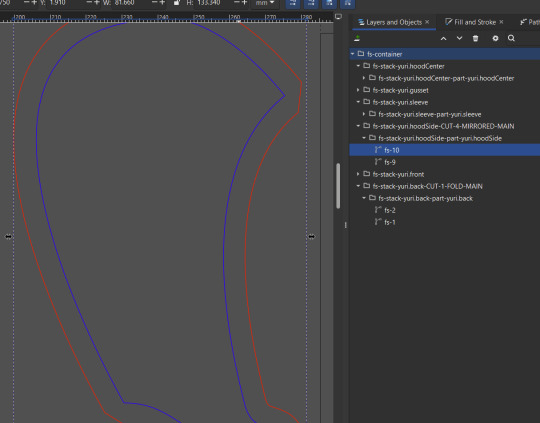
If you're having trouble selecting lines, it might be helpful to use the Node tool, which is right below the select tool on the toolbar. The default shortcut key is N.
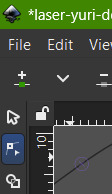
It may be easier to select individual lines between different Groups with this tool.
8d. Apply this same line styling to all your other pieces. Inkscape includes a way to do this very quickly. Start by selecting your colored seam line and press CTRL+C to copy it. Then, select the seam line on another piece and press CTRL+SHIFT+V to paste only the line styling. Repeat with all other seam lines, then go back to the cut line and press CTRL+C to copy that and CTRL+SHIFT+V to paste the styling to all the other cut lines. Save your progress.
9. Add stitch guides for hems. This entire step is optional, but I prefer to have it, and you may find the techniques shown to be useful. Select the stitch line of a piece that has a hem, such as a sleeve, and press CTRL+D to duplicate it. Then, click on Path>Inset. This will move the duplicate inside your seam line by half your seam allowance if you set your Inset/Outset correctly in step 5.

9a. We only want to keep one segment of this line, in our case the one parallel to the cuff. Switch to the Node tool and select the far right-most point of the line you want to keep. From the Node tool's ribbon, click "Break path at selected node," then press the Delete key.

This should delete the part of the line past the one we want to keep. If it does not, press ctrl+z and manually click on the point again and press Delete one more time. Keep deleting nodes until only the line we want is left.

9b. Switch back to the Select tool. Hold down Shift and use one of the horizontal arrows-- not the diagonals-- to stretch the line out to the cut line.
9c. Use the same method as in 9a to delete the line that marks the bottom edge of the garment. This lines up exactly with where the edges of the hem start to taper inward, so you can recreate this line after cutting by simply folding from one corner to the other.

You can also use this method to shorten the amount of fabric in the hem. By default, FreeSewing puts three times your seam allowance in the hem, meaning your final hem folds up into four layers of fabric. This can be way too much for things like dolls or when using very thick fabric, or if you want to finish with a binding or facing instead of a hem.
10. Transfer any notches. There are a couple of different ways to do this, the simplest of which is to print out a copy of the pattern, cut out the piece along the seam line, and then fold or cut the pattern piece as needed to create templates you can trace onto your fabric with chalk or a frixion pen. However, you can also get away with doing most of it paperlessly. In yuri, the sleeve piece has two separate notches, which you can see better by zooming in:
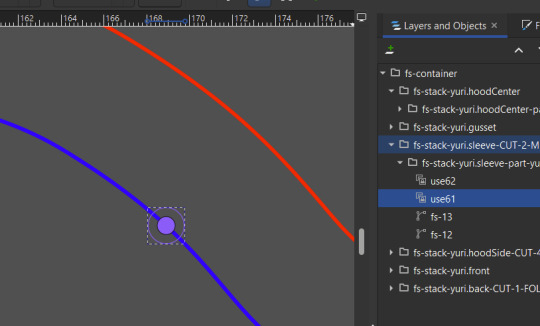
Select the Star/Polygon tool from the toolbar on the left or by pressing * and use the following settings in polygon mode:
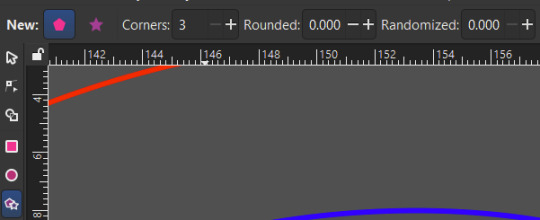
This will generate a triangle. Place one that's about the size of the notch marker, then switch back to the Select tool by clicking its icon or pressing S, and move it so that it's centered over the notch, and rotate it so that it's pointing outward toward the cut line. Don't worry about the line style, it won't matter.

Slide the triangle in the direction it's pointing until it's sticking out of the cut line. It doesn't have to be precise.

With the triangle still selected, hold down Shift and select the cut line. Both objects should now be selected. Go to Path>Union at the top of the screen, or press the CTRL key and the + key (or CTRL+SHIFT+=) to merge the two. The triangle should take on the style of the cut line if it doesn't already have it. Save your progress.

The other notch is marked differently to indicate that it needs to be distinct from the first notch. To do this, simply add another triangle and continue holding shift while selecting it include it in the Union.

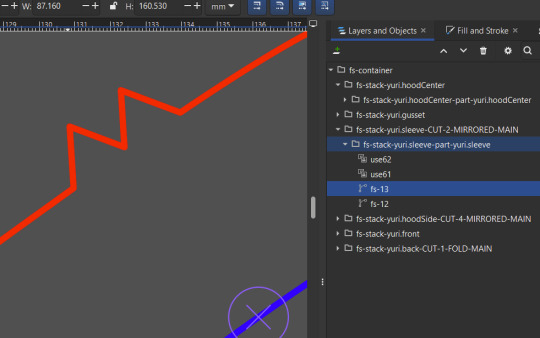
You can see in the above screenshot that these are not perfectly lined up. This is fine, as these sleeve cap notches don't need to match up perfectly with the arm holes; they are just to indicate which side of the sleeve cap touches the front of the jacket, and which side touches the back. Other patterns may have similar needs, so plan accordingly after reviewing the pattern's instructions. Once your notches are marked in the seam allowance, you can delete the originals. Save your progress.
11. Add any other marks. Try using a circle or a dovetail, or an inverted notch cut into the seam allowance for marking things like stitching or gathering stop/start points. Remember that anything in blue will be done in perforation mode, so you can even try adding things like letters in the seam allowance. Buttonholes will be cut open after they're sewn, so you can safely use a perforated line to mark where those go. If you're cutting scrap fabric for a rough draft, there's nothing stopping you from using perforations for every single pattern marking. Save your progress.
12. Unfold any pieces cut on the fold. While it's possible to line up pieces on a laser cutter on a fold by simply cutting a marker line on your base, lining the fold up against it, lining up all your pieces along that line in LightBurn, and then excluding the line from the final cut, it's a lot more precise to have these pieces unfolded. Make sure this is the very last edit you make! Inkscape's Live Path Effects feature makes this whole process very quick.
12a. Select the cut line in the Layers and Objects tab, then open the Path Effects tab. From the drop down, select Mirror Symmetry.
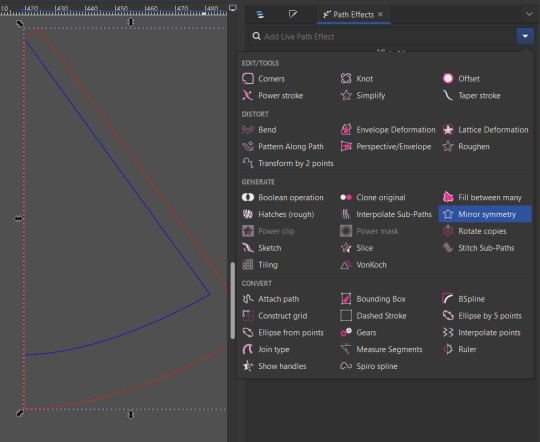
12b. By default, the piece will be mirrored as if flipped along the highest X coordinate of the piece. FreeSewing always puts the fold on the left, or at X coordinate zero, so it will appear backwards.

To fix this, simply set the X value of both the start and end points of the mirror line to 0. The default values are automatically generated, but if you get stuck, you can also get the correct result by changing the Start point's Y coordinate to zero, and the End point's Y coordinate to 1.

12c. Once the piece is correctly mirrored, check both the "Fuse opposite sides" and "Fuse paths" boxes to erase the center line. If the center line is still present, increment both X values by 0.01 until it disappears. Then, from the drop down in the upper right corner next to the trash can icon, select "flatten" to merge the two into one continuous path. Save your progress. Repeat this process with the seam line.
13. Lay out your pieces. At this point, we can be done in Inkscape, and the .svg file can be imported into LightBurn. However, you can do all of your layout work ahead of time in inkscape so that there is no work to be done after importing.
13a. Set your document size to your laser's bed size. Go to File>Document Properties or press Shift+Ctrl+D to change the document's width and height. At this point, you may want to save an extra copy of your document so that you can prepare multiple layouts if not all of your pieces will fit on your bed at the same time.
13b. Read through the pattern's Cutting Instructions on FreeSewing to make sure you're cutting the correct quantities. To cut multiples of a piece, first select the highest level Group of the piece you want to duplicate to make sure all parts of it are selected, then press CTRL+D to duplicate it. Use the Select tool to drag the duplicate out from under the original.

To create a Mirrored version of a duplicate, press M to flip the selected object horizontally. Make sure that you remove any marks that shouldn't be duplicated-- in yuri, the button hole only goes on one of the two front pieces.
13c. Rotate and move your parts to fit them inside the laser's cutting area and reduce fabric waste as best as you can. Remember that we already arranged the pieces with the grain line running the same way, so make sure any rotations are done by 90 degree increments for normal wovens, and 180 degrees for stripes. If your fabric has a clear right-way-up, you may not want to rotate any parts at all. Save your progress.
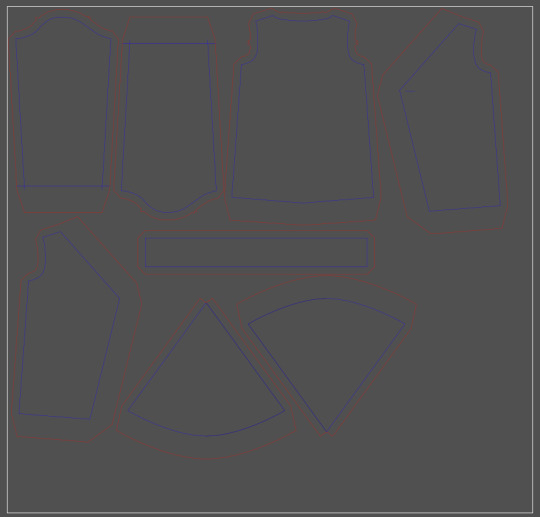
14. Save as an .svg, and import into LightBurn.
0 notes
Text

Julien Fournie Fall 2023 Couture
292 notes
·
View notes
Text
“If it’s about a dad dating other dads, how come some of them have kids???”



604K notes
·
View notes
Text
a picture's worth a thousand kirbs

as mentioned in the pinned hub post yesterday, new print is available on [redbubble] of the first 1000 days of kirby all crammed into one little house :) (this is why I started working on everything in july)
you can also get a .zip file of the first 1000 individual days of kirby on my [kofi] for $1 (personal and creative use only) (these ones are unedited except for watermarks on a couple commissions/for-print designs, so they still have the bgs and all)
131 notes
·
View notes