
Statistics
We looked inside some of the posts by theanalogousanalog and here's what we found interesting.
Average Info
Notes Per Post
0
Likes Per Post
0
Reblog Per Post
0
Reply Per Post
0
Time Between Posts
12 days
Number of Posts By Type
Text
5
Video
11
Photo
1
Last Seen Tumblr Blogs


Fun Fact
1,644 Tumblr posts in 1 second.
Text
MAX MSP FINAL PROJECT OVERVIEW
Introduction
For this project, I wanted to create a song that I could perform live using mainly guitar and field recordings. Many use Max/MSP to make intricate beats and synthesisers, I wanted to go against this by layering various recordings that would span the entire frequency spectrum, this comes from my own taste in music, I dislike hearing heavily produced and polished music and favour sounds that are muddier but have more character.
Future Development
I really enjoyed this technique of making music, it expanded my ability to manipulate organic sounds and improved my skill to make music using none musical samples. I would like to further use these tools I’ve created to aid the music making process in future. For this project, I decided to export the raw mix as I wanted the whole project to be created solely in Max but in future, I will use the individual stems to further process in Logic or Ableton.
Self Evaluation
Overall, I was happy with the outcome of this project. I was pleased with my final composition and enjoyed playing it live, I decided to keep the visuals quite basic as I wanted them to match the simplicity and ambience of the audio, if I was going to make similar projects in future I would like to explore more of Jitter and use it as a writing tool to inspire the music rather than just making visuals to compliment the audio. I also think that in future, if I make another project like this in Max/MSP I will create the composition, export all of the parts and then re-import them to a patch with little processing happening live, this will help prevent any lag and make sure my CPU isn’t strained too much, minimising the likelihood of Max crashing or any other issues occurring.
References
VIDEOS -
• John Reed - Max 7 Tutorial # 11: Matrix Control (2015) https://www.youtube.com/watch?v=yh7zm3371aY&t=1166s
• MUST1002 - Max 7 Tutorials: 8.1c Effects: Delay—recursive (feedback) delay (2017) https://www.youtube.com/watch?v=rt13YUkBoJc
• Ned Rush - New Persons Guide to Jitter (max msp) video playlist (2014) https://www.youtube.com/watch?v=aUWnor15_qM&list=PLerLtHwIDOSXFXbeHuIplwJIxnS9PFcbL
• MUST1002 - Max 7 Tutorials: 7.1 Basic Drum Sequencer—making your own objects (2017) https://www.youtube.com/watch?v=jVVbaJBdbuA
BOOKS -
• Alessandro Cipriani and Maurizio Giri - Electronic Music and Sound Design – Theory and Practice with Max/MSP volume 1 (2010)
• Alessandro Cipriani and Maurizio Giri - Electronic Music and Sound Design – Theory and Practice with Mac/MSP volume 2 (2014) • Paul Virostek – Field Recording: From research to wrap an introduction to gathering sound effects (2013)
• Hugh Davies – Creative Explorations of the Glitch in Music (2004)
• T. T. Opie – Creation of a Real-Time Granular Synthesis Instrument for Live Performance (2003)
• Kim Cascone – The Aesthetic of Failure: 'Post-Digital' Tendencies in Contemporary Computer Music (2002)
PATCHES -
• BAIKAL_M – Launchpad Step Sequencer (2009) https://cycling74.com/forums/simple-step-sequencer-for-novation-launchpad
• Freida Abtan - Video_Out (2011)
• Freida Abtan – Amplitude Modulation (2013)
• Freida Abtan – Panning Sounds (2013)
0 notes
Text
Max MSP Final Project Week 9
This week I started to wrap up the last bits of my production. I used sfrecord~ objects to export the song in real time. I both exported this as a stereo mix and each separate instrument individually. This would enable me to be able to send stems for others for remixing. I also set up my Jitter visuals and exported those, I had some issue exporting in full HD in real time as the jit.record object was only allowing me to record up to 5fps due to the intensity of the effects. I then decided to record the visuals none real-time and sync up with the audio afterwards. This was effective, but I found when I uploaded to YouTube and Vimeo, the compression really degraded the quality of the footage. I tried many different ways of exporting to different bitrates and various other settings but in the end, using the Quicktime screen recorder seemed to work the best.
0 notes
Video
tumblr
Max MSP Final Project Week 8
This week I continued on with my launchpad sequencing whilst simultaneously trying to work out how I would play the song live. What I was doing with the launchpad and midi keyboard was really interesting sounding, but it just didn’t fit with the rest of the song. I decided to make a bassline by pitching down a sequence I made with the launchpad. This worked perfectly with the minimalist ambient sounds of the rest of the song.
I then spent a few days practising performing the song as I wanted to be able to work out a basic structure of what I would play live but give myself the flexibility to change it on the fly so I could play it differently depending on the vibe of the show.
At this point I decided to add some visuals, I originally wasn’t going to add visuals but at this stage, I thought it could really add an extra element to the live performance. I didn’t want the visuals to be too complex as the music itself is atmospheric and dreamy, I wanted to create visuals that would complement the piece and not be a distraction. I decided to use a video feedback loop I had created using analogue video equipment to be the basis of the piece. I then ran it through a series of different effects including jit.rota, a fractal effect and the Vizzie video scramblr. I made these effects vary throughout the piece by automating the effects in different ways. This allowed me to have changing effects that would be subtle and compliment what I had already done musically. Finally, I added a fader which would fade from white at the beginning and to white at the end using the NanoKontrol. Signally the beginning and end of the song.
0 notes
Video
tumblr
Max MSP Final Project Week 7
This week I focused on creating my midi setup ready to play live. My main controller was a Korg NanoKontrol which I would use to fade in sounds and effects. I initially routed these to affect a lot of different parameters within the song but decided to stick with just controlling gain objects. This was mainly because the possibilities would be infinite if I were to control a myriad of parameters live which I believe would result in a more experimental performance than intended. I liked the restriction of setting everything up and just using the faders to bring in sounds and effects and it definitely suited the song a lot better.
At this stage, I started to build some more polyrhythmic guitar sequences using the matrixctrl. At this time, I also purchased a Novation Launchpad as I thought it would be a great way of playing these kinds of sequences live. This really aided me in a different way than expected, I mainly bought it as a performance tool, but I found it really helped me as a writing tool. It took a while to set it up with Max/MSP as it wasn’t as straight forward as most midi devices but once it was all up and running I began to make some interesting sequences. I also then incorporated my midi keyboard into the mix which allowed me to change the pitch of a sequence using the pitchshift object. This was brilliant as I could lay out a sequence using the launchpad then play it like an arpeggiator on the midi keyboard. I plan to further experiment with this and try to write an extra part to my song next week.
0 notes
Video
tumblr
Max MSP Final Project Week 6
This week I decided to make my project more interesting by adding some extra sounds that would work as sound effects to compliment the rest of the song. I tried a number of different things but in the end, I created 3 different effects. Firstly, I created a spinning sound that I hear a lot in IDM music. I used a sample where I scrapped a knife along a rail and set the playback frequency to between -30 and 30 over the space of 10 seconds. This would mean that the effect would start the sample really fast in reverse, then as it hits 1 it will play back at normal speed then get faster as it goes towards 30.
Secondly, I created a recursive feedback delay effect which I have heard a lot on the more experimental side of electronic music recently. I wanted to create an effect over the hi-hat with a variable delay which would also change over time. I decided to pan these two effects in opposite directions in the audio spectrum, this would allow for an interesting and different effect on each side of the mix. Finally, I added an extra rain effect that would pan quickly from left and right. All of these effects are made to subtly increase interest in the song and are used to fill out the audio spectrum rather than just being straight down the middle of the mix.
0 notes
Video
tumblr
Max MSP Final Project Week 5
This week I decided to jump ahead of my schedule a little, I planned on building the composition later on once I had created all of the sounds and instruments. I realised that it would make more sense to try to compile the sounds together to see what would fit and what would not. This also allowed me the space to see whether anything was missing and how the different parts would interact with each other. I started by introducing the Spindrift patch and my percussion patch. I decided for performance purposes that it would be best to draw each of the patches into a master patch with it’s own gain object allow me to use sliders on my midi controllers to control the output level of each individual patch.
I also worked on a number of other instrumental sounds based on the wave object patch I demonstrated in last weeks video. These all slightly vary depending on what I wanted to use them for,
I created a subtle glitching effect on a rain sample, a pitch shifting sample of a train announcer and a reverse effect on a metalic hit from one of my field recordings. This is all starting to work well together but there is still more that I need to do to fill out the sound.
I decided to try to rework a drum machine I made for a previous homework to add some extra drum sounds into the song, I thought using 808 samples would work well, a lot of the music I enjoy and am inspired by use 808 drums in a similar manner so it made sense to me. I amended the patch to enable me to instantaneously mute each drum track and also included a gain object so that I could fade each drum sound in and out.
0 notes
Video
tumblr
Max MSP Final Project Week 4 Continued
This week I also wanted to work out a way that I could manipulate buffers in glitchy and interesting ways. I discovered the Wave object which will allow you to take small segments of an audio sample and loop them, for instance you can take a 1 second sample and loop differing sized segments of it to create interesting glitch effects. I am currently working with the metro set to 4 seconds and the patch flips between playing a kick every 1/2 second to playing a random division from 1-500 ms. I have also used a pitchshift object that randomly shifts the pitch every 500 ms (only when the glitch effect is engaged). At present the sound is a bit too experimental for my project but I plan to tame it and work out a way I can utilise it in my project.
0 notes
Video
tumblr
Max MSP Final Project Week 4
This week I got deep into Spindrift and granular synthesis, the documentation on Spindrift is really helpful and I have a good understanding of how the object works, I have been taking the guitar recordings that I did in week 2 and running the via a buffer through Spindrift, manipulating the pitch, timing, reverse and various other parameters. I also learn’t from my reading a lot about how granular synthesis works, taking small grains of an audio sample and rearranging it, I am glad that I did this research as it came in handy whilst trying to work out Spindrift. Above is a video of me manipulating a guitar sample using granular synthesis.
0 notes
Video
tumblr
Max MSP Final Project Week 3
This week I spent more time researching into different objects and building some of my own patches, I did some research into ways that I could make interesting drum patterns and I discovered how I could make an interesting percussion beat using some of the field recordings. I wanted the beats to match the tempo but randomly change so I made a drum matrix object connected to a preset object that randomly switches between 4 presets. I then also made the metro randomly switch between 4n, 8n and 16n. I was inspired by musicians like Aphex Twin and Autechre to make these erratic and sporadic beats. Check out a sample video of this above.
This week I also started to look into different ways of creating granular synthesis, I came across a few different options but the one I found most interesting was called Spindrift, the reference material goes very in depth so I will have another look at it next week and try to make something with it.
0 notes
Text
Max MSP Final Project Week 2
This week I have been further experimenting in Max. I have decided to make separate patches for different parts of my drum machine as I want each bit to do something different(I plan to later combine these in a master patch). This involved playing around with a matrix and preset object as well as creating a global transport that has several metro objects sending different signals to different parts of my patches. This week I also recorded some guitar, this was a collaborative effort between a fellow guitarist and myself. I decided that it would be a good idea to record some of the musical elements a bit earlier on as it will give me some more idea of structure and the guitar manipulation can become a part of the song structure.
0 notes
Text
Max MSP Final Project Week 1
This week has mainly consisted of background research and field recordings. I read a book on techniques and the philosophy of field recording which was useful, I’ve also started to read a book about Max MSP and granular synthesis. I’ve managed to get a lot of field recording done over the past few days. This included recording around my office, on a train, on a bus and recordings that I made just out and about. Finally, this week I have looked into a lot of different Max objects, learning new things and new ways of exploring the possibilities of Max. This led to me creating patches experimenting with the objects I am most interested in.
0 notes
Text
Project Idea Proposal - Numerex7 Midi Sequencer
Concept
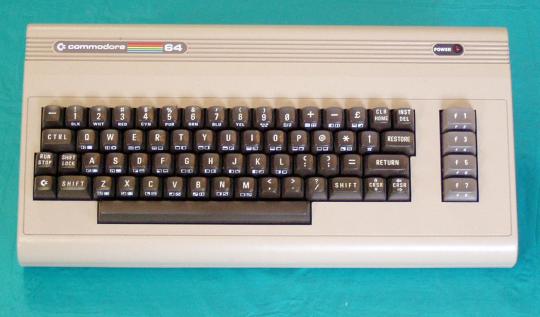
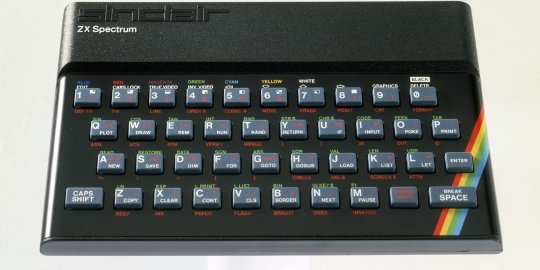
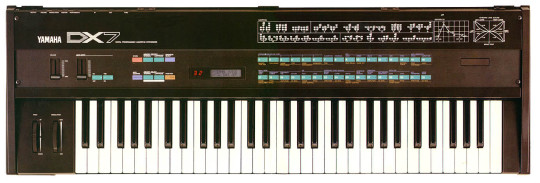
I plan on creating a device using a vintage numeric keypad which will control (via a ps/2 port) data feeding into a midi output which will then play sequences (a series of musical notes) on my Yamaha DX7 synthesiser. I was inspired by Evan Kale’s post on Instructables about making a Midi Controller with Keyboards. In this project Evan uses 4 computer keyboards to control a DAW as a midi input not unlike a music midi keyboard. I will be using this basic idea but instead of a music keyboard playing sounds using a DAW I will make a sequencer controlling a synthesiser. Below are some technological/design inspirations:
The Commodore 64 and Sinclair ZX Spectrum are both classic examples of devices which can produce music and visuals using a keyboard platform.
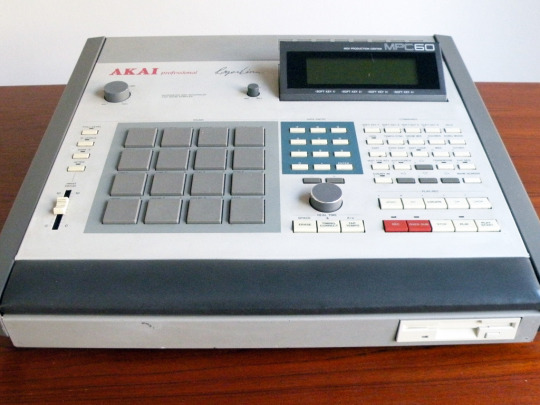
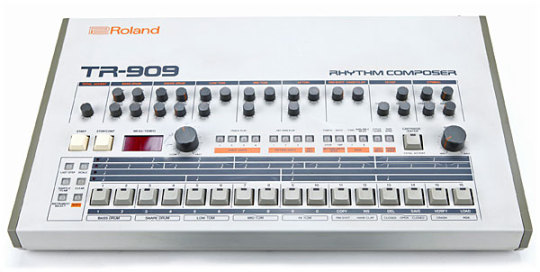
I was also inspired by classic music devices such as the Akai MPC series and the Roland drum machines from the 1980’s.
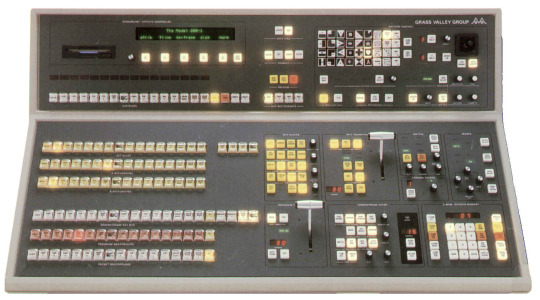
Finally, as a videographer with a collection of vintage video equipment I am also inspired by the retro vision mixers used by the BBC and other broadcasters in the 1980’s/90’s.

Electronics
What electronic parts do you need to create your project?
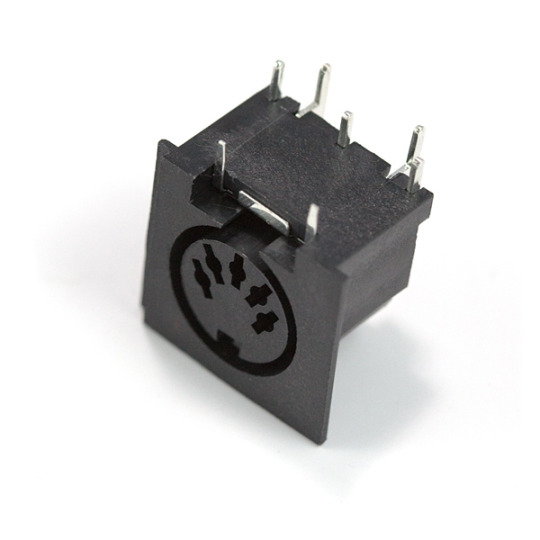
Input: I will be using a numeric keypad via a PS/2 port to control the output of the synthesiser. I will create a sequence of notes that are effected depending on which button I press on the keypad. This may have to be controlled by a laptop using the Arduino IDE but I would ideally like to make a standalone device.


Output: I will be outputting this data via a midi out port to my Yamaha DX7 allowing me to create music without having to touch the keyboard itself.
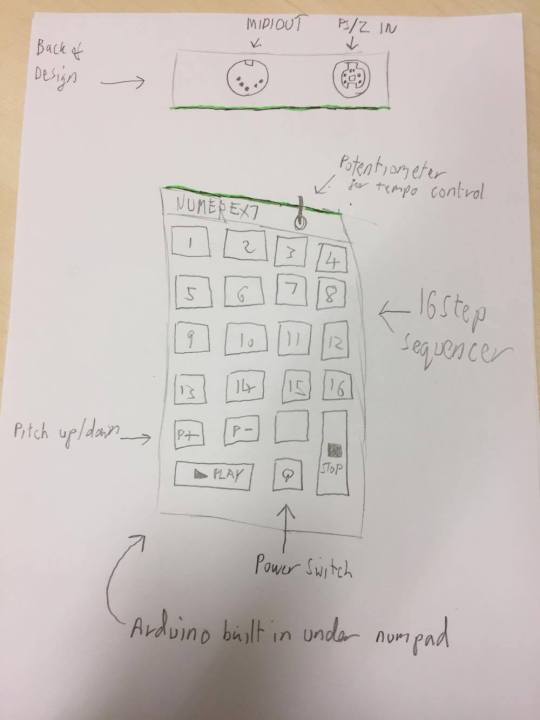
I would ideally like to power this project with a 9V battery so that I am not reliant on the power coming from the usb connection but I am going to work out whether that is viable further down the line. I am also considering including a potentiometer to adjust the tempo of the sequencer.
Design
in terms of the design I have a very specific idea for how I would like my project to look. You can see from the images I included as inspiration in my concept that I am going for a retro 80’s tech look. Using the casing of a numeric keypad and modifying it, maybe 3D printing an extra chassis to also contain the Arduino and the input/output sockets in one neat device.
As I have previously stated I will use the 3D printer but I am also interested in using the vinyl cutter to potentially cut stickers for the keys and name of the device.
The aim of this project is the create a simple device that anyone can get their hands on, the beauty of a sequencer is that you do not need to be able to play a musical instrument to program in simple musical patterns. Everyone know what a computer keyboard looks like and how to use it as an input device. This project will flip this idea on it’s head allowing interaction in a new and interesting way.
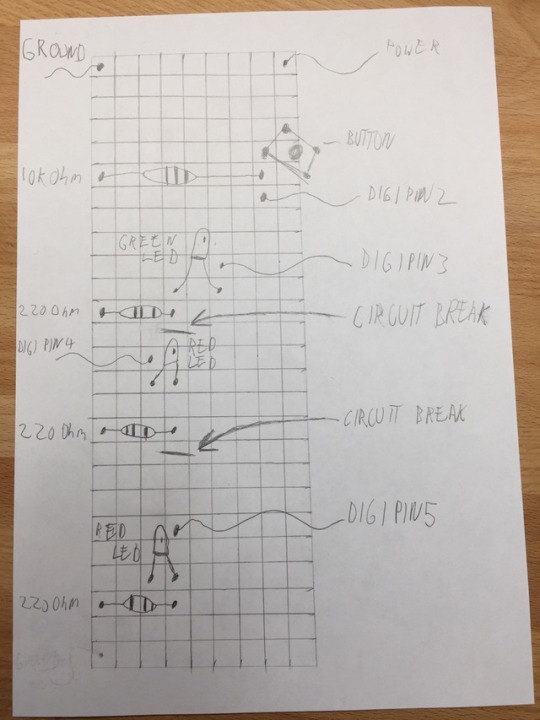
Here is a (very) rough sketch of the design I have in mind:
Minimum Viable Product
My mvp would be a device that can output midi data to the synthesiser using a simple series of buttons.
0 notes
Photo
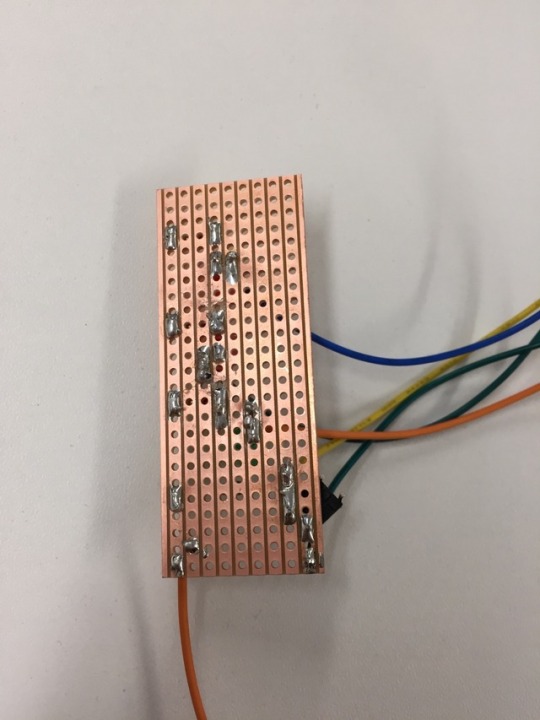
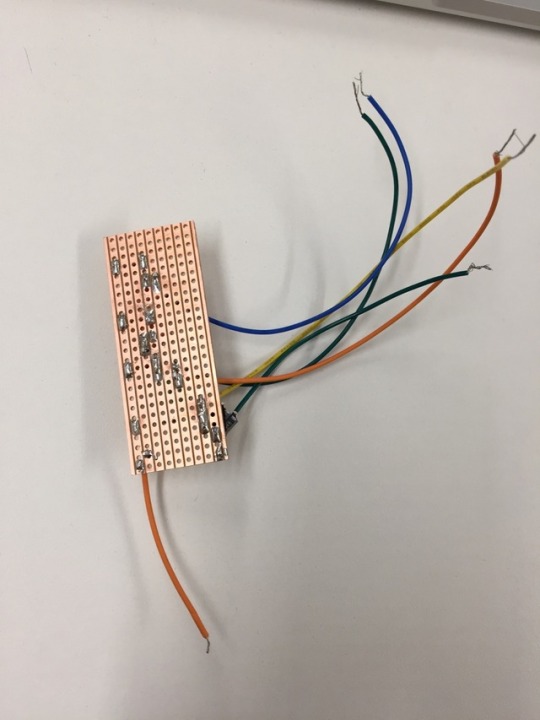
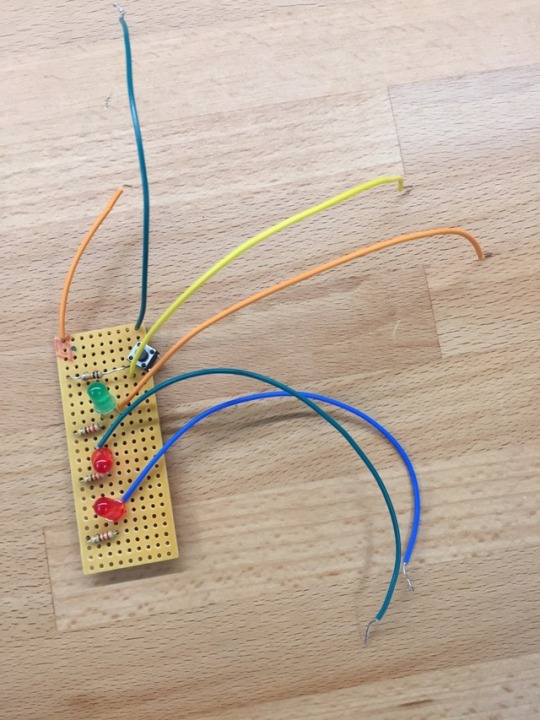

Further spec of how I made my Arduino Spaceship Interface
0 notes
Video
tumblr
Soldered circuit of the Arduino Spaceship Interface
0 notes