
Grafisk formgivare, Dj och Retrospels samlare. Har jag några galna idéer eller funderingar omkring design eller spelrelaterade ämnen så kommer dom garanterat dyka upp på denna bloggen! Spana gärna in min portfolio för mer infomation. Min Portfolio / Twitter / Blog / Hypemachine / Deviantart /
Don't wanna be here? Send us removal request.
Statistics
We looked inside some of the posts by thermoptic and here's what we found interesting.
Average Info
Notes Per Post
46K
Likes Per Post
29K
Reblog Per Post
17K
Reply Per Post
21
Time Between Posts
2 months
Number of Posts By Type
Text
8
Photo
9
Last Seen Tumblr Blogs


Fun Fact
28.6 is the average number of monthly visits per US mobile user.
Text
Wizard of Wor just got a Coop mode!
Hokuto Force just released a new cracked version of one of my favorite c64 games of all time, Wizard of Wor. This crack adds a lot of trainer options like unlimited life, Invincibility, Autofire etc. But the most important feature is the Coop mode! This is essentially an option to turn friendly fire on and off. But this is a big deal as its really easy to accidentally killing your friend, so having this option really helps if you are aiming to get as far as possible in this game in a 2-player mode. You have to select YES when you are asked to Save High-Score to get the coop option. You can download the cracked version here https://csdb.dk/release/index.php?id=183327&fbclid=IwAR22UA64lCmpoawS7gFGfXYfGU6NAvhOl2_AO5MRFwdvlSJ7xQtYMhdv0gg
via Subretro https://ift.tt/329G55H
8 notes
·
View notes
Text
Clean and Minimalistic Retropie Themes
RetroPie is really amazing if you are insterested in turning your Rasperry Pi into a retro-gaming machine. And with all these thousands of games in your library you will probably spend more time in the RetroPie EmulationStation frontend scrolling through games instead of actually playing them and because of this its really fun if you have a really nice looking theme to look at. An luckily there are some amazing theme creators out there. I especially like the themes that have a very clean and minimalistic look. So i just wanted to list a couple of them here.
There are two ways of installning themes, the easy way is directly via the EmulationStation Gui. Just go to the “RetroPie” selection on the screen, and then pick “Es Themes” from the list. And then just Install a theme from the list (there are many youtube guides for this) and then back in Emulationstation press Start en go to the UI Setting and scroll down to Theme Set. Done!
The other way is to download themes from the Internet and upload them via ftp. To do this you have to download WinSCP Client and connect to your RasperryPi via the Network. Go to the RetroPie selection and pick Show IP to get the Ip adress and connect to your Rasperry Pi using WinSCP. When you have connected locate the folder called “/opt/retropie/configs/all/emulationstation” and create a folder there called “themes” so it looks like this: /opt/retropie/configs/all/emulationstation/themes and then you can upload your themes here. Thats it. Just reboot your RasperryPi and the theme should show up in the Set Theme section in Emulation Station.
Art Book


A really amazing and clean looking theme with many different options and view modes. For more info go to the creators page here https://retropie.org.uk/forum/topic/11728/theme-art-book You can download the theme here
Chicuelo

Another great and minimalistic theme. I just love the big artworks in the system selection. You can find more info of the theme here https://retropie.org.uk/forum/topic/15830/chicuelo-theme and you can download the theme here
via Subretro https://ift.tt/347hEIh
3 notes
·
View notes
Photo
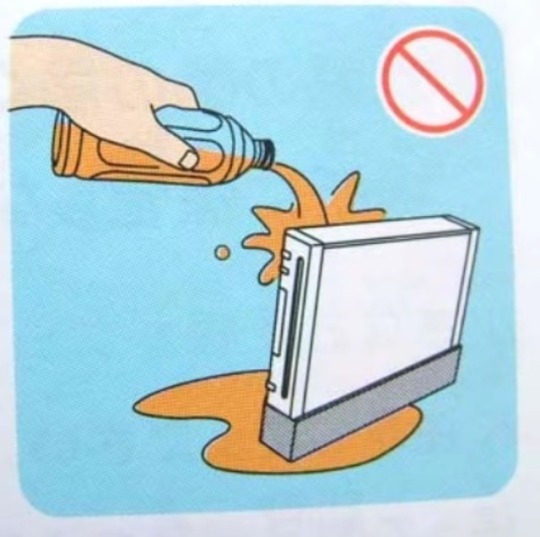


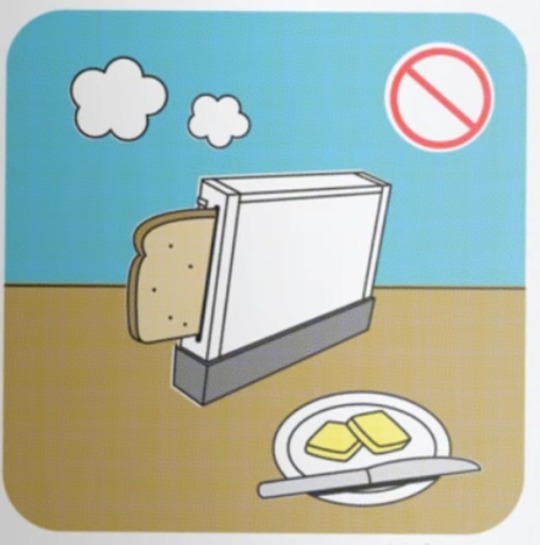
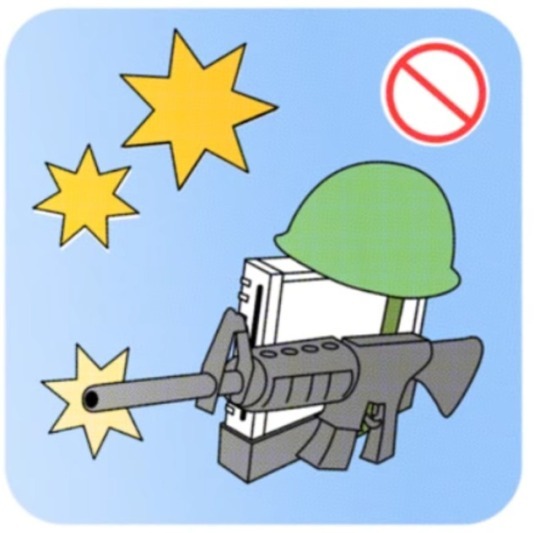


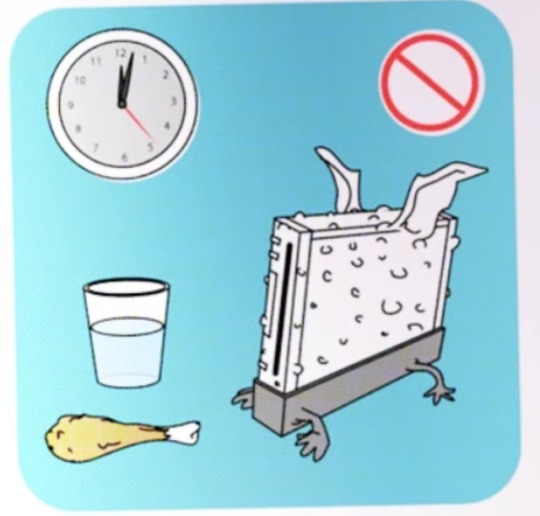
Safety warnings from the Nintendo Wii’s Japanese manual
10K notes
·
View notes


Text
GoldenEye Invert aim finally fixed!

Multiplayer deathmatch in GoldenEye 007 for the N64 was just amazing! Screencheating, Slappers only, Golden Gun, Oddjob, Proximity mines, so much fun so fond memories! Oh and if you are a big fan of the game and have not yet watched the amazing parody clip made by College Humor called GoldenEye Stand-Off then go watch it right now!
We still have GoldenEye gaming nights now and then where me and my friends gather to play som multiplayer matches. But a problem that has occurred after many years of Fps playing on consoles is that some people has gotten used to either using Inverted Aim or Non-Inverted Aim when controlling the character. We never thought about this back in 1997 but now when we want to play this is a big problem! Why? Let me explain,
When playing GoldenEye in Solo mode you can switch Inverted Aim on and off when you are playing the game, just bring up the options menu that are located in Bonds very elegant wrist watch and change this. But in multiplayer this option does not exist! All four players have the same settings that you set when playing Solo mode. So if you have Invert ON in Solo mode, then all four players in multiplayer has Invert ON also.
This problem has bothered me for many years and I have constantly been looking for a solution for this problem. If you are using an Emulator you can fix this by just changing the look up and down in the key configuration for each player. But this is not possible on a real N64. There are some amazing N64 flash cartridges out there, so i figured that all we needed to have a fix for this problem was to have some amazing hacker to fix a romhack for this.

So i got in contact with SubDrag who is the owner of the former fan site GoldenEye Vault. And guess what, he is also a programmer and romhacker

After talking to SubDrag he managed to fix this Invert fix rom in just an hour and released the hacks on the wiki N64 Vault for everyone to download! So now finally we can all play GoldenEye 007 on a real N64 (if you have a flashcart) where every player can have their prefered aiming style!
SubDrag solved this problem by creating three different hacks, each hack inverts the control on different player counts. So for example if just two players want to have Invert aim off then you need to use the “Goldeneye (U) [!] NoInvert2P3P.xdelta” hack for this. So the best solution is to have four different roms on your flashcart and just pick the right one when you are going to play. Super simple!
I have only tested these hacks on an N64 Emulator but they should work perfectly with a flashcart on a real n64 too. But there was still one little thing i was missing and that was to have ALL levels, cheats and characters unlocked for our GoldenEye gaming nights. There are ways to fix this by downloading save files or using gameshark codes.. or just do it the very time consuming way and unlocking everything by playing through the game in solo mode! But as i love romhacking there must be a way to just hack each rom to have everything unlocked right from the start. And yes i found a solution for this. SubDrag who fixed this hack for us has co-developed a romhacking tool for GoldenEye called GoldenEye Setup Editor 3.0. With this tool you can unlock everything and patch the roms. If you want to know how to do this scroll down to the next post or click here!
So that’s it, after all these years of inverted aim problems when GoldenEye is finally over! Big thanks to SubDrag for these hacks and all his help. The Invert fixes and other hacks for GoldenEye is available at N64 Vault.
via Subretro https://ift.tt/2OAL1i3
0 notes
Text
GoldenEye 007 (N64) – Permanently unlock all levels and characters

We all know that Goldeneye 007 for then N64 has a incredibly fun multiplayer mode. But sadly many of the levels, characters and cheats are locked and you need to unlock these by playing the solo mode. I just got an Everdrive for my N64 to play multiplayer with my friends and I don’t want to play all the solo levels again just to unlock all stuff for the multiplayer mode. There are some ways to go around this, most emulators and the Everdrive have support for the Gameshark, so you can add codes to unlock most stuff. You can also download save files and add these to have everything unlocked.
But I just want a way to have the rom file to have everything unlocked from the start. A romhack for this would be the best but I couldn’t find this. But luckely I found the GoldenEye Setup Editor 3.0 from the site GoldenEye Vault, Its a very comprehensive editor for the GoldenEye rom that can alter an hack many things, and yes unlock everything in the game! I just followed the instructions from the FAQ section on the GoldenEye Vault site, that you can check too. But im going to walk you through it here anyways

Step 1. Download and install the editor http://www.goldeneyevault.com/viewfile.php?id=37
Step 2. Choose Tools > Preferences and look for “Quick Convert ROM” and click the “Choose rom” and find your GoldenEye rom file on your computer.
Step 3. Choose Tools > Game Configuration. This will bring up a big window with a lot of tabs and options.
Step 4. Lets start with unlocking all Multiplayer Levels and Characters. Select the “Multiplayer” TAB look for “All Multi chars Available” and pick that and then press the “Unlock all Multis”

Step 5. Can also be a good idea too unlock all solo levels and cheat modes. Select the “Stage Options” TAB and press the “All Solo Levels Unlocked” and “All Cheats Unlocked” buttons. Thats it, just one more step!

Step 6. Finally press the “Delete Debug Data” and then “Write Rom” that are located at the bottom of the window. Then you can name the rom file and save it to your computer.

I would recommend using an emulator to try this out and see if all things are unlocked. Done!
via Subretro https://ift.tt/2NXPlmU
0 notes
Text
Pico-8 on Raspberry Pi
About the guide I wanted to share my knowledge on how I installed the virtual fantasy console called Pico-8 on my Raspberry Pi creating an awesome little Pico-8 console that boots in about 6 seconds and doesn’t need any configuration! Its super easy and super fun. All you need is any model of the Raspberry Pi, an Sd card and a gamepad. All of this is possible thanks to Gamaral who created the PICOPi os, you can find a guide, videos etc on his site here: http://ift.tt/2hNl8Lx
What is Pico-8 Before i start explaining how to get Pico-8 running I just briefly wanted to explain what actually this is. Pico-8 is the name of a made up virtual gaming console. Think of it as a Nes or Atari with all its old retro limitations, but that you can play on your computer or web browser. The creator of Pico-8 carefully picked a set of limitations to make the console look and feel like a retro console from the 80s. It only has 128×128 pixels of resolution with a beautiful 16 color palette and the games even comes in virtual “cartridge” images that you “insert” to the system, all this to have that old retrogaming feel. Just love this! And the best part is that it’s really easy to code games and share them and they are all available to play directly from Pico-8 using a built in browser where you can play your downloaded cartridges or play them directly from the Pico-8 webserver.
What you need – A Raspberry Pi (Models 1,2,3 or Zero) – Pico-8 Raspberry Pi files (That you can download when you purchase Pico-8) – PiPico files (A supertiny OS built especially for running Pico-8) – A Gamepad controller (more about this later in this guide)
That’s it! Of course you need an SD card for your Raspberry Pi that will have all the necessary files for the system to boot and run.
Get the Pico-8 License? You need to purchase the license from the official Pico-8 site, when you do you will get the files you need for Raspberry Pi, and also downloads for running Pico-8 on Win, Osx and Linux. But you might already own a Pico-8 License without knowing it! If you purchase many gaming bundles from Humble Bundle you might have the license there. Pico-8 was included in the “Humble GameDev Software Bundle” and it was also “hidden” in the “Humble Voxatron Debut” bundle, when you got Voxatron you also got Pico-8 but you need to find the Voxatron key in your humble bundle library, and then find the link “Lexaloffle Account Activation” then after activating this you will also get Pico-8
Installing Pico-8 to Raspberry Pi All you need to do is znzip the PICOPi onto the SD card and also unzip the Raspberry Pi Pico-8 zip file that you download from http://ift.tt/2oYDDPz and thats it! Just connect the Sd card to your Raspberry Pi and it should boot Pico-8. If you need even more detailed information on how to do this then you can find instructions and videos on the PICOPi site: http://ift.tt/2hNl8Lx
Gamepads So this is for me one of the most important parts of this project. The whole idea is to create your own console instead of playing Pico-8 on the computer using a keyboard. And that is having a good gamepad!
Bluetooth controllers? Today we sit further away from the tv so wireless controllers is something I really like. Raspberry Pi 3 has built in bluetooth or you can pruchase a small usb blutooth receiver for any other model, but the problem is that you need a way to connect the controllers in the operating system and that’s not possible in this case (Well maybe it is if you have really good knowledge with Linux and coding etc) So the way to solve this problem is to get a bluetooth controller or wireless controller that has its own usb receiver, and i have tested two controller that works great without any configuration. Just plug and play. And here are the controllers:
– Xbox 360 gamepad + Wireless 360 receiver If you have a wired Xbox 360 you just connect the usb to the Raspberry Pi and it just works. If you have a wireless controller you need the original Xbox 360 receiver. Just connect the receiver and it just works without any configuration and all the buttons you need for Pico-8 are perfectly mapped.
– 8Bitdo Contollers + 8Bitdo Receiver If you dont what 8Bitdo is then i suggest you check them out http://www.8bitdo.com/ They make incredible wireless retrogaming controllers that look and feel like old console gamepads like Nes and Snes etc and they are bluetooth wireless controllers. I have ordered mine from eBay so i suggest you check there if you want to order one. To get a 8Bitdo controller to work you need a “Retro Receiver” from 8Bitdo that you connect with a usb cord from the Raspbeery Pi to the receiver and it just works, no configuration.
via Subretro http://ift.tt/2yS8UWC
0 notes
Text
How to downgrade the Retron5
Im writing this post because there might be someone out there that did the same mistake as i did. I updated the firmware on my Retron5 and crashes suddenly occurred on my favorite games that worked perfectly before.
After searching the net for reasons for this you will find that many people are having many different issues and problems after updating the firmware. The short explanation for this is that after version 2.1 Hyperkin did some huge changes to the firmware which made it worse. Apparently the Retron5 used some code for emulating the systems that weren’t allowed so they had to remove this code replacing it with new code that wasn’t that perfect, and all this started with firmware v2.2.
So the solution to the problems and crashes is simply, go back to firmware version 2.1
So how do you do this? If you did what i did and updated to the very latest firmware which where v2.5 then when i tried to “upgrade” back to v2.1 i just got an error. Luckily there is one way to fix this, and that is to make a factory reset. Restoring the Retron5 to factory settings gives you the opportunity to then update it to what ever version you want.
To do the factory reset I had to follow the instructions on Retron5s page “Retron 5 Factory Reset Instructions”: http://ift.tt/2y3NAwZ
After the reset is done and you start the Retron5 you must give it a firmware update. It asks for you to insert an SD card containing a firmware update and i don’t think i was able to continue without doing a firmware update first. So i simply downloaded v2.1 from Retron5s site: http://ift.tt/2zf0cTj
Then everything was fine again and every game played perfectly. I was surprised how easy and pain free the factory reset was and the firmware update to v.2.1 was simple and fast. I hope all the links above still works if you had the same problem as i did. Good luck!
via Subretro http://ift.tt/2zf0dXn
0 notes
Photo


Valenberg a.k.a. Mr. Valenberg
Tumblr (@valenberg) // Facebook // Twitter // DeviantArt // Instagram
Previous Artist Feature: Archipics
For more artist features follow @retronator and support the blog on Patreon.
736 notes
·
View notes
Photo

After many years I finally decided to get an Easyflash for my #c64 and it was worth the wait because of the third model that is so much better than the first model. So much more space and nice features with the added buttons on the cartridge 😊 #commodore64
0 notes
Photo

“And many more!”
0 notes
Photo
Happy New Year 2017AD! Love to you all wherever you are.
31K notes
·
View notes

Text
Gaming Night Nes Tournament
A couple of years ago I arranged a Nes tournament for my friends. The concept of the Tournament was to play a set of handpicked Nes games that had support for 2-playes. I made up simple rules for the games so they would be quick and also work as a good competitive game in a tournament for a big gaming group. I wrote about the tournament in an earlier post on this blog but decided to look over the games and tweak the rules to make them more streamlined and more fun!
Every game in the list has support for 2-players and are often games where you can choose to go for the highscore or be the last man standing. I choose how many levels you have to play on each game. If both players are still alive at the last stage we pick the player that has the best high-score and that one is the winner. Should your opponent be killed on one of the levels you are the winner Simple, fast and fun. We played all these games on a real Nes using a PowerPak Flash Cartridge. A pro-tip to have easy access to the controllers during a tournament with many players is to use the Nes Four-Score Adapter as this works perfect as an extension cable
Ice Climber – Best high-score at the end of the third level or last man standing.
Mario Bros (Classic Serie) – Best high-score at the end of the first bonus level or last man standing.
Balloon Fight – Best high-score at the end of the first bonus level or last man standing.
Life Force – Best high-score at the end of the first level or last man standing.
Micro Machines – Pick a level, winner of that level.
Battle City – Best high-score at the end of the first level or last man standing.
Tetris Tengen – Choose a score, first player to reach that score.
Ice Hockey – Winner of one match.
Vs. Excitebike (Nds) – 2 player mode. Pick a level, winner of that level.
Nintendo World Championships 1990 – Best score (6min 15secs)
via Subretro http://ift.tt/2fN2FdQ
0 notes
