
Don't wanna be here? Send us removal request.
Statistics
We looked inside some of the posts by tipsonunix and here's what we found interesting.
Average Info
Notes Per Post
1
Likes Per Post
1
Reblog Per Post
0
Reply Per Post
0
Time Between Posts
17 days
Number of Posts By Type
Text
17
Last Seen Tumblr Blogs


Fun Fact
Tumblr’s website traffic is steadily declining.
Text
How to install qBittorrent on Ubuntu / LinuxMint
In this tutorial, we will walk you through the steps on how to download and install qBittorrent on Ubuntu 22.04 LTS and Linux Mint 21.
Introduction
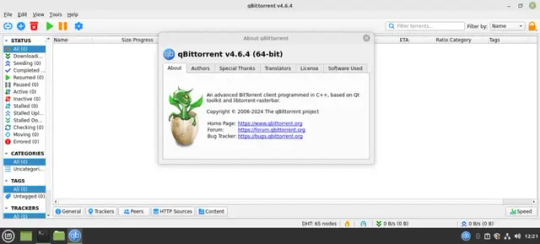
qBittorrent is a free and open-source BitTorrent client that's popular for its user-friendly interface, feature-packed design, and efficient performance. It is a great alternative to other clients like µTorrent and other BitTorrent Mainline clients. qBittorrent Features - It runs on Windows, macOS, and Linux operating systems - No ads on the user interface - It uses minimal system resources, making it ideal for older computers. - Search for torrents directly within the application, saving you time. - Manage your upload and download speeds with granularity. - Works with various BitTorrent protocols, ensuring wider compatibility. - Developed by a community, it benefits from transparency and constant security updates. - IPv6 compliant and supports more than 70+ languages
How to Install qBittorrent on Ubuntu and Linux Mint
Step 1: Download the App image from the downloads page and select the required version stable or beta based on your requirements or you can use the below command to download. wget -c https://excellmedia.dl.sourceforge.net/project/qbittorrent/qbittorrent-appimage/qbittorrent-4.6.4/qbittorrent-4.6.4_x86_64.AppImage Step 2: Provide execution permissions to the Appimage chmod 755 qbittorrent-4.6.4_x86_64.AppImage Step 3: Double-click the downloaded AppImage file in your downloaded location or run the following command in the terminal ./qbittorrent-4.6.4_x86_64.AppImage
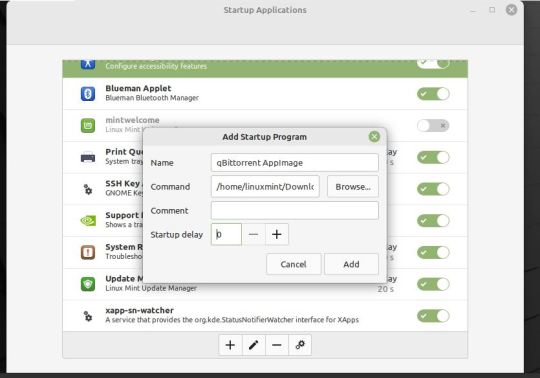
Step 4: Add qBittorrent to startup applications - Search for "Startup Applications" in your Ubuntu / LinuxMint menu. - Click on the "Startup Applications" icon to open the settings window. - Click the "+" button to add a new startup program. - In the "Name" field, enter the name as"qBittorrent AppImage" - Click Add and it will be enabled automatically
Uninstalling qBittorrent with AppImage
Delete the downloaded AppImage file. You can find it in your Downloads folder or wherever you saved it. Remove the startup applications entry if you have added That's it! qBittorrent will be completely removed from your system. Conclusion From this tutorial, you have learned how to download and install qBittorent on Ubuntu 22.04, Ubuntu 20.04, and Linux Mint 21 Do let us know your comments and feedback in the comments section below. If my articles on TipsonUNIX have helped you, kindly consider buying me a coffee as a token of appreciation.

Thank You for your support!! Read the full article
0 notes
Text
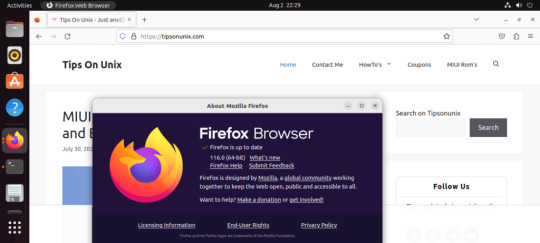
How to install Firefox 124 on Ubuntu / LinuxMint

This guide will show you how to install Firefox 124 on Ubuntu and Linux Mint. This latest update brings a host of new features and improvements to make your time online smoother and more secure.
Firefox 124 Changelog
- Caret Browsing: Now works within the PDF viewer, enhancing navigation and text selection. - Screen Wake Lock API: Prevents screen dimming or locking for applications requiring continuous operation. - WebSockets: Supports creating connections using HTTP(S) and relative URLs. - AbortSignal API: Adds support for any() static method for managing multiple abort signals. - Android: - Pull to Refresh: Improved functionality for refreshing webpages - HTML Drag and Drop: Enables drag and drop of text and HTML content from other apps using a mouse. - macOS: Fullscreen mode now utilizes the macOS fullscreen API for a more native user experience. (Can be disabled in about:config) Download Firefox 124 today and experience the latest in web browsing technology!
How to Install Firefox 124 On Ubuntu
There are two methods to install Firefox 124 - Using a software repository (PPA) - Downloading and installing the deb file from the Firefox repo Method 1: Using a software repository PPA (Recommended) This method is generally easier and ensures you receive automatic updates for Firefox. Step 1: Add the official PPA by opening the terminal and run the below command sudo add-apt-repository ppa:mozillateam/ppa Step 2: Update repositories and install Firefox sudo apt update && sudo apt install -t "o=LP-PPA-mozillateam" firefox Note: This method avoids installing the built-in snap package by giving priority to the PPA source. Method 2: Using the Deb File from Firefox repo Step 1: Open the terminal and run the below command Step 2: Run the following command to download the latest Firefox deb file from the repository wget -c https://ftp.mozilla.org/pub/firefox/releases/124.0/linux-x86_64/en-US/firefox-124.0.deb Step 3: Install the deb file sudo dpkg -i firefox-124.0.deb If you encounter any dependency issues related to libgdk-pixbuf2.0-0 not installed, please install the package and once again proceed to install the package root@linuxmint21:~# dpkg -i firefox-124.0.deb (Reading database ... 379689 files and directories currently installed.) Preparing to unpack firefox-124.0.deb ... Unpacking firefox (124.0~build1) over (124.0~build1) ... dpkg: dependency problems prevent configuration of firefox: firefox depends on libgdk-pixbuf2.0-0 (>= 2.22.0); however: Package libgdk-pixbuf2.0-0 is not installed. dpkg: error processing package firefox (--install): dependency problems - leaving unconfigured sudo apt-get install libgdk-pixbuf2.0-0 Step 4: Open a new terminal window and run the following command to start Firefox or from the Menu Search for Firefox firefox
Uninstall Firefox
For un-installation, the First step is to identify the installation method whether it is installed via the PPA package or other sources Open a terminal window (press Ctrl+Alt+T) and run the below command, dpkg -l | grep firefox ii firefox 124.0+build1-0ubuntu0.22.04.1~mt1 amd64 Safe and easy web browser from Mozilla In this example, "ii" indicates that Firefox is installed and was installed via a package manager (apt in this case). so proceed with the below steps sudo apt remove firefox sudo add-apt-repository --remove ppa:mozillateam/ppa Use the below command to do a complete cleanup sudo dpkg --purge firefox && apt autoremove
Conclusion
From this tutorial, you have learned how to install Firefox 124 on Ubuntu and Linux Mint. Please let us know your comments and feedback in the comments section below. If my articles on TipsonUNIX have helped you, kindly consider buying me a coffee as a token of appreciation

Thank You for your support!! Read the full article
0 notes
Text
Unlock Huge Savings with Parallels Coupon Code

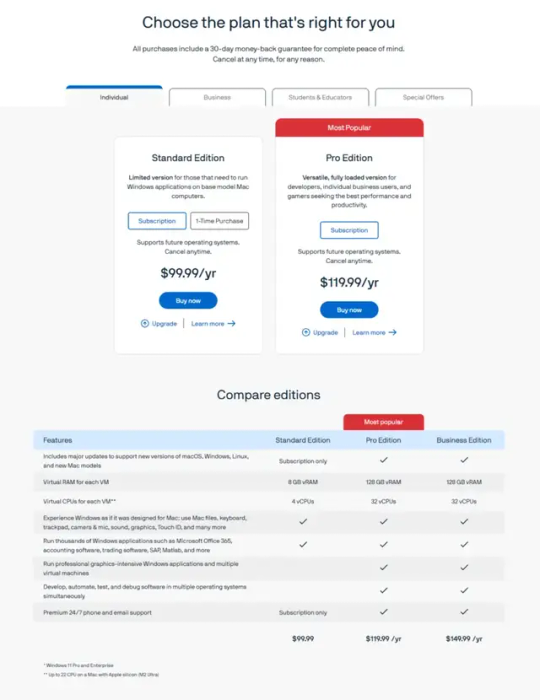
Calling all Mac users who need to run Windows apps! For a limited time, you can save 10% on your purchase with our exclusive parallels coupon code. Parallels Desktop, a leading virtualization software, has been a go-to solution for individuals and businesses looking to enhance their computing experience.
Why Choose Parallels for Virtualization Software?
In the land of virtualization software programs, Parallels Desktop effectively reigns supreme for Mac customers who want to optimize Windows in close proximity to their macOS paradise. But why do you need Parallels to be crowned as virtualization king ? Let’s check out the benefits. - Performance feat: Parallels Desktop boasts cutting-edge optimization technology that makes the beast appear in your Mac. - Feature Madness: Parallel Desktop is not a bare-bones virtual gadget author; It’s a remarkable celebration! Easily drag and drop files between macOS and Windows, move percentages of your clipboard with ease, or even remove Windows apps from your Mac dock once and for all. - Mac-Centric Magic: Parallels Desktop Mac knows the soul. It integrates flawlessly with your macOS environment displaying appropriate Windows content on your Mac computing device and can handle familiar Mac gestures in your virtual Windows environment It is like a translator to your digital worlds in, ensure pure and simple joy. - Security savvy: Worried about perceived authentication breaches or malware? Parallels Desktop is back to you with improved security capabilities. Separate your Windows environment from your Mac, encrypt your digital devices, and use a digital TPM chip for maximum security. Rest assured, your data is safe and sound in its virtual fortress. You can also read - Get 50% off on Parallels Desktop Student Edition! Latest Parallels coupon code and discounts If you're looking to save on Parallels software, you're in luck. By utilizing our latest Parallels coupon code, you can unlock massive discounts on their products. These coupon codes are regularly updated and provide exclusive offers to help you get the most value for your money. Currently parllels is offering 10% instant discount for Parallels Desktop (full license & 1st year of subscriptions only) Steps to redeem Parallels coupon code - Copy the Coupon code by clicking the show code , once show code is clicked it will load the parallels website in an another tab. - Click the Buy now option

- Once it is selected, it will redirect to the Plan selection, Choose the plan that is applicable for you and click on Buy Now
- The page will be redirected to the checkout page, select the check box which mentions check to enter coupon code, once it is selected paste the coupon code from the above coupon.

- once coupon code entered discount will be applied and cart will be updated immediately.
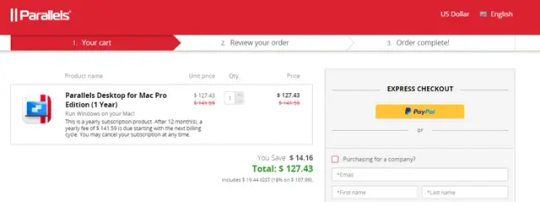
- Proceed with the payment by entering the required information and license will be sent to your email.
Frequently asked questions about Parallels coupon codes
Conclusion
In conclusion, using Parallels coupon code can help you unlock massive discounts on their innovative virtualization software. By taking advantage of these savings, you can enjoy the benefits of running multiple operating systems on a single device without breaking the bank. Do let us know your comments and feedback in the comments section below. If my articles on TipsonUNIX have helped you, kindly consider buying me a coffee as a token of appreciation

Thank You for your support!! Read the full article
0 notes
Text
SMPlayer Download and Installation Guide for Ubuntu and Other Linux Distros: Step-by-Step

In this article, we will guide you with our step-by-step guide on SMPlayer download and installation. and also using multiple methods on Ubuntu, Linux Mint, and other Linux distro variants. What is SMPlayer? SMPlayer, is a free media player for Windows, Linux, and Mac OS, with built-in codecs for virtually all video and audio formats, eliminating the need for clunky codec packs and it is licensed under GPL License. This graphical interface for the powerful MPlayer engine offers convenient features like remembering playback settings, resuming from where you left off, and playing YouTube videos. Additionally, SMPlayer lets you download subtitles and provides access to a range of MPlayer's advanced options. Download SMPlayer and experience versatile and effortless media playback. Features of SMPlayer - Seamless Playback - Customization Options - Intuitive Interface - Cross-Platform Compatibility This article provides detailed steps for installing the SMPlayer 23.12.0 on Ubuntu. and we will install it on Ubuntu and Linux Mint systems using multiple methods. - Method 1: Ubuntu PPA - Method 2: Using Flatpak - Method 3: Using Snap - Method 4: Using appimage How to Install SMPlayer On Ubuntu and Linux Mint Method 1: Using Ubuntu PPA Step 1: Add the official PPA sudo add-apt-repository ppa:rvm/smplayer Step 2: Update the repos and install smplayer sudo apt update && sudo apt install smplayer smtube smplayer-themes smplayer-skins Installing SMPlayer Across the Linux Landscape SMPlayer extends its reach beyond Ubuntu, embracing a variety of Linux distributions. Method 2: Using Flatpak Step 1: Setup Flatpak on your system using the setup guide Step 2: Download the Flatpak package from the official SMPlayer website. sudo flatpak install smplayer*.flatpak Step 3: Post-installation run the command on terminal. flatpak run info.smplayer.SMPlayer Method 3: Using Snap Make sure snap is installed on the server and once it is installed run the below command. sudo snap install smplayer Method 4: Using appimage Step 1: Download the AppImage package from the downloads page Step 2: Make it executable using your file manager or the command chmod 755 SMPlayer-23.12.0-x86_64.AppImage Step 3: Double-click to launch – no installation required!

The Great Media Player Showdown: SMPlayer vs. VLC FeaturesSMPlayerVLCEase of UseIntuitive interface, minimal learning curveCan feel overwhelming with extensive featuresBuilt-in CodecsExtensive codec support, plays virtually any formatRequires manual installation for some niche formatsResource UsageExtensive codec support plays virtually any formatCan be more resource-intensive, especially with advanced featuresBonus FeaturesEqualizer adjustments, subtitle search, YouTube playbackDisc ripping, advanced streaming options, DVD menu supportCustomizationSkinning and personalization optionsExtensive customization options, plugins, and extensionsInstallation on UbuntuOne-click installN/A Conclusion From this tutorial, you have learned our step-by-step guide on SMPlayer download and installation. and also using multiple methods on Ubuntu, Linux Mint, and other Linux distro variants. Do let us know your comments and feedback in the comments section below. If my articles on TipsonUNIX have helped you, kindly consider buying me a coffee as a token of appreciation.

Thank You for your support!! Read the full article
0 notes
Text
How to Install LibreOffice on Ubuntu / Linux Mint - 3 Easy Methods

In this article, we will show you how to install LibreOffice on Ubuntu and Linux Mint systems using the 3 methods. LibreOffice is a free and popular open-source office suite that offers a range of tools for word processing, spreadsheets, presentations, and more. This article provides detailed steps for installing the LibreOffice suite on Ubuntu. and we will install it on Ubuntu and Linux mint systems using 3 methods - Method 1: Using the Ubuntu Software Center - Method 2: Using Official PPA - Method 3: Using the Installer file
Prerequisites
Before proceeding with installation make sure our system is up to date sudo apt update && sudo apt upgrade The latest version from LibreOffice is 7.6.4 and it comes with a lot of bug fixes, in this, post we will use this version for installation on the systems. LibreOffice 7.6.4 Changelog - Fixed a bug where floating table objects in tables were positioned incorrectly. - Improved the performance of saving documents on macOS ARM devices. - Fixed a bug where paragraphs were disappearing or opening inside a frame when importing RTF documents. - Fixed a bug where empty paragraphs after page breaks were moving to the previous page. - Improved the accuracy of the LanguageTool spell checker. - Fixed a bug where text was hidden when importing PDF documents with RTL text. - Fixed various UI issues, including laggy scrolling and erratic behavior after resizing windows. - Fixed a bug where applying a hyperlink to a tabulator caused a PDF conversion error. - Fixed several bugs related to printing and exporting PDF documents. - Improved the stability and performance of LibreOffice. For older versions of LibreOffice installation refer here
How to install LibreOffice on Ubuntu and Linux Mint
Method 1: Using the Ubuntu Software Center Step 1: From the applications menu, open the Ubuntu Software Center.

Step 2: search for "LibreOffice" on the search bar and select it.

Step 3: Once selected, click the Install button and it will prompt for the password

Step 4: Once the password is prompted the installation will begin and once it is finished, launch LibreOffice from the same applications menu or you can use libreoffice in the terminal. Method 2: Using the Official PPA Step 1: Add the official PPA sudo add-apt-repository ppa:libreoffice/ppa Step 2: Update the system and install LibreOffice 7.6.4 sudo apt update && sudo apt install libreoffice Method 3: Using the Installer file This method is slightly different and technical than the other 2 methods Step 1: Download the LibreOffice Package from the official website Step 2: Choose the Linux (64-bit) (deb) from the drop-down of operating systems and click Download Step 3: Once downloaded, open the terminal and extract the deb packages tar -xf LibreOffice_7.6.4_Linux_x86-64_deb.tar.gz && cd LibreOffice_7.6.4.1_Linux_x86-64_deb/DEBS/ Step 4: Install it by using the below command sudo dpkg -i *.deb
Conclusion
From this tutorial, you have learned how to install LibreOffice on Ubuntu and Linux Mint systems using multiple methods. If my articles on TipsonUNIX have helped you, kindly consider buying me a coffee as a token of appreciation

Thank You for your support!! Read the full article
0 notes
Text
Exclusive BigRock Coupon Code for Massive Discounts in the Independence Day Sale 2023!

Independence Day is just around the corner, and BigRock is celebrating with a massive sale on web hosting! Get up to 75% off on web hosting plans by using our Bigrock coupon code which are given in the blogpost.
Why Choose BigRock?
BigRock is a reliable and efficient web hosting provider that has established itself as a go-to choice for businesses and individuals alike. Their user-friendly interface, robust server performance, and outstanding customer support set them apart from the competition.
Unlock the Savings with Independence Day Sale BigRock Coupon Code:
This Independence Day, BigRock is pulling out all the stops to give you significant savings on their hosting plans. Summary of the offers Hosting PlanDurationDiscountAdditional benefitsLinux Hosting Starter Plan1, 2 & 3 years50% offFree Let's Encrypt SSLLinux Hosting Starter Plan5 years65% offFree Let's Encrypt SSLLinux Hosting Pro & Advanced Plan1, 2 & 3 years50% offFree Let's Encrypt SSL+ Free DomainLinux Hosting Pro & Advanced Plan5 years75% offFree Let's Encrypt SSL+ Free DomainLinux Hosting Ultimate Plan1, 2 & 3 years50% offFree Domain + Free SSL+Free Dedicated IPLinux Hosting Ultimate Plan5 years75% offFree Domain + Free SSL+Free Dedicated IP Linux Hosting Starter Plan Flat 50% OFF on Linux Hosting Starter Plan With the coupon code, you can enjoy a whopping 50% discount on the regular price of the Linux Shared Starter Plan when you commit to a 1, 2, or 3-year subscription. This means you get all the benefits of reliable hosting at half the cost! Flat 65% OFF on Linux Hosting Starter Plan If you're ready to make a longer commitment to your online presence, the 5-year plan is your best bet. You'll receive an incredible 65% off the standard price. This substantial discount ensures that you not only secure your hosting for an extended period but also save significantly in the process.
Linux Shared Pro & Advanced Plan
Flat 50% off on 1, 2, or 3-Year Plan This offer brings you a 50% discount on the Linux Shared Pro & Advanced Plan when you opt for a 1, 2, or 3-year subscription. This enables you to access advanced hosting capabilities of unlimited domains, unmentered SSD, unmetered transfer , unlimited databases and daily backups with free domain for 1 year Flat 75% off on 5 Year plan You not only enjoy a remarkable 75% discount but also receive a free domain name to establish your online identity. This combination of savings and added value is a fantastic way to secure your web presence for the long term.
Linux Shared Ultimate Plan
Flat 50% off on 1, 2, or 3-Year Plan + Free Domain & SSL You can avail yourself of a 50% discount on the Linux Shared Ultimate Plan for 1, 2, or 3 years. Additionally, you'll receive a free domain name, Free dedicated IP and a free SSL certificate, ensuring your website's security and professional appearance. Flat 75% off on 5-Year Plan + Free Domain & SSL Opting for the 5-year plan allows you to access an incredible 75% discount, along with the benefits of a free domain name and a free SSL certificate. This is the ultimate package for those who are committed to excellence and want to save big on their hosting investment.
How to Redeem Your BigRock Coupon
Here are the general steps. - Select any of your desired hosting plan's and click on the coupons's show code - It will display the coupon and prompt you to copy the coupon code. - After copying the coupon code you will be automatically redirected to the BigRock web hosting homepage. - Choose the plan again and click on "BUY NOW" - You will then be directed to the checkout page, where you'll find a summary of your chosen hosting plan and options. - Look for the designated field labeled " Do you have a Promo Code." Paste the coupon code you copied earlier into this field.

- After pasting the coupon code, find the button labeled "Apply". Click this button to activate your coupon code and trigger the associated discount. - As you click the "Apply" button, you'll see the prices of your selected hosting plan decrease, reflecting the exclusive discount. - You've successfully redeemed your BigRock coupon and got an exciting discount.
Conclusion
I hope this blog post helps you save money on your Linux hosting with BigRock. If you have any questions, please feel free to leave a comment below. Do let us know your comments and feedback in the comments section below. If my articles on TipsonUNIX have helped you, kindly consider buying me a coffee as a token of appreciation

Thank You for your support!! Read the full article
0 notes
Text
The Easy Way to Change Runlevel on Ubuntu and Linux Mint

In this article, we will show you how to change runlevel on Ubuntu and LinuxMint. We will also explain the different systemd targets and what they do.
Ubuntu Systemd Targets
Ubuntu can be booted into one of several systemd targets. The default target to which the system is configured to boot will dictate which systemd units are started. The targets that relate specifically to system startup and shutdown are. - poweroff.target - The system shuts down. - rescue.target - The system boots into a single-user mode under which only the root user can log in. No networking, graphical user interface, or multi-user services are started. This run level is ideal for system administrators to perform system maintenance or repair activities. - multi-user.target - The system boots into a multi-user mode with text-based console login capability. - graphical.target - The system boots into a networked, multi-user state with X Window System capability. By default, the graphical desktop environment will start at the end of the boot process. This is the most common run level for desktop or workstation use. - reboot.target - The system reboots.
How to check current runlevels on Ubuntu / Linux Mint
When the system boots, systemd activates the default.target unit by default. This unit's main function is to activate other units and services by pulling them in based on their dependencies. To view the default target, type the following command: systemctl get-default ➜ ~ systemctl get-default multi-user.target ➜ ~
Change Runlevel on Ubuntu
To change the default runlevel you can use the below syntax systemctl set-default .target To change runlevels on the fly, use the following command: systemctl isolate Examples To set the default runlevel to graphical.target, you would use the following command: systemctl set-default graphical.target To change the runlevel to multi-user.target while the system is running, you would use the following command: systemctl isolate multi-user.target

Conclusion
The systemd targets provide a flexible way to control how Ubuntu boots. By understanding the different targets and how to change them, you can customize the boot process to meet your specific needs. From this tutorial, you have learned how to change runlevel on Ubuntu and Linux Mint. Do let us know your comments and feedback in the comments section below. If my articles on TipsonUNIX have helped you, kindly consider buying me a coffee as a token of appreciation

Thank You for your support!! Read the full article
0 notes
Text
Install Firefox 116 on Ubuntu System in Minutes: Surprisingly Easy Guide!

Mozilla has released Firefox 116, the latest version of its popular web browser. The new release includes a number of new features and improvements and in this tutorial, I will show you how to install Firefox 116 on Ubuntu and Linux Mint.
Introduction to Firefox
In the world of web browsers, Firefox has emerged as a top-notch option for Ubuntu users. Its versatility, reliability, and user-friendly interface make it an ideal choice for navigating the vast expanse of the internet. There are several compelling reasons why Ubuntu users should consider Firefox as their primary web browser. First and foremost, Firefox is an open-source project, closely aligned with the Linux philosophy embraced by Ubuntu. It promotes transparency, collaboration, and a commitment to user privacy, making it an excellent fit for Ubuntu users who value these principles.
Benefits of using Firefox on Ubuntu
- Utilizing Firefox on Ubuntu brings numerous advantages to the table. - For starters, Firefox seamlessly integrates with the Ubuntu operating system, ensuring a smooth and harmonious user experience.
Firefox 116 Changelog
- New - Sidebar switcher: Easy access to Bookmarks, History, and Synced Tabs panels. - Release notes in the update notification - File pasting: Copy files from your operating system and paste them into Firefox. - Picture-in-Picture volume slider: Control the volume of Picture-in-Picture windows. - Edit text annotations - Fixed - HTTP/2 upload performance: Improved upload performance of HTTP/2, especially on networks with high bandwidth and latency. - various Security fixes - Changed - Keyboard shortcut to reopen closed tabs: The keyboard shortcut to reopen closed tabs now reopens the last closed tab or window, in the order they were closed. - Enterprise - Policy updates and enterprise-specific bug fixes: Information about policy updates and enterprise-specific bug fixes can be found in the Firefox for Enterprise 116 Release Notes.
Install Firefox 116 on Ubuntu
Step 1: Add the official PPA sudo add-apt-repository ppa:mozillateam/ppa Step 2: Update the repos and install Firefox 116 sudo apt update && sudo apt install -t "o=LP-PPA-mozillateam" firefox Create a file under /etc/apt/preferences.d and write the below rules to avoid overriding the PPA with the built-in snap package # Prefer Firefox package from Mozillateam PPA Package: firefox* Pin: release o=LP-PPA-mozillateam Pin-Priority: 501
Install Firefox 116 On Ubuntu / Linux Mint via Source File
Step 1: Open a terminal window. Step 2: Run the following command to download the latest Firefox installer wget https://ftp.mozilla.org/pub/firefox/releases/116/linux-x86_64/en-US/firefox-116.0.tar.bz2 Step 3: Once the installer has been downloaded, extract it with the following command sudo tar -xf firefox-116.0.tar.bz2 -C /opt/ Step 4: Create a symbolic link to the Firefox executable file ln -s /opt/firefox/firefox /usr/bin/firefox Step 5: Open a new terminal window and run the following command to start Firefox: firefox Firefox 116 will now start. You can now use it to browse the web.
Conclusion
In conclusion, Firefox 116 is a solid release that brings a number of useful new features and improvements. Do let us know your comments and feedback in the comments section below. If my articles on TipsonUNIX have helped you, kindly consider buying me a coffee as a token of appreciation

Read the full article
0 notes
Text
How to Install WineHQ 8.13 on Ubuntu: A Step-by-Step Guide
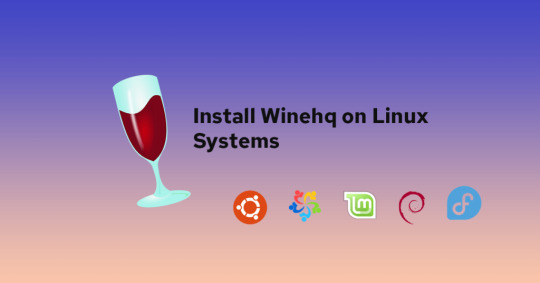
This tutorial will be helpful for beginners to install Winehq 8.13 on Ubuntu 22.04 LTS, Ubuntu 20.04, and Linux Mint 21.
What is winehq?
Wine is a recursive acronym for “Wine Is Not an Emulator“. WineHQ is an open-source compatibility layer that allows you to run Windows software on Ubuntu without the need for a Windows operating system. WineHQ Team released its new Development version 8.13 on July 21, 2023 What's New in Wine 8.13? - Wow64 support in WineGStreamer. - WeakMap support in JScript. - Georgian translation. - Various bug fixes.
Install Winehq 8.13 on Ubuntu / Linux Mint
Step 1: Install the Required dependencies sudo apt install libgnutls30:i386 libgpg-error0:i386 libxml2:i386 libasound2-plugins:i386 libsdl2-2.0-0:i386 libfreetype6:i386 libdbus-1-3:i386 libsqlite3-0:i386 Step 2: Enable the 32-bit architecture and download the repository key sudo dpkg --add-architecture i386 && sudo wget -O /etc/apt/keyrings/winehq-archive.key https://dl.winehq.org/wine-builds/winehq.key Step 3: Add the Official Wine repository cd /etc/apt/sources.list.d && sudo wget -nc https://dl.winehq.org/wine-builds/ubuntu/dists/$(lsb_release -cs)/winehq-$(lsb_release -cs).sources For Linux Mint 21 users run the below command wget -nc https://dl.winehq.org/wine-builds/ubuntu/dists/jammy/winehq-jammy.sources Step 4: Install the Wine 8.13 Development version sudo apt update && sudo apt install --install-recommends winehq-devel Step 5: Configuring WineHQ WineHQ provides various configuration options to optimize your Windows application experience. Wine Configuration Options To configure winehq , use the below command in the terminal, after executing this it will allow us to adjust the settings for Audio, Graphics, and compatibility modes. winehq Managing Wine Prefixes Wine uses prefixes to separate each Windows application environment. you can create and manage prefixes using the wine prefix env export WINEPREFIX=~/.wine_new_app winecfg Step 6: Running Windows applications Once WineHQ is installed and configured, you can run Windows applications directly from the Terminal by using the wine command followed by the application's installer or executable file. wine wine notepad.exe
Uninstalling WineHQ
If you ever need to remove WineHQ from your system, you can do so by running the following commands: sudo apt remove --auto-remove winehq-devel sudo apt purge --auto-remove winehq-devel
Conclusion
From this tutorial, you have learned how to download and install Wine 8.13 on Ubuntu 22.04, 20.04, and Linux Mint 21 Do let us know your comments and feedback in the comments section below. If my articles on TipsonUNIX have helped you, kindly consider buying me a coffee as a token of appreciation

Thank You for your support!! Read the full article
0 notes
Text
Delete Git Branches Made Easy: Step-by-Step Guide

In this article, we will guide you through the process of deleting the Git branch, both locally and remotely, step by step.
Introduction to Git
Git is a free and open-source version control system that helps you track changes to our code and help you to save time and headaches with working with code. It allows you to revert to previous versions of your code, collaborate with others, and manage your projects effectively. Why Delete Git Branch? - Once the changes are merged into the master branch the purpose of the branch is fulfilled. - To keep the repository clean and maintain compliance - The branch has become stale and it is no longer actively maintained. - To clean up your commit history. Checking Available Branches Before proceeding with deletion, it is a good practice to list out the branches in the repository and save it in our notepad and inspect using the below command. git branch Deleting a Local Git Branch For deleting the local git branch, make sure you are in a different branch eg: master branch, and delete the non-required branches. git checkout once successfully checked in delete the branch git branch -d If the branch has unmerged changes, Git will prompt you to confirm the deletion or inform you about the pending changes. If you want to delete the branch, type y and press Enter. Git will remove the branch from your local repository. Deleting a Remote Git Branch To delete the remote git branch, ensure that you have the latest updates from the remote repository git fetch Once you have the latest updates, you can use the following command to delete the remote branch and this will remove the branch from the remote repository git push origin --delete
Conclusion
Deleting Git branches is an important part of maintaining a clean and organized repository. By removing unnecessary branches, you can improve the clarity of your project's history and make it easier for other developers to navigate. Do let us know your comments and feedback in the comments section below. If my articles on TipsonUNIX have helped you, kindly consider buying me a coffee as a token of appreciation

Thank You for your support!! Read the full article
0 notes
Text
How to Install Jupyter Notebook on Ubuntu 22.04

In this article, we will guide you through the process of how to install Jupyter Notebook on the Ubuntu operating system 22.04 LTS.
Introduction
Jupyter Notebook is a powerful and essential tool for developers to create and share documents containing live code, narrative text, etc... Uses of Jupyter Notebook - Write code in Python, R, Julia, or other programming languages. - Create interactive visualizations using Matplotlib, Plotly, or other libraries. - Add text, equations, and other annotations to your documents. - Share your notebooks with others so that they can see your work and collaborate with you. Prerequisites - Ubuntu / Linux Mint system - Python
How to Install Jupyter Notebook on Ubuntu
To install Jupyter, we first need to install pip3, which is a Python package installer. To do this, we need to make sure the system is updated to date. sudo apt update && sudo apt upgrade -y Once the system is updated, install the pip3 sudo apt install python3-pip Creating Python Virtual Environment It is always a good practice to create a virtual environment for your activities so that the real environment will not be conflicted with yours. sudo pip3 install virtualenv mkdir /opt/jypter && cd /opt/jypter virtualenv env && source env/bin/activate Installing Jupyter Notebook Once the virtual environment is activated, install the Jypter using the below command pip install jupyter

Launching Jupyter Notebook Now that Jupyter Notebook is installed, you can start using it using the below command jupyter notebook
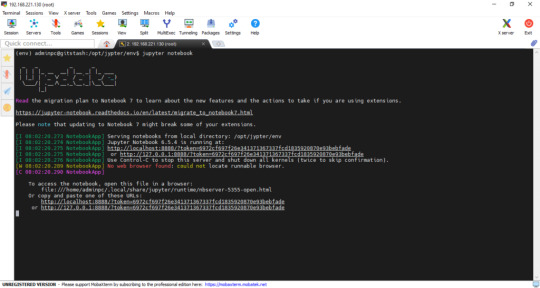
Once the command is executed, Your default web browser will open automatically, displaying the Jupyter Notebook interface.

Securing Jupyter Notebook with a Password By default, Jupyter Notebook doesn't require any authentication. However, you can set the password for Jupyter Notebook using the below command jupyter notebook password Once the password is set the next login will prompt for the password, once it is provided then it will load the notebook

Conclusion
You've successfully installed Jupyter Notebook on your Ubuntu system. and not Jupyter Notebook is up and running. Do let us know your comments and feedback in the comments section below. If my articles on TipsonUNIX have helped you, kindly consider buying me a coffee as a token of appreciation

Thank you for your support!! Read the full article
0 notes
Text
YouTube Vanced Alternative: Enhance Your YouTube Experience with These 6 Amazing Alternatives

Introduction
YouTube has become an indispensable platform for video content consumption. While the official YouTube app offers a great user experience, some users may seek additional features or a more personalized interface. This is where YouTube Vanced alternatives come into play. In this article, we will explore several alternatives that can enhance your YouTube experience with the same youtube experience.
Best YouTube Vanced Alternatives
YouTube Vanced was a popular third-party app that allowed users to watch YouTube videos without ads, in the background, and with other customization options. However, the app was discontinued in 2022 due to legal issues. YouTube Vanced alternatives are third-party applications that offer additional features and customization options beyond what the official YouTube app provides. These alternatives aim to enhance your viewing experience, provide ad-blocking capabilities, background playback, and even the ability to download videos for offline viewing below are the best alternatives Youtube Premium YouTube Premium is a subscription service that offers a number of features that are not available in the free version of YouTube. These features include: - Ad-free playback - Background playback - Video downloads - Access to YouTube Originals - The ability to play videos in picture-in-picture mode YouTube Premium costs $119.99 per Year in the United States LibreTube LibreTube is an open-source YouTube client that offers a distraction-free and ad-free viewing experience. It is built on the principles of privacy and customization, allowing you to enjoy YouTube content without intrusive ads and personalize your viewing interface.

- Ad-free playback - Background playback - Sponsor skips - Privacy Download LibreTube NewPipe NewPipe is an open-source YouTube client for Android that offers a number of features that are not available in the official YouTube app. These features include: - Open in Kodi - Watch/Block age-restricted material - Browse videos and audio within a channel - Subscribe to channels (yes, without logging into any account!) - Get notifications about new videos from channels you're subscribed to - Create and edit channel groups (for easier browsing and management) - Browse video feeds generated from your channel groups - View and search your watch history

Download NewPipe YouTube ReVanced This is a fork of YouTube Vanced that is still under development. It offers most of the same features as YouTube Vanced, including ad blocking, background playback, and sponsor skips. - Ad-free playback - Background playback - Sponsor skips - Privacy Download ReVanced ReVanced Extended Revancde Extended is a fork of the popular YouTube Vanced app that offers a few extra features, such as the ability to change the theme and the ability to download videos. It is still under development, but it is a great option for people who want more features than what is available in the official YouTube app. Features: - Downloads - Whitelist - Swipe controls - No Ads - old Layout - Sponsor block - Shorts component Download Revanced Extended Kiwi Browser If you don't want to use any of the above apps then you can go for the browser with an inbuilt ad block, background playback and it has the ability to download videos. Additionally, Kiwi Browser provides a night mode for comfortable viewing in low-light conditions and supports Chrome extensions, allowing for further customization and functionality. Download Kiwi Browser Brave Browser Brave Browser is a web browser that blocks ads by default. It also has a built-in YouTube player that offers ad blocking, background playback, and sponsor skips. This makes it a great alternative to YouTube Vanced, as it offers many of the same features without the need to install a third-party app. It is also a good option for people who want to support creators directly, as Brave Browser allows you to tip creators with BAT tokens. Download Brave Browser
Comparison of Youtube Vanced Alternatives
FeatureYouTube ReVancedVanced ExtendedSkyTubeLibreTubeBrave BrowserKiwi BrowserYouTube PremiumAd blockingYESYESYESYESYESYESYESBackground playbackYESYESYESYESYESYESYESSponsor skipsYESYESYESYESNONONOFree and open-sourceYESYESYESYESNONONOPop-up modeYESYESYESYESNONOYESCostFREEFREEFREEFREEFREEFREE$111.99/YR
Conclusion
The discontinuation of YouTube Vanced has left many users looking for alternatives. There are a number of alternatives to YouTube Vanced available, some of which offer similar features. Some of the most popular alternatives include NewPipe, LibreTube, and YouTube Premium. Do let us know your comments and feedback in the comments section below. If my articles on TipsonUNIX have helped you, kindly consider buying me a coffee as a token of appreciation

Thank You for your support!! Read the full article
0 notes
Text
How to Install Linux Kernel 6.4 on Ubuntu 22.04 & Linux Mint 21: A Comprehensive Guide

In this tutorial, we will walk you through the steps on how to install Linux Kernel 6.4 on Ubuntu 22.04 LTS and Linux Mint 21.
Introduction
Linux kernel is the core of the Linux operating system. It is responsible for managing the hardware, scheduling tasks, and providing a platform for running applications. Linux Kernel 6.4 has been recently released, bringing with it a range of new features, improvements, and bug fixes. As per Linus Torvalds Hmm. Final week of 6.4 is done, and we've mainly got some netfilter fixes, some mm reverts, and a few tracing updates. There's random small changes elsewhere: the usual architecture noise, a number of selftest updates, some filesystem fixes (btrfs, ksmb), etc. Most of the stuff in my mailbox the last week has been about upcoming things for 6.5, and I already have 15 pull requests pending. I appreciate all you proactive people.
Understanding the Importance of Kernel Updates
- Improved stability: Kernel updates can fix bugs that can cause instability in your operating system. This can lead to crashes, freezes, and other unexpected behavior. - Enhanced security: Kernel updates can patch vulnerabilities that could be exploited by hackers to gain unauthorized access to your system. - Increased performance: Kernel updates can optimize system performance by making better use of your hardware resources. This can lead to faster boot times, smoother application performance, and better battery life. - New features: Kernel updates can introduce new features that can make your operating system more powerful and versatile. For example, recent kernel updates have added support for new hardware, improved filesystem performance, and introduced new security features. What's New in Linux Kernel 6.4? - Intel Lunar Lake HD audio support: - Better MSI laptop support. - SELinux runtime disable the feature. - SLOB memory allocator removed - Linus cleaned up x86 memory copy code
How to Install Linux Kernel 6.4 On Ubuntu / Linux Mint?
Step 1: Update the system before proceeding to install kernel 6.4 sudo apt update && sudo apt upgrade Step 2: Download the mainline kernel packages for Kernel 6.4 using the below commands wget https://kernel.ubuntu.com/~kernel-ppa/mainline/v6.4/amd64/linux-headers-6.4.0-060400_6.4.0-060400.202306271339_all.deb wget https://kernel.ubuntu.com/~kernel-ppa/mainline/v6.4/amd64/linux-headers-6.4.0-060400-generic_6.4.0-060400.202306271339_amd64.deb wget https://kernel.ubuntu.com/~kernel-ppa/mainline/v6.4/amd64/linux-image-unsigned-6.4.0-060400-generic_6.4.0-060400.202306271339_amd64.deb wget https://kernel.ubuntu.com/~kernel-ppa/mainline/v6.4/amd64/linux-modules-6.4.0-060400-generic_6.4.0-060400.202306271339_amd64.deb Step 3: Install the kernel deb files sudo dpkg -i *.deb Step 4: Validate the kernel Once installation is completed reboot the server and verify the newly installed kernel by running the below command or running the neofetch command will print the newer kernel. uname -r

Conclusion
From this tutorial, you have learned how to download and install Linux kernel 6.4 on Ubuntu 22.04 and Linux Mint Do let us know your comments and feedback in the comments section below. If my articles on TipsonUNIX have helped you, kindly consider buying me a coffee as a token of appreciation

Thank You for your support!! Read the full article
0 notes
Text
Install Darktable 4.4.0 on Ubuntu and Linux Mint

This guide will show you how to install Darktable 4.4.0 on Ubuntu or Linux Mint.
Introduction to Darktable
Darktable is a powerful open-source photography workflow software that allows photographers to manage and edit their digital images. It is available for Linux, macOS, and Windows. Darktable provides various modules for tasks such as raw image processing, color correction, noise reduction, and lens correction, making it a versatile tool for photographers of all levels. Prerequisites - sudo access required - Ubuntu 20.04 and Linux Mint 19 or later.
Darktable's Features
Non-destructive editing: Darktable preserves your original files and allows you to make changes without permanently modifying them. This means that you can experiment with different settings and revert back to your original image at any time. RAW processing: Darktable can process RAW images, which are the unprocessed files that are captured by your camera's sensor. This gives you much more control over the look of your images than if you were to edit JPEGs. Tone curves and levels: These tools allow you to fine-tune the tonal range and contrast of your images. This can be used to improve the overall look of your images, as well as to correct problems such as overexposed or underexposed areas. Noise reduction: Darktable can reduce unwanted noise and graininess in your photos, particularly in low-light conditions. This can help to improve the quality of your images and make them look more professional. Lens correction: Darktable can correct lens distortions and aberrations. This can help to improve the overall sharpness and clarity of your images.
Install Darktable 4.4.0 on Ubuntu
Make sure Flatpak is installed on the system before proceeding, you can check it using the below command flatpak --version If Flatpak is not installed, install it by using the below command sudo apt install flatpak After Flatpak installation proceed with the installation of Darktable flatpak install flathub org.darktable.Darktable Once Darktable is installed run the below command to start the application flatpak run org.darktable.Darktable
Uninstall Darktable
Uninstalling Darktable using Flatpak is a straightforward process, just execute the below command in the terminal. flatpak remove org.darktable.Darktable
Conclusion
In this tutorial, we have shown the easiest method to install Darktable 4.4.0 on Ubuntu and Linux Mint. Do let us know your comments and feedback in the comments section below. If my articles on TipsonUNIX have helped you, kindly consider buying me a coffee as a token of appreciation.

Read the full article
0 notes
Text
Debian 12 Bookworm Released: Check Out the New Features

Debian 12 Bookworm Released with New Features and Improved Security The Debian Project released Debian 12 "Bookworm" on June 10, 2023. This major release includes a number of new features and improvements, as well as updated components.
Key Features
- Linux 6.1 LTS kernel: This kernel brings new and updated drivers to support modern hardware, and it will be officially supported until December 2026. - Read/write support for APFS: This allows users to read and write files to APFS (Apple File System) drives. - ntfs2btrfs: This tool converts NTFS drives to Btrfs file systems. - mimalloc: This is a new malloc implementation that improves memory performance. - ksmbd-tools: This is a new kernel SMB server that provides file-sharing services. - merged-user root file system layout: This new layout improves performance and security
Updated components
- GNU Compiler Collection (GCC): This has been updated to version 12.2. - Debian Med Blend distribution: This now includes a new shiny-server package that simplifies scientific web apps using the R language. - Artwork: This has been redesigned by Juliette Taka.
Support
Debian 12 will be supported for five years, until June 2028. This means that users of Debian 12 will receive security updates and bug fixes for five years after the release date.
Debian 12 Download
Debian 12 is available for download in a variety of formats, including live images and installation images. Live images can be used to test Debian 12 before installing it, and installation images can be used to install Debian 12 on a new or existing computer. For more information about Debian 12, please visit the following website: Debian 12

Read the full article
0 notes
Text
Install HPLIP 3.23.5 on Ubuntu and Linux Mint

This tutorial will be helpful for beginners to download and install HPLIP 3.23.5 on Ubuntu 22.04, RHEL 9.1, RHEL 8.6, RHEL 8.7, and Linux Mint 21.1.
What is HPLIP?
HPLIP (HP Linux Imaging and Printing) is a free and open-source software suite that provides drivers and tools for printing and scanning on Linux. It supports a wide range of HP printers and scanners, including both inkjet and laser printers.
HPLIP 3.23.5 Changelog
- HP Color LaserJet Enterprise 6700dn - HP Color LaserJet Enterprise 6700 - HP Color LaserJet Enterprise 6701dn - HP Color LaserJet Enterprise 6701 - HP Color LaserJet Enterprise X654dn - HP Color LaserJet Enterprise X65455dn - HP Color LaserJet Enterprise X654 - HP Color LaserJet Enterprise X65465dn - HP Color LaserJet Enterprise X654 65 PPM - HP Color LaserJet Enterprise X654 55 to 65ppm License - HP Color LaserJet Enterprise X654 Down License - HP Color LaserJet Enterprise MFP 6800dn - HP Color LaserJet Enterprise Flow MFP 6800zf For the complete changelog refer to the release notes
How to Install HPLIP 3.23.5 on Ubuntu / Linux Mint
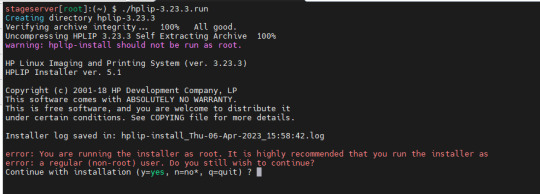
Step 1: Download the installer file wget https://nchc.dl.sourceforge.net/project/hplip/hplip/3.23.5/hplip-3.23.5.run Step 2: Provide execute permissions to the installer file and execute it sudo chmod +x hplip-3.23.5.run Step 3: Run the installer file sudo ./hplip-3.23.3.run The installer will guide you through the installation process. Follow the on-screen instructions to complete the installation.
Step 4: Restart or RE-PLUG your printer. Once the installation is completed, restart or re-plug the printer, Device Discovery window will appear
Conclusion
Installing HPLIP 3.23.5 on Ubuntu and Linux Mint is a straightforward process that can help you manage your HP printers and scanners on your Linux system. Do let us know your comments and feedback in the comments section below. If my articles on TipsonUNIX have helped you, kindly consider buying me a coffee as a token of appreciation.

Read the full article
0 notes
Text
How to install Firefox 114 on Ubuntu / LinuxMint

Mozilla has released Firefox 114, the latest version of its popular web browser. The new release includes a number of new features and improvements and in this tutorial, I will show you how to install Firefox 114 on Ubuntu and Linux Mint.
Why Firefox?
- Enhanced Performance - Enhanced Privacy and Security - New Features and UI Improvements
Firefox 114 Changelog
- DNS over HTTPS (DoH) support: DoH is a new security feature that encrypts DNS queries, making it more difficult for third parties to track your browsing activity. Firefox 114 now supports DoH by default, and you can also choose to use it with specific websites. - FIDO2 support: FIDO2 is a new authentication standard that uses hardware-based security keys to make it more difficult to hack your accounts. Firefox 114 now supports FIDO2, and you can use it to sign in to websites and services. - Improved performance: Firefox 114 is faster than previous versions, thanks to a number of performance improvements. These improvements include better memory management, faster startup times, and improved rendering performance. - Bug fixes: Firefox 114 also includes a number of bug fixes. These fixes address issues with performance, stability, and security. Download Firefox 114 today and experience the latest in web browsing technology! Install Firefox 114 On Ubuntu / Linux Mint via PPA Step 1: Add the official PPA sudo add-apt-repository ppa:mozillateam/ppa Step 2: Update the repos and install Firefox 114 sudo apt update && sudo apt install -t "o=LP-PPA-mozillateam" firefox Create a file under /etc/apt/preferences.d and write the below rules to avoid overriding the PPA with the built-in snap package # Prefer Firefox package from Mozillateam PPA Package: firefox* Pin: release o=LP-PPA-mozillateam Pin-Priority: 501 Install Firefox 114 On Ubuntu / Linux Mint via Source File Step 1: Open a terminal window. Step 2: Run the following command to download the latest Firefox installer wget https://ftp.mozilla.org/pub/firefox/releases/114/linux-x86_64/en-US/firefox-114.tar.bz2 Step 3: Once the installer has been downloaded, extract it with the following command sudo tar -xf firefox-114.tar.bz2 -C /opt/ Step 4: Create a symbolic link to the Firefox executable file ln -s /opt/firefox firefox/firefox /usr/bin/firefox Step 5: Open a new terminal window and run the following command to start Firefox: firefox Firefox 114 will now start. You can now use it to browse the web.
Conclusion
In conclusion, Firefox 114 is a solid release that brings a number of useful new features and improvements. The addition of DNS over HTTPS is a major security win, and the support for FIDO2 is a welcome addition for users who want to improve the security of their online accounts. Overall, Firefox 114 is a worthy upgrade for anyone who uses the browser. Do let us know your comments and feedback in the comments section below. If my articles on TipsonUNIX have helped you, kindly consider buying me a coffee as a token of appreciation

Read the full article
1 note
·
View note