
Statistics
We looked inside some of the posts by veronarinoa and here's what we found interesting.
Average Info
Notes Per Post
1
Likes Per Post
1
Reblog Per Post
0
Reply Per Post
0
Time Between Posts
14 hours
Number of Posts By Type
Text
5
Last Seen Tumblr Blogs


Fun Fact
Women make up for the other 50% of Tumblr’s audience.
Text
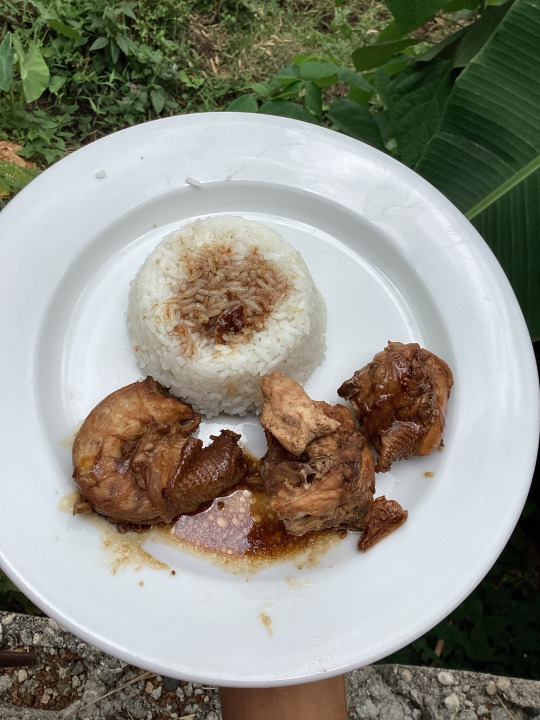
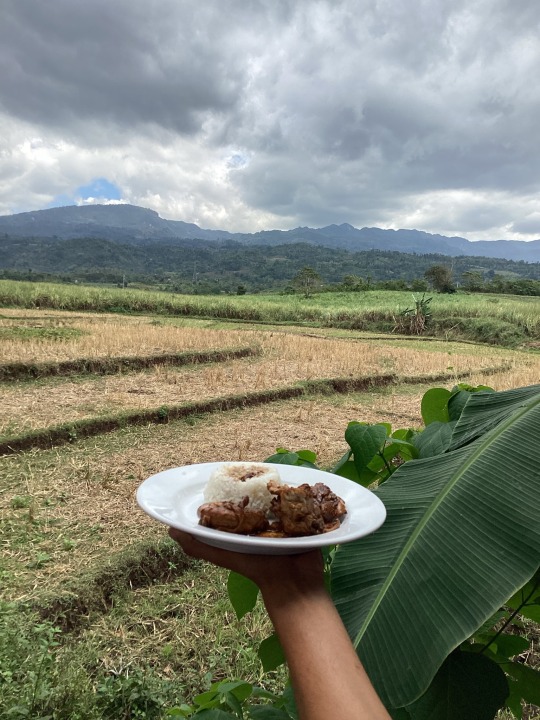


Chicken Adobo
"Savoring the flavors that ignite my senses." Yes after a long week here it is! Our very own Chicken adobo from a native chicken, this dish is one of the best dish you will ever try with the savory chicken and mouthwatering soy sauce this season of flu this can make u gain more appetite for eating.
Why You’ll Love It
Browning the chicken in the pan first adds an extra savory flavor to the finished adobo. It’s a step that many other recipes skip, but trust me — it’s 100% worth it.
Toasting the garlic, bay leaves, and black peppercorns in the fat left in the pan helps release their flavors and allows them to permeate the sauce. Again, more flavor!
Oyster sauce is what sets this recipe for Filipino adobo apart — it adds body and an umami-rich flavor that’ll make you want to use up every last bit of the sauce.
The skin is actually crispy! Because chicken adobo is simmered, you usually lose out on crispiness. I solve this by broiling it quickly.
INGREDIENTS
5 cloves garlic
3 pounds bone-in chicken thighs, drumsticks, or a combination
1/2 teaspoon kosher salt
1 tablespoon neutral oil, such as canola
3 dried bay leaves
2 teaspoons whole black peppercorns
2 cups water
1/2 cup soy sauce, preferably a Filipino brand like Silver Swan
1/3 cup cane vinegar
3 tablespoons oyster sauce
Steamed white rice, for serving
INSTRUCTIONS
Smash and peel 5 garlic cloves. Pat 3 pounds chicken thighs, drumsticks, or a combination dry with paper towels. Season all over with 1/2 teaspoon kosher salt.
Heat 1 tablespoon neutral oil in a Dutch oven or large heavy-bottomed pot over medium-high heat until shimmering. Working in 2 batches, add the chicken to the pot (skin-side down if using thighs). Sear until browned on all sides, about 6 minutes per batch (reduce the heat as needed if starting to burn). Transfer to a plate.
Place the garlic, 3 dried bay leaves, and 2 teaspoons whole black peppercorns in the pot. Stir until the garlic cloves and peppercorns are slightly toasted and fragrant, 30 seconds to 1 minute. Add 2 cups water, 1/2 cup soy sauce, 1/3 cup cane vinegar, and 3 tablespoons oyster sauce. Scrape up any browned bits from the bottom of the pot with a wooden spoon.
Return the chicken and any accumulated juices on the plate to the pot, arranging the chicken in a single layer (skin-side down if using thighs). Bring to a boil. Reduce the heat to maintain a simmer. Cook uncovered until the chicken registers at least 165ºF in the thickest part, flipping each piece over halfway through, about 20 minutes total. When the chicken is almost ready, arrange a rack in the upper-third of the oven and heat the oven to broil. Line a rimmed baking sheet with aluminum foil.
Using tongs, transfer the chicken (skin-side up if using thighs) to the baking sheet. Continue to let the sauce simmer on the stove. Broil the chicken until browned on top, about 3 minutes. Remove the chicken from the oven, flip each piece, and brush with some of the sauce from the pot. Return the chicken to the oven and broil until browned on the second side, about 3 minutes more. Remove and discard the bay leaves if desired. Serve with steamed white rice and drizzle heavily with the sauce.
Checkout also our other link:
0 notes
Text

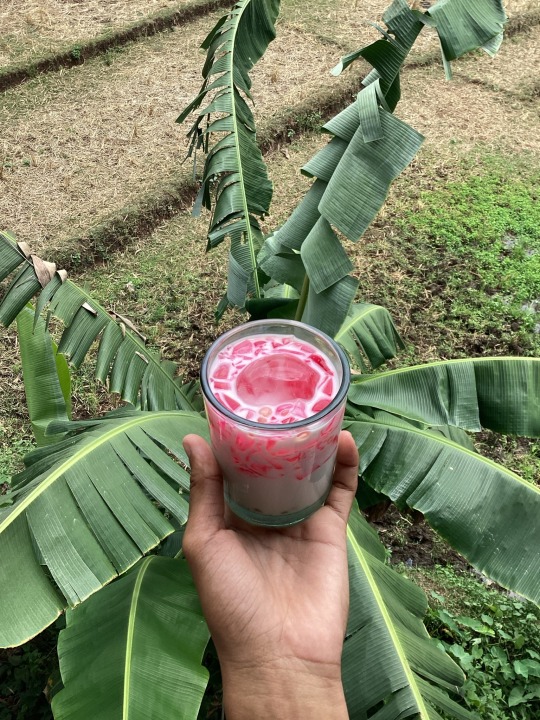
Tapioca
"Food should be fun." - Thomas Keller. It should certainly be Fun!. Try this topioca juice this upcoming summer with the sweetness and coldness and juiciness of this fresh tapioca will make your summer cool!. Insides are filled with sweet sago matching with gulaman that is reddish in color and a rich milky taste that can also make it even more refreshing.
Ingredients
8 cups (1.9L) water
3/4 cup (155g) small tapioca pearls
1 cup (235ml) whole or 2% milk
3/4 cup (175ml) full-fat canned coconut milk
3 1/2 tablespoons honey, divided (can sub with sugar or maple syrup)
Instructions
Just mix all ingredients and add water then there you have it💕
For more info check our other links
0 notes
Text


Pastillas
"Life is uncertain. Eat dessert first." - Ernestine Ulmer. The moment you get to try this delicious dessert you'll definitely beg for more!. The milky and sweet flavor of this dessert will make you feel like you're floating, with the milky texture and flavor this milk coated candy reduces my anxiety
Ingredients
½ cup store-bought ube jam
2 cups (200g) NIDO® 3+ / 5+
¼ cup condensed milk
½ tsp ube extract
¼ cup white sugar (for rolling)
Instructions
Mix ube jam, NIDO® 3+ / 5+, condensed milk and ube extract in a bowl. Set aside in the refrigerator for 1 hour.
Press mixture into the mold. Unmold and gently coat with sugar.
Set aside in the refrigerator for 1 hour before serving.
Want to see more. check out our link:
0 notes
Text

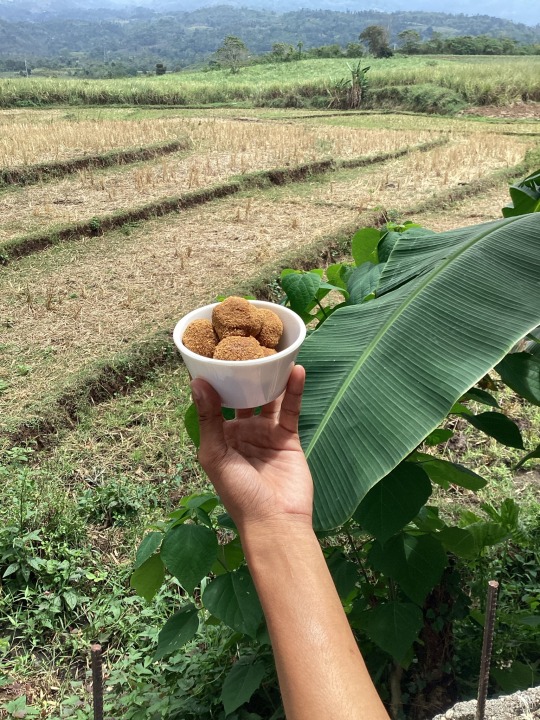
Grahamballs Everybody's Fave!!
"All you need is love. But a little chocolate now and then doesn't hurt." - Charles M. Schulz. CERTAINLY!!. The moment you try this delicious chocolate balls this will make your taste buds jump in happiness since the flavorful taste of chocolate and graham and MARSHMALLOW inside will make your heart melt!!. This chocolate balls is filled with a marshmallow of your type and a bit of sugary flavouring.💕
Ingredients
3/4 cup graham crackers, crushed
1/4 cup condensed milk
6 marshmallows, small
1 tablespoon graham crackers, crushed, for coating
Cooking oil, as needed
Instructions
Mix all the ingredients except for the 2 tablespoons of crushed graham crackers.
Place the mixture inside the refrigerator for at least 1 hour. (This step will make the mixture easier to handle.)
After an hour, start molding the graham balls. Scoop out 1 1/2 tablespoons of the mixture.
Form a disc shape out of the crushed graham mixture. Make sure that the size is enough to stuff the marshmallow.
Stuff the marshmallows. Cover it with the mixture.
Shape the graham balls into golf balls.
Roll into the remaining crushed graham crackers. Use cupcake liner to hold the graham balls stuffed with marshmallows.
Repeat the same process for the remaining mixture.
Check out our other platform posts:
0 notes
Text


Fried Hotdog Rings
"Cooking is like love. It should be entered into with abandon or not at all." - Harriet Van Horne. Definitely a Good Hotdog rings is Loveeee!!. Come with me to cook and try this very delicious and crunchy outside and tender inside Fried Hotdog Rings.
Ingredients:
4 medium wieners sliced into 6 sections each
24 medium tooth pics
½ cup all purpose flour
¼ cup corn starch
½ tsp garlic powder
½ tsp onion powder
½ tsp smoked paprika
½ tsp salt
½ tsp ground black pepper
1 large egg
½ cup cold water (vary depending on how thick you want the batter)
2 cup Panko bread crumbs
2 cup oil for frying
½ cup ketchup for serving
Instructions:
Slice the hot dogs lengthwise into 3 pieces and slice them in half.
Grab one slice and form it into a circle so it overlaps about 1/4 of an inch. Insert a tooth pick trough each so a circle forms. Set aside.
In a separate bowl add the flour, corn starch, seasoning, egg, and a bit of the water. Begin to whisk and continue adding water, a bit at a time, until a fairly thick batter forms. Think enough to coat the wieners.
Add the bread crumbs to a separate bowl.
Dredge the hot dog rings into the batter until they are coated and then into the bread crumbs until coated. Set aside.
Heat oil in a pan until it reaches between 329 F and 350 F - about
180 C. Fry the hot dog rings until golden brown. This won't take long. About 1 1/2 minutes on each side. Set aside on a wire rack.
Serve your hot dog rings with ketchup and enjoy.
Check out this links for more information:
1 note
·
View note