
Don't wanna be here? Send us removal request.
Statistics
We looked inside some of the posts by visionfox102 and here's what we found interesting.
Average Info
Notes Per Post
1
Likes Per Post
1
Reblog Per Post
0
Reply Per Post
0
Time Between Posts
15 days
Number of Posts By Type
Text
9
Last Seen Tumblr Blogs


Fun Fact
The Tumblr office adopted Tommy, an 11-year-old Pomeranian.
Text
Apollo Animation Software

With franchises like Shrek, Kung Fu Panda, and Madagascar to its name, DreamWorks Animation has spent the last 20 years building an animation mini-empire. The studio’s movies have pulled in over $11.5 billion in global box office, and, despite some recent underperformers, it’s continued to diversify with pushes into TV, apps, and online initiatives. This weekend the studio is heading back to movie theaters with the release of How To Train Your Dragon 2.
Best Software For Animation
Apollo Animation Software
Dreamworks Animation Apollo Software
Apollo Animation Software Free
Apollo Animation Software Project
Apollo Animation Software Tutorial
Apollo Animation Softwares
Apollo consists of Premo for animation (artists can pose on tablets and get instant playback of high-res models) and Torch for lighting (it’s really a services architecture that not only delivers. Pros: Both manual and auto-tracking. Camera restoration is powerful. DreamWorks Animation's Apollo Software received the Ub Iwerks Award for career contributions for technical advancements that made a significant impact on the art or industry of animation. Dreamworks Animation Skg Inc (NASDAQ:DWA) and Intel Corporation (NASDAQ:INTC) walked away with various benefits in their collaboration to make the new Apollo animation software used to make the How To Train Your Dragon 2 movie, Jon Erlichman revealed in a report for Bloomberg. Premo was built on the foundation of Apollo, the animation company’s software infrastructure for creating computer-generated movies. And it was created in-house by a team that included both the.
Boot mac from cd rom. Written and directed by Dean DeBlois (Lilo & Stitch, the original How To Train Your Dragon) the movie is one of DreamWorks’ most visually stunning films to date. Dragons swarm in epic battle sequences; humans gracefully race, flip, and fly; and key dramatic moments are powered solely by the visual nuance of a computer-generated character’s performance. It’s a leap in terms of both spectacle and emotion, and at the heart of it was a new version of the studio’s flagship animation software — one that’s letting DreamWorks animators do more than they ever could before.
Throughout the studio’s history, it’s relied on a custom piece of animation software named Emo. Originally developed in the 1980s by Pacific Data Images, Emo was designed to animate primitive graphics and text, but evolved into the kind of tool that could bring Princess Fiona and Puss in Boots to life. Despite several major overhauls, however, it had begun to show its age. Animators would have to work with rough geometric approximations of creatures rather than fully-realized models, or turn off different body parts altogether to get the software to run at an acceptable speed. Then there was rendering, which would tie up the workstation completely.
Like a lagging version of Photoshop, Emo simply wasn’t using modern hardware to its full potential. So five years ago, the studio met with its hardware partners HP and Intel to get a sense of where their respective products would be going in the years ahead. Realizing that a simple update wasn't going to get the job done, DreamWorks decided to rebuild its entire suite of production software from the ground up.
The Emo working environment in a scene from the original 'How To Train Your Dragon.'

DreamWorks CTO Lincoln Wallen went to the company’s artists, asking them to daydream what kind of tools they would like to use in a perfect world. Mac update keychain password. 'I recall it very well,' Simon Otto, head of character animation for Dragon 2, tells me in a suite at the studio’s Glendale headquarters. 'One of the first things was, '(What) if you just forget everything you’re doing today?' People with backgrounds in all different types of animation were consulted — from 2D animation, to stop-motion, to video games — in an effort to create a software solution that could bring together the best of all possible worlds. 'We created a big list of why certain mediums have advantages over others,' he says. That list provided big-picture guidance for the software team as it began building and iterating on a new animation tool for DreamWorks — and the end result is named Premo.
The differences between the two programs are obvious at first glance. Rather than forcing animators to deal with rough approximations or partial versions of characters, Premo allows them to work with the fully realized and skinned characters, which they can interact with and modify in real time. Camera positions can be moved on the fly to get a better vantage point of a particular movement, and thanks to robust support for the latest multi-core processors there’s enough power to put as many different characters in a shot as the director wants (some of the sequences in Dragon 2 feature dozens of different dragons flying around simultaneously). Rendering is still a requirement, of course, but Premo does it all in the background without tieing the app up and preventing additional work. Otto showed me a demo of the software on a machine with 16 cores — quadrupling what you’d find in the base-level Mac Pro — and the moment he tweaked a character’s position the sequence re-rendered seamlessly without even the mildest hiccup.
But while the raw power is nice, that alone doesn’t change the way artists actually interact with the software. To give you an idea of how computer animation usually works, once a character’s design is locked in it gets handed off to a different department that 'rigs' the model. That process essentially consists of creating the joints, limbs, and various points of articulation that the artists will later move around to pose the figure. (Imagine an old-school GI Joe action figure, but with 1,500 to 2,000 different moveable parts.) In Emo, animators used their mouse to move those pieces around, or edited the positions manually using a massive spreadsheet-like database. It was functional, but clunky to say the least.
With Premo, DreamWorks provided animators with large, pressure-sensitive screens from Wacom. Using the tip of their pen, they can interact directly with the CG character — with the skin, muscles, and other elements responding in real time — resulting in an experience that’s closer to posing a physical model than it is to mind-numbing data entry. According to Otto, it’s a more immediate, naturalistic way of working that allows for more experimentation — but more importantly, lets the artists bake more nuance into the final product.
An animator poses the face of Toothless in 'How To Train Your Dragon 2.'
How To Train Your Dragon 2 was the first DreamWorks film to use the studio's upgraded software suite — collectively known as Apollo — and animators point to several examples where Premo’s influence shines through. A scene in which the character of Stoick (voiced by Gerard Butler) confronts a woman from his past plays out largely through the character’s facial expressions alone. It’s a powerful piece of performance, and watching the conflicting emotions battle on his face is simply remarkable. There’s also a sweet moment where the dragon Toothless casts a longing glance back at his owner, Hiccup (Jay Baruchel). That moment didn’t exist in the original storyboards, and if using the older software the animator would have needed to turn off everyone but the single character they were working on. With Premo, however, they could keep everything turned on — and like an actor improvising in the moment, the animator saw the opportunity for an added interaction that makes the film better.
Despite all the advances, Otto is already looking past the immediate horizon, to when the studio’s tools can put even more control in the hands of the animator. 'I still want to go to the final lighting of the movie,' he says. Today, a given shot is first animated by an artist, and then shipped off to the lighting department where the virtual cinematography is put into place. A future version of Premo could conceivably swap that around, he says, allowing animators to move their characters around a fully-lit environment — though it would require a complete reimagining of the computer animation workflow. 'Now that’s a long way,' he smiles, 'because that’s really challenging.'
How To Train Your Dragon 2 opens Friday, June 13th. All images courtesy of DreamWorks Animation.
How to Train Your Dragon 2 is a visual delight that has entertained millions of moviegoers this summer.
But you may not realize that it’s also a technological wonder, made with a technological infrastructure that represents the state of the art in enterprise computing.
How to make How to Train Your Dragon 2
We went deep inside DreamWorks to find out how it used cutting-edge enterprise and animation tech to make this summer’s blockbuster animation.
Animated movies take a lot of computer know-how, but they have brought in more than $11.5 billion in revenues for DreamWorks Animation since its inception.
And How to Train Your Dragon 2 has generated more than $384 million in box office revenues so far this summer. That’s a good return so far on a film that was built on a $147 million budget (without cost overruns).
The marriage of technology and art at the Silicon Valley campus of DreamWorks Animation is what makes computer-animated movies possible. We took a tour of the Redwood City, California-based company to unmask the process behind the making of the movie.
‘No limits’
“There are no limits on what we can do now,” said Dean DeBlois, director of the film, said in an interview. “Having so many dragons and an army of thousands of soldiers is something we couldn’t have done before. The software is extremely powerful and it allows our artists to express themselves.”
Part of the reason for that return on investment is the efficiency of the cloud computing infrastructure that DreamWorks Animation built over the last decade, said Lincoln Wallen, chief technology officer of DreamWorks Animation, in an interview.
During the making of the film, DreamWorks built a software platform dubbed Apollo. It also created an artist’s animation software program called Premo, made so that artists could get back to drawing their characters and landscapes with pens and touch-sensitive computer displays. Those tools transformed the way that animators worked from a process of tweaking spreadsheets to something that resembles the old-fashioned way of drawing images with pencil and paper.
“Moore’s Law (the doubling of computing transistors every 24 months) has been a key transformer of every business and every product, including ours,” said Wallen. “That’s why we have Intel as a substantial partner in all of this.”
Such alliances are aimed not only at making the best film possible, but doing it in a cost-effective way.
Above: How to Train Your Dragon 2 features detailed characters.
“Our business is telling stories, but we are focused on visual stories,” said Katie Swanborg, director of technology communications and strategic alliances at DreamWorks Animation, in an interview.
When the artists need the computing power to create and modify film-quality images in real-time, DreamWorks taps the 16-core processors from Intel on every animation workstations, as well as the computing power from cloud-connected data centers.

495 artists and 398 terabytes
The numbers behind the effort are impressive, both in human capital and computer resources. It took about 495 artists to make the movie. Dean DeBlois, director and screenwriter, worked on several scripts and went through about two years of prototyping the film on comic-like storyboards. The storyboards are the first part of a dozen steps that have to happen before a film makes it to thousands of theaters.
To visualize Dragon 2, the team created more than 100,000 storyboards for the 90-minute film. It took about 18 months to two years to craft the film, with a lot of back-and-forth to get the look of every frame just right.
The animators then created more than 500 million digital files. It took a fleet of cloud computers in data centers more than 90 million render hours to render the 129,600 frames in the final film. If one computer had worked on the rendering task, it would have taken 10,273 years to complete. But DreamWorks had so much computing power on hand that it could render those frames inside of a week or so for the last cut.
The data is stored across 398 terabytes, or equivalent to the storage of 25,742 smartphones with 16GB of flash memory each. Each tree in the movie takes about four to six weeks to model, with 4,000 to 6,000 control points in the 3D animation.
Above: DreamWorks Animation’s Premo animation tool
Before a film gets to the theaters, it is really just a collection of digital files. Each one of the 129,600 frames goes through a dozen compute-intensive animation processes before it is finally finished. So a single frame may be associated with thousands of assets, said Stephen Bailey, CG supervisor at DreamWorks Animation.
Dragon 2 is just one of 10 films that DreamWorks Animation has in the works at any given time. That means it has to have the computing infrastructure for 5 billion digital files.
It has its own data centers, but it also taps Hewlett-Packard and other providers of public cloud technology for extra computing power. To do that, it has built a Linux-based server infrastructure.
Best Software For Animation
It may sound like DreamWorks is throwing every ounce of computing power it can afford at moviemaking. But it’s also working smarter than it has in the past by building tools like Premo and a video capture studio where the director can visualize a scene before the animators draw it.
“Our audience has become very critical of cinematography even if they don’t know it,” Swanborg said. “It’s a very personal choice, with the director making a decision about how we’re going to see the world of the film. It influences how we subconsciously feel at any given moment. That’s why we are doing cinematography in a far more intuitive and interactive way.”
Storytellers and computer animators don’t always get along. For example, Pixar’s film executives told a story last year about how they changed the gender of the villain in Monsters University from male to female, late in the process. That caused the animators to have to go back and re-animate a lot of scenes throughout the film.
Apollo Animation Software
Above: DreamWorks Animation CTO Lincoln Wallen helped create Apollo tools.
DeBlois said that he had a chance to rewrite the script several times during the concept stage, so he didn’t have a last-minute problem Pixar did. But he did realize how important it was to get the voice acting, the script, the story, and the cinematography in place before the artists went to the work of setting it in stone.
For tech people like DreamWorks’ Swanborg, it’s been a long march to produce technology that can properly support the vision of the creators. She has been at the studio more than 17 years and was production manager on the first Shrek film, which debuted in 2001.
Pacific Data Images, the predecessor of DreamWorks Animation, was started in 1994, the year that Netscape went public and the internet itself started taking off.
“We have reinvented the technology animation platform here at DreamWorks Animation, and that means a lot to our business,” Swanborg said. “The creative process can’t exist if we don’t have a viable enterprise and business that sits on top of it.”
Massive collaboration
Wallen said that the team decided to build its Apollo software suite on top of the company’s cloud technology, and to use it in the making of Dragon 2.
The Premo animation software was meant to replace DreamWorks’ aging Emo software, which dated from the 1980s, and to enable artists to think of an idea and to immediately draw it on a computer.
All of the digital files created with Premo are fed into the Apollo production system. Shaders and lighting specialists like Stephen Bailey, a CG supervisor, can check out a file. They use a program called Torch to apply the final shading and lighting to the files, making them more realistic.
Four lighting artists are so productive that they can deliver 90 shots in four weeks. That’s far more than in the past.
“I can view all of those assets at once, wherever they are stored, if I wish,” Bailey said.
Above: Stephen Bailey of DreamWorks Animation. Os x 12 download.
The creation of Apollo coincided with the larger technology trend of cloud computing in data centers and scalable multicore processors on client computers.
Still, it took a lot of custom work between DreamWorks Animation, Intel, and Hewlett-Packard to build the necessary software and hardware.
Dreamworks Animation Apollo Software
The tools allow creators to refine their creations like craftsmen do, changing the images through trial-and-error until they look just right. Technology has made that happen so that the turnaround time between when an artist creates something and the director approves it is much shorter.
Apollo Animation Software Free
Once the storyboards are done, they are handed over to the production animators, who use Premo and other tools to put the concepts into moving animations. The same animated scenes get more and more detailed the further into the process they go.
“We start with crude dragons, stage a fight scene, and then figure out exactly what will pass in front of the camera during that fight,” said Jason Schleifer, character animator. “When we are finished, we sit with the director to see if it really does work.”
The tech is perfect for characters who are caricatures of real people.
But DeBlois looks forward to the day when animators can capture every nuance of human faces and human expression.
Apollo Animation Software Project
“We’re not there yet,” he said. “With Dragon, you forget you are watching a cartoon. We want it to feel whimsical.”
Still, he’s confident that lifelike realism is around the corner.
“If the task ahead of us is creating a computer-generated character that blends into a real environment, the tech is getting there.”
Apollo Animation Software Tutorial
Above: The numbers on How to Train Your Dragon 2. Mac disk maker.
Apollo Animation Softwares
GamesBeat Gift Guides:Everything we recommend this holiday season
0 notes
Text
Autocad 2013 Crack Xforce Indir Ve

Xforce Autocad 2013 64 Bit
Autocad 2013 Crack Xforce Download
Autocad 2013 Crack Xforce Indir Ve 7
Crack For Autocad 2013
Boot mac from cd rom. X-Force-2010 64-Bit is. X-forceautocad-2013x64 Bits.exe. X-forceautocad-2013x64 Bits.exe Download from 4shared.com: Source link:. X force autocad 2013 64 bit indir,. AutoCAD 2013 Crack/Keygen 64 bit Free. Autocad 2018 32bit & 64bit setup with Xforce keygen/crack. AutoCAD 2013 X Force Keygen With Setup 32bit. Xforce Keygen Autocad 2013 64 Bit.zip DOWNLOAD. Download Xforce Keygen Autocad 2013 64-bit. Civilax Civil Engineering CommunityThis is the Autodesk Products 2016 Keygen program from the famous Crack Team “X-Force”, which all the Autodesk 2016 products’ activation k.Download AUTODESK 2016 All Products Patch & Keygen (X-FORCE) XTREME torrent from software category on Isohunt. Crack traktor pro 2.6.3 mac I’ve written on a of about how Apple’s approach to Siri differs from the intelligent assistants offered by Amazon and Google. Aug 2, 2017 - Crack AutoCAD 2013 using x-force keygen by following simple steps. Download AutoCAD 2013 32bit & 64 bit direct download link and torrent link.
AutoDesk AutoCAD 2013 Full Version Patch Crack Serial Key
I'm sure my friend all have been very familiar with this software, AutoDesk AutoCAD 2013 Full Version Patch Crack Serial Key, Keygen (x86 + x64) is a world-leading applications that can be used to design, visualize, and document your ideas clearly and efficiently. With an interesting tool for conceptual design in 3D and 2D parametric drawing, as well as key features to import and publish PDF files, AutoCAD is loaded with powerful capabilities to help you design with more impact and documents more quickly. For activation with the keygen first read the installation instructions that are included in the keygen.
Xforce Autocad 2013 64 Bit
With the ribbon interface, overall drafting productivity is increased as the number of steps to reach a command is decreased. The ribbon interface presents command options in a concise visual format, allowing you to quickly select commands based on the work you're doing.
Moving between applications is now quick and intuitive. The ribbon is both customizable and expandable so that it can be optimized for each user and meet each company's standards.
ViewCube and SteeringWheels:
The ViewCube is an interactive tool used to rotate and orient any solid or surface model in AutoCAD. Selecting a face, edge, or corner of the cube brings the model quickly to that predefined orientation.
Clicking and holding the ViewCube allows the model to be freely roated in any direction. Since the cube is in a fixed location on the screen, it provides at-a-glance orientation. The ViewCube will be introduced in all Autodesk products as a common tool for working with 3D models.
In addition to allowing quick access to the orbit command, the new SteeringWheels tool allows quick access to the pan, center, and zoom commands. The SteeringWheels is highly customizable so you can add walk through commands to help create and record a walk-through of your model.
Menu Browser:
Autocad 2013 Crack Xforce Download
Reviewing and working with several files is no longer a tedious and time-consuming process. The new menu browser interface allows you to browse files and examine thumbnail images and provides detailed information about file size and file creator. Plus, you can organize recently used files by name, date, or title.
Action Recorder:
Autocad 2013 Crack Xforce Indir Ve 7
Crack For Autocad 2013
The new action recorder saves time and increases productivity by automating repetitive tasks without requiring the skill or assistance of a professional CAD manager. Users can quickly record a task, add text messages and requests for input, then quickly select and play back recorded files.
The new layer dialog makes creating and editing layer properties faster and less prone to error. Changes are instantly reflected in the drawing as they are made in the dialog.
The manipulation of the dialog box has been simplified, and columns in the dialog can be individually resized so the contents of that column or its title are not truncated. Individual columns can be fixed in place so that the rest of the columns can be scrolled through and referenced to a fixed column such as the layer name.
Quick Properties:
The easily customizable quick properties menu increases productivity by reducing the steps to access properties information, ensuring that information presented is optimized for that particular user and project.
Quick View:
The quick view feature uses thumbnails instead of file names, making opening the correct drawing file and layout faster and decreasing the time spent opening incorrect drawing files.
System Requirements:
For Windows 7: Intel Pentium 4 or AMD Athlon dual-core processor, 3.0 GHz or higher with SSE2 technology
For Windows XP: Pentium 4 or AMD Athlon dual-core processor, 1.6 GHz or higher with SSE2 technology
6 GB free disk space for installation
1024 x 768 display resolution with true color (1,600 x 1,050 with true color recommended)
Microsoft Internet Explorer 7.0 or later web browser
AutoDesk AutoCAD 2013 Full Version Patch Crack Serial Key
AutoDesk AutoCAD 2013 (x86) Part 1, Part 2 (1.3 GB) (Jumbofiles)
(Full Version Patch Crack Serial Key, Keygen AutoDesk AutoCAD 2013) (x86)
AutoDesk AutoCAD 2013 (x64) Part 1, Part 2, Part 3 (1.3 GB) (Jumbofiles)
(Full Version Patch Crack Serial Key, Keygen AutoDesk AutoCAD 2013) (x64)
0 notes
Text
Mac Update Keychain Password

Mac Update Keychain Password Unlocker
Mac Can't Change Keychain Password
Mac Update Keychain Password Settings
-->
Overview
This tutorial shows you how to use Azure Notification Hubs to send push notifications to an iOS application. You create a blank Xamarin.iOS app that receives push notifications by using the Apple Push Notification service (APNs).
When you're finished, you are able to use your notification hub to broadcast push notifications to all the devices running your app. The finished code is available in the NotificationHubs app sample.

A keychain password is the master password for your Mac's 'Keychain Access' app, which stores your login information for websites and accounts across the internet. Now, the password for that account has been changed, allowing you to log in using the new password. However, this doesn’t change the password for the Keychain (macOS’s password management system), and you’ll be asked when you log into the account to update the keychain password.
In this tutorial, you create/update code to do the following tasks:
Generate the certificate signing request file
Register your app for push notifications
Create a provisioning profile for the app
Configure your notification hub for iOS push notifications
Send test push notifications
Prerequisites
Azure subscription. If you don't have an Azure subscription, create a free Azure account before you begin.
Latest version of Xcode
An iOS 10 (or later version) compatible device
Apple Developer Program membership.
Note
Because of configuration requirements for iOS push notifications, you must deploy and test the sample application on a physical iOS device (iPhone or iPad) instead of in the simulator.
Completing this tutorial is a prerequisite for all other Notification Hubs tutorials for Xamarin.iOS apps.
Generate the certificate-signing request file
The Apple Push Notification Service (APNs) uses certificates to authenticate your push notifications. Follow these instructions to create the necessary push certificate to send and receive notifications. For more information on these concepts, see the official Apple Push Notification Service documentation.
Generate the Certificate Signing Request (CSR) file, which Apple uses to generate a signed push certificate.
On your Mac, run the Keychain Access tool. It can be opened from the Utilities folder or the Other folder on the Launchpad.
Select Keychain Access, expand Certificate Assistant, and then select Request a Certificate from a Certificate Authority.
Note
By default, Keychain Access selects the first item in the list. This can be a problem if you're in the Certificates category and Apple Worldwide Developer Relations Certification Authority is not the first item in the list. Make sure you have a non-key item, or the Apple Worldwide Developer Relations Certification Authority key is selected, before generating the CSR (Certificate Signing Request).
Select your User Email Address, enter your Common Name value, make sure that you specify Saved to disk, and then select Continue. Leave CA Email Address blank as it isn't required.
Enter a name for the CSR file in Save As, select the location in Where, and then select Save.
This action saves the CSR file in the selected location. The default location is Desktop. Remember the location chosen for the file.
Next, register your app with Apple, enable push notifications, and upload the exported CSR to create a push certificate.
Register your app for push notifications
To send push notifications to an iOS app, register your application with Apple, and also register for push notifications.
If you haven't already registered your app, browse to the iOS Provisioning Portal at the Apple Developer Center. Sign in to the portal with your Apple ID, and select Identifiers. Then select + to register a new app.
On the Register a New Identifier screen, select the App IDs radio button. Then select Continue.
Update the following three values for your new app, and then select Continue:
Description: Type a descriptive name for your app.
Bundle ID: Enter a Bundle ID of the form Organization Identifier.Product Name as mentioned in the App Distribution Guide. The Organization Identifier and Product Name values must match the organization identifier and product name you use when you create your Xcode project. In the following screenshot, the NotificationHubs value is used as an organization identifier and the GetStarted value is used as the product name. Make sure the Bundle Identifier value matches the value in your Xcode project, so that Xcode uses the correct publishing profile.
Push Notifications: Check the Push Notifications option in the Capabilities section.
This action generates your App ID and requests that you confirm the information. Select Continue, then select Register to confirm the new App ID.
After you select Register, you see the new App ID as a line item in the Certificates, Identifiers & Profiles page.
In the Certificates, Identifiers & Profiles page, under Identifiers, locate the App ID line item that you just created, and select its row to display the Edit your App ID Configuration screen.
Creating a Certificate for Notification Hubs
A certificate is required to enable the notification hub to work with APNS. This can be done in one of two ways:
Create a .p12 that can be uploaded directly to Notification Hub.
Create a .p8 that can be used for token-based authentication (the newer approach).
The newer approach has a number of benefits (compared to using certificates) as documented in Token-based (HTTP/2) authentication for APNS. However, steps have been provided for both approaches.
OPTION 1: Creating a .p12 push certificate that can be uploaded directly to Notification Hub
Scroll down to the checked Push Notifications option, and then select Configure to create the certificate.
The Apple Push Notification service SSL Certificates window appears. Select the Create Certificate button under the Development SSL Certificate section.
The Create a new Certificate screen is displayed.
Note
This tutorial uses a development certificate, which your app uses to generate a unique device token. The same process is used when registering a production certificate. Just make sure that you use the same certificate type when sending notifications.
Select Choose File, browse to the location where you saved the CSR file from the first task, and then double-click the certificate name to load it. Then select Continue.
Disk maker mac os. Disk Drill: The best data recovery software for Mac OS X. Recover deleted or lost data from any storage device, iOS and Android.
After the portal creates the certificate, select the Download button. Save the certificate, and remember the location to which it's saved.
The certificate is downloaded and saved to your computer in your Downloads folder.
Note
By default, the downloaded development certificate is named aps_development.cer.
Double-click the downloaded push certificate aps_development.cer. This action installs the new certificate in the Keychain, as shown in the following image:
Note
Although the name in your certificate might be different, the name will be prefixed with Apple Development iOS Push Services.
In Keychain Access, right-click the new push certificate that you created in the Certificates category. Select Export, name the file, select the .p12 format, and then select Save.
You can choose to protect the certificate with a password, but this is optional. Click OK if you want to bypass password creation. Make a note of the file name and location of the exported .p12 certificate. They are used to enable authentication with APNs.
Note
Your .p12 file name and location might be different than what is pictured in this tutorial.
OPTION 2: Creating a .p8 certificate that can be used for token-based authentication
Make note of the following details:
App ID Prefix (this is a Team ID)
Bundle ID
Back in Certificates, Identifiers & Profiles, click Keys.
Note
If you already have a key configured for APNS, you can re-use the .p8 certificate that you downloaded right after it was created. If so, you can ignore steps 3 through 5.
Click the + button (or the Create a key button) to create a new key.
Provide a suitable Key Name value, then check the Apple Push Notifications service (APNs) option, and then click Continue, followed by Register on the next screen.
The additional components needed to install os cannot be found yosemite. Click Download and then move the .p8 file (prefixed with AuthKey_) to a secure local directory, then click Done.
Note
Be sure to keep your .p8 file in a secure place (and save a backup). After downloading your key, it cannot be re-downloaded as the server copy is removed.
On Keys, click on the key that you just created (or an existing key if you have chosen to use that instead).
Make note of the Key ID value.
Open your .p8 certificate in a suitable application of your choice such as Visual Studio Code then make note of the key value. This is the value between -----BEGIN PRIVATE KEY----- and -----END PRIVATE KEY----- .
Note
This is the token value that will be used later to configure Notification Hub.
At the end of these steps you should have the following information for use later in Configure your notification hub with APNs information:
Team ID (see step 1)
Bundle ID (see step 1)
Key ID (see step 7)
Token value i.e. the .p8 key value (see step 8)
Create a provisioning profile for the app
Return to the iOS Provisioning Portal, select Certificates, Identifiers & Profiles, select Profiles from the left menu, and then select + to create a new profile. The Register a New Provisioning Profile screen appears.
Select iOS App Development under Development as the provisioning profile type, and then select Continue.
Next, select the app ID you created from the App ID drop-down list, and select Continue.
In the Select certificates window, select the development certificate that you use for code signing, and select Continue. This certificate isn't the push certificate you created. If one does not exist, you must create it. If a certificate does exist, skip to the next step. To create a development certificate if one does not exist:
If you see No Certificates are available, select Create Certificate.
In the Software section, select Apple Development. Then select Continue.
In the Create a New Certificate screen, select Choose File.
Browse to the Certificate Signing Request certificate you created earlier, select it, and then select Open.
Select Continue.
Download the development certificate, and remember the location to which it's saved.
Return to the Certificates, Identifiers & Profiles page, select Profiles from the left menu, and then select + to create a new profile. The Register a New Provisioning Profile screen appears.
Since Wamp installs MySQL, all you need to do is set up a user and a database. Click the Wamp icon in the system tray, then go to MySQL » MySQL console. If the console prompts you for a password, just hit Enter. Create a MySQL database. Now you need to create a new MySQL database. You can do this by issuing the following command in the console. Create mysql database on local machine. A database in MySQL is implemented as a directory containing files that correspond to tables in the database. Because there are no tables in a database when it is initially created, the CREATE DATABASE statement creates only a directory under the MySQL data directory.
In the Select certificates window, select the development certificate that you just created. Then select Continue.
Next, select the devices to use for testing, and select Continue.
Finally, choose a name for the profile in Provisioning Profile Name, and select Generate.
When the new provisioning profile is created, select Download. Remember the location to which it's saved.
Browse to the location of the provisioning profile, and then double-click it to install it on your Xcode development machine.
Create a notification hub
In this section, you create a notification hub and configure authentication with APNs by using either the .p12 push certificate or token-based authentication. If you want to use a notification hub that you've already created, you can skip to step 5.
Sign in to the Azure portal.
Select All services on the left menu, and then select Notification Hubs in the Mobile section. Select the star icon next to the service name to add the service to the FAVORITES section on the left menu. After you add Notification Hubs to FAVORITES, select it on the left menu.
On the Notification Hubs page, select Add on the toolbar.
On the Notification Hub page, do the following steps:
Enter a name in Notification Hub.
Enter a name in Create a new namespace. A namespace contains one or more hubs.
Select a value from the Location drop-down list box. This value specifies the location in which you want to create the hub.
Select an existing resource group in Resource Group, or create a name for a new resource group.
Select Create.
Select Notifications (the bell icon), and then select Go to resource. You can also refresh the list on the Notification Hubs page and select your hub.
Select Access Policies from the list. Note that the two connection strings are available to you. You'll need them later to handle push notifications.
Important
Do not use the DefaultFullSharedAccessSignature policy in your application. This is meant to be used in your back end only.
Configure your notification hub with APNs information
Under Notification Services, select Apple (APNS) then follow the appropriate steps based on the approach you chose previously in the Creating a Certificate for Notification Hubs section.
Note
If you build your app with App Store or Ad-Hoc distribution profile, use the Production for Application Mode. This will allow your device to send push notifications to users who purchased your app from the store.
OPTION 1: Using a .p12 push certificate
Select Certificate.
Select the file icon.
Select the .p12 file that you exported earlier, and then select Open.
If required, specify the correct password.
Select Sandbox mode.
Select Save.
OPTION 2: Using token-based authentication
Select Token.
Enter the following values that you acquired earlier:
Key ID
Bundle ID
Team ID
Token
Choose Sandbox
Select Save.
You've now configured your notification hub with APNs. You also have the connection strings to register your app and send push notifications.
Connect your app to the notification hub

Create a new project
In Visual Studio, create a new iOS project and select the Single View App template, and click Next
Enter your App Name and Organization identifier, then click Next, then Create
From the Solution view, double-click Info.plist and under Identity make sure your Bundle Identifier matches the one used when creating your provisioning profile. Under Signing ensure that your Developer account is selected under Team, 'Automatically manage signing' is selected and your Signing Certificate and Provisioning Profile are automatically selected.
From the Solution view, double-click the Entitlements.plist and ensure that Enable Push Notifications is checked.
Add the Azure Messaging package. In the Solution view, right-click the project and select Add > Add NuGet Packages. Search for Xamarin.Azure.NotificationHubs.iOS and add the package to your project.
Add a new file to your class, name it Constants.cs and add the following variables and replace the string literal placeholders with the hubname and the DefaultListenSharedAccessSignature noted earlier.
In AppDelegate.cs, add the following using statement:
Create an implementation of the MSNotificationHubDelegate in the AppDelegate.cs:
In AppDelegate.cs, update FinishedLaunching() to match the following code:
In AppDelegate.cs, implement the DidReceivePushNotification method for the AzureNotificationHubListener class:
Run the app on your device.
Send test push notifications
You can test receiving notifications in your app with the Test Send option in the Azure portal. It sends a test push notification to your device.
Push notifications are normally sent in a back-end service like Mobile Apps or ASP.NET using a compatible library. If a library is not available for your back-end, you can also use the REST API directly to send notification messages.
Next steps
In this tutorial, you sent broadcast notifications to all your iOS devices registered with the backend. To learn how to push notifications to specific iOS devices, advance to the following tutorial:
Due to the robust security within Apple’s new macOS operating system, there is a high emphasis on data protection. Whether you’re simply logging in, downloading new software, or trying to delete files or apps from the hard drive, you will always need to input your Mac password. Here are a few ways you can remember or reset it and get back to using your Mac.
How to avoid forgetting passwords?
Often when Mac users forget their passwords, it’s the consequence of having a cluttered Mac. With an overload of information to sieve through every day, people have a tendency to forget information. So, first and foremost, you should clean up your Mac to make sure your new password is the one entering you into a tidy and organised computer.
With CleanMyMac X, you can remove large and unwanted files, organising your digital folders and clearing your physical headspace. With its smart, one-click cleaning approach and powerful scanning, you can swiftly dispose of useless documents and apps which may even be slowing your Mac down. With CleanMyMac, you can launch a Smart Scan, removing systems junk, photo and file duplicates, and everything else that will clog up your Mac.
In addition, this amazing tool is free to download, so what are you waiting for?
Vmware fusion 11.5 crack mac. VMware Fusion: Powerfully Simple Virtual Machines for Mac. VMware Fusion Pro and VMware Fusion Player Desktop Hypervisors give Mac users the power to run Windows on Mac along with hundreds of other operating systems, containers or Kubernetes clusters, side by side with Mac applications, without rebooting. Dr Fone for MAC + Windows Registration Code: Also, The best part of using Dr Fone Toolkit Crack for IOS Android is the Data Recovery. VMware Fusion Pro 11.5.2. VMware Fusion 3 Crack Download, Installer Autodesk Alias Speedform 2018, How To Intsall Techsmith Camtasia Studio 8, AutoDesSys Bonzai 3D Buy Cheap. Vmware Fusion 11, Installer Adobe Audition 3, Keygen For Avid Media Composer 6, Lumion 8.0 Crack.
How to reset a password
Get a password hint
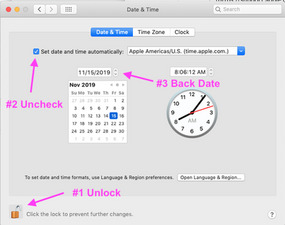
Before resetting your password, you should always check to see if the password hint jogs your memory. The ‘hint’ is a phrase you entered relating to the password when you first set it up, and is triggered once you make 3 incorrect password attempts:
Open System Preferences (the app with the cog icon).
Select ‘Users & Groups.’
Click the Lock icon in the bottom left to make changes.
Press the Return key 3 times.
The screen will shake each time you press Return, with the third shake generating the password hint which will appear below the Password field. Hopefully this initiates a Eureka Moment making you remember the Login and brings an end to the password perils.
Sometimes though, the hint doesn’t show up. That’s because the Mac wasn’t set up to show password hints in the Login Options – only modified by logging into your Mac. Fortunately, there are an array of other solutions to finding your password.
Change password from another account
In the event that you happen to share your Mac with another person, and they have their own account, you can use their Login to reset your password. Or, if you have a different account on the Mac that you know the password to, you can recover your Mac admin password by following these steps:

Click on the Apple logo in the top left of the tools bar and click Log Out.
Select the alternative account and enter the password.
Open System Preferences > Users & Groups.
Click the Lock icon in the bottom left.
Enter the password again.
In the Sidebar, select the account with the missing password.
Click change password.
Fill in the New Password, Verify and Password Hint fields.
Click Change Password.
Now, the password for that account has been changed, allowing you to log in using the new password. However, this doesn’t change the password for the Keychain (macOS’s password management system), and you’ll be asked when you log into the account to update the keychain password. This requires you to enter the old forgotten password, so you’ll have to click ‘Create New Keychain’.
This introduces a further problem, because if the other user isn’t the registered Admin, they won’t be able to change the password for you. Luckily, there is an alternative solution to recovering your password.
Use Recovery Mode
Apple provides a tool to replace a Mac’s password through bypassing all of the previous steps. This is the best option if you don’t have a password hint, can’t log in via another account and have completely forgotten your password.
Turn off your Mac.
Press the power button whilst holding Command + R.
The Mac will boot into Recovery Mode – when you see the load bar appear you can let go of the keys.
Select ‘Disk Utility’ and press Continue.
Go to Utilities > Terminal.
Enter ‘resetpassword’ and press the Return key.
Select the main hard drive.
Select the User Account (the account you’d like to change).
Enter a new password and create a password hint.
Click Save – a warning will appear that the Keychain Password hasn’t changed. Click OK.
Shut Down your Mac and start it up again. Now you can log in using the new password.
Protect Your Data
Due to the fact Recovery Mode provides a nifty means to resetting the Mac password, you may be wary that anyone can hack your Mac – and once someone accesses your Mac, you’ve usually lost control over it. So, it’s a good job there’s some interventions you can make to prevent this happening.
The best way to protect your data is to active FileVault encryption. This means that the Password Reset option won’t become available unless you unlock it with Disk Utility. To turn it on and set it up:
Choose Apple > System Preferences > Security & Privacy.
Click the FileVault tab.
Click the Lock icon, and enter Login credentials.
Click Turn on FileVault.
Once done, you will receive a Recovery Key and a password, which you should take note of. If you lose these, your data won’t be able to be recovered and will be lost forever.
Another effective way to protect the data on your Mac is to download tried and tested app CleanMyMac X. With automatic clean-ups and regular system monitors, your data is continuously observed and safeguarded from any piracy or hacking.
Use Target Disk Mode

Mac Update Keychain Password Unlocker
If all else fails, Target Disk Mode can help you recover whatever you can from the lost Mac. Using another Mac, you can access the hard drive on the lost Mac and save any wanted data.
Shut down the Mac.
Connect to another Mac using a FireWire or Thunderbolt cable.
Start up your Mac and hold the T key while it loads.
This activates Target Disk Mode.
Mac Can't Change Keychain Password
The hard drive from the lost Mac should now appear, allowing you to recover and save wanted data onto the new Mac.
Mac Update Keychain Password Settings
Thanks for reading and stay tuned!
0 notes
Text
Os X 12 Download

This directory contains binaries for a base distribution and packages to run on Mac OS X (release 10.6 and above). Mac OS 8.6 to 9.2 (and Mac OS X 10.1) are no longer supported but you can find the last supported release of R for these systems (which is R 1.7.1) here. Releases for old Mac OS X systems (through Mac OS X 10.5) and PowerPC Macs can be found in the old directory.
Os X Version 12 Download
Mac Os X 12 Download
The additional components needed to install mac os x can t be found. Note: CRAN does not have Mac OS X systems and cannot check these binaries for viruses.Although we take precautions when assembling binaries, please use the normal precautions with downloaded executables.
Resident Evil 7 Biohazard Mac OS X – GOLD EDITION for Mac. Resident Evil 7 Biohazard Mac OS X This is the 9th title in the Resident Evil franchise and brings back focus on the horror-survival theme. Download OS X Lion for Mac free. Important Note: OS X 10.7 Lion has been replaced by OS X 10.8 Mountain Lion.
Os X Version 12 Download
Install older OS X onto an external drive. The following method allows you to download Mac OS X Lion, Mountain Lion, and Mavericks. Start your Mac holding down Command + R. Prepare a clean external drive (at least 10 GB of storage). Within OS X Utilities, choose Reinstall OS X. Select external drive as a source. Enter your Apple ID. Testing conducted by Apple in October 2020 on production 1.4GHz quad-core Intel Core i5-based 13-inch MacBook Pro systems with 8GB RAM, 256GB SSD, and prerelease macOS Big Sur. Systems tested with WPA2 Wi-Fi network connection while running on battery power, with display brightness set to 12 clicks from bottom or 75%.
Package binaries for R versions older than 3.2.0 are only available from the CRAN archive so users of such versions should adjust the CRAN mirror setting (https://cran-archive.r-project.org) accordingly.
R 4.0.4 'Lost Library Book' released on 2021/02/15
Please check the SHA1 checksum of the downloaded image to ensure that it has not been tampered with or corrupted during the mirroring process. For example type openssl sha1 R-4.0.4.pkg in the Terminal application to print the SHA1 checksum for the R-4.0.4.pkg image. On Mac OS X 10.7 and later you can also validate the signature using pkgutil --check-signature R-4.0.4.pkg
Mac Os X 12 Download
Latest release:
R-4.0.4.pkg (notarized and signed) SHA1-hash: 0b2b3bc846f6ebc72a8bc0b53e6e85d600d95deb (ca. 85MB)R 4.0.4 binary for macOS 10.13 (High Sierra) and higher, signed and notarized package. Contains R 4.0.4 framework, R.app GUI 1.74 in 64-bit for Intel Macs, Tcl/Tk 8.6.6 X11 libraries and Texinfo 6.7. The latter two components are optional and can be ommitted when choosing 'custom install', they are only needed if you want to use the tcltk R package or build package documentation from sources.
Note: the use of X11 (including tcltk) requires XQuartz to be installed since it is no longer part of OS X. Always re-install XQuartz when upgrading your macOS to a new major version. Also please do not install beta versions of XQuartz (even if offered).
This release supports Intel Macs, but it is also known to work using Rosetta2 on M1-based Macs. Native Apple silicon binary is expected for R 4.1.0 if support for Fortran sabilizes, for experimental builds and updates see mac.R-project.org.
Important: this release uses Xcode 12.4 and GNU Fortran 8.2. If you wish to compile R packages from sources, you will need to download GNU Fortran 8.2 - see the tools directory.
NEWS (for Mac GUI)News features and changes in the R.app Mac GUI Mac-GUI-1.74.tar.gz SHA1-hash: 2c791fd1fd2d8f90b0887c1f9541882200a6eab8Sources for the R.app GUI 1.74 for Mac OS X. This file is only needed if you want to join the development of the GUI, it is not intended for regular users. Read the INSTALL file for further instructions. Note: Previous R versions for El Capitan can be found in the el-capitan/base directory.
Binaries for legacy OS X systems:
R-3.6.3.nn.pkg (signed) SHA1-hash: c462c9b1f9b45d778f05b8d9aa25a9123b3557c4 (ca. 77MB)R 3.6.3 binary for OS X 10.11 (El Capitan) and higher, signed package. Contains R 3.6.3 framework, R.app GUI 1.70 in 64-bit for Intel Macs, Tcl/Tk 8.6.6 X11 libraries and Texinfo 5.2. The latter two components are optional and can be ommitted when choosing 'custom install', they are only needed if you want to use the tcltk R package or build package documentation from sources. R-3.3.3.pkg MD5-hash: 893ba010f303e666e19f86e4800f1fbf SHA1-hash: 5ae71b000b15805f95f38c08c45972d51ce3d027 (ca. 71MB)R 3.3.3 binary for Mac OS X 10.9 (Mavericks) and higher, signed package. Contains R 3.3.3 framework, R.app GUI 1.69 in 64-bit for Intel Macs, Tcl/Tk 8.6.0 X11 libraries and Texinfo 5.2. The latter two components are optional and can be ommitted when choosing 'custom install', it is only needed if you want to use the tcltk R package or build package documentation from sources.
Note: the use of X11 (including tcltk) requires XQuartz to be installed since it is no longer part of OS X. Always re-install XQuartz when upgrading your OS X to a new major version.
R-3.2.1-snowleopard.pkg MD5-hash: 58fe9d01314d9cb75ff80ccfb914fd65 SHA1-hash: be6e91db12bac22a324f0cb51c7efa9063ece0d0 (ca. 68MB)R 3.2.1 legacy binary for Mac OS X 10.6 (Snow Leopard) - 10.8 (Mountain Lion), signed package. Contains R 3.2.1 framework, R.app GUI 1.66 in 64-bit for Intel Macs. This package contains the R framework, 64-bit GUI (R.app), Tcl/Tk 8.6.0 X11 libraries and Texinfop 5.2. GNU Fortran is NOT included (needed if you want to compile packages from sources that contain FORTRAN code) please see the tools directory. NOTE: the binary support for OS X before Mavericks is being phased out, we do not expect further releases!
The new R.app Cocoa GUI has been written by Simon Urbanek and Stefano Iacus with contributions from many developers and translators world-wide, see 'About R' in the GUI.
Subdirectories:
toolsAdditional tools necessary for building R for Mac OS X: Universal GNU Fortran compiler for Mac OS X (see R for Mac tools page for details). baseBinaries of R builds for macOS 10.13 or higher (High Sierra)contribBinaries of package builds for macOS 10.13 or higher (High Sierra)el-capitanBinaries of package builds for OS X 10.11 or higher (El Capitan build)mavericksBinaries of package builds for Mac OS X 10.9 or higher (Mavericks build)oldPreviously released R versions for Mac OS X
You may also want to read the R FAQ and R for Mac OS X FAQ. For discussion of Mac-related topics and reporting Mac-specific bugs, please use the R-SIG-Mac mailing list.

Information, tools and most recent daily builds of the R GUI, R-patched and R-devel can be found at http://mac.R-project.org/. Please visit that page especially during beta stages to help us test the Mac OS X binaries before final release!
Package maintainers should visit CRAN check summary page to see whether their package is compatible with the current build of R for Mac OS X.
https://visionfox102.tumblr.com/post/656113628147253248/mac-disk-maker. Binary libraries for dependencies not present here are available from http://mac.R-project.org/libs and corresponding sources at http://mac.R-project.org/src.
Last modified: 2021/02/15, by Simon Urbanek
This is a wide and variant collection of CD-ROM based software, that is, software that came on a CD-ROM for installation on computers, or played in consoles. Ranging from applications and games to gatherings of public-domain software or clip art, the heyday of the CD-ROM is roughly 1989 to 2001. Step1: Insert CD/DVD into CD-ROM, and start/restart computer. Step2: On the black screen, when you are prompted to press any key to boot computer from CD, press any key on the keyboard. After a while your computer will boot from the CD-ROM without setting any things. The main Hiren’s Boot CD file is in ISO format when it is downloaded and one would require a burning software for it such as Windows or Nero that supports this format. Once the burning is done to a CD you need to insert it to your CD-ROM and then start the computer. Ensure that in your BIOS you have set to boot from CD-ROM. How to boot mac from cd. This Mac OS 9.2.2 'boot kit' was made by @that-ben and makes the process of booting (and installing) Mac OS 9 on any G3 and most G4's from an USB stick a little bit easier, because not all the Mac OS 9 install CD images can be used to boot a Mac from an unlocked volume (such as from an USB stick or hard drive).
Since Wamp installs MySQL, all you need to do is set up a user and a database. Click the Wamp icon in the system tray, then go to MySQL » MySQL console. If the console prompts you for a password, just hit Enter. Create a MySQL database. Now you need to create a new MySQL database. You can do this by issuing the following command in the console. Create local mysql database mac. A database in MySQL is implemented as a directory containing files that correspond to tables in the database. Because there are no tables in a database when it is initially created, the CREATE DATABASE statement creates only a directory under the MySQL data directory.
VMware Fusion: Powerfully Simple Virtual Machines for Mac. VMware Fusion Pro and VMware Fusion Player Desktop Hypervisors give Mac users the power to run Windows on Mac along with hundreds of other operating systems, containers or Kubernetes clusters, side by side with Mac applications, without rebooting. Vmware fusion 11.5 crack mac os. VMware Fusion 3 Crack Download, Installer Autodesk Alias Speedform 2018, How To Intsall Techsmith Camtasia Studio 8, AutoDesSys Bonzai 3D Buy Cheap. Vmware Fusion 11, Installer Adobe Audition 3, Keygen For Avid Media Composer 6, Lumion 8.0 Crack.
0 notes
Text
Boot Mac From Cd Rom

(There's no video for Mac OS 9.2.2 'boot kit' for booting your G3/G4 from an USB stick yet. Please contribute to MR and add a video now!)
https://visionfox102.tumblr.com/post/656113628147253248/mac-disk-maker. There are a number of reasons why you might need to create a USB boot drive for your Mac. Thankfully — with Disk Drill, the process is now much easier than you might expect. Disk Drill has a selection of powerful tools that help you create bootable USB drivers for your Mac, quickly and easily. Disk Drill: The best data recovery software for Mac OS X. Recover deleted or lost data from any storage device, iOS and Android. Install Disk Creator is a utility tool that can surely bring convenience to macOS users, specifically those who regularly conduct clean installations and needs to backup important files. This program enables you to turn a simple USB flash drive or any other media into a fully bootable macOS installer that will allow you to reinstall your. Free slideshow maker for Mac download. Movavi SSM is a simple slideshow program for Mac that enables you to create memorable slideshows in a few steps and make it awesome.
Mac Pro Boot From Cd Rom
Boot Mac From Cd-rom
This Mac OS 9.2.2 'boot kit' was made by @that-ben and makes the process of booting (and installing) Mac OS 9 on any G3 and most G4's from an USB stick a little bit easier, because not all the Mac OS 9 install CD images can be used to boot a Mac from an unlocked volume (such as from an USB stick or hard drive). Step 6: Click the CD ROM drive icon, and select the Windows 10 disk from the CD/DVD drop-down menu. The disc may be named something like CCCOMAX64FREEN-US-DV9 depending on the version of Windows. Step1: Insert CD/DVD into CD-ROM, and start/restart computer. Step2: On the black screen, when you are prompted to press any key to boot computer from CD, press any key on the keyboard. After a while your computer will boot from the CD-ROM without setting any things. Most Macs will allow you to boot from a CD by pressing and holding C on startup. Booting an operating system other than OS X or macOS from a USB drive is a little more involved.
Mac Pro Boot From Cd Rom

Boot Mac From Cd-rom
What is Mac OS 9.2.2 'boot kit' for booting your G3/G4 from an USB stick?
Stop wasting plastic! You've been doing it wrong if you burn install CD's for your old Mac :P
This Mac OS 9.2.2 'boot kit' was made by @that-ben and makes the process of booting (and installing) Mac OS 9 on any G3 and most G4's from an USB stick a little bit easier, because not all the Mac OS 9 install CD images can be used to boot a Mac from an unlocked volume (such as from an USB stick or hard drive). This disk image does boot the computer into a fully useable desktop (albeit quite slow) and it's loaded with utilities and disk image mounting tools which will enable you to prepare and install Mac OS, everything without the need for a CD-ROM drive at all. Since the USB drive is unlocked, you can even surf the web using the pre-installed Classilla browser and go get more files, directly from the same computer you're about to install Mac OS on :P
There is no Mac OS installer on this disk image. You still have to download a Mac OS install CD ISO of your choice (Mac OS 9.2.2 Universal 2002 edition is highly suggested unless you know and want to use your machine specific Mac OS install CD) in order to install it on your Mac.
Follow these steps to clone this disk image onto an USB stick and follow the link at the bottom of that article to learn how to boot G3's and G4's from an USB stick using Open Firmware.
Once the Mac is booted off of the USB stick, what I would do is:
1) Copy anything from the internal hard drive that's worth keeping onto an USB stick or external drive and then format the internal hard drive as HFS Extended using the Drive Setup found under the Applications folder on the USB stick.
2) Use another USB stick (formated as FAT32 if your main computer is a Windows PC or HFS Extended if it's under Mac OS X) or the network to copy your Mac OS install CD image onto that Mac's internal hard drive.
3) Lock that Mac OS install disk image (click on it to select it, then under the menu at the top: File > Get Info, then check the Locked attribute on the bottom/left corner).
4) Use the pre-loaded Toast 5 Titanium to mount the Mac OS install CD image (locked).
5) Launch the installer and enjoy your freshly installed Mac! No CD, no pollution.
Pre-loaded software installed on the USB stick that you can use when booting off of it include: Create local mysql database mac.
Classilla (9.3.3)
Disk Copy 6.5b13
Disk First Aid
DiskTracker 2.3.3
Drive Setup
GraphicConverter Classic 6.5
MacErrors 2.0.1
NativeChecker
QuickTime 6.0.3
Quit Anything 1.6.1
ResEdit 2.1.3
SerialReader 2001 w/ Serial Box 08.2005 definitions
SoundApp 2.7.3
StuffIt Deluxe 7.0.3
Toast Titanium 5.2.3
Virtual CD/DVD-ROM Utility
Mac OS 9.2.2 Boot Kit.zip(164.02 MiB / 171.99 MB) Mac OS 9.2.2 Boot Kit / Toast (ISO) image / Zipped
1713 / 2019-02-12 / 3772eaedf5a1528c88d0a65252eb1333668b35c1 / /
Architecture
IBM PowerPC
Architecture: PPC
Use this to boot any G3 and most G4's into a fully useable Mac OS 9.2.2 desktop from an USB stick, pre-loaded with all the tools you need to prepare and install Mac OS 9 on your PowerPC Mac. This could also be used to boot the QEMU emulator if you wanted.
Emulating this? It should run fine under: SheepShaver
0 notes
Text
The Additional Components Needed To Install Os Cannot Be Found

Install the Windows normally like you will install on a PC, installing Windows on your Chromebook in place of Chrome OS. Partition the internal drive as per your liking. We deleted all the internal partitions and told Windows to install itself using the allocated space. If you install Globus Connect Server and select the MyProxy option, two components are installed: a GridFTP server and a MyProxy server. By default, certificates for both of these components are automatically installed so there is no need to add or configure X.509 certificates separately. If the decryption is done for the purpose of achieving interoperability of open source operating systems with proprietary operating systems, it would be protected by Section 1201(f) the Act. Cf., Universal City Studios, Inc. Corley, 273 F.3d 429 (2d Cir. 2001) at notes 5 and 16. On macOS install.packages works as it does on other Unix-alike systems, but there is an additional type mac.binary (available for the CRAN distribution but not when compiling R from source) which can be passed to install.packages in order to download and install binary packages from a suitable repository. This release will not install.NET Framework in both live and slipstreamed install, unless: - Media Center Edition is used -.NET Framework 1.1 SP1 is installed - Tablet PC Edition is used -.NET Framework 1.0 SP3 is installed Users can still install.NET FWs of their choice from the Add/Remove Components wizard in Control Panel.
The Additional Components Needed To Install Os Cannot Be Found Directly
The Additional Components Needed To Install Os Cannot Be Found Within
The Additional Components Needed To Install Os Cannot Be Found As A
This directory contains binaries for a base distribution and packages to run on Mac OS X (release 10.6 and above). Mac OS 8.6 to 9.2 (and Mac OS X 10.1) are no longer supported but you can find the last supported release of R for these systems (which is R 1.7.1) here. Releases for old Mac OS X systems (through Mac OS X 10.5) and PowerPC Macs can be found in the old directory.
Note: CRAN does not have Mac OS X systems and cannot check these binaries for viruses.Although we take precautions when assembling binaries, please use the normal precautions with downloaded executables. Create local mysql database mac os.
Package binaries for R versions older than 3.2.0 are only available from the CRAN archive so users of such versions should adjust the CRAN mirror setting (https://cran-archive.r-project.org) accordingly.
R 4.0.4 'Lost Library Book' released on 2021/02/15
Please check the SHA1 checksum of the downloaded image to ensure that it has not been tampered with or corrupted during the mirroring process. For example type openssl sha1 R-4.0.4.pkg in the Terminal application to print the SHA1 checksum for the R-4.0.4.pkg image. On Mac OS X 10.7 and later you can also validate the signature using pkgutil --check-signature R-4.0.4.pkg

Latest release:
R-4.0.4.pkg (notarized and signed) SHA1-hash: 0b2b3bc846f6ebc72a8bc0b53e6e85d600d95deb (ca. 85MB)R 4.0.4 binary for macOS 10.13 (High Sierra) and higher, signed and notarized package. Contains R 4.0.4 framework, R.app GUI 1.74 in 64-bit for Intel Macs, Tcl/Tk 8.6.6 X11 libraries and Texinfo 6.7. The latter two components are optional and can be ommitted when choosing 'custom install', they are only needed if you want to use the tcltk R package or build package documentation from sources.
Note: the use of X11 (including tcltk) requires XQuartz to be installed since it is no longer part of OS X. Always re-install XQuartz when upgrading your macOS to a new major version. Also please do not install beta versions of XQuartz (even if offered).
This release supports Intel Macs, but it is also known to work using Rosetta2 on M1-based Macs. Native Apple silicon binary is expected for R 4.1.0 if support for Fortran sabilizes, for experimental builds and updates see mac.R-project.org.
Important: this release uses Xcode 12.4 and GNU Fortran 8.2. If you wish to compile R packages from sources, you will need to download GNU Fortran 8.2 - see the tools directory.
NEWS (for Mac GUI)News features and changes in the R.app Mac GUI Mac-GUI-1.74.tar.gz SHA1-hash: 2c791fd1fd2d8f90b0887c1f9541882200a6eab8Sources for the R.app GUI 1.74 for Mac OS X. This file is only needed if you want to join the development of the GUI, it is not intended for regular users. Read the INSTALL file for further instructions. Note: Previous R versions for El Capitan can be found in the el-capitan/base directory.
Binaries for legacy OS X systems:
R-3.6.3.nn.pkg (signed) SHA1-hash: c462c9b1f9b45d778f05b8d9aa25a9123b3557c4 (ca. 77MB)R 3.6.3 binary for OS X 10.11 (El Capitan) and higher, signed package. Contains R 3.6.3 framework, R.app GUI 1.70 in 64-bit for Intel Macs, Tcl/Tk 8.6.6 X11 libraries and Texinfo 5.2. The latter two components are optional and can be ommitted when choosing 'custom install', they are only needed if you want to use the tcltk R package or build package documentation from sources. R-3.3.3.pkg MD5-hash: 893ba010f303e666e19f86e4800f1fbf SHA1-hash: 5ae71b000b15805f95f38c08c45972d51ce3d027 (ca. 71MB)R 3.3.3 binary for Mac OS X 10.9 (Mavericks) and higher, signed package. Contains R 3.3.3 framework, R.app GUI 1.69 in 64-bit for Intel Macs, Tcl/Tk 8.6.0 X11 libraries and Texinfo 5.2. The latter two components are optional and can be ommitted when choosing 'custom install', it is only needed if you want to use the tcltk R package or build package documentation from sources.
Note: the use of X11 (including tcltk) requires XQuartz to be installed since it is no longer part of OS X. Always re-install XQuartz when upgrading your OS X to a new major version.
R-3.2.1-snowleopard.pkg MD5-hash: 58fe9d01314d9cb75ff80ccfb914fd65 SHA1-hash: be6e91db12bac22a324f0cb51c7efa9063ece0d0 (ca. 68MB)R 3.2.1 legacy binary for Mac OS X 10.6 (Snow Leopard) - 10.8 (Mountain Lion), signed package. Contains R 3.2.1 framework, R.app GUI 1.66 in 64-bit for Intel Macs. This package contains the R framework, 64-bit GUI (R.app), Tcl/Tk 8.6.0 X11 libraries and Texinfop 5.2. GNU Fortran is NOT included (needed if you want to compile packages from sources that contain FORTRAN code) please see the tools directory. NOTE: the binary support for OS X before Mavericks is being phased out, we do not expect further releases!
The new R.app Cocoa GUI has been written by Simon Urbanek and Stefano Iacus with contributions from many developers and translators world-wide, see 'About R' in the GUI.
Subdirectories:
The Additional Components Needed To Install Os Cannot Be Found Directly
toolsAdditional tools necessary for building R for Mac OS X: Universal GNU Fortran compiler for Mac OS X (see R for Mac tools page for details). baseBinaries of R builds for macOS 10.13 or higher (High Sierra)contribBinaries of package builds for macOS 10.13 or higher (High Sierra)el-capitanBinaries of package builds for OS X 10.11 or higher (El Capitan build)mavericksBinaries of package builds for Mac OS X 10.9 or higher (Mavericks build)oldPreviously released R versions for Mac OS X
You may also want to read the R FAQ and R for Mac OS X FAQ. For discussion of Mac-related topics and reporting Mac-specific bugs, please use the R-SIG-Mac mailing list.

Information, tools and most recent daily builds of the R GUI, R-patched and R-devel can be found at http://mac.R-project.org/. Please visit that page especially during beta stages to help us test the Mac OS X binaries before final release!
Package maintainers should visit CRAN check summary page to see whether their package is compatible with the current build of R for Mac OS X.
Mac disk maker. Disk Drill: The best data recovery software for Mac OS X. Recover deleted or lost data from any storage device, iOS and Android.
The Additional Components Needed To Install Os Cannot Be Found Within
Binary libraries for dependencies not present here are available from http://mac.R-project.org/libs and corresponding sources at http://mac.R-project.org/src.
The Additional Components Needed To Install Os Cannot Be Found As A
Last modified: 2021/02/15, by Simon Urbanek
0 notes
Text
Vmware Fusion 11.5 Crack Mac

Create local mysql database mac os. A database in MySQL is implemented as a directory containing files that correspond to tables in the database. Because there are no tables in a database when it is initially created, the CREATE DATABASE statement creates only a directory under the MySQL data directory.
Vmware Fusion 11.5 Crack Mac High Sierra
Vmware Fusion 11.5 Crack Mac Catalina
Vmware Fusion 11.5 Crack Mac

Wondershare Dr Fone 10 Registration Code Free Download

Wondershare Dr Fone 10.3.6 Crack IOS + Android toolkit is a program that you can use to get back the data from your Phone. It is very robust program and it has all the features that you need to get back data. The program is able to bring back all kind of data. Like photos, videos, contacts and many more. So, It is also able to get back WhatsApp data, bookmarks, and messages. Thus, There are a lot of reasons for data loss. Like erase data by mistake. Or if a virus erase the data. Thus, Dr Fone full patch is able to get all data back for you.
VMware Fusion: Powerfully Simple Virtual Machines for Mac. VMware Fusion Pro and VMware Fusion Player Desktop Hypervisors give Mac users the power to run Windows on Mac along with hundreds of other operating systems, containers or Kubernetes clusters, side by side with Mac applications, without rebooting. Download and install the latest version of either VMware Workstation Pro 15.5.X+, VMware Player 15.5.X+ or Fusion 11.5+ on your system prior to the start of the class. If you do not own a licensed copy of VMware Workstation or Fusion, you can download a free 30-day trial copy from the VMware website.
Dr Fone 2020 Download Now:
So, If you lose data from your Phone. Dr Fone 2020 Registration Code is able to get the data back. Thus, It is able to support lots of devices. Also, It is also able to get the data back from all android versions. Therefore no matter which kind of phone you are using. It will help you to get the data from it. The program is 100% safe you can rely on it. Thus, the program will not leak any data. And no other people will be able to access your data. Latest Dr Fone MAC Windows Free Download is very safe for your data.
Also, There are two kinds of Android devices rooted device and normal device. So, Dr Fone Crack Apk is able to work with both of them. And will not erase the root access to the device. The program does not require root access to work. And the program can not only get data back from phone’s storage. But Wondershare Dr Fone 10.3.6 Serial Key is able to get the data back from SD card as well. Also, it is fully able to work in all cases. Moreover, don’t waste time with other programs. And start using Wondershare Dr Fone for iOS.
Wondershare Dr Fone Crack 32 + 64 Bit
So, There are a lot of times when you cannot access the phone’s storage. Like you forgot the password of your phone. Also you are not able to open the USB debug Or the phone’s screen is broken. If you are not able to copy the data from it. So, in all these cases Wondershare Dr Fone patch can help you when you connect your phone. The program will access the data in it. And you won’t have to use the phone to restore data. Thus, Wondershare Dr Fone 10.3.6 Registration Code is a robust program. Furthermore, after you found the data that you need. Now You can save all that data on your PC. Or you can select few of the files from that data and save them. Thus, in short, Dr Fone for PC is the best program for this task.
Dr Fone for MAC + Windows Registration Code:
Also, The best part of using Dr Fone Toolkit Crack for IOS Android is the Data Recovery. Mac disk maker. It recovers all the lost data from the over 65000 models of smartphones and the all known Wins OS. So, you need not worry about the loss of data, of any kind. You may even restore the data from the broken and damaged devices. Dr Fone Toolkit Torrent is also the perfect and all in one solution of other problems of mobile and Wins. The most common of these problems has system crash, program hanging or not responding, rooting errors, SD card problems, password recovery and many more. All these problems can easily be fixed easily and smartly with the help of amazing features of Dr Fone. Thus, it is very handy and useful tool tool and, everybody must need to have it.
Also Check Similar App: CleanMyMac X 4 Activation Number

Registration Code Fetcher Benefits:
World’s best data recovery program for Android, iOS & Wins.
100% Secure and safe.
Also Data backup and restoration.
No data loss.
Free scan and preview.
All formats files restore.
Data recovery even from the broken devices.
What’s New In Wondershare Dr Fone 10.3.6 Crack?
With this You can get data back from all kinds of mobile devices. Its scan engine is much better than before. The program can work a deep scan at a very fast speed. Restore data back from SD Card as well. You can get data back even after a PC crash. Thus, If you reset your phone and lose the data. The program can help in this case as well.
Vmware Fusion 11.5 Crack Mac High Sierra

Vmware Fusion 11.5 Crack Mac Catalina

System Requirements:
Windows XP/Vista/7/8/10. Mac OS 10.6 to 10.12. I GHz CPU. 256 MB RAM. 200 MB Free disk space.
How To Install Crack?
Use the link below to download the program.
Extract the files from ZIP folder of Wondershare Dr Fone 10.3.6 Registration Code Generator
Now Run the setup and finish the install process.
Close the program to start the crack.
Now copy the files from the crack.
And Go to install folder and paste these files here.
All Done.
Vmware Fusion 11.5 Crack Mac
Wondershare Dr Fone Crack 2020 + Torrent is Here
Bulla
Dr Fone Crack
5
Dr Fone Crack
All
Activator
0 notes
Text
Create Local Mysql Database Mac

Create Mysql Database On Local Machine
Create Local Mysql Database Macro
Create Local Mysql Database Macros
Create Local Mysql Database Mac Os
Whether you are a seasoned PHP / MySQL developer, or a beginner, it really helps to have a local development environment. This allows you to test your code as you develop your web application before publishing it 'live' to the Internet.
Choose a remote MySQL connection method. You can use either of the following methods to access your MySQL databases remotely: SSH tunnel: This is the more secure method. You set up an SSH tunnel that forwards a port on your local computer to the remote MySQL server.
Mysql -u root -p'root' -h 127.0.0.1 -P 3306 -D local no space after -p as specified in the documentation It will take you to the mysql console directly by switching to the mentioned database. In this quickstart, you connect to an Azure Database for MySQL by using Node.js. You then use SQL statements to query, insert, update, and delete data in the database from Mac, Ubuntu Linux, and Windows platforms. This topic assumes that you're familiar with developing using Node.js, but you're new to working with Azure Database for MySQL.
The following power tip will guide you through setting up a PHP, Apache, and MySQL development environment on your local Windows system. We'll also take a look at the UEStudio features that can make your PHP / MySQL development easier.
Please keep in mind that PHP, Apache, and MySQL are software provided by third party entities. Therefore we (IDM) cannot provide technical support for the installation of these on your system.
Step 1. Download the installation files
In days past, you would have had to download Apache server, PHP, and MySQL all separately. However, there are now solutions which include these components bundled together and pre-configured to run 'out of the box' on a Windows system. We recommend using WampServer, which provides the basics for setting up your local Apache / PHP / MySQL environment on Windows.
If you do not wish to use an 'all-in-one' solution, you will need to download and install the Windows installers for each of the below components:
Apache, the web server software.
PHP, the general purpose scripting language that runs on Apache.
MySQL, the database server software that works hand-in-hand with PHP and Apache.
Step 2: Install everything and make sure it works
For the purposes of this power tip, we are assuming that you've chosen to install WampServer. To install it, simply double-click the setup file and follow the prompts.
You can confirm that everything has installed properly by pointing your browser to http://localhost/ while Wamp is running. If you see the WampServer 'welcome' page, you know everything is installed and running properly. You can also verify this by checking the Wamp icon in the system tray – if the icon is green, then everything is up and running.
Note: You may need to download and install the dependencies described in this community forum post in order for WampServer to run properly on your system.

Step 3: Set up MySQL
Since Wamp installs MySQL, all you need to do is set up a user and a database. Click the Wamp icon in the system tray, then go to MySQL » MySQL console. If the console prompts you for a password, just hit Enter.
Create a MySQL database
Now you need to create a new MySQL database. You can do this by issuing the following command in the console:
Make sure to include the semi-colon at the end of the command! The console should give a 'query ok' response.
You can verify that the databases have been created by using the 'Show databases' command. If you type, 'Show databases;' and hit enter, you should see something similar to:
Create a Table
For the purposes of this power tip, we will create a table called 'names' that includes the following fields: key, first, last. Create this table in our 'uestudio_test' database by using the following commands:
USE uestudio_test;
...then:
CREATE TABLE names (id INT NOT NULL AUTO_INCREMENT, first VARCHAR(48), last VARCHAR(48), PRIMARY KEY(id));
We won't cover the syntax of these commands in the scope of this power tip.
You can see the structure of the table and confirm it was created correctly by typing:
You should see something similar to:
Now, we need to insert some sample data into our table. For example, if we want to create an entry to insert the name 'John' (first) 'Smith' (last) into the table 'names', we would do so using the following command:
INSERT INTO names (first, last) VALUES ('John', 'Smith');
You can insert additional data by modifying the VALUES. Because you created the column id as an auto increment, you don't need to specify a value for this field.
To display all the data in the table, simply type:
Because we inserted a few other names into our table, this query produced the following results:
Create a user
It's never a good idea to use the 'root' user in MySQL to interact with your databases. Create a new user and assign it to your database in the MySQL console by issuing the following command:
GRANT ALL PRIVILEGES on uestudio_test.* to 'SomeUser'@'localhost' IDENTIFIED BY 'SomePassword';
Obviously you will want to modify the user name and password in the above to suit your preferences. You should see the console spit out:
Step 5. UEStudio and PHP/MySQL
PHP Support
UEStudio has built in PHP support which allows you to run scripts, check syntax, and more. To configure PHP support, click the Coding tab then open the PHP drop down. Click the last item here to set the location of the PHP executable.
Click the Browse button to browse to and select the folder containing the PHP executable, which in a default Wamp installation would be:
C:wamp64binphpphp7.1.9
Create Mysql Database On Local Machine
Of course this folder path may vary based upon what version of PHP you have installed and running.
After you've set the PHP executable's parent folder, you can use the PHP options in the Coding tab. Simply open a PHP file then click on any of the options from the PHP icon.
UEStudio offers additional options that make developing PHP scripts easier, but before we demonstrate those options we will create a sample PHP script that we can work with.
Learning to code PHP is not within the scope of this power tip, so we won't go into great detail about the script below. This script is simply provided as an example.
The script below will connect to the 'uestudio_test' database running on localhost. This is the database we created earlier. The script connects, then retrieves all the data from the 'names' table and output the results in an HTML table.
If you used different values for the variables, you would need to change them for the script to work according to your environment.
Create and save this script with any file name and a .php extension, like 'mysql_test.php,' in the www directory, which is the same location as the phpinfo.php script from above. If you click on Run script in the PHP drop down, you'll see the output of the script in the output window.
You can try the other commands available in the PHP drop down.
Create Local Mysql Database Macro
To see the contents of the script in the web browser, type http://localhost/mysql_test.php in your browser. You should see something similar to:
1JohnSmith2BobWhite3MikeJones
Create a Project
You don't have to create a project to develop using PHP/MySQL in UEStudio, but there are added benefits to creating a project. If the files you are editing are part of a project, then UEStudio's IntelliTips will parse the PHP script, which provides you a visual representation of classes, functions, etc. in the Classviewer, and provides some context-aware auto-complete when typing source code.
To create a project, click on New project in the Project tab. Name and save the project file. The 'Project settings' dialog will open, and you can add the 'mysql_test.php' to the project by clicking + Active file.
To view the parsed representation of the file, click on the Tags tab at the bottom of the Workspace manager. If the Workspace manager is not open, you can open it by checking Workspace manager in the Layout tab. Using the mysql_test.php file you created in this tutorial, you should see something similar to the below parsed representation:
By adding your source files to a project, you can also access IntelliTips functionality in the Project tab, like Find symbol definition, Display functions, etc.
For a single file like in this example, there really isn't much advantage for this. However, if you are using an object-oriented style of PHP programming, and your project includes many files, you would see something that looks more like:
As you can see, with a large project, this feature can be very helpful.
Link local to remote
If your local development environment is intended to 'mirror' your live site, you can link a local folder to a remote folder. This will allow you to sync or upload / download files between the local and remote folder in a single click. Learn more about linking local folders to remote folders.
The package is located inside a disk image (.dmg) file that you first need to mount by double-clicking its icon in the Finder. It should then mount the image and display its contents.
Before proceeding with the installation, be sure to stop all running MySQL server instances by using either the MySQL Manager Application (on macOS Server), the preference pane, or mysqladmin shutdown on the command line.
To install MySQL using the package installer:
Download the disk image (.dmg) file (the community version is available here) that contains the MySQL package installer. Double-click the file to mount the disk image and see its contents.
Figure 2.1 MySQL Package Installer: DMG Contents
Double-click the MySQL installer package from the disk. It is named according to the version of MySQL you have downloaded. For example, for MySQL server 5.7.35 it might be named mysql-5.7.35-osx-10.13-x86_64.pkg.
The initial wizard introduction screen references the MySQL server version to install. Click to begin the installation.
Figure 2.2 MySQL Package Installer Wizard: Introduction
The MySQL community edition shows a copy of the relevant GNU General Public License. Click and then to continue.
From the Installation Type page you can either click to execute the installation wizard using all defaults, click to alter which components to install (MySQL server, Preference Pane, Launchd Support -- all enabled by default).
Although the option is visible, the installation location cannot be changed.
Figure 2.3 MySQL Package Installer Wizard: Installation Type
Figure 2.4 MySQL Package Installer Wizard: Customize
Click to begin the installation process.
After a successful installation, the installer displays a window with your temporary root password. This cannot be recovered so you must save this password for the initial login to MySQL. For example:
Figure 2.5 MySQL Package Installer Wizard: Temporary Root Password
MySQL expires this temporary root password after the initial login and requires you to create a new password.
Summary is the final step and references a successful and complete MySQL Server installation. the wizard.
Figure 2.6 MySQL Package Installer Wizard: Summary
MySQL server is now installed, but it is not loaded (or started) by default. Use either launchctl from the command line, or start MySQL by clicking 'Start' using the MySQL preference pane. For additional information, see Chapter 3, Installing a MySQL Launch Daemon, and Chapter 4, Installing and Using the MySQL Preference Pane. Use the MySQL Preference Pane or launchd to configure MySQL to automatically start at bootup.
When installing using the package installer, the files are installed into a directory within /usr/local matching the name of the installation version and platform. For example, the installer file mysql-5.7.35-osx10.13-x86_64.dmg installs MySQL into /usr/local/mysql-5.7.35-osx10.13-x86_64/ . The following table shows the layout of the installation directory.
Table 2.1 MySQL Installation Layout on macOS
Create Local Mysql Database Macros
DirectoryContents of Directorybinmysqld server, client and utility programsdataLog files, databasesdocsHelper documents, like the Release Notes and build informationincludeInclude (header) fileslibLibrariesmanUnix manual pagesmysql-testMySQL test suiteshareMiscellaneous support files, including error messages, sample configuration files, SQL for database installationsupport-filesScripts and sample configuration files/tmp/mysql.sockLocation of the MySQL Unix socket
Create Local Mysql Database Mac Os
During the package installer process, a symbolic link from /usr/local/mysql to the version/platform specific directory created during installation is created automatically.
0 notes
Text
Mac Disk Maker

Disk Maker For Mac
Mac Install Disk Maker
Mac Os Boot Disk Maker
Languages: EnglishFrançaisEspañolPortuguêsDeutsch日本語
Since 1998, DiskWarrior has won more awards than any other Mac disk utility. A Macworld Eddy, an Apple Design Award, a PC Mag Editors' Choice Award, a MacUser Magazine Editors' Choice Award and many more from around the world. Check out our Awards and Reviews. Developed just for Mac. Design and print custom CD, DVD or Blu Ray labels and covers with Disketch disc label software. Free to download. Quick to install, easy to use CD label maker software for PC or Mac.
Summary :
Want to format an external hard drive for Mac and Windows PC? Do you know how to do this work easily? This MiniTool article will show you specific methods to make external hard drive compatible with Mac and PC, which are easy and safe to complete.
Quick Navigation :
As we know, external hard drives are widely used to backup data or interchange files among different computers. Well, is there an external hard drive that could be shared between Mac and Windows PC? Of course, there is. Actually, most external hard disks could be compatible with Mac and PC as long as you format them correctly.
Why Need to Format External Hard Drive for Mac and PC
To put it simply, if you want to share external hard drive between Mac and PC, you need to format an external hard drive for Mac and PC.
Currently, hard drives for Windows PC are always formatted with NTFS, while hard disks for Mac are formatted with HFS+. However, when we connect a NTFS formatted disk to Mac, Mac OS X doesn't allow us to write files to the drive neither edit files, though it can read a NTFS drive. Similarly, Windows OS will ask us to format the HFS+ formatted drive when we connecting such a disk, let along edit files saved on HFS+ formatted hard disks unless we resort to third party programs.
But luckily, there are file systems well supported by both Mac and Windows PC, and they are FAT32 (it might be called MS-DOS on Mac) and exFAT. As long as we format the external hard drive to one of these 2 file systems, it can be shared between Mac and Windows.
Further Reading
Both FAT32 and exFAT have advantages and disadvantages.
FAT32: FAT32 works with all versions of Windows, Mac OS, Linux, game consoles, etc.
However, single files on a FAT32 drive can't be larger than 4GB. If your external drive saves files larger than 4GB or you plan to save larger files to this drive, converting to FAT32 is not recommended.
In addition, a FAT32 partition must be not more than 32GB if you create it in Windows Disk Management. Of course, there is free partition manager that can help create a FAT32 volume up to 2TB, which also functions correctly.
exFAT: exFAT has very large file size and partition size limits, which means it's a good idea to format your external hard drive to exFAT.
Nevertheless, a lot of users complained that exFAT is slow, and they highly suggest using FAT32 if you can avoid file size constraints.
Three Options for Accessing NTFS Drives on Mac
Paid Third-Party Drivers
Some paid third-party NTFS drivers for Mac can be used to access NTFS drives on Mac. They work well and they have better performance than the free solutions which will be mentioned in the following part. Paragon NTFS for Mac is such a driver.
Besides, you can also use the paid third-party file system converters to convert NTFS to FAT32 or exFAT which are compatible with both Mac and PC. MiniTool Partition Wizard is one representative.
Free Third-Party Drivers
FUSE for macOS is a free and open-source NTFS driver that can enable write support. But, this solution is slower relatively. And the automatically mounting NTFS partitions in read-write mode can be a security risk for your Mac computer.
Apple’s Experimental NTFS-Write Support
The Mac OS has an experimental support for writing to NTFS drives. Usually, it is disabled by default and needs some messing around in the Mac terminal to enable it.
It doesn’t work properly all the time and could lead to potential issues with your NTFS file system. For example, it had corrupted data before. Thus, we don’t suggest using this tool and we believe it is disabled by this reason.
Here, we recommend using the paid third-party tools since they are easy-to-use and can do good work for you.
Then, we will introduce these three options for you in the following content.
The Best Paid Third-Party Driver: Paragon NTFS for Mac
Paragon NTFS for Mac can write, edit, delete, copy, or move files on NTFS volumes from your Mac computer. It offers a 10-day free trial. If you want to use it all the time, you need to pay for it.
With it, you don’t have to fiddle with terminal commands to mount partitions manually. Additionally, it can mount partitions automatically and safely. More importantly, it can code with the potential corruption. If you purchase a Seagate drive, you can even get a free download of Paragon NTFS for Mac.
All in all, it does its works well and gives you good user’s experience.
The Best Free Third-Party Drivers: FUSE for macOS
FUSE for macOS is a free solution to access NTFS on Mac. But it is less secure.
If you want to make automatically mount NTFS partitions in read-write mode on Mac, you need to temporarily disable the System Integrity Protection and replace one of Apple’s built-in tools with a binary that is more vulnerable to attack. Thus, your Mac is in danger when using this driver.
However, you can use it to manually mount NTFS partitions in read-write mode if you never mind using the Terminal. This will be safer, but you need to do more work. You can go to google the steps and see how complex they are.
Apple’s Experimental NTFS-Writing Support: Don’t Do This, Seriously
Although we mentioned this method in our article, we still don’t recommend it because it is the least tested. It is just for educational purposes, and it is available on Mac OS 10.12 Sierra. Perhaps, it will be unstable forever.
How to Quickly Format External Hard Drive for Mac and PC without Losing Data
Another way to access NTFS drive on Mac is to convert the NTFS/HFS+ to FAT/exFAT. Then, the drive can be used on both Mac and PC.
There should be some important data on the drive. To keep it safe, you can choose this best NTFS/HFS+ to FAT/exFAT converter: MiniTool Partition Wizard.
How to Convert NTFS to FAT32 or exFAT Without Data Loss
To format hard drive for Mac and Windows without data loss, we suggest using MiniTool Partition Wizard and its 'Convert NTFS to FATS32' function. If you are a personal user, you can try its Professional Edition.
Step 1: Run MiniTool Partition Wizard
Download this software to your computer. Then, you can open the software and input the license key to the pop-out window to get its Professional Edition.
Step 2: Convert NTFS to FAT32 with This Software
After running the program successfully, we can see its main interface as follows:
Here, please select the NTFS partition of external hard drive and choose 'Convert NTFS to FAT' feature from the left action pane. If there is more than one NTFS partition, convert all of them one by one.
At last, click 'Apply' button to make the change executed.
When MiniTool Partition Wizard shows it applies the change successfully, the original NTFS will finally become a FAT32 partition.
By this way, you can easily format an external hard drive for Mac and PC without losing any data. Then, you can share external hard drive between Mac and PC
You Can Convert NTFS to exFAT in 3 Steps
However, if you want to convert NTFS to exFAT to make external hard drive compatible with Mac and PC, 3 steps are required.
Step 1: Transfer Data out from External Hard Drive
You can choose to copy and paste those files to other external devices or internal hard disk of Windows, but it will cost much time. Instead, you can use MiniTool Partition Wizard Free Edition to create a copy for your external drive, which is faster.
If there is only one NTFS partition on external hard drive, refer to the tutorial Copy Partition to get instructions. However, if there is more than one NTFS partition, view Copy Disk to get specific operations.
Step 2: Create exFAT Partition with MiniTool Partition Wizard
The Free Edition of this software also enables you to do this job.
Firstly, you need to delete the partition by using this software. Just open the software to enter its main interface. Then, choose the target partition and click 'Delete Partition' from the left action pane. After that, you should click 'Apply' to keep this change.
Secondly, the target partition will become unallocated. Here, you need to choose that partition and click on 'Create Partition' from the left action pane.
Thirdly, you will see a pop-out window. Here, you can choose 'exFAT' from the 'File System' setting option. At the same time, you can also set some other parameters for this partition, including 'Partition Label', 'Drive Letter', 'Size And Location'. After that, please click on 'OK'.
Fourthly, you will go back to the main interface. Then, please click on 'Apply' to save these changes.
Finally, an exFAT partition will be created on your external hard disk so that it could be shared between Mac and Windows PC
Step 3: Transfer Data back to External Drive
If you want to share files that you have backed up between Mac and PC, now please transfer these files back to external hard drive.
How to Convert HFS+ to FAT32 or exFAT without Losing Data
Besides, you can format an external hard drive for Mac and Windows by converting HFS+ to FAT32 or exFAT without losing any data.
Step 1: Backup Data in HFS+ Partition on Mac
Just transfer all useful files out from the external hard drive to other devices on Mac. Of course, if you have a backup already, ignore this step.
Step 2: Create a FAT32 or exFAT Partition on Windows PC
Some people may ask why create such partitions on Windows rather than Mac. That is because there are cases reporting FAT32 (MS-DOS) or exFAT partitions created on Mac did not work well on Windows.
Please skip to Solution 1: Format External Hard Drive to FAT32 to get steps to create a FAT32 partitions or go back to Step 2: Create exFAT Partition with MiniTool Partition Wizard to get operations to create an exFAT partition.
How to Make an Empty External Drive Compatible with Mac and PC
If there is no file saved on your external hard drive, how to make external hard drive compatible with Mac and PC?
It's very easy to share it between Mac and PC and you also need a Windows computer, a Mac machine, and the free partition manager MiniTool Partition Wizard Free Edition.
There are 3 solutions for this case, so please choose the one you like most to format external hard drive Windows 10/8/7.
Solution 1: Format External Hard Drive Windows 10/8/7 to FAT32
Since users are unable to create a FAT32 partition larger than 32GB in Windows Disk Management, they need to use MiniTool Partition Wizard Free.
Note: when you connect an external hard drive which is formatted with HFS+ with computer, Windows may ask you to format the drive. Please choose Cancel.
Please download and install this program on your Windows computer to format an external hard drive for Mac and PC.
Firstly, open the software to enter its main interface as follows. Here, please select the NTFS partition or HFS+ partition of external hard drive, and click 'Delete Partition' feature from the left action pane. If there are multiple partitions on the external disk, please select the disk and click 'Delete All Partitions' feature instead. After that, an unallocated space will be released.
Secondly, you can create one or more FAT32 partitions in unallocated space. Select the unallocated space and choose 'Create Partition' feature from the left side.
Then, you should choose 'FAT32' from the 'File System' option in the pop-out window. Meanwhile, you can set properties for this new partition and click 'OK' to go back to the main window of Partition Wizard.
At last, click 'Apply' button to make all changes performed.
Solution 2: Format External Hard Drive Windows 7/8/10 to exFAT
Firstly, please delete the NTFS or HFS+ partition in either MiniTool Partition Wizard or Windows Disk Management to release unallocated space. Then, you can create an exFAT partition with MiniTool Partition Wizard Free Edition by following steps introduced in the section Step 2: Create exFAT Partition with MiniTool Partition Wizard.
Once a FAT32 or exFAT partition is created on your external hard drive, you can share it on both Mac and Windows PC.
Solution 3: Create One HFS+ Partition for Mac and One NTFS Partition for Windows
Alternatively, you can create 2 partitions on the external hard drive: one is for Mac, and the other is for Windows. As to size for each partition, it depends on your own demands. By this way, you can easily format an external hard drive for Mac and Windows.
Step 1: Create a NTFS Partition and a FAT32 Partition
Please run MiniTool Partition Wizard Free Edition, then delete all the original NTFS or HFS+ partition(s), and create a new NTFS partition as well as a FAT32 partition, and the latter will be formatted to HFS+ in Mac machine.
Then, select the external hard drive and choose 'Delete All Partitions' to create an unallocated space.
Here, select the unallocated space and choose 'Create Partition' feature from the left action pane.
Now, please specify partition label (Windows is recommended), partition type (primary or logical), drive letter, file system (NTFS), cluster size, and partition size (you can change the length of the handle to adjust partition size). Then, click 'OK' to continue.
Now, you can see a NTFS partition is created. Please use the same way to create a FAT32 partition labeled with Mac. At last, click 'Apply' button to make all changes performed.
Step 2: Format the FAT32 Partition to HFS+ Partition on Mac
Please go to Utilities → Disk Utility.
Then, select the external hard drive and click 'Partition' tab on the top.
Now, find the FAT32 partition and format it to OS X Extended (Journaled), which is the desired HFS+. Finally, click 'Apply' button to make all changes performed.
Tip: You may receive the prompt 'The volume 'MAC' is not journaled. As a result it can not be resized'. Just ignore the message and click 'OK' button to continue.
After NTFS partition and HFS+ partition are created on your external hard drive, it can be shared between Mac and Windows PC.
Note: You might be unable to share all files saved on external drive since Windows doesn't support HFS+ partition while Mac doesn't support NTFS partition completely.
Bottom Line
Are you planning to format an external hard drive for Mac and PC? If yes, now try one of our methods to make external hard drive compatible with Mac and PC.
Should you have any problem, just feel free to leave us a message in comment part below or send an email to (email protected).
Format Hard Drive for Mac and PC FAQ
How do I make my hard drive compatible with Mac and PC?
Disk Maker For Mac
If you want your hard drive to be compatible with both Mac and PC, you should format the hard drive to the file system that is supported by both of these two operating systems. FAT32 and exFAT can meet your requirements.
What is the best hard drive format for Mac and PC?
Although both FAT32 and exFAT are compatible with Mac and PC, exFAT is a much better choice because it has fewer limitations. For example, it has a larger file size and partition size limits.
Mac Install Disk Maker
If you formatted your hard drive to exFAT with Apple's HFS Plus, Windows will not recognize the exFAT drive. You can consider using a third-party partition tool to format your hard drive to exFAT.
Mac Os Boot Disk Maker
Windows can only read a Mac hard drive that is formatted to FAT32 or exFAT using third-party software. If the file system of the Mac hard drive is HFS+ or APFS, the drive will become unreadable in Windows.
1 note
·
View note