Statistics
We looked inside some of the posts by weeklyrider-blog and here's what we found interesting.
Average Info
Notes Per Post
12
Likes Per Post
12
Reblog Per Post
0
Reply Per Post
0
Time Between Posts
9 days
Number of Posts By Type
Text
2
Photo
7
Video
8
Last Seen Tumblr Blogs


Fun Fact
US Tumblr user growth rate is estimated to slow down to 4.1%.
Text
Yosemite Spring 2019
Welcome back every body, as you can interpret from my title....I WENT TO YOSEMITE!!! This was a complete surprise to me as of Thursday last week, but long story short a spot came up in my cousins trip so I filled it in. I was very excited to go back to Yosemite and I would like to share my adventure with you guys.
For those of you who do not know what Yosemite is, here is a picture

If you still do not recognize this master piece then you must live under a rock and are no longer of interest to me :). Like I was saying I went to Yosemite for the weekend and had a really great time, I left early Friday morning and arrived at about 2:30 pm. We hung out for a while and decided to go into the valley and eat some food. The next day we woke up early and went back into the valley and went for a hike up to Vernal Falls. On our way there I found a pretty gnarly climb to hit.

It was a pretty good climb and I really enjoyed practicing some climbing outdoors, rather than just indoors. The hike to Vernal Falls was pretty cool, I have done it many times before. It is pretty steep but very easy if you ask me. On our way back I found another cool rock feature that I also climbed.

This climb was pretty easy and like 30-40 feet high, nothing to crazy since I did not have a mat. It was pretty cool to climb this since There are not many good visible holds, like in a rock climbing gym. It takes some more creativity to see the different holds on a climb like this. After this we went back and had some snacks at Yosemite village. We then walked over to the start of the Yosemite falls trail. We would only do the bottom half since there was not enough time to go to the top. It was very cool to go to the bottom of the water fall since it was super windy and you just get soaked with water from the water fall. Here I have a picture that I took of it from a distance.

The day went by pretty fast and we did not get to do a lot of things, but it was still a very fun trip nevertheless. As we were leaving we stop to look at El Cap which is one of my favorite rock features in Yosemite. Especially after the movie Free Solo, I as a climber want to one day climb El Cap. Seeing it in person is just amazing and to imagine someone climbing it in three hours with out a rope is insane.

Here is a picture of the wall that would be climbed by anyone wanting to attempt to get to the top. As we were leaving I got this amazing shot of the valley.

It is a very nice shot that shows the out lines of the rock features and has a glowing effect since the sun was still hitting just the edges of the rocks. One key thing that was very unique was that there was still snow in the valley which was very cool. We would then leave the next day (today), we got back home at around 6 pm and here I am writing my blog about my weekend in Yosemite. Thanks for reading my blog and I will see you next week.
4 notes
·
View notes
Text
Rock Climbing
Welcome back everyone one, like promised I am going to be showing you guys some of the projects I have been working on.
To start off, projects are specific climbs that you have been working on finishing. Before we get started I would like to mention that there is different types of climbing ratings but the ones I will be sticking to are American ratings which range from V0 to V15.
The picture below shows two very nice climbs that I was working on today.

The first climb is the blue V4 that I think is very fun and similar to the white V5. To start off the V4 has some slope style geometric holds which are very fun to climb on. From the starting hold you use your right hand to grab a crimp right below the starting holds of the white V5. Then you use your left hand to grab the next slope hold in the middle of the picture. Then you bring your right foot up and press with your left on the wall as balance as you more your right hand to the farthest right slope hold. From here you here you lift your left leg up to the left slope hold and then move your left hand to the last hold. Then you put your right foot up on the left most hold and match both hands on to the last hold. From there you trust your feet on the slopes and push up to the top of the wall. The climb it self was very fun to play around with. I had originally skipped it but after some people started trying it I decided to hit it and got it on my 4th try.
The next one had less moves but was far more difficult. Your hands start pulling apart on the first two slope holds in the middle of the picture. Your feet then can either start on the either of the 4 bottom holds, which ever is easiest. For me the top 2 work best. First you lunge for the right most hold above the start, from here I have to jump/lunge to the left most hold and bring my feet up to the starting holds since I am too short to grab the hold instantly. After that I stand up on reach for the last hold with my right hand, which is a very hard hold and leaves me fully extended. I then have to heel hook on the hold that my right hand was last on. From there you use that heel to push up and grab the top of the wall. I have not yet finished this climb since I did not realize how well a heel hook works till the end.
These of course are the ways I find it easiest to do these climbs.

The next climb was a competition style climb that was setup on one part of the wall. The climb it self only includes the red holds, and the 3 cylinder volumes and the spherical one in the middle. you start on the right side with 3 fingers in the two pocket holds. Then I transition my left hand to a small crimp hold on the volume in the middle. I then reach over with my right hand a grab the same one while I move my left hand to the other side. I then transition to the other volume and work my way up the leftmost red holds to be able to grab the top volume. I then put one foot on the highest crimp hold on the center volume and swing over to grab the finishing hold on the other side of the volume. This climb was a pretty easy one to do and took my about 4 tries. It is a very unique and fun climb to do, there is no rating on it yet but I would rate it a V2/V3.
That is all for this weekend, I know it was not a lot but next weekend I will try to get some video and some pictures on the auto-belay wall. Thank you for re-visiting my blog and I hope to see you next weekend.
0 notes
Photo

Summer Time is Here
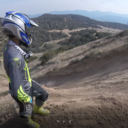
Welcome back everybody I hope you had a good week and are doing great. Since summer time is coming it is getting pretty warm very quickly. Riding in the heat is something that not many people are fond of. Me personally, I will still ride in the heat but we definitely ride a lot less in the summer. Since I will not be riding as much I decided to transition over to my other hobby, which is rock climbing.
To start off, there are different forms of rock climbing. For example I mainly boulder, which is the most common type of climbing people first do. It will usually contain routes that a short but will require a lot of energy and strength. Another form of climbing is top roping where you will have a rope running from the stop of a rock wall and someone at the bottom will have the rope running through a belay device. The other form is very similar to top roping but instead the climber will have to clip their rope into carabiners as they make their way up the rock wall. All are fun but since I do not have anyone to climb with, other than the people I hang out with at the gym, I stick to bouldering and auto-belaying (Top Roping).
There are multiple types of holds in rock climbing which include, jugs, slopers, pinches, crimps, and pockets. Jugs are usually the easiest to hold on to and are most common on the beginner routes. They are grabbed by the whole hand and usually can be gripped like a handle. Slopers are usually round and rely on grip strength to be able to hold on to the smooth edge. Pinches rely on being able to use your thumb to grab the other side of a hold. This hand placement is just like pinching something but with your whole hand. Crimps will usually only have enough room for one ‘pad’ of your finger to hold on to it. This means you will have to curl your hand in order to hold on to it. These types of holds will definitely require good finger strength. Pockets can really have almost any type embedded into it, but the whole idea behind them is that you have to be precise because they will be in a pocket, hence the name pocket.
The gear above you can see above are pretty much the essentials for rock climbing. If you really want to go bare-bones, then you can get away with just the shoes. The whole point of having rock climbing shoes is to have a tight fit on your feet and kinda curl your toes down for better hold on the wall. The specific shoes I have are Scarpas. The chalk you can see right next to my shoes is for drying your hands to get better grip on the holds when they get sweaty, but sometimes you have to brush off a hold when they have too much chalk. The harness is used for any other form of climbing with rope. My harness has 4 loops for holding equipment and a small loop on the back to hold my chalk bag.
That is all for this week, next week I will come back with some more pictures of the rock climbing gym itself and more in depth explanation on types of climbing and milestones made by climbers.
0 notes
Photo


Miller Canyon Ride
Welcome back everybody, I come back this weekend with a couple of different things. There may also be a change in the type of posts you will be seeing
First of all, this weekend I went riding at Miller Canyon which you can see in the photos above. This time it was my dad, brother, and I. I rode my yz, my brother rode his wr, and my dad rode the dr-z, since he did not want to bring out his cr. We headed packed up early in the morning and were able to head out by 6:00 am. By the time we arrived it was about 7:15 and there was not many people. We headed out on our ride which was fun, although it was not the most comfortable since my suspension is meant for the track and not trails. My dad and my brother definitely had a much smoother ride, but I still had fun. This time around they took it slower than usual. I decided to push my self and try to go as fast as I could with out wadding my self. Nothing exciting really happened but one thing I noticed was that since I had previously put the new pipe I had just cleaned up the heat of the bike running discolored the metal to a blue-ish brown tint. This is expected but it was just cool to see. That was pretty much it for the riding.

The picture above shows my rock climbing shows and chalk. Yes that is correct I am once again getting back into rock climbing.
I had never mentioned my rock climbing in any of my other blog posts, but I did indeed used to rock climb. The type of rock climbing I do is mainly bouldering. Which usually includes more technical and shorter routes so a rope is not necessary. I did not really do much top-roping since I did not have a harness of my own I would usually just rent one. I decided that I am going to step up and get a harness of my out so I can at least do the auto belay. Once I find a partner I can do more advanced lines. I am really excited to get back into rock climbing since it is a lot easier to do on a more consistent basis that riding dirt bikes. The rock climbing gym I will be climbing at is Hangar 18. As of right now I mainly do 2/3 and 3/4 difficulty rated climbs and I plan to progress to at least some 7/8′s.
That is all I have for you guys and girls this blog post. I hope you enjoyed my short blog post and will come back to see what I will have in store for next week. I do plan on doing more rock climbing stuff since it will be too hot to be riding dirt bikes much. Where as rock climbing is indoors with air conditioning.
0 notes
Video
tumblr
THE YZ250 IS FINALLY BACK TOGETHER!
As you can tell from the video above the yz is back and running better than ever.
Welcome back everybody I hope you all had an amazing week, this weekend was going to be a good one for me. Most of you know that I had previously taken off my old pipe and carb so I could replace the pipe and seals for the carb. This Saturday the parts finally came in so I could put the bike back together.
The first thing I did today was throw the seals and new jet in the carb. I had gotten a new jet since the old one was meant for standard fuel and I plan on running race fuel. Along with the jet I had to get a new seal for the float bowl. Once I put all the parts in the carb I was able to put it back together and back on the bike, which you can see below

Putting in the carb itself took some work the get back in between the air box and reeds. I had taken this time to clean the engine since I could get to it easier with the carb out of the way, along with the carb itself.
The next thing to do was put the pipe back on. I will most likely take it off once I get my scotch bright wheels in the mail. Once I get them I can polish the pipe up, but for now the dull look will do.

As you can tell the pipe came out real clean. The only things I have to do is polish it up and use paint to fill in the badge. I do plan on getting some frame covers to cover up the parts of the frame that get rubbed by my boots.
There are also couples things that I want to work towards getting. One thing is a new fully custom graphics kit. A new set of reeds and piston kit, along with a new clutch. I also plan on getting new brakes, brake discs, and sprocket.
So far there is not much that will be going on since it is getting hot here in southern California and it is not the best time to be riding. I know that the most likely the Glamis trip will be during Thanks Giving. Hopefully I will be going riding soon and if not I will be posting about next weekends super cross event. Along with Lorreta Lynns coming up for the Super-Mini’s and my personal favorite rider Haden Deegan.
I may also be posting about my trip to Carmel this week since I might do some rock climbing If I can find some cool spots that are not too dangerous without foam pads.
Thank you all for reading my blog, I hope you enjoyed the process of putting my dirt bike back together and finally getting to hear it run once again. I hope to see you next week and until then, keep it on two wheels.
0 notes
Video
tumblr
Welcome back everybody, before we get started with my blog I forgot about this video that I had took when I took my carb off.
Now, as you guys know last week I picked up that 2 stroke pipe which was rusted completely and had taken apart my carb. Today I bring you guys the almost final result of the 2 stroke pipe.


As you can see the top image is the before and the bottom is after. I had soaked the pipe in vinegar, muriatic acid, and some metal cleaner. This seemed to do the trick and removed almost all the rust. On the lower fron portion you can see a black spot which is some left over residue that the vinegar did not get through. Once I pick up our bench grinder I will be able to get all the little imperfections out. Other than that the pipe is looking amazing, especially compared to my original pipe which I will put a picture of below.

All that is left is to burn all the carbon build up inside the pipe off and polish it up.
Although the pipe is almost done, I still need the O-rings that go on the header portion along with the flow bowl O-ring for my carb.
On another note we were able to pick up some parts for the 1994 yz250. We bought a new air filter, carbon fiber reeds, and some new clutch and brake cables. The progress has really slowed for the 1994 yz250 project since parts are not easy to find and take a while to ship.

This picture above is someone at the edge of half dome which is a huge monument in the Yosemite Valley. The reason I am bringing this up is because this summer, if time allows, I will be hiking up half dome and really want to take this picture. I know for a fact that I can make the hike up the side of the cliff, which may seem like the scariest part. My main concern is if I can be ballsy enough to take this exact picture maybe, sitting down if I do take this picture. As of right now I only have a picture of me at the edge of Glacier Point which I personally think could be much cooler at this cliff edge. I will need to make sure that I apply for a hiking permit, since I need one if I plan on going to the top of half dome. I also plan on doing the whole hike in one day rather than 2 like some people do, but that require far more equipment for that extra day.

Although in this picture you can see half dome in the top left which is like fore-shadowing what I plan on doing next.
Well that is all I have for you guys and girls this weekend, next week I should be putting my carb back together and do some deep cleaning on the 2 stroke pipe. I may also put a little you tube video together of the whole process of fixing my carb and pipe.
1 note
·
View note
Photo


Yz250 Repairs/Parts
Welcome back everybody, today I bring you some updates on what I am doing to the yz and a new toy we got in the garage.
So the last time I went riding I had realized that my carburetor was covered in a layer of dirt along with the part of the engine below it. This was because the seal in between the bowl and carb body had gone bad. This was a great time to test out the new toy we just got which was a parts washer. This washer specifically has a sink that sits on top of a 50 gallon barrel of heavy duty degreaser, which then gets pumped up into the brush that will release the fluid that way when you are scrubbing parts the brush will be constantly spraying fluid on it. It also has a separate hose that you can position in case you want to use a different brush and still have a constant flow of fluid.
Like I was saying before as you can see from the bottom left picture, I have taken off my carburetor, which you can see in the second picture. I still have the stock carb on my bike which is a Keihin carb. In the same picture you can see that I have already taken the bowl off. The carb was still nice and clean like it should be. I have already ordered a new bowl seal so next weekend I will be putting it back together.
Along with taking off my carb I decided to go to my uncles house and pick up a 2 stroke pipe that he had which was in better condition than my current pipe . . . . . . . . . . . . . sorta. As you can see the pipe is completely covered in rust except for the stainless steel badge. The reason why this pipe is in better condition than mine in a way is because it only has two very small dents versus the big dent that I have on my pipe from when I over shot the jump at mile stone. When I first got the pipe that I have the my bike right now it had even more rust than this one. Last time though, I had used a angle grinder with a sand paper attachment and that took forever and a lot of work to get rid of most of the rust, it also did not leave a good finish, and left some scratches. This time I plan on filling up a container with some water, vinegar, hydrochloric acid, and some rust remover. The end result should be a really clean looking pipe, after that I will dry it off right away to ensure the freshly exposed metal does not start oxidising again. Then I am going to try to burn the inside with a blow torch to dry to burn off any carbon build up on the inside of the pipe. Since this will cause some heat dis-coloration in the metal I am going to hit the outside with a scotch bright pad, which should also help clean out any left over imperfections. I might also end up using the blow torch to do some dis-coloration on the weld lines, to really make it look like the original Pro Circuit Works Pipe.
You can also see in the image of the 2-stroke pipe, a pro circuit 304 factory sound exhaust which is just like the one on my bike. My uncle also found this exhaust which should fit on the vintage yz that we are also working on.
That is all for this weekend I hope you guys and girls enjoyed my blog and until next weekend I will see you all later.
0 notes
Photo


2019 Monster Energy Super Cross, Race 10 @ Daytona
This Saturday was Race 10 at Daytona. This Race had a couple of stand outs that had been expected to do good. Chad Reed on the 22 said that his bike was feeling good after getting the suspension dialed. Ken Roczen as well was confident in his riding. Over all there were many stars shining in qualifying like, Marvin Musquin, Blake Bagget, and Cooper Webb.
The way super cross works is that there is a race every weekend, and almost every race is the same in terms of rules. The 250 class has two different divisions, East and West. The 450 class on the other hand only has one division. Each class will go through qualifying first. All the top qualifiers will then move on. There are 2 Heat races for each class, the top 9 in each will move on to the Main Event. Everyone else will move to the Last Chance Qualifier, the top 4 in the LCQ will also move on to the Main Event. There is also a point system for the winners, First place gets 26, Second 23, Third 21, Fourth 19, Fifth 18, etc.

Me personally, I am on the Web Wagon who is in the lead for points in the 450 class, which is why he has the red number plate. As for the 250 West Class, my go to pick is Adam Cianciarulo and in the East my pick is Austin Forkner. Both of the 250 riders I am rooting for race for ‘Team Green’ which is the Kawasaki Factory race team. In the 450 class I can not really say who I go for since they all have their ups and downs but my top 3 are Cooper Webb, Marvin Musquin, and Eli Tomac. One person that was expected to do good was Ken Roczen on the 94 which you can see in the background of this picture.

Earlier in 2018 Ken Roczen had gotten into a crash with Cooper Webb when he was racing with Yamaha. His arm had gotten caught into the back of Cooper’s Bike and cut him up and had done some further internal damage leading to a surgery. So for Roczen to come back so strong was really good for him. Although in this weekends race he had gotten caught up in the back in the first turn of the Main Event and went down, he sadly was not able to make it back from 21st to a solid position.

The Race in the 250 class was as expected with Austin Forkner coming in first, Chase Sexton in second, and Justin Cooper in third. The Point Standings after this race where, 1st Austin Forkner, 2nd Justin Cooper, 3rd Chase Sexton, the top three pretty much stayed in their point positions. The 450 Class Results where, Eli Tomac in first, Cooper Webb in second, and Marvin Musquin in third. The point standings after this race stayed almost the same with Eli Tomac over taking Marvin Musquin, 1st Cooper Webb, 2nd Eli Tomac, 3rd Marvin Musquin.
Overall this race was a very exciting race especially in the 450 class. The race itself is one of the biggest right behind the Las Vegas championship. The Daytona Track has 3 different dirt types, Beach Sand, Red Clay Dirt, Regular West coast dirt. The Track itself is pretty technically, especially the sand section which was a struggle for Marvin Musquin in the last lap.
Come back next week for a surprise blog post
1 note
·
View note
Video
tumblr
Ocotillo Wells!
Just today My brother and I went out to Ocotillo Wells for the day. Up above is a quick clip of some riding from today but I will start with the prep for this day.
Prep.
Every trip needs planning and preparation, although this trip did not really require as much prep and could have used better planning. Initially when my brother said we were going to Ocotillo, the plan was to leave Saturday and maybe stay the night and leave Sunday morning. When Friday came I still had to clean the air filter on my bike, and re-pack the bearings. I also had to work on a project for history class and my brother was pretty tired from working all week. We decided to just leave Sunday and come back the same day. (Quick Note: I am currently typing this in the car on the way back.) In this case I spent Saturday finishing up my school work and then got to working on my dirt bike.
Today (Sunday)
This morning I woke up at 5:00 am and got the tool bag ready while my brother got some extra sleep since he would be driving. At about 5:30 I took a shower and then woke up my brother after. By 6:20 We had the bikes all loaded up along with everything else we would need for the trip. At around 7:00 we had gotten fresh gasoline and breakfast for champions. Once we got past the Cabazon outlets and closer to the Salton Sea, there was a bunch of bugs that would make gross yellow splats on the wind shield. We finally arrived at about 9:00 pm at out preferred camp spot, Cahuilla Trail. When I opened up the door I was hit with a huge gust of wind. I had almost forgot that there was going to be 25 mile an hour winds out in Ocotillo today which meant no jumping, especially big jumps. When we first headed out we kinda just picked a direction and went for it. After exploring for about an hour we headed to Shell Reef, which is a well known place if you have ever been to Ocotillo. After that we headed towards some dirt valleys on the other side of the highway. The video above is some footage I got of riding through the little valleys which usually ended with dead ends. After riding through the valleys we went to Power Line Road, which has some good booters along the side of the road. A booter is a jump that is fun but nothing crazy, unless its a big boy booter. Then we came back to the truck and my brother took a little nap, at this point it was starting to get dark so we decided to pack up the bikes. Even though we had loaded up the bikes we still wanted to have some fun so we took the truck off-roading through the night which was really fun.
Overall I had a lot of fun riding out in Ocotillo. Sadly I was not able to hit any big jumps since the wind was really strong. Hopefully you guys and girls come back next week cause I am headed out to Glamis !
0 notes
Video
tumblr
More and More Updates
Welcome back everyone to my blog, sorry to disappoint you guys and gals but I do not have a whole lot to cover in this weeks blog other than updates and throwbacks.
First off as you can see in this first and second video, I am riding my dads yfz450. These clips specifically are of me having some fun after riding my dirt bike for a while. When I initially started riding my dirt bike in the sand dunes I thought I would never go back to riding a quad. I had thought wrong though, the key differences from a dirt bike and a quad is the fact that one has 2 wheels and the other has 4. When your riding a dirt bike you lean as you turn and in the sand it can dig in and be a bit harder. Also, when coming into the valley of a dune the front tire will dig in if you are not on the gas, whereas a quad has more surface area and will stay on top of the dunes. When turning in a quad you can slide the back end around with more forgiveness than a dirt bike. That is why in these two videos you can see that I am having some fun throwing the back end around. The only thing about hopping from a dirt bike to a quad, is the feeling of being cramped.
youtube

Bike Service Updates
As you can see the retro yz250 is coming together. Although, sadly we are at a standstill for a while because of parts. We are going to need some new bolts since some have become rusted and seized. We also are going to need some new coolant hoses. The last major thing to do bike would be to clean out the carb and throw some new wheels on this thing. The bike will get some replacement parts along the road, like plastics, shift levers, brake levers, and many more little bits and parts. If things go to plan I will not be updating about this bike next week.
That brings me into my next topic which is riding. Its been a while since I have been riding, so next week my brother and I plan on heading out to Ocotillo. I have been waiting for almost a year to go back to Ocotillo since it is one of my favorite places to ride at. The plan is to take my bike and test out the freshly serviced rear shock and my brothers freshly re-valved forks. I am really exciting to go to Ocotillo since I have been wanting to go back to the “playground” again. The “Playground” is probably one of the hottest spots to be if you are on a dirt bike. There are tons of 30-45 foot doubles, along with some 100+ foot doubles too. The overall plan for this trip would be to head out at the crack of dawn on Saturday and maybe stay the night and leave Sunday evening.
Thank you for reading my blog and I hope you guys and girls come back next week to hear about my Ocotillo trip.
1 note
·
View note
Video
tumblr
Gorman Family Day Trip
Just last weekend I went to Gorman with my family. We only went for the day since it would have taken more prep to be there for the weekend. Since we were taking my sisters who have never ridden, we had to take my old dirt bikes. We took my ttr-90 for my 10 year old sister, and my drz-125 for my 18 year old sister. Of course I was riding my yz250, my brother was riding my dads cr250, and my dad was riding my brothers wr250. A bit complicated but basically my brother likes to ride my dads bike sometimes and that day was one of those times.
First, we got breakfast for champions, and then head out to Gorman. We got there at around 10 am, which is a decent time considering we took everyone with us. When we initially got there my dad, brother, and I went on our own ride since my sister do not really know how to ride. We also stopped by the Gorman motocross track. The motocross definitely needed to be re-groomed. There was large ruts from water and riding, the lips of the jumps were worn down, and the burms were blown out. I really was not satisfied with the condition of the track. We ended up heading back so we could eat some lunch that my mommy made for us. After we ate my brother, sister, and I decided to go for a little ride, when we came across this pretty gnarly climb. It was nothing crazy but the sun was definitely in a bad position. As you can tell from the footage, it is pretty hard to see and make out details. After a couple of minutes my dad and little sister came out of no-where. A quick ride with only three of us then turned into a family ride. We continued to go around for a bit which was cool to be riding with my family. Overall the day went well and I had a lot of fun with my family this trip.
Vintage yz250 Restoration Progress

As you can tell from this firs picture, we have finally taken apart the yz250. In terms of repairs my brother has re-done the forks since they were leaking.

One of the main things we had to do was repair the top end since it had low compression and did not want to fire. In this picture you can see into the crank which looks pretty good so we should not have to worry too much about the bottom end, other than an oil change.

In this picture you can getting a clear picture of the top end. Aside from the carbon build up on top this piston head looks okay. Personally I would replace the piston either way.

This is the picture that really shows what going on. We put a flash light under the piston head in to see if there is any gaps. As you can tell there is definitely a gap. This is probably the main reason the low compression, which is also why it would not fire since the gas would not get compressed enough. My brother just ordered the parts to fix this so hopefully next weekend I can come back with some footage of this puppy running.
That’s all for this weekend, I hope you guys and girls enjoyed my blog. Come back next week to possibly see some footage of this old thumper run.
0 notes
Video
tumblr
Big Bear Trip
Just last weekend I headed up to our cabin in Big Bear. My brother and I were really excited to go up and be able to ride in the snow. Which you can clearly see above that we did ride in the snow.
My brother and I did not do much to get ready for the snow especially since we knew there was not going to be more than a couple inches of snow. One common thing to prepare for is re-jetting your carburetor. The whole point of re-jetting a carburetor is to help the bike run better since the air to fuel mixture is different when you are higher up in altitude and thinner air. I did not have the personal time or money to buy a proper jet for the trip, so I ran the bike as is. My brothers bike on the other hand is fuel injected and will automatically adjust to the thinner air. One thing that is available for carbureted bikes is an automatic adjust carb offered by Lectron. The Lectron carb does not use jets, but a barometer inside and some magic voodoo they will not release to make it possible for it to work in any condition with out adjustment.
My brother and I left on Friday pretty late. By the time we had started to go up the mountain it had already started to get dark. We eventually made it to our cabin and slept in pretty late. We woke up the next morning at around 10 am and made some breakfast. We then went on a hike and had some fun playing games in the cabin. At around 12 pm we headed out to the staging area which is only about 15 minutes away from our cabin. For the most part the trails were covered in snow, but it was not as pleasant as we hoped. Since it had rained earlier that week there was a layer of ice underneath the snow, which I thought was not as bad as I thought since I had never ridden in the snow. I soon realized that you have literally no traction at all on the ice, especially when it is wet on top. In the video you can see me wobble left and right since the front end kept sliding around. You can also see that my brother did not keep as much momentum as he should have and ended up getting stuck. In my case I had started to lose control of the front end and the bike started to lean to the right and I could not correct it against the super slippery ice. Once I got back up and picked up the bike I tried to move around to the other side where I would not be trying to walk around on the ice, but as you can see I ended up doing just that.
One thing that I was able to take away from riding in these conditions is that the optimal riding time would be right after it snows so it is fresh powder with out ice. If there is Ice though, a couple studs on the tired would make a big difference. In the case you do not have studs, like I did not, then your best bet is getting good speed before hand and keeping the front end as straight as possible.
I hope you guys all enjoyed hearing about my snow biking experience, and come back next week for my trip to Gorman (Hungry Valley).
1 note
·
View note
Video
tumblr
Glamis New Years Pt.2
For the second part of my Glamis trip I am going to attempt to cover the rest of the trip.
Most of the days involved riding around and not much more. One day we attempted to take one of our good friend’s Rhino (Side by Side) to China Wall, which it almost made it but since it does not have as much power as a Can-Am X3 or a Polaris rzr it did not make it. So it ended up just being six of us making it out there. By the time we got to China Wall the sun was starting to set and since most of us did not have lights, we were only there for a little bit. That same day my brother and I decided to go out on a night ride which you can see some footage of above. Night riding is really fun in my opinion, but as you can tell it is very very hard to see anything. Our initial plan was to try to get to Oldsmobile Hill, but since it was already 2 am, we could not see anyone.
The next day we saw two helicopters fly in, and we knew something bad had happened. The story I am going to share is from someone who was there when the incident happened. “There was a head on collision between a razor and a sand rail at the top of the jump going down Oldsmobile. A razor was coming down not even fast enough to jump down, it was just driving down the hill. A man in a V8 sand rail thought it would be a good idea to jump up the jump at Oldsmobile, going 80 miles an hour, on the busiest weekend of the year with no one flagging or spotting for him. I was standing at the lip of the jump when I looked down and seen him coming up at a high rate of speed, and said what the heck is this guy doing. I looked back and I see a razor coming down the the roll in hill for the jump, at that moment my friend and everybody else that was paying attention started waving their arms and yelling for everybody to stop. The razor slowed down, however the sand rail did not. The sand rail crashed head-on into the razor. In that moment I just saw a man die in-front of his two daughters. The little girl in the back seat was shaken up but did not have any injuries. A younger girl and her father were trapped in the front seats of the crushed razor. After Bureau of Land Management figured out they did not have a blot they needed to make their jaws of life work correctly, we proceeded to use winches and straps to pry the roll cage open. They got the younger girl out which I pray for and looked like she only had non-life-threatening injuries. Sadly the Father had already passed from the injuries he sustained. I say this with a deeply saddened hear only to hopefully keep someone else from making the same mistake.”
After finding out what happened it really makes you think on how dangerous it can be out in Glamis. With thousands of people in total and hundreds in one area, it can get dangerous quickly. On average a holiday weekend leaves 100 injured, 5 critical, and 2 deaths. Glamis has always been a dangerous place but the only way to avoid this is by being smart and safe, and even then accidents happen.
Overall Glamis New Years 2018-19 Trip was a huge success and a lot of fun. Come back next week to see my riding trip up to Big Bear.
0 notes
Photo

New Years Glamis Trip!
This year was going to start off in one of the best possible ways by being out in Glamis. If you have been keeping up with my blogs you know that I was getting ready to go on a Glamis trip for New Years.
The day started on the 27th of December, we had left the house at around noon so we were not on schedule at all. At about 2 pm we had made it to Red Earth Casino, which is an iconic gas station for anyone who goes to Glamis. From there it would take about another 2 hours. We eventually made it to Glamis and began to pull in which you can see in the picture above. The sun sets at about 4:50 this time of the year so we would less than an hour to unpack every thing.

The next which I consider the actual first day started with riding my dads bike in order to send him some pictures since he would not be showing up until the 29th along with everyone else. So now was the time to take some pictures with out everyone else trying to follow around.


These picture were taken just by the camp since we did not want to risk taking the camera out into the dunes where the sand will find its way everywhere. This was also a prime time to get some nice action shots of my new helmet.

This next picture is right after riding my dads bike and hopping on mine. As you can tell I got a bit excited and got on the power band a bit to quick. I still brought the bike back down instead of falling off the back.

Later on in the day my brother, sister and I went out to go to China Wall but on our way their my sister was tired of riding and trying to keep up with us. So we decided to just take her back before it got dark. My brother and I then headed out to just some dunes and watched the sunset. We also Had some fun trying to find a swing set somewhere in the dunes which we could not find.


The day ended off amazing with some good fun along with a beautiful sunset. We did not go on a night ride that night either but we would later.

The next day (29th) my brother and I decided to head out to Oldsmobile Hill which was very packed.

When we got there my brother and I started to talk about how different Glamis has gotten. It mainly was conquered by quads, three wheeler’s, and dirt bikes. Of course over the years some sand buggies became popular along with some sand rails. This led to lots of competition and some exciting races to watch. Nowadays everybody is in a side by side (Off-road sport car) and nobody really races that much anymore. People just show up and watch and sit for hours. I am not sure if it is just the older generation who has just gotten into a more comfy sand car, because if so the younger generation may bring back the days of quads and dirt bikes.
In my next blog post I will try to cover the rest of the trip since there is a lot, or i might divide this into three parts.
1 note
·
View note
Photo


Glamis is Almost Here
For those of you who have been keeping up with my blog posts you would know that there is only one weekend left until I leave to Glamis. Which means everything has to be ready to be easily loaded up the day before we leave, and there is only one more weekend to do so. So far we have put back the DS 90 and have put a brand new set of tires on the cr250r. I have also realigned my front wheel and cleaned the air filters of all the bikes at our house. There are still a handful of bikes at my uncle’s house which we need to start up to make sure they work, and clean all of those air filters. This trip there is going to be a total of 9 quads and 2 dirt bikes going with us. Since we are taking most of our quads we will need to bring out an additional flat bed trailer with us on top of our trailer and my uncle’s trailer. Two of the quads are getting new clutch cables since they both snapped last year.
Throwbacks
Recently I went through some pictures I had from this year and It was amazing to see some of them.

This first picture was taken on my second ride on the 1999 yz250. At this time I still was learning the ways of a 2-stroke and had a lot of fun that day getting used to the power band of a 2-stroke.

This picture was taken on my 3rd or 4th ride on the yz. This was taken at Gorman and you can see me drinking chicken noodle soup since it was really cold that day. You can really tell in the picture but it began to snow, I believe it was about 30 degrees.


These next two pictures where taken when my brother and I went to Ocotillo Wells for a weekend. I remember it being really hot and dry which especially sucked for my brother since he had to deal with the dust. We only went out there with just a 4 person tent and a yeti ice chest. We probably should have brought an ez-up to hide from the sun, but no better way to learn than the hard way.


These next three pictures are from my Yosemite/Lake Tahoe trip. The first two were taken when we initially left at around sun down and embarked on our 12 hour drive. The last picture was taken at Tahoe when my brother and I were looking for some trails to ride on.

This last picture is also from Tahoe, but one thing I realized after writing this blog was that I am very lucky to have a brother like the one I have. He supports me with my shenanigans and pays for all my expenses. He is the one who took me riding in all of these pictures. He is one of the best brothers I could have asked for and I just wanted to take a moment to thank him for everything he has done for me.
1 note
·
View note
Photo


UPDATES!!!(Glamis, Gear, Repairs)
Recently I had broken my helmet when I went to Glamis couple of weeks ago. This weekend I went to Chaparral Motorsports to get a new helmet. The helmet I set on was a Troy Lee Designs SE4 Polyacrylite Helmet. This is a newly designed helmet with the latest safety technology.
Safety Features
- 13% more EPS than closet competitor in frontal head band area
- 8% more EPS than the closest competitor in the top and rear parietal zones
- Plastic visor screw and brass inserts for easy break-away upon impact
- EPS extends lower in occipital area (rear of the head) for extended protection
- Anatomical “3D” contoured cheek pads with emergency release system for EMS responders
- Mips patented brain protection system.
- Exceeds certifications for DOT FMVSS 218, and ECE 22.05
Construction Features
- Technologically advanced Polyacrylite shell construction
- Three separate EPS inserts with varying low and high speed impact-specific densities
- Expanded polypropylene, or EPP, chin bar liner for multi-impact performance
- Removable snap-in, washable Comfort Liner
- 1500 grams/ 3.3 lbs (+-50 grams)
Ventilation Features
- High flow intake system with 16 intake passages and 6 large, rear exhaust vents
- Massive air flow ducts utilize negative pressure to draw hot air away from riders head and promote massive cooling, a significant advantage in warm riding conditions
Additional Features
- Eject Helmet Removal System approved design
- Large top surface area ideal for multiple GoPro mounting positions
In a nut shell this helmet meets the specifications for any competition/event. It also has all the quick release and break away accessories to decrease chance of head injuries. I have already put GoPro mounts on my helmet that way it is ready for recording any epic jumps or crashes.
Glamis Trip
As I have said before Glamis is my favorite place to ride and I am heading out once again. Our plan is to leave December 27, 2018 and come back January 2, 2019. Glamis during New Years is as crazy as it gets, people riding throughout the night, huge group rides, fireworks all night, and 200,000 plus people. We plan on taking all of our bikes for everyone to ride, which means of course fixing them.


Bike Repairs
The first bike we worked on was the Raptor 250 which we needed to replace a clutch on. The clutch on the raptor was really bad, the clutch basket was brown with scorch marks, also upon removal the smell of burnt clutch was definitely there. One of the kid quads had blown a top end, which you can see the piston with scuff marks and a broken ring. We have ordered the new piston and are waiting for it to come in the mail. The cr250 is perfectly fine although lately the bike has been leaking oil from the exhaust, so we are going to repack the exhaust. Also we have to get a paddle tire for the cr250 since we have not taken it to the sand dunes before. As for my bike (yz250) I still have to realign the front end. We also have to start cleaning out and preparing the trailer for Glamis.
1 note
·
View note
Video
youtube
Glamis Pt.2
Day 2:
I woke up early on the second day in order to start waking up my body for the day. We started helping out our cousins load up their bikes since they planned on leaving early. At around noon they were heading out and it was just my brother, my dad, my uncle, and I left. We all decided we were going to go on a ride to China Wall, which is a huge dune that looks vertical and has a lip at the top. When we were heading out into the dunes my uncles clutch cable broke, so we had to head back since he would not be able to stop with out stalling the bike or shift smoothly. We came back to camp to drop him off and my dad decided to stay behind to start packing up. Now it was just my brother and I heading out to China Wall. On our way through we decided to cut through the back, since it would be more exciting that way.
youtube
Once my brother and I made it to China Wall we had some fun racing up the dune. Of course I won since I am the superior brother. After playing around in the big dunes for a while we headed across the dunes to Oldsmobile Hill Once again. After watching people race up and down for a while we started to head back. That is when we came across what is called a ‘razor-back’ which is formed on the back side of dunes. Typically when you go over these you simply give it some gas to help pop the front wheel over and kinda just bunny hop it. In this case I was not paying attention and was already backing off the throttle. It was a soon as my rear tire hit the razor back I could feel the rear shock kick back and buck me forward. When you are in this situation you hold your throttle wide open in order to help rotate the bike back. My reflexes were quick enough but the bike had too much forward momentum for me to have enough time to shift up a couple gears to get the rear tire spinning faster to help correct my mistake. At first thought I expected to just hit the ground and be winded, but the bike came back around once I hit the floor and the flag holder hit me on the side of the head.

As you can see the metal piece is clearly bent and the flag has been broken off.

Luckily the bike hit me in the head and only gave me a concussion and the foot peg cut my back. Based of the broken helmet, if the flag holder would have hit me in the arm instead of the helmet, there would be a good chance that I would have a nice deep fat gash in the side of my arm and may have broke my arm too. I was lucky enough that I got away with only a concussion and forgetting my locker combination. If the helmet would not have held up things could have gone far worse. For this reason it is always important to never cheap out on safety equipment, especially a helmet. After my crash the front tire was misaligned, which is a simple fix. After collecting my breath we carefully headed back and were able to make it back to camp without any more injuries.

Bike info:
Bike: 1998 yz250
Tank: 5 gal
Tire: 19 in 8-cup Paddle Tire
Front tire: Misaligned
Fuel: 110 Octane 32-1 Castor-927 Premix
1 note
·
View note