
Hello there. Looks like you found my art blog. Hope you like and enjoy what you find!
Don't wanna be here? Send us removal request.
Statistics
We looked inside some of the posts by whyisartsobloodyhard and here's what we found interesting.
Average Info
Notes Per Post
181K
Likes Per Post
102K
Reblog Per Post
79K
Reply Per Post
87
Time Between Posts
20 days
Number of Posts By Type
Text
10
Photo
5
Note
2
Last Seen Tumblr Blogs


Fun Fact
The “We are the 99%” Tumblr blog became the slogan for the Occupy Wall Street movement.
Text
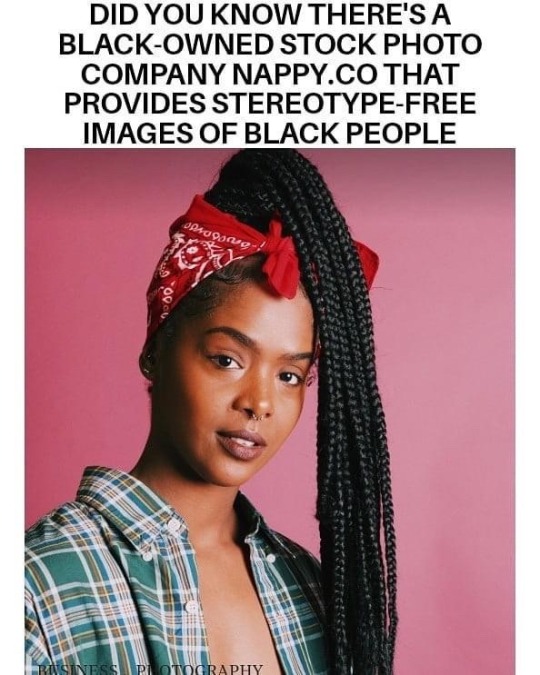
Nappy.co
142K notes
·
View notes
Photo

Rad Radish socks PDF knitting pattern // StoneKnits
1K notes
·
View notes
Text
Three knitting bind-offs:
Introduction:
Binding off is a technique to secure knitting stitches so they can safely be removed from their needles. It's a crucial step to finishing up a knitting project.
When you're learning how to knit, you might struggle with figuring out what bind-offs are suitable for which projects. Here are the three bind-offs I use the most frequently, and when to use them.
The standard bind-off:
This bind-off is probably the first one most of us learn when we first get into knitting. Knit two stitches (or slip the first if your pattern says so), then pass one stitch over the other.
The resulting edge looks neat but isn't very stretchy. Use it when you need simple edges that don't need a lot of stretch. This method is also perfect for edges that will be picked up or sewn together at a later moment.
Text tutorial
Video tutorial

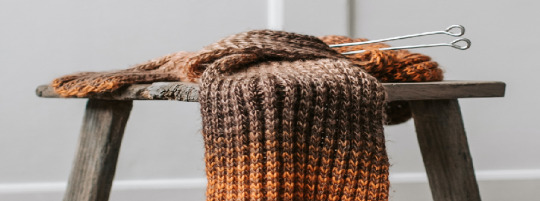
(Image source) [ID: a close-up of a knitting sample in orange and white yarn, showing an edge that has been bound with a standard bind-off. The stitches neatly lean into each other sideways.]
The suspended bind-off:
This bind-off is very similar to the standard bind-off. However, instead of dropping your passed-over stitch off your needle, you first knit the next stitch, then drop both stitches at the same time.
Due to this stitch suspension, the resulting edge is stretchier than a standard bind-off. Use this bind-off when you need a medium amount of stretch or if you have a tendency to bind off too tightly.
Text tutorial
Video tutorial

(Image source) [ID: a close-up of a knitting sample in orange and white yarn, showing an edge that has been bound with a suspended bind-off. The stitches neatly lean into each other sideways, but are slightly longer than those in a standard bind-off.]
Jeny's surprisingly stretchy bind-off:
This bind-off is super stretchy, just like the name says! It's similar to the standard bind-off, but uses yarn-overs to add extra yarn to your work, which results in more stretch.
Use this bind-off when you need all the stretch you can get.
Text tutorial
Video tutorial

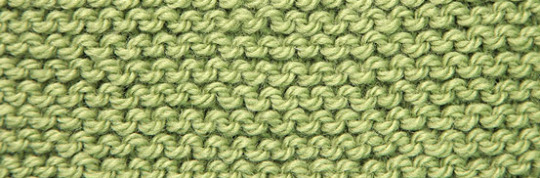
(Image source) [ID: a close-up of a knitting sample in green and white yarn, showing an edge that has been bound off with a suspended bind-off. There's a little gap between every bound stitch, which lean into each other in a subtle zig-zag pattern.]
Conclusion:
Picking a fitting bind-off can make or break a project. Always think of what kind of edge you need before you bind off your stitches. A non-stretchy edge on a stretchy item can make your garment impossible to wear, while a too stretchy bind-off on a more static piece can make the garment hang awkwardly on your body.
There are plenty of different bind-off techniques, but these three are a great place to get started. Learn how to do the standard bind-off first, then try out the suspended one. Once you've got the hang of that one, try out Jeny's surprisingly stretchy bind-off.
Good luck!
640 notes
·
View notes
Note
I'm not sure if this is something you can help me with, but I've been trying to darn holes in my couch. All my attempts have caused the material to pull around the outside of my darn, making a new hole that partly circles it. Is there anything I can do?
To be honest, I have no experience with furniture upholstery, so please take this reply with a grain of salt.
Couch with removable cover:
If the couch has a removable cover with holes in it, take off the cover and darn it in the conventional way. If that makes the surrounding material pull out and rip further, that means the fabric surrounding the darning has been weakened too much to handle the strain of your repairs, so unless you also darn the weakened spots to strengthen the fabric, it will keep ripping.
Sewing patches of fabric over the holes and the weakened fabric might be an easier route to take, depending on how large the weakened area is. Both the blanket stitch and the whipstitch are good options for this.
Couch without a removable cover:
Darning holes on a couch without a removable cover seems like a daunting task, and if that's the case I think you're brave for trying! Darning is difficult when you can't see or reach the back of your work.
Sewing a patch over the holes might once again be the easier option, especially if the fabric keeps ripping around your mends. Use a whipstitch to sew the fabric over the hole, and use a sufficiently large needle or even an upholstery needle to make things easier on yourself. If this proves too difficult, fabric glue is also an option (depending on the material the couch is made of).
Making your own cover:
If you're really adventurous, you could try to make your own cover. Old bed sheets or second-hand curtains are great for this due to their large size. You could even mix and match fabrics for a quilted look if you can't find enough matching material. You can also drape fabric over the couch to hide the holes, and hope they won't rip any further.
If the couch happens to be IKEA, there's a fair chance you'll find model-specific instructions or even sewing patterns to make your own cover online. You'll need to know the model's name to find them, though. There's quite a few examples of this on Pinterest.
Some inspiration:
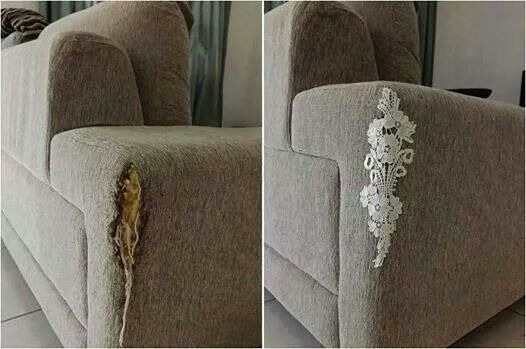
(Image source) [ID: a gray couch with a rip that's been covered up with white lace.]
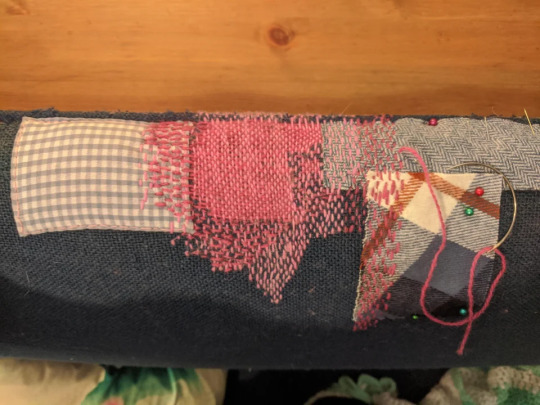
(Image source) [ID: a black sofa with colourful darning and patchwork.]

(Image source) [ID: a white sofa covered in colourful hexagonal patches.]

(Image source) [ID: a patchwork sofa cover consisting of many different fabrics.]

(Image source) [ID: a green sofa with orange and green doilies sewn all over the seating area.]
253 notes
·
View notes
Note
any advice on making capes?
Ooh, I love capes!
Making capes
Types of capes:
There are different types of capes. Let's take a look at a few options.
Rectangle cape: the type of cape American superheroes wear. They consist out of a simple rectangle that can be tied or clasped at the neck. Use gathered fabric for extra fullness. This type of cape won't give you a lot of warmth as it will only cover your back.
Quarter circle cape: slightly more flared than a rectangle cape, but will still only cover your back.
Half circle cape: will cover both your back and shoulders and some of your body, which will give you extra warmth. Great for drama!
Fitted half circle cape: similar to a half circle cape, but made out of three separate pieces to fit around your body better. It won't cover you completely, but it will cover your back, shoulders, and more of your body than a normal half circle cape would.
Full circle cape: this cloak will cover your full body and keep you nice and warm.
Savvy sewists will notice these cape types are similar to circle skirts. The idea's basically the same. Instead of making a skirt, you leave your circle open in the front, and cut a hole that fits your neck rather than your waist.
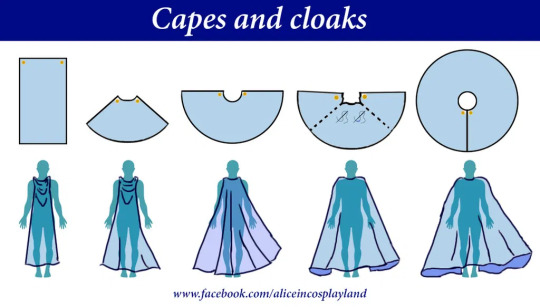
(Image source) [ID: drawing showing five types of coats: rectangle, quarter circle, half circle, half fitted circle, full circle. Text: "Capes and cloaks. www.facebook.com/aliceincosplayland".]
Aside of volume, you can also play around with length. A floor-length cape has a very different effect and function than a cape that reaches your hips, or even a capelet.
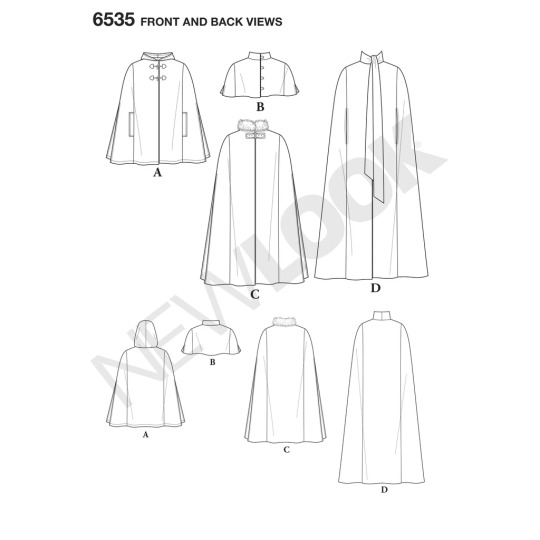
(Image source) [ID: a pattern diagram showing four different cape lengths: floor length, hip length, waist length, and a capelet. Text: "6535 Front and back views. Newlook."]
Details like a hood or armholes can make your cape extra comfortable, and you've got a wide range of options when it comes to fasteners, too.
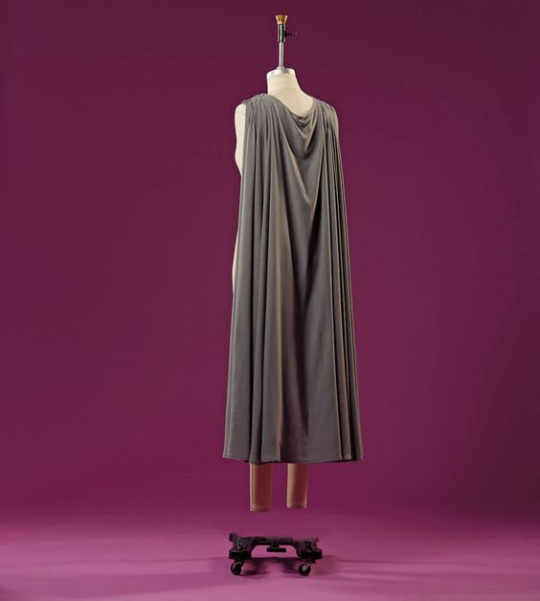
(Image source) [ID: back view of a long gray half circle cape that's been pleated at the shoulders.]
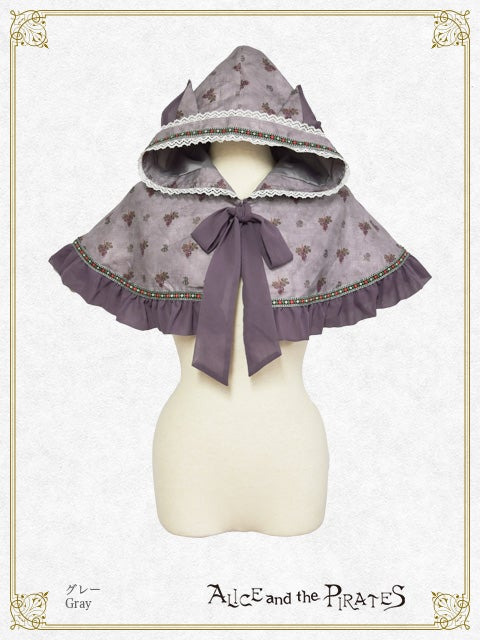
(Image source) [ID: a purple capelet with a hood, frills, cat ears, and lace, tied with a bow at the front. Text: "Gray. Alice and the Pirates."]
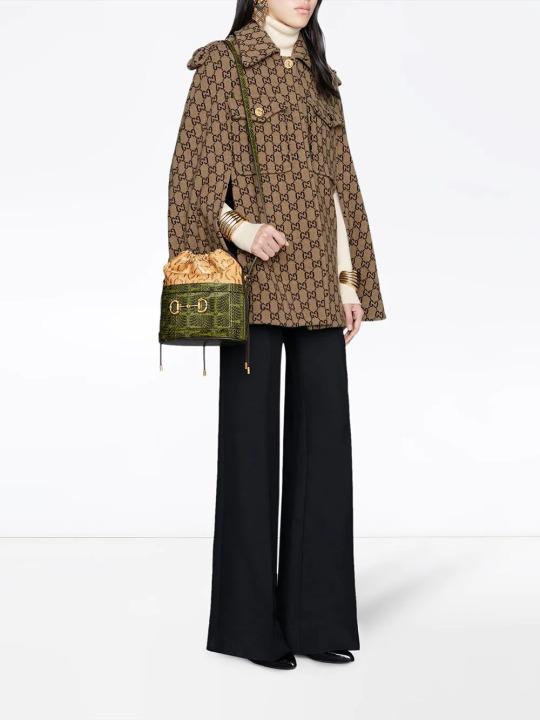
(Image source) [ID: a person wearing a brown monogrammed hip-length cape with front pockets and arm slits at the sides.]
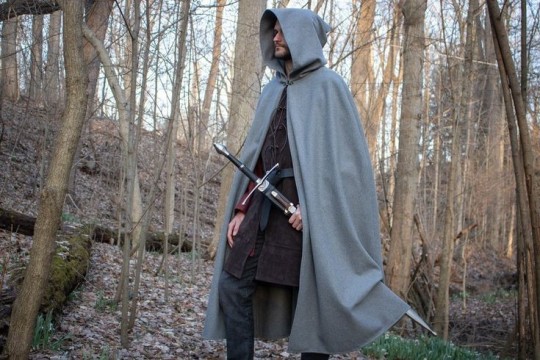
(Image source) [ID: a person wearing a long gray hooded cape, standing in a forest and holding a sword.]
Materials:
Before deciding what fabrics to make your cloak or cape out of, ask yourself what you're trying to achieve first.
Warmth, drape, fabric price, comfort, aesthetic, wearing context,... are some examples of things that can influence your decision.
Some examples:
A cosplay cloak has to look good but doesn't necessarily have to be warm. Choose a fabric that's suitable for your character's outfit, but also keep the circumstances in which you plan to wear your outfit in mind. For example, a warm cloak might pose issues if you do a lot of indoor photo shoots, but convention halls can be pretty chilly.
A fashion cloak intended for winter really does need to be warm! Wool, tweed, and velvet are good options.
A cloak intended for historical re-enactment preferably uses period-accurate materials and therefore won't be lined with fabrics like polyester and such. Which fabric to use depends on the period and region you're working in.
Tutorials and patterns:
Here's a few tutorials/patterns to get you started:
Fitted cloak: winterberry cape (Mood)
How to draft your own hooded cape (The Spruce Crafts)
Pleated half circle cape (Gilian Conahan)
Half circle capelet (Buzzfeed)
Long hooded cloak (Fleece Fun)
Full circle capelet (Project Run and Play)
Four ways to make a cape (WikiHow)
Eight types of capes (Sew Guide)
Half circle fashion cape (Indoor Shannon)
21 free cape sewing patterns (Love Sewing)
Hooded cloak with lining (Online Fabric Store)
Conclusion:
Capes and cloaks make for fun sewing projects. They're pretty easy to make: if you know how to draw circles, you know how to draft a cape pattern.
Capes are a versatile garment, and can range from a great last-minute Halloween costume to an every-day winter cloak. Play around with materials, lengths, shapes, design elements, decoration,... to achieve different effects.
And most of all: have fun with it!
28K notes
·
View notes
Text
Knitting 101:
Introduction:
Want to learn a cool new skill? How about knitting? I know it looks intimidating, but I promise it's not. I'm the most dyspraxic person you'll ever meet, and even I can do it.
What is knitting:
Knitting is a craft technique used to turn yarn into fabric. Essentially, it's nothing more than making a bunch of loops. As knitting uses loops instead of criss-crossing threads like weaving does, the resulting fabric is elastic. Knitting is usually done on needles, though loom knitting is also possible.
Other techniques to turn yarn into fabric are nålebinding (an old as balls yarn manipulation technique employing a tapestry needle) and crochet.
Supplies:
The bare minimum requirements to get started are yarn and a set of knitting needles in a matching size. Check your yarn label to see what needle size it requires. It didn't come with a label? Try to guestimate your yarn weight and go from there. A general rule of thumb is: the thicker your yarn, the thicker your needles should be.
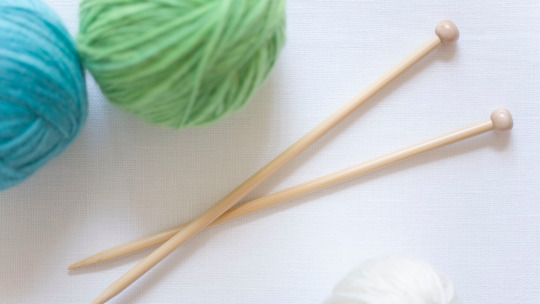
As a beginner, start out with a pair of straight needles. There are other types of needles like circular needles or double-pointed needles, but keep those for after you've mastered the basics. Check out this guide on types of knitting needles if you're curious.
There are many types of yarn too, but for your first project just stick to one you find comfortable to touch. Check out this guide to yarn types if you want to know more.
Other items you may find useful as you progress in your knitting journey are a stitch counter, a cable needle, stitch markers, stitch holders, a tapestry needle, a crochet hook, and maybe even a yarn bowl. But let's keep those for for a more advanced tutorial. :)
You can buy needles and yarn from almost any craft store. However, the goal of this blog is to avoid buying new things, so here are some zero waste alternatives:
- Ask around if anyone has supplies you can borrow, or maybe even leftover yarn. A lot of knitters always buy an extra skein of yarn when starting a new project in case they need more than estimated. This often leaves us with a collection of random skeins. Maybe one of your friends has some extra skeins lying around?
- Trade yarn with fellow knitters. My friend and I save up all of our spare bits of yarn and trade them with each other whenever we run out of inspiration.
- Thrift stores are your friend! I have knitting needles in almost every available European size, and the entire collection only cost me €5 because I got them from the thrift shop's craft corner. You'll also frequently find unused skeins of yarn in thrift stores.
- Online thrifting is also a good option. I recently got €100 worth of yarn for €35 on Vinted because someone had bought the wrong type of yarn for a project and decided to resell the lot online. There's also a lot of people selling leftover yarn from past projects online.
- Ask around in freecycle groups. You'll likely bump into people who picked up knitting as a hobby once but didn't like it and are now stuck with supplies they don't use.
- If you're really adventurous, you could also browse second-hand shops for knitted items made from a yarn you like, and unravel the yarn at home.
Patterns:
The best place to get knitting patterns is Ravelry. It's THE place to be on the internet for everything knitting related. If you make a free account, you'll get access to tons of knitting patterns (both paying and free), a yarn database, and fora where you can ask any knitting-related questions.
Check if your local library has any books on knitting. If it doesn't, then check out an online library such as Archive.org. You'll find a lot of free vintage knitting patterns there.
Allfreeknitting.com is also a good source for free patterns, and so is Knitty.com.
If you have dyscalculia/dyslexia or any other reasons why reading a written-out pattern may give you trouble, I can highly recommend Pierrot patterns. Pierrot is a Japanese yarn brand that has a ton of free knitting patterns on their website which rely on schematics rather than text. Most have been translated to English, but even the original Japanese ones are fairly easy to follow as the instructions are visual rather than written.
Basic stitches:
Let's look at some of the most basic stitches you'll need to know to get started:
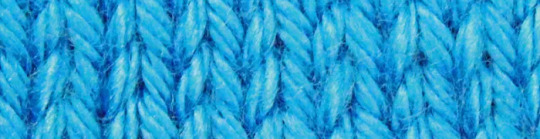
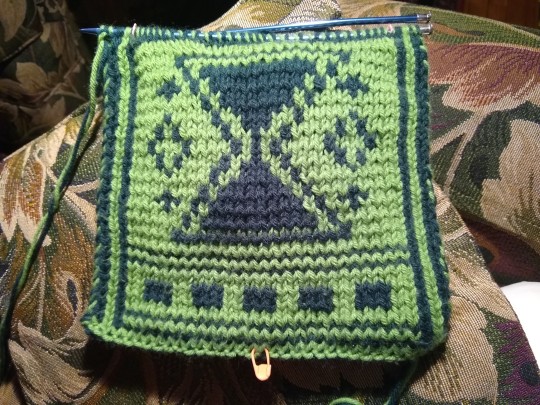
[ID: blue swatch: stockinette stitch; green swatch: garter stitch.]
Cast-on: a cast-on is a technique to get your yarn onto your needles when starting a new project. There are many different types of cast-ons that will give different effects, but let's stick to the most basic cast-on for now.
Video tutorial for a basic cast-on
Text tutorial for a basic cast-on
(Note: if you find this specific cast-on difficult to do, try out a different one. There's plenty of options.)
Knit: the knit stitch is the most basic stitch in knitting. On the right side of your work, it looks like a little v. On the wrong side of your work, it looks like a little -. Most knitting projects will use this stitch. If all of your rows have been knit with the knit stitch, you get the garter stitch. This is the easiest way to knit.
Video tutorial for the knit stitch
Text tutorial for the knit stitch
Purl: the purl stitch is the second most basic knitting stitch. It looks like a - on the right side of your work and a v on the wrong side of your work: it's the exact opposite of a knit stitch! If you purl every row, you also get the garter stitch.
If you alternate between rows of knits with rows of purls, you get the stockinette stitch: the basic knit stitch most commercial sweaters and t-shirts are made of. And if you alternate between a knit and a purl within the same row, you get ribbing, which is great for the edges of your work.
Video tutorial for the purl stitch
Text tutorial for the purl stitch
Slip stitch: the slip stitch is literally what it sounds like: you slip a stitch from one needle to the other. This stitch can be used for many reasons, but beginners will mainly use it as an edge stitch. By not knitting the first stitch of your row, you'll create a neater edge for your work.
Video tutorial for the slip stitch
Text tutorial for the slip stitch
Bind-off: binding off your work, also known as casting off, is a technique used to finish your work and to get it off your needle without unraveling it. There are many different techniques to bind off your work, but let's stick to the most basic one for now.
Video tutorial for a basic bind-off
Text tutorial for a basic bind-off
Other stitches you'll find useful as you take on more adventurous projects:
Increase: increasing means adding new stitches to your work. This technique is used to shape your work. There are many different types of increases, but as always we'll stick to the most basic one for now.
Video tutorial for a basic increase
Text tutorial for a basic increase
Decrease: decreasing means subtracting stitches from your work. This technique is used to shape your work. There are many different types of decreases, but as always we'll stick to the most basic one for now.
Video tutorial for a basic decrease
Text tutorial for a basic decrease
Yarn over: a yarn over means wrapping your yarn around your needle before working a stitch. This technique will also increase your amount of stitches, but unlike the above techniques, a yarn over leaves a hole. This stitch is used a lot in lace knitting.
Video tutorial for a yarn over
Text tutorial for a yarn over
Knitting gauge:
How do you know how many stitches to cast on for a project? Will your project even fit you? To figure this out, you need to know your yarn's gauge.
Imagine a 10x10cm (4x4 inch) square of knitting. This 10cm swatch will have a specific amount of stitches per row, and a specific amount of rows. These two combined are your knitting gauge.
Every knitting pattern will specify which gauge you need to knit the pattern in the intended size. A gauge will consist of two numbers, for example 22x30. This means the pattern's intended gauge is 22 stitches and 30 rows for a square of 10x10cm (4x4 inch) of knitting.
Your personal knitting gauge is defined by the yarn you're using, the size of your needles, and your own personal knitting tension. This means you'll have to make a gauge swatch for every new yarn/needle combination you're using.
Most commercial yarns will have a gauge estimate on their label. If the sizing of your project doesn't need to be super accurate, you can often just go by this estimate. Do keep in mind that your personal gauge will often differ from this estimate, though.
Don't be scared by swatching! It's easier than it looks, I promise! And don't worry, you won't be wasting any yarn doing this. You can always unravel your swatch once you're done, or use your swatch as a dish cloth.
How to knit a gauge swatch
How to measure your gauge swatch
Easy beginner project:
Let's make a scarf! Just a straight no-nonsense scarf, nothing more.
Get your yarn and your needles and cast on the amount of stitches needed to get the width you want your scarf to be. How do you know how much stitches this will be? Either check your yarn's label, make a gauge swatch, or guestimate how much you need by trial-and-error. It's just a scarf, sizing isn't super important.
Row 1: slip your first stitch, then knit every stitch until you reach the end of your row. Turn your work around.
Row 2: slip your first stitch, then purl every stitch until you reach the end of your row. Turn your work around. This will give you a stockinette scarf.
Want to make things even easier? Forgo the purling and just knit every row: this will result in a garter stitch scarf.
Repeat these two rows until your scarf is your desired length, then cast off.
Conclusion:
You've done it! You've made your first knitting project! Have fun wearing your scarf! Need more practice? Scarves make great gifts, and certain charities will take your scarves to hand out in winter, too.
Knitting takes practice, but it's not as hard as it looks. There's tons of options once you've got the hang of it: scarves, sweaters, hats, tops, blankets, gloves, bags,...
Good luck, and feel free to show me your work!
319 notes
·
View notes
Text

hard out procrastinating my uni stuff by practicing with my drop spindle for the first time in ages
in order from the top down; the intial washed wool, some carded wool(the fluffy stuff), the bit I'm currently working on spinning (that's on the spindle), and a very small amount of spun yarn at the end there
50 notes
·
View notes
Photo

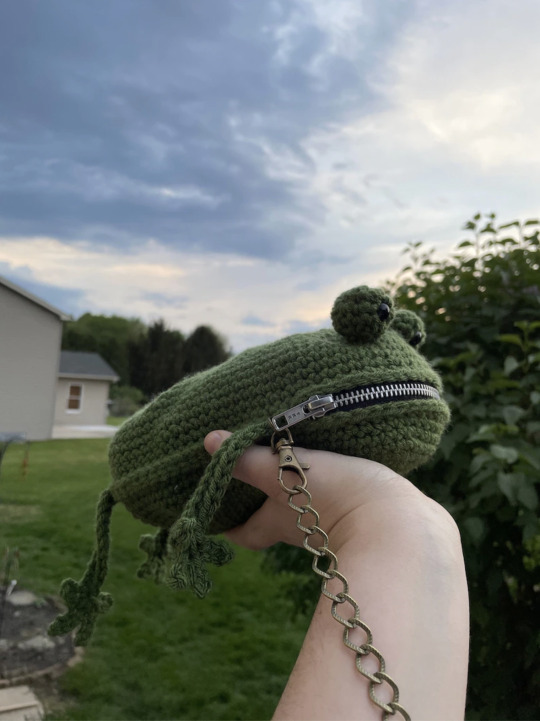
Frog Purse Pattern from ArtsyAshleighStudios
1K notes
·
View notes
Text


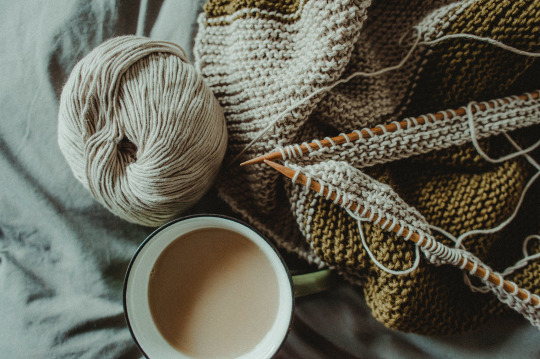
Rainy day here, perfect to cuddle up in a snug little house
My own design and pretty much my own pattern. Really in love with this little guy
258 notes
·
View notes
Text


Took 8 months and 8 skeins but I finished it and it’s so perfect! The goal was a blanket I could wear.
541 notes
·
View notes
Photo

While winter isn’t the most exciting time to forage, there are some subtle preserved beauties out there to find. Some of my favorites are making tea with conifer leaves and turkey tails, jams from the mushier rose hips, and collecting frozen sap. What’s your favorite foraged finds during the cold season?
784 notes
·
View notes
Photo

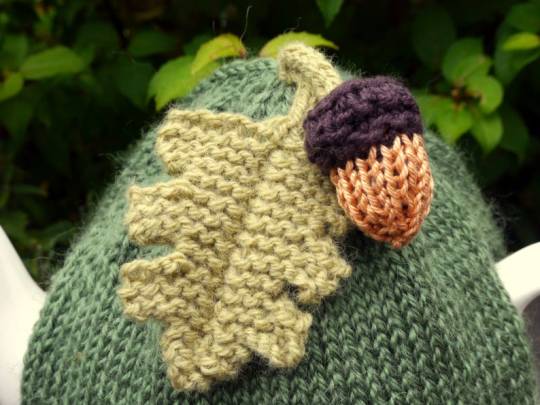
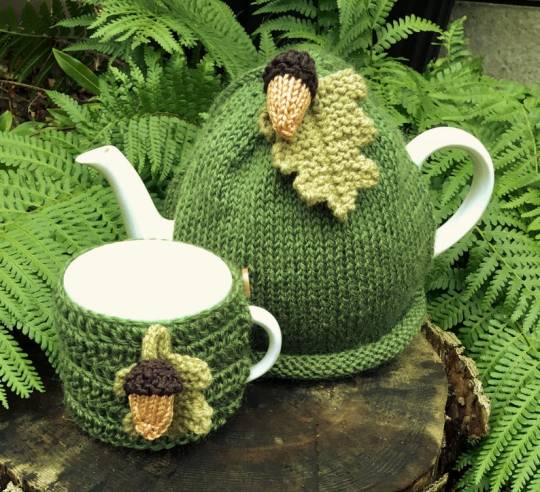
Knitted Acorn Tea Cosy by HookLoopKnits
4K notes
·
View notes
Text


Working on another granny square blanket🧡
503 notes
·
View notes
Text

Classic Retro! Knit a Pair of Vintage Legwarmers ...FREE Pattern! 👉 https://buff.ly/3rcGPnD
34 notes
·
View notes
Photo


How to Make Your Own Warmth
Year: 1977
202 notes
·
View notes
Text

The Truth Is Out There ... X-Files Fans, I Want To Believe That You'll Knit This Sweater! 👉 https://buff.ly/3pydztS 👽
253 notes
·
View notes