
Welcome to Yasirinsights.com. I’m Yasir Baig, an AI Software Engineer, Machine Learning Enthusiast, and Digital Marketer specializing in Machine Learning, Deep Learning, DSA, SEO, Content Writing, WordPress, and Front-End Development. I help businesses and individuals enhance their online presence and technical skills. Let’s bring your digital vision to life!
Don't wanna be here? Send us removal request.
Statistics
We looked inside some of the posts by yasirinsights and here's what we found interesting.
Average Info
Notes Per Post
2
Likes Per Post
2
Reblog Per Post
0
Reply Per Post
0
Time Between Posts
5 days
Number of Posts By Type
Text
8
Last Seen Tumblr Blogs


Fun Fact
Tumblr is used by 21% of adults online aged 18-29 years.
Text

Eid ul Azha 2025 Mubarak! A Celebration of Sacrifice, Faith, and Unity 🌙🕋✨
Eid ul Azha 2025 Mubarak! 🌙✨ A day of sacrifice, devotion, and unity. May your Qurbani be accepted, your home filled with joy, and your heart with gratitude. 🕋🐐💫
#EidUlAzha2025 #EidMubarak #FestivalOfSacrifice #Qurbani2025 #EidJoy #BakraEid #MuslimFestival #EidBlessings #EidCelebration #YasirInsights
0 notes
Text
💥 Failing Forward: The Secret Fuel of Growth

Failure isn’t your enemy—it’s your foundation. As #YasirInsights often reminds us, every setback is a setup for a stronger comeback. You don’t lose when you fall—you lose only if you quit.
#YasirBaig believes success isn’t built on perfection, but on persistence—on falling, learning, and rising again. Whether it’s #MirzaYasir pushing through hard lessons or #MirzaYasirAbdullahBaig redefining resilience, the truth stays the same: failure is not the opposite of success; it’s part of it.
So wear your failures with pride. They are proof that you tried, that you learned, and that you’re growing into the best version of yourself—just like #YasirAbdullah keeps showing us through every challenge faced and every goal chased.
#FailForward #BounceBackStronger #GrowthMindset #PurposeDriven #KeepPushing #FromFailureToSuccess #ResilienceInAction #BuiltByFailure
0 notes
Text
Mastering Seaborn in Python – Yasir Insights
Built on top of Matplotlib, Seaborn is a robust Python data visualisation framework. It provides a sophisticated interface for creating eye-catching and educational statistics visuals. Gaining proficiency with Seaborn in Python may significantly improve your comprehension and communication of data, regardless of your role—data scientist, analyst, or developer.

Mastering Seaborn in Python
Seaborn simplifies complex visualizations with just a few lines of code. It is very useful for statistical graphics and data exploration because it is built on top of Matplotlib and tightly interacts with Pandas data structures.
Also Read: LinkedIn
Why Use Seaborn in Python?
Concise and intuitive syntax
Built-in themes for better aesthetics
Support for Pandas DataFrames
Powerful multi-plot grids
Built-in support for statistical estimation
Installing Seaborn in Python
You can install Seaborn using pip:
bash
pip install seaborn
Or with conda:
bash
conda install seaborn
Getting Started with Seaborn in Python
First, import the library and a dataset:
python
import seaborn as sns import matplotlib.pyplot as plt
# Load sample dataset tips = sns.load_dataset("tips")
Let’s visualize the distribution of total bills:
python
sns.histplot(data=tips, x="total_bill", kde=True) plt.title("Distribution of Total Bills") plt.show()
Core Data Structures in Seaborn in Python
Seaborn works seamlessly with:
Pandas DataFrames
Series
Numpy arrays
This compatibility makes it easier to plot real-world datasets directly.
Essential Seaborn in Python Plot Types
Categorical Plots
Visualize relationships involving categorical variables.
python
sns.boxplot(x="day", y="total_bill", data=tips)
Other types: stripplot(), swarmplot(), violinplot(), barplot(), countplot()
Distribution Plots
Explore the distribution of a dataset.
python
sns.displot(tips["tip"], kde=True)
Regression Plots
Plot data with linear regression models.
python
sns.lmplot(x="total_bill", y="tip", data=tips)
Matrix Plots
Visualize correlation and heatmaps.
python
corr = tips.corr() sns.heatmap(corr, annot=True, cmap="coolwarm")
e. Multivariate Plots
Explore multiple variables at once.
python
sns.pairplot(tips, hue="sex")
Customizing Seaborn in Python Plots
Change figure size:
python
plt.figure(figsize=(10, 6))
Set axis labels and titles:
python
sns.scatterplot(x="total_bill", y="tip", data=tips) plt.xlabel("Total Bill ($)") plt.ylabel("Tip ($)") plt.title("Total Bill vs. Tip")
Themes and Color Palettes
Seaborn in Python provides built-in themes:
python
sns.set_style("whitegrid")
Popular palettes:
python
sns.set_palette("pastel")
Available styles: darkgrid, whitegrid, dark, white, ticks
Working with Real Datasets
Seaborn comes with built-in datasets like:
tips
iris
diamonds
penguins
Example:
python
penguins = sns.load_dataset("penguins") sns.pairplot(penguins, hue="species")
Best Practices
Always label your axes and add titles
Use color palettes wisely for accessibility
Stick to consistent themes
Use grid plotting for large data comparisons
Always check data types before plotting
Conclusion
Seaborn is a game-changer for creating beautiful, informative, and statistical visualizations with minimal code. Mastering it gives you the power to uncover hidden patterns and insights within your datasets, helping you make data-driven decisions efficiently.
0 notes
Text

The Canvas of Intelligence: Where Data Meets Code
In the world of deep learning, a neural network is more than just lines of code—it's a living system where data flows like brushstrokes, revealing patterns, insights, and intelligence. This quote reflects the poetic beauty of AI, where math meets meaning, and machines begin to understand.
#NeuralNetworks #DeepLearning #MachineLearning #AIQuotes #TechWisdom #ArtificialIntelligence #NeuroAI #AIInspiration #DataScience #FutureOfAI #DeepTech #IntelligentSystems #QuoteOfTheDay #YasirInsights #YasirAI #YasirOnTech #YasirQuotes #YasirDeepThoughts #YasirML #TechByYasir
0 notes
Text
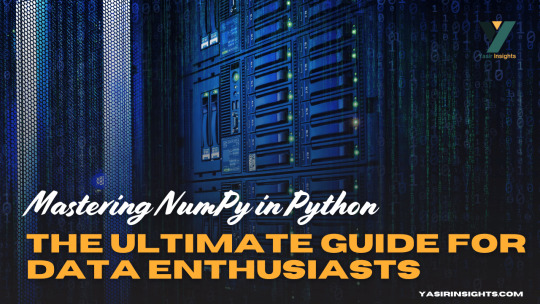
Mastering NumPy in Python – The Ultimate Guide for Data Enthusiasts
Imagine calculating the average of a million numbers using regular Python lists. You’d need to write multiple lines of code, deal with loops, and wait longer for the results. Now, what if you could do that in just one line? Enter NumPy in Python, the superhero of numerical computing in Python.
NumPy in Python (short for Numerical Python) is the core package that gives Python its scientific computing superpowers. It’s built for speed and efficiency, especially when working with arrays and matrices of numeric data. At its heart lies the ndarray—a powerful n-dimensional array object that’s much faster and more efficient than traditional Python lists.
What is NumPy in Python and Why It Matters
Why is NumPy a game-changer?
It allows operations on entire arrays without writing for-loops.
It’s written in C under the hood, so it’s lightning-fast.
It offers functionalities like Fourier transforms, linear algebra, random number generation, and so much more.
It’s compatible with nearly every scientific and data analysis library in Python like SciPy, Pandas, TensorFlow, and Matplotlib.
In short, if you’re doing data analysis, machine learning, or scientific research in Python, NumPy is your starting point.
The Evolution and Importance of NumPy in Python Ecosystem
Before NumPy in Python, Python had numeric libraries, but none were as comprehensive or fast. NumPy was developed to unify them all under one robust, extensible, and fast umbrella.
Created by Travis Oliphant in 2005, NumPy grew from an older package called Numeric. It soon became the de facto standard for numerical operations. Today, it’s the bedrock of almost every other data library in Python.
What makes it crucial?
Consistency: Most libraries convert input data into NumPy arrays for consistency.
Community: It has a huge support community, so bugs are resolved quickly and the documentation is rich.
Cross-platform: It runs on Windows, macOS, and Linux with zero change in syntax.
This tight integration across the Python data stack means that even if you’re working in Pandas or TensorFlow, you’re indirectly using NumPy under the hood.
Setting Up NumPy in Python
How to Install NumPy
Before using NumPy, you need to install it. The process is straightforward:
bash
pip install numpy
Alternatively, if you’re using a scientific Python distribution like Anaconda, NumPy comes pre-installed. You can update it using:
bash
conda update numpy
That’s it—just a few seconds, and you’re ready to start number-crunching!
Some environments (like Jupyter notebooks or Google Colab) already have NumPy installed, so you might not need to install it again.
Importing NumPy in Python and Checking Version
Once installed, you can import NumPy using the conventional alias:
python
import numpy as np
This alias, np, is universally recognized in the Python community. It keeps your code clean and concise.
To check your NumPy version:
python
print(np.__version__)
You’ll want to ensure that you’re using the latest version to access new functions, optimizations, and bug fixes.
If you’re just getting started, make it a habit to always import NumPy with np. It’s a small convention, but it speaks volumes about your code readability.
Understanding NumPy in Python Arrays
The ndarray Object – Core of NumPy
At the center of everything in NumPy lies the ndarray. This is a multidimensional, fixed-size container for elements of the same type.
Key characteristics:
Homogeneous Data: All elements are of the same data type (e.g., all integers or all floats).
Fast Operations: Built-in operations are vectorized and run at near-C speed.
Memory Efficiency: Arrays take up less space than lists.
You can create a simple array like this:
python
import numpy as np arr = np.array([1, 2, 3, 4])
Now arr is a NumPy array (ndarray), not just a Python list. The difference becomes clearer with larger data or when applying operations:
python
arr * 2 # [2 4 6 8]
It’s that easy. No loops. No complications.
You can think of an ndarray like an Excel sheet with superpowers—except it can be 1d, 2d, 3d, or even higher dimensions!
1-Dimensional Arrays – Basics and Use Cases
1d arrays are the simplest form—just a list of numbers. But don’t let the simplicity fool you. They’re incredibly powerful.
Creating a 1D array:
python
a = np.array([10, 20, 30, 40])
You can:
Multiply or divide each element by a number.
Add another array of the same size.
Apply mathematical functions like sine, logarithm, etc.
Example:
python
b = np.array([1, 2, 3, 4]) print(a + b) # Output: [11 22 33 44]
This concise syntax is possible because NumPy performs element-wise operations—automatically!
1d arrays are perfect for:
Mathematical modeling
Simple signal processing
Handling feature vectors in ML
Their real power emerges when used in batch operations. Whether you’re summing elements, calculating means, or applying a function to every value, 1D arrays keep your code clean and blazing-fast.
2-Dimensional Arrays – Matrices and Their Applications
2D arrays are like grids—rows and columns of data. They’re also the foundation of matrix operations in NumPy in Python.
You can create a 2D array like this:
python
arr_2d = np.array([[1, 2, 3], [4, 5, 6]])
Here’s what it looks like:
lua
[[1 2 3] [4 5 6]]
Each inner list becomes a row. This structure is ideal for:
Representing tables or datasets
Performing matrix operations like dot products
Image processing (since images are just 2D arrays of pixels)
Some key operations:
python
arr_2d.shape # (2, 3) — 2 rows, 3 columns arr_2d[0][1] # 2 — first row, second column arr_2d.T # Transpose: swaps rows and columns
You can also use slicing just like with 1d arrays:
python
arr_2d[:, 1] # All rows, second column => [2, 5] arr_2d[1, :] # Second row => [4, 5, 6]
2D arrays are extremely useful in:
Data science (e.g., CSVS loaded into 2D arrays)
Linear algebra (matrices)
Financial modelling and more
They’re like a spreadsheet on steroids—flexible, fast, and powerful.
3-Dimensional Arrays – Multi-Axis Data Representation
Now let’s add another layer. 3d arrays are like stacks of 2D arrays. You can think of them as arrays of matrices.
Here’s how you define one:
python
arr_3d = np.array([ [[1, 2], [3, 4]], [[5, 6], [7, 8]] ])
This array has:
2 matrices
Each matrix has 2 rows and 2 columns
Visualized as:
lua
[ [[1, 2], [3, 4]],[[5, 6], [7, 8]] ]
Accessing data:
python
arr_3d[0, 1, 1] # Output: 4 — first matrix, second row, second column
Use cases for 3D arrays:
Image processing (RGB images: height × width × color channels)
Time series data (time steps × variables × features)
Neural networks (3D tensors as input to models)
Just like with 2D arrays, NumPy’s indexing and slicing methods make it easy to manipulate and extract data from 3D arrays.
And the best part? You can still apply mathematical operations and functions just like you would with 1D or 2D arrays. It’s all uniform and intuitive.
Higher Dimensional Arrays – Going Beyond 3D
Why stop at 3D? NumPy in Python supports N-dimensional arrays (also called tensors). These are perfect when dealing with highly structured datasets, especially in advanced applications like:
Deep learning (4D/5D tensors for batching)
Scientific simulations
Medical imaging (like 3D scans over time)
Creating a 4D array:
python
arr_4d = np.random.rand(2, 3, 4, 5)
This gives you:
2 batches
Each with 3 matrices
Each matrix has 4 rows and 5 columns
That’s a lot of data—but NumPy handles it effortlessly. You can:
Access any level with intuitive slicing
Apply functions across axes
Reshape as needed using .reshape()
Use arr.ndim to check how many dimensions you’re dealing with. Combine that with .shape, and you’ll always know your array’s layout.
Higher-dimensional arrays might seem intimidating, but NumPy in Python makes them manageable. Once you get used to 2D and 3D, scaling up becomes natural.
NumPy in Python Array Creation Techniques
Creating Arrays Using Python Lists
The simplest way to make a NumPy array is by converting a regular Python list:
python
a = np.array([1, 2, 3])
Or a list of lists for 2D arrays:
python
b = np.array([[1, 2], [3, 4]])
You can also specify the data type explicitly:
python
np.array([1, 2, 3], dtype=float)
This gives you a float array [1.0, 2.0, 3.0]. You can even convert mixed-type lists, but NumPy will automatically cast to the most general type to avoid data loss.
Pro Tip: Always use lists of equal lengths when creating 2D+ arrays. Otherwise, NumPy will make a 1D array of “objects,” which ruins performance and vectorization.
Array Creation with Built-in Functions (arange, linspace, zeros, ones, etc.)
NumPy comes with handy functions to quickly create arrays without writing out all the elements.
Here are the most useful ones:
np.arange(start, stop, step): Like range() but returns an array.
np.linspace(start, stop, num): Evenly spaced numbers between two values.
np.zeros(shape): Array filled with zeros.
np.ones(shape): Array filled with ones.
np.eye(N): Identity matrix.
These functions help you prototype, test, and create arrays faster. They also avoid manual errors and ensure your arrays are initialized correctly.
Random Array Generation with random Module
Need to simulate data? NumPy’s random module is your best friend.
python
np.random.rand(2, 3) # Uniform distribution np.random.randn(2, 3) # Normal distribution np.random.randint(0, 10, (2, 3)) # Random integers
You can also:
Shuffle arrays
Choose random elements
Set seeds for reproducibility (np.random.seed(42))
This is especially useful in:
Machine learning (generating datasets)
Monte Carlo simulations
Statistical experiments.
Reshaping, Flattening, and Transposing Arrays
Reshaping is one of NumPy’s most powerful features. It lets you reorganize the shape of an array without changing its data. This is critical when preparing data for machine learning models or mathematical operations.
Here’s how to reshape:
python
a = np.array([1, 2, 3, 4, 5, 6]) b = a.reshape(2, 3) # Now it's 2 rows and 3 columns
Reshaped arrays can be converted back using .flatten():
python
flat = b.flatten() # [1 2 3 4 5 6]
There’s also .ravel()—similar to .flatten() but returns a view if possible (faster and more memory-efficient).
Transposing is another vital transformation:
python
matrix = np.array([[1, 2], [3, 4]]) matrix.T # Output: # [[1 3] # [2 4]]
Transpose is especially useful in linear algebra, machine learning (swapping features with samples), and when matching shapes for operations like matrix multiplication.
Use .reshape(-1, 1) to convert arrays into columns, and .reshape(1, -1) to make them rows. This flexibility gives you total control over the structure of your data.
Array Slicing and Indexing Tricks
You can access parts of an array using slicing, which works similarly to Python lists but more powerful in NumPy in Python.
Basic slicing:
python
arr = np.array([10, 20, 30, 40, 50]) arr[1:4] # [20 30 40]
2D slicing:
python
mat = np.array([[1, 2, 3], [4, 5, 6], [7, 8, 9]]) mat[0:2, 1:] # Rows 0-1, columns 1-2 => [[2 3], [5 6]]
Advanced indexing includes:
Boolean indexing:
python
arr[arr > 30] # Elements greater than 30
Fancy indexing:
python
arr[[0, 2, 4]] # Elements at indices 0, 2, 4
Modifying values using slices:
python
arr[1:4] = 99 # Replace elements at indices 1 to 3
Slices return views, not copies. So if you modify a slice, the original array is affected—unless you use .copy().
These slicing tricks make data wrangling fast and efficient, letting you filter and extract patterns in seconds.
Broadcasting and Vectorized Operations
Broadcasting is what makes NumPy in Python shine. It allows operations on arrays of different shapes and sizes without writing explicit loops.
Let’s say you have a 1D array:
python
a = np.array([1, 2, 3])
And a scalar:
python
b = 10
You can just write:
python
c = a + b # [11, 12, 13]
That’s broadcasting in action. It also works for arrays with mismatched shapes as long as they are compatible:
python
a = np.array([[1], [2], [3]]) # Shape (3,1) b = np.array([4, 5, 6]) # Shape (3,)a + b
This adds each element to each element b, creating a full matrix.
Why is this useful?
It avoids for-loops, making your code cleaner and faster
It matches standard mathematical notation
It enables writing expressive one-liners
Vectorization uses broadcasting behind the scenes to perform operations efficiently:
python
a * b # Element-wise multiplication np.sqrt(a) # Square root of each element np.exp(a) # Exponential of each element
These tricks make NumPy in Python code shorter, faster, and far more readable.
Mathematical and Statistical Operations
NumPy offers a rich suite of math functions out of the box.
Basic math:
python
np.add(a, b) np.subtract(a, b) np.multiply(a, b) np.divide(a, b)
Aggregate functions:
python
np.sum(a) np.mean(a) np.std(a) np.var(a) np.min(a) np.max(a)
Axis-based operations:
python
arr_2d = np.array([[1, 2, 3], [4, 5, 6]]) np.sum(arr_2d, axis=0) # Sum columns: [5 7 9] np.sum(arr_2d, axis=1) # Sum rows: [6 15]
Linear algebra operations:
python
np.dot(a, b) # Dot product np.linalg.inv(mat) # Matrix inverse np.linalg.det(mat) # Determinant np.linalg.eig(mat) # Eigenvalues
Statistical functions:
python
np.percentile(a, 75) np.median(a) np.corrcoef(a, b)
Trigonometric operations:
python
np.sin(a) np.cos(a) np.tan(a)
These functions let you crunch numbers, analyze trends, and model complex systems in just a few lines.
NumPy in Python I/O – Saving and Loading Arrays
Data persistence is key. NumPy in Python lets you save and load arrays easily.
Saving arrays:
python
np.save('my_array.npy', a) # Saves in binary format
Loading arrays:
python
b = np.load('my_array.npy')
Saving multiple arrays:
python
np.savez('data.npz', a=a, b=b)
Loading multiple arrays:
python
data = np.load('data.npz') print(data['a']) # Access saved 'a' array
Text file operations:
python
np.savetxt('data.txt', a, delimiter=',') b = np.loadtxt('data.txt', delimiter=',')
Tips:
Use .npy or .npz formats for efficiency
Use .txt or .csv for interoperability
Always check array shapes after loading
These functions allow seamless transition between computations and storage, critical for real-world data workflows.
Masking, Filtering, and Boolean Indexing
NumPy in Python allows you to manipulate arrays with masks—a powerful way to filter and operate on elements that meet certain conditions.
Here’s how masking works:
python
arr = np.array([10, 20, 30, 40, 50]) mask = arr > 25
Now mask is a Boolean array:
graphql
[False False True True True]
You can use this mask to extract elements:
python
filtered = arr[mask] # [30 40 50]
Or do operations:
python
arr[mask] = 0 # Set all elements >25 to 0
Boolean indexing lets you do conditional replacements:
python
arr[arr < 20] = -1 # Replace all values <20
This technique is extremely useful in:
Cleaning data
Extracting subsets
Performing conditional math
It’s like SQL WHERE clauses but for arrays—and lightning-fast.
Sorting, Searching, and Counting Elements
Sorting arrays is straightforward:
python
arr = np.array([10, 5, 8, 2]) np.sort(arr) # [2 5 8 10]
If you want to know the index order:
python
np.argsort(arr) # [3 1 2 0]
Finding values:
python
np.where(arr > 5) # Indices of elements >5
Counting elements:
python
np.count_nonzero(arr > 5) # How many elements >5
You can also use np.unique() to find unique values and their counts:
python
np.unique(arr, return_counts=True)
Need to check if any or all elements meet a condition?
python
np.any(arr > 5) # True if any >5 np.all(arr > 5) # True if all >5
These operations are essential when analyzing and transforming datasets.
Copy vs View in NumPy in Python – Avoiding Pitfalls
Understanding the difference between a copy and a view can save you hours of debugging.
By default, NumPy tries to return views to save memory. But modifying a view also changes the original array.
Example of a view:
python
a = np.array([1, 2, 3]) b = a[1:] b[0] = 99 print(a) # [1 99 3] — original changed!
If you want a separate copy:
python
b = a[1:].copy()
Now b is independent.
How to check if two arrays share memory?
python
np.may_share_memory(a, b)
When working with large datasets, always ask yourself—is this a view or a copy? Misunderstanding this can lead to subtle bugs.
Useful NumPy Tips and Tricks
Let’s round up with some power-user tips:
Memory efficiency: Use dtype to optimize storage. For example, use np.int8 instead of the default int64 for small integers.
Chaining: Avoid chaining operations that create temporary arrays. Instead, use in-place ops like arr += 1.
Use .astype() For type conversion:
Suppress scientific notation:
Timing your code:
Broadcast tricks:
These make your code faster, cleaner, and more readable.
Integration with Other Libraries (Pandas, SciPy, Matplotlib)
NumPy plays well with others. Most scientific libraries in Python depend on it:
Pandas
Under the hood, pandas.DataFrame uses NumPy arrays.
You can extract or convert between the two seamlessly:
Matplotlib
Visualizations often start with NumPy arrays:
SciPy
Built on top of NumPy
Adds advanced functionality like optimization, integration, statistics, etc.
Together, these tools form the backbone of the Python data ecosystem.
Conclusion
NumPy is more than just a library—it’s the backbone of scientific computing in Python. Whether you’re a data analyst, machine learning engineer, or scientist, mastering NumPy gives you a massive edge.
Its power lies in its speed, simplicity, and flexibility:
Create arrays of any dimension
Perform operations in vectorized form
Slice, filter, and reshape data in milliseconds
Integrate easily with tools like Pandas, Matplotlib, and SciPy
Learning NumPy isn’t optional—it’s essential. And once you understand how to harness its features, the rest of the Python data stack falls into place like magic.
So fire up that Jupyter notebook, start experimenting, and make NumPy your new best friend.
FAQs
1. What’s the difference between a NumPy array and a Python list? A NumPy array is faster, uses less memory, supports vectorized operations, and requires all elements to be of the same type. Python lists are more flexible but slower for numerical computations.
2. Can I use NumPy for real-time applications? Yes! NumPy is incredibly fast and can be used in real-time data analysis pipelines, especially when combined with optimized libraries like Numba or Cython.
3. What’s the best way to install NumPy? Use pip or conda. For pip: pip install numpy, and for conda: conda install numpy.
4. How do I convert a Pandas DataFrame to a NumPy array? Just use .values or .to_numpy():
python
array = df.to_numpy()
5. Can NumPy handle missing values? Not directly like Pandas, but you can use np.nan and functions like np.isnan() and np.nanmean() to handle NaNs.
0 notes
Text

Honoring the Workforce: A Labor Day Tribute from YasirInsights
At YasirInsights, we celebrate the strength, resilience, and dedication of every worker. This Labor Day, let's recognize the hands that build, the minds that innovate, and the hearts that drive progress. Your hard work shapes the future—thank you! 🙌
#YasirInsights #LaborDay #LaborDay2025 #WorkersMatter #HardWorkPaysOff #ThankYouWorkers #WorkforceAppreciation #Dedication #Inspiration #CelebrateLabor
0 notes
Text
Data Engineer vs Data Analyst vs Data Scientist vs ML Engineer: Choose Your Perfect Data Career!

In today’s rapidly evolving tech world, career opportunities in data-related fields are expanding like never before. However, with multiple roles like Data Engineer vs Data Analyst vs Data Scientist vs ML Engineer, newcomers — and even seasoned professionals — often find it confusing to understand how these roles differ.
At Yasir Insights, we think that having clarity makes professional selections more intelligent. We’ll go over the particular duties, necessary abilities, and important differences between these well-liked Data Engineer vs Data Analyst vs Data Scientist vs ML Engineer data positions in this blog.
Also Read: Data Engineer vs Data Analyst vs Data Scientist vs ML Engineer
Introduction to Data Engineer vs Data Analyst vs Data Scientist vs ML Engineer
The Data Science and Machine Learning Development Lifecycle (MLDLC) includes stages like planning, data gathering, preprocessing, exploratory analysis, modelling, deployment, and optimisation. In order to effectively manage these intricate phases, the burden is distributed among specialised positions, each of which plays a vital part in the project’s success.
Data Engineer
Who is a Data Engineer?
The basis of the data ecosystem is built by data engineers. They concentrate on collecting, sanitising, and getting data ready for modelling or further analysis. Think of them as mining precious raw materials — in this case, data — from complex and diverse sources.
Key Responsibilities:
Collect and extract data from different sources (APIS, databases, web scraping).
Design and maintain scalable data pipelines.
Clean, transform, and store data in warehouses or lakes.
Optimise database performance and security.
Required Skills:
Strong knowledge of Data Structures and Algorithms.
Expertise in Database Management Systems (DBMS).
Familiarity with Big Data tools (like Hadoop, Spark).
Hands-on experience with cloud platforms (AWS, Azure, GCP).
Proficiency in building and managing ETL (Extract, Transform, Load) pipelines.
Data Analyst
Who is a Data Analyst?
Data analysts take over once the data has been cleansed and arranged. Their primary responsibility is to evaluate data in order to get valuable business insights. They provide answers to important concerns regarding the past and its causes.
Key Responsibilities:
Perform Exploratory Data Analysis (EDA).
Create visualisations and dashboards to represent insights.
Identify patterns, trends, and correlations in datasets.
Provide reports to support data-driven decision-making.
Required Skills:
Strong Statistical knowledge.
Proficiency in programming languages like Python or R.
Expertise in Data Visualisation tools (Tableau, Power BI, matplotlib).
Excellent communication skills to present findings clearly.
Experience working with SQL databases.
Data Scientist
Who is a Data Scientist?
Data Scientists build upon the work of Data Analysts by developing predictive models and machine learning algorithms. While analysts focus on the “what” and “why,” Data Scientists focus on the “what’s next.”
Key Responsibilities:
Design and implement Machine Learning models.
Perform hypothesis testing, A/B testing, and predictive analytics.
Derive strategic insights for product improvements and new innovations.
Communicate technical findings to stakeholders.
Required Skills:
Mastery of Statistics and Probability.
Strong programming skills (Python, R, SQL).
Deep understanding of Machine Learning algorithms.
Ability to handle large datasets using Big Data technologies.
Critical thinking and problem-solving abilities.
Machine Learning Engineer
Who is a Machine Learning Engineer?
Machine Learning Engineers (MLES) take the models developed by Data Scientists and make them production-ready. They ensure models are deployed, scalable, monitored, and maintained effectively in real-world systems.
Key Responsibilities:
Deploy machine learning models into production environments.
Optimise and scale ML models for performance and efficiency.
Continuously monitor and retrain models based on real-time data.
Collaborate with software engineers and data scientists for integration.
Required Skills:
Strong foundations in Linear Algebra, Calculus, and Probability.
Mastery of Machine Learning frameworks (TensorFlow, PyTorch, Scikit-learn).
Proficiency in programming languages (Python, Java, Scala).
Knowledge of Distributed Systems and Software Engineering principles.
Familiarity with MLOps tools for automation and monitoring.
Summary: Data Engineer vs Data Analyst vs Data Scientist vs ML Engineer
Data Engineer
Focus Area: Data Collection & Processing
Key Skills: DBMS, Big Data, Cloud Computing
Objective: Build and maintain data infrastructure
Data Analyst
Focus Area: Data Interpretation & Reporting
Key Skills: Statistics, Python/R, Visualisation Tools
Objective: Analyse data and extract insights
Data Scientist
Focus Area: Predictive Modelling
Key Skills: Machine Learning, Statistics, Data Analysis
Objective: Build predictive models and strategies
Machine Learning Engineer
Focus Area: Model Deployment & Optimisation
Key Skills: ML Frameworks, Software Engineering
Objective: Deploy and optimise ML models in production
Frequently Asked Questions (FAQS)
Q1: Can a Data Engineer become a Data Scientist?
Yes! With additional skills in machine learning, statistics, and model building, a Data Engineer can transition into a Data Scientist role.
Q2: Is coding necessary for Data Analysts?
While deep coding isn’t mandatory, familiarity with SQL, Python, or R greatly enhances a Data Analyst’s effectiveness.
Q3: What is the difference between a Data Scientist and an ML Engineer?
Data Scientists focus more on model development and experimentation, while ML Engineers focus on deploying and scaling those models.
Q4: Which role is the best for beginners?
If you love problem-solving and analysis, start as a Data Analyst. If you enjoy coding and systems, a Data Engineer might be your path.
Published By:
Mirza Yasir Abdullah Baig
Repost This Article and built Your Connection With Others
0 notes
Text
GitHub and Git Commands: From Beginner to Advanced Level

Git and GitHub are essential tools for every developer, whether you're just starting or deep into professional software development. In this blog, we'll break down what Git and GitHub are, why they matter, and walk you through the most essential commands, from beginner to advanced. This guide is tailored for learners who want to master version control and collaborate more effectively on projects.
GitHub and Git Commands
What Is Git?
Git is a distributed version control system created by Linus Torvalds. It allows you to track changes in your code, collaborate with others, and manage your project history.
What Is GitHub?
GitHub is a cloud-based platform built on Git. It allows developers to host repositories online, share code, contribute to open-source projects, and manage collaboration through pull requests, issues, and branches
Why Learn Git and GitHub?
Manage and track code changes efficiently
Collaborate with teams
Roll back to the previous versions of the code
Host and contribute to open-source projects
Improve workflow through automation and branching
Git Installation (Quick Start)
Before using Git commands, install Git from git-scm.com.
Check if Git is installed:
bash
git --version
Beginner-Level Git Commands
These commands are essential for every new user of Git:
1. git init
Initialises a new Git repository.
bash
git init
2. git clone
Clones an existing repository from GitHub.
bash
git clone https://github.com/user/repo.git
3. git status
Checks the current status of files (modified, staged, untracked).
bash
git status
4. git add
Stage changes for commit.
bash
git add filename # stage a specific file git add . # stage all changes
5. git commit
Records changes to the repository.
bash
git commit -m "Your commit message"
6. git push
Pushes changes to the remote repository.
bash
git push origin main # pushes to the main branch
7. git pull
Fetches and merges changes from the remote repository.
bash
git pull origin main
Intermediate Git Commands
Once you’re comfortable with the basics, start using these:
1. git branch
Lists, creates, or deletes branches.
bash
git branch # list branches git branch new-branch # create a new branch
2. git checkout
Switches branches or restores files.
bash
git checkout new-branch
3. git merge
Merges a branch into the current one.
bash
git merge feature-branch
4. git log
Shows the commit history.
bash
git log
5. .gitignore
Used to ignore specific files or folders in your project.
Example .gitignore file:
bash
node_modules/ .env *.log
Advanced Git Commands
Level up your Git skills with these powerful commands:
1. git stash
Temporarily shelves changes not ready for commit.
bash
git stash git stash apply
2. git rebase
Reapplies commits on top of another base tip.
bash
git checkout feature-branch git rebase main
3. git cherry-pick
Apply the changes introduced by an existing commit.
bash
git cherry-pick <commit-hash>
4. git revert
Reverts a commit by creating a new one.
bash
git revert <commit-hash>
5. git reset
Unstages or removes commits.
bash
git reset --soft HEAD~1 # keep changes git reset --hard HEAD~1 # remove changes
GitHub Tips for Projects
Use Readme.md to document your project
Leverage issues and pull requests for collaboration
Add contributors for team-based work
Use GitHub Actions to automate workflows
Final Thoughts
Mastering Git and GitHub is an investment in your future as a developer. Whether you're working on solo projects or collaborating in a team, these tools will save you time and help you maintain cleaner, safer code. Practice regularly and try contributing to open-source projects to strengthen your skills.
Read MORE: https://yasirinsights.com/github-and-git-commands/
2 notes
·
View notes